The Silk Road
The Silk Road
Our Silk Road Main Lesson Block has grown over the years and each time we dive into it, it expands to include supporting blocks. This history period, that began with the Middle Ages in Medieval Europe, now includes our Africa Main Lesson Block which focuses on the Empires of Ghana, Mali and Songhai (900s-1400s), North Africa Main Lesson Block on Ibn Battuta, The Travels of Marco Polo and the Great Khans of Mongolia, Ancient and Middle Ages China, The Silk Road and the Islamic Empire (600s-1500s). No wonder what started out as a one year unit study grew into a multiple year endeavor.
When we first embarked on our Silk Road main lesson block, we thought we would simply add a few resources to complement our Middle Ages unit. Three years later and this little unit has grown into several deeply engaging main lesson blocks that span over 1000 years of history and half the world from North Africa to China. As we explored historical events and notable figures, we were whisked away into histories that deserved their own units rather than afterthoughts to a larger Middle Ages unit.
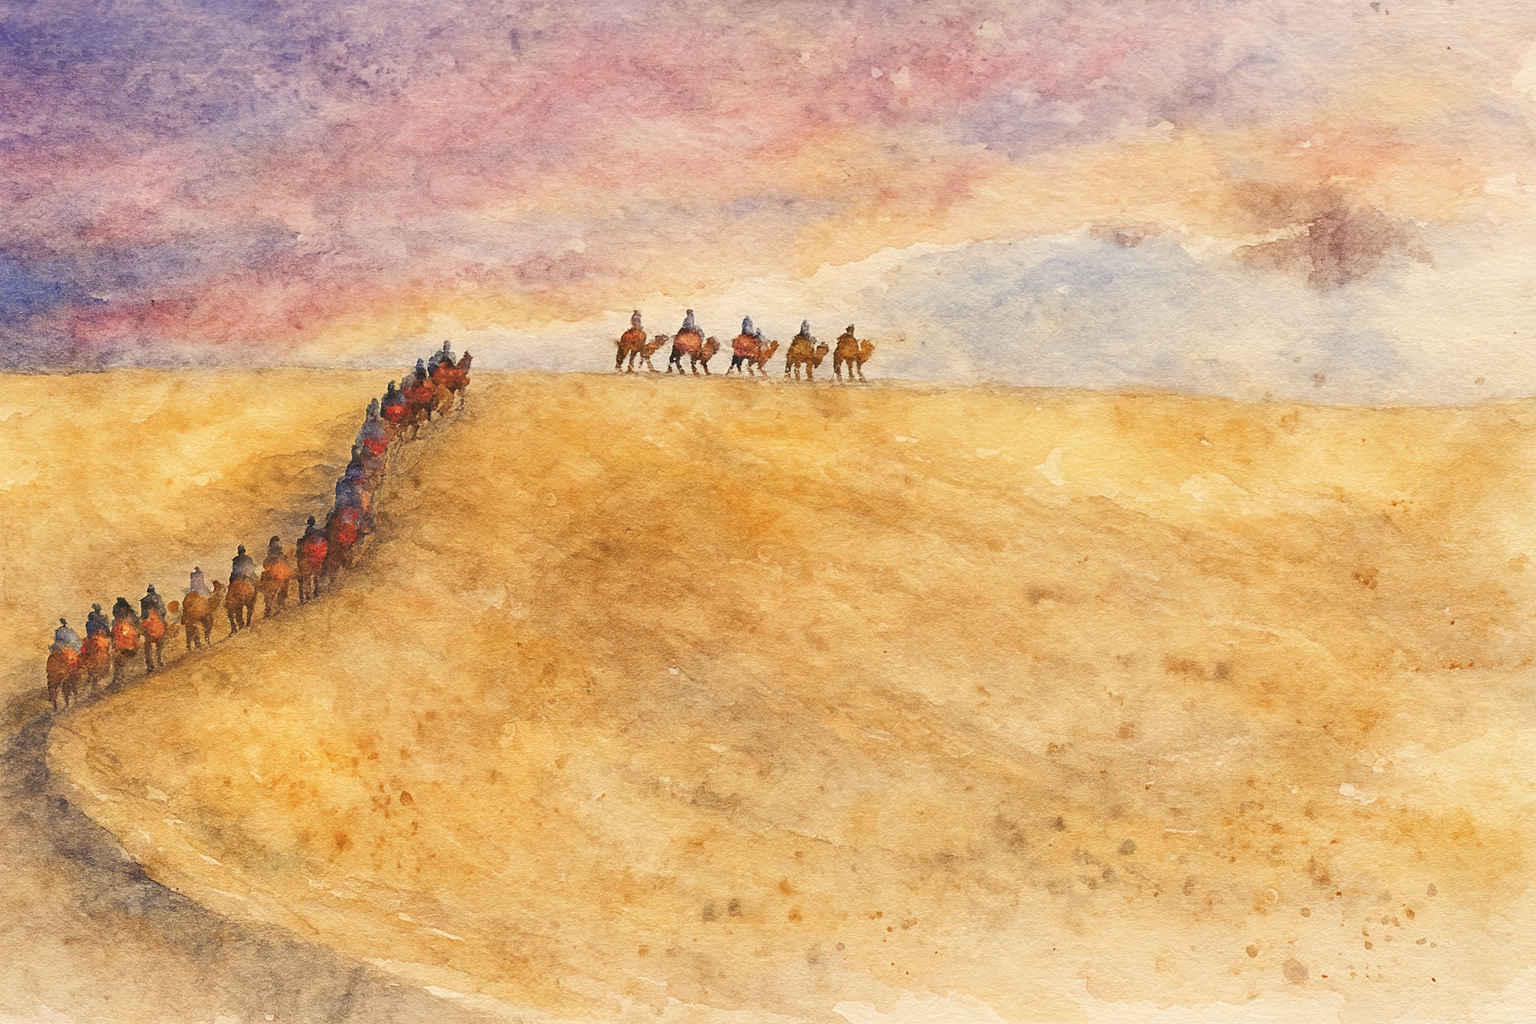
As a result, we now have an African main lesson block which focuses on the empires of Mali, Ghana and Songhai, the king Mansa Musa and the time period of about the 900s to the 1400s. We also did a unit on Ibn Battuta, Marco Polo and the Great Khans of Mongolia. That led us to China, so a unit on Ancient China naturally emerged, which led us full circle to the Silk Road and the expansion and diversifying of ideas, culture and religion, which naturally brought us back to a unit on Islam and the Islamic Golden Age which ended up being an extensive unit in and of itself. So when looking into the Silk Road, what originally was going to be books that complement the Golden Age of Islam or Ancient China, became its own independent and focused unit. In this unit we explore what it was like for merchants and caravans on the silk road. We discover the historical figures who traversed the silk road for the sake of religion, trade and conquering. We learn how this highway changed the course of history in profound ways and how through trade, more than just products were exchanged.

The Silk Road
-
Resources & Chalk Drawings
When we first embarked on our Silk Road main lesson block, we thought we would simply add a few resources to complement our Middle Ages unit. Three years later and this little unit has grown into several deeply engaging main lesson blocks that span over 1000 years of history and half the world from North Africa to China. As we explored historical events and notable figures, we were whisked away into histories that deserved their own units rather than afterthoughts to a larger Middle Ages unit.
-
Projects & Activities
We include hands-on projects whenever possible and especially with our history and science blocks. For this unit, we have included the projects for our Ancient China and Silk Road blocks. While some activities came as pre-assembled kits (my favorite), we also did our own projects based on activity and craft books.
-
Recipes
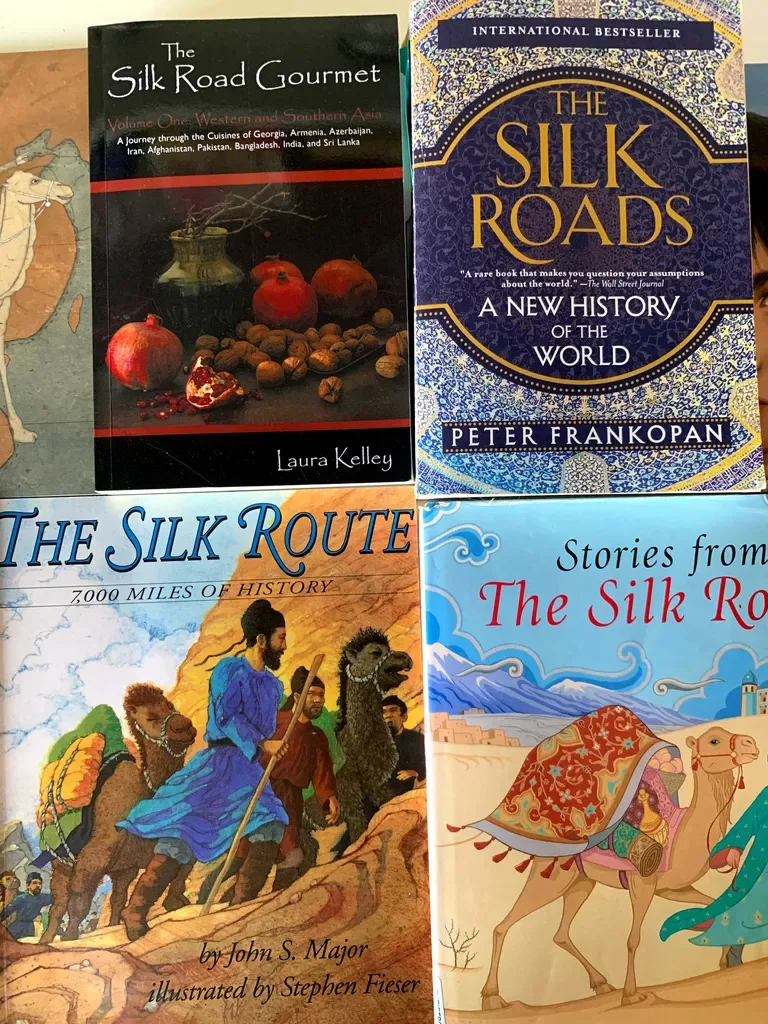
One of the best cookbooks we’ve every used for a history main lesson block is Silk Road Gourmet by Laura Kelley. Nearly every recipe we tried instantly became a family favorite. We were exposed to rich spice combinations and diverse flavors. Sometimes a unit gets plenty of time in the kitchen and this is such a unit.
Silk Road Resources & Chalk Drawings
-
Silk Road Main Lesson Block | How to Make Your Own Unit Study
This history period, that began with the Middle Ages in Medieval Europe, now includes our Africa Main Lesson Block which focuses on the Empires of Ghana, Mali and Songhai (900s-1400s), North Africa Main Lesson Block on Ibn Battuta, The Travels of Marco Polo and the Great Khans of Mongolia, Ancient and Middle Ages China, The Silk Road and the Islamic Empire (600s-1500s).
-
Lesson Plans
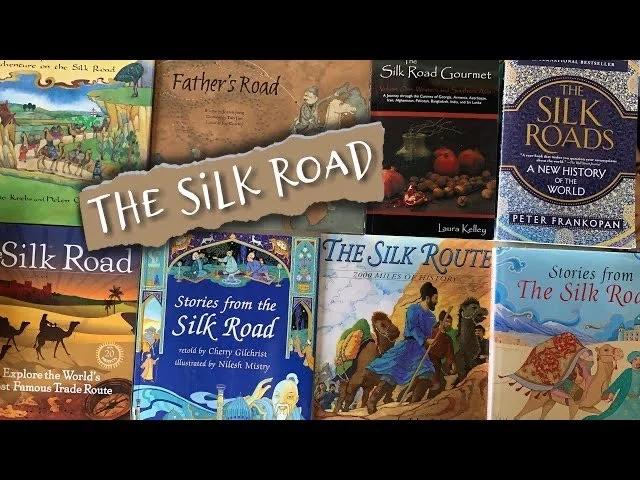
Our main lesson blocks and unit studies are book rich which means you don't need to buy a curriculum to do them, but you will need books. Many of these books can be found at the library, and if not, I share with you how you can swap out books and other resources for the materials you have.
-
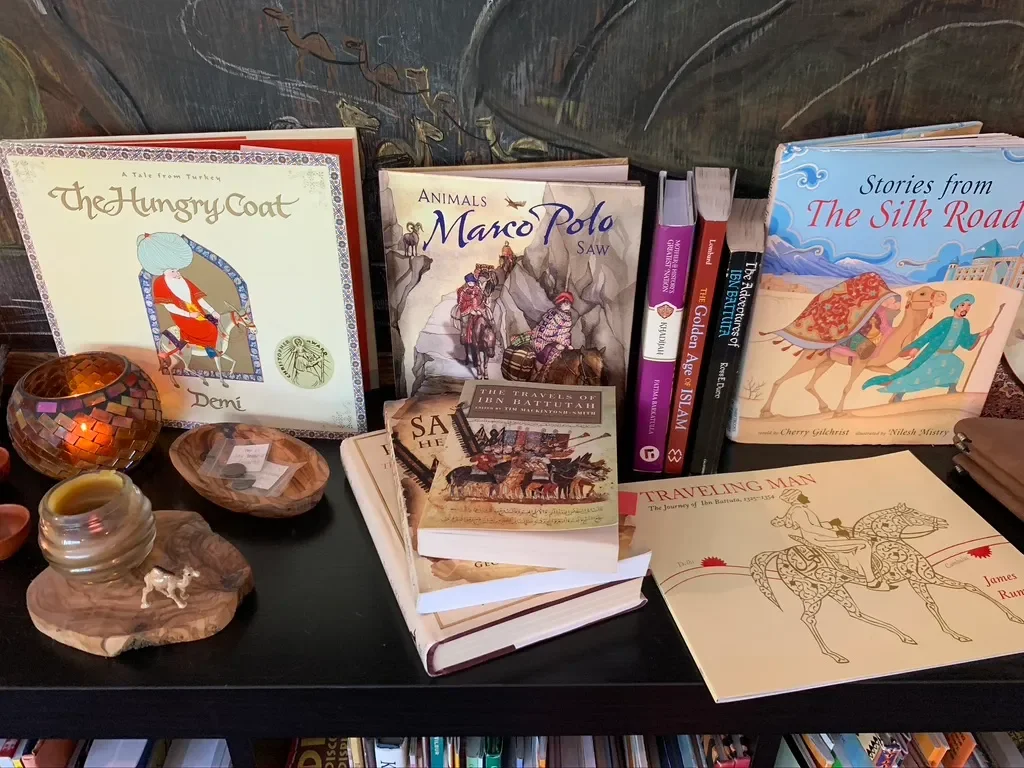
Creating an Inspiring Main Lesson Block
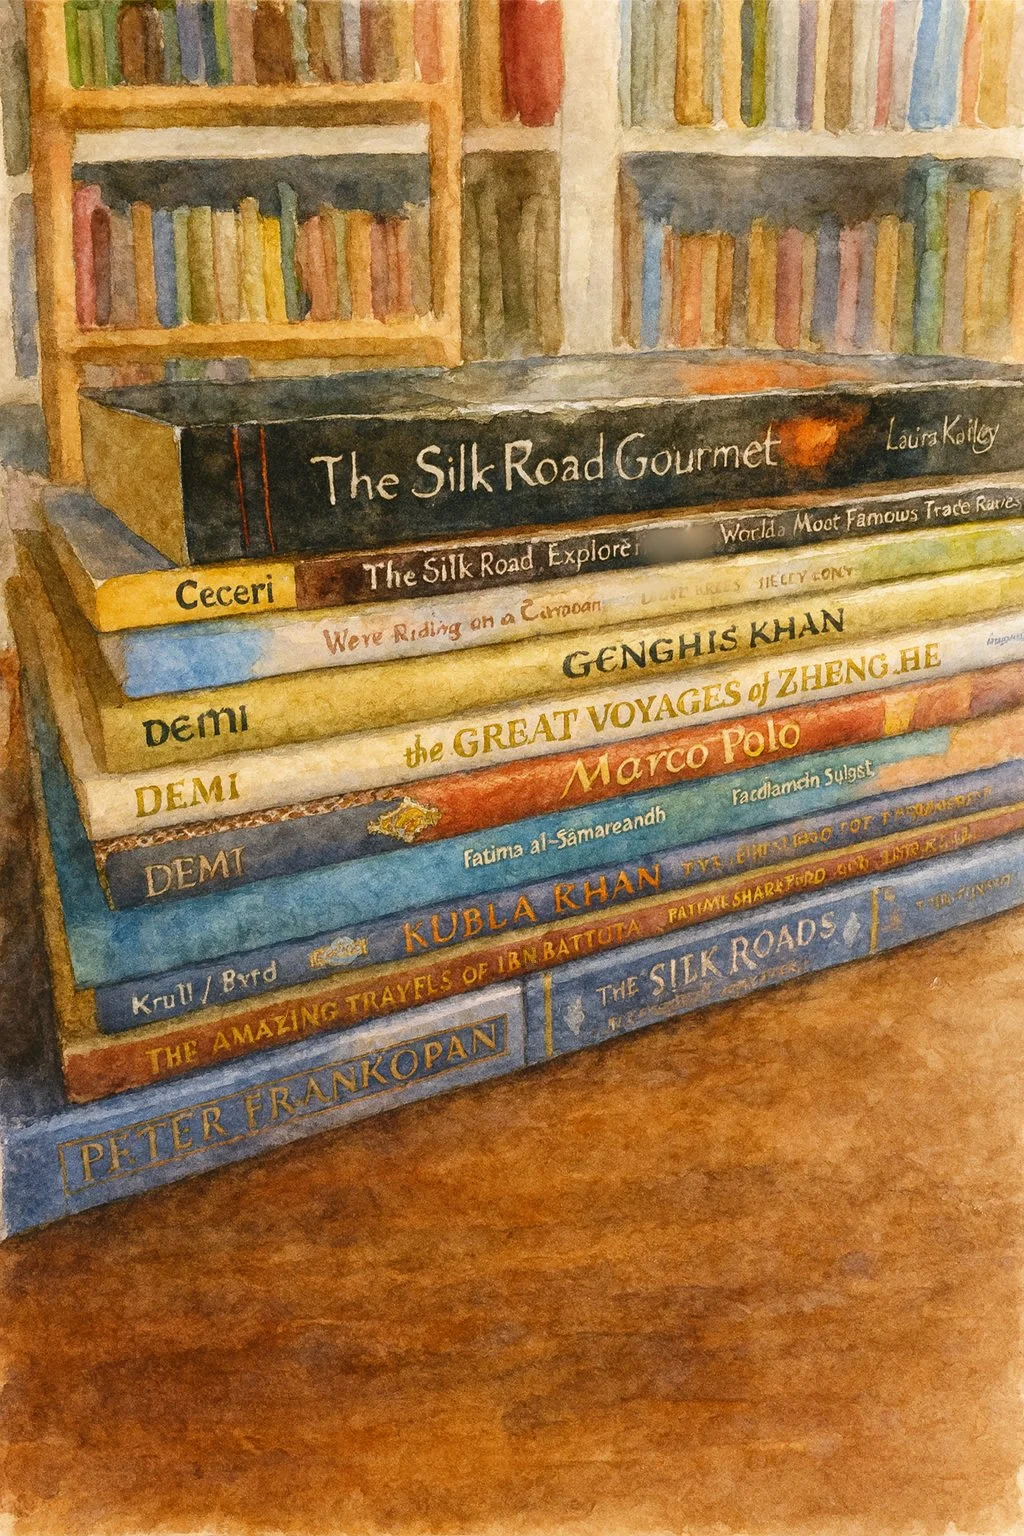
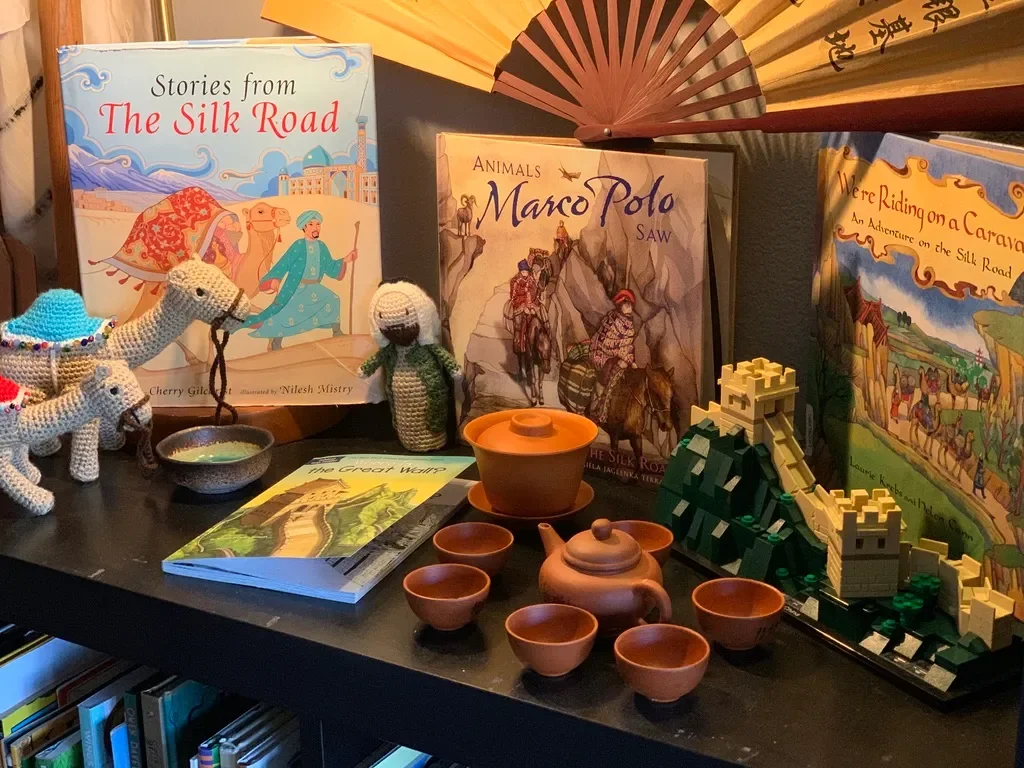
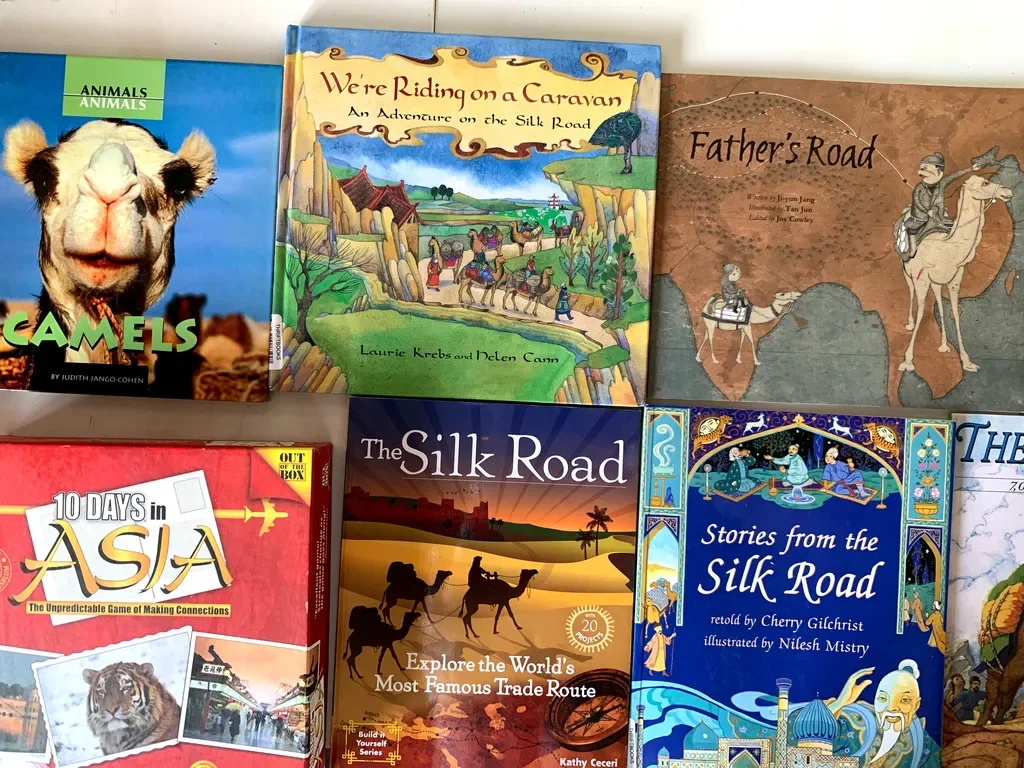
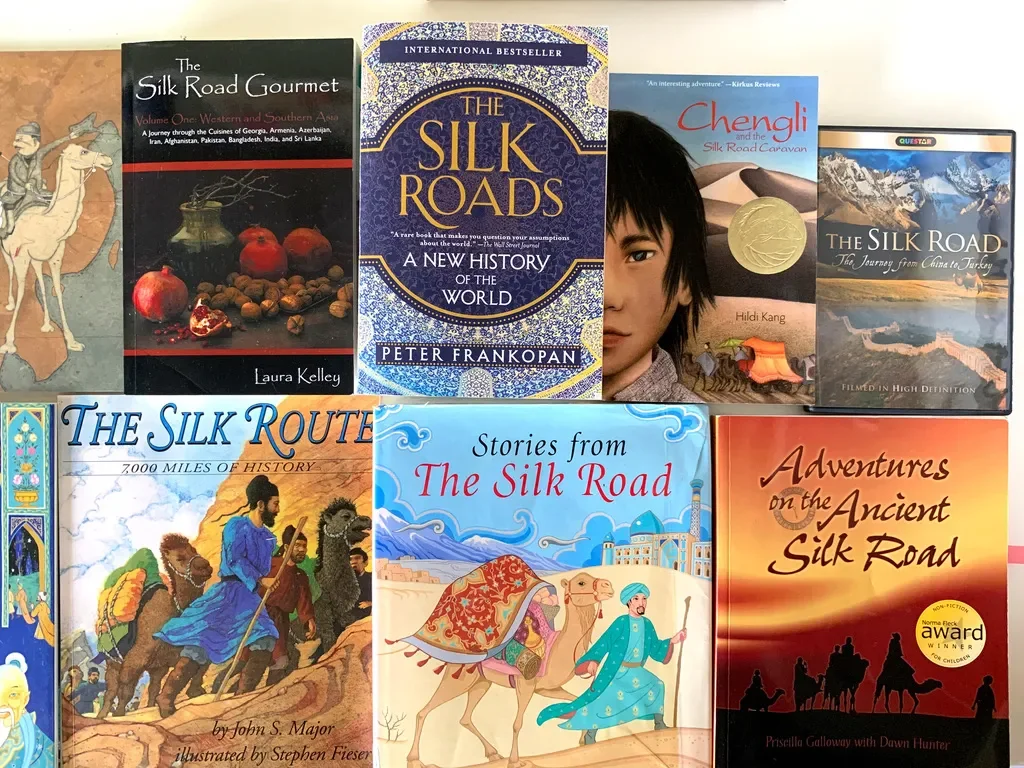
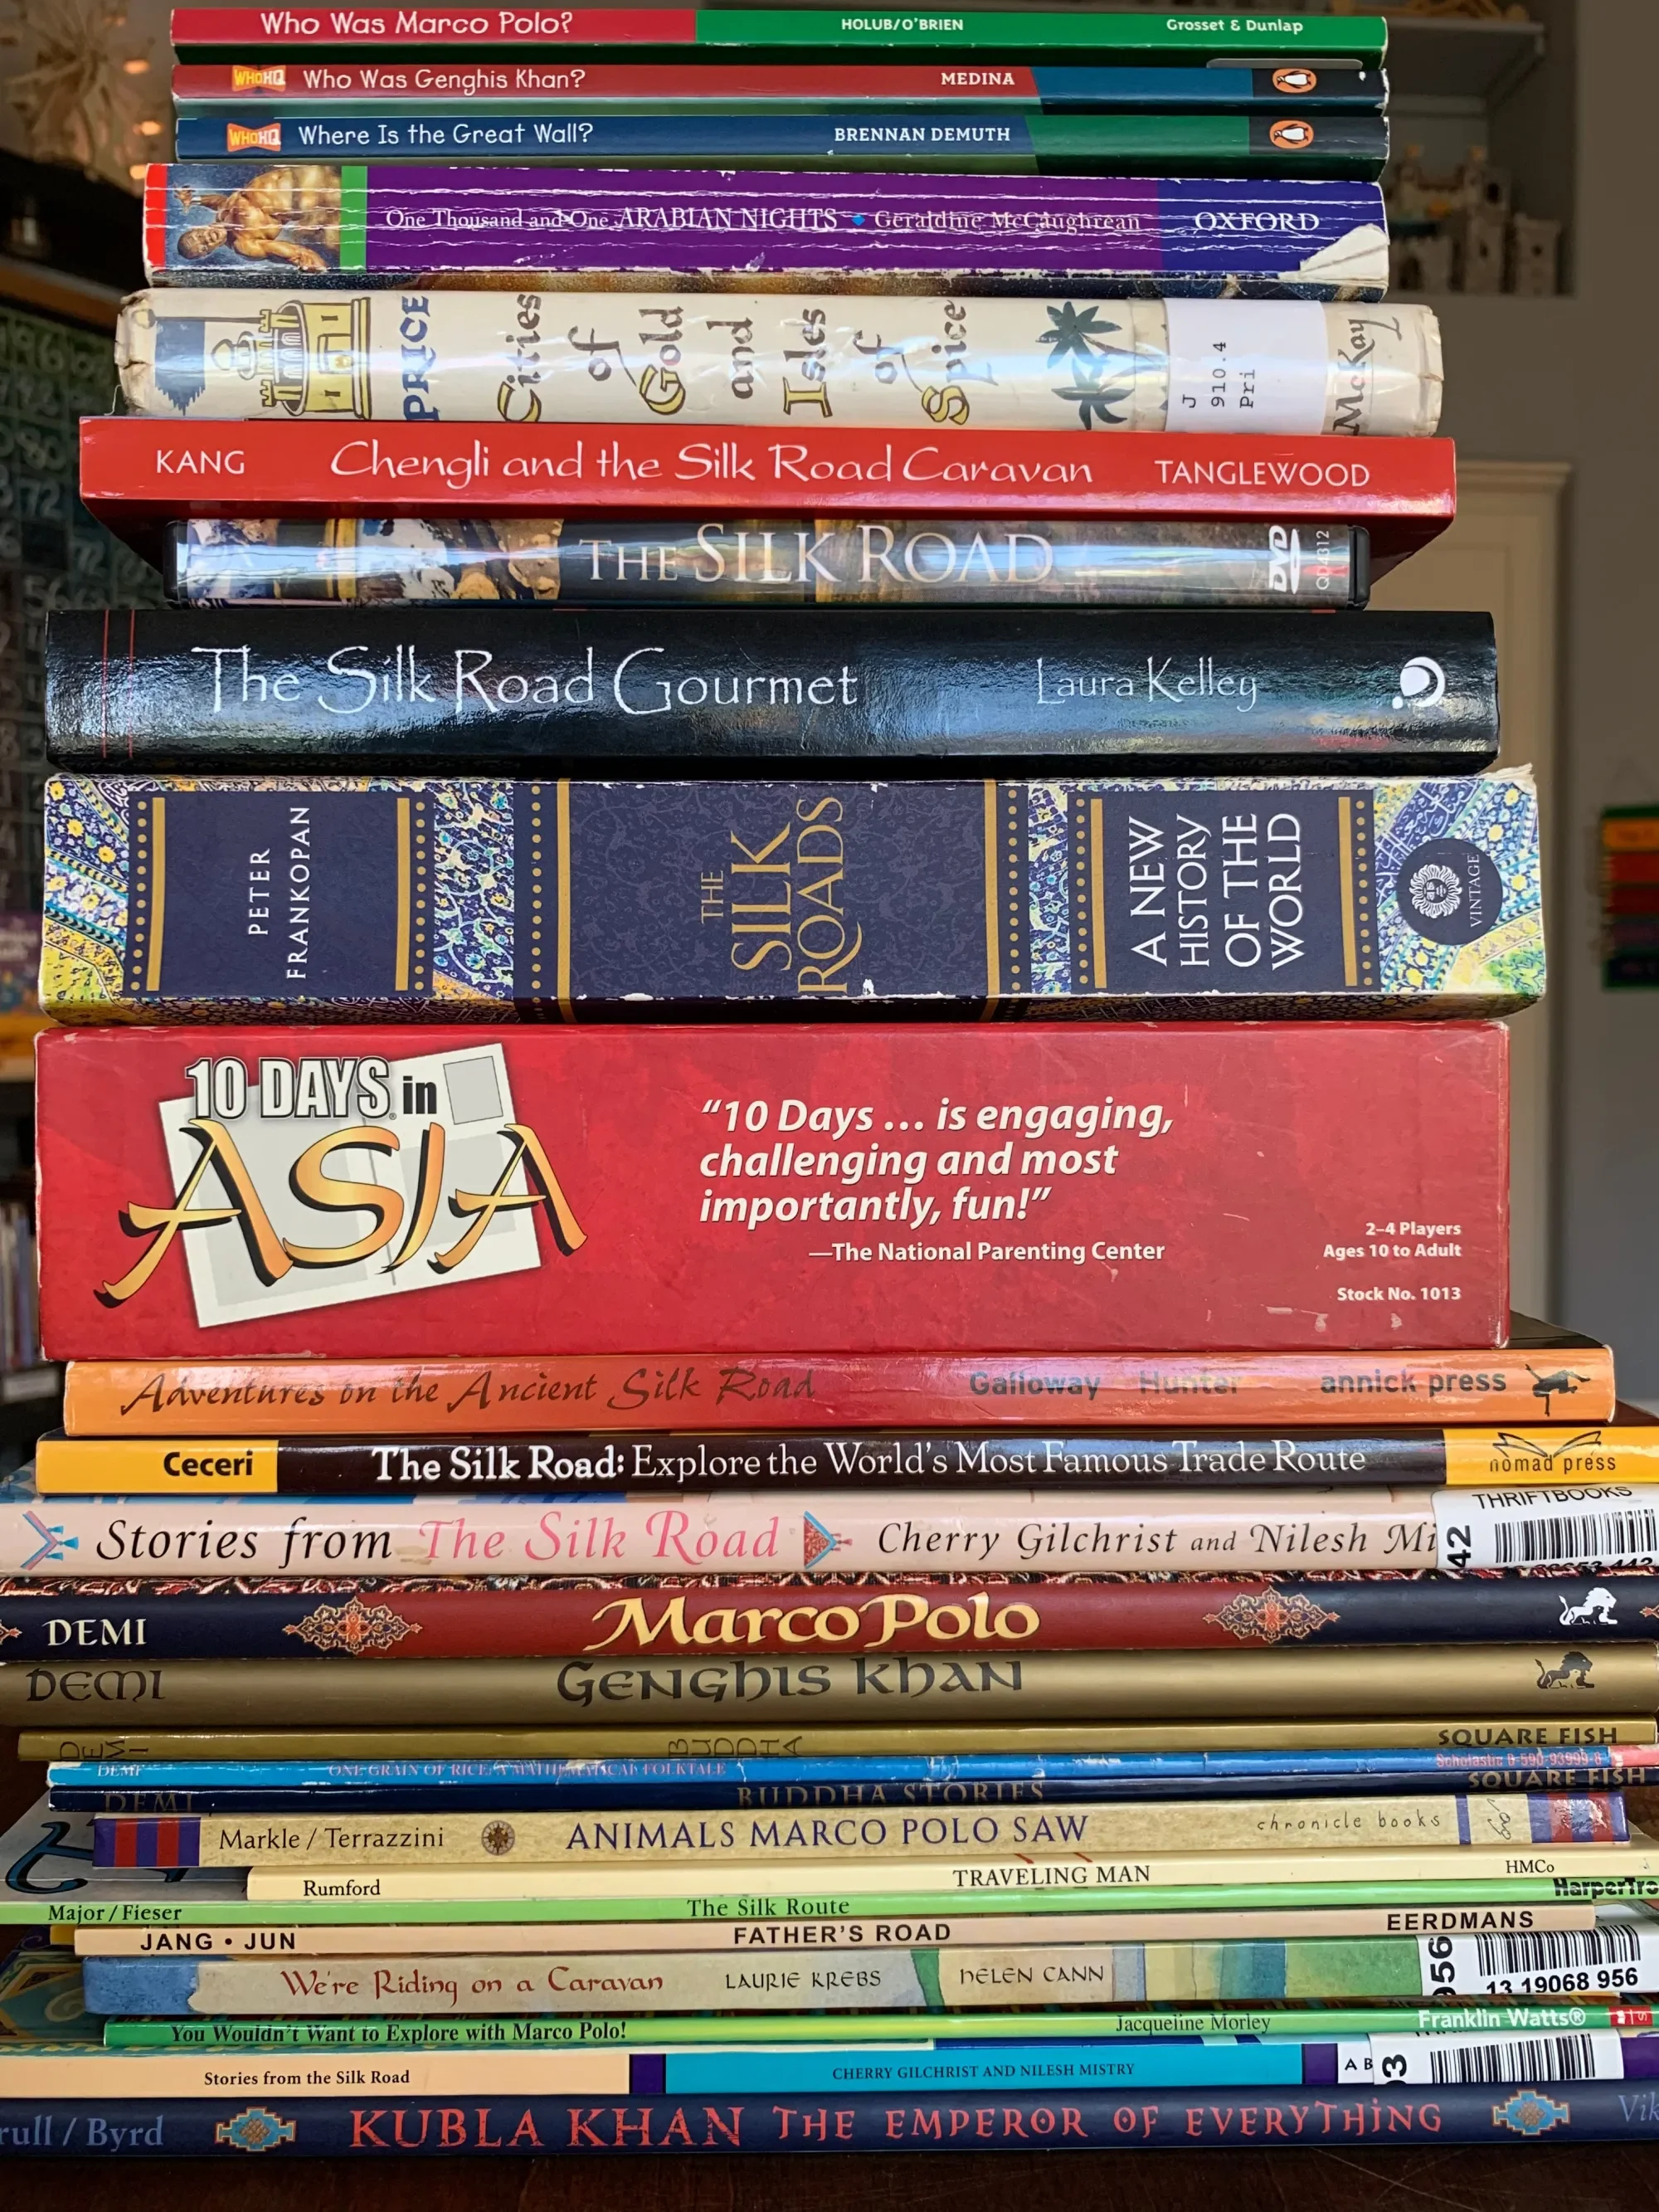
I love gathering our books to decorate the area next to our chalkboard for our unit studies and main lesson blocks. It feels festive, inviting and inspiring. When I first put these lessons together, I had all our “Silk Road” units together. I’ve since separated them because we ended up with so many resources.
-
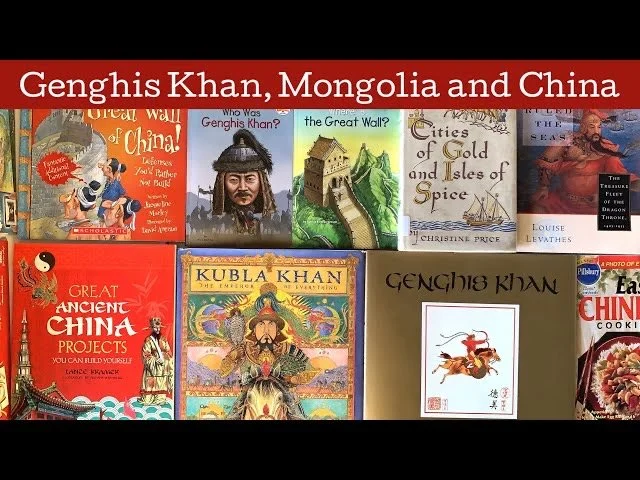
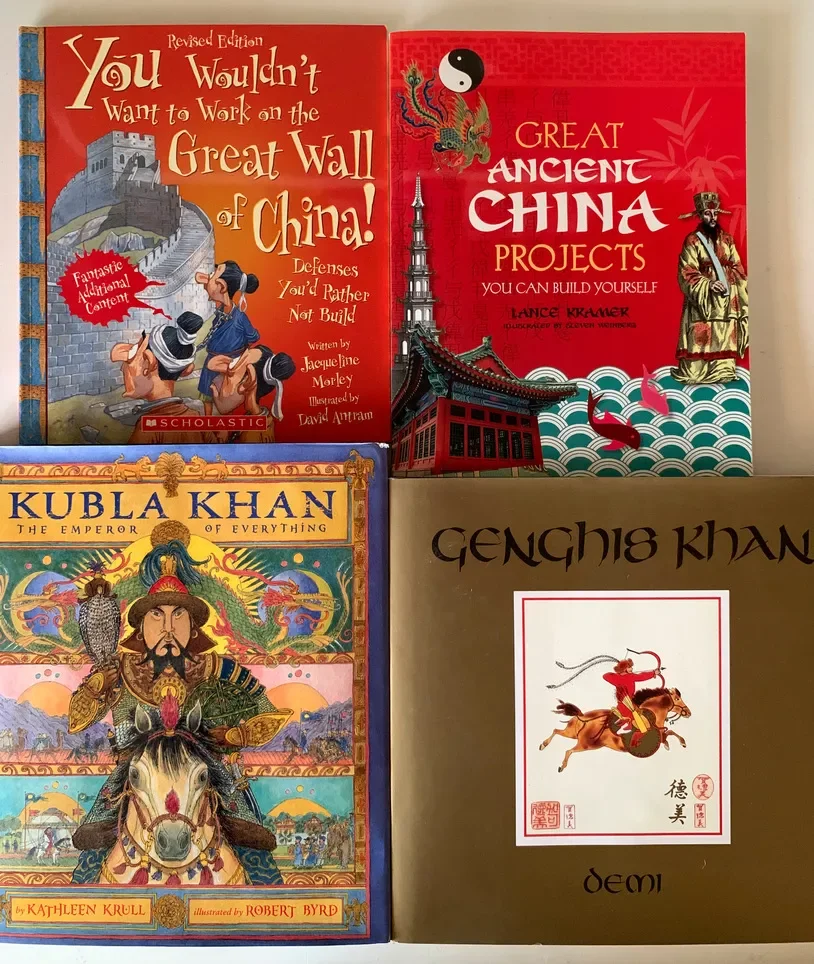
The Great Khans of Mongolia | Kubla Khan, Genghis Khan, The Great Wall of China
It's not a history unit if you don't talk about the people. After all history is His Story right? Her story is mixed in there, but is rarely the focus. While I have not made an effort to explore female historical figures, I think we do ourselves, our education and our children a disservice when we don't include their stories.
-
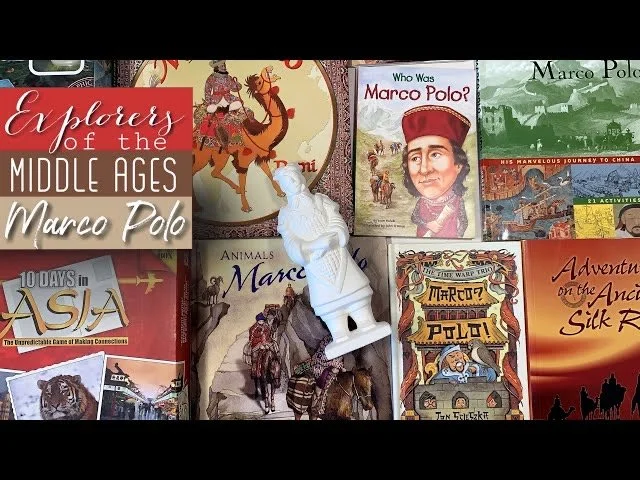
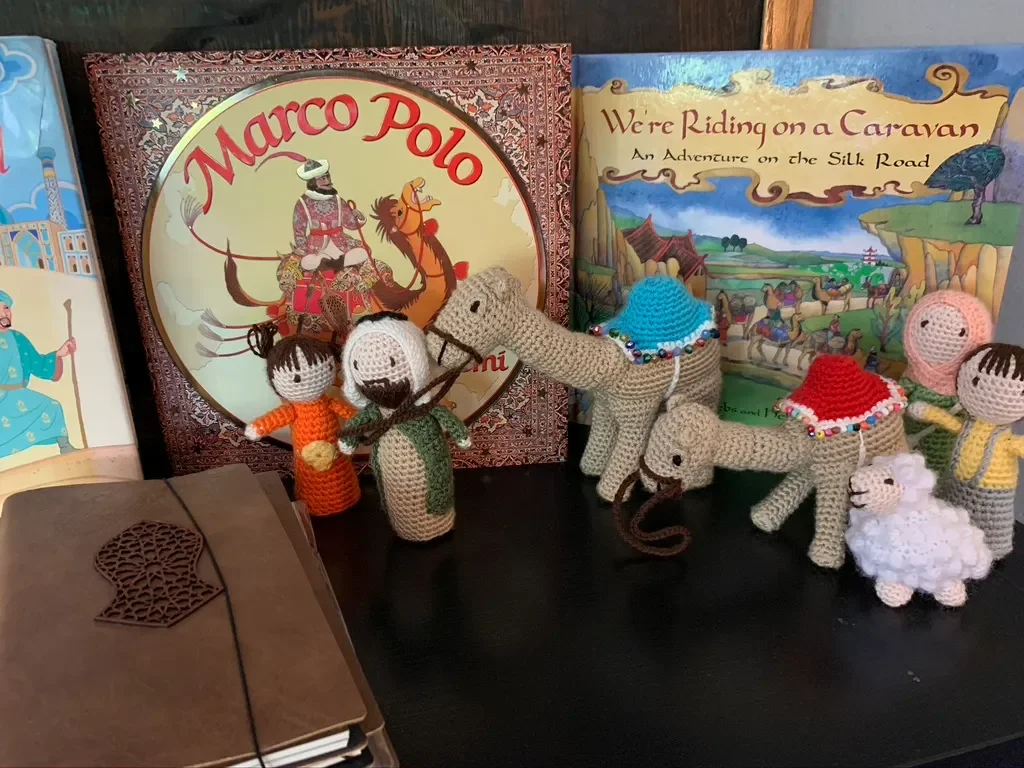
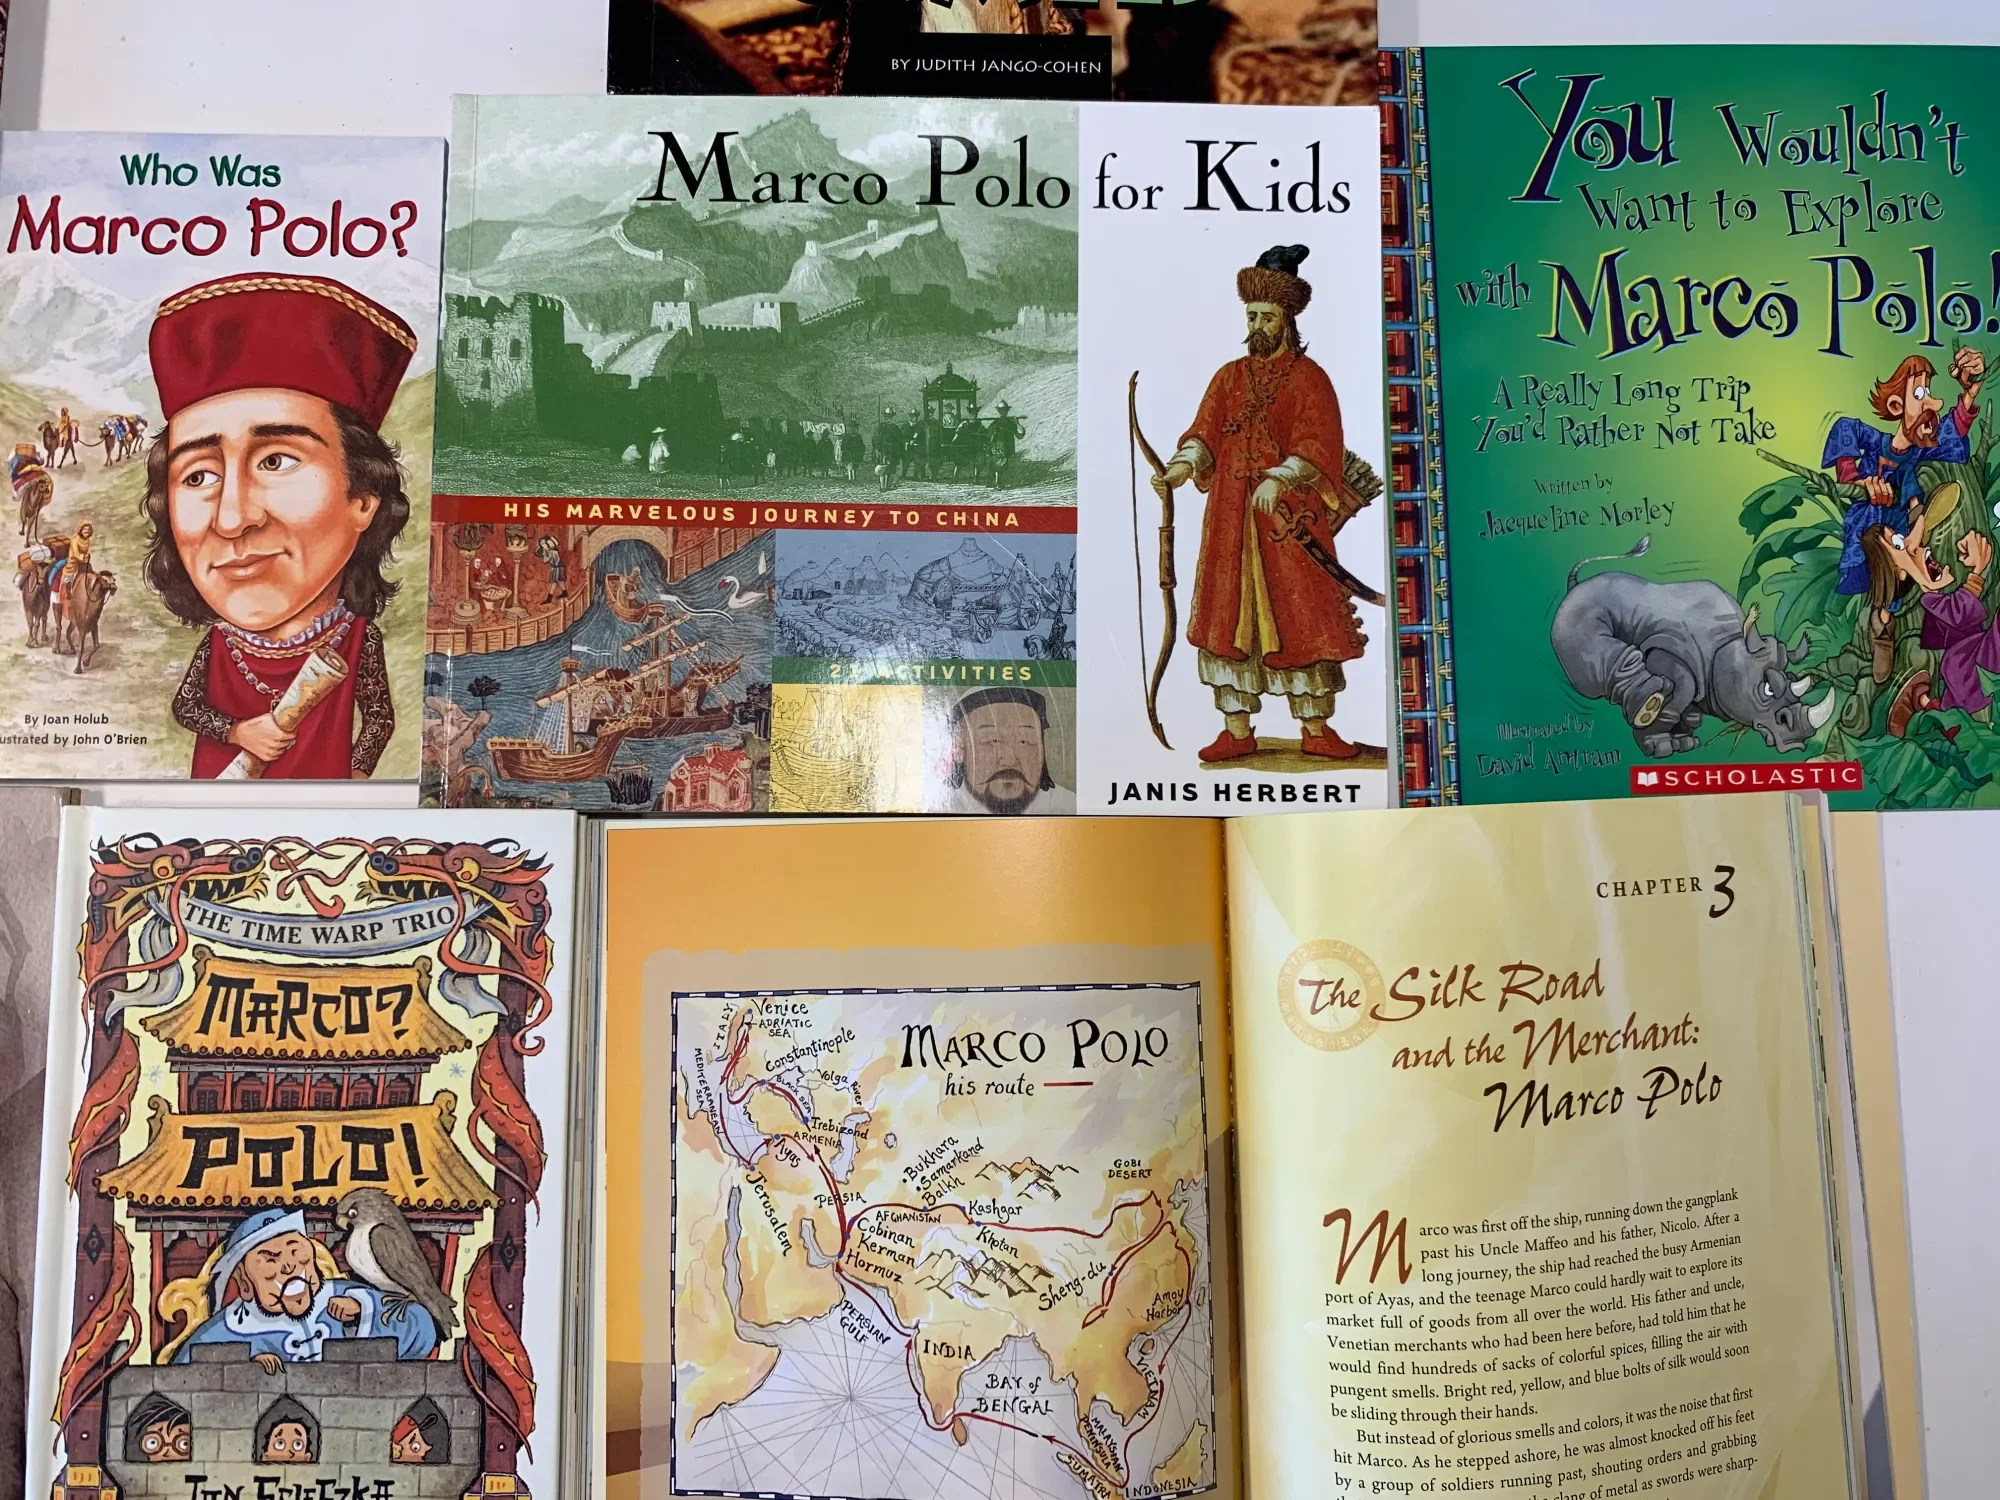
Marco Polo Unit Study
When we first embarked on our Silk Road main lesson block, we thought we would simply add a few resources to complement our Middle Ages unit. Three years later and this little unit has grown into several deeply engaging main lesson blocks that span over 1000 years of history and half the world from North Africa to China.
-
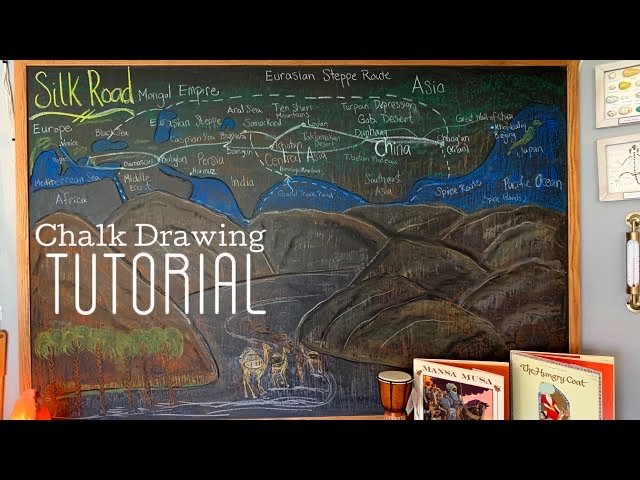
Silk Road Chalk Drawing | Waldorf Inspired
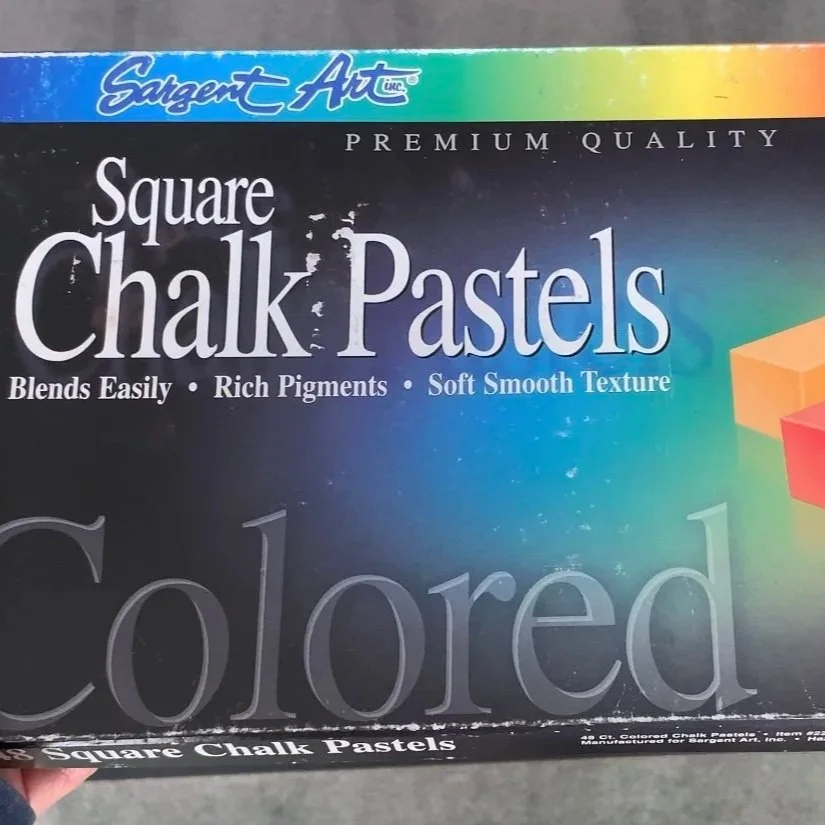
For this chalk drawing, I'm using Sargent Art Square chalk pastels from Blick Art Material. Drawing inspiration comes from the book The Silk Road, and I'm drawing on my 4'x6' chalkboard by Ghent.
-
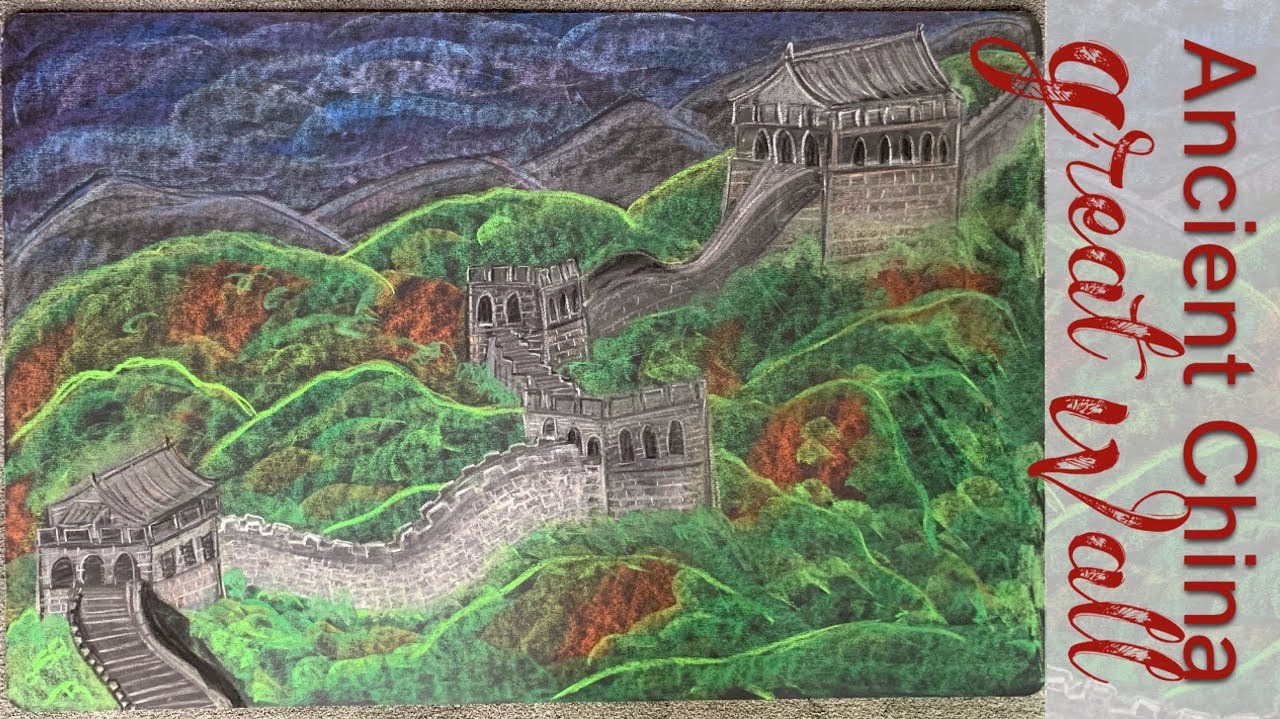
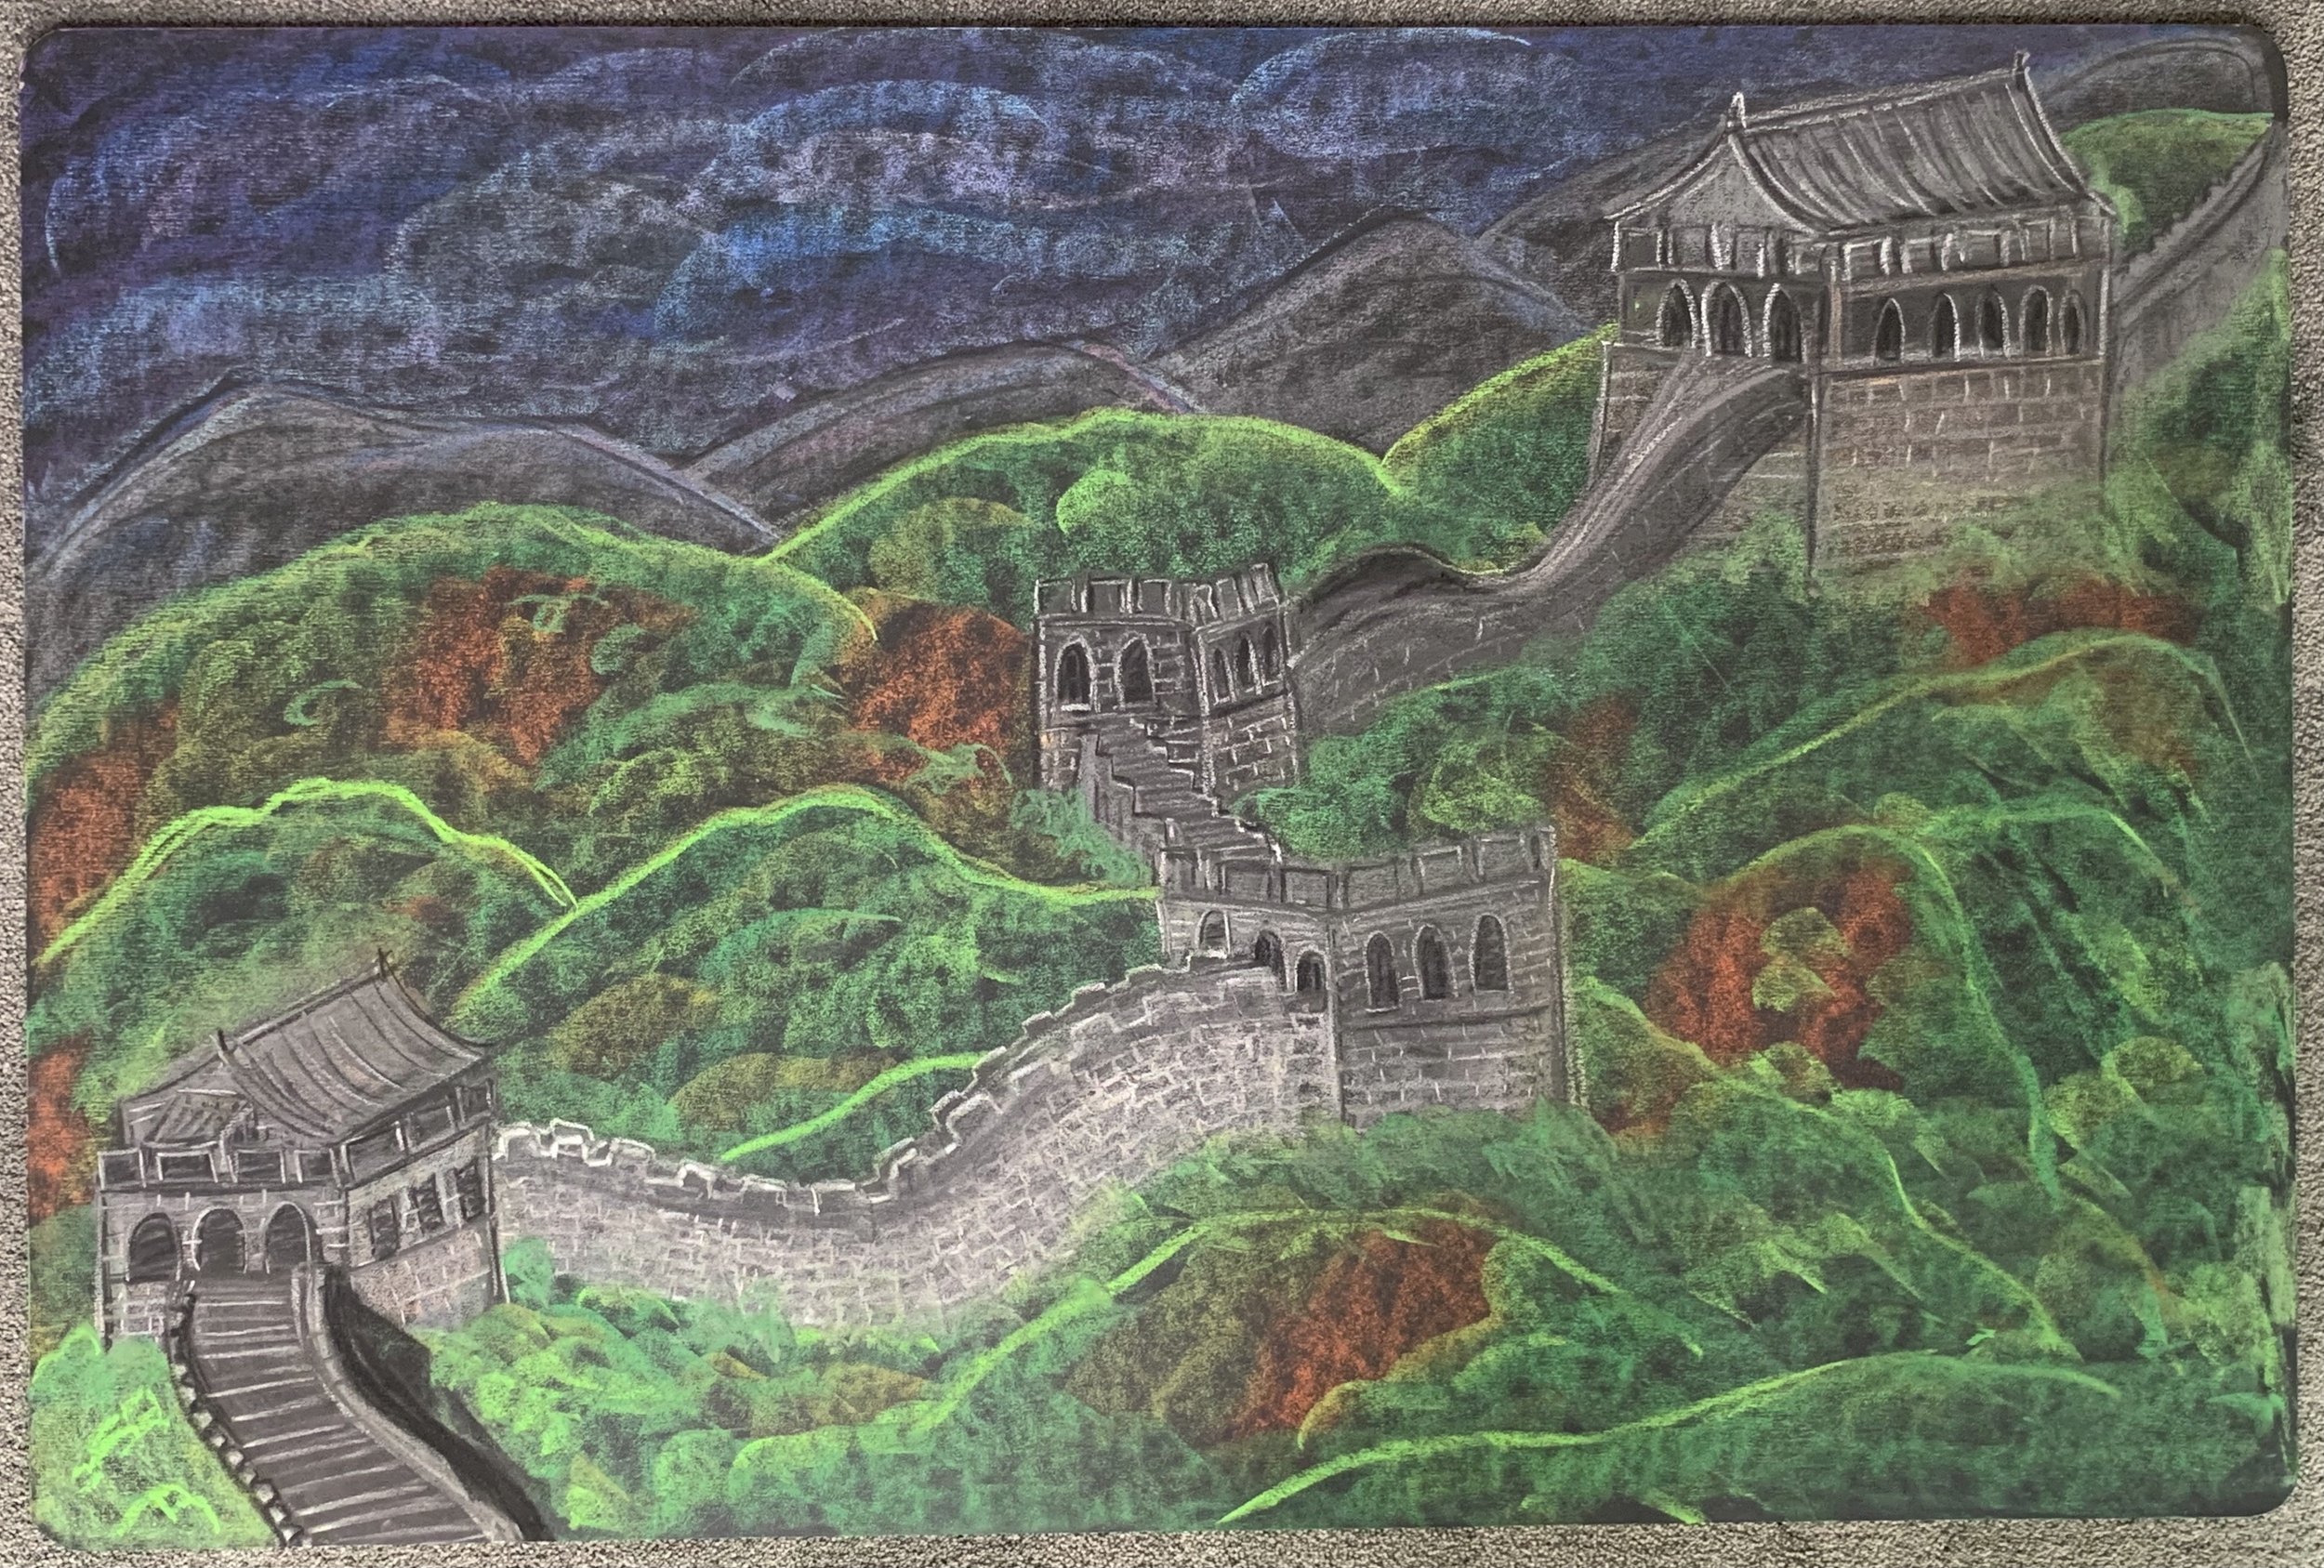
The Great Wall of China Chalk Drawing
The chalkboard I'm using for this chalk drawing measures 24"x 36" but it comes in smaller sizes. Of all the chalkboards I've used, I love these the most (be sure to get the same brand if you want the same results). I find the size to be suitable for most chalk drawings, and what's great about it is that you can have a few of them to work with rather than just one big one.
-

Genghis Khan | Mongolian Chalk Drawing
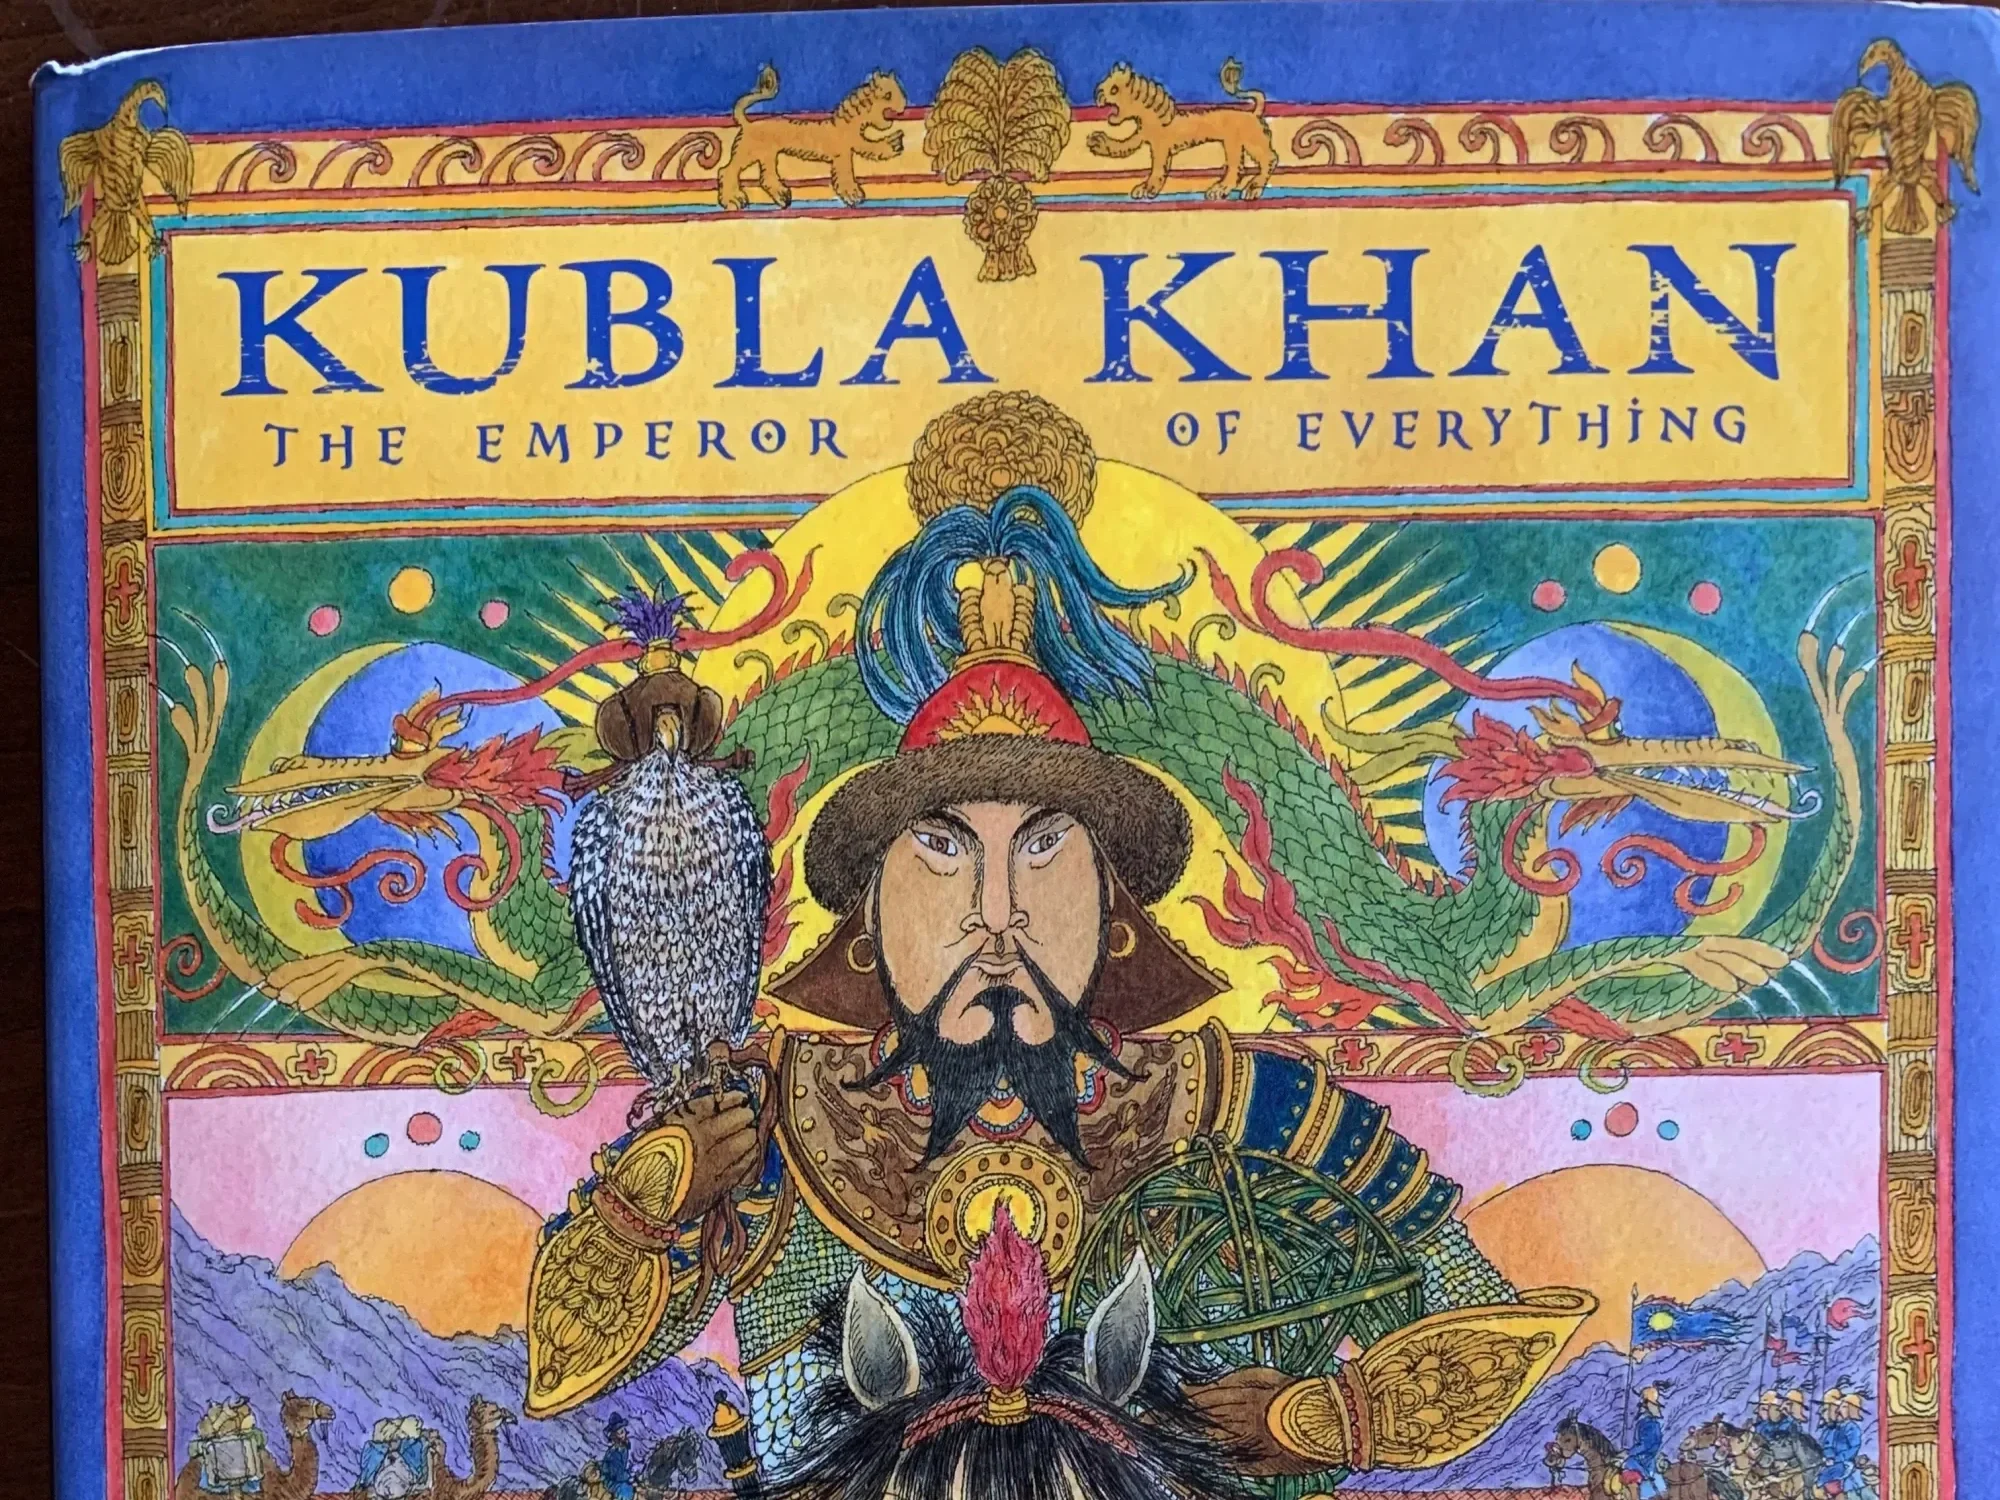
This chalk drawing is inspired by the book Kubla Khan the Emperor of Everything by Kathleen Krull. I used my Sargent Art Square Chalk Pastels and my favorite chalkboard, a 2'x3' blackboard available from Paper, Scissors Stone at Waldorf Supplies. This chalk drawing is of a Mongolian landscape with yurts in the foreground with camels and horses as they are significant to Mongol lifestyle and livelihood.
-
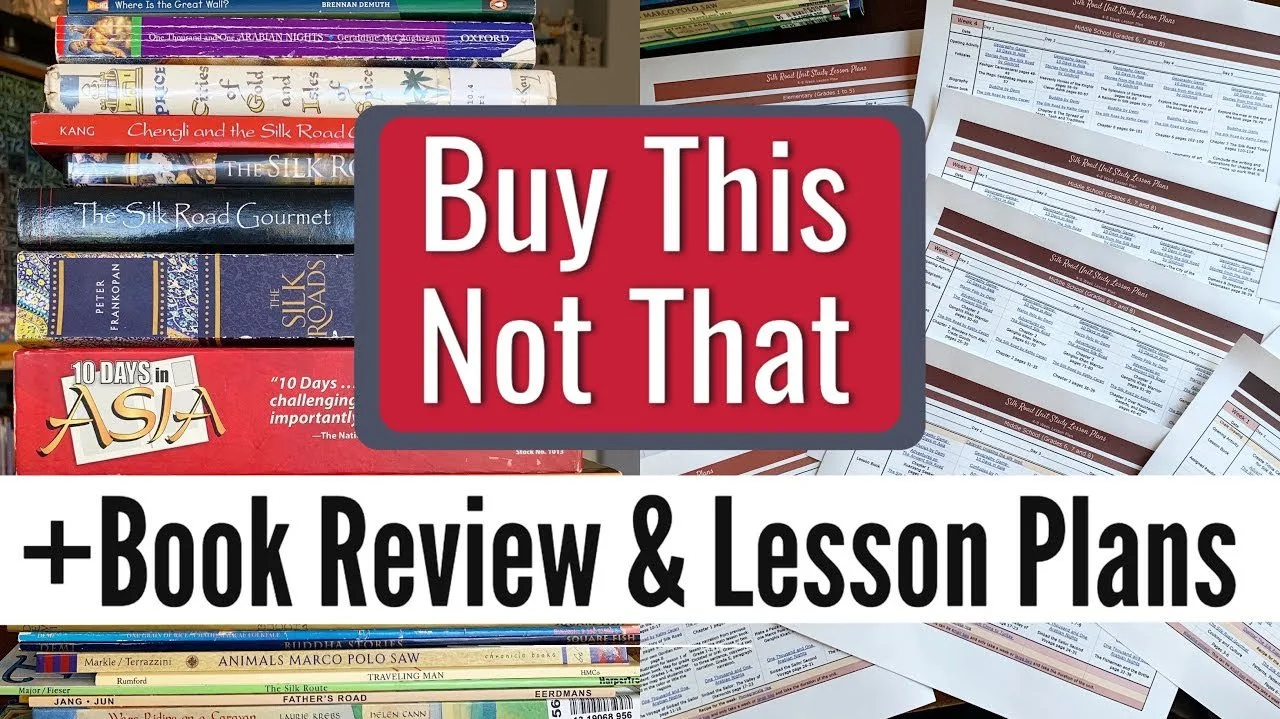
Silk Road Unit Study Review + Lesson Plans!
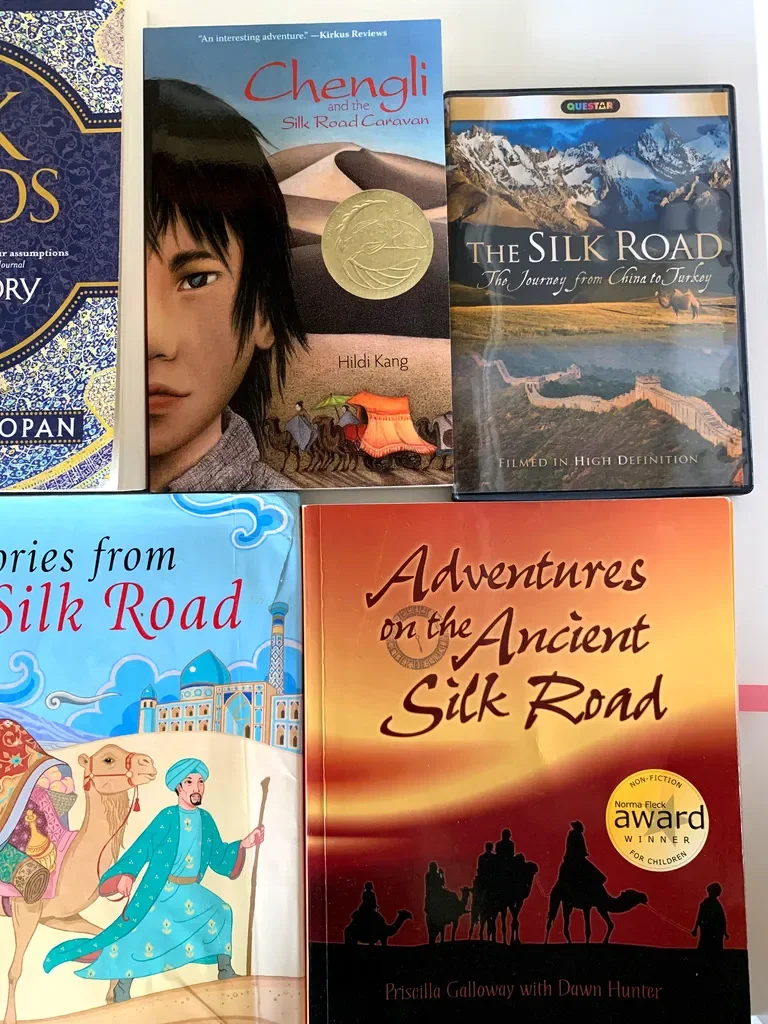
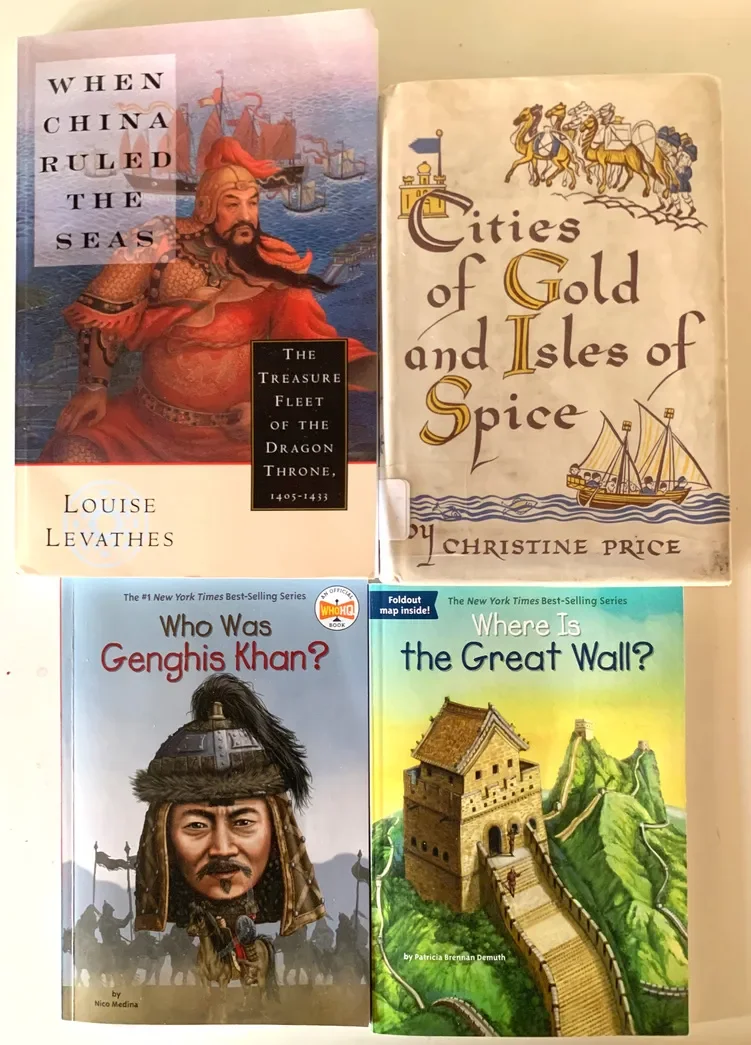
There are more books and resources you could use for a Silk Road unit study. Check out the China, Marco Polo, Genghis Khan and Islamic Empire unit studies for more books and projects. We concluded this part of our lessons with a review of the books, resources and projects we did for this part of our Silk Road unit which focuses on the travels of warriors, explorers and pilgrims along the Silk Road. We used picture books, chapter books and nonfiction books.
Silk Road Projects & Activities
-
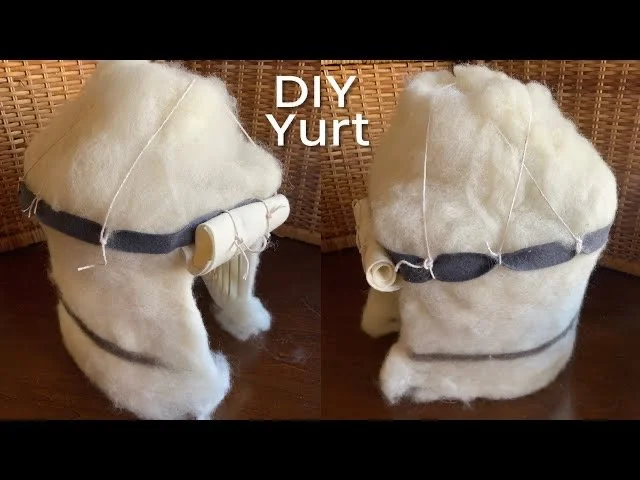
How to Make a Yurt or Ger
For our Silk Road and Marco Polo units, we did several hands on projects. One of them was to make a model yurt or ger. For the second time in seven years, we are doing this project. The first time we did it, we did a more simplified version that my then 8 and 12 year old sons did on their own with little help.
-

DIY Historic Kaaba
While working through our West Africa main lesson block, we learned about Mansa Musa and his great pilgrimage to Makkah to perform Hajj. He is reportedly the wealthiest man in recorded history and carried so much gold to give as charity that he crashed the markets in Egypt with in the influx of gold.
-

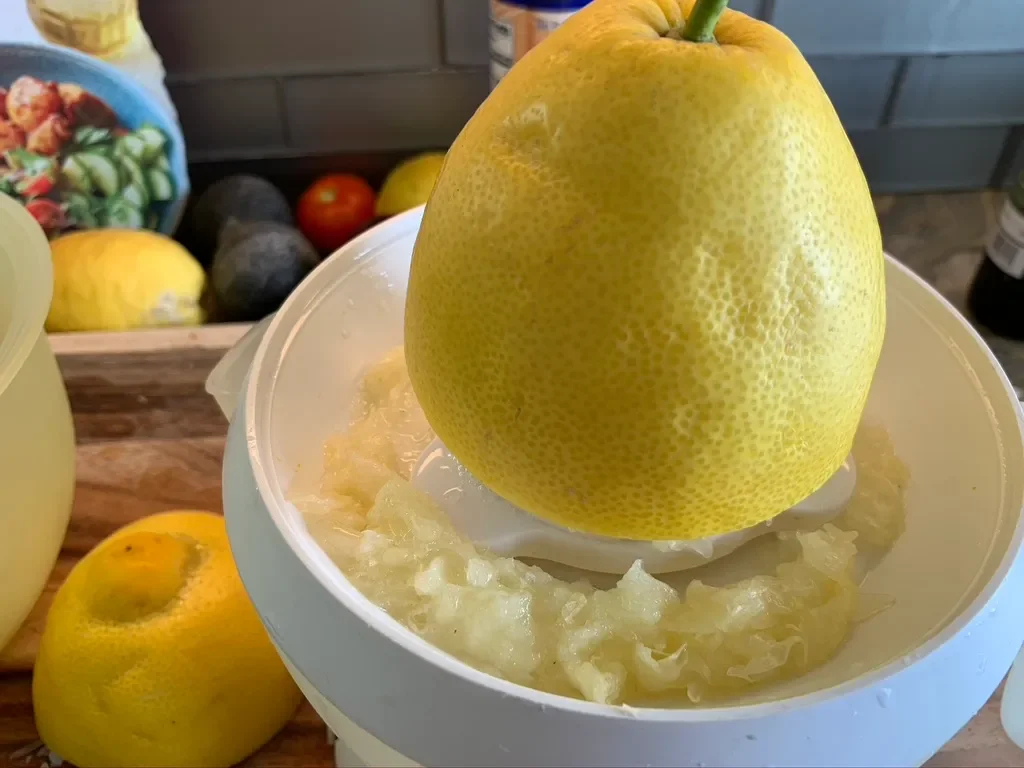
What's Inside a Silkworm Cocoon
Recently my 6-year-old girl was playing with silk cocoons. She was curious what was inside the cocoon as it rattled while she played with them. I thought, "why not open one up and show her?" We were all surprised and slightly grossed out at what we saw.
-

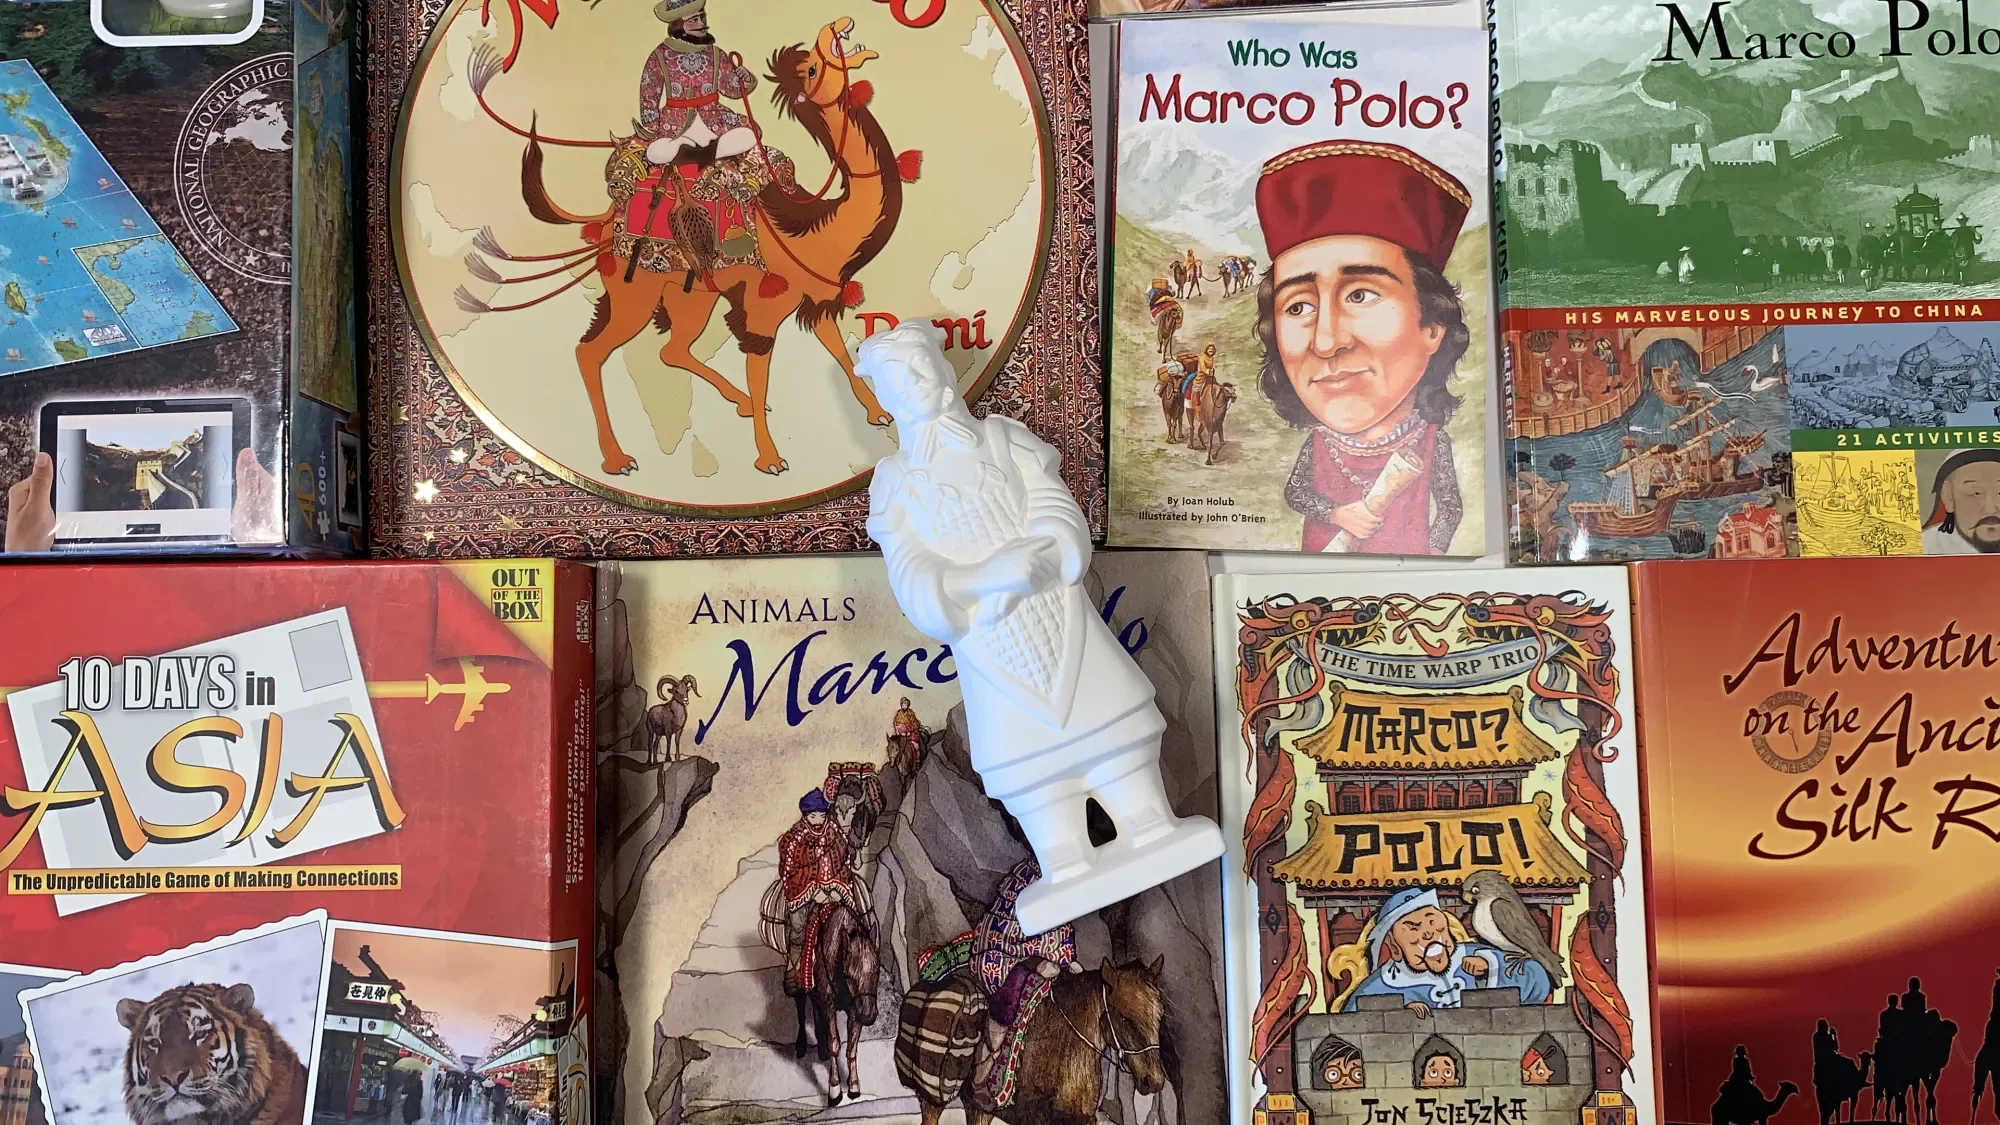
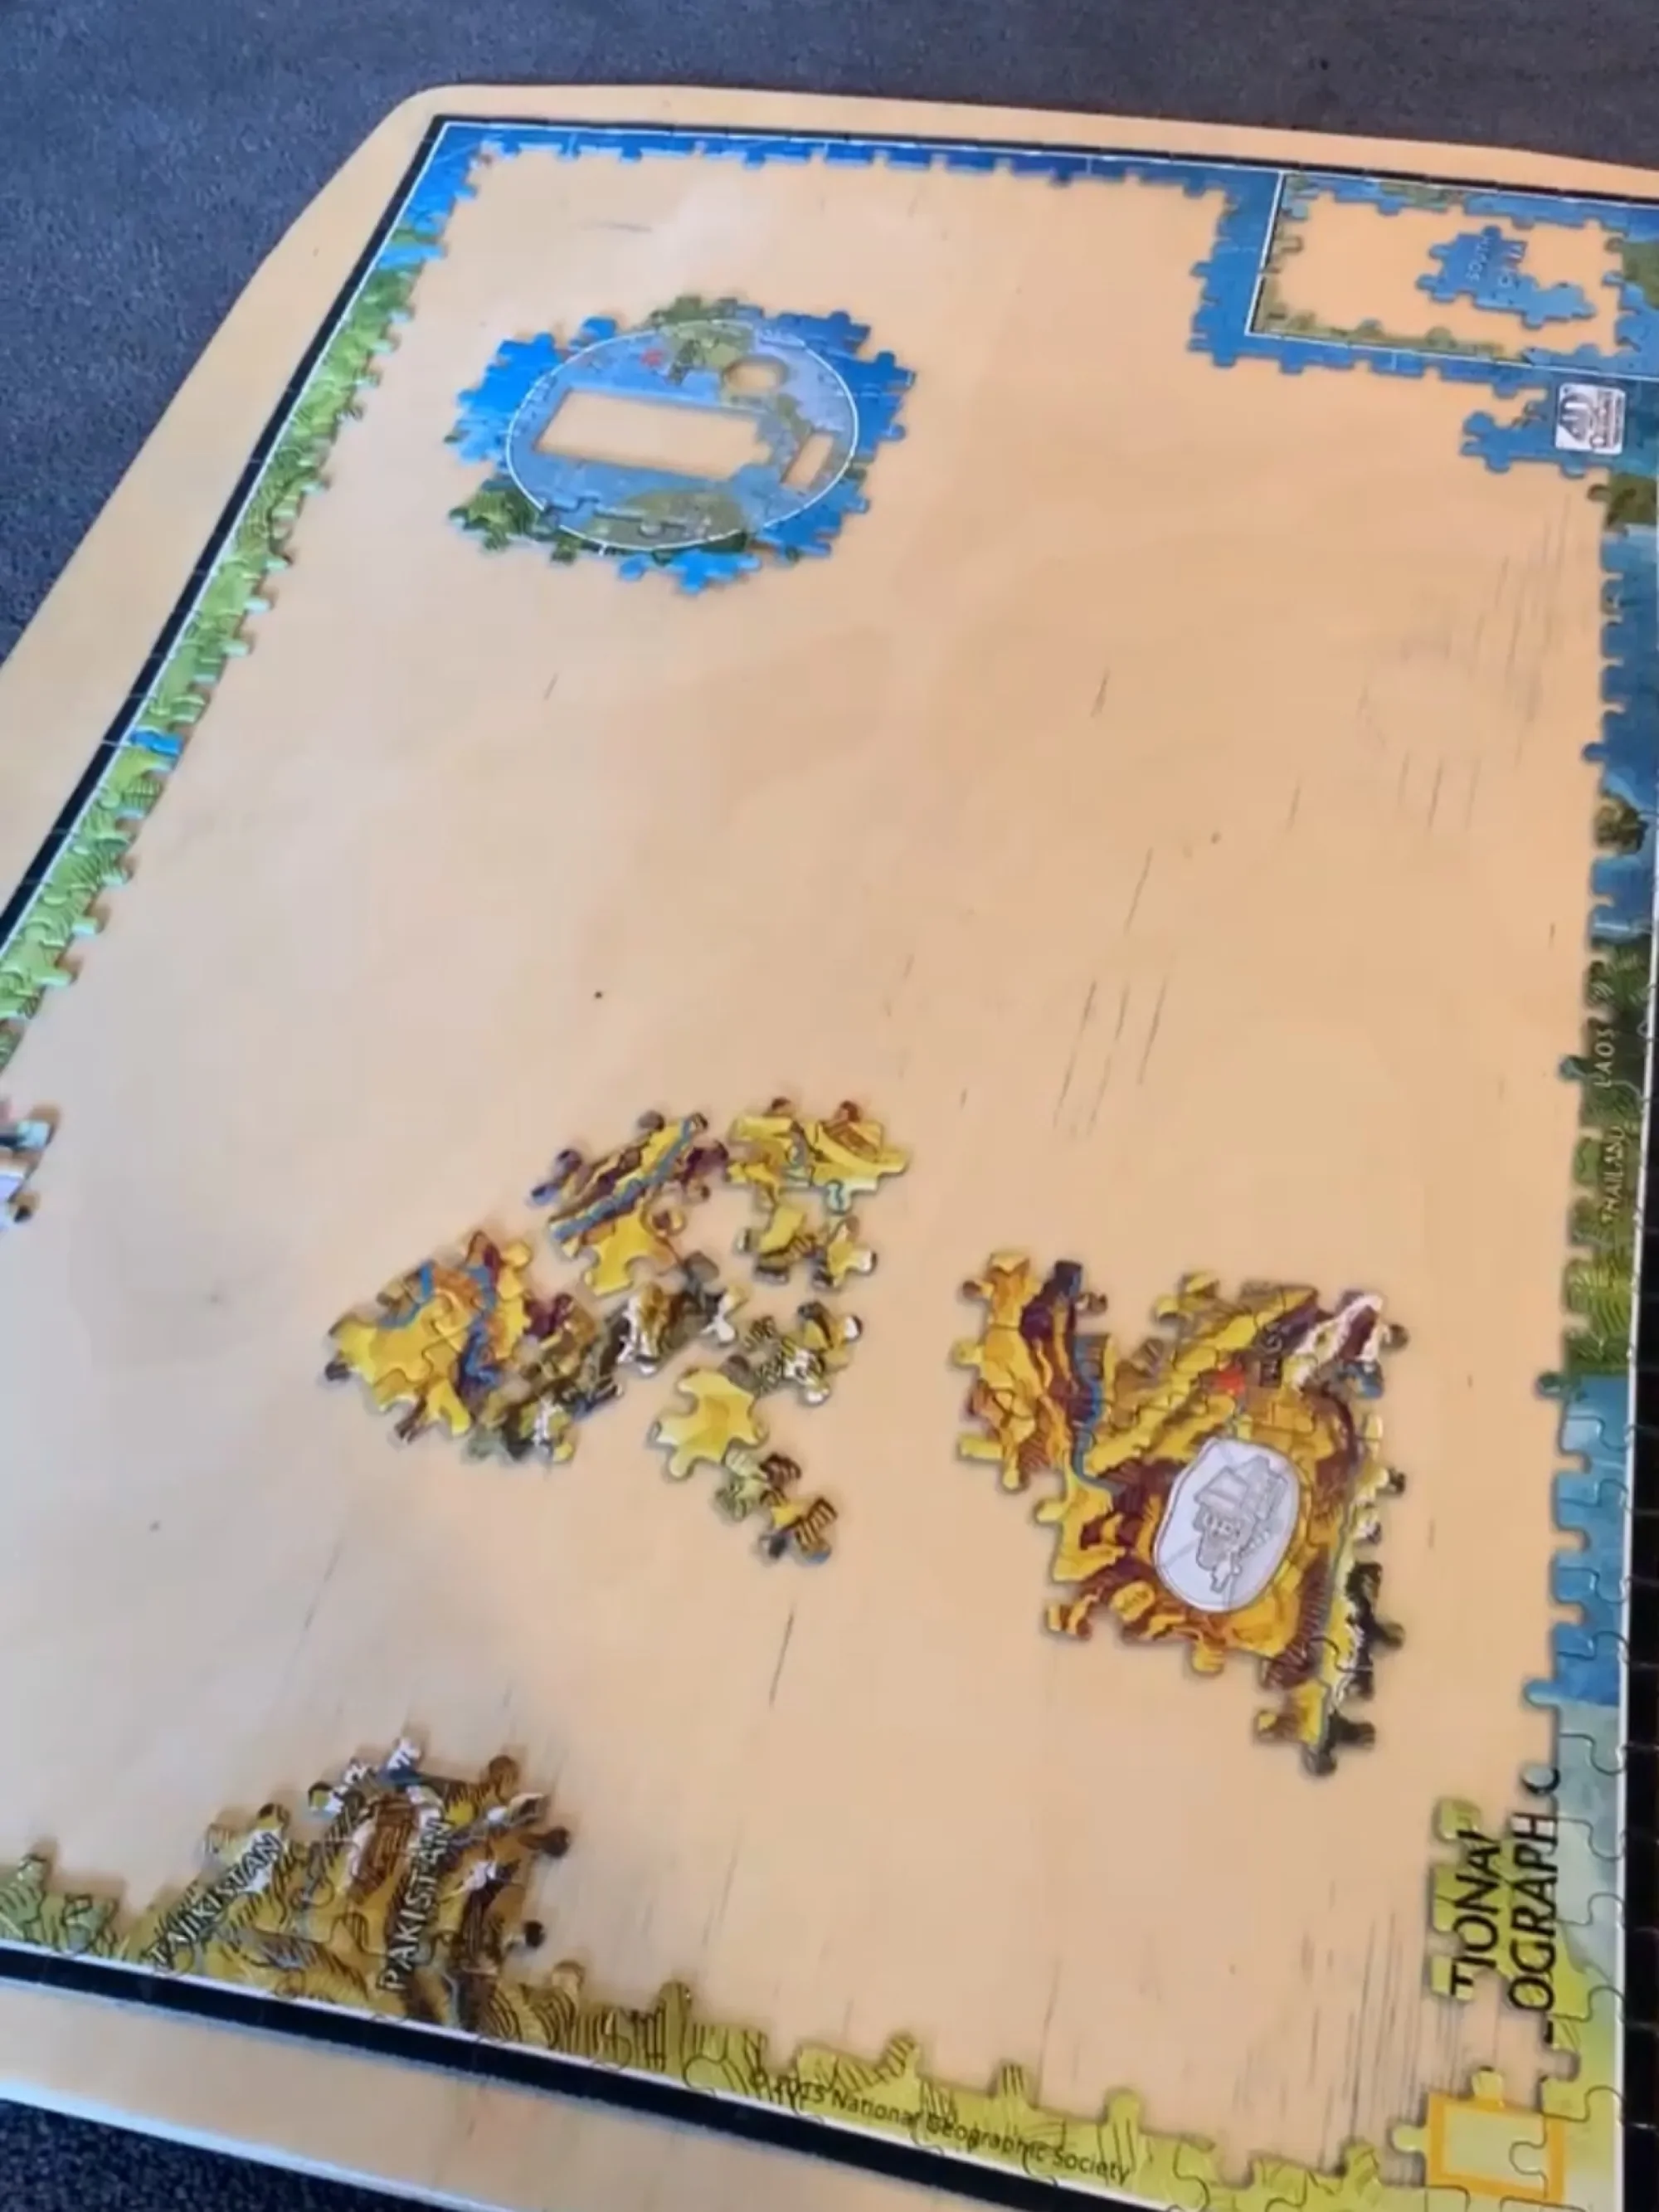
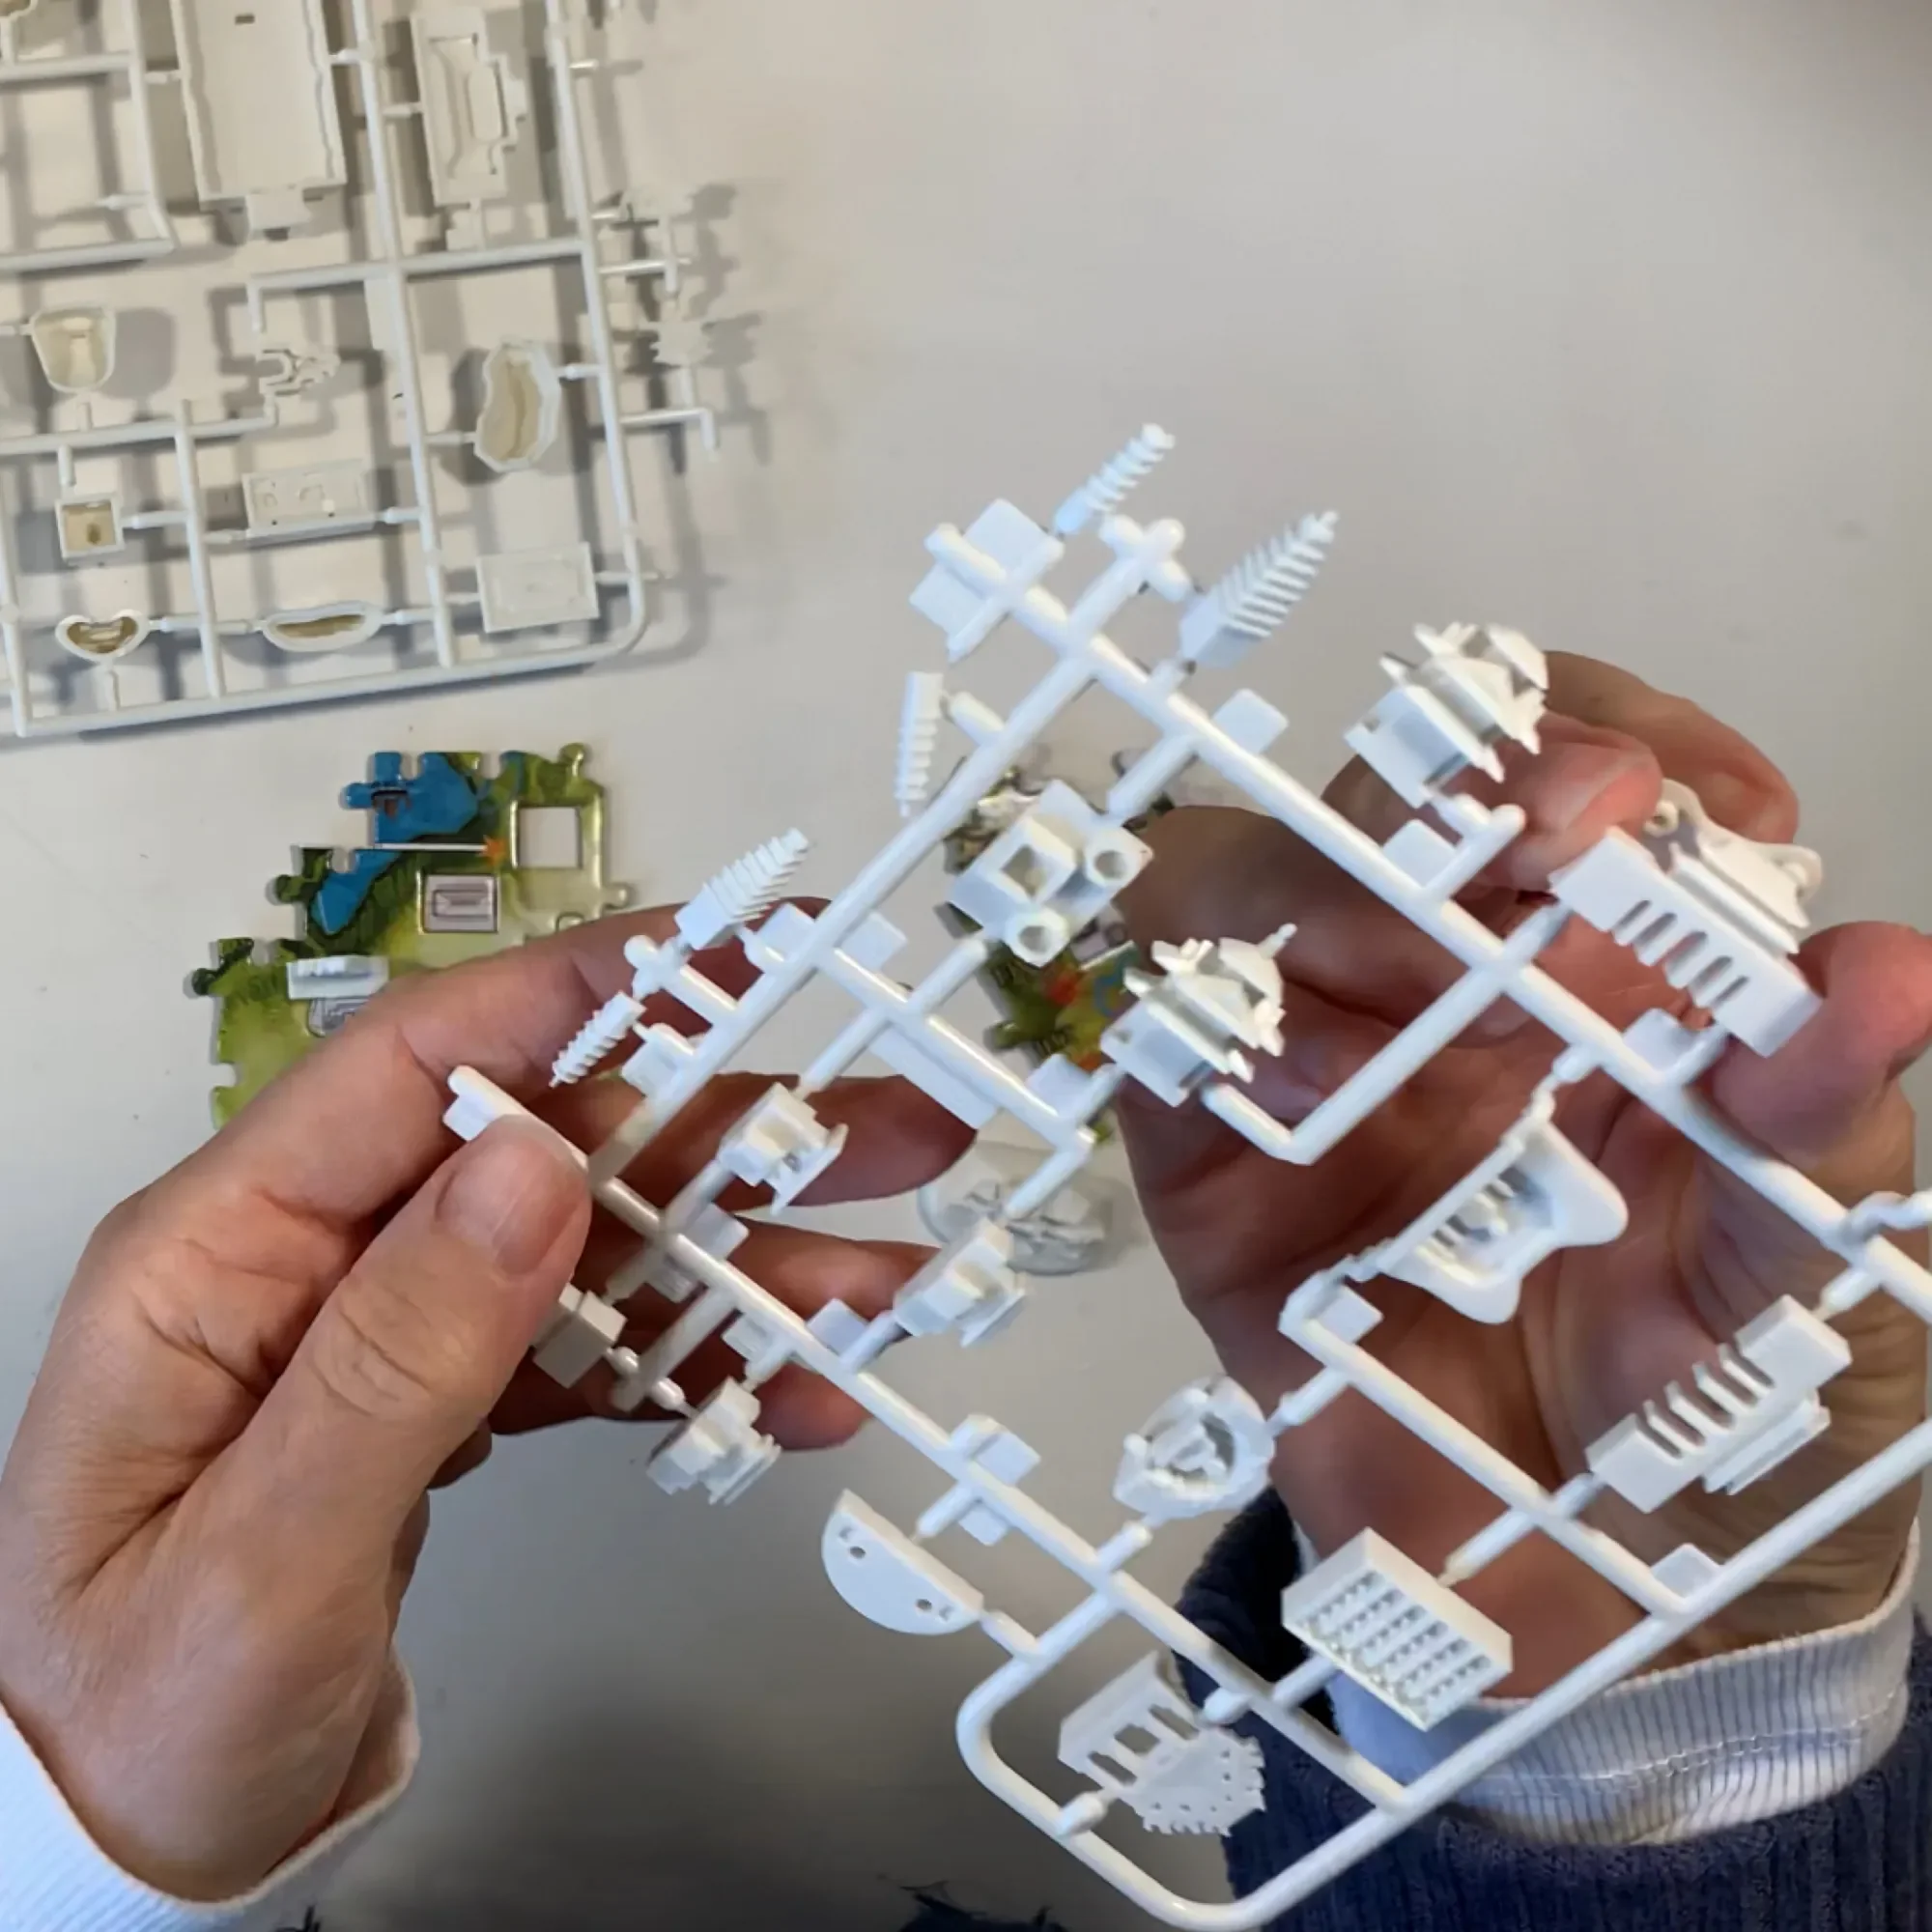
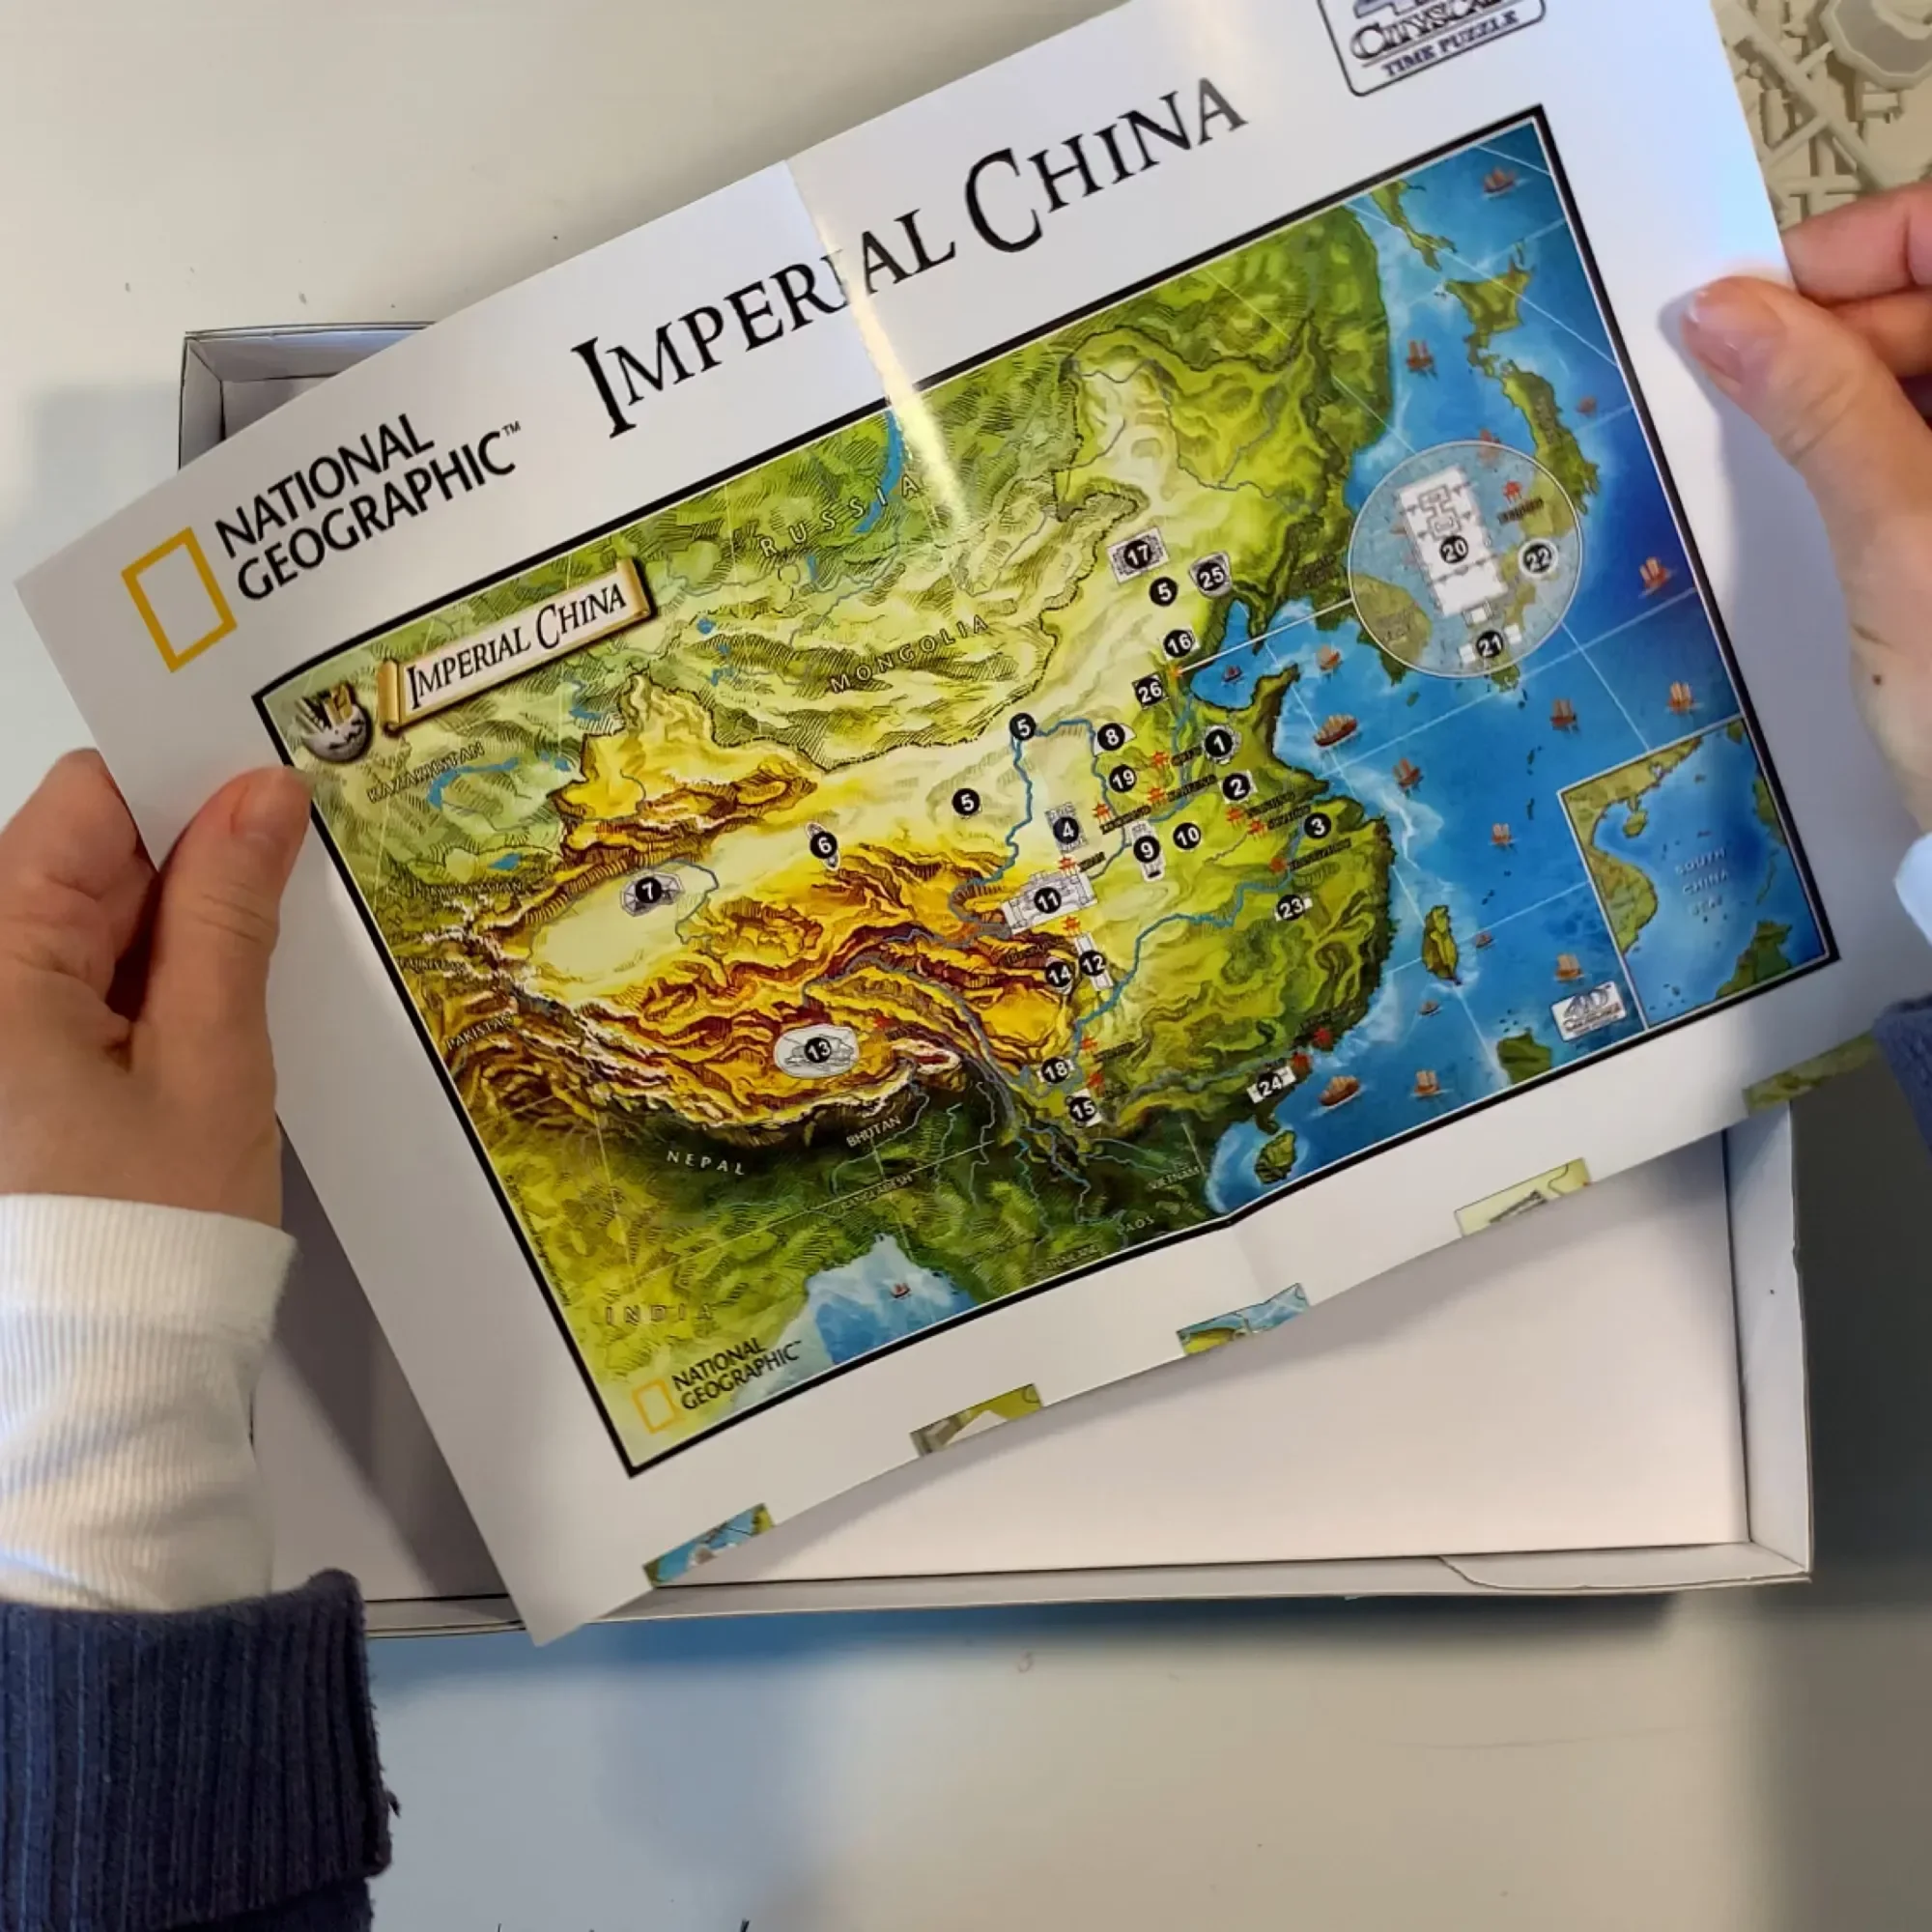
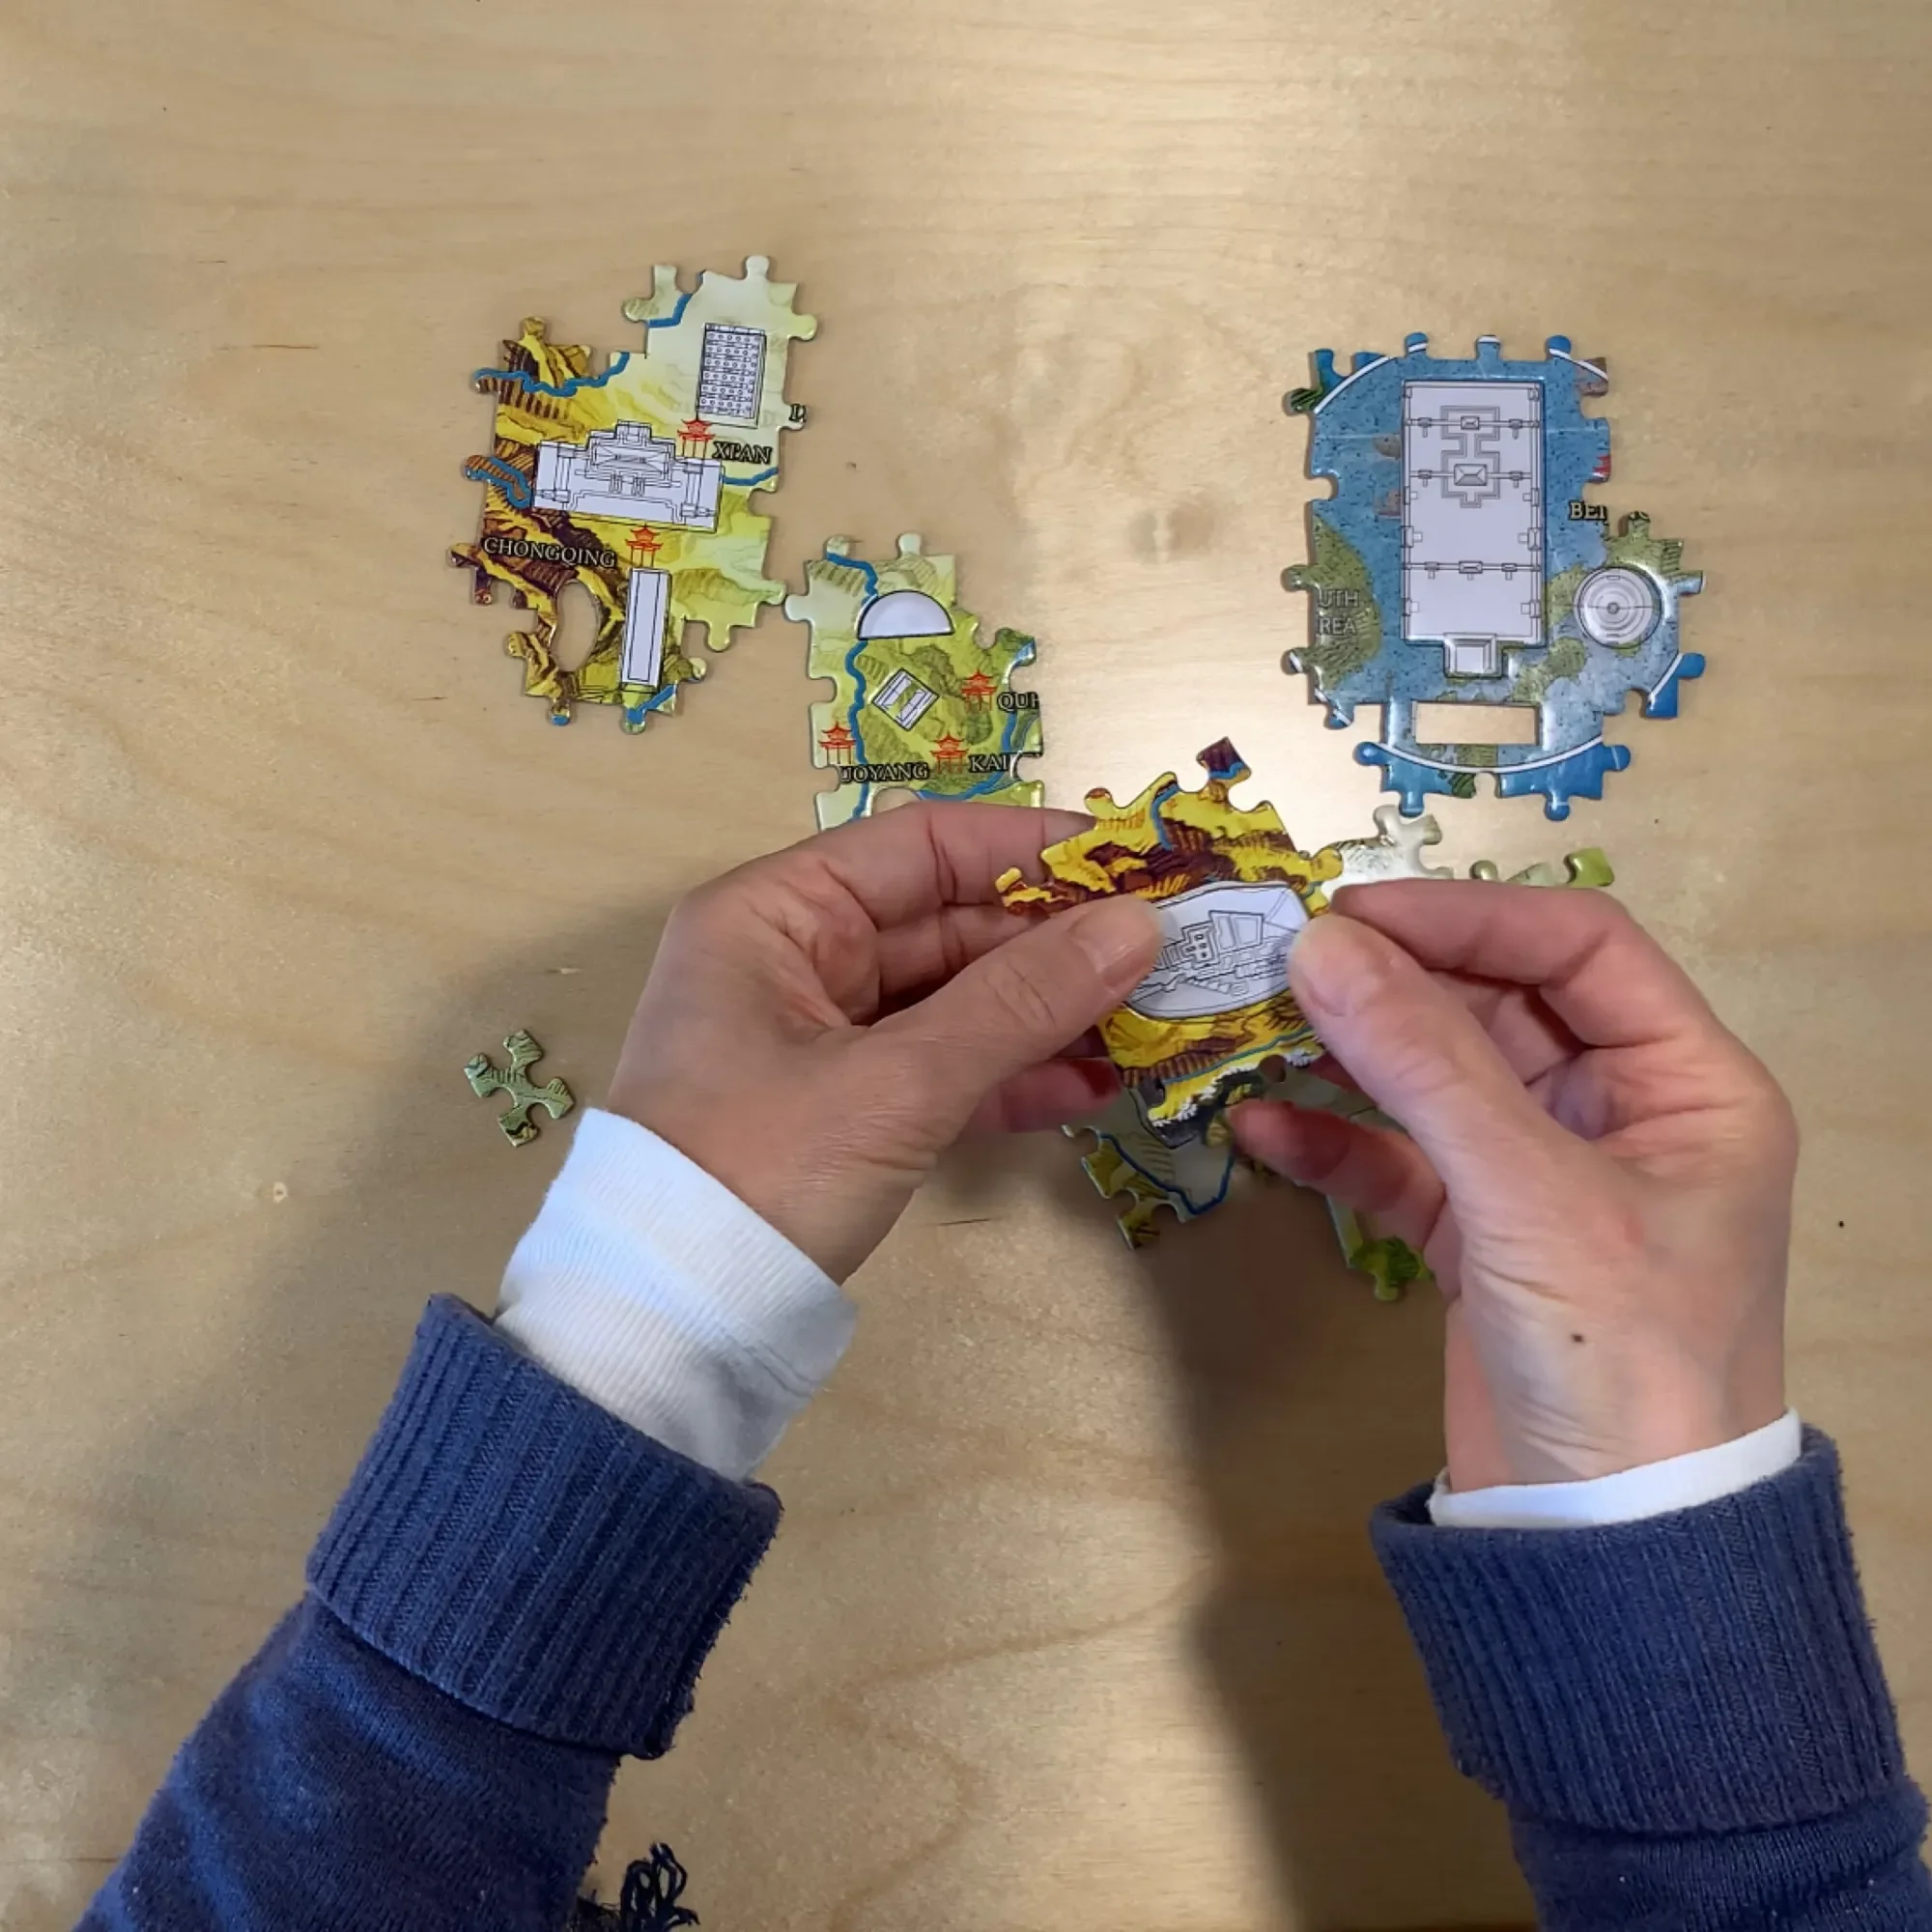
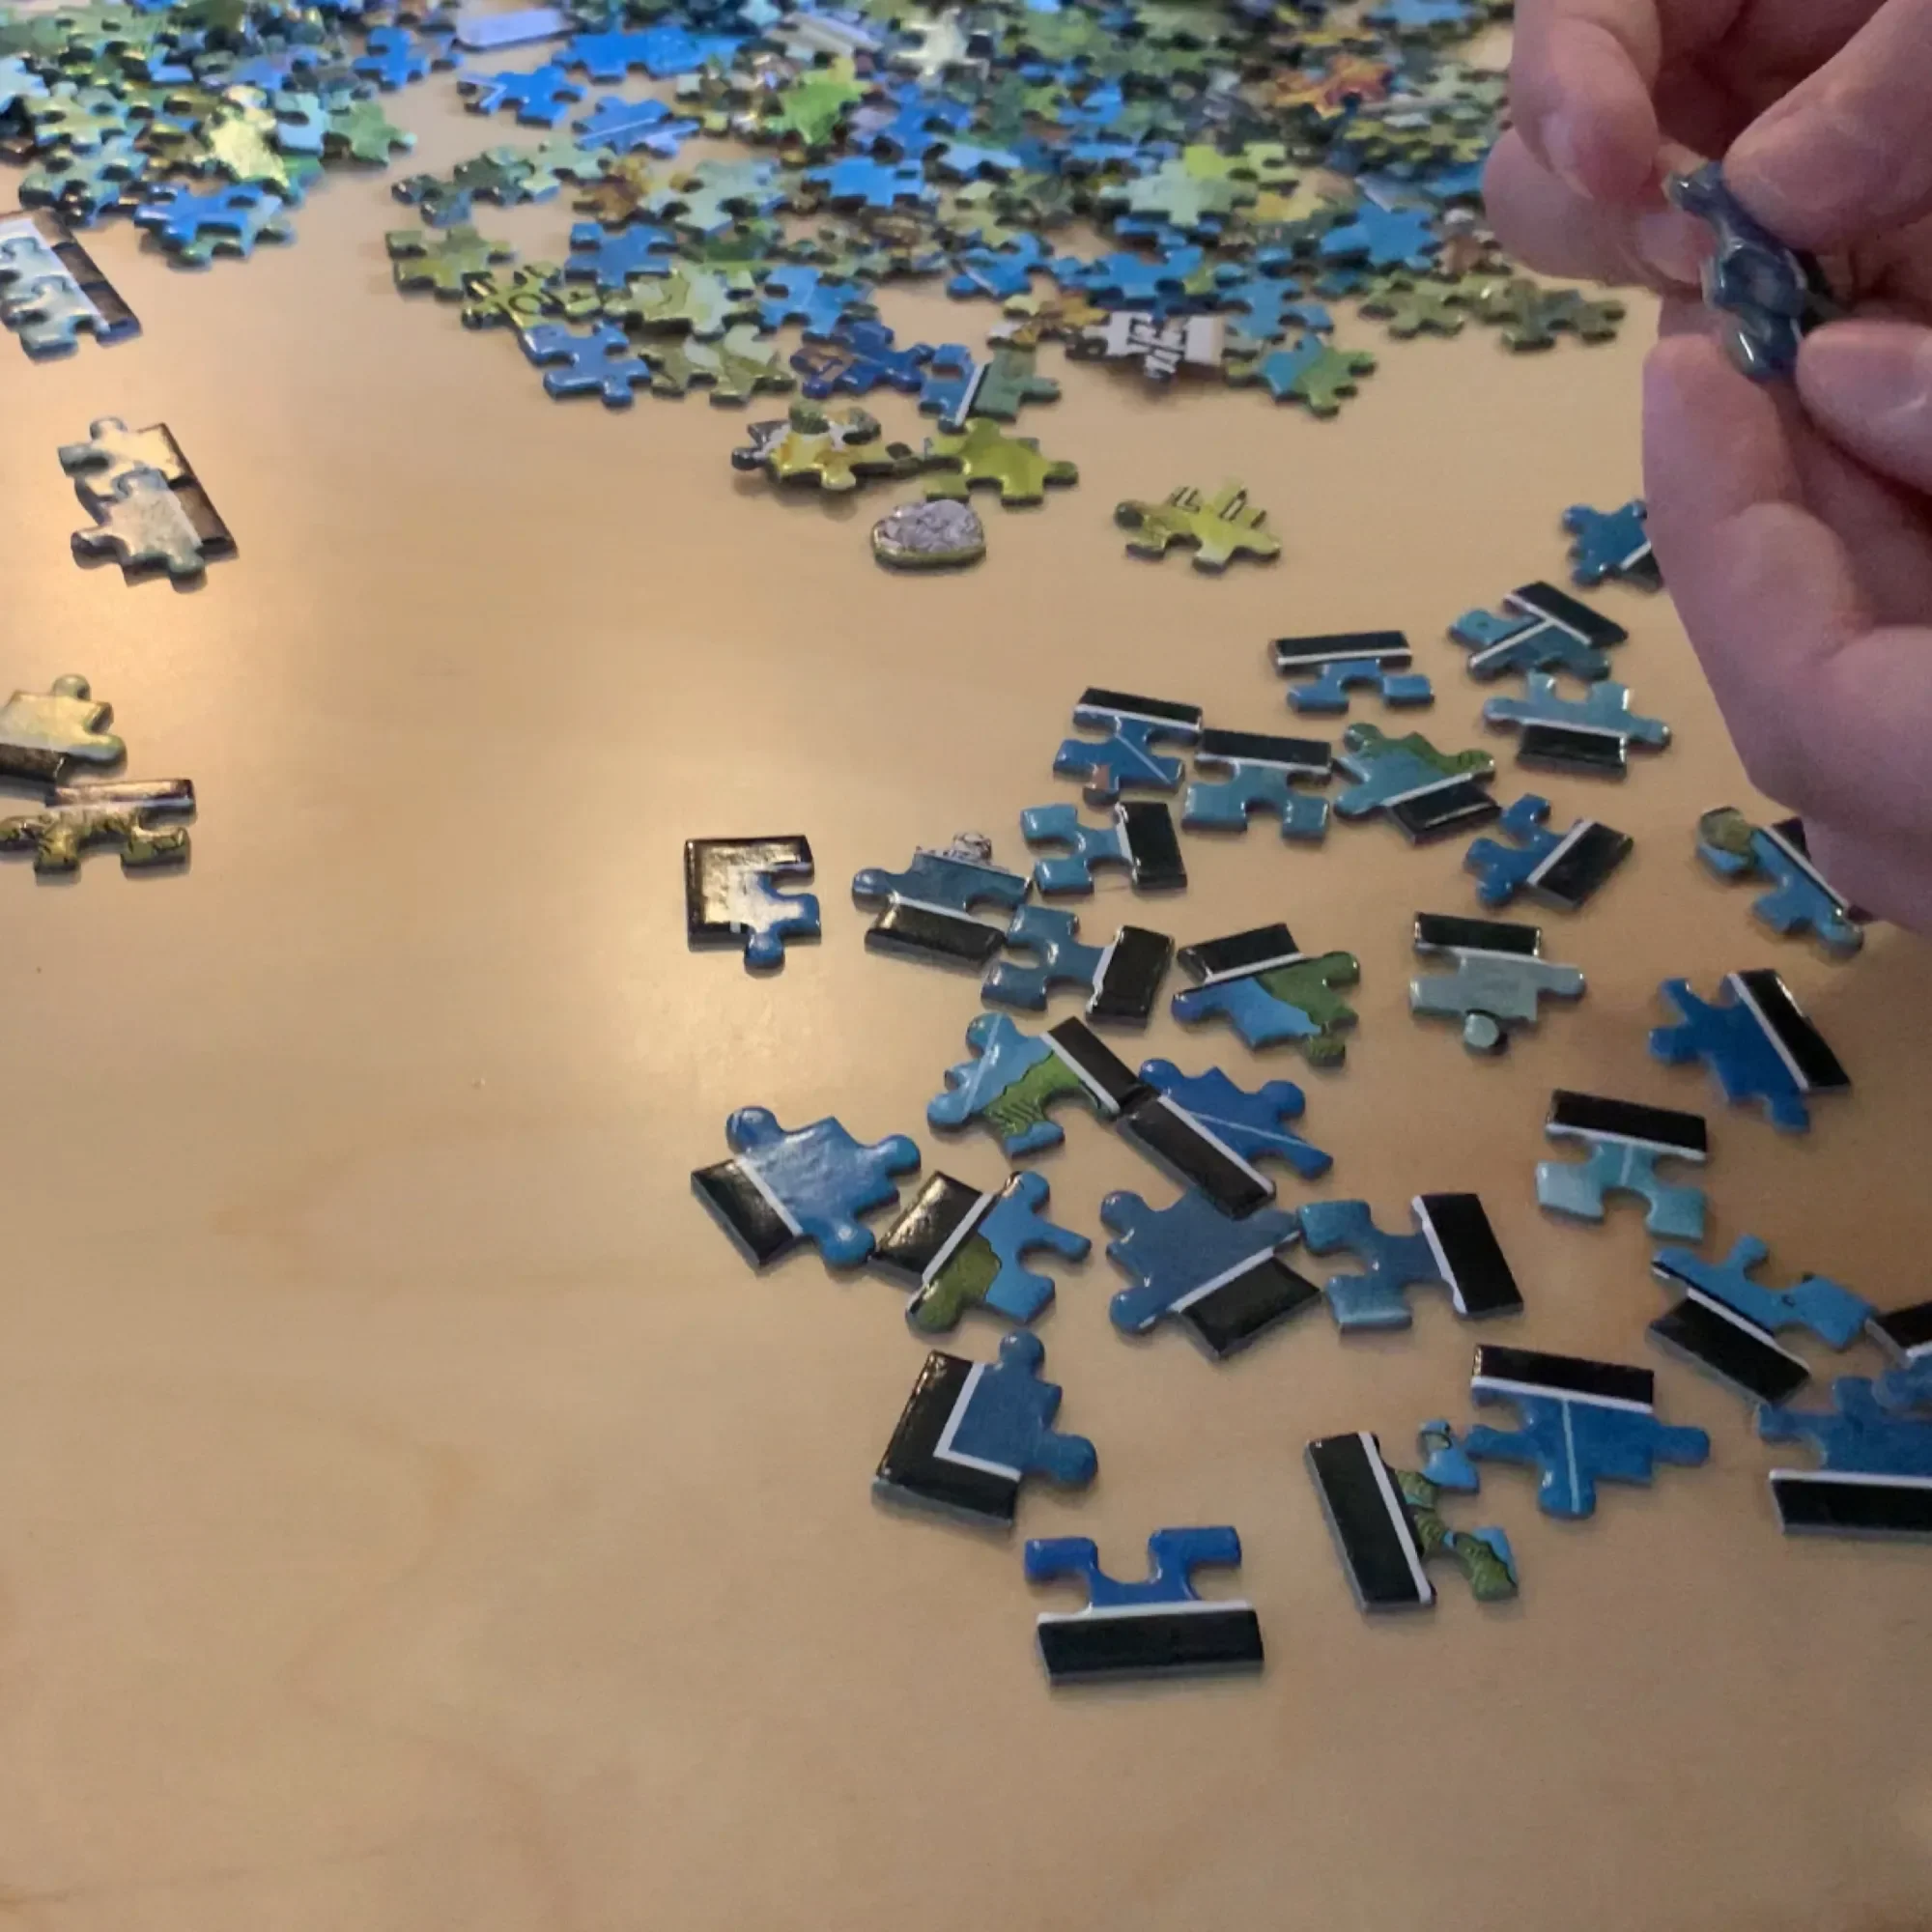
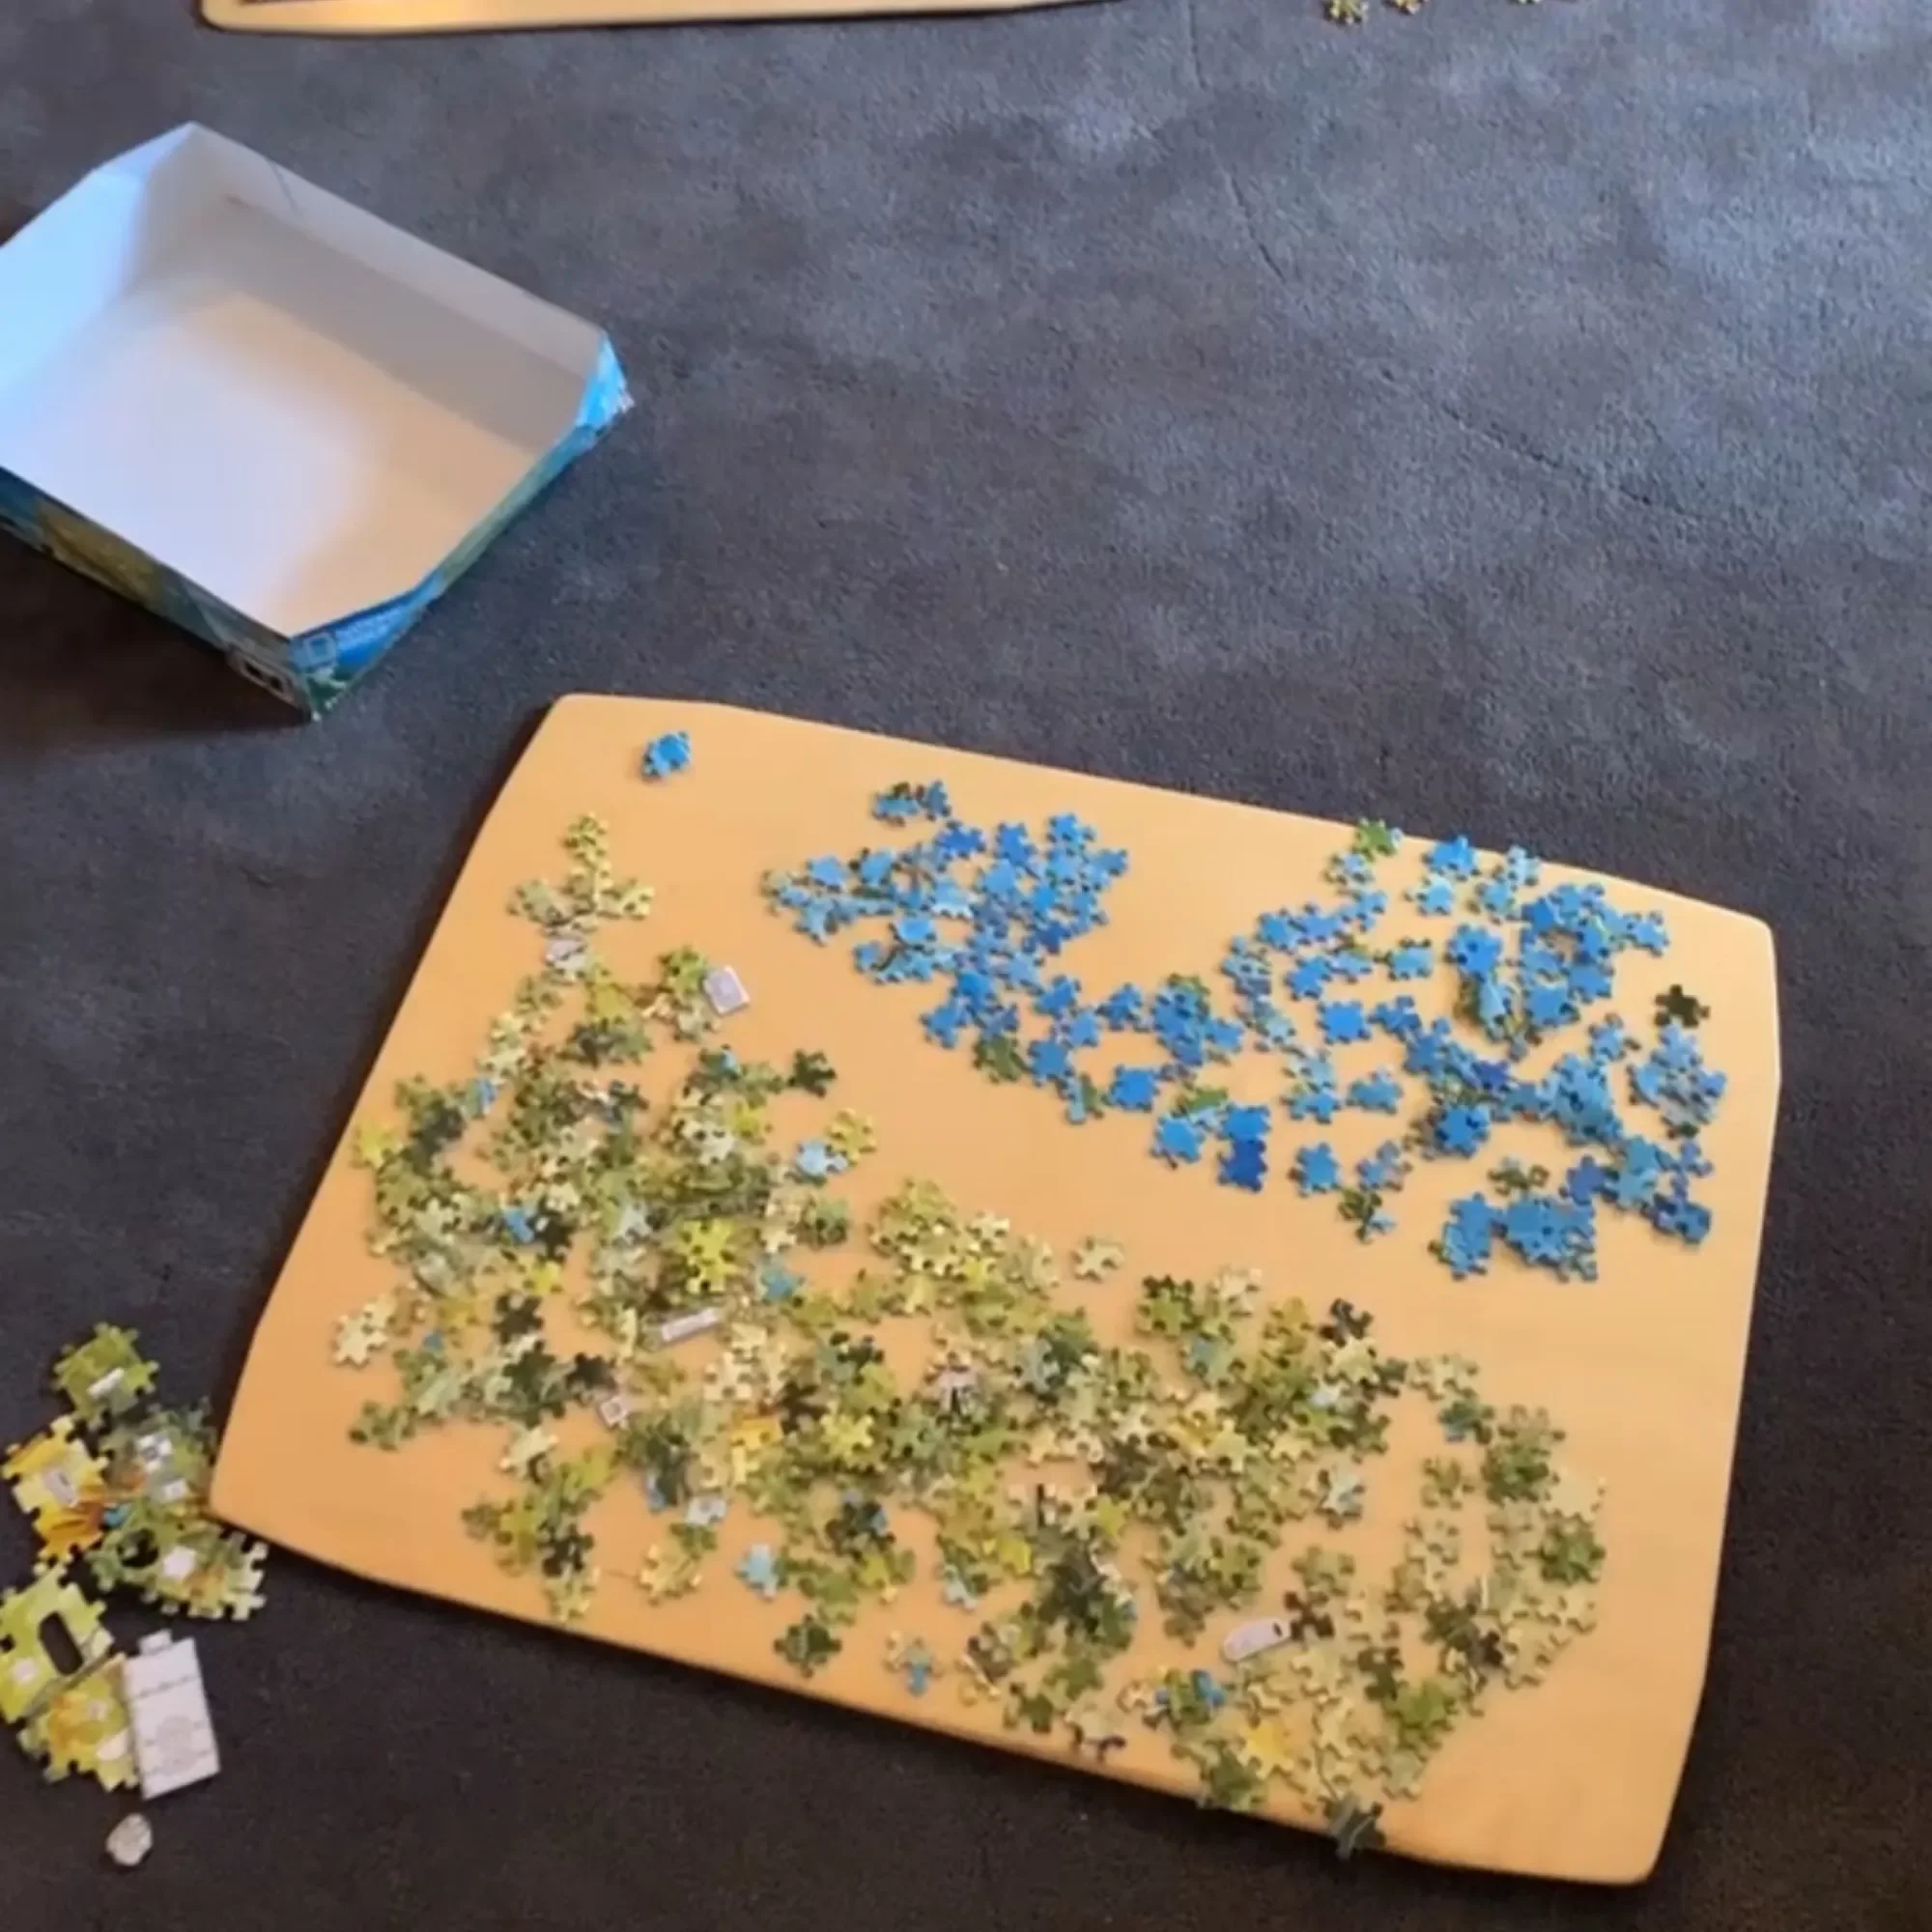
4D Imperial China Puzzle
I had high hopes for this project. Sure, assembling the puzzle was fun enough and the bonus was the three dimensional plastic pieces that fit perfectly into holed out pieces on the puzzle, but we did this puzzle for one reason...to see it through our iPad using the app suggested on the box.
-

How to Make Chinese Ribbon Dance Sticks
When we do our history units for homeschool, I aim to include a craft book or kits. I love hands on activities and feel it enhances a curriculum. For this unit (including China, Ancient China and the Silk Road), I found this gem of a craft book.
-
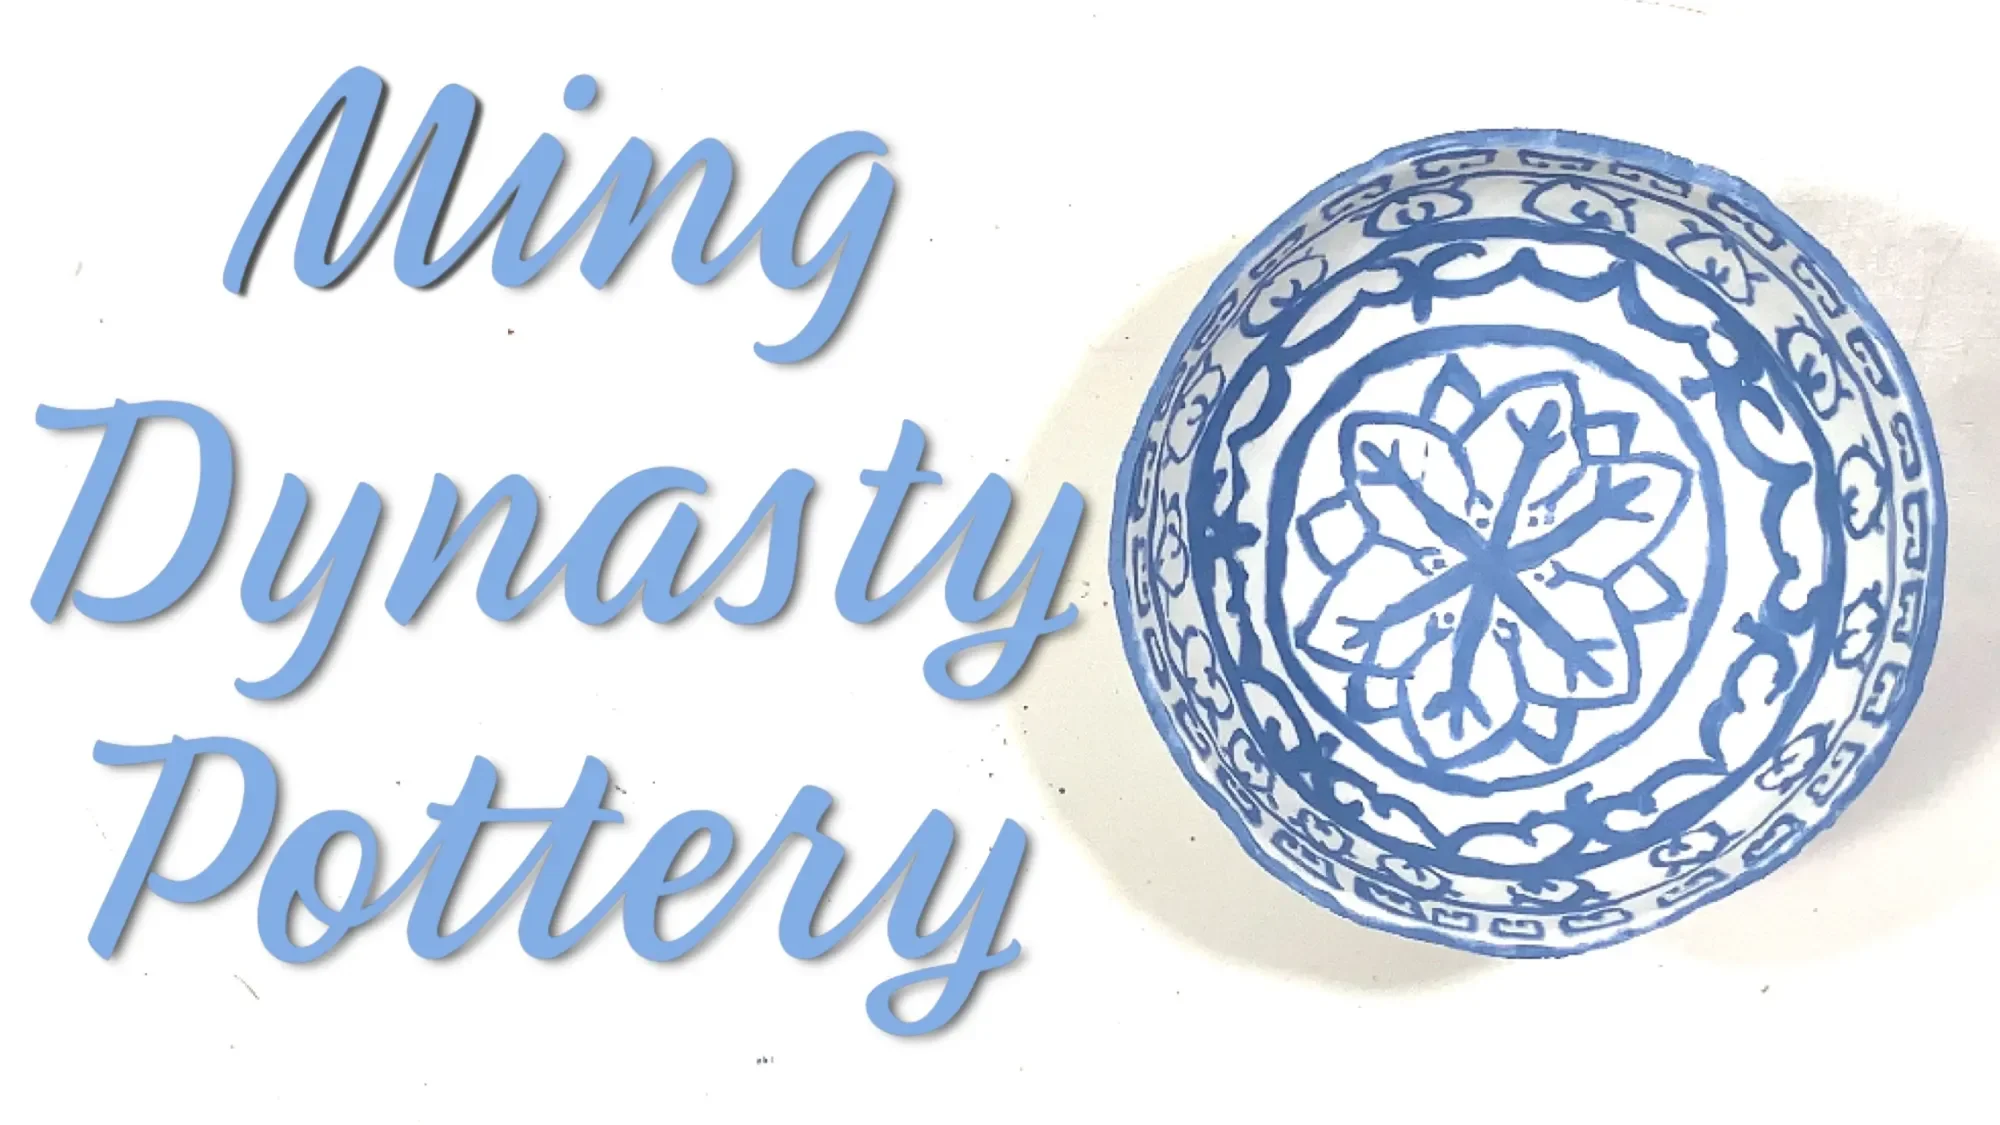
How to Make Ancient Chinese Ming Porcelain
This project was a success and it turned out 100 times better than I expected! I can't believe we made stunning faux Chinese Porcelain from the Ming Dynasty using Sculpey Soft Oven Bake Clay and acrylic paints
-
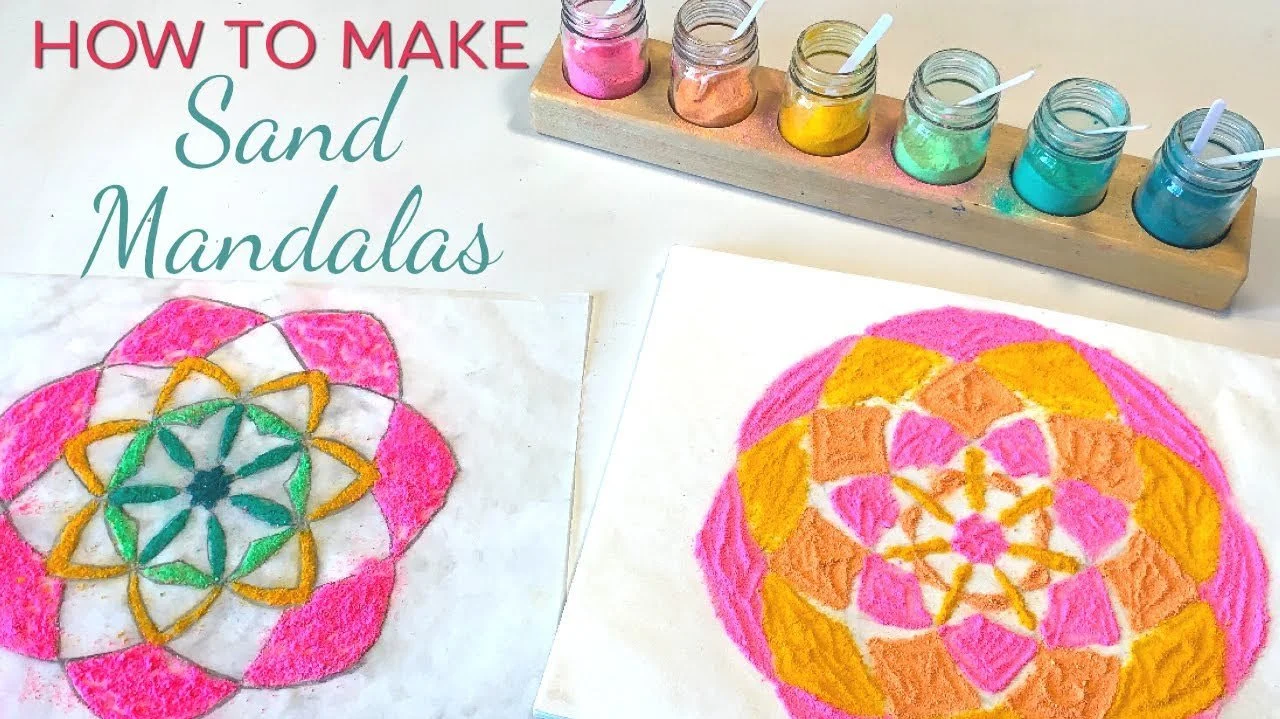
How to Make A Sand Mandala
We've made Mandalas before as part of our geometry unit, but this was our first time making them with sand...or in our case, salt. I have a bag of sand in the backyard we have for various projects and when I went to collect a beaker full I found it soaking wet.
-
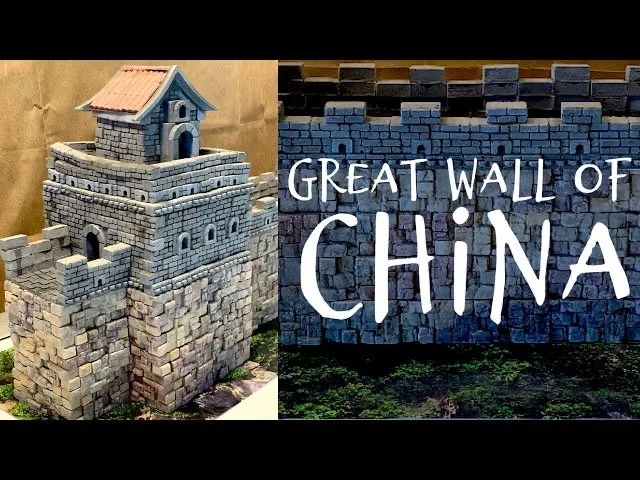
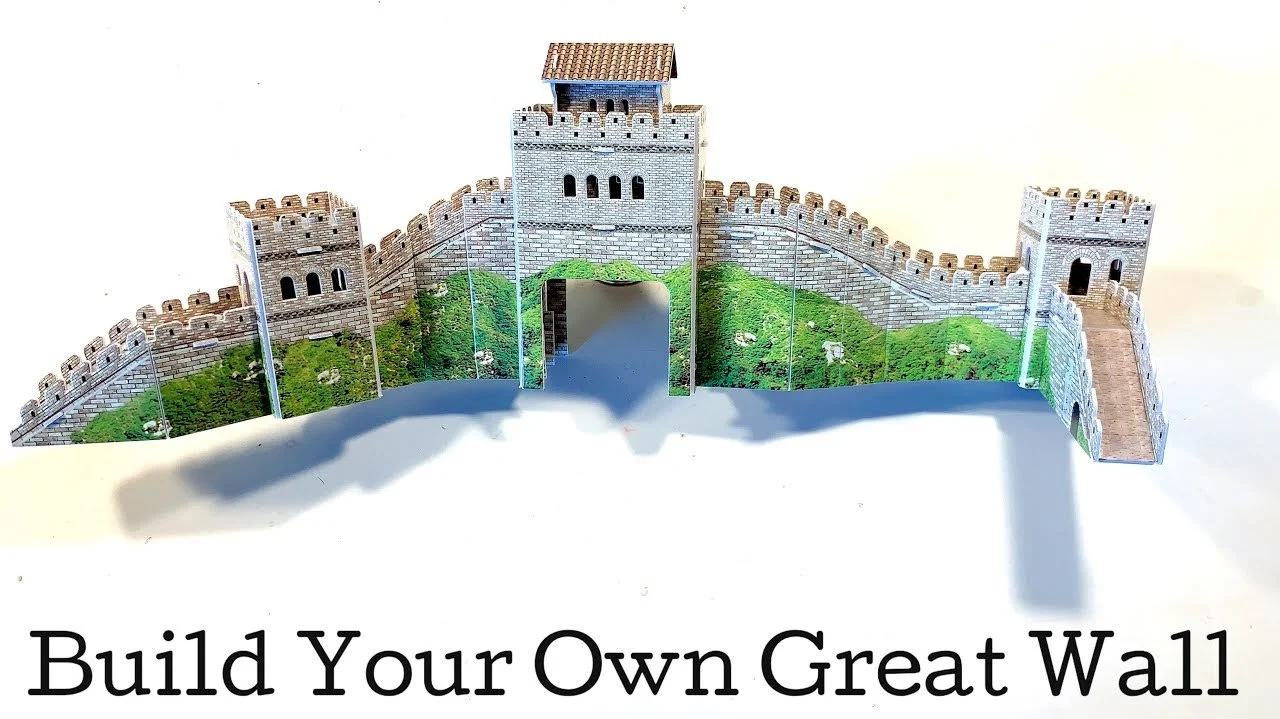
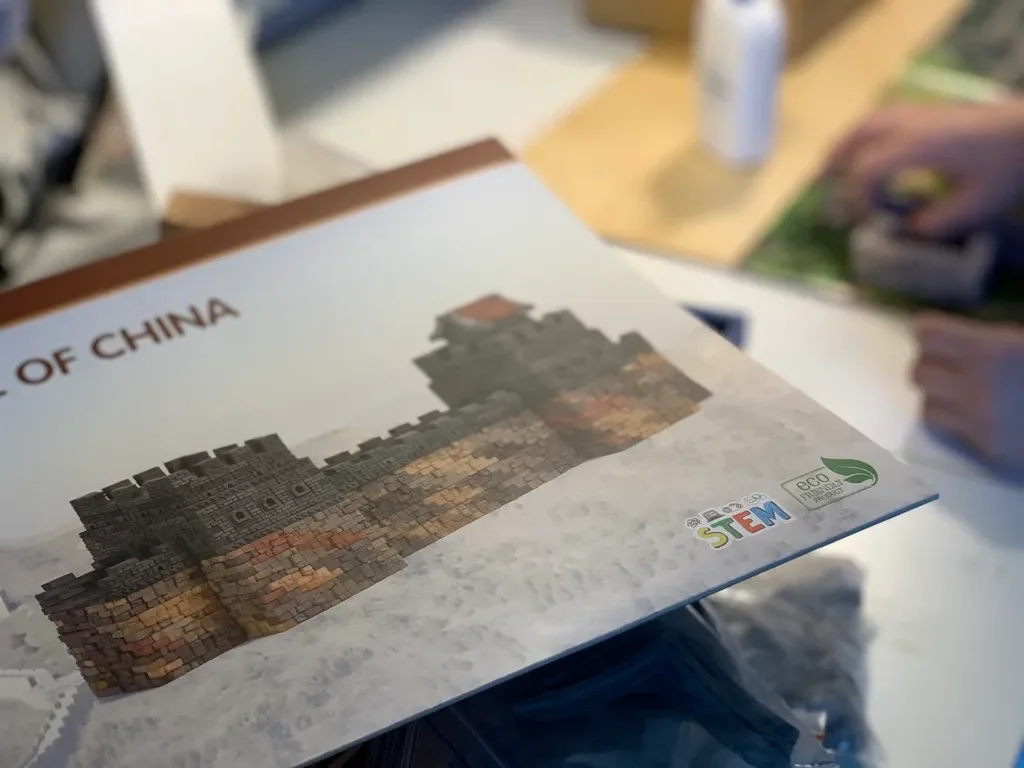
The Great Wall of China
I love this kit!! We've done our fair share of build kits and what I love about this one is how lovely this looks in the end. But that's not all. This Great Wall of China kit by Wise Elk considers the project, the storage and multiple uses of it by providing versatility with this kit
-
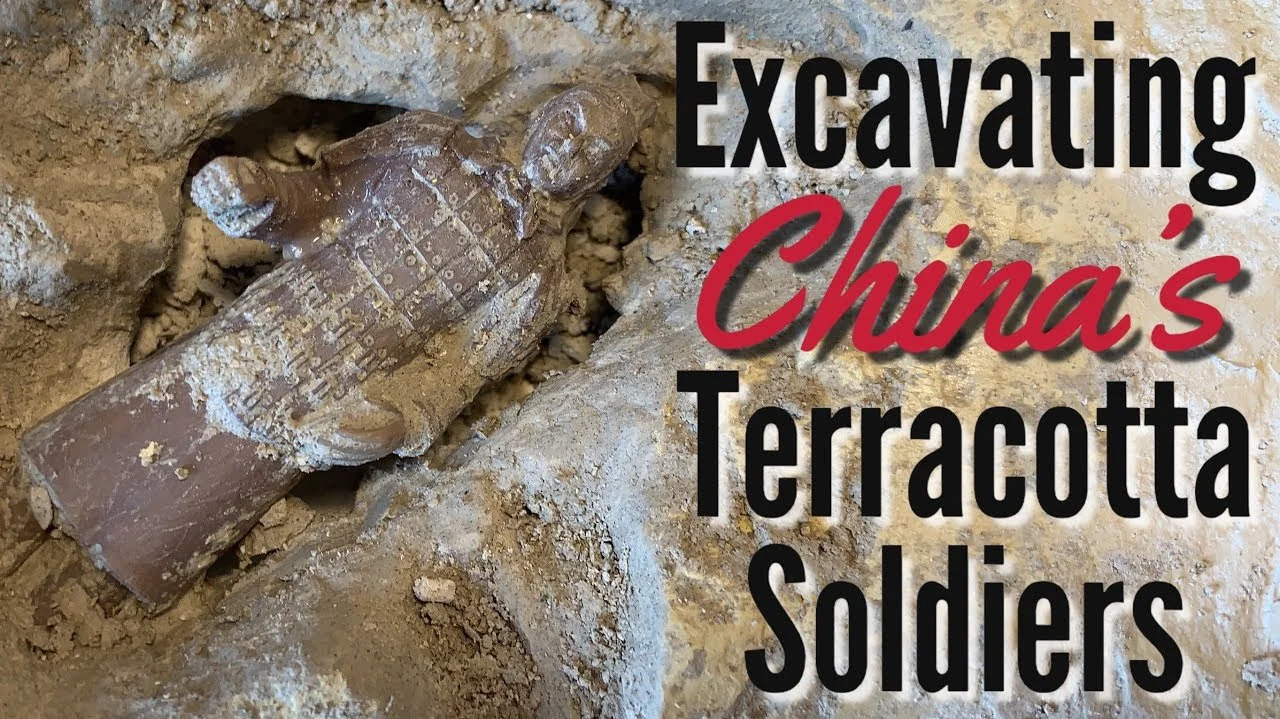
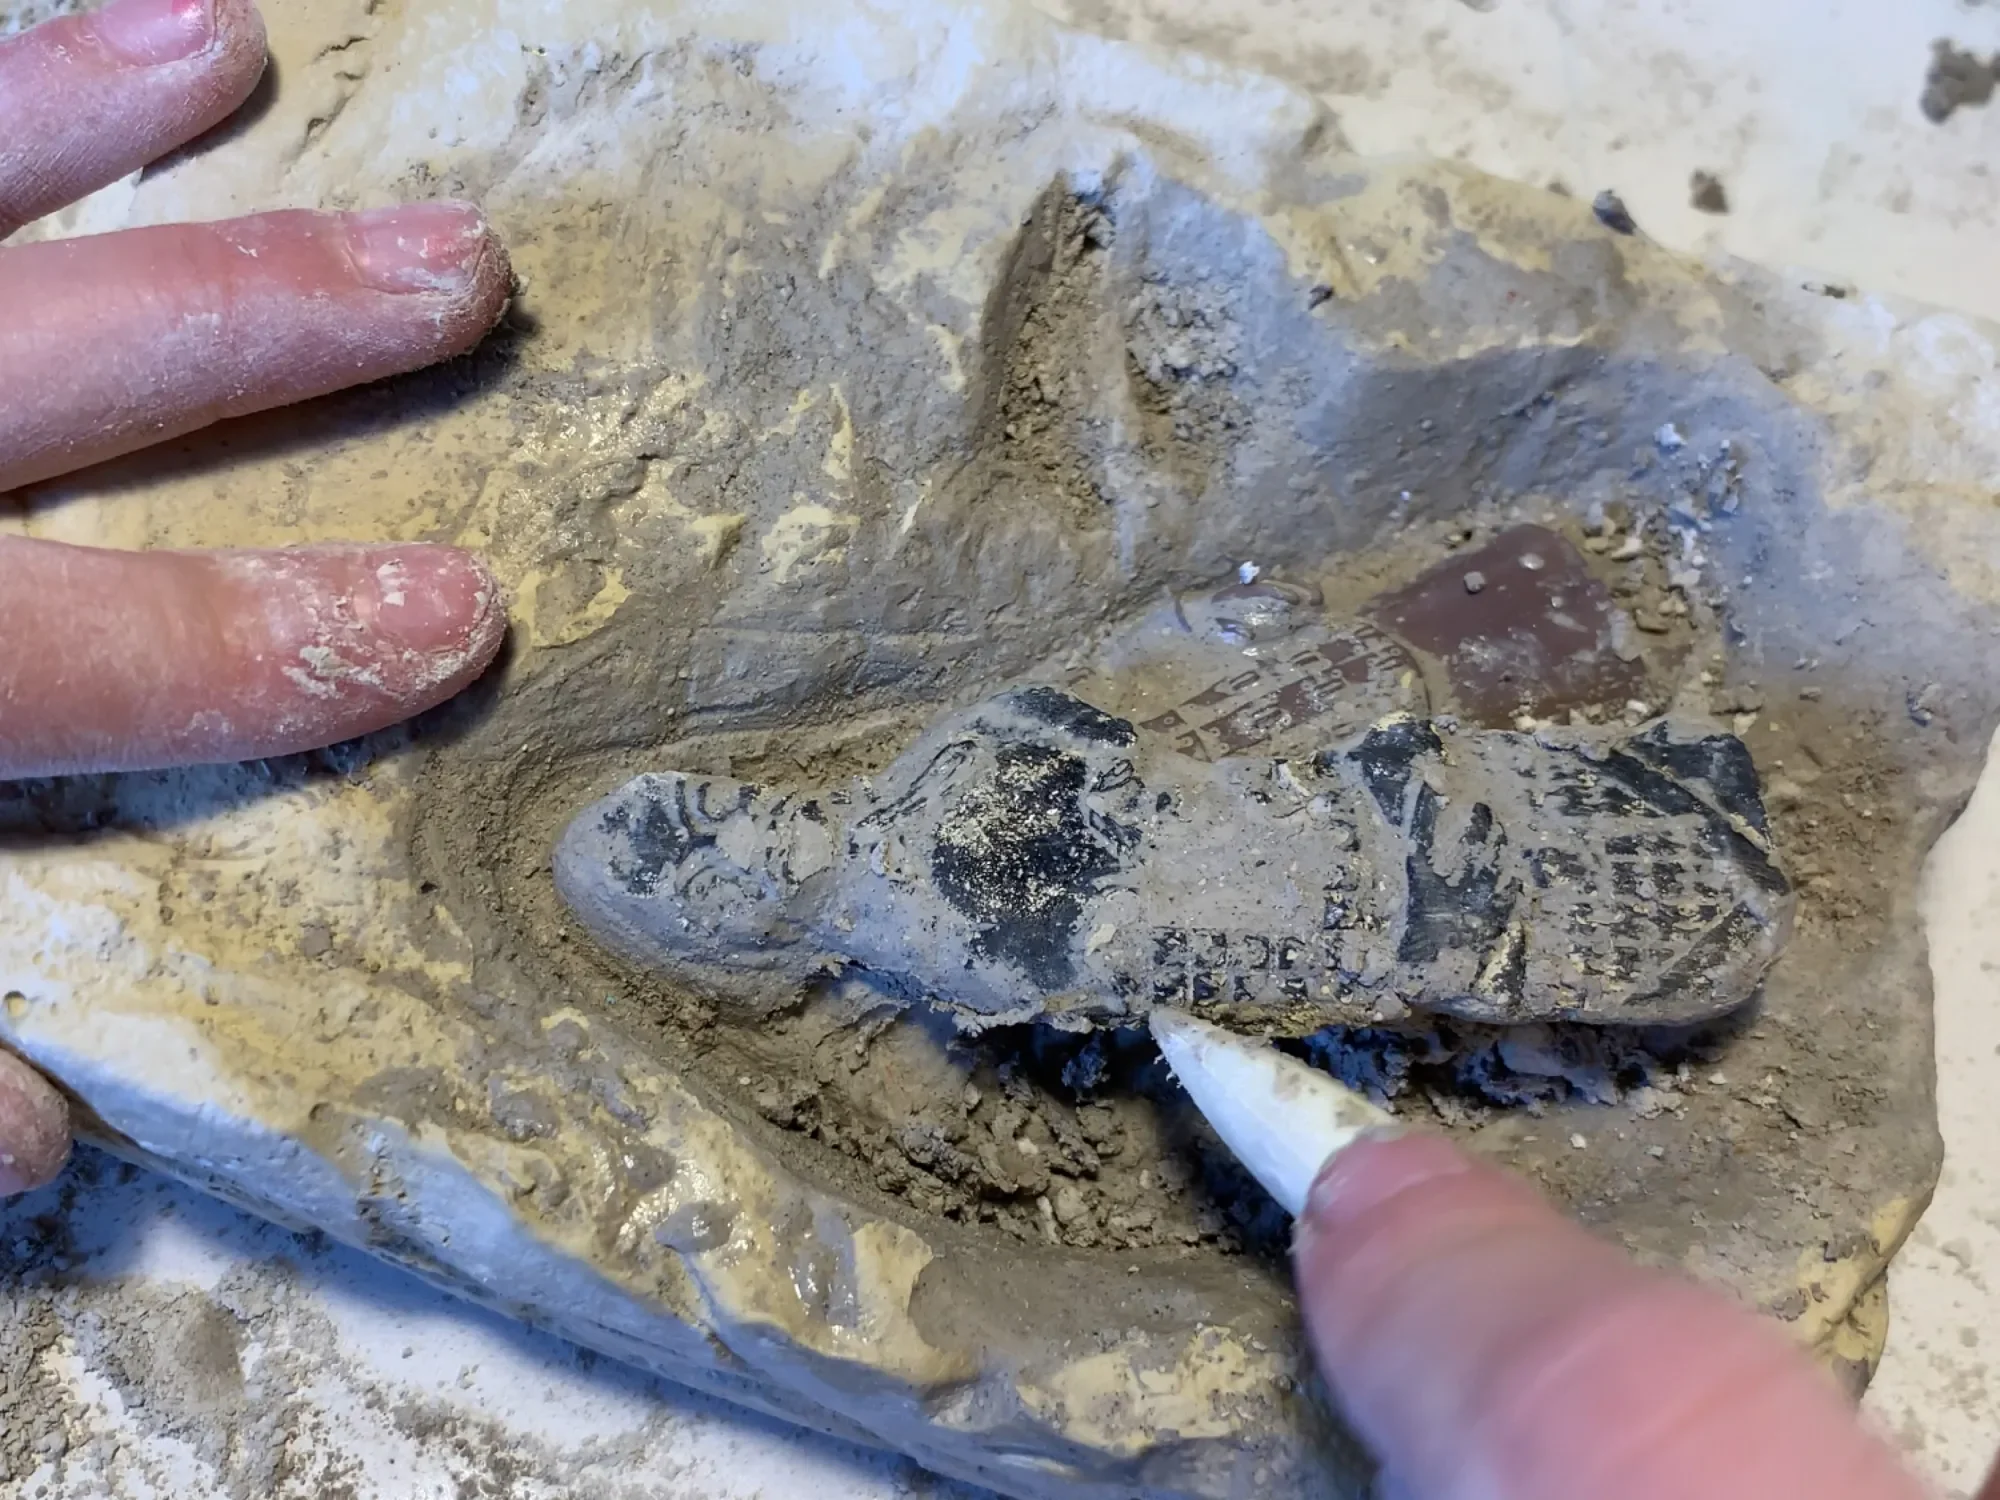
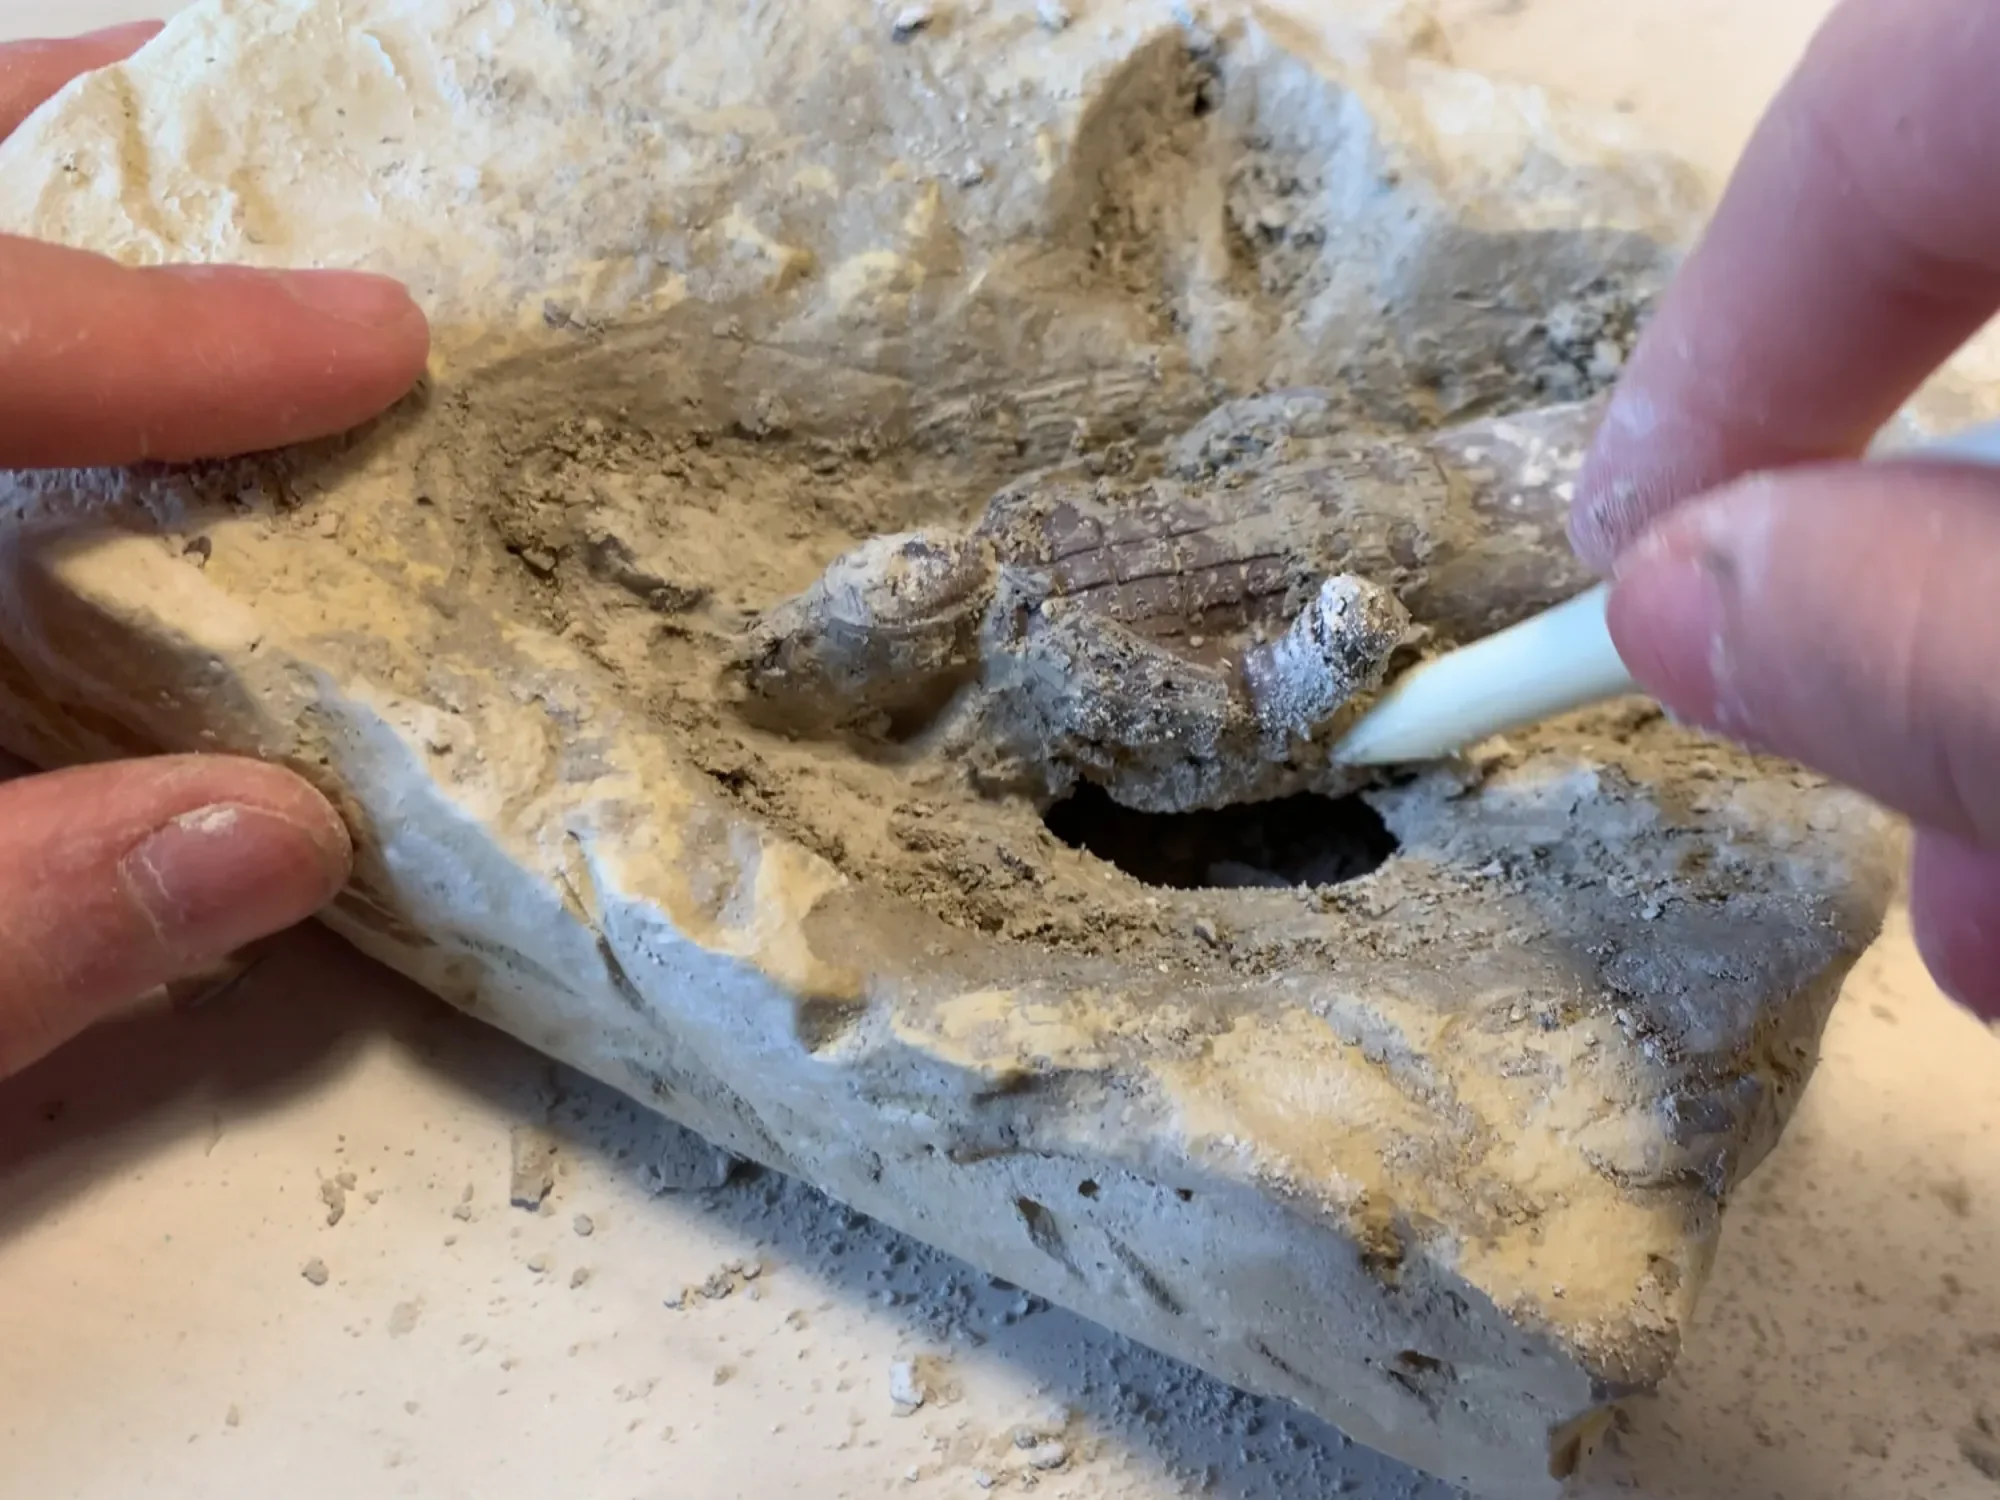
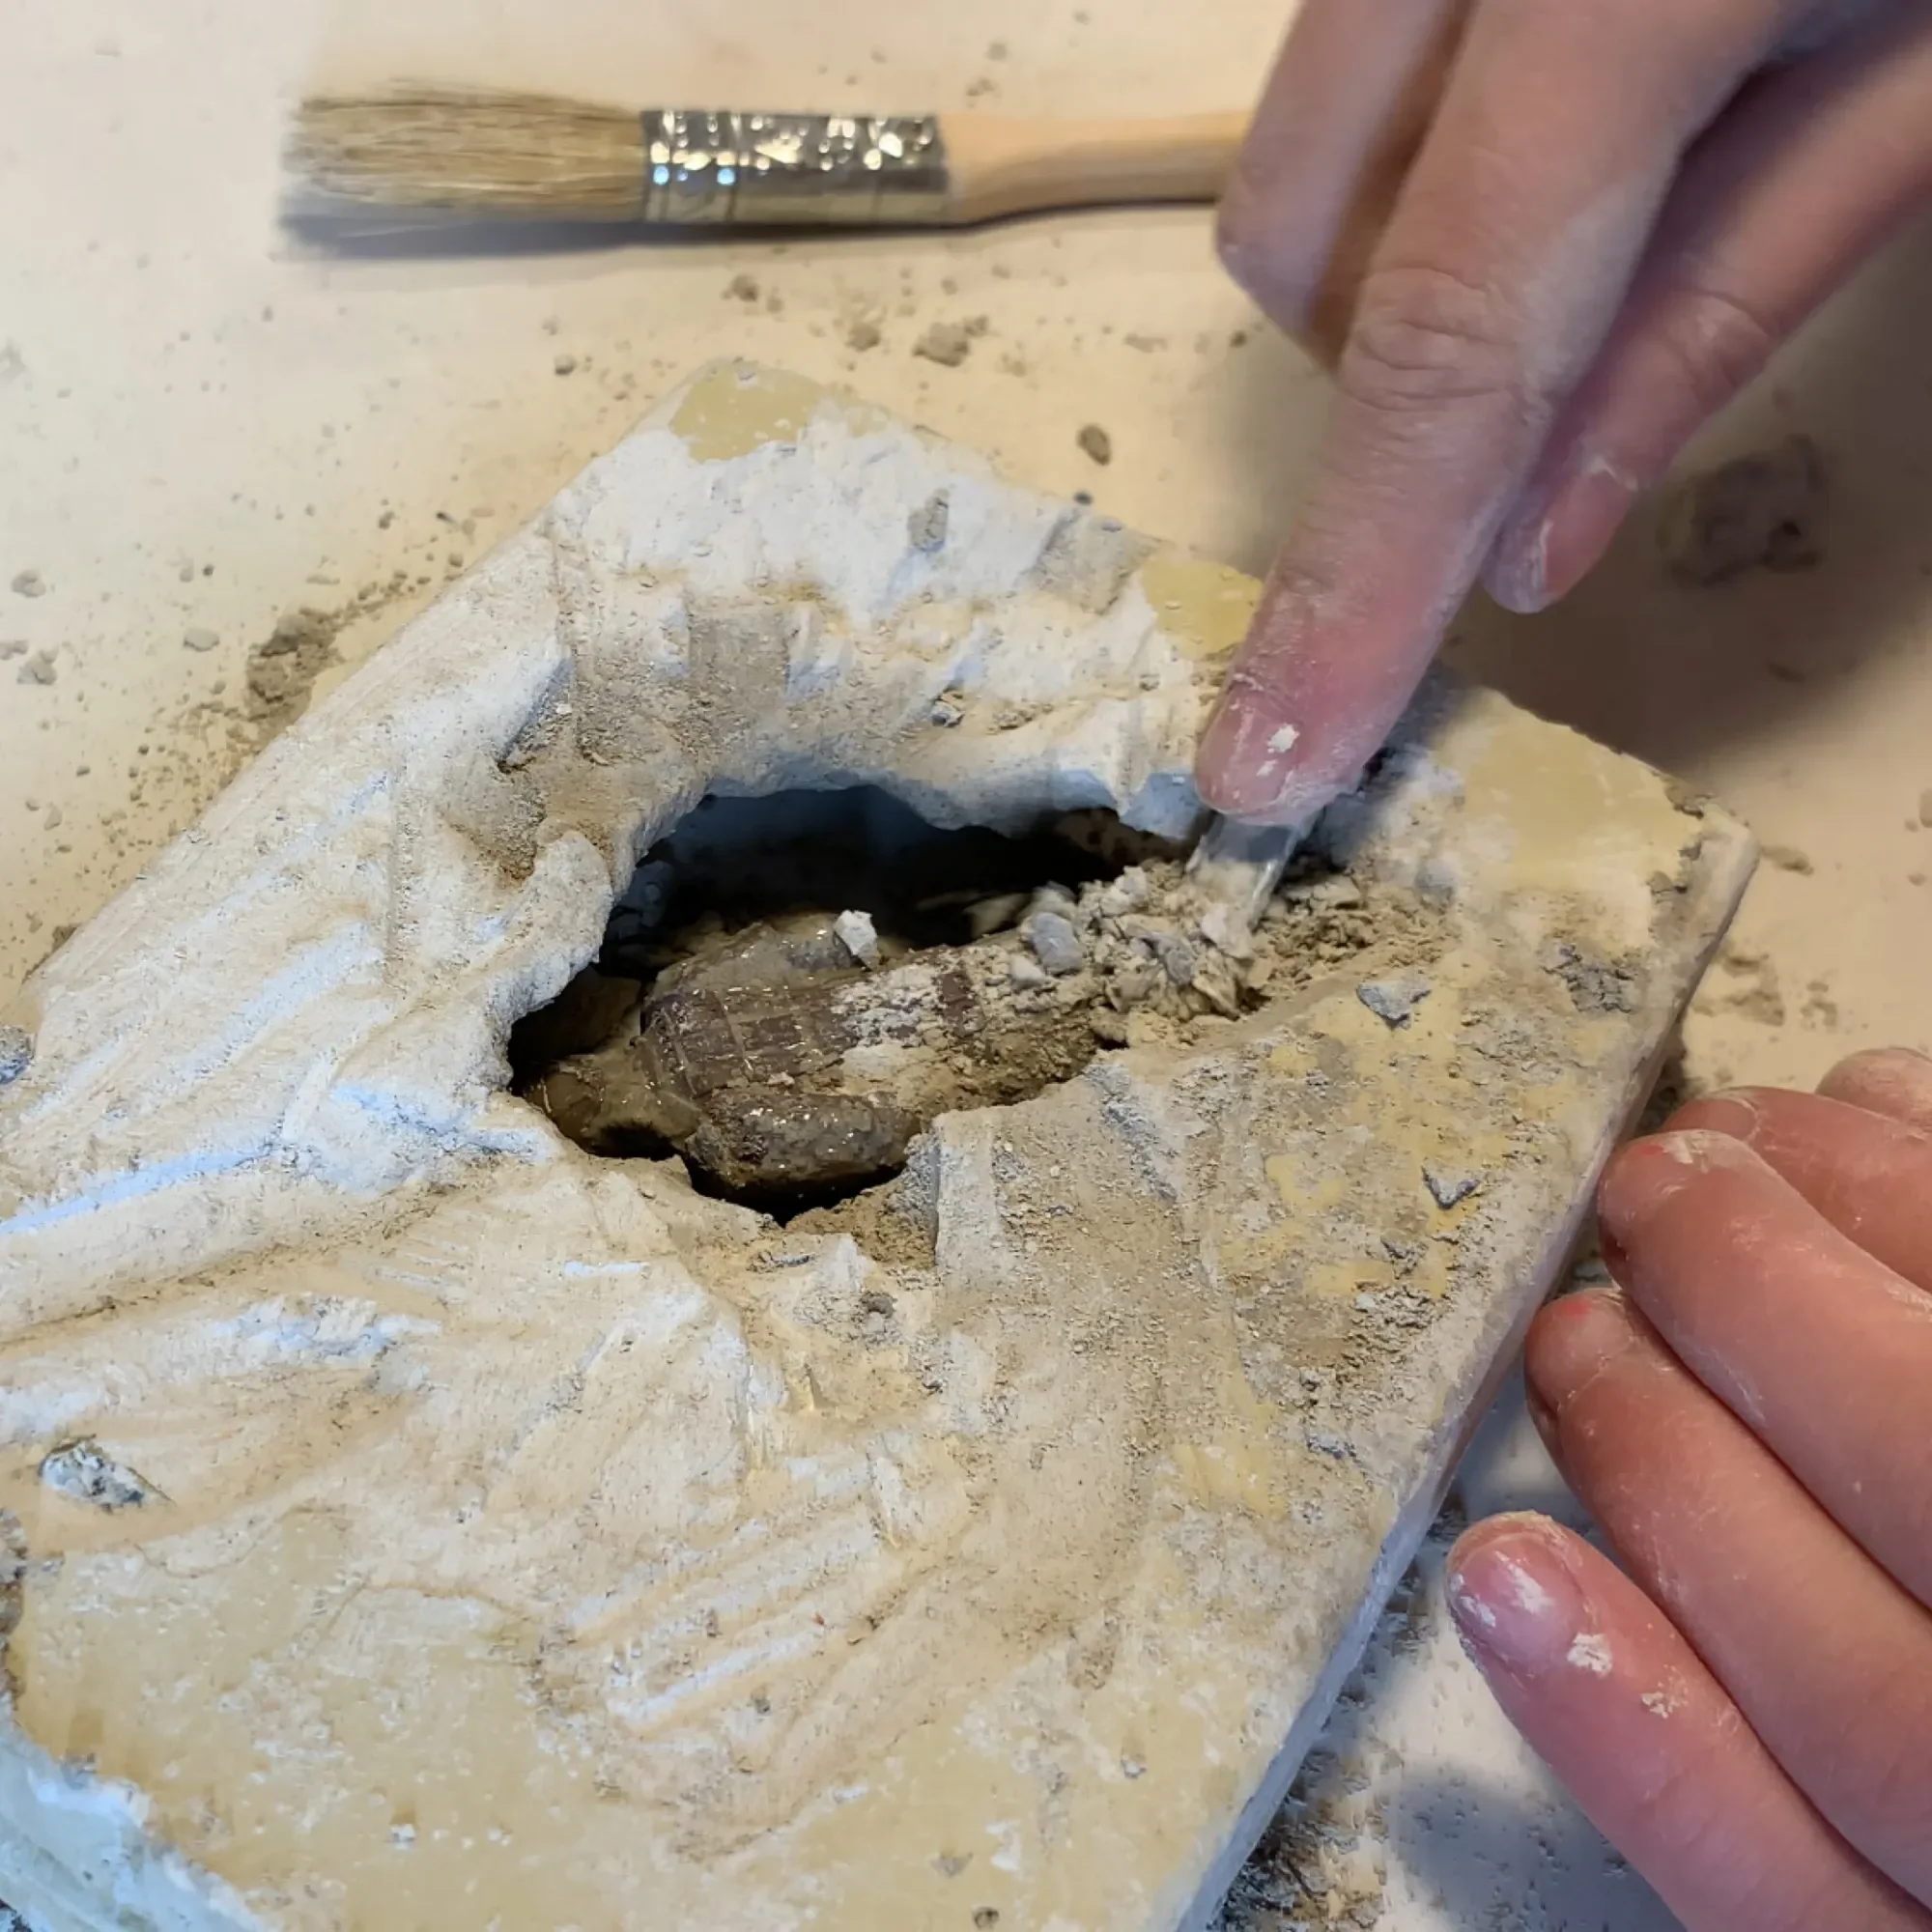
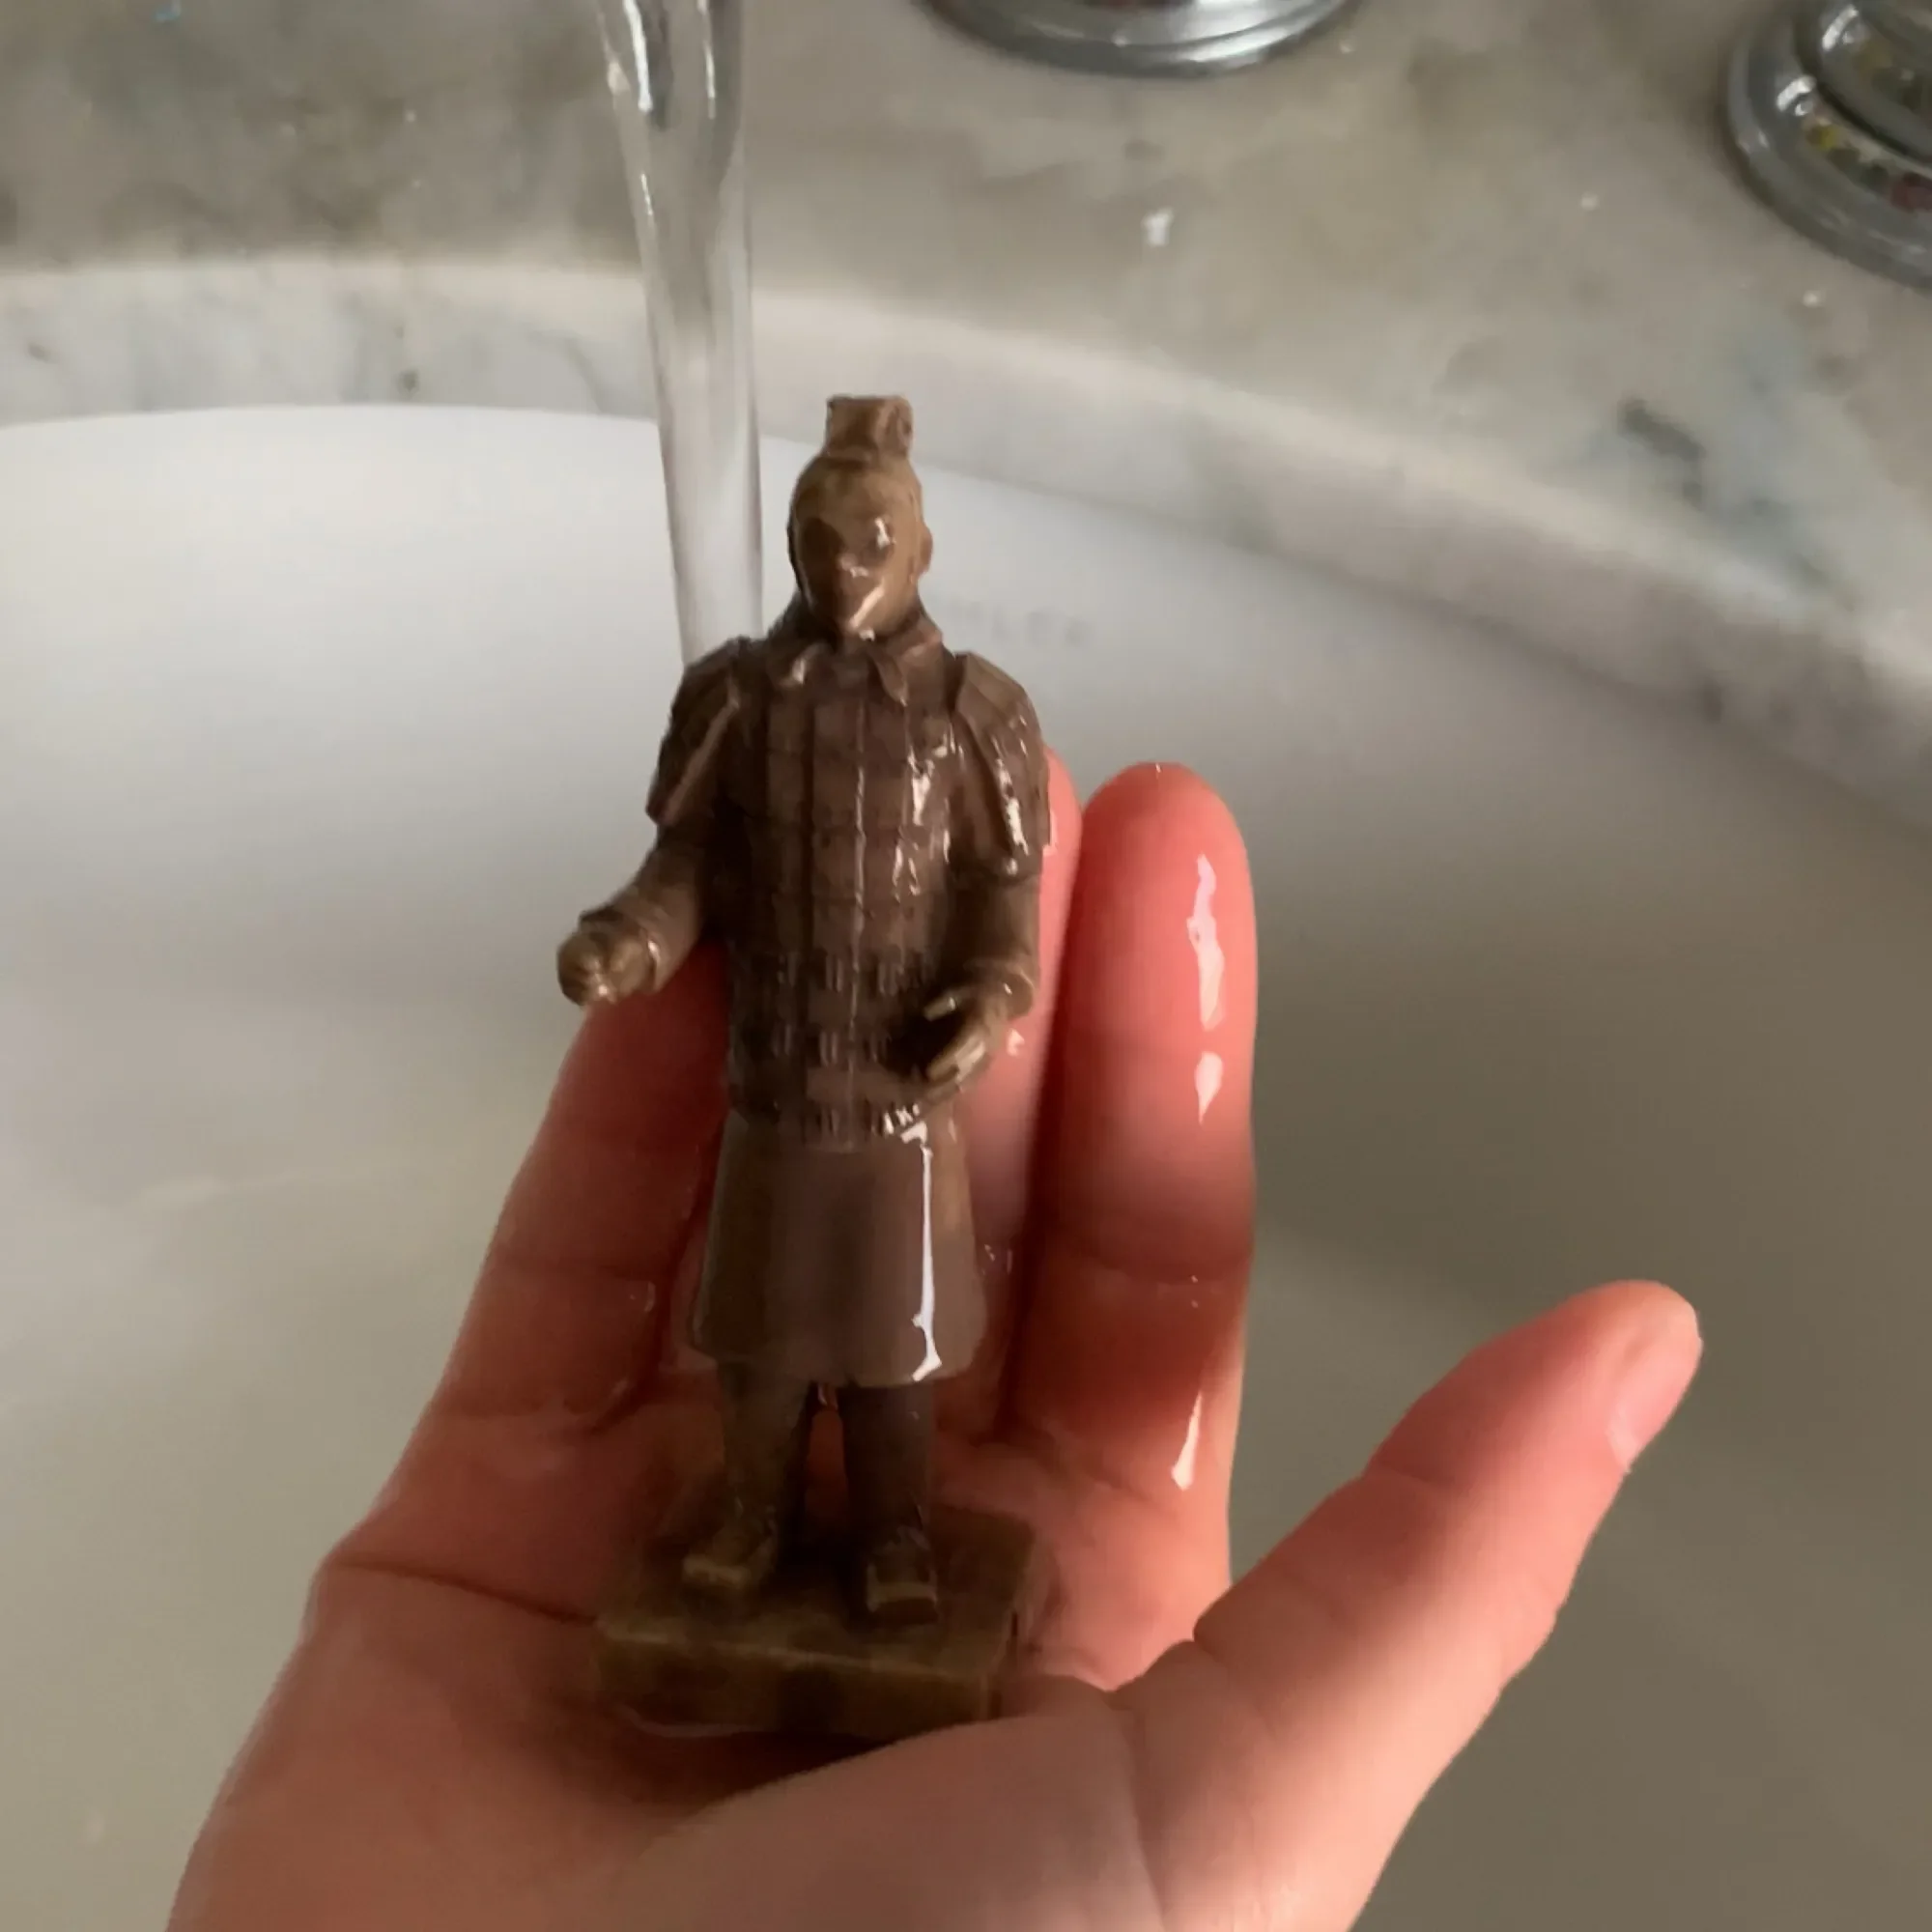
Excavating China's Terracotta Soldiers
We've been adding dig kits to our lessons for years and they never get old. While each company has its own unique way to do an archaeological dig kit, I especially liked this one called Discover China Ancient Dig Kit by Explorer by Tedco because the artifacts were high quality and the clay/plaster was just the right balance been hard and easy.
-
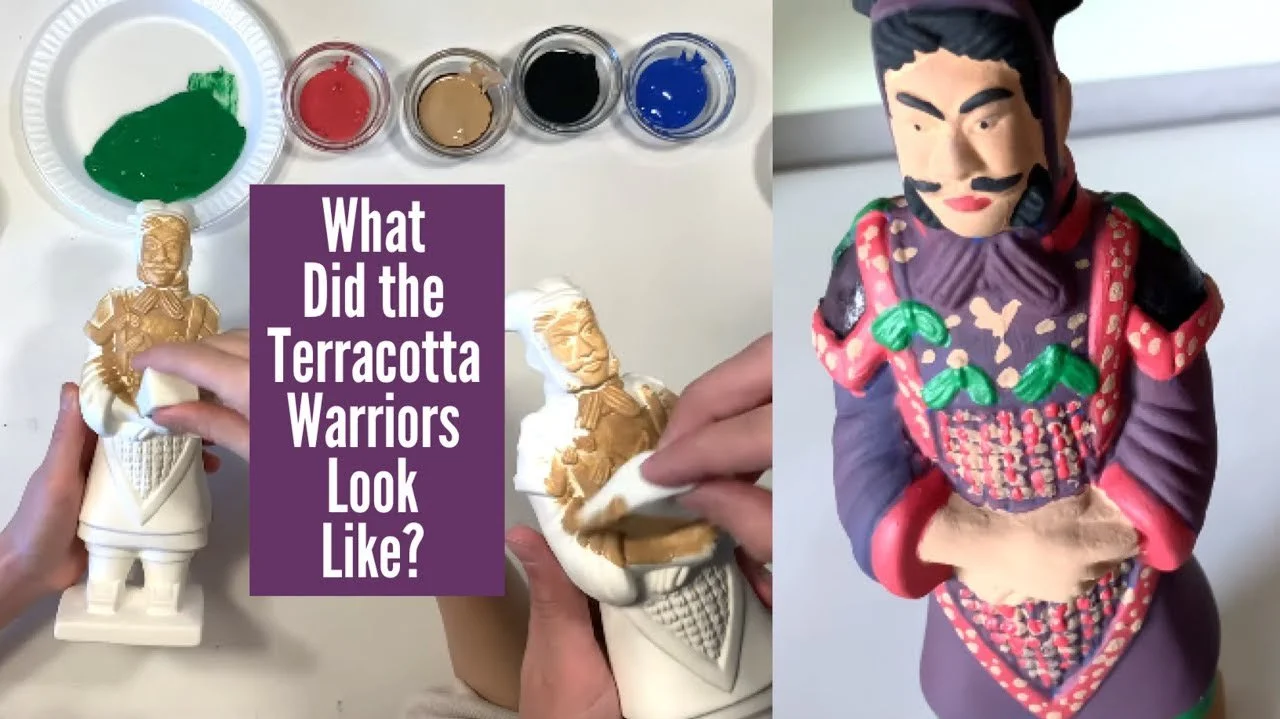
Ancient China Terracotta Warriors
These terracotta warriors replicas were one of the best projects we did for our Ancient China unit. They are quite large measuring about 8 inches (21 cm) and look impressive once painted. Actually the end project looks nothing like what you see in photos depicting the Terracotta Warriors of the Qin Dynasty.
-
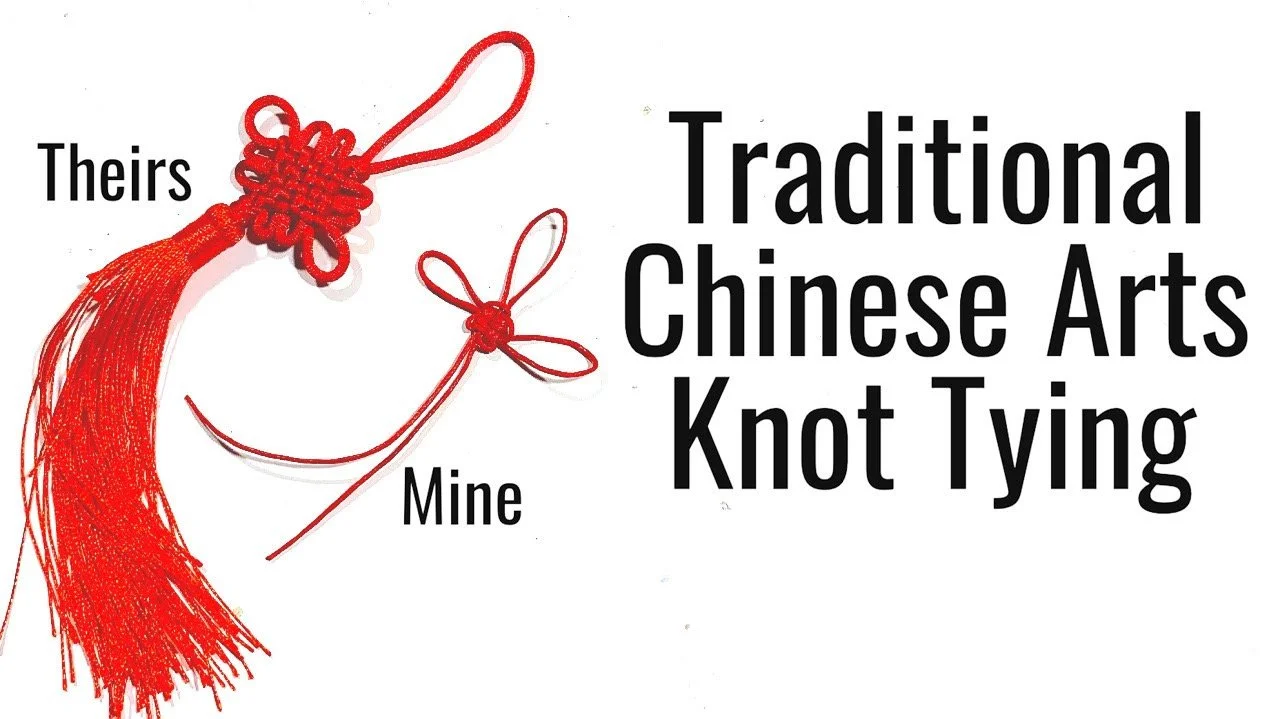
Knot Tying A Traditional Chinese Art
I forget that before machines did much of the work for us, we once learned how to do things by hand. Over time, we honed and improved our skills. The Chinese square knot, made using a small square template about 1/2 an inch square with four holes punched on each side, is a beautiful and unique knot that decorates clothes and lanterns.
-
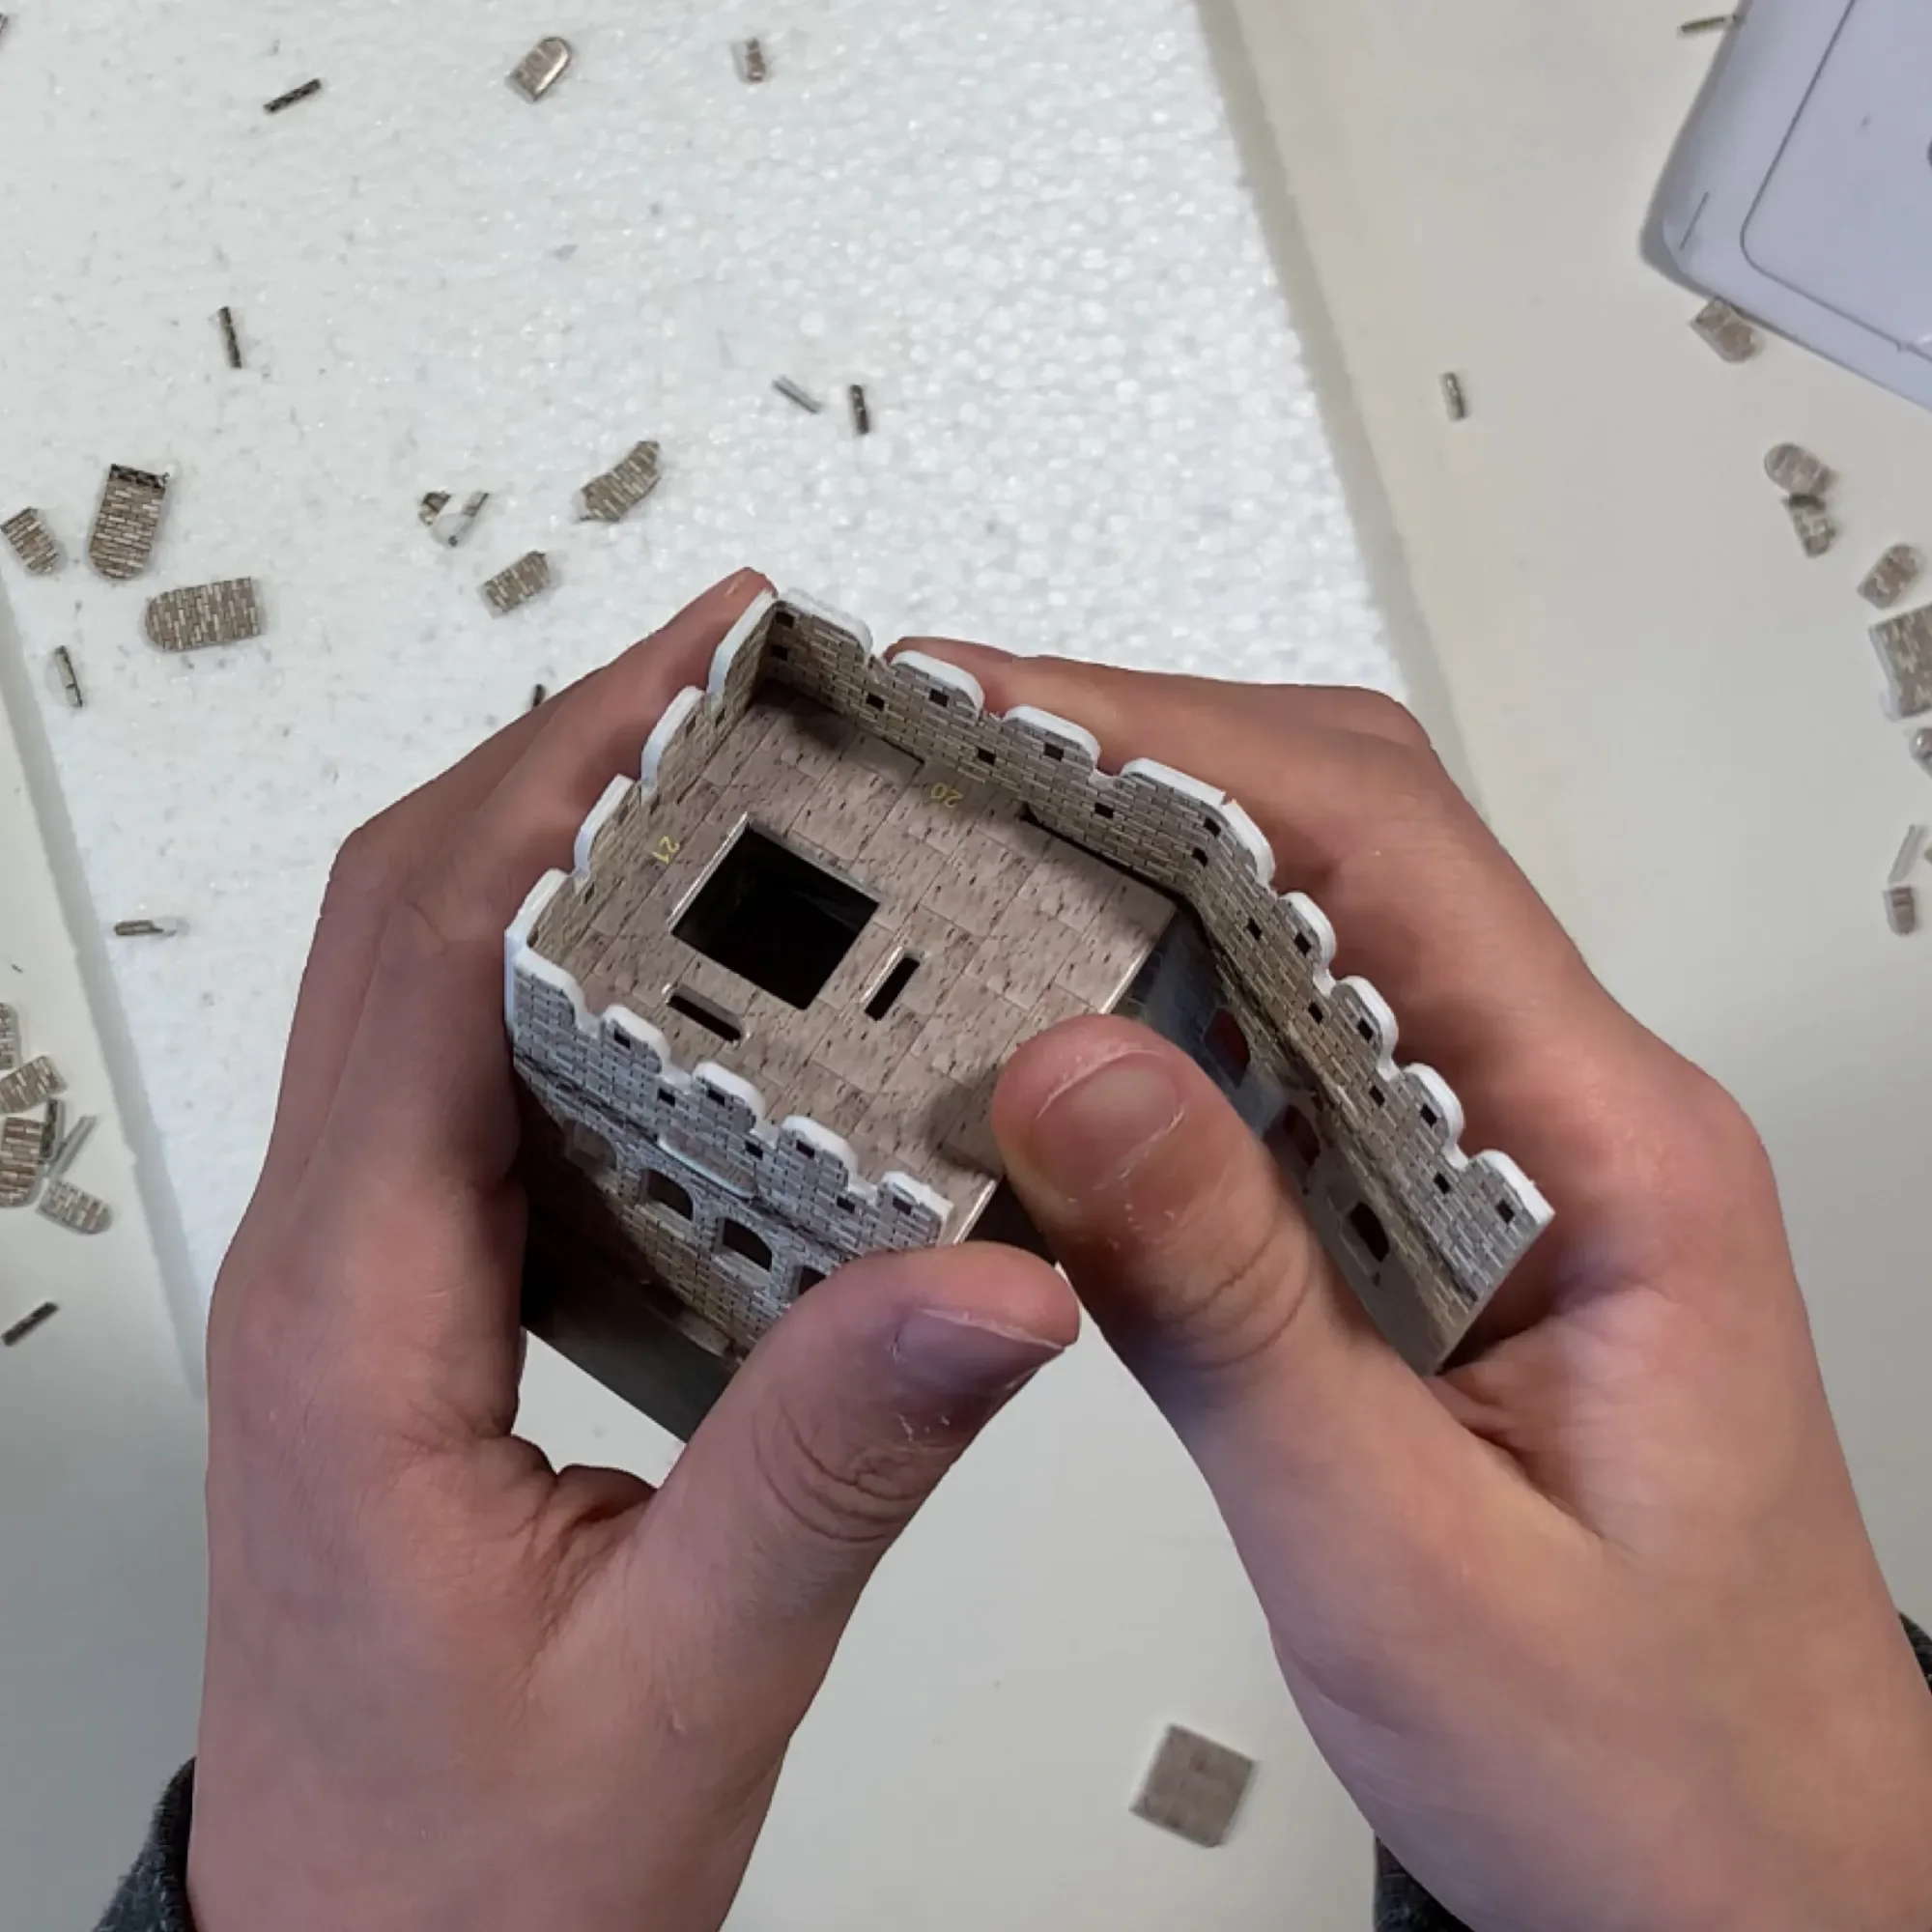
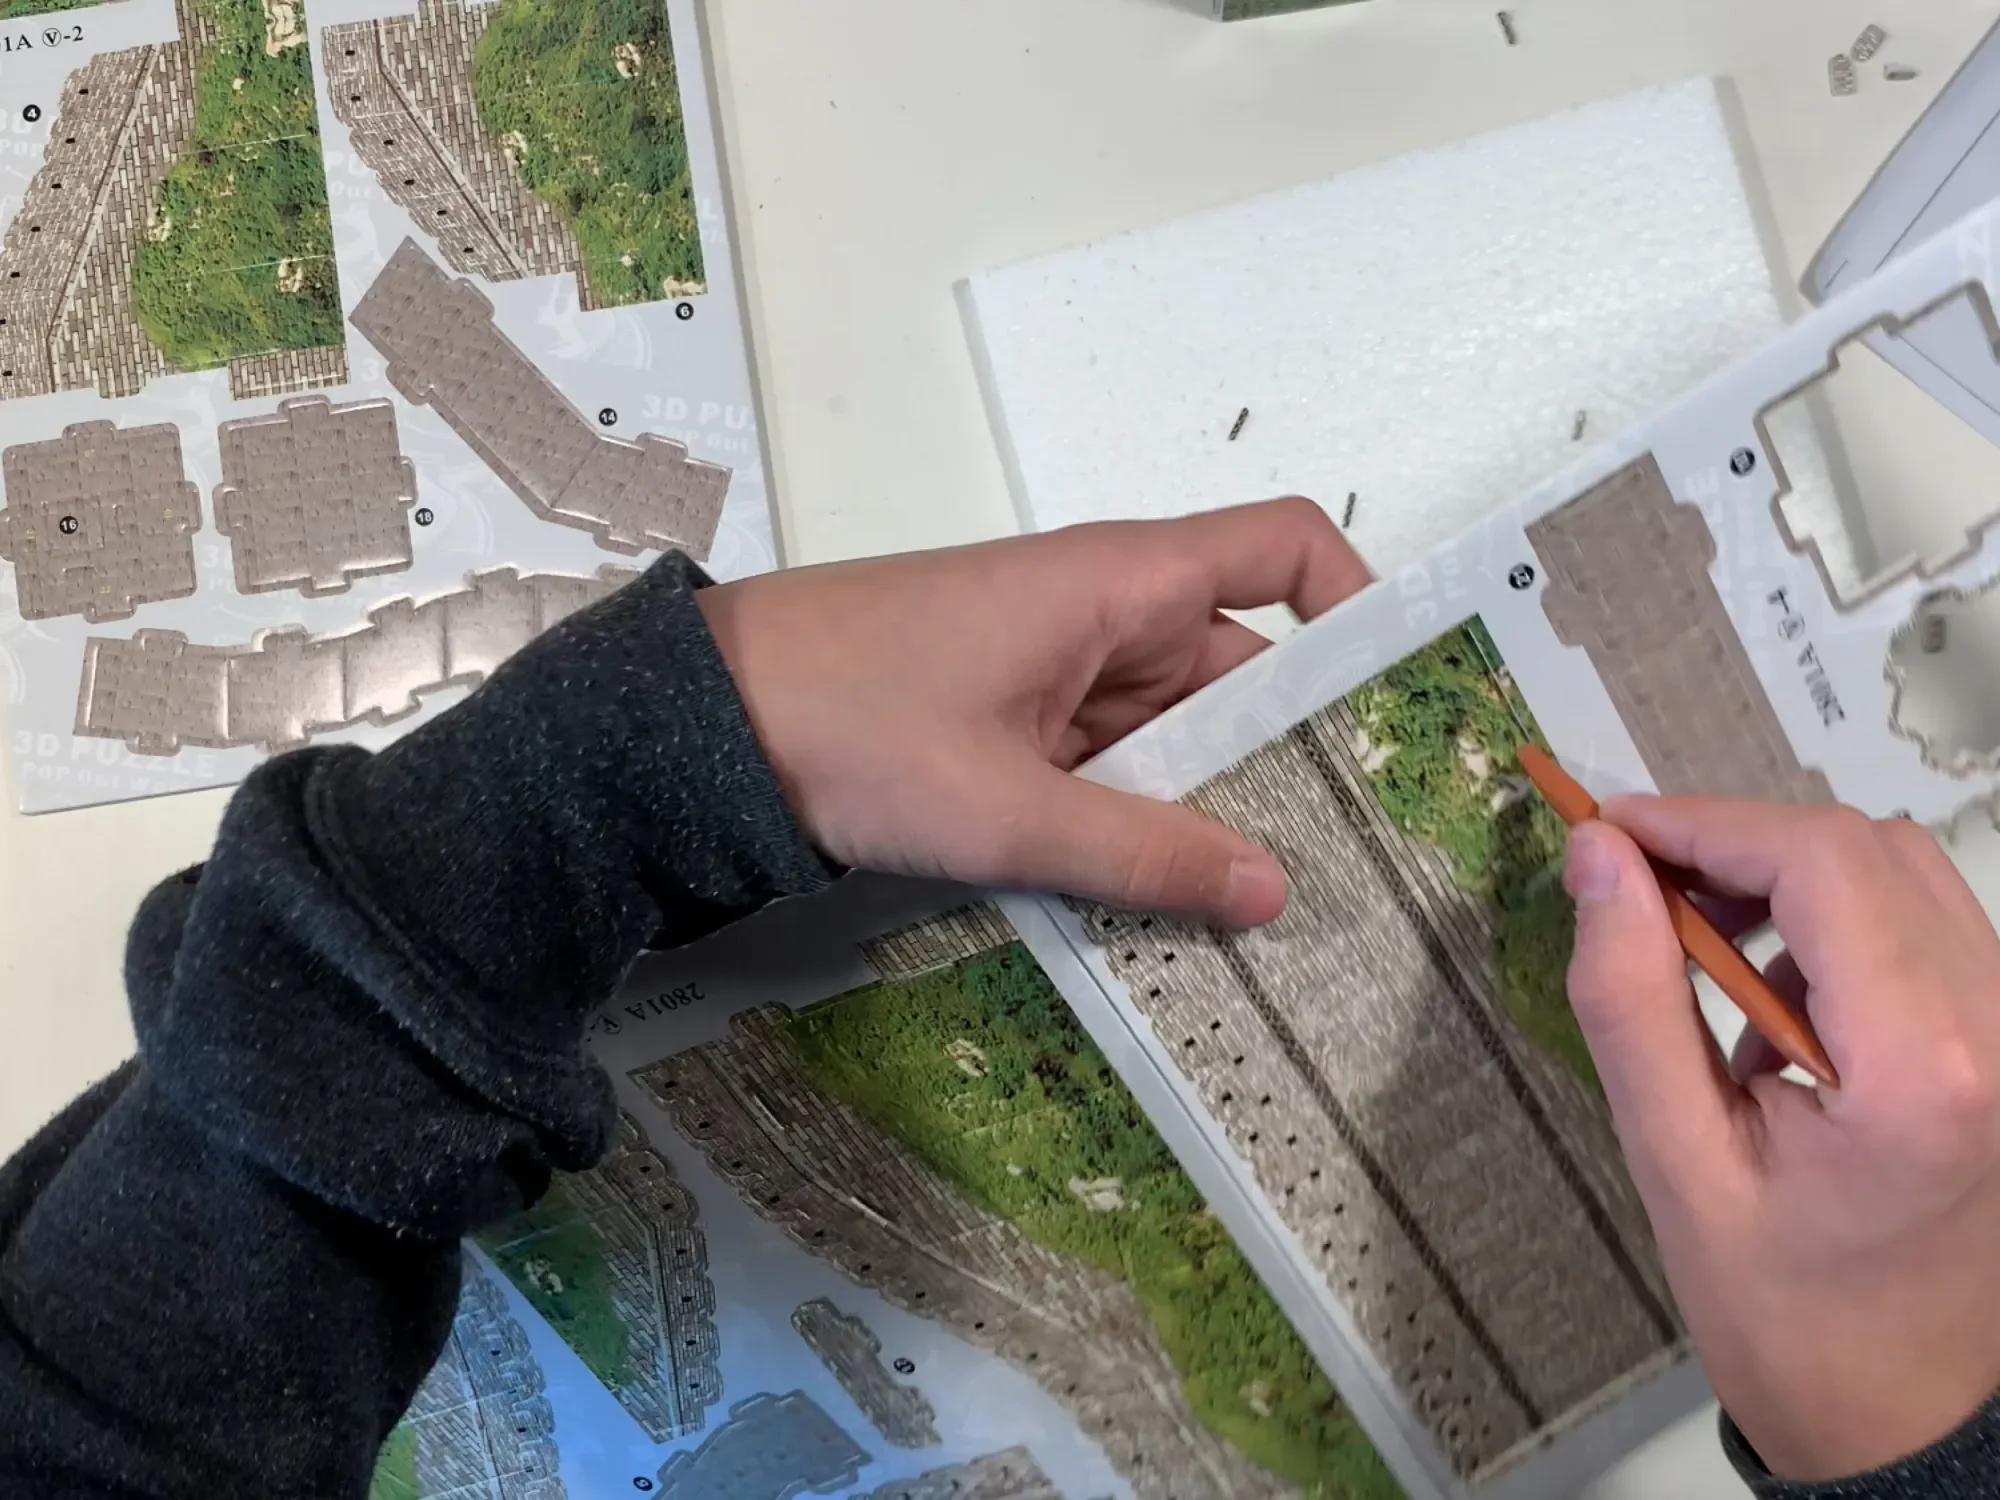
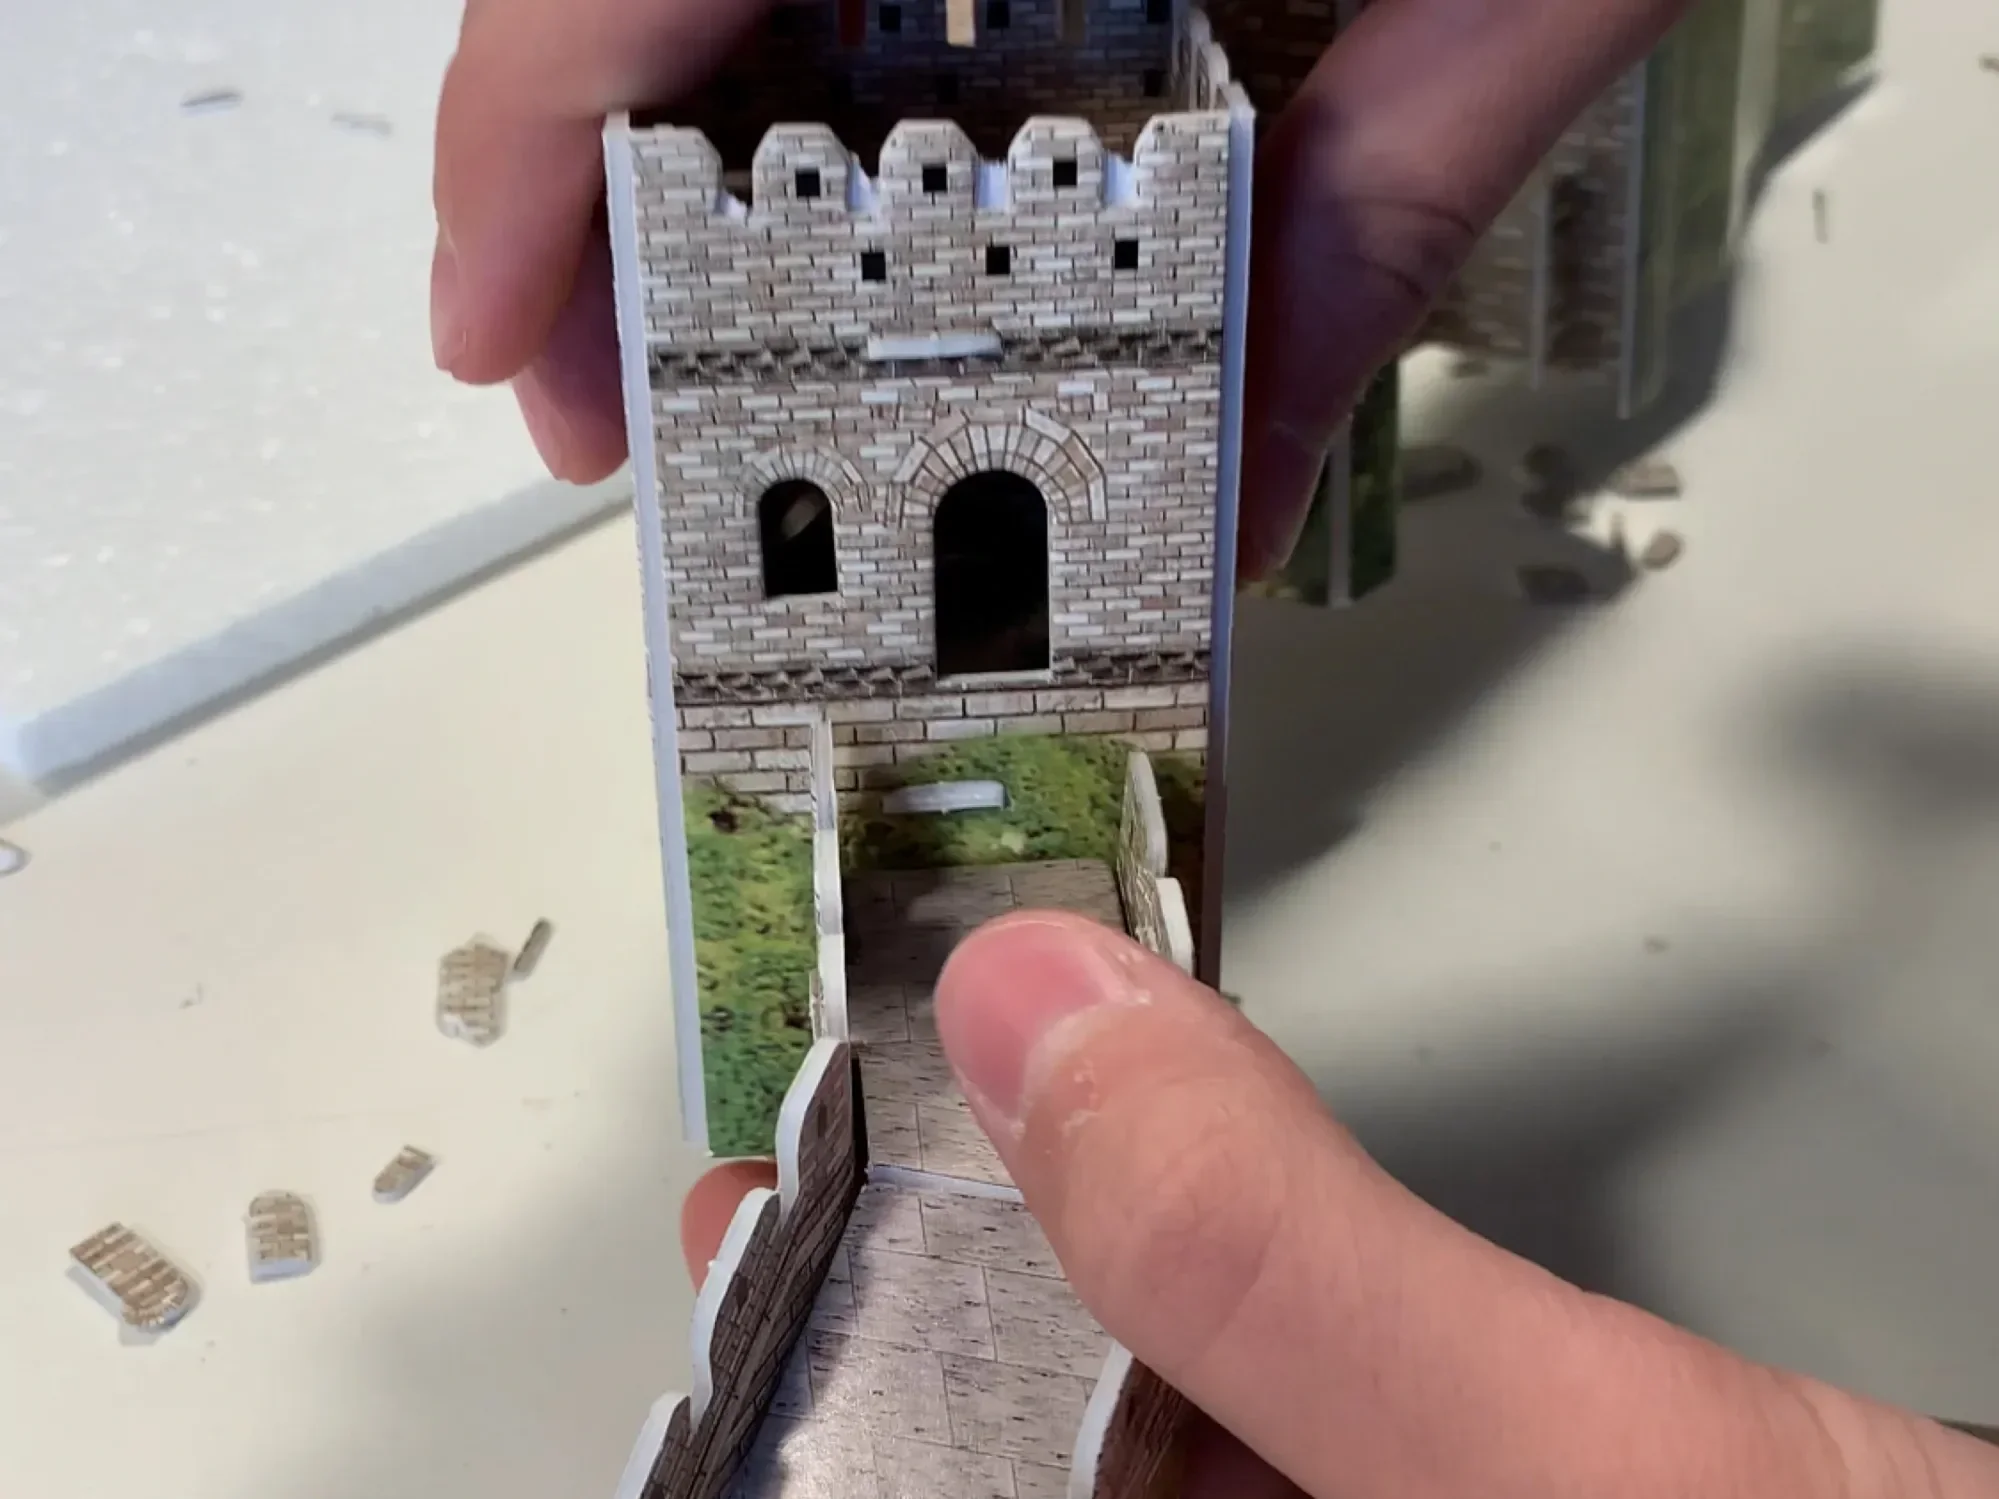
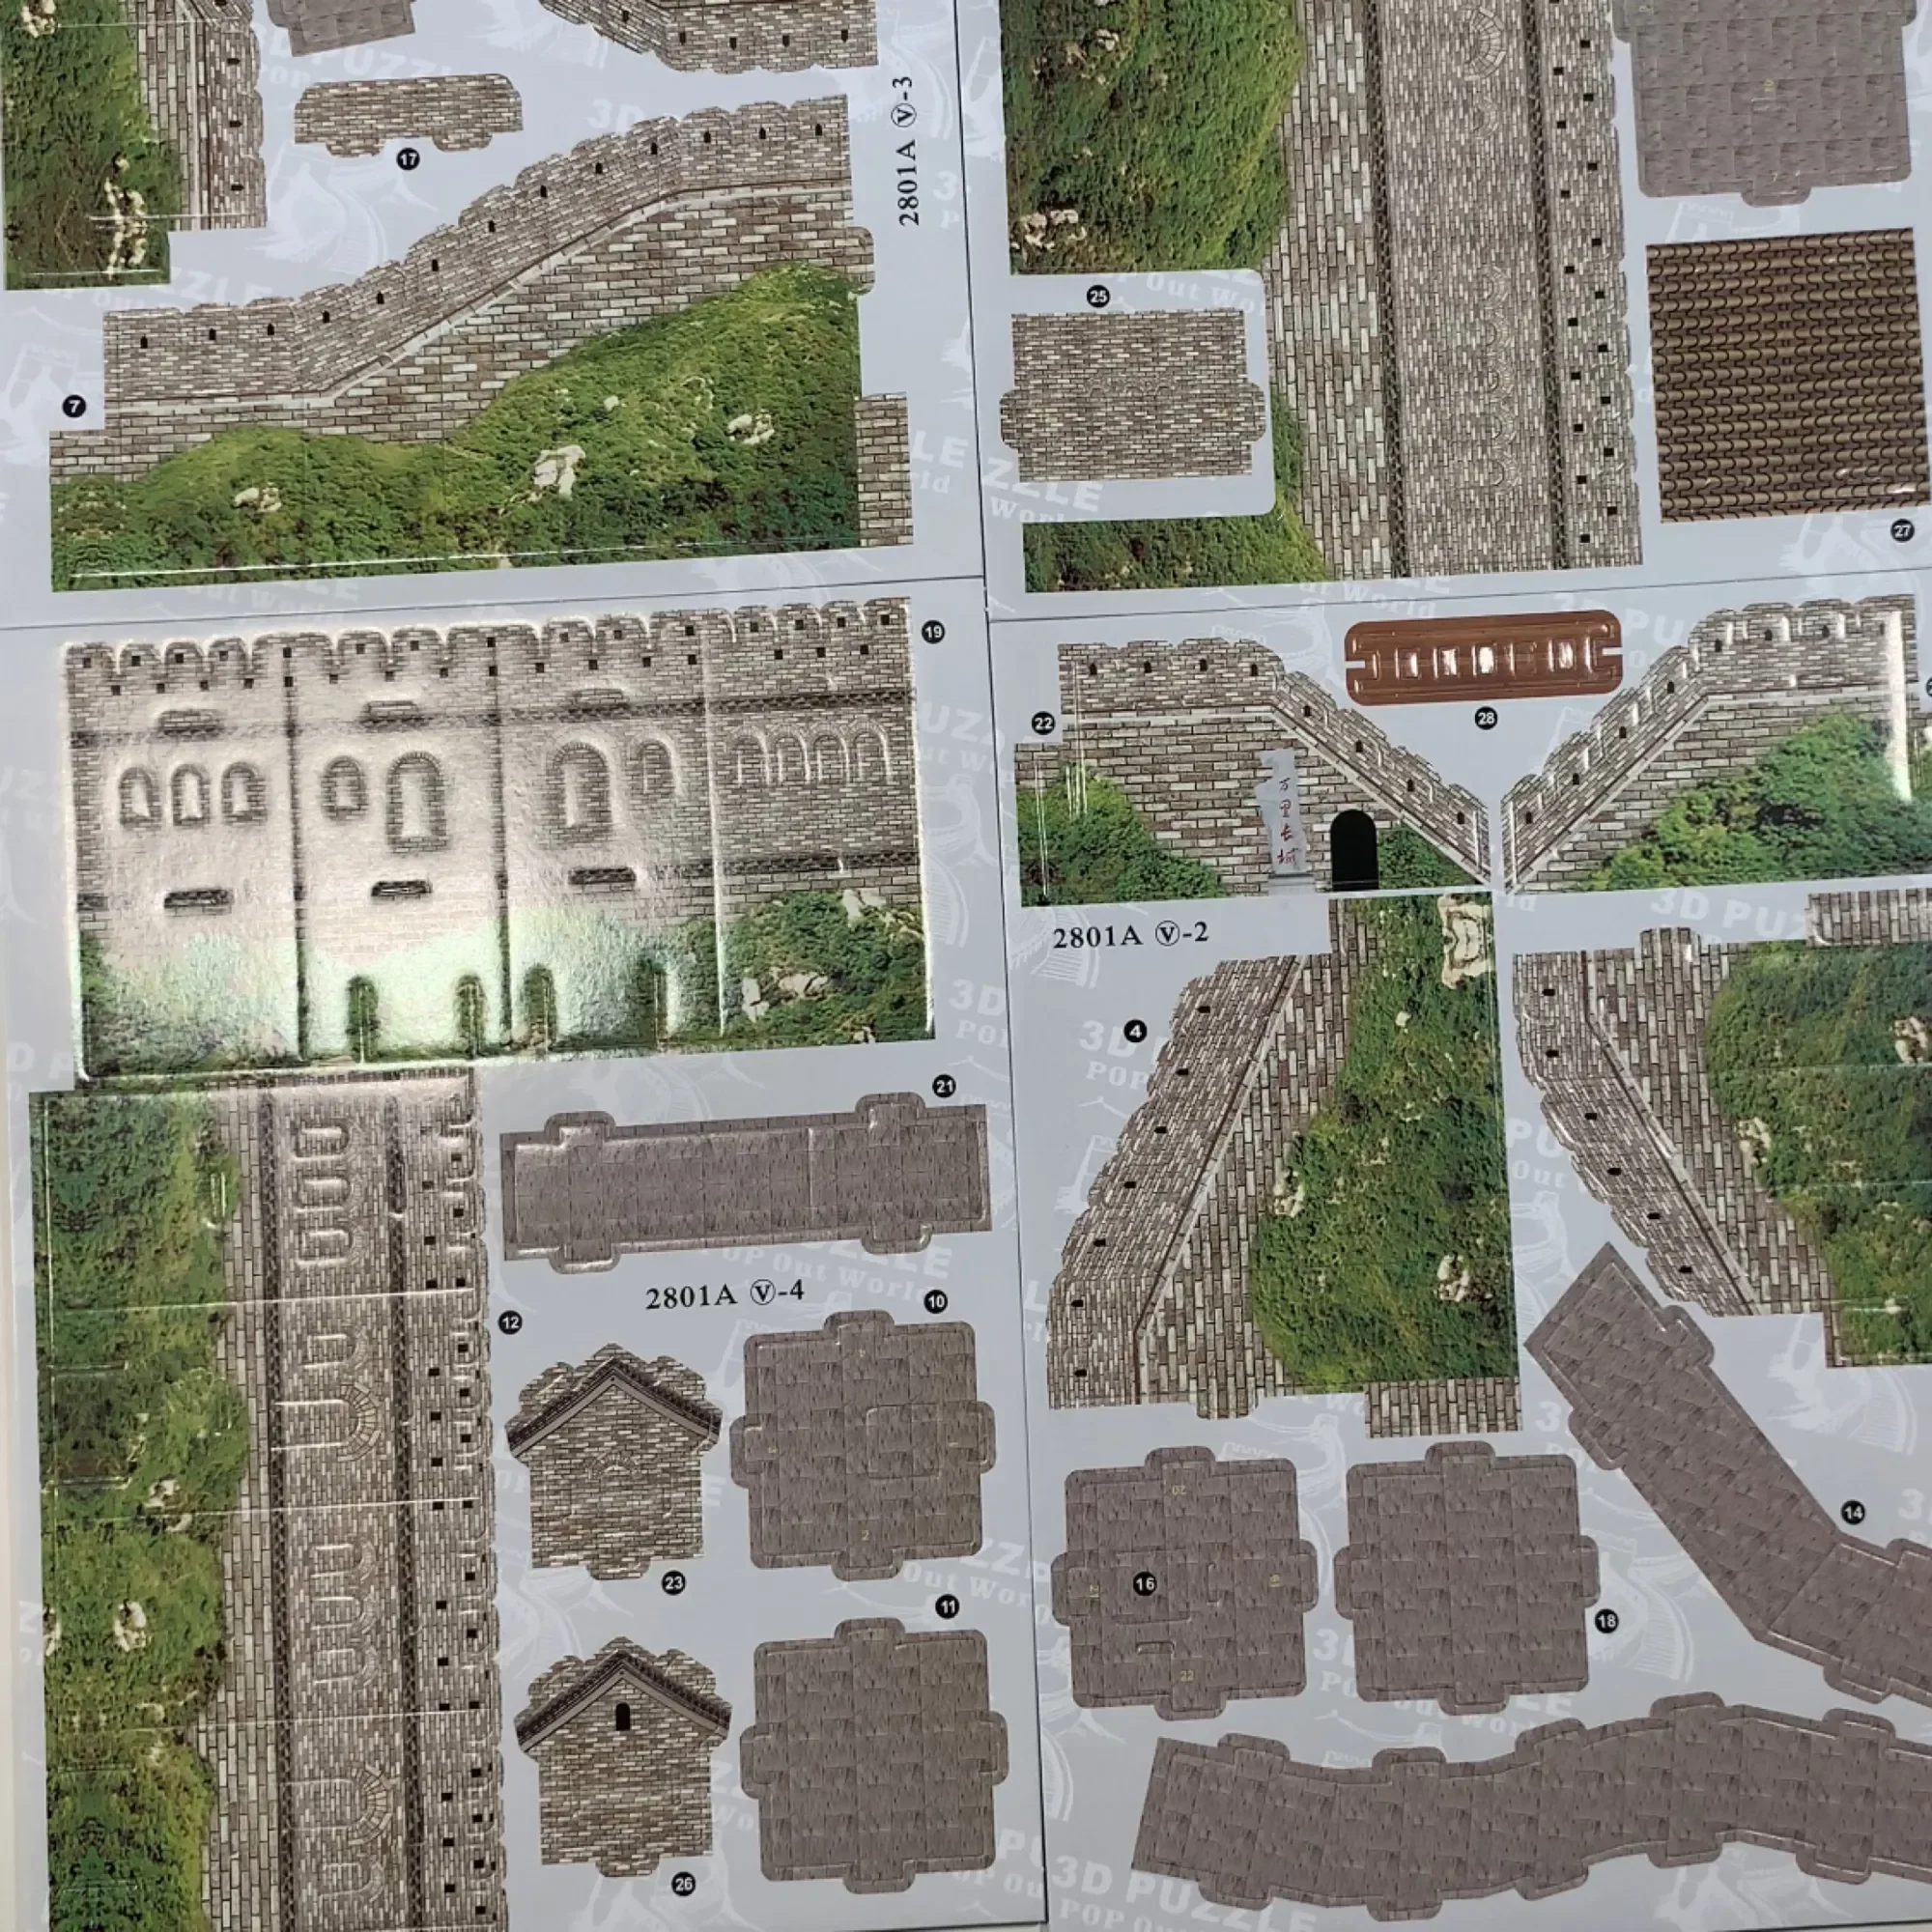
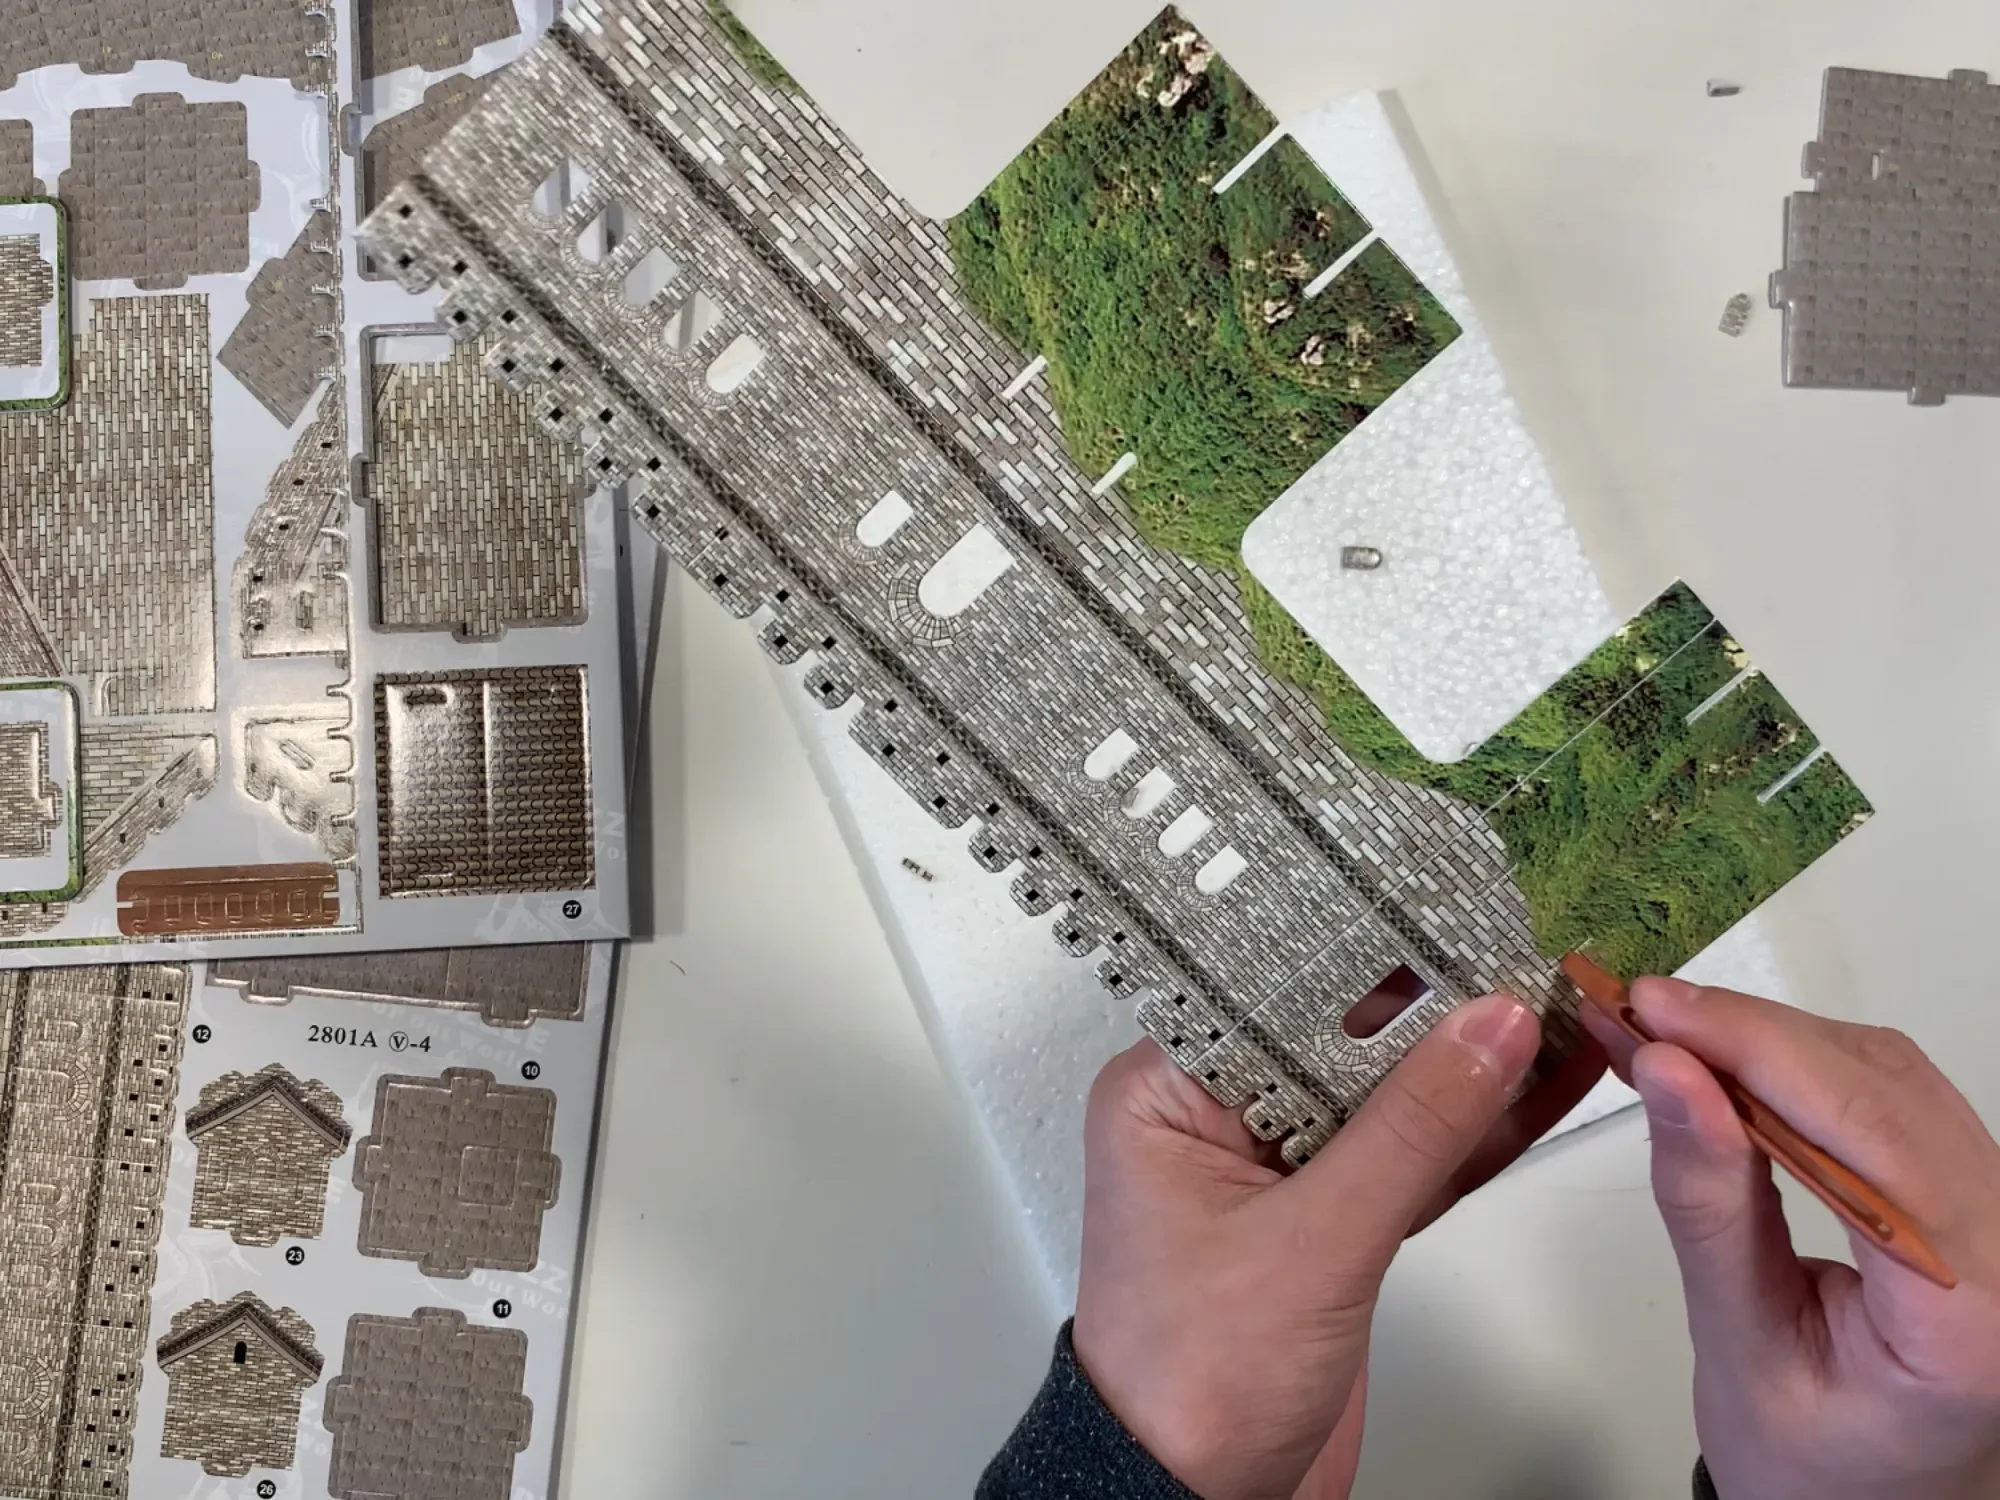
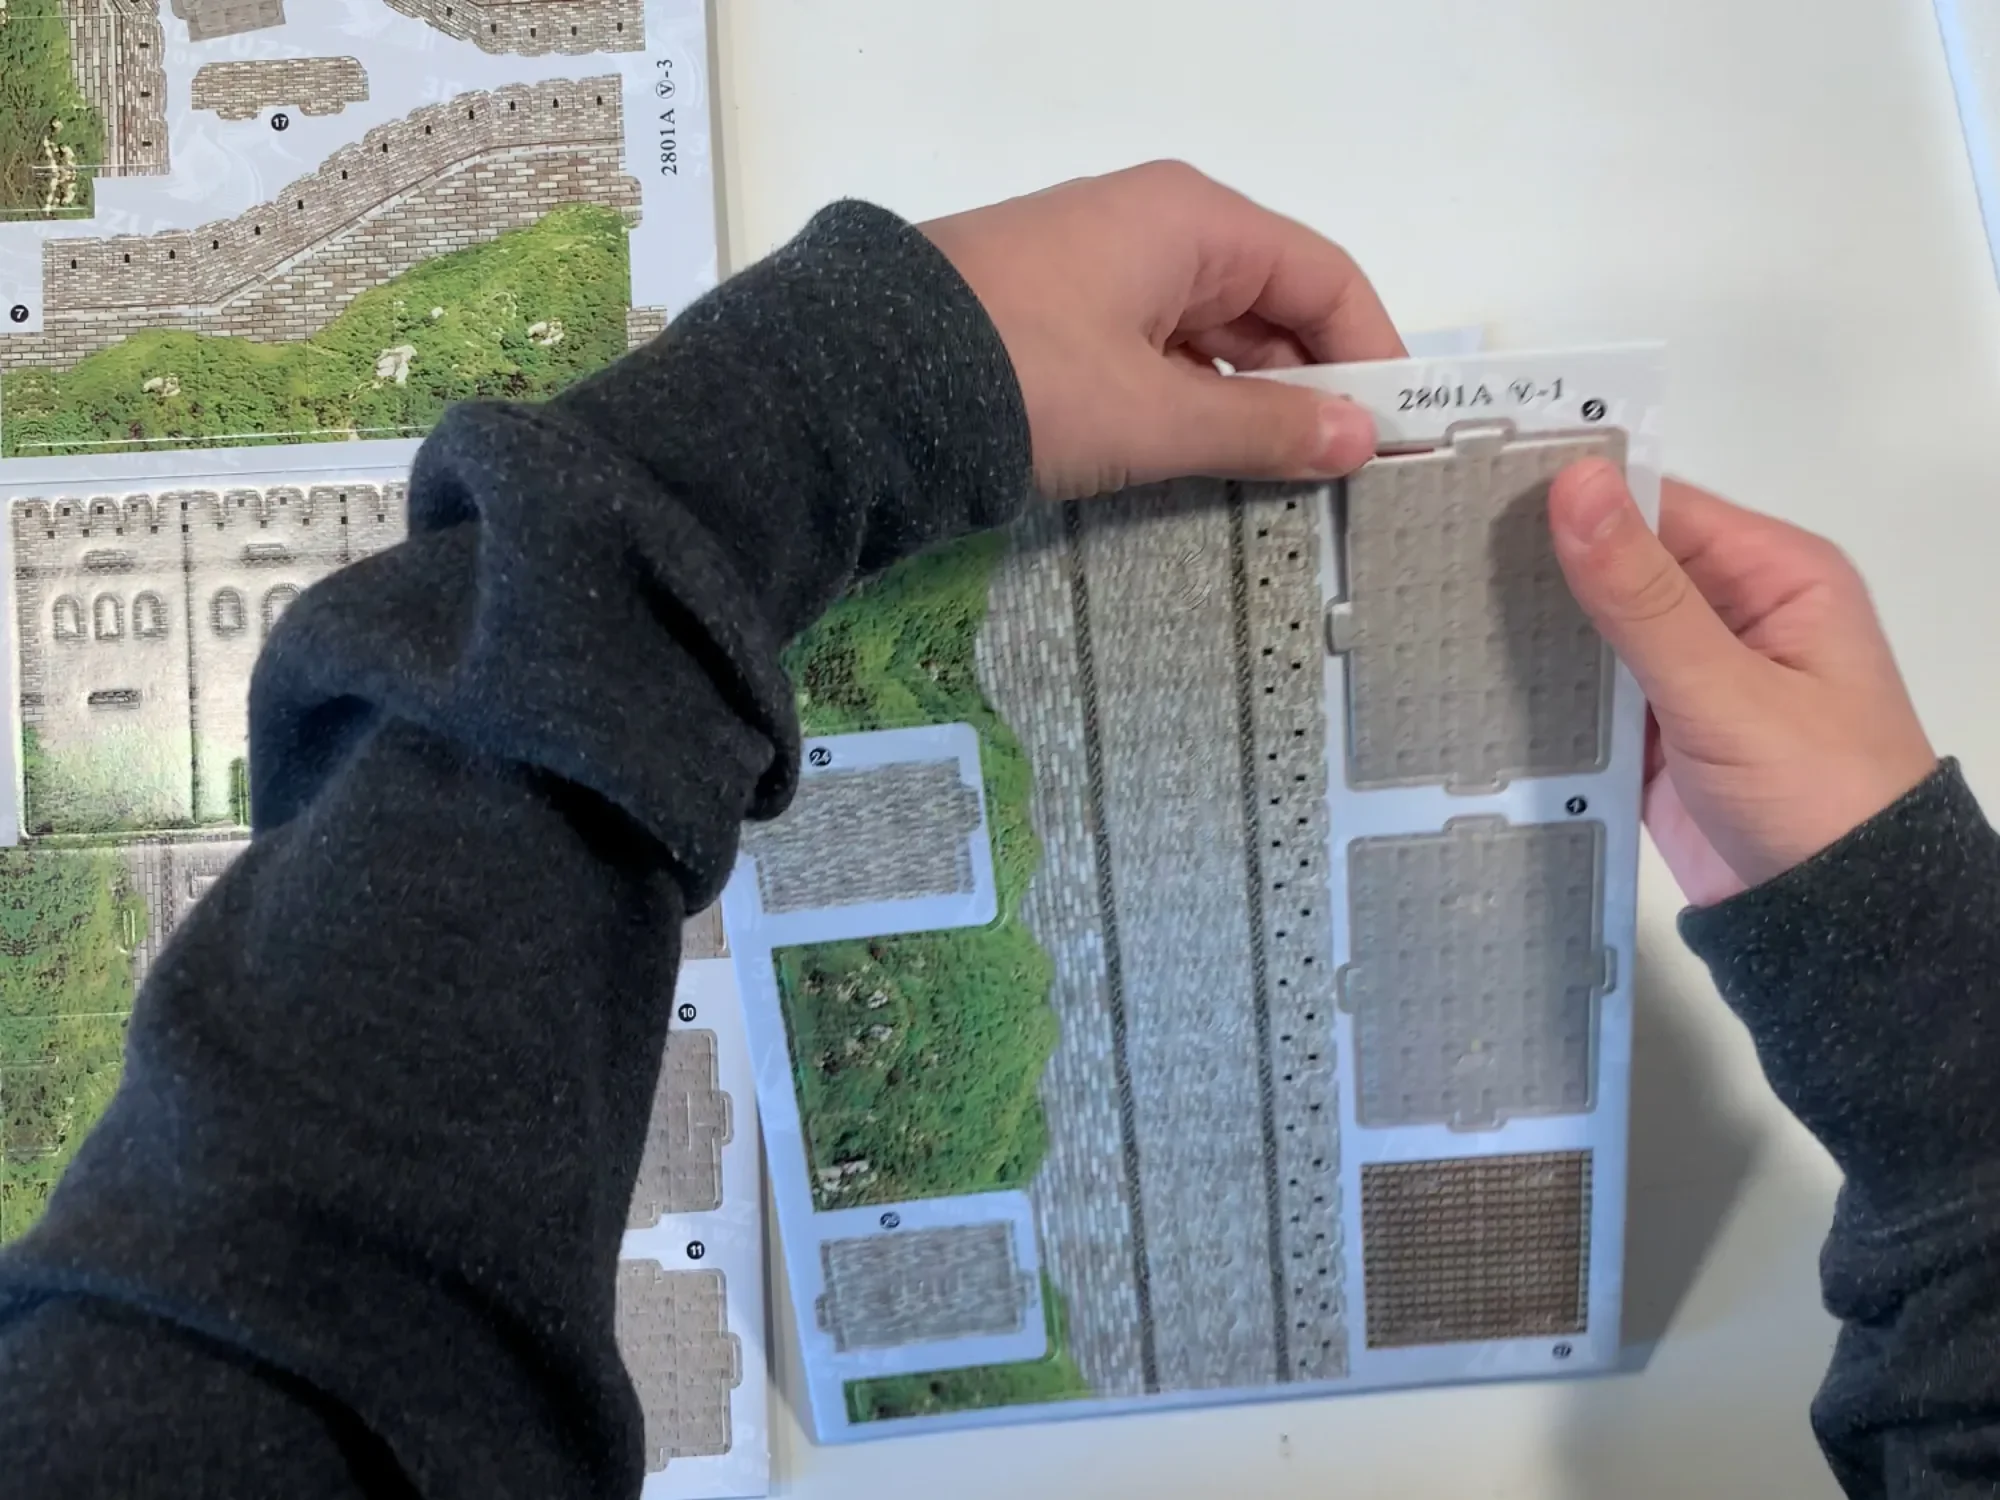
DIY Great Wall of China Foam Building Kit
We've done a number of Great Wall of China project kits and while this one was the most affordable and quickest of them all, it was also our least favorite. This one is made of high quality printed material over a foam core.
-

How To Make Chopstick Holders
Today's project is another she can do on her own, but I decided to share this super easy origami tutorial on how to make chopstick cases. I'm using Folia Origami Paper from A Child's Dream which measures 6"x6" which is slightly small for this project but you'll still get great cases.
-
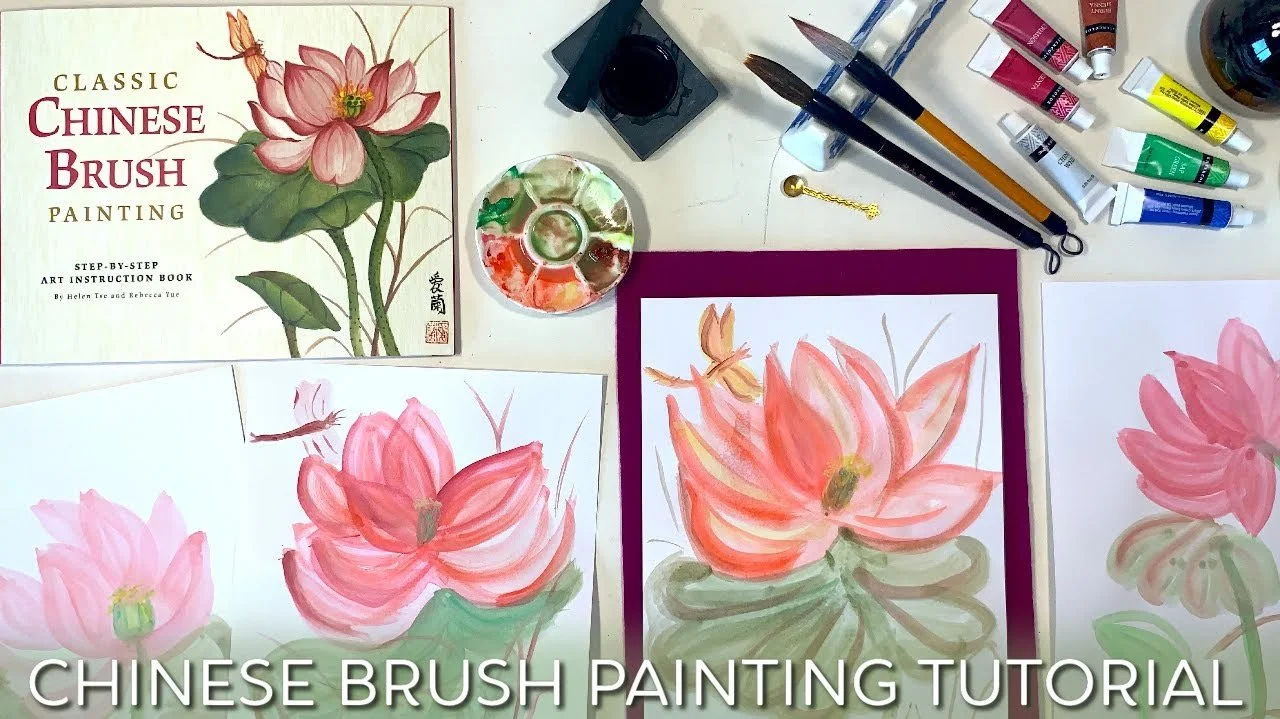
Chinese Brush Painting
Chinese brush painting was my favorite of all the hands on projects we did for our Ancient China unit study for homeschool. We got this Chinese Brush Painting kit from Barnes and Noble. It comes with basic supplies of which I don't know of the quality. Being that we were beginners, it appeared the supplies we used were good enough for our endeavor, but you can find high quality professional supplies from Oriental Art Supply.
Silk Road Recipes
-
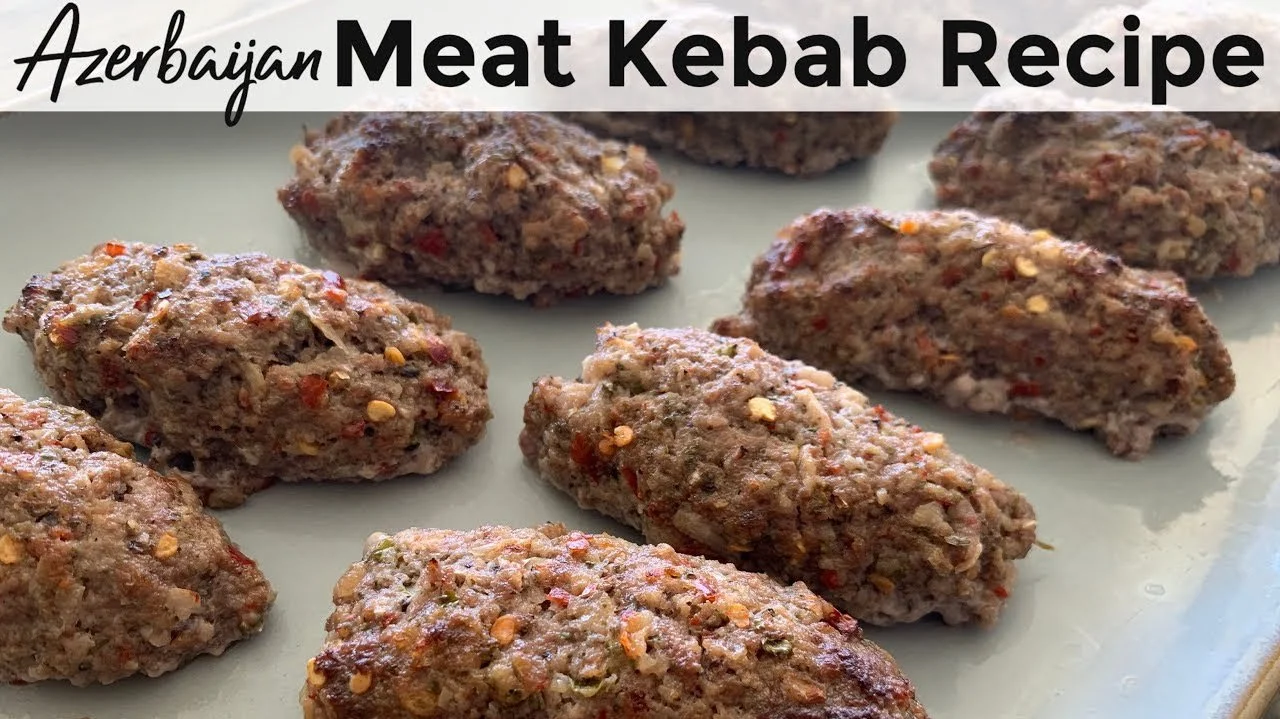
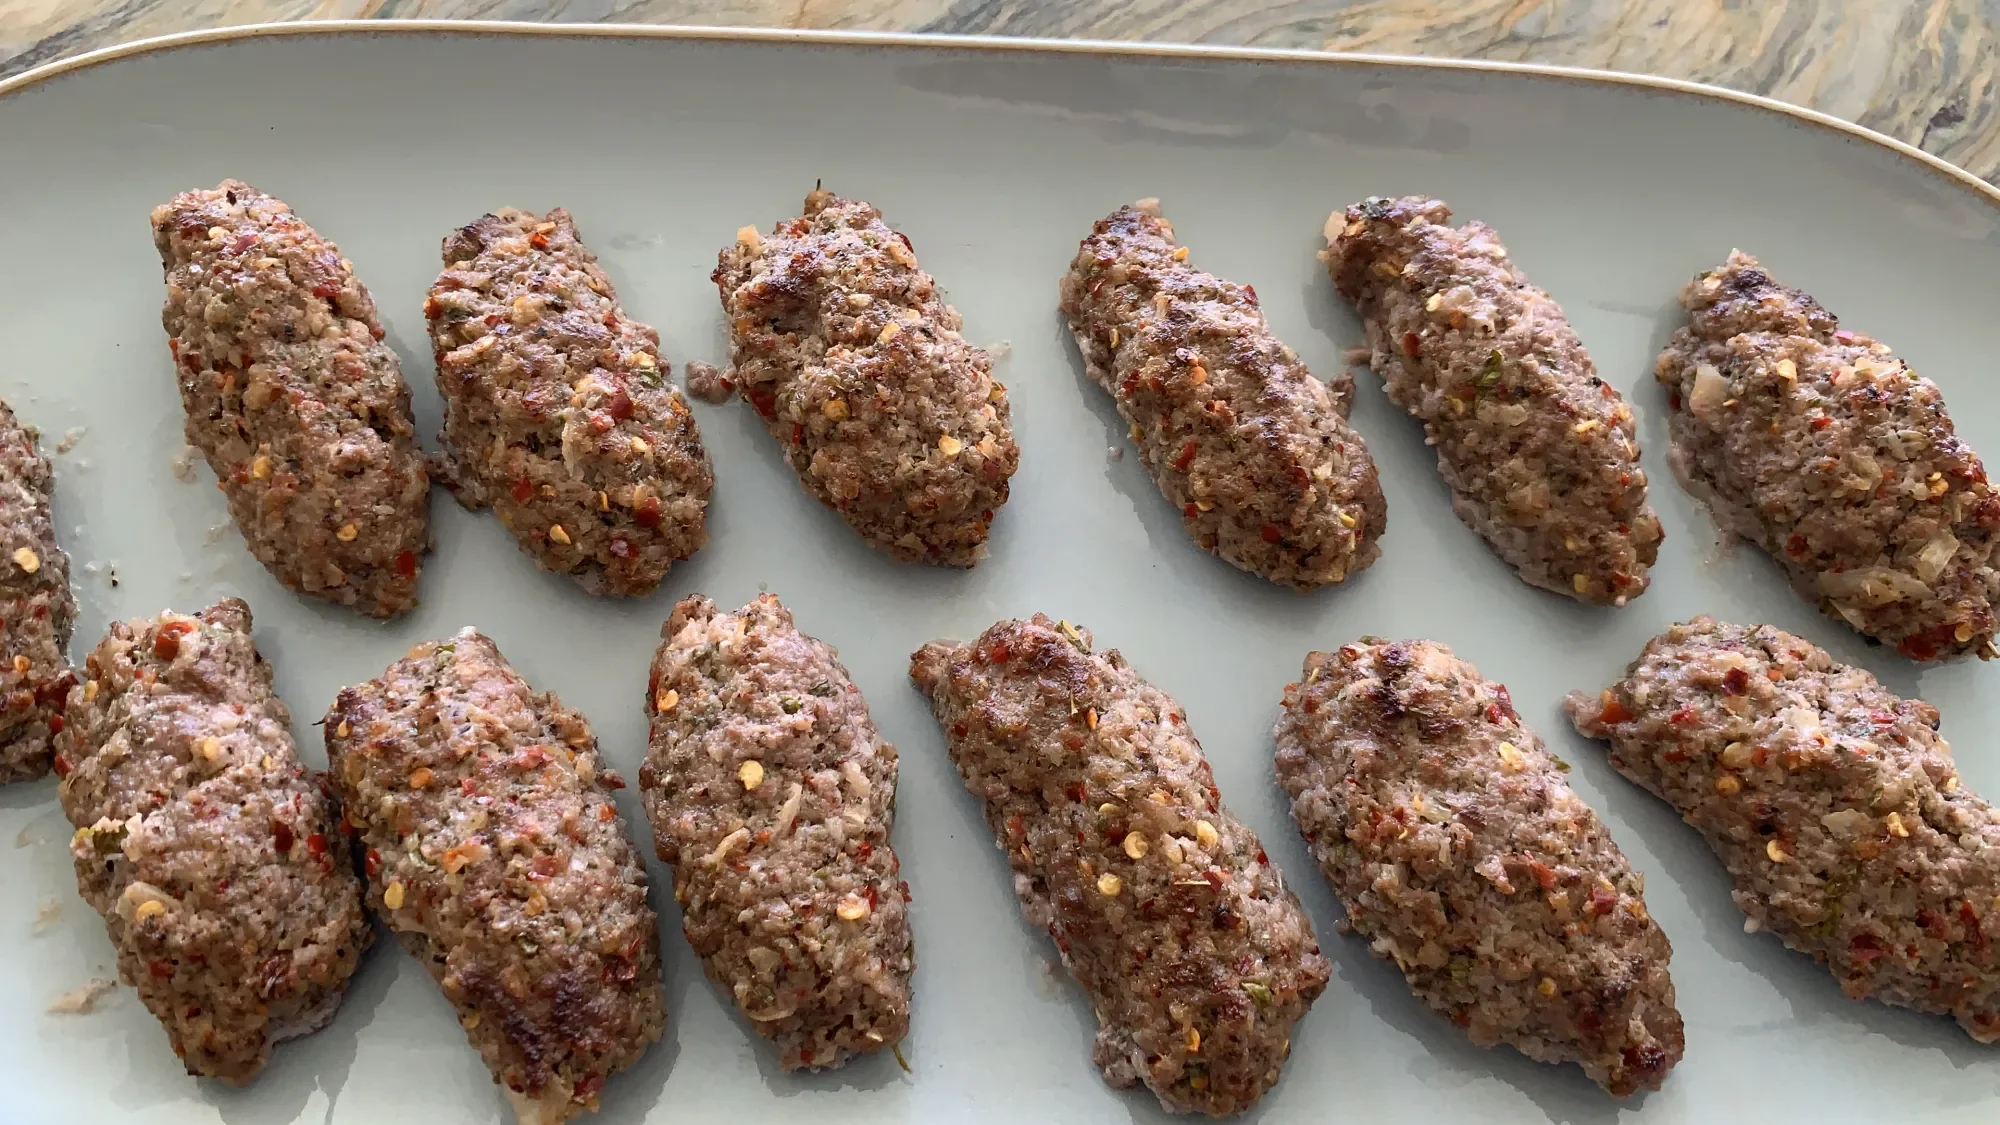
Azerbaijan Meat Kebabs with Mint | The Silk Road Gourmet
So far these are the best kebabs I've made my family. We got the recipe from The Silk Road Gourmet, a cookbook that brings recipes from the Silk Road to the modern cook. The book covers nine different regions: Republic of Georgia, Armenia, Azerbaijan, Iran, Afghanistan, Pakistan, Bangladesh, India and Sri Lanka.
-
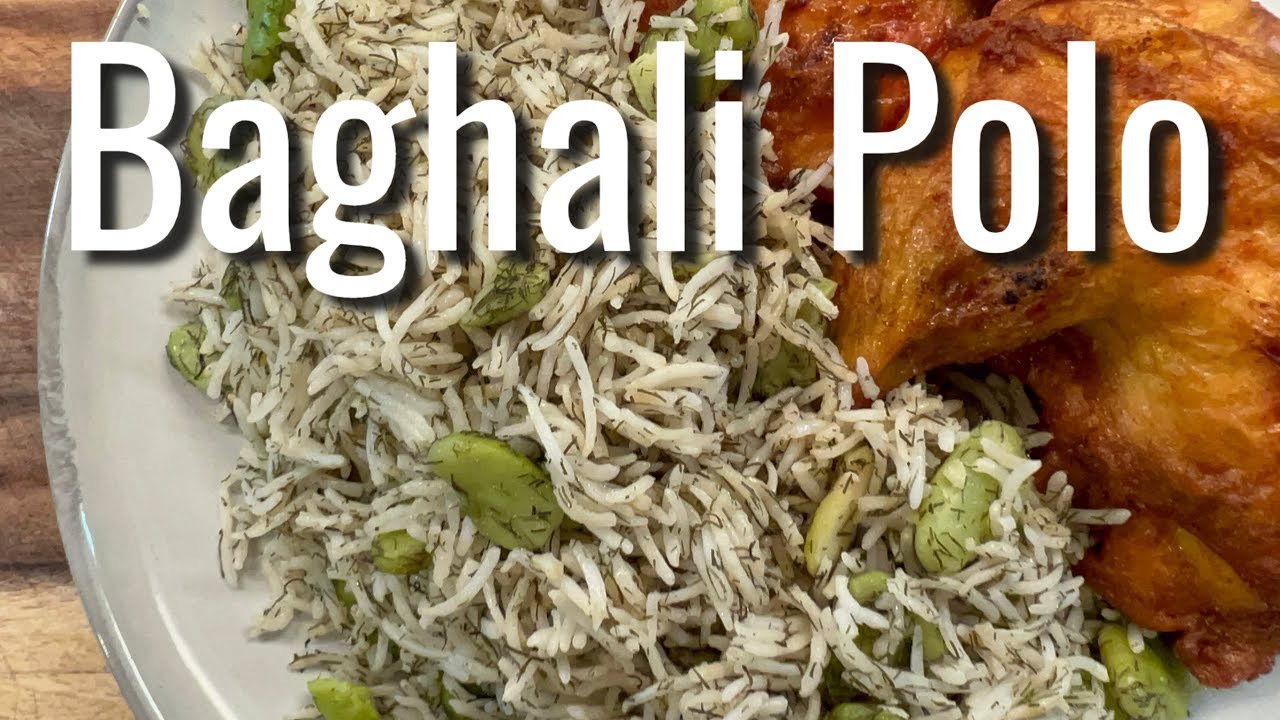
Baghali Polo | Persian Rice with Dill Weed and Fava Beans
Nearly all my Persian recipes come from my friend Teyebeh who often gets from her mom, and I'll take a good guess and assume she gets them from her mom.
-
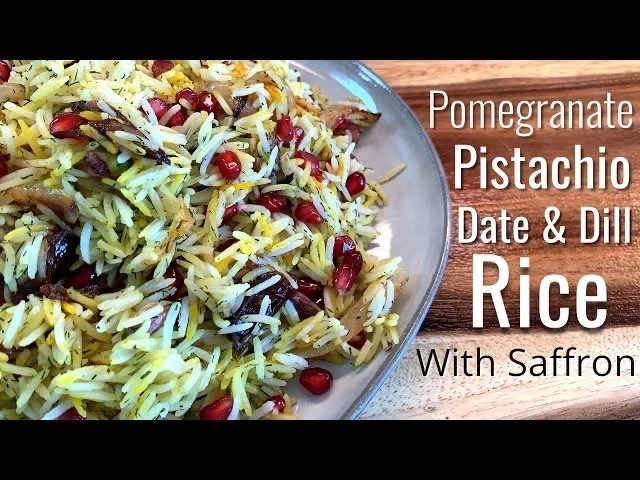
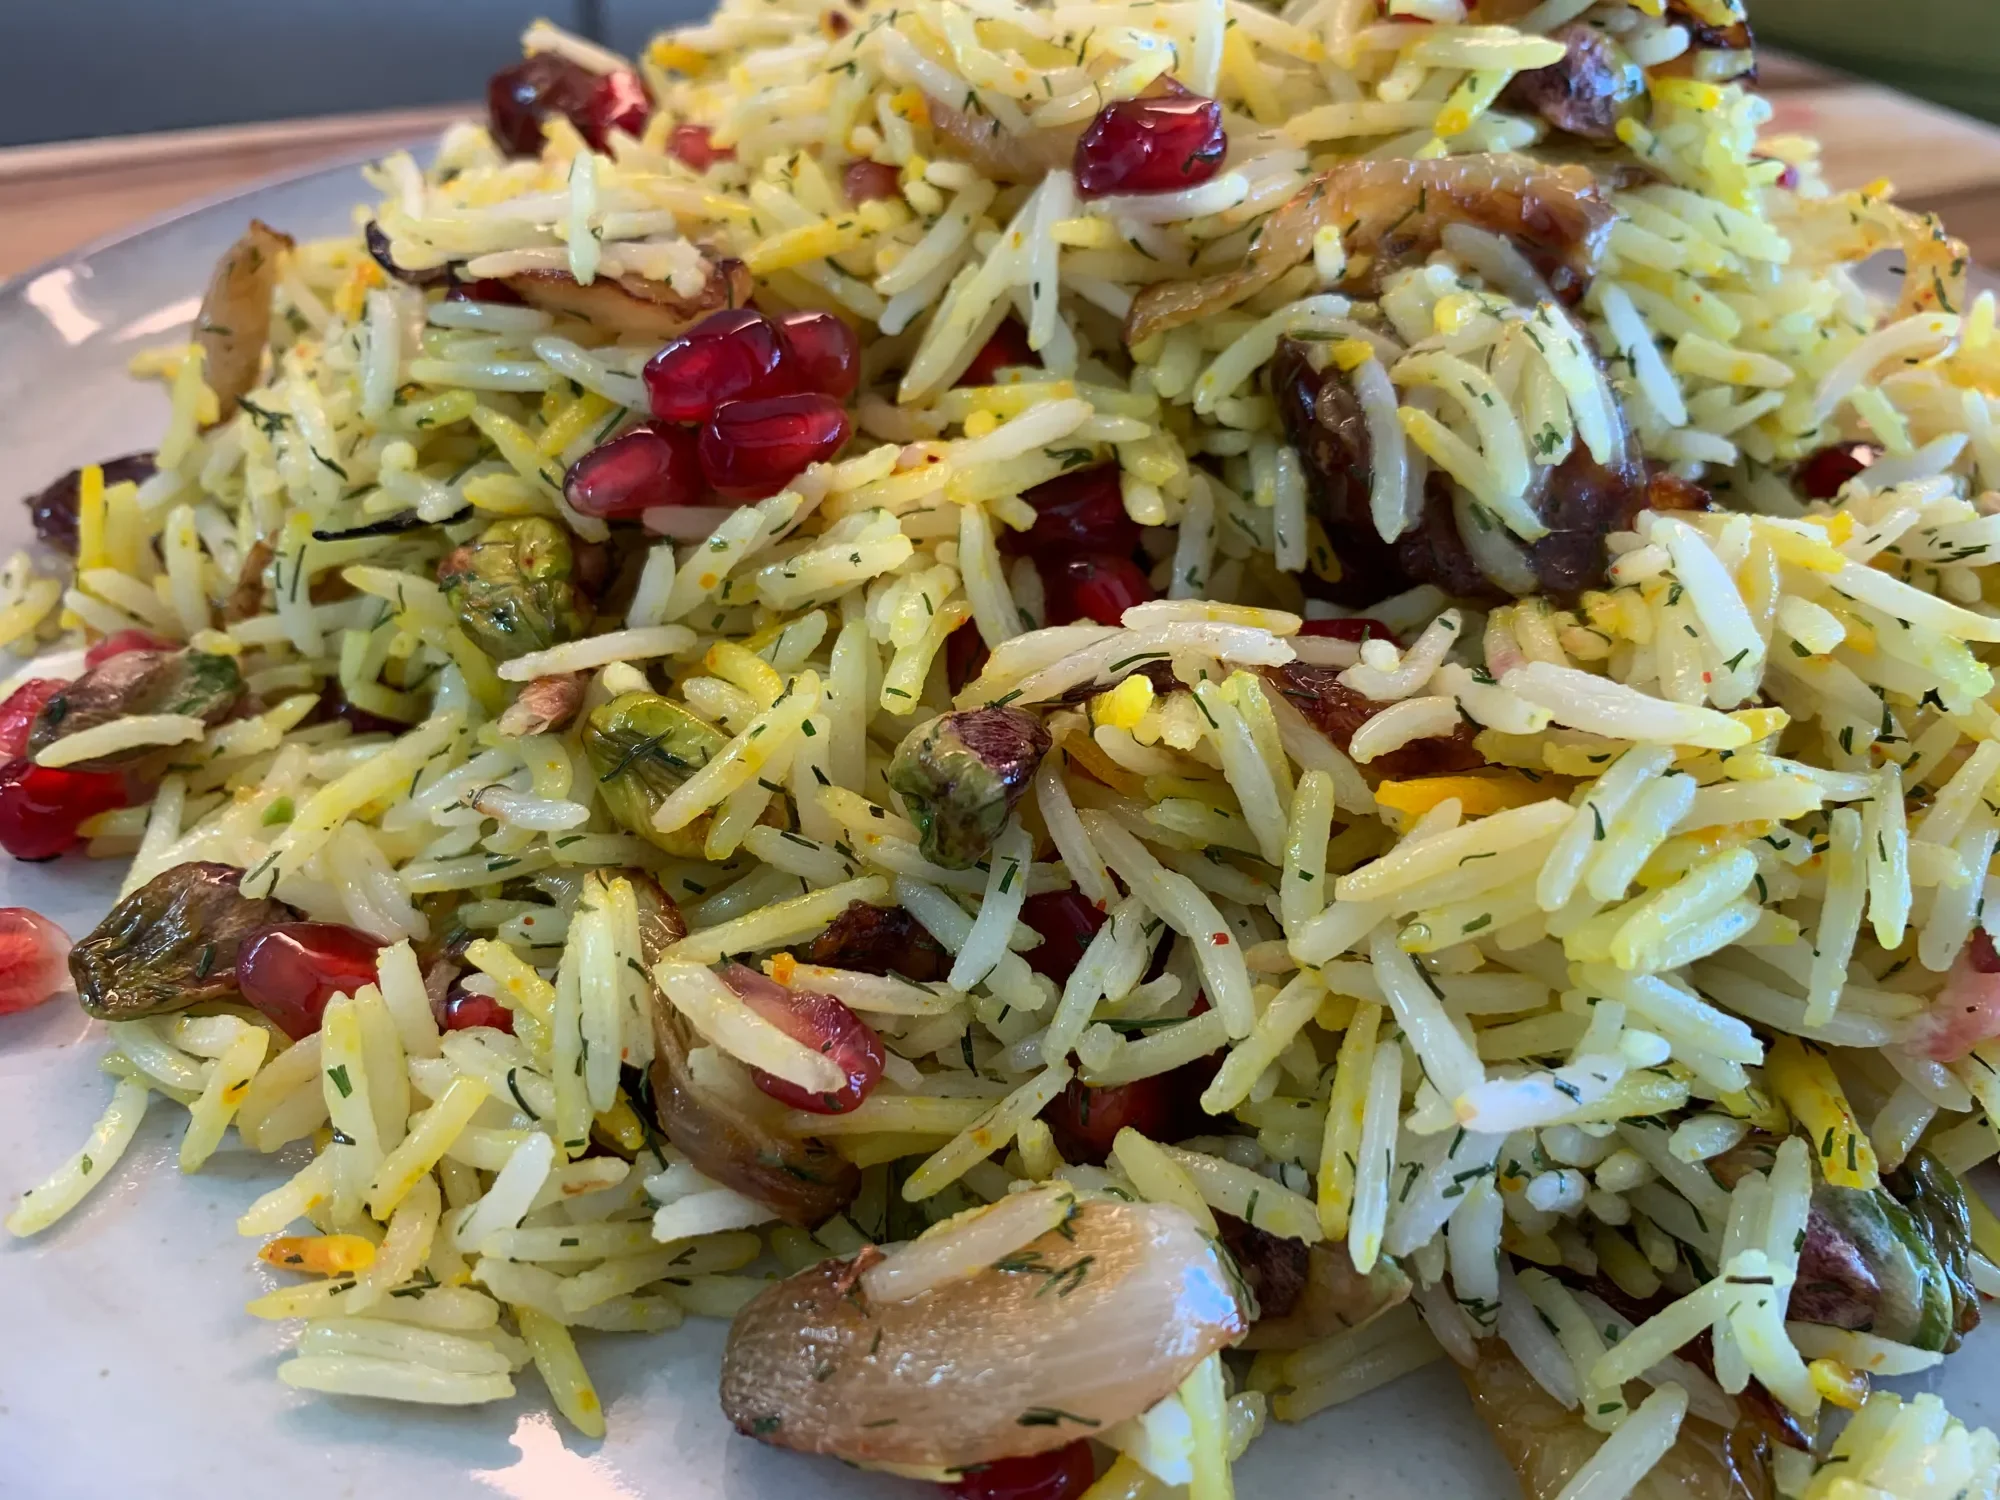
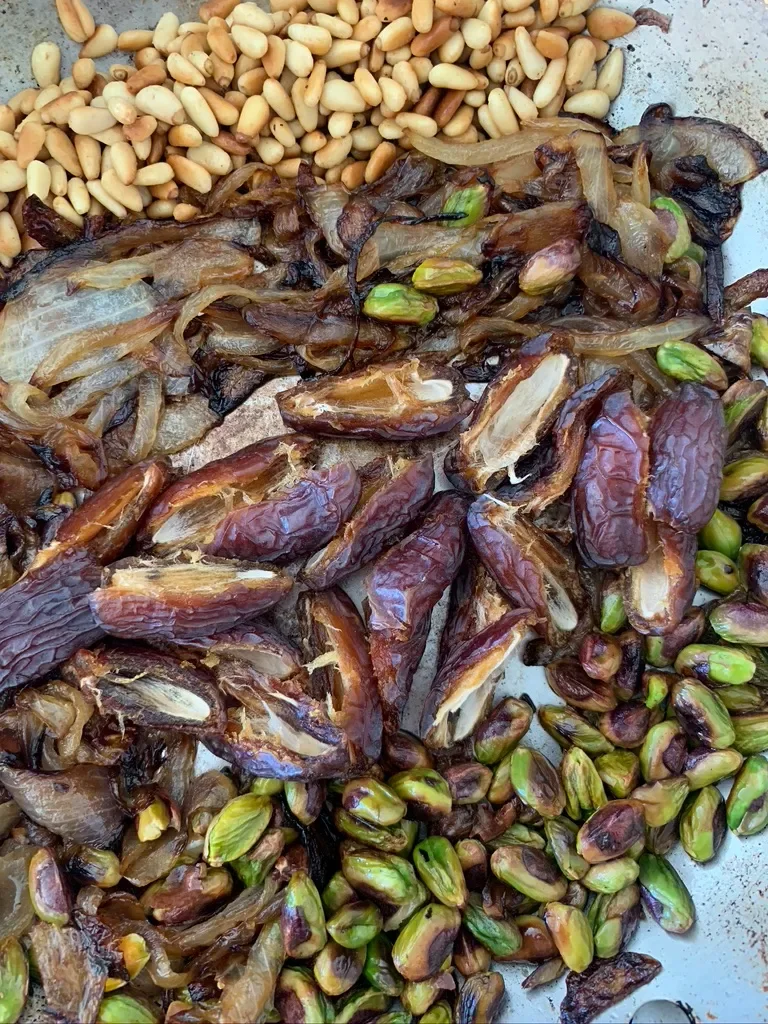
Pomegranate, Date & Pistachio Rice
This is one of our favorite recipes!! I've only added fried onions to the recipe as well as a sprinkle of saffron. If you don't have fresh dill, I've swapped it out for dried dill on many occasions. We pair this with a rack of lamb. We got this recipe from the Martha Stewart Living magazine and it's become on of our favorite recipes ever!!
-
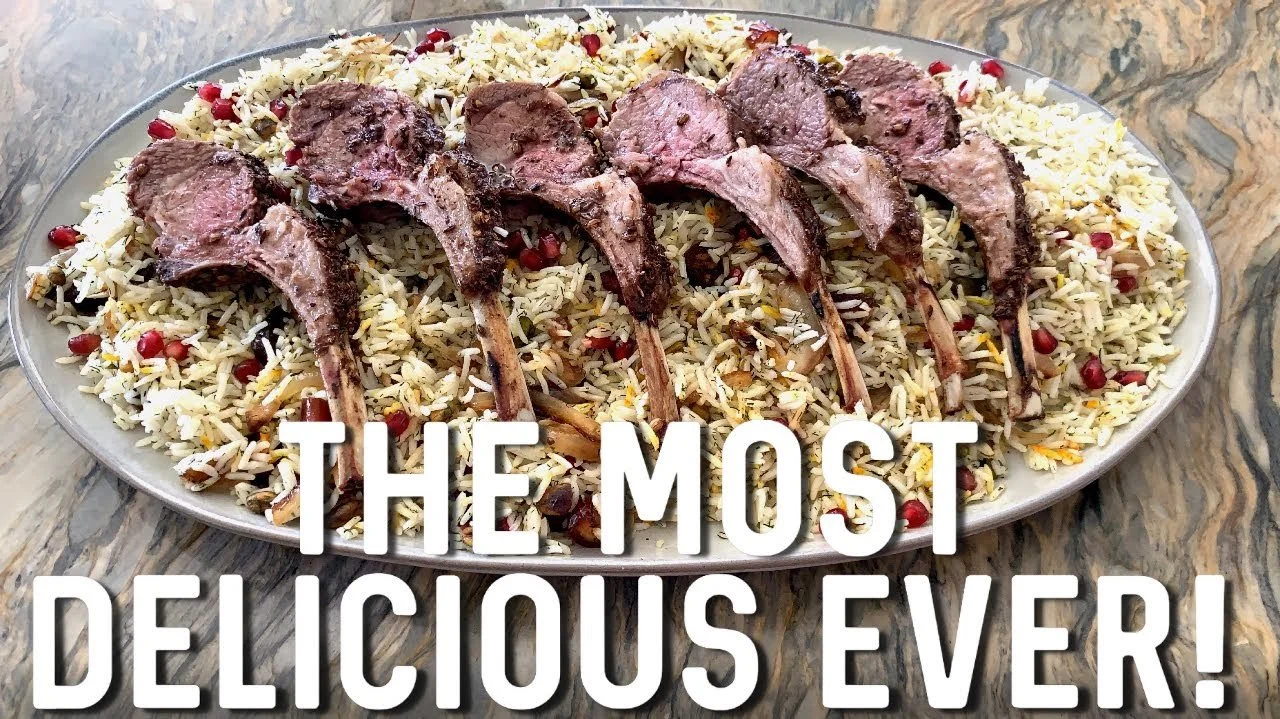
Silk Road Lamb Recipe | Amazingly Delicious and Easy!
This recipe is hands down my family's favorite recipe of all time. There's never enough even when I double the recipe. It's just one of those special treats that we can only do once in a while because a rack of lamb is quite pricey. For me too, it's one of the most delicious recipes I've ever had.
-
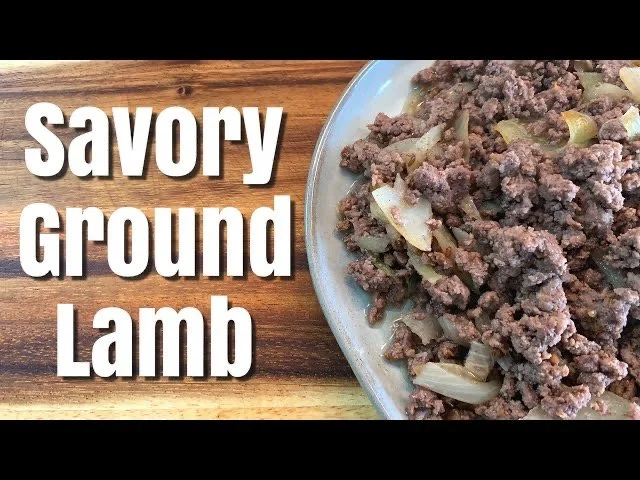
How to Cook Ground Lamb
I've altered a recipe we love from the Martha Stewart Living magazine which is an herbed rack of lamb that is paired with a pomegranate rice. We love that recipe so much we cook it often. One day, I made the pomegranate rice but didn't have anything except ground lamb. So, this is the recipe I came up with to pair with the rice.
-
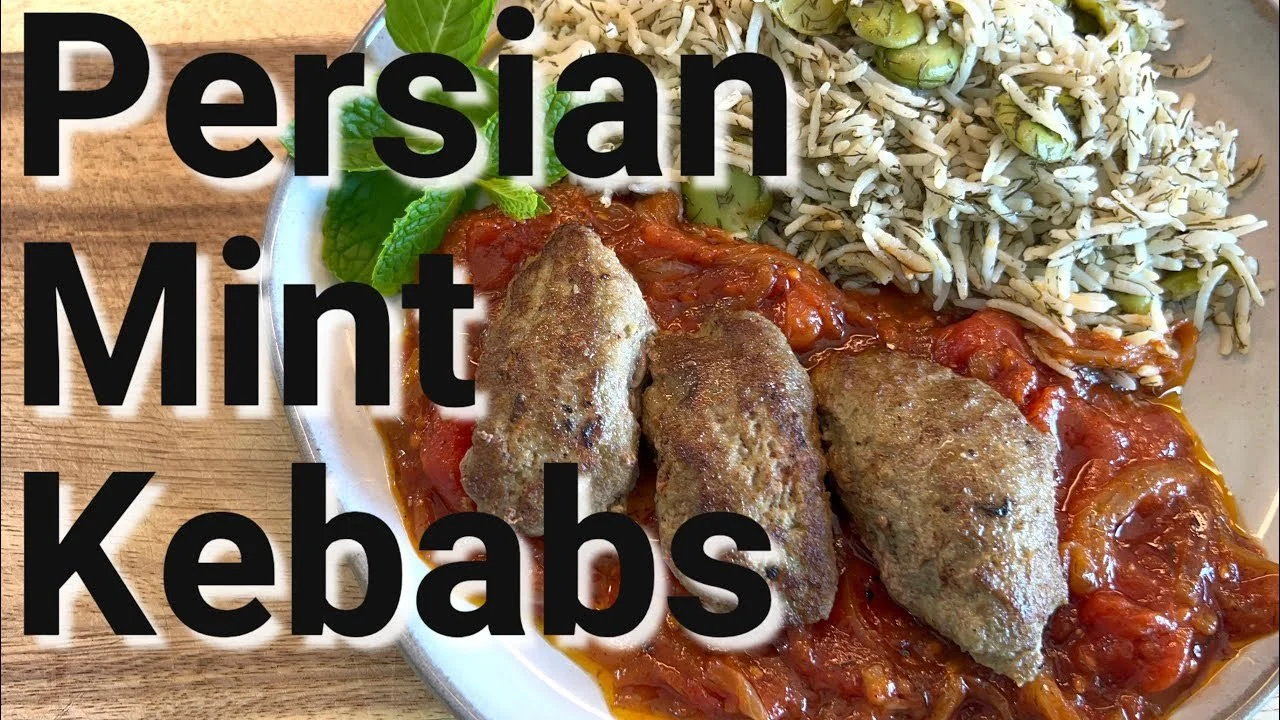
Persian Mint Meatballs
This recipe is from the book The New Persian Kitchen by Louisa Shafia. We do a lot of cooking anyway, but especially with our homeschooling. While doing our ancient Persia lessons, we got this and other Persian cookbooks to try some new recipes.
-
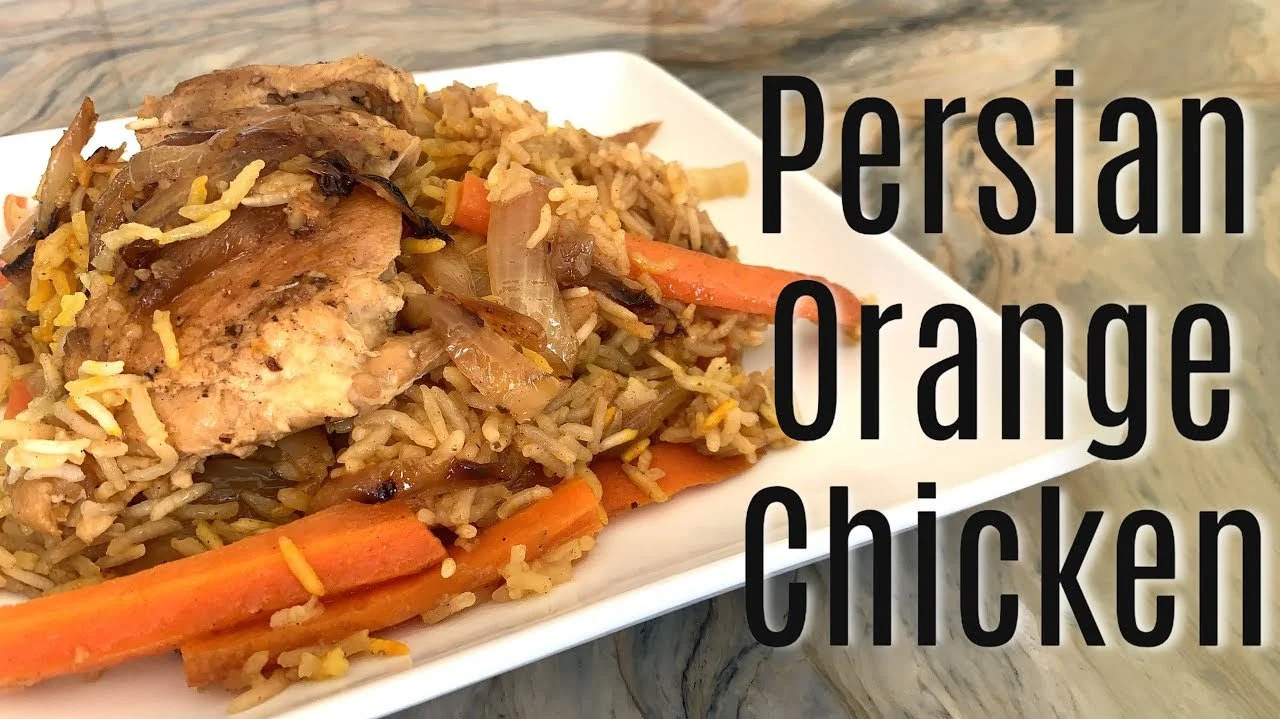
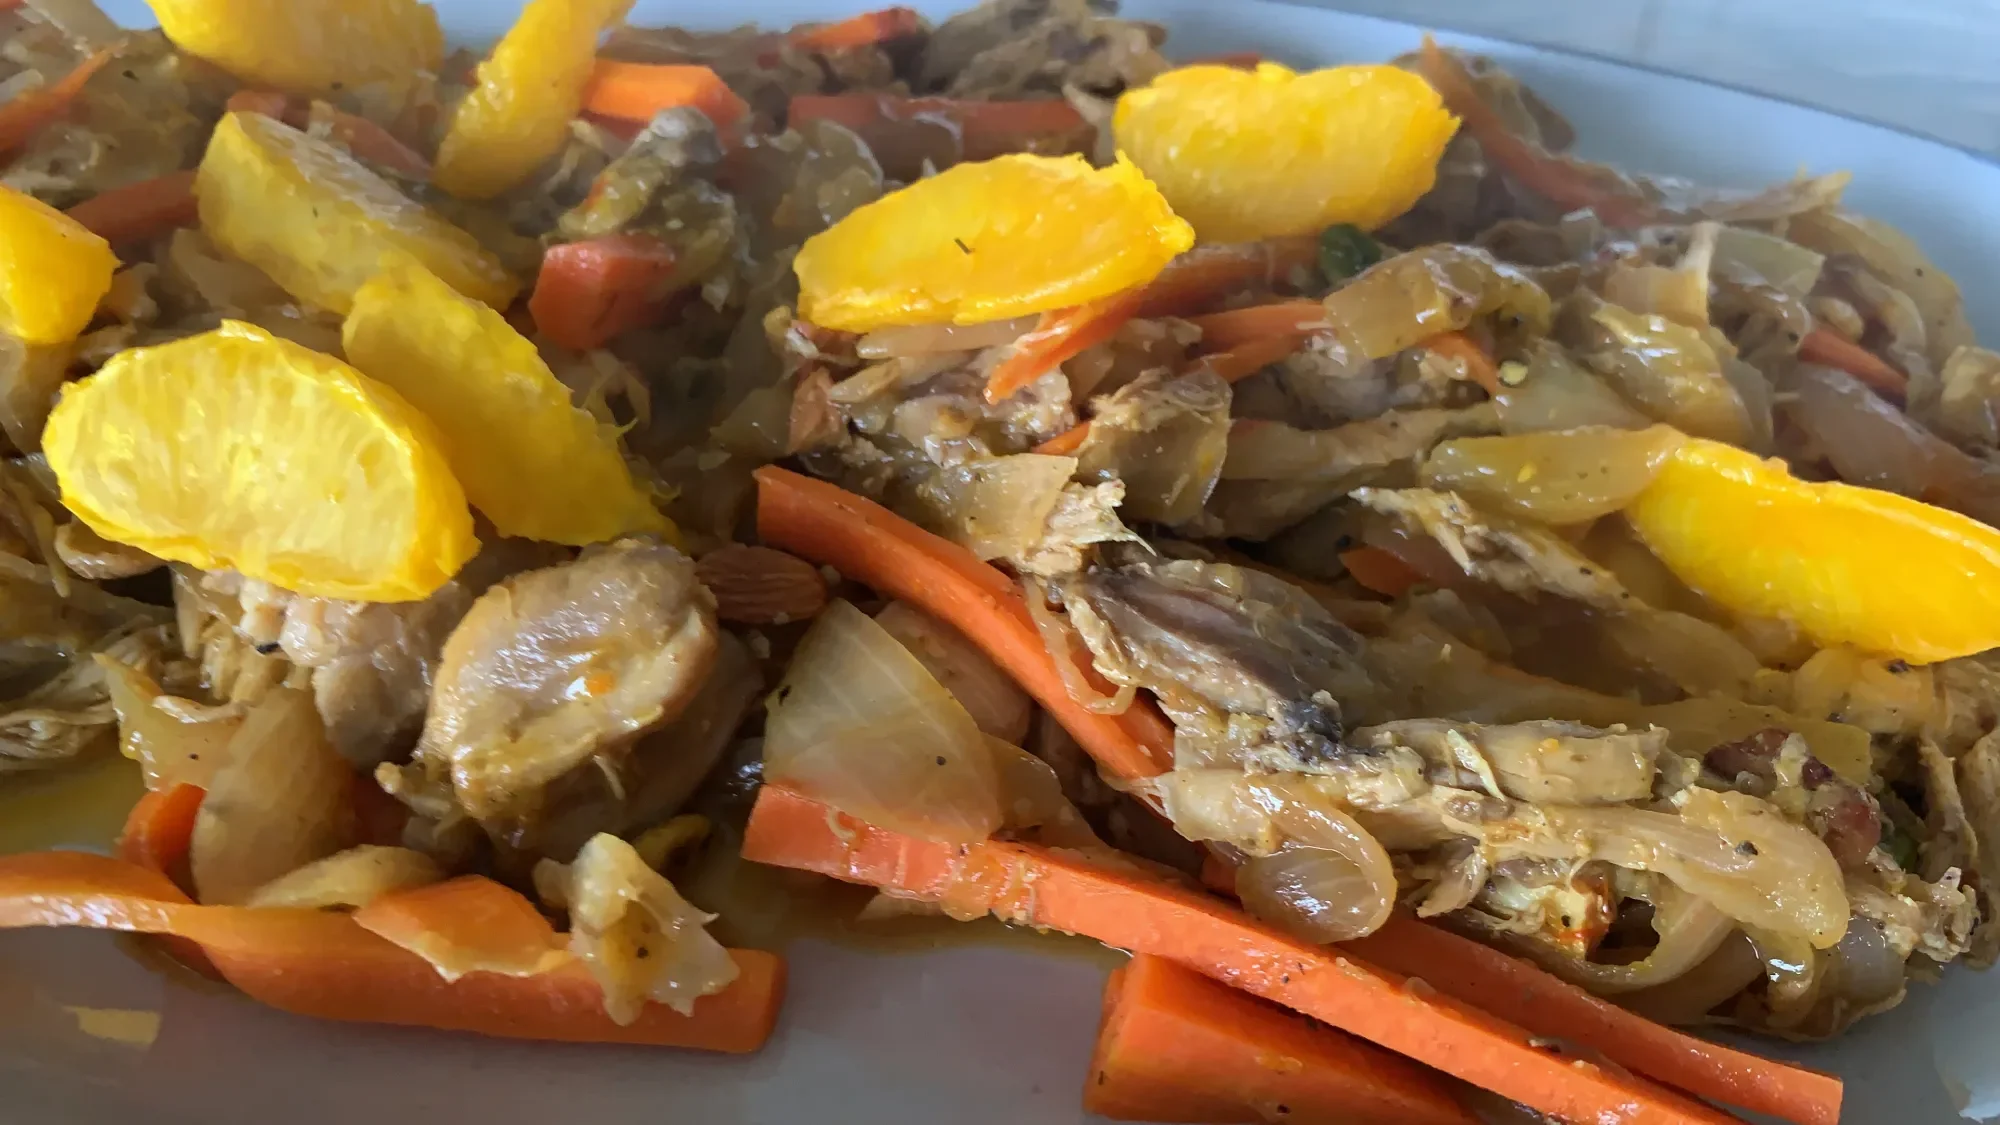
Orange Chicken Koresh | Iranian Cooking
I do love adding sweet to savory and even like orange flavored Chinese chicken, but I didn't seem to like this dish quite as much. However, my 18-year-old son said it was the best chicken I ever made. So the following day, I made the recipe again and cut down on the orange accents.
-
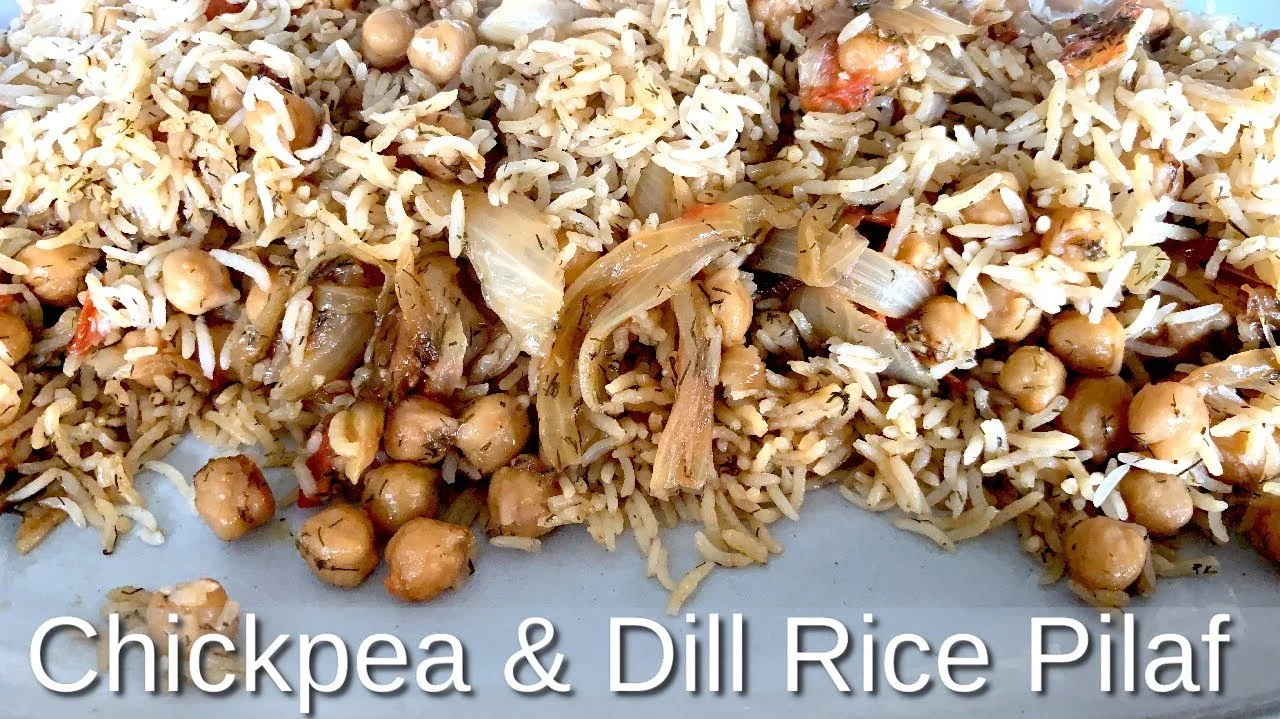
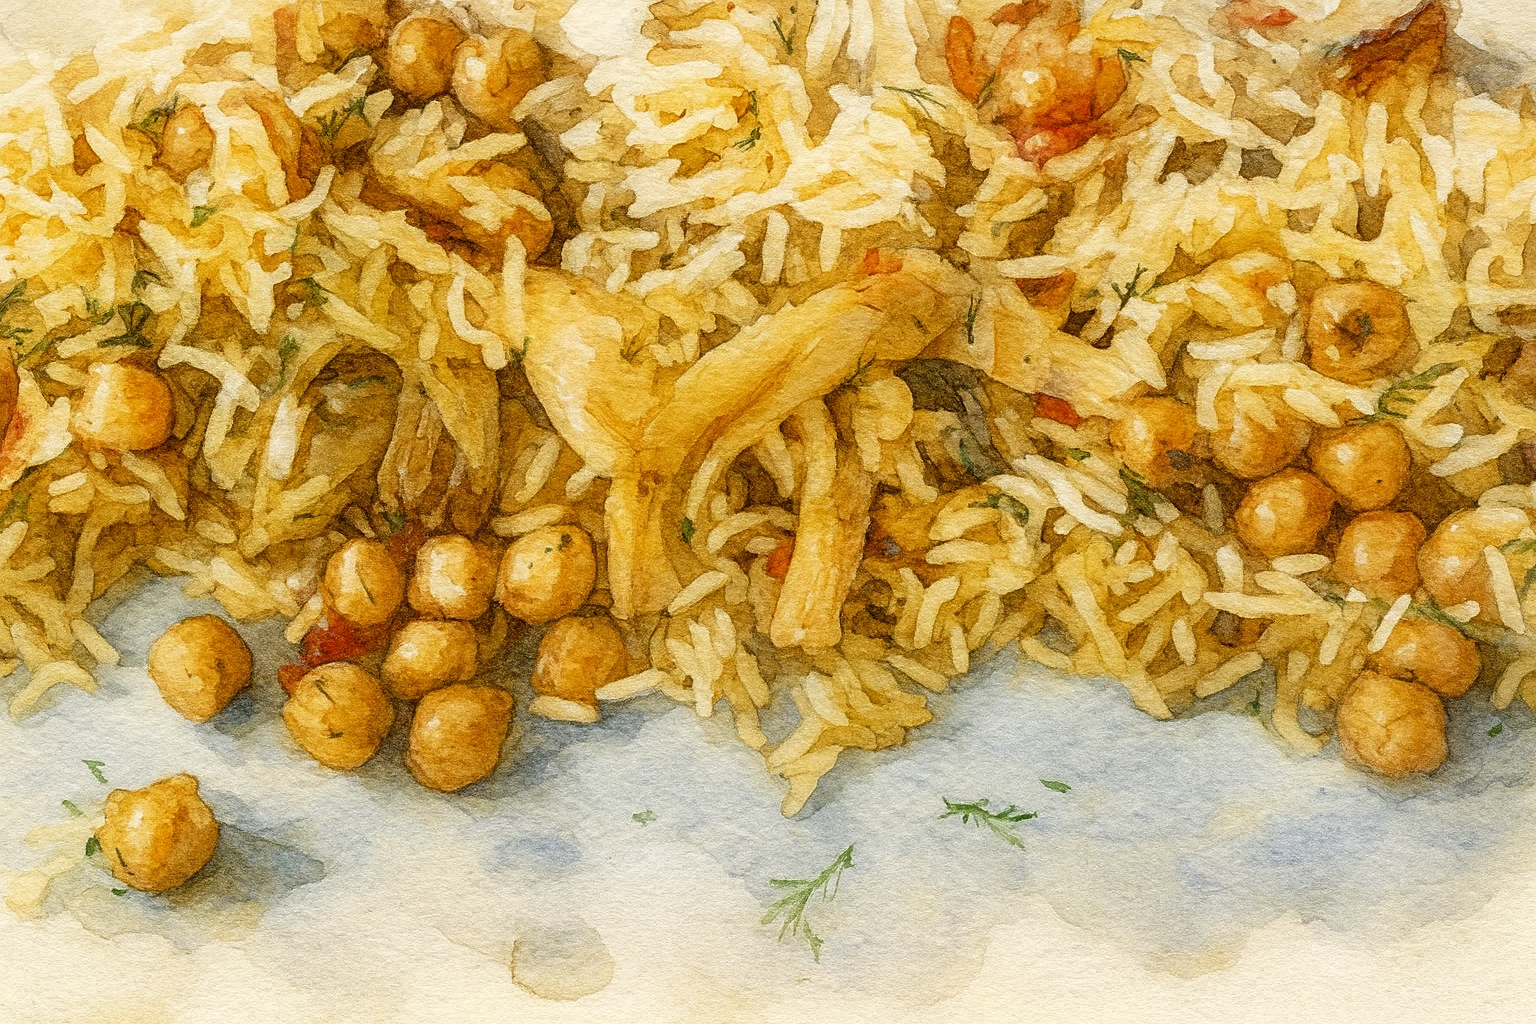
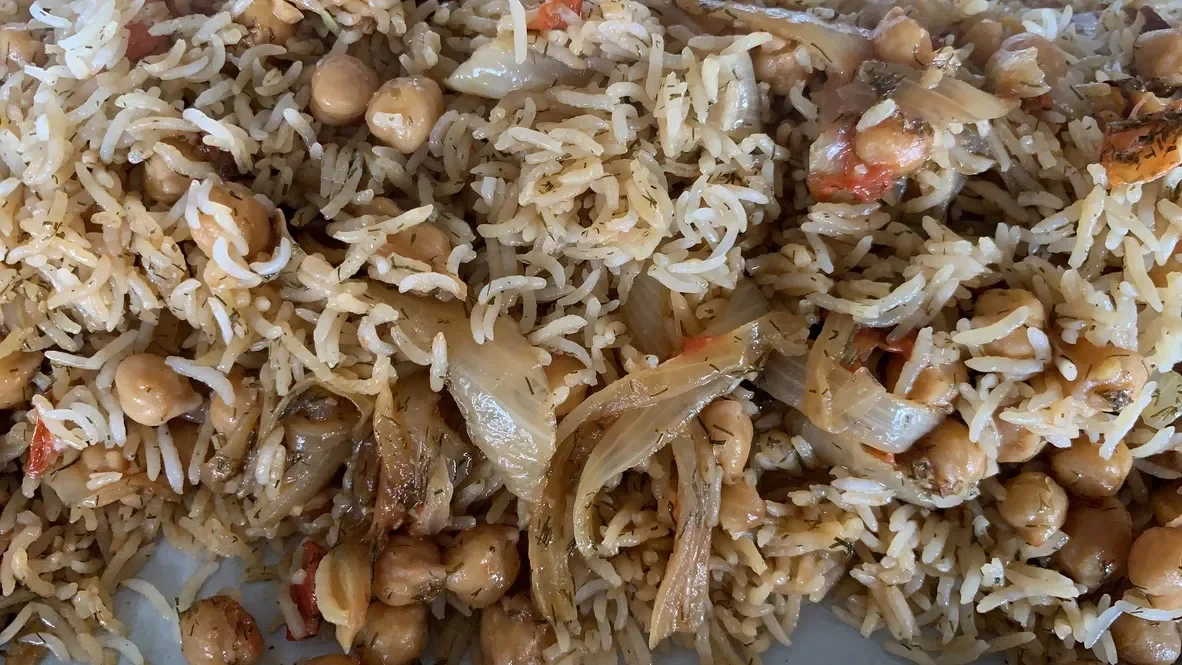
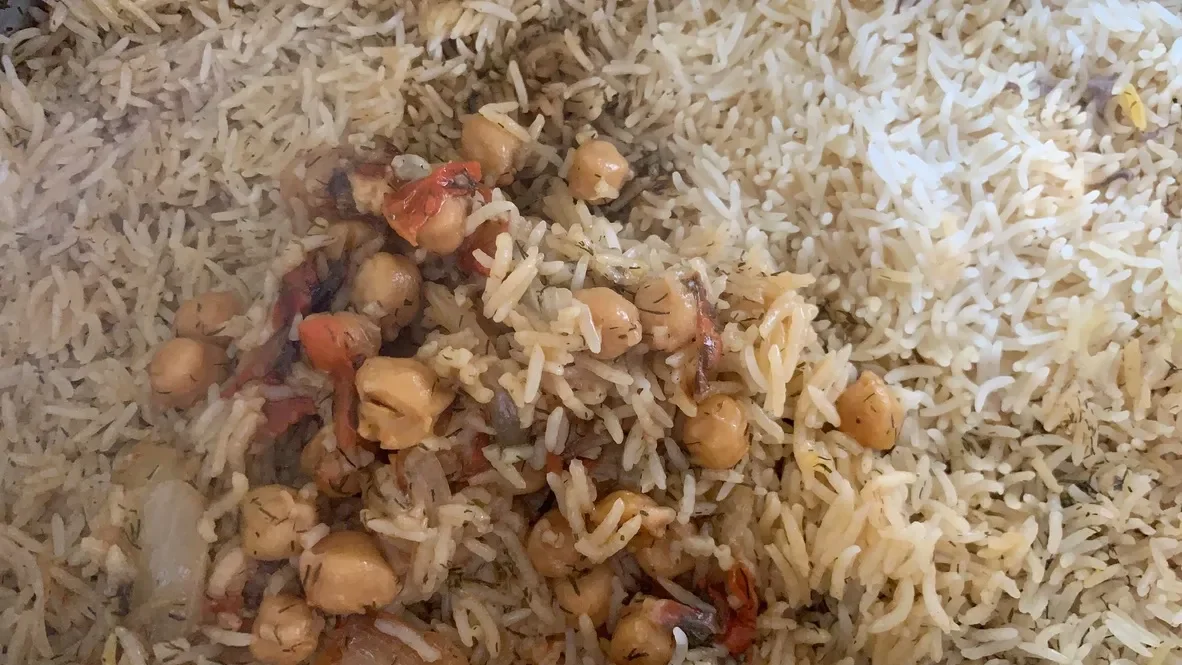
Chickpea and Dill Rice Pilaf | Iranian Cooking
We paired it with orange chicken koresh which is a sweet dish which probably would be better balanced with a plain rice dish, but my children loved the combination. Both recipes are from the book The Silk Road Gourmet by Laura Kelley
-
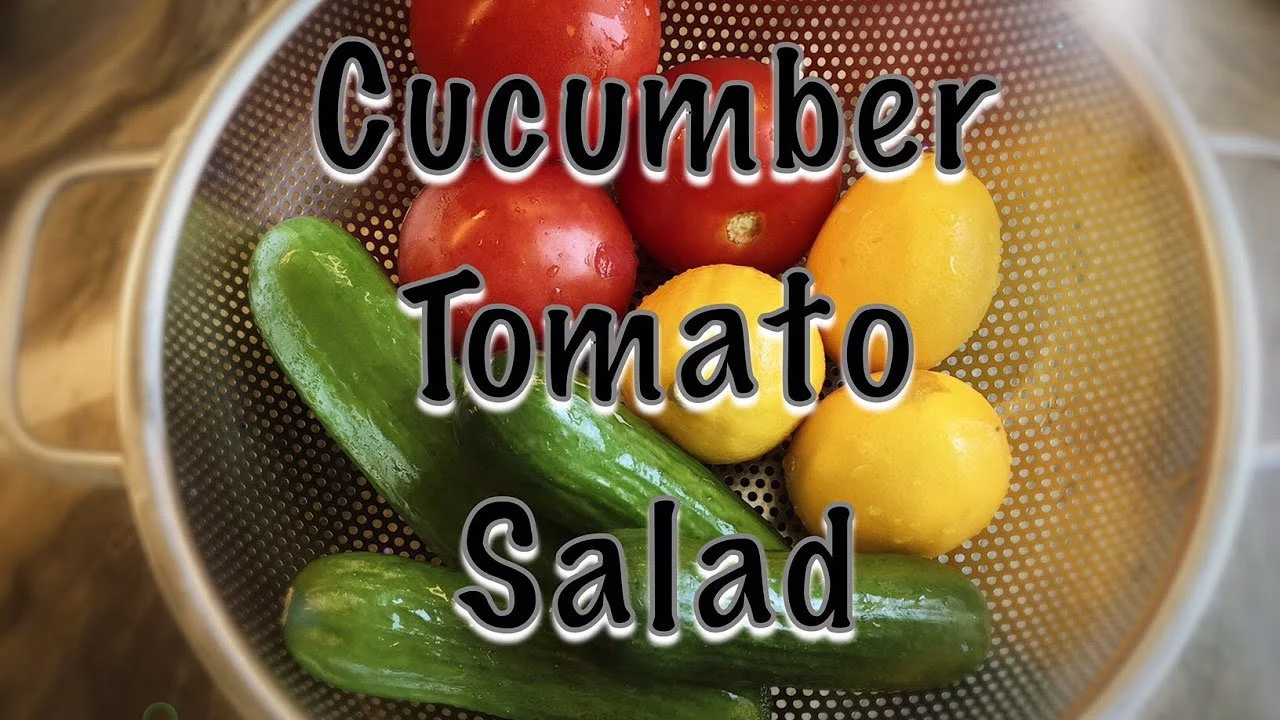
How to make Cucumber Salad | Persian Recipe
This is one of the most refreshing salads you'll ever taste! What I love about Persian food is that the ingredients are simple, flavorful and nourishing. Salad Shirzi or Cucumber Salad as I like to call it accompanies many Persian meals.
-
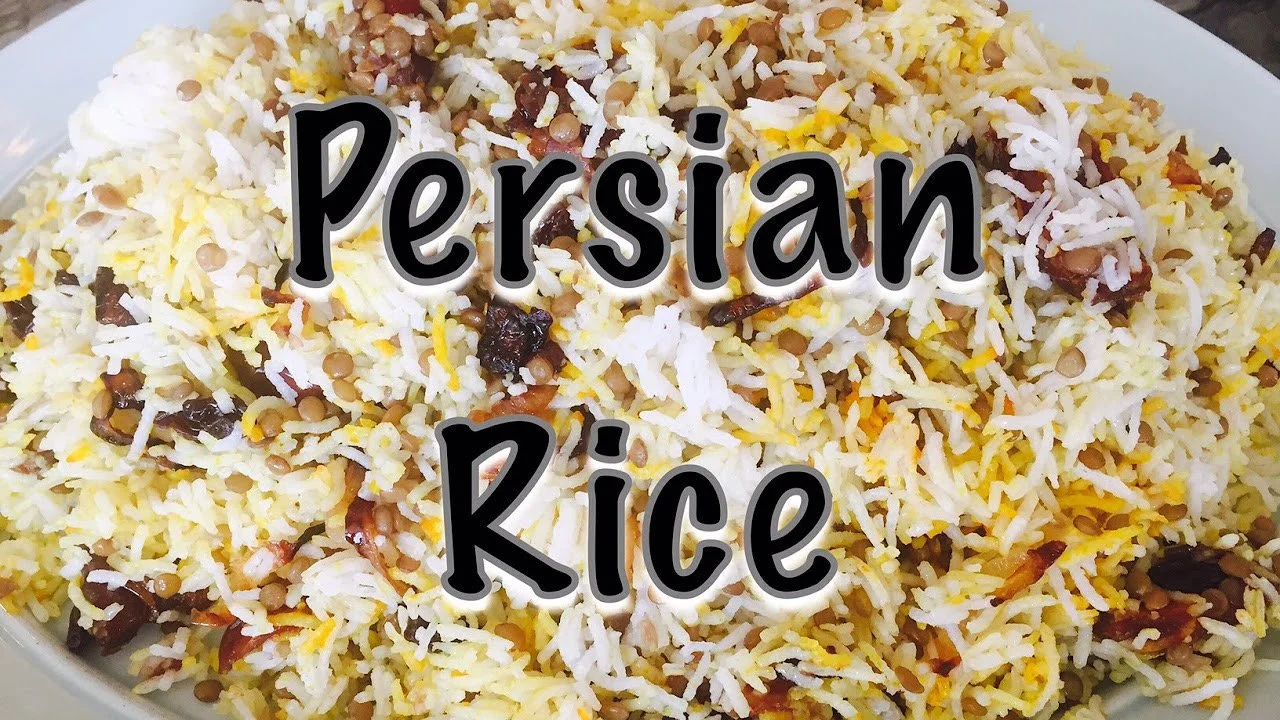
How to Make Persian Rice | Adas Polo
This has got to be the best tastiest rice in the world!! I'm not a fan of rice, but this is one rice dish, I'll gladly eat. Packed with dates, currants, lentils and fried onions, what's not to love?! I season mine with olive oil, grapeseed oil, salt and saffron. Occasionally if I make a whole roasted chicken to go along with this rice, I'll add my secret ingredient: pan drippings!
-
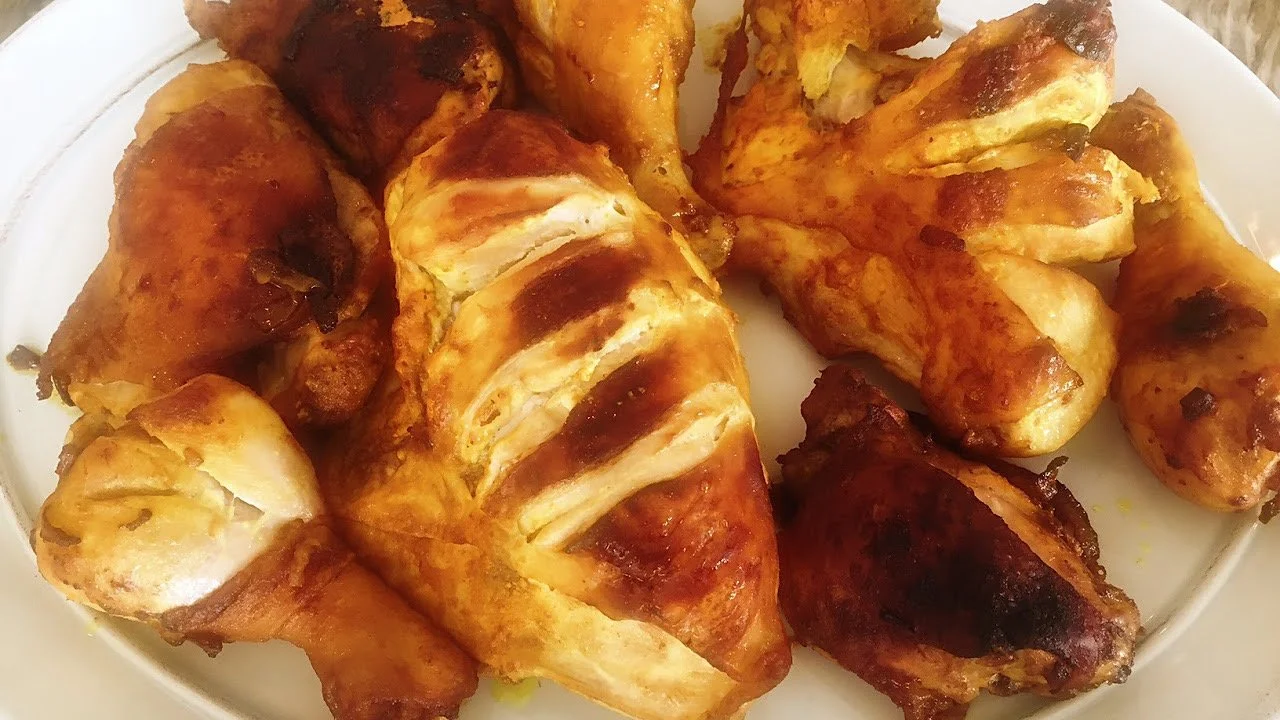
Turmeric Chicken for Adas Polo | Persian Recipe
Did you know turmeric is so good for you? Aside from being an antioxidant, it's full of other other benefits for your body and brain. I tend to overdo my turmeric consumption, and this is one chicken recipe that's full of it! This chicken dish perfectly accompanies Adas Polo, Zeresh Polo and Baghali Polo.
-
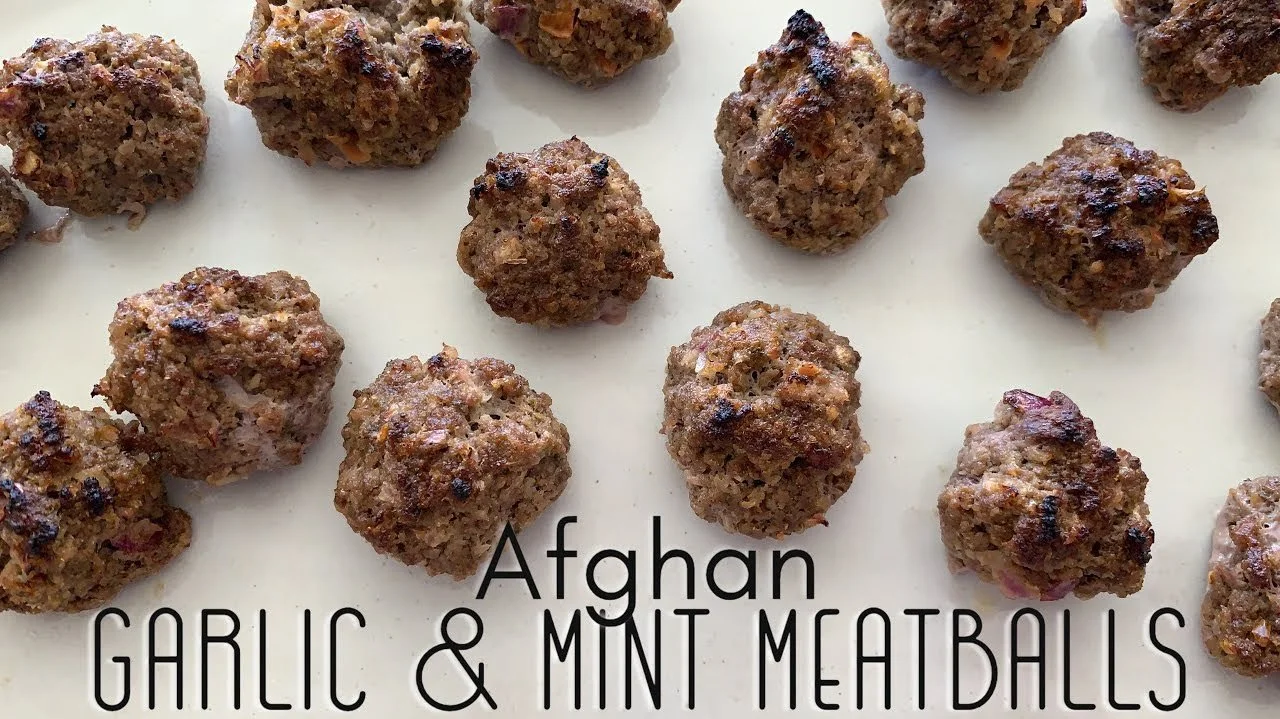
How to Make Garlic and Mint Meatballs | Afghan Meatballs
This recipe is significant. It's marks the point when we have had the most success with a cookbook. That cookbook is The Silk Road Gourmet by Laura Kelley. When putting together our history units, I like to find regional cookbooks as a way to include cooking foods from that culture, region or period in time.
-

Cardamom Oatmeal Raisin Chocolate Chunk Cookies
Cardamom Oatmeal Raisin Chocolate Chunk Cookies, that's a mouthful! And these cookies are worth it. I love how unique they are, for me that is, as we settle into sugar cookies, chocolate chip or white chocolate chip cocoa cookies.
-
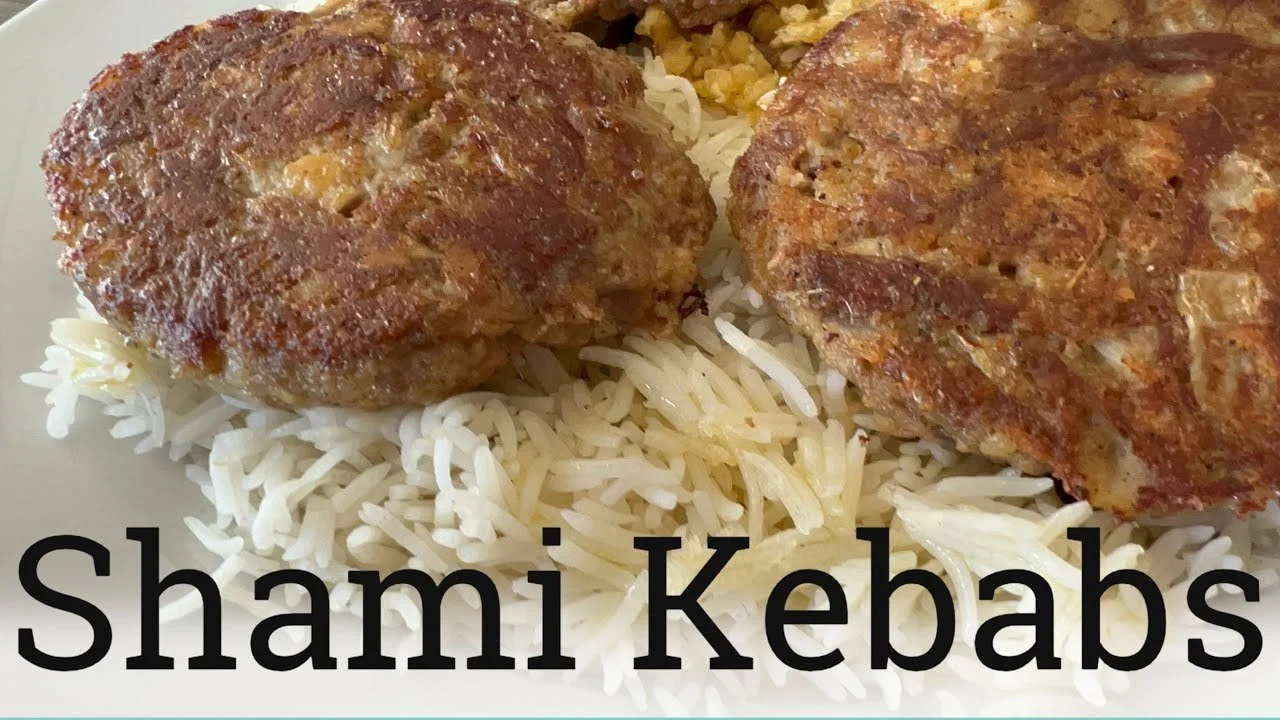
Shamee Kebabs | Indian Foods
I made a huge batch of shami kebabs! You can cut this recipe down quite a bit, but whenever I make these, because they are so labor intensive to begin with, I make a huge batch and freeze them for easy meals.
-
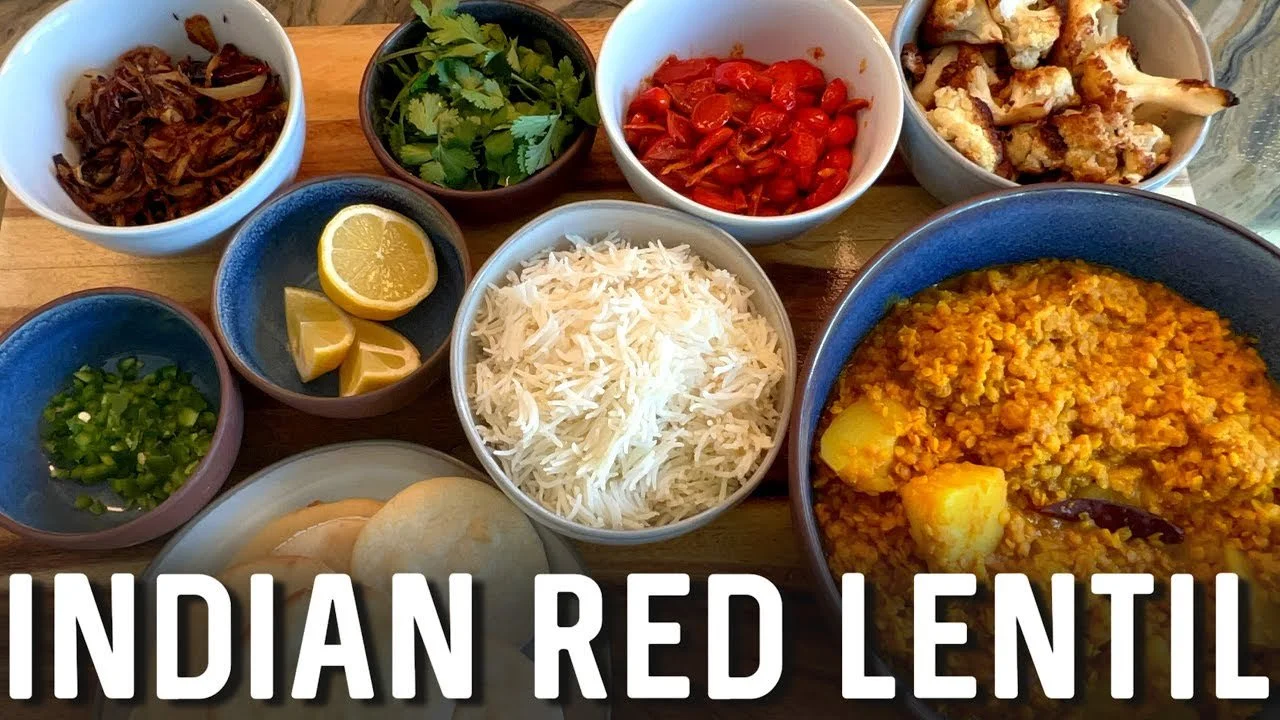
Indian Red Lentil Daal | Dahl Recipe
Are you looking for a tasty, filling vegan meal? Try Indian Daal! It's fast (if you use my fast recipe), nutritious and delicious. For this recipe, I included many toppings and garnishes we love to include when making Daal, but only if Daal is going to be the main dish rather than a side dish because all these extras that I show take a long time to make.
-

How To Make Samosas
So the thing is that I only make these during Ramadan, but really, you can make them any time of year. This year, I didn't make them once for Ramadan. And now that Ramadan is over, I'm making up for lost time and turning out samosas like it's nobody's business.
-
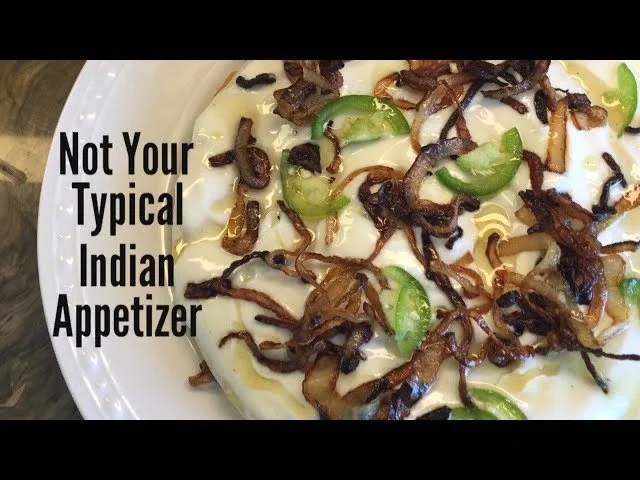
Yogurt Tortilla| Hyderabadi Appetizer
Dahi Pulki or Yogurt Tortilla is a family favorite, especially during Ramadan. We like to break fast with fruit chaat and this layered tortilla dish that's thick with yogurt and fried onions. While this appetizer is a Ramadan family favorite of ours, you could really have it any time of year.
-
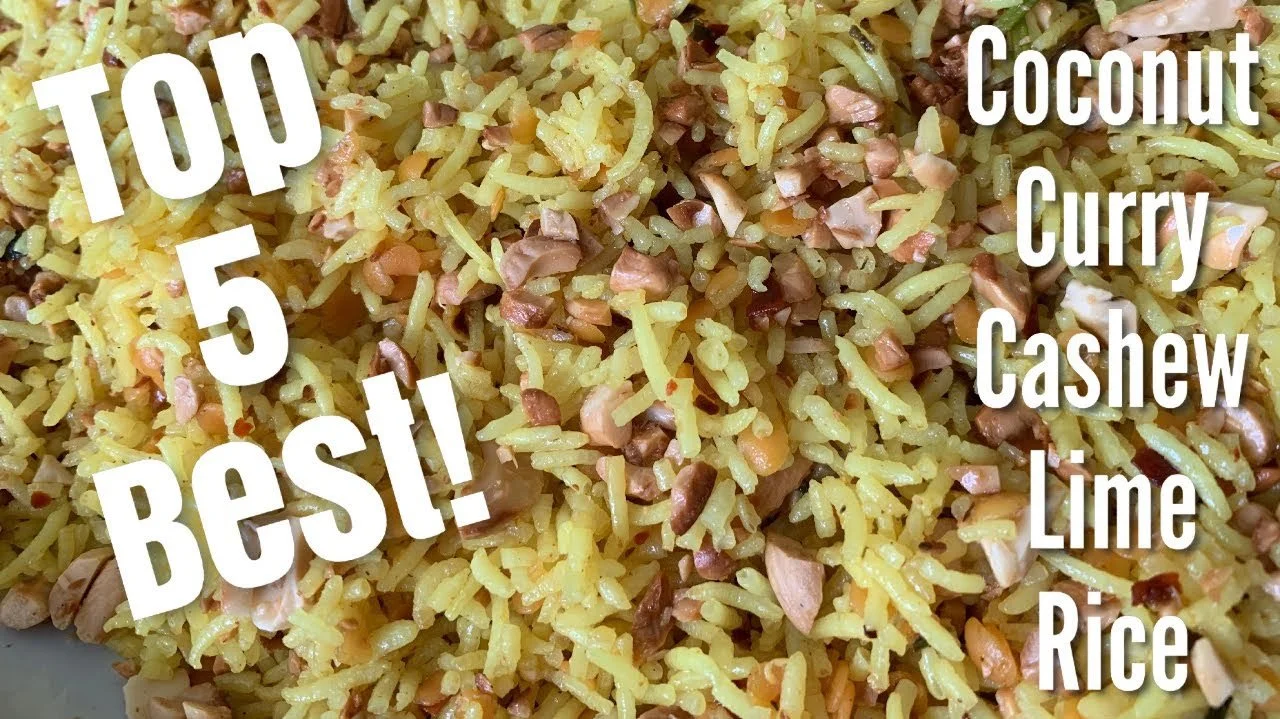
Coconut, Cashew & Curry Rice with Lime
I'm may not be a fan of rice by my family is! Being married to an Indian, I quickly learned how to make the perfect basmati rice from my mother-in-law. Thereafter, I sort of stalled in my skills for rice making and for years made simple basmati rice.
-
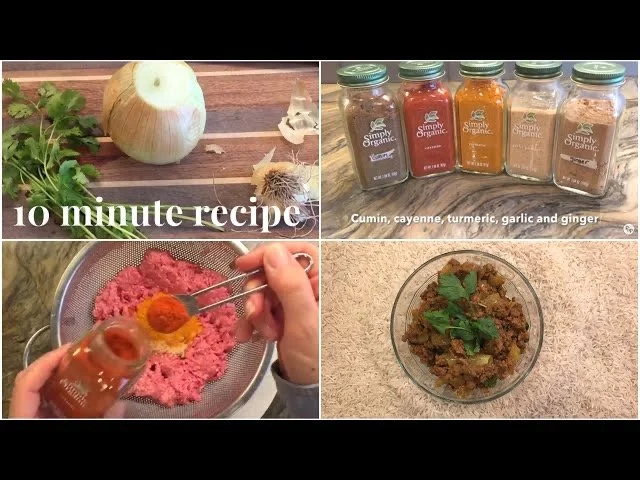
Keema | INDIAN GROUND BEEF | 10 Minute Recipe
Description goes here -

Indian Fruit Salad | Fruit Chaat
If you've never tried fruit salad with spices, I encourage you to try this. You fruit will get a kick out of it, and so will you! You'll impress your taste buds with cayenne, salt and pepper mixed with sugar and the sweetness of seasonal fruit and fresh juice.
-
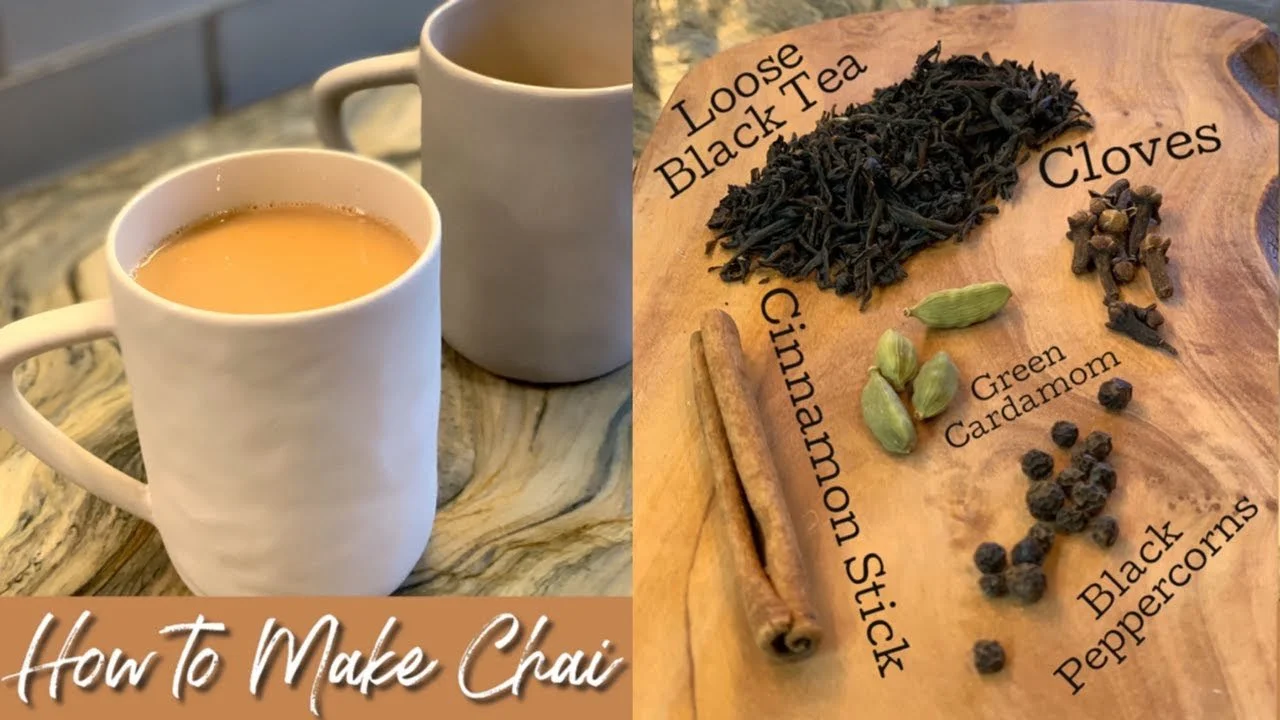
How To Make Chai Tea | Indian Tea
I've been both praised and despised for my tea. Praised because it always tastes so good, cursed because it's so strong that my tea drinkers are usually up until the wee hours of the morning, tossing and turning because they can't sleep.
-
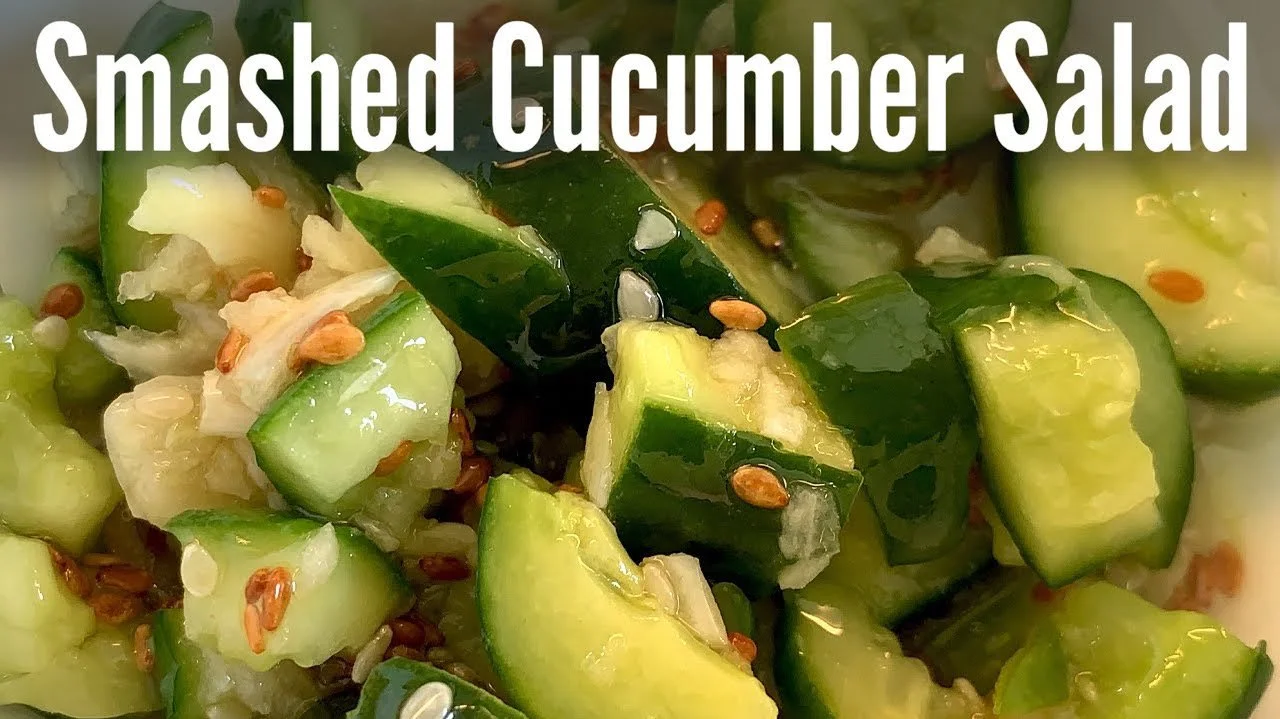
Smashed Cucumber Salad | Garlic and Sesame Seeds
I've been on the hunt for a cucumber salad recipe that tastes just like the one I love from a local Shabu Shabu restaurant. While this one is so tasty, it's not quite the same. My 10-year-old daughter, however, loved it soooo much and asks me to make it everyday.
-

How To Make Lebanese Meat Pies
These Lebanese meat pies were an immediate winner in our home. Everyone loved them and in the years since we've learned how to make them, we still do with some modifications. The dough is a dense, dry and flavorful dough that bakes up smooth and delicious.
-

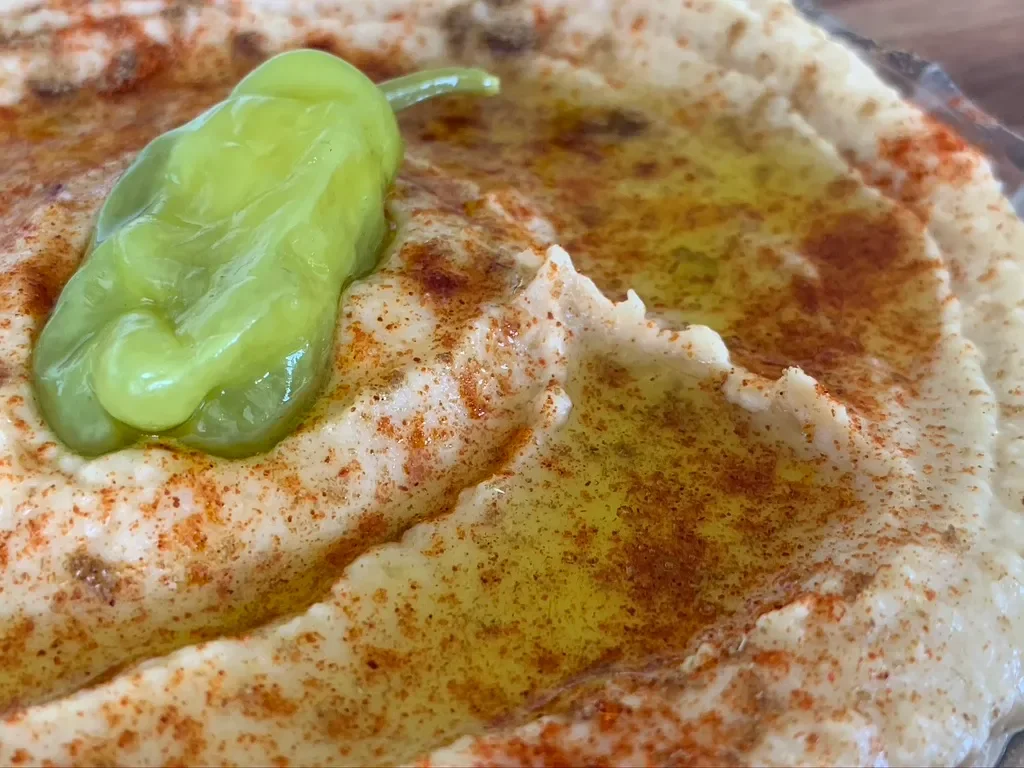
How to Make A Hummus Chicken Bowl
This recipe for a chicken hummus bowl was such a winner in our home, we have since made it often with great success! One thing that will make preparing this dish even faster is to use store bought hummus or make it from a can. I make mine from scratch so I have to plan ahead when I made this.
-
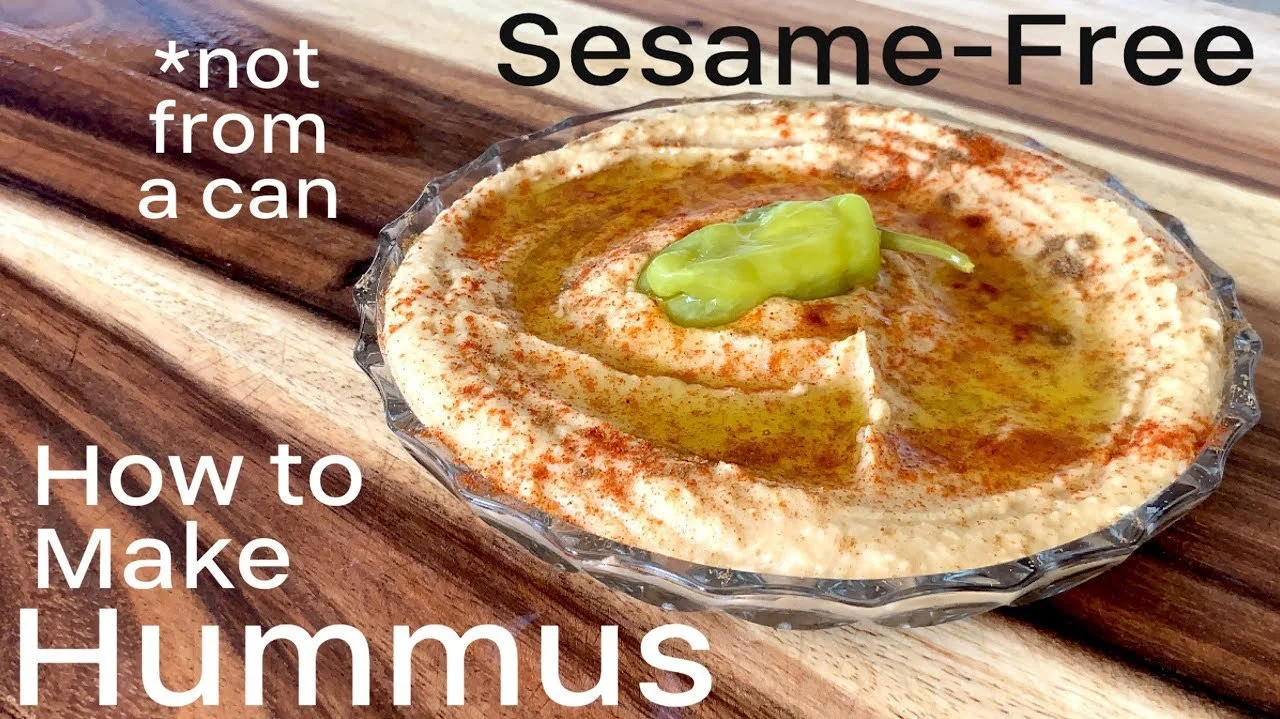
How to Make Hummus
This isn't your traditional hummus recipe. For one thing, you'll find that I didn't use tahini. While I love tahini and add it often to our homemade hummus, I omitted it this time, and it tastes just as good! Hummus as a food is generally pretty safe for most known allergens.
Silk Road Resources
Silk Road Main Lesson Block
How to Make Your Own Unit Study
Our Silk Road unit has been underway for a couple years now. Each time we dive into it, it grows. Now this history period, that began with the Middle Ages in Medieval Europe, has grown to include our Africa Main Lesson Block which focuses on the Empires of Ghana, Mali and Songhai (900s-1400s), North Africa main lesson block on Ibn Battuta, The Travels of Marco Polo and the Great Khans of Mongolia, Ancient and Middle Ages China, The Silk Road and the Islamic Empire (600s-1500s). No wonder what started out as a one year unit study grew into a multiple year endeavor. I like to start out our units with a haul video, a how we put this unit together video and a chalk drawing video. The chalk drawing sets the stage for the unit and is often the only drawing we’ll have up for the unit. For this chalk drawing, I’m using Sargent Art Square chalk pastels from Blick Art Material. Drawing inspiration comes from the book The Silk Road, and I’m drawing on my 4’x6′ chalkboard by Ghent. While I really dislike this chalk drawing, I didn’t have the desire to redraw it. I don’t like the colors, lack of detail and yellow accents. In the end, the books I put on display in front of the chalkboard covered most of the caravans. and the map was helpful, but not referred to as much as I hoped. The following year, however, I drew several smaller chalk drawings for our continued Silk Road unit as this large chalkboard held our math main lesson block drawing.
Check out the complete Ibn Battuta and North Africa Unit Study playlist, the China Unit Study playlist, the Silk Road Unit Study playlist, the Islamic Empire Unit Study playlist, and the Marco Polo & Genghis Khan Unit Study playlist as all these unit studies work well together.


Lesson Plans
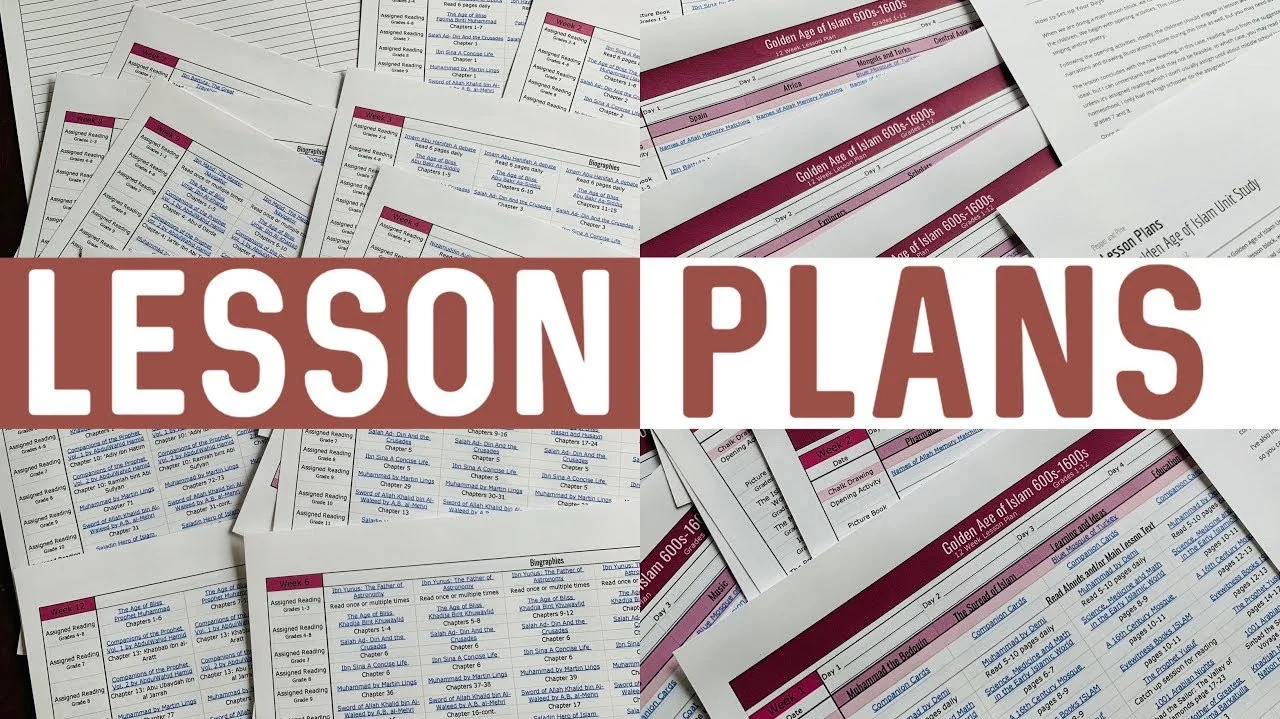
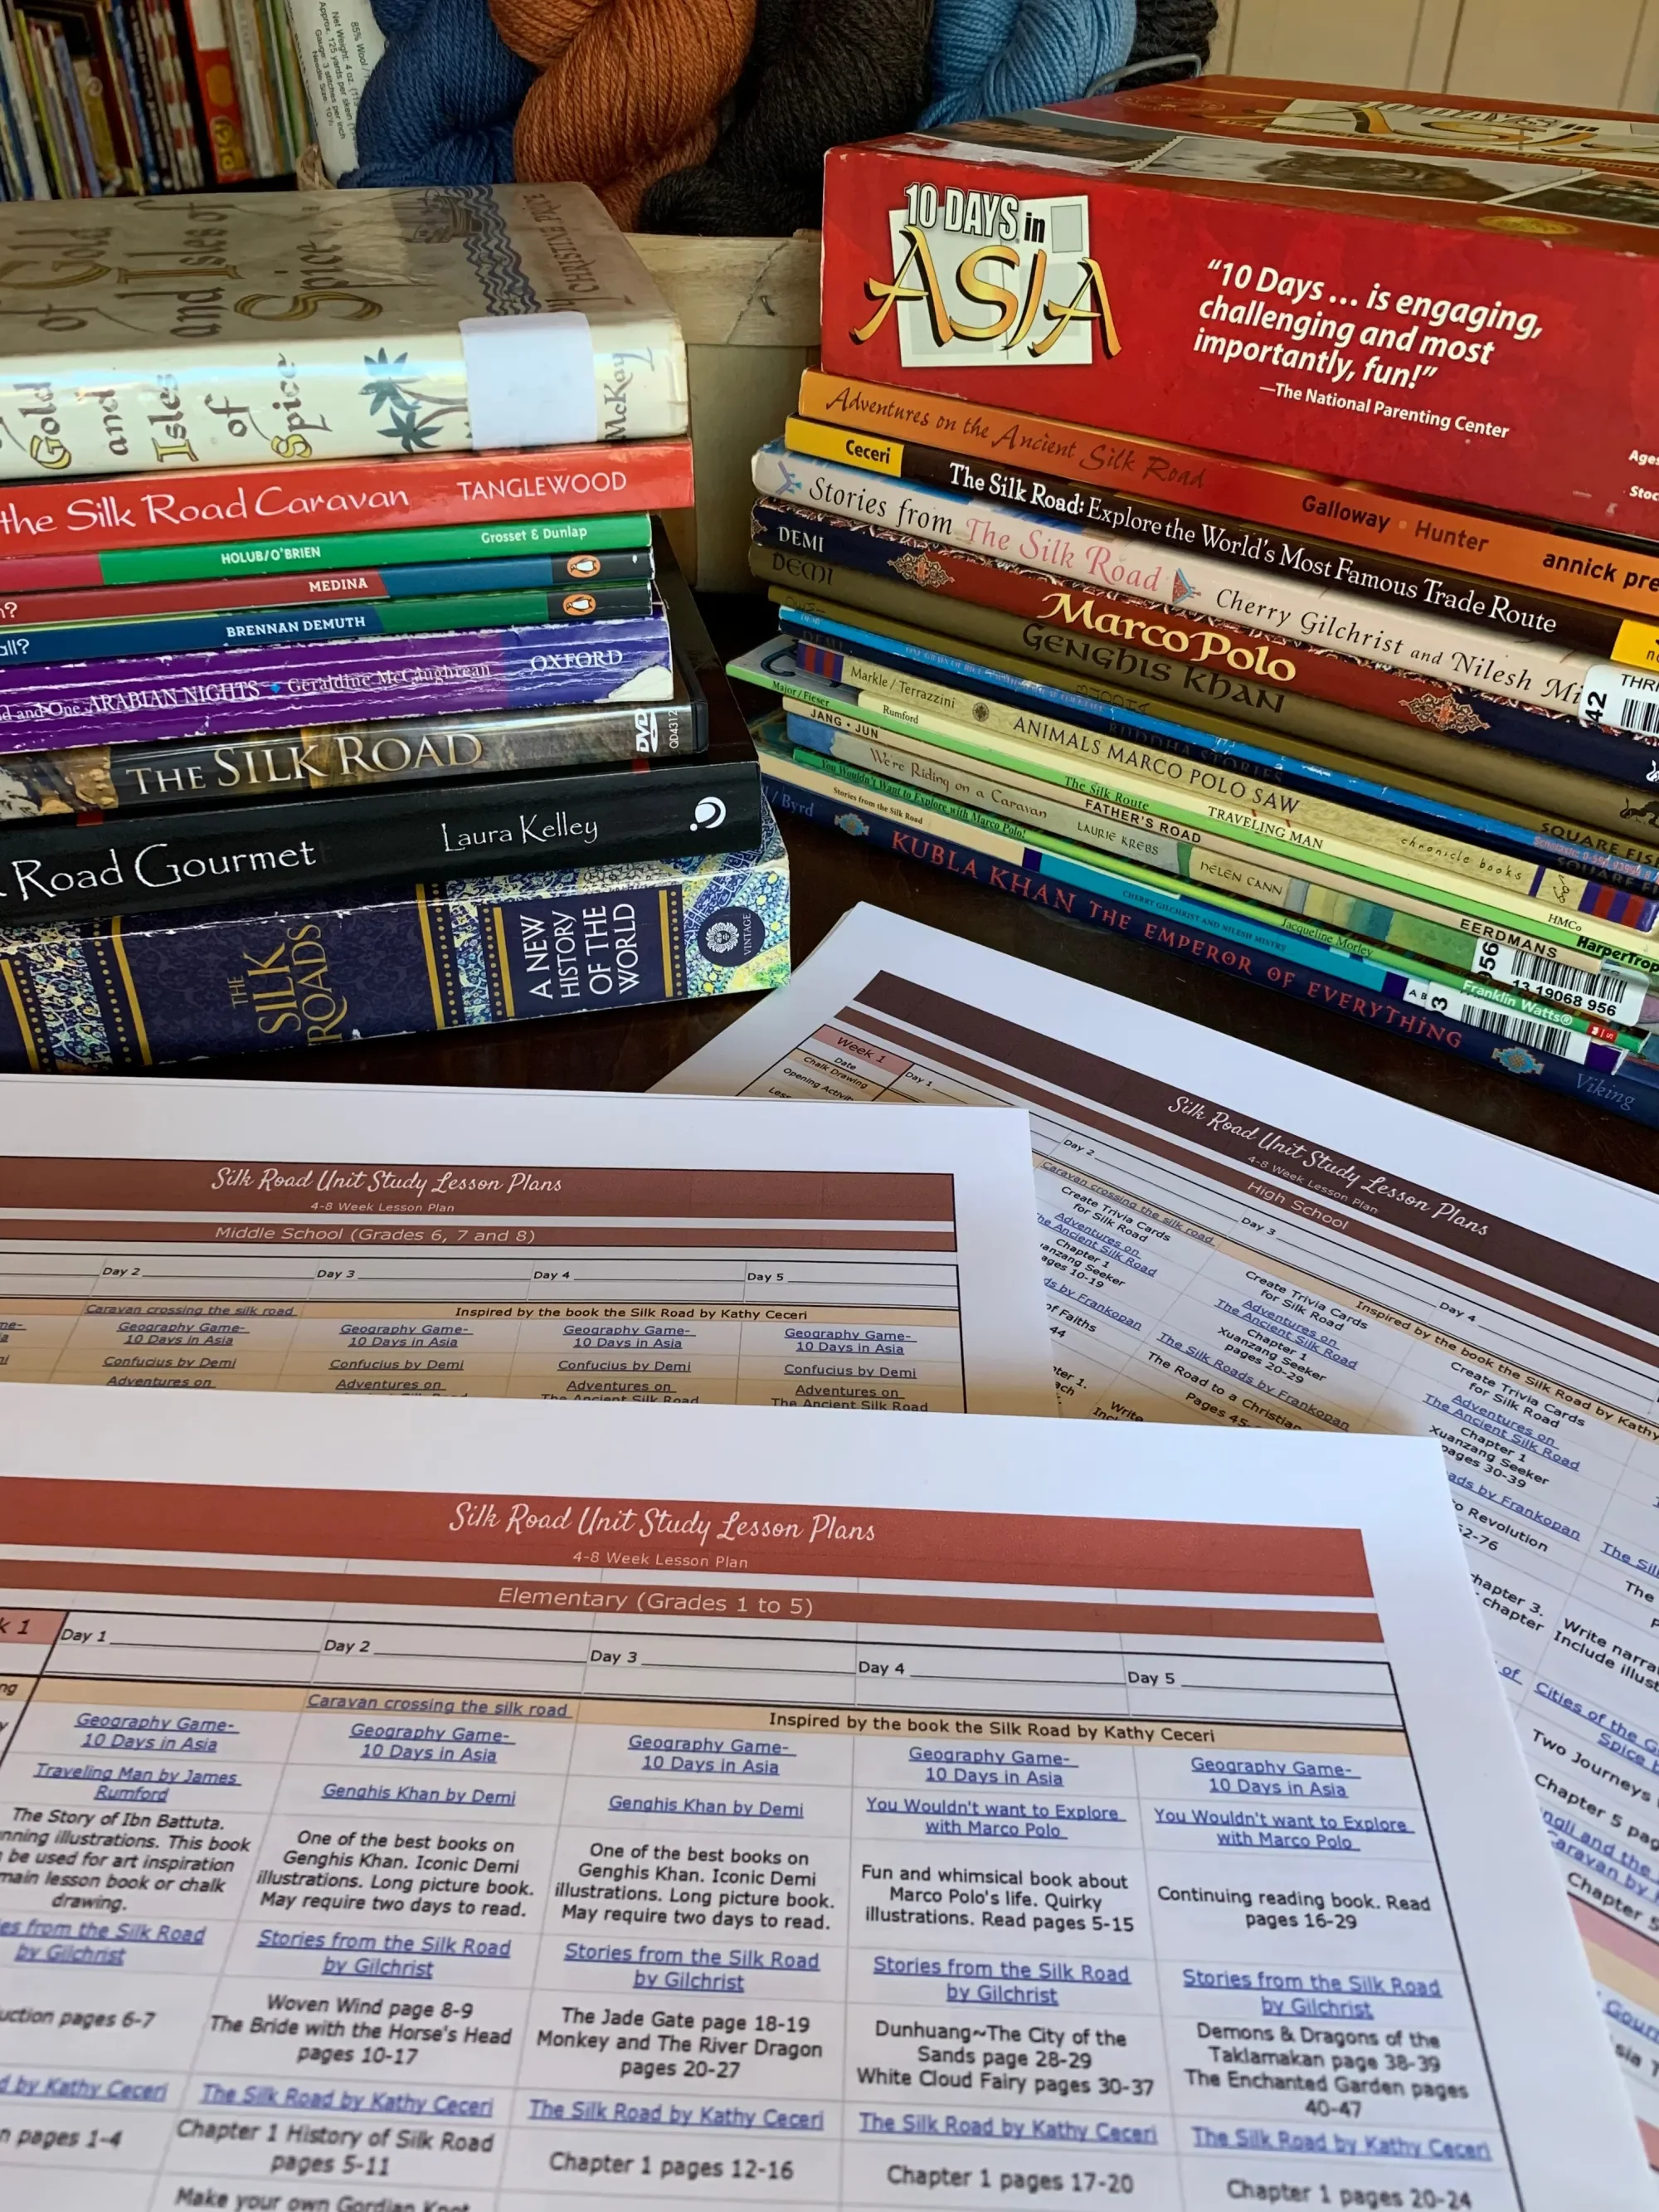
Lesson Plans! Do you do them? Do you want them done for you? I share a little of how I lesson plan and walk you through 5 lesson plans that are now available on my website. Our main lesson blocks and unit studies are book rich which means you don't need to buy a curriculum to do them, but you will need books. Many of these books can be found at the library, and if not, I share with you how you can swap out books and other resources for the materials you have. Each lesson plan comes with information on how to use the lesson plans, a bit about how I structure our unit studies and why I offer all grade levels in one lesson plan. I've included grade levels in case you want to focus on a particular level or on specific content, but since everything is included in one plan, you can easily mix and match resources to suit your needs.
Welcome to the Lesson Plans for The Golden Age of Islam Unit Study. When we initially decided to broaden our European Middle Ages main lesson block, we didn’t realize that it would become a 4 year extension! So far, what began as our Silk Road unit became multiple units as each subject area became its own unit. Currently we have units for The Silk Road, Ancient China, Mongolia, West Africa and The Travels of Ibn Battuta.
When putting together these lesson plans, I realized I had far too broad a range of books than could be contained in a short unit study dedicated to a 3-4 year grade range. Usually I am able to create lessons which work for multiple grades and student interests. This unit, however, includes material that’s best suited for high school level and adult so it doesn’t easily work for all grades.
To accommodate the material and grade range, I’ve made this unit 12 weeks long which would be best implemented in 3-4 week blocks throughout 3-4 times in a year or over multiple years in conjunction with other history lessons.
I’ve also included all the materials (books and kits), tutorials, projects and recipes for all 12 grades so you can mix and match the books and lessons you wish to use.
If books or kits are not available or you have other materials you wish to use, please make adjustments as you see fit. These lesson plans may be used as a guide for inspiration rather than a rigid course of lessons. Setting up the lessons in a weekly manner allows for flexibility in how you wish to do the lessons and in which order. The grade range offered is my own estimation, but you will find that your student doesn’t fit that range and you may wish to provide other lessons or modify the materials suggested.
Check out the complete Ibn Battuta and North Africa Unit Study playlist, the China Unit Study playlist, the Silk Road Unit Study playlist, the Islamic Empire Unit Study playlist, and the Marco Polo & Genghis Khan Unit Study playlist as all these unit studies work well together.


Creating an Inspiring Main Lesson Block
The Setting
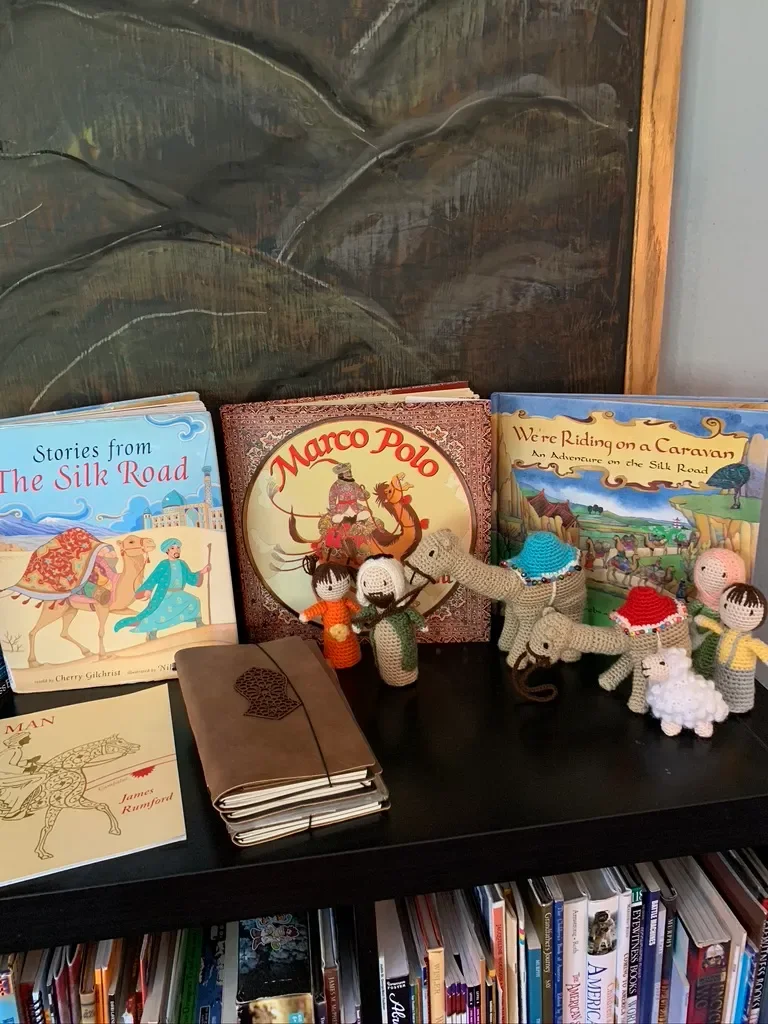
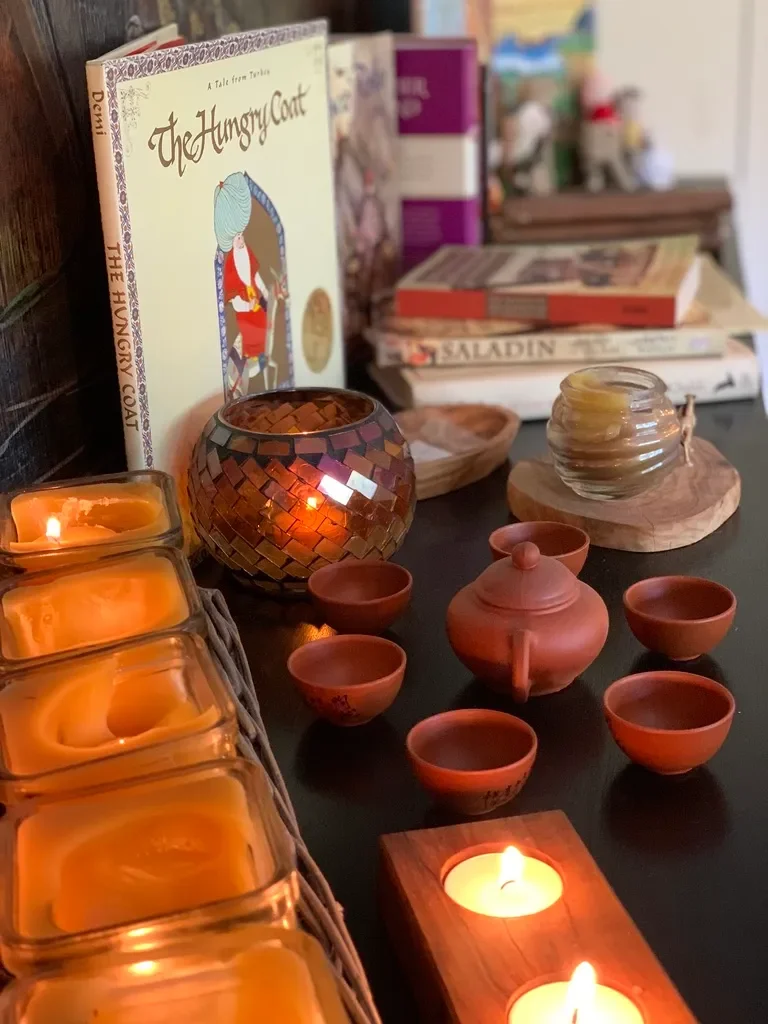
I love gathering our books to decorate the area next to our chalkboard for our unit studies and main lesson blocks. It feels festive, inviting and inspiring. When I first put these lessons together, I had all our “Silk Road” units together. I’ve since separated them because we ended up with so many resources. Check out the Instagram post on Setting the Scene for our Silk Road block.
New units call for new books, a fresh chalk drawing & an exciting display of items to spark the imagination & fuel the curiosity.
I only wish this inspiration would last the duration of the unit. Instead, our collective enthusiasm peaks the day I set up our new unit & steadily declines from there. It’s a bit frustrating because there inevitably comes a time when we struggle through the unit as if we are walking through waist deep water.
Our units are too long. In Waldorf education, units are about 3 weeks. Longer units that are 6-8 weeks, are broken up into two blocks (units). One block lasts for 3-4 weeks, then a different block is done in between before returning to the original block. Sometimes several blocks are done in between.
I’ve always resisted this method because it didn’t suit me. I’m the kind of person who dives into something & works through it until motivation, inspiration or unit comes to an end. I don’t like stopping something in the middle or while I’m still enjoying it.
I’ve learned a lot while attending the @liveeducation summer seminars. Here’s a gem & a story:
Formally end your lesson just like you formally begin your lesson. While Waldorf classroom teachers have to pay attention to the clock, homeschool teachers have to pay attention to the students. When we see the learning turn from inspirational & positive, we need to find a way to close the lesson. Even if the lesson was only 5 minutes. It doesn’t mean it’s done for the day, it’s just done for now. Resume the lesson after a 15 minute break. Formally open the lesson again. We have to get in tune with the difference between healthy struggle & unhealthy despair. I’ve not paid attention to the difference for nearly all my homeschooling journey. I need to learn how to stop on a high note. It preserves the love of learning & keeps them from experiencing educational fatigue.
I once heard the cofounder of the Live Education curriculum say he only has a bite or two of dessert, then stops. He never finishes. That’s some self discipline born from a desire to stop at the peak of enjoyment. Food for thought.
Check out the complete Ibn Battuta and North Africa Unit Study playlist, the China Unit Study playlist, the Silk Road Unit Study playlist, the Islamic Empire Unit Study playlist, and the Marco Polo & Genghis Khan Unit Study playlist as all these unit studies work well together.
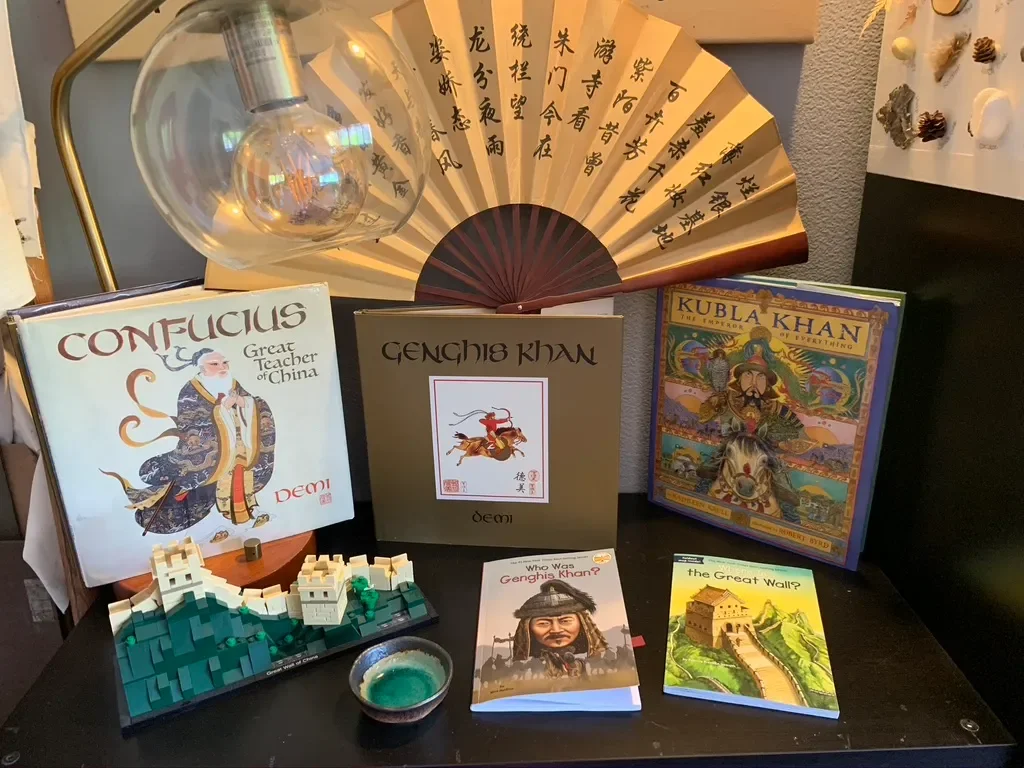
The Great Khans of Mongolia
Kubla Khan, Genghis Khan, The Great Wall of China
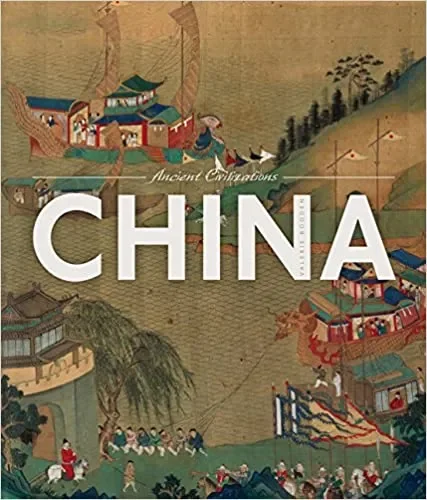
It’s not a history unit if you don’t talk about the people. After all history is His Story right? Her story is mixed in there, but is rarely the focus. While I have not made an effort to explore female historical figures, I think we do ourselves, our education and our children a disservice when we don’t include their stories. One book series I recently found that does a fair job exposing what it’s like to be a girl and a boy in history is the “If You Were Me and Lived in…Ancient China” by Carole P. Roman. There are several in this series and what I like is seeing the difference in what kind of life you would have depending on whether you were a girl or a boy, or woman or man, or rich or poor. For our Ancient China and Silk Road unit, we did a mini explorative unit on Genghis Khan, Kublai Khan and Marco Polo. Other notable biographies specifically on Chinese figures would be ZhengHe, Xuanzang, and Confucius as well as emperors from the different dynasties.
It’s not a history unit if you don’t talk about the people. After all history is His Story right? Her story is mixed in there, but is rarely the focus. While I have not made an effort to explore female historical figures, I think we do ourselves, our education and our children a disservice when we don’t include their stories. One book series I recently found that does a fair job exposing what it’s like to be a girl and a boy in history is the “If You Were Me and Lived in…Ancient China” by Carole P. Roman. There are several in this series and what I like is seeing the difference in what kind of life you would have depending on whether you were a girl or a boy, or woman or man, or rich or poor. For our Ancient China and Silk Road unit, we did a mini explorative unit on Genghis Khan, Kublai Khan and Marco Polo. Other notable biographies specifically on Chinese figures would be ZhengHe, Xuanzang, and Confucius as well as emperors from the different dynasties.
Check out the complete Ibn Battuta and North Africa Unit Study playlist, the China Unit Study playlist, the Silk Road Unit Study playlist, the Islamic Empire Unit Study playlist, and the Marco Polo & Genghis Khan Unit Study playlist as all these unit studies work well together.
Marco Polo Unit Study
When we first embarked on our Silk Road main lesson block, we thought we would simply add a few resources to complement our Middle Ages unit. Three years later and this little unit has grown into several deeply engaging main lesson blocks that span over 1000 years of history and half the world from North Africa to China. As we explored historical events and notable figures, we were whisked away into histories that deserved their own units rather than afterthoughts to a larger Middle Ages unit. As a result, we now have an African main lesson block which focuses on the empires of Mali, Ghana and Songhai, the king Mansa Musa and the time period of about the 900s to the 1400s.
We also did a unit on Ibn Battuta, Marco Polo and the Great Khans of Mongolia. That led us to China, so a unit on Ancient China naturally emerged, which led us full circle to the Silk Road and the expansion and diversifying of ideas, culture and religion, which naturally brought us back to a unit on Islam and the Islamic Golden Age which ended up being an extensive unit in and of itself. So when looking into the Silk Road, what originally was going to be books that complement the Golden Age of Islam or Ancient China, became its own independent and focused unit. In this unit we explore what it was like for merchants and caravans on the silk road. We discover the historical figures who traversed the silk road for the sake of religion, trade and conquering. We learn how this highway changed the course of history in profound ways and how through trade, more than just products were exchanged.
Check out the complete Ibn Battuta and North Africa Unit Study playlist, the China Unit Study playlist, the Silk Road Unit Study playlist, the Islamic Empire Unit Study playlist, and the Marco Polo & Genghis Khan Unit Study playlist as all these unit studies work well together.

Silk Road Chalk Drawing
Waldorf Inspired
Our Silk Road unit has been underway for a couple years now. Each time we dive into it, it grows. Now this history period, that began with the Middle Ages in Medieval Europe, has grown to include our Africa Main Lesson Block which focuses on the Empires of Ghana, Mali and Songhai (900s-1400s), North Africa main lesson block on Ibn Battuta, The Travels of Marco Polo and the Great Khans of Mongolia, Ancient and Middle Ages China, The Silk Road and the Islamic Empire (600s-1500s). No wonder what started out as a one year unit study grew into a multiple year endeavor. I like to start out our units with a haul video, a how we put this unit together video and a chalk drawing video. The chalk drawing sets the stage for the unit and is often the only drawing we’ll have up for the unit. For this chalk drawing, I’m using Sargent Art Square chalk pastels from Blick Art Material. Drawing inspiration comes from the book The Silk Road, and I’m drawing on my 4’x6′ chalkboard by Ghent. While I really dislike this chalk drawing, I didn’t have the desire to redraw it. I don’t like the colors, lack of detail and yellow accents. In the end, the books I put on display in front of the chalkboard covered most of the caravans. and the map was helpful, but not referred to as much as I hoped. The following year, however, I drew several smaller chalk drawings for our continued Silk Road unit as this large chalkboard held our math main lesson block drawing. Check out the Instagram post on this new Chalk Drawing for our Silk Road block.
Check out the complete Ibn Battuta and North Africa Unit Study playlist, the China Unit Study playlist, the Silk Road Unit Study playlist, the Islamic Empire Unit Study playlist, and the Marco Polo & Genghis Khan Unit Study playlist as all these unit studies work well together.
The Great Wall of China
Chalk Drawing
For this chalk drawing, I'm using Sargent Art Square chalk pastels from Blick Art Material and my small portable chalkboards (which can be mounted on the wall) from Paper Scissors Stone. The chalkboard I'm using for this chalk drawing measures 24"x 36" but it comes in smaller sizes. Of all the chalkboards I've used, I love these the most (be sure to get the same brand if you want the same results). I find the size to be suitable for most chalk drawings, and what's great about it is that you can have a few of them to work with rather than just one big one. It's really hard erasing chalk drawings, and this way, I can keep them longer and have multiples at the same time. I like the surface of these chalk boards because they allow for the best blending I've experienced so far (I've used 4 types of chalkboards including one with chalkboard paint). My Sargent Art Chalk pastels are vibrant and colorful and offer a great range of colors. I do need to use a damp washcloth to fully and cleanly remove all the chalk and residue but once the chalkboard dries, it's ready to go.
Check out the complete Ibn Battuta and North Africa Unit Study playlist, the China Unit Study playlist, the Silk Road Unit Study playlist, the Islamic Empire Unit Study playlist, and the Marco Polo & Genghis Khan Unit Study playlist as all these unit studies work well together.

Genghis Khan
Mongolian Chalk Drawing
When I initially put together our Silk Road main lesson block, I scheduled it for several weeks even several months. That was three years ago and we are still slowly making our way through this unit which has grown extensively to include Europe, Africa, Arabia and Asia. In this unit which focused on Marco Polo, Genghis Khan and other figures found along the Silk Road, I decided to add another chalk drawing as I circle back to this unit and continue it with a focus on the 1200s in Mongolia.
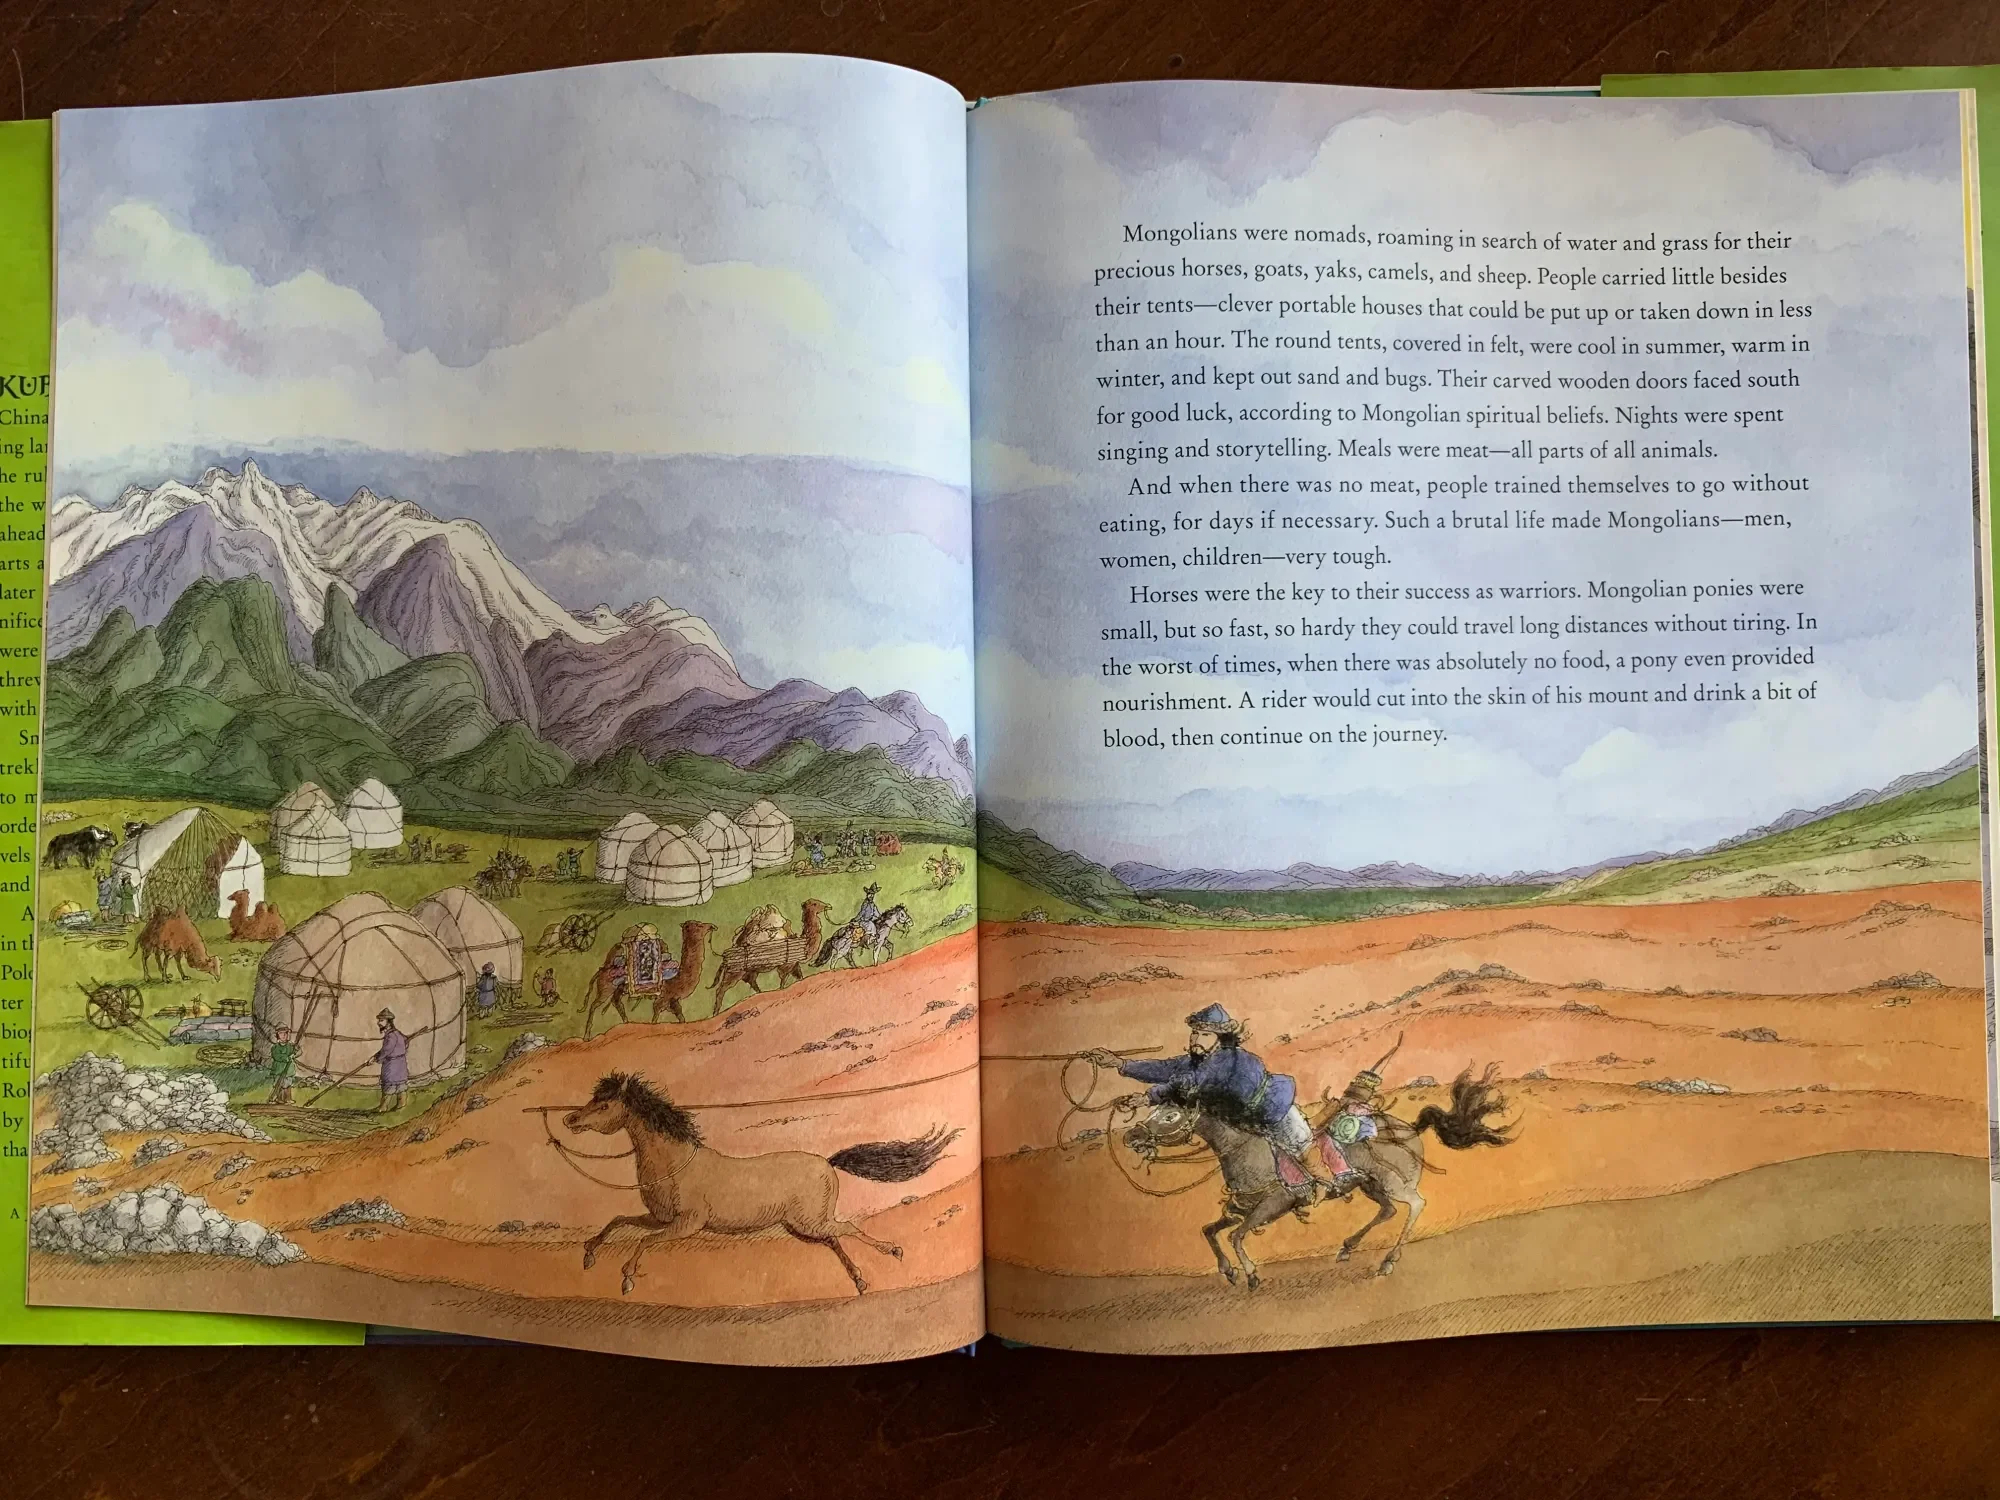
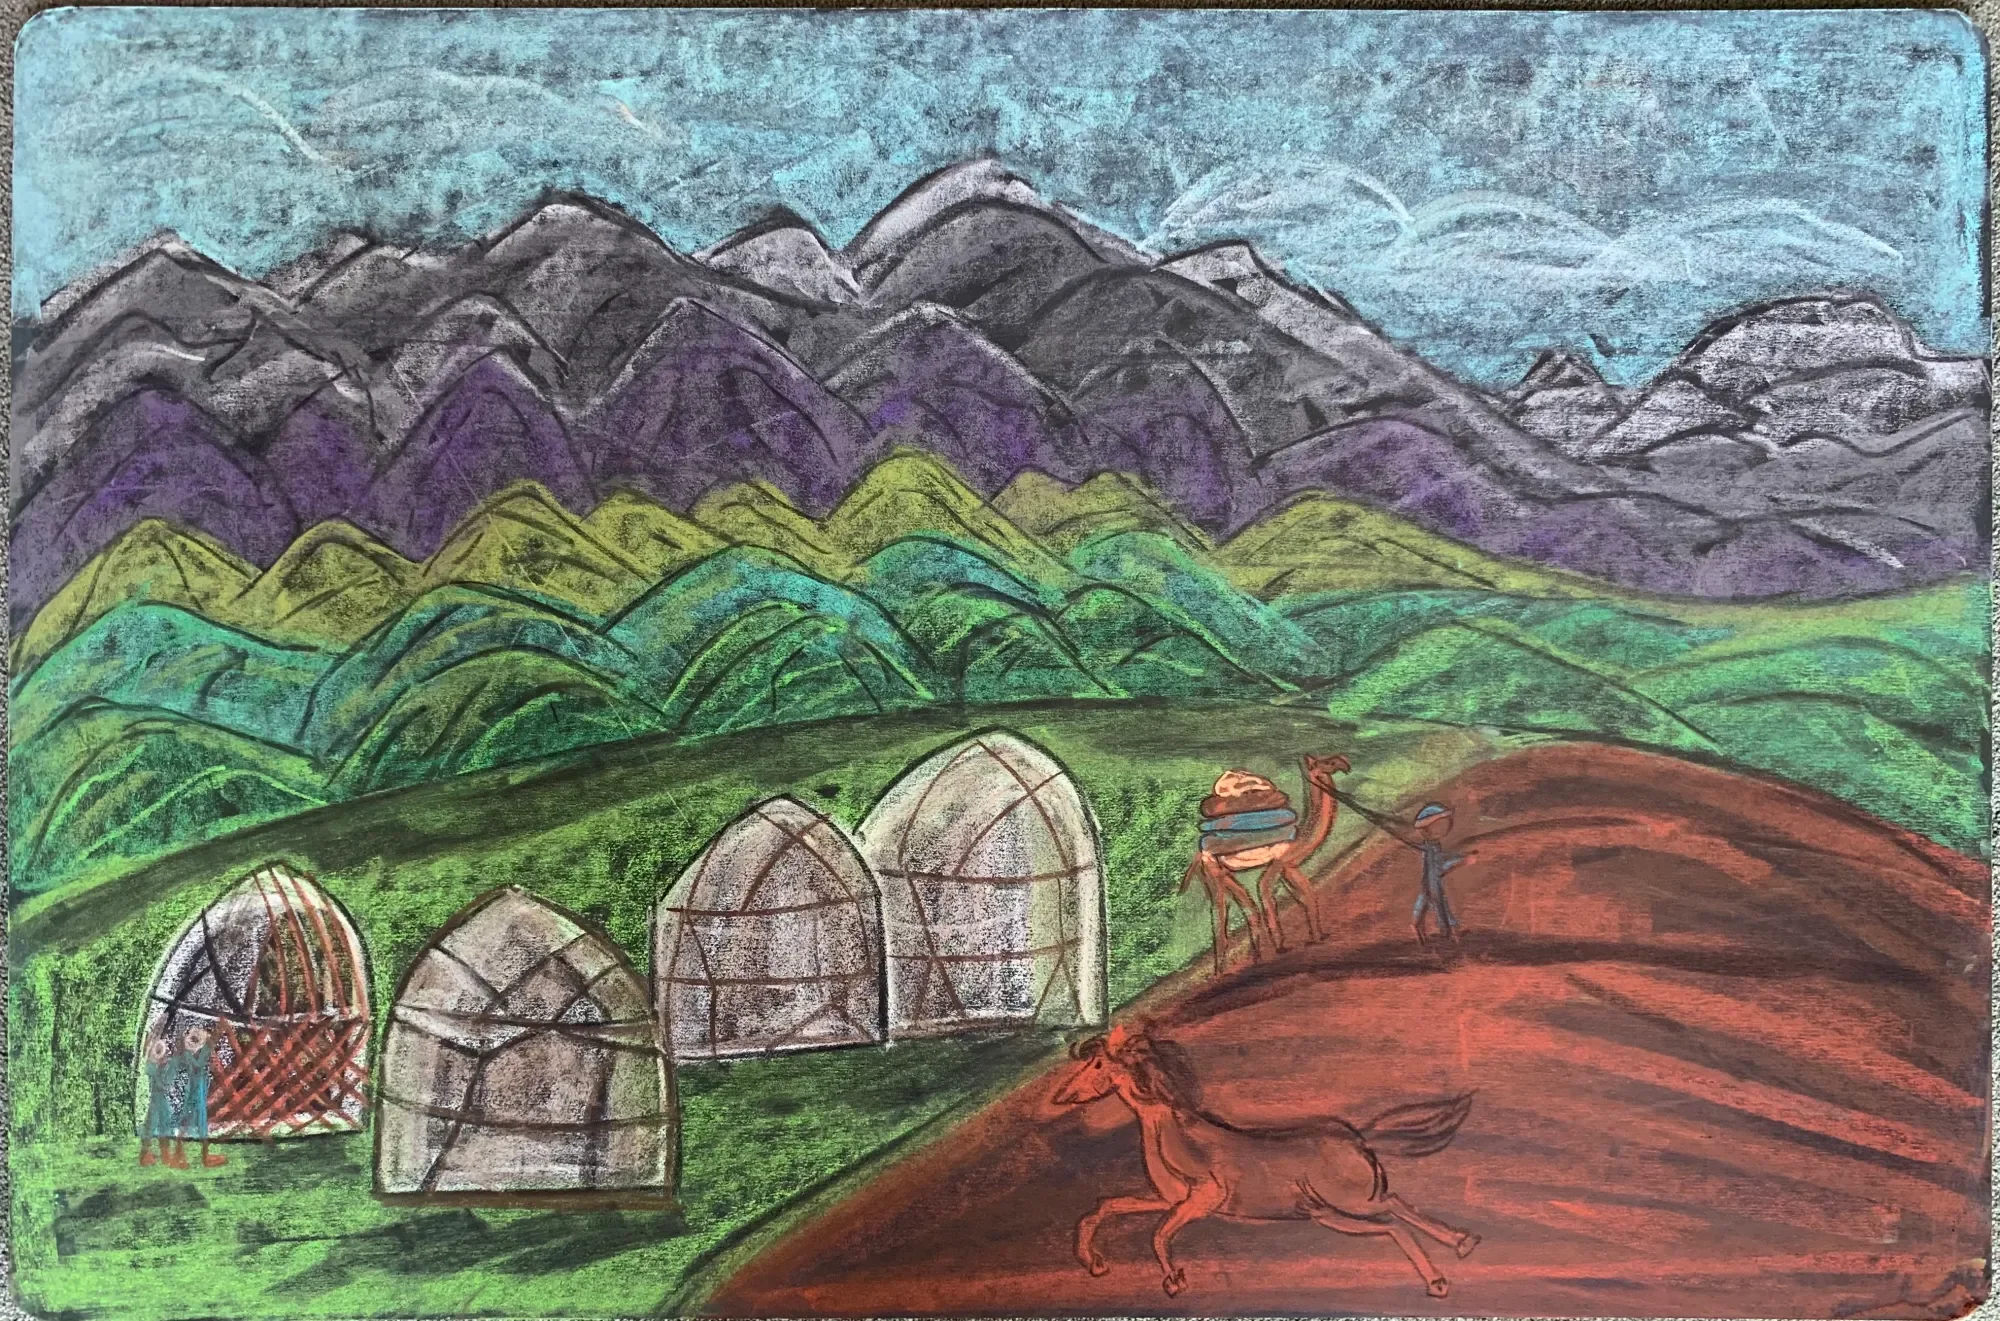
This chalk drawing is inspired by the book Kubla Khan the Emperor of Everything by Kathleen Krull. I used my Sargent Art Square Chalk Pastels and my favorite chalkboard, a 2’x3′ blackboard available from Paper, Scissors Stone at Waldorf Supplies. This chalk drawing is of a Mongolian landscape with yurts in the foreground with camels and horses as they are significant to Mongol lifestyle and livelihood.
Check out the complete Ibn Battuta and North Africa Unit Study playlist, the China Unit Study playlist, the Silk Road Unit Study playlist, the Islamic Empire Unit Study playlist, and the Marco Polo & Genghis Khan Unit Study playlist as all these unit studies work well together.


Silk Road Unit Study Review + Lesson Plans!
There are more books and resources you could use for a Silk Road unit study. Check out the China, Marco Polo, Genghis Khan and Islamic Empire unit studies for more books and projects. We concluded this part of our lessons with a review of the books, resources and projects we did for this part of our Silk Road unit which focuses on the travels of warriors, explorers and pilgrims along the Silk Road. We used picture books, chapter books and nonfiction books intended for adults (suitable for high school and college).
Nearly all the books were read alouds but in the lesson plans for this unit, you can see where I’ve divided up some of the books as assigned reading options. My 10-year-old daughter and 14-year-old son continue to work in their main lesson books which includes illustrations, narrations and copywork. These lesson could take four weeks to complete depending on how much other work you are doing on a daily basis. While we are moving on to our China Unit, there are projects and work we will continue to do for our Silk Road unit as there is always some overlap when doing our units. Additionally, there is a lot of content overlap with our Silk Road unit as many of the other units coordinate with this unit, but are divided up for ease.
Check out the complete Ibn Battuta and North Africa Unit Study playlist, the China Unit Study playlist, the Silk Road Unit Study playlist, the Islamic Empire Unit Study playlist, and the Marco Polo & Genghis Khan Unit Study playlist as all these unit studies work well together.
Projects & Activities
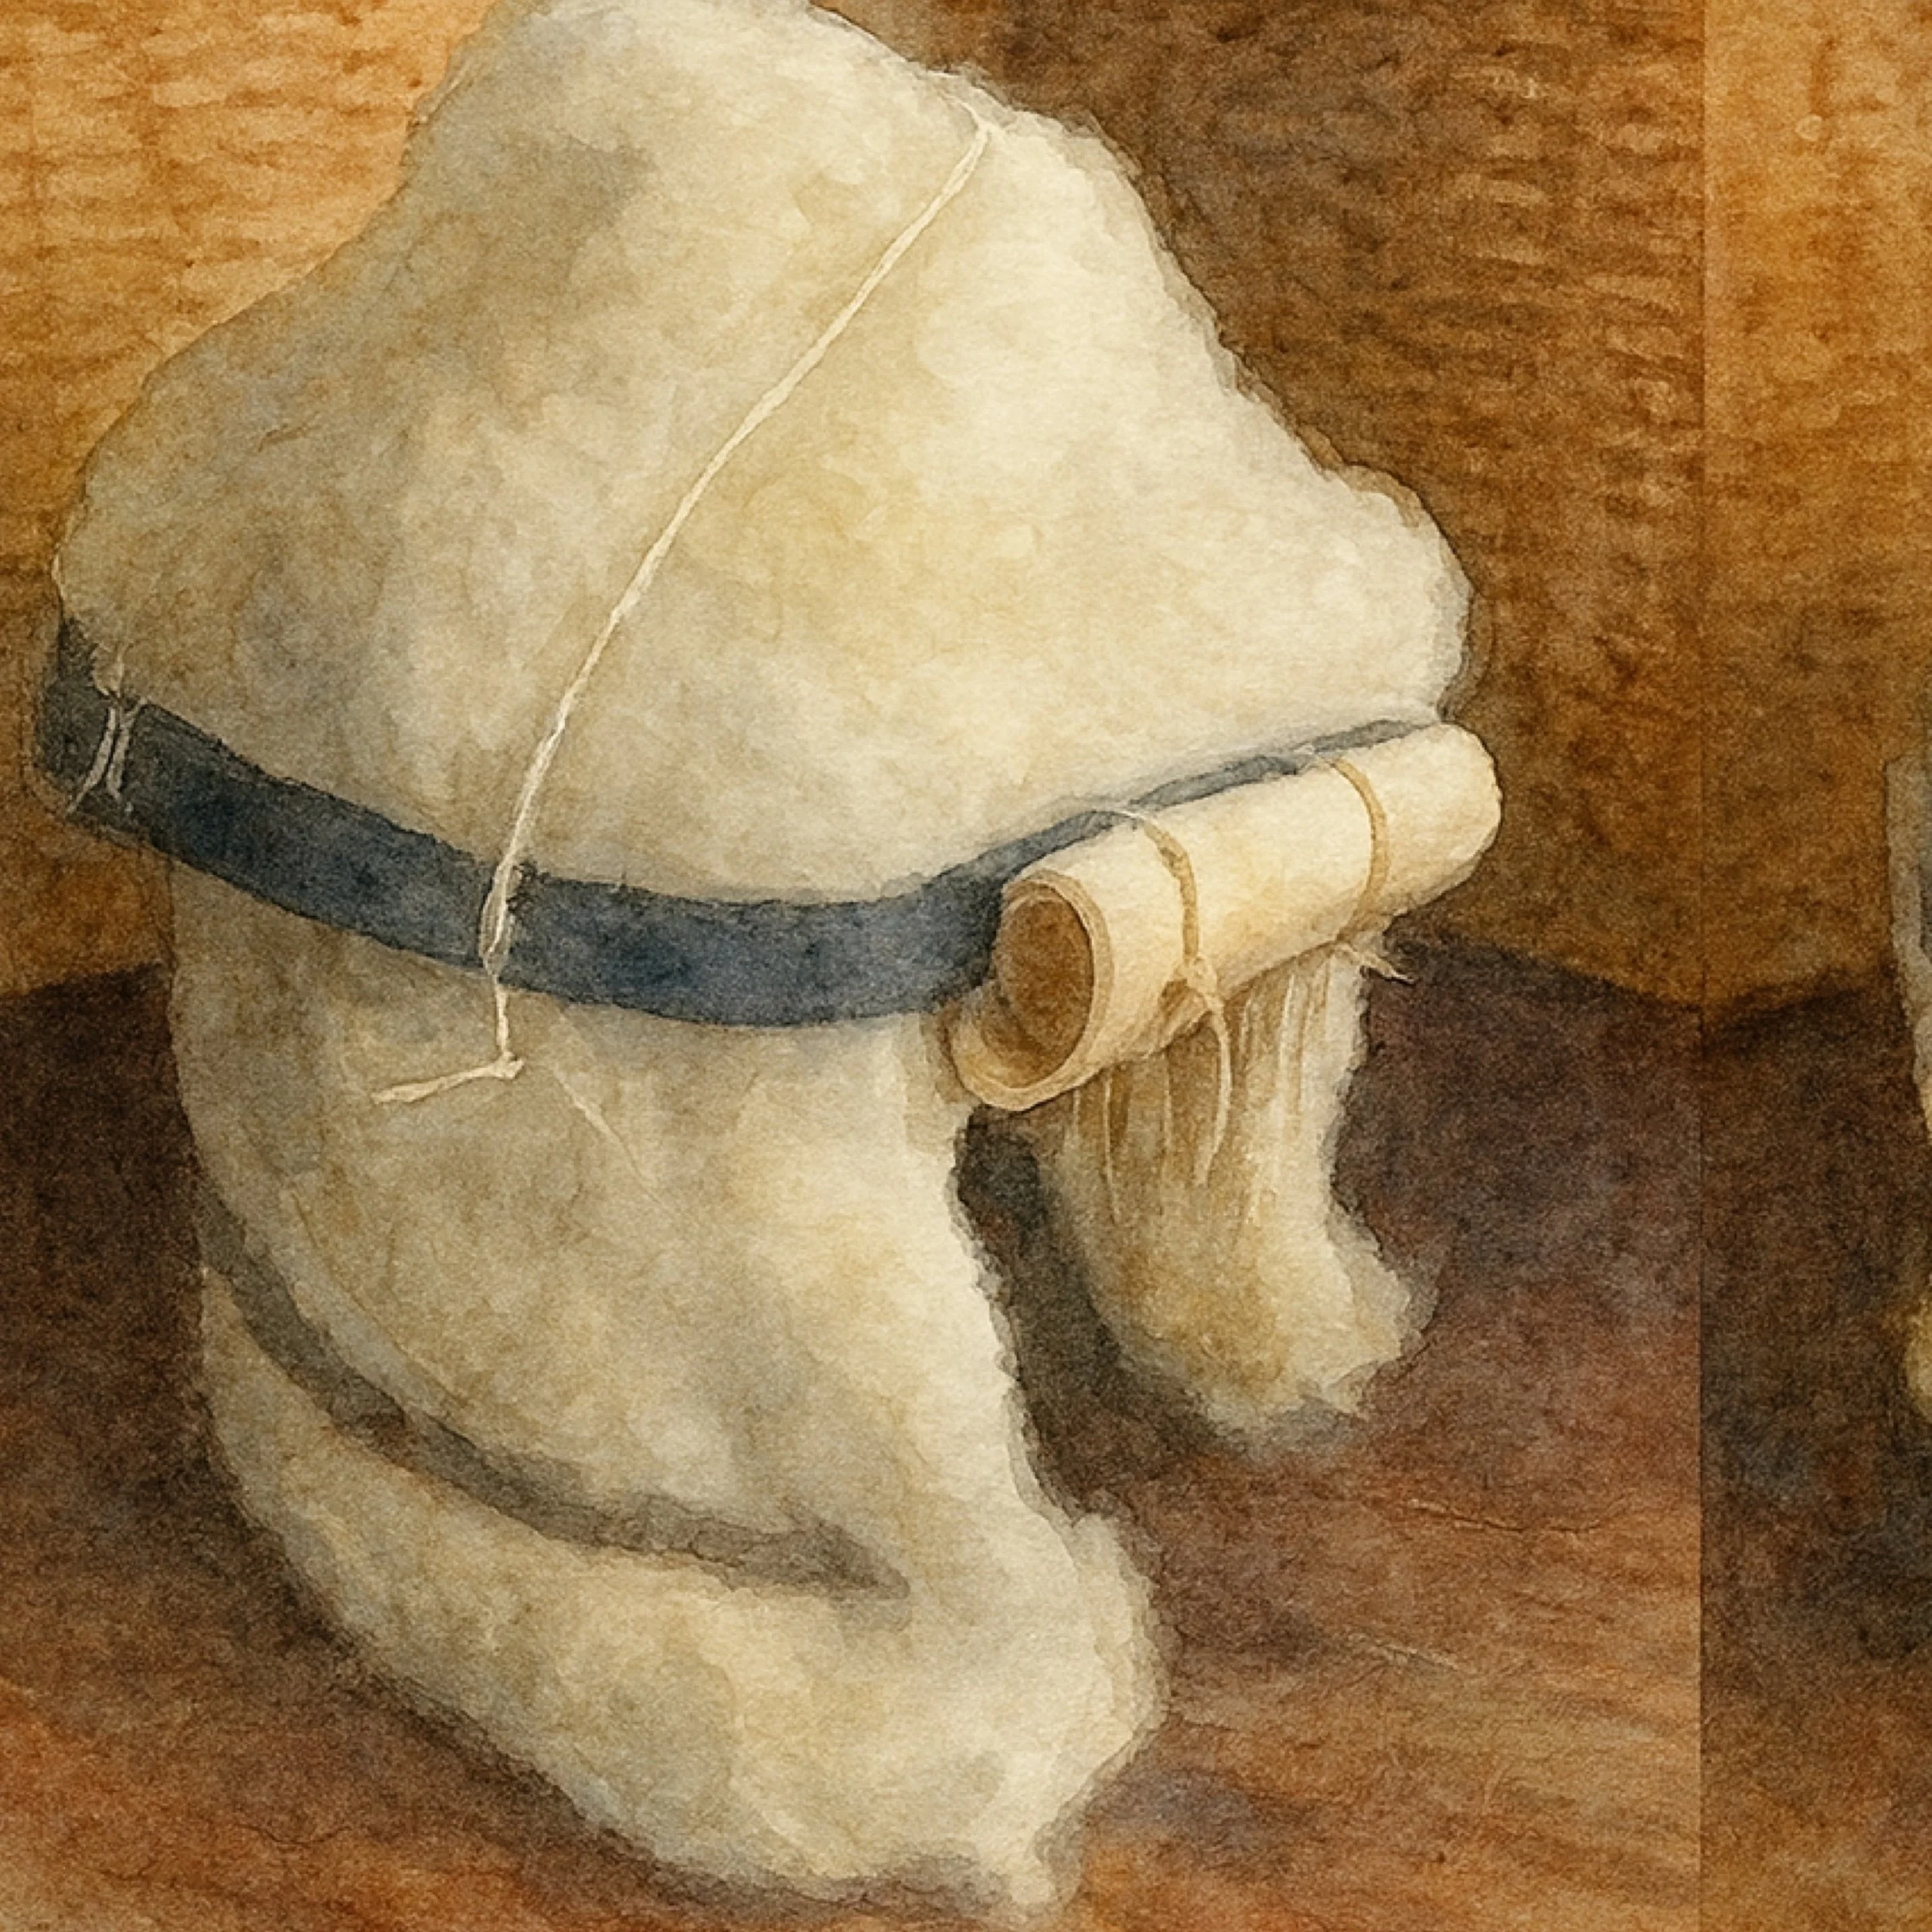
How to Make a Yurt or Ger
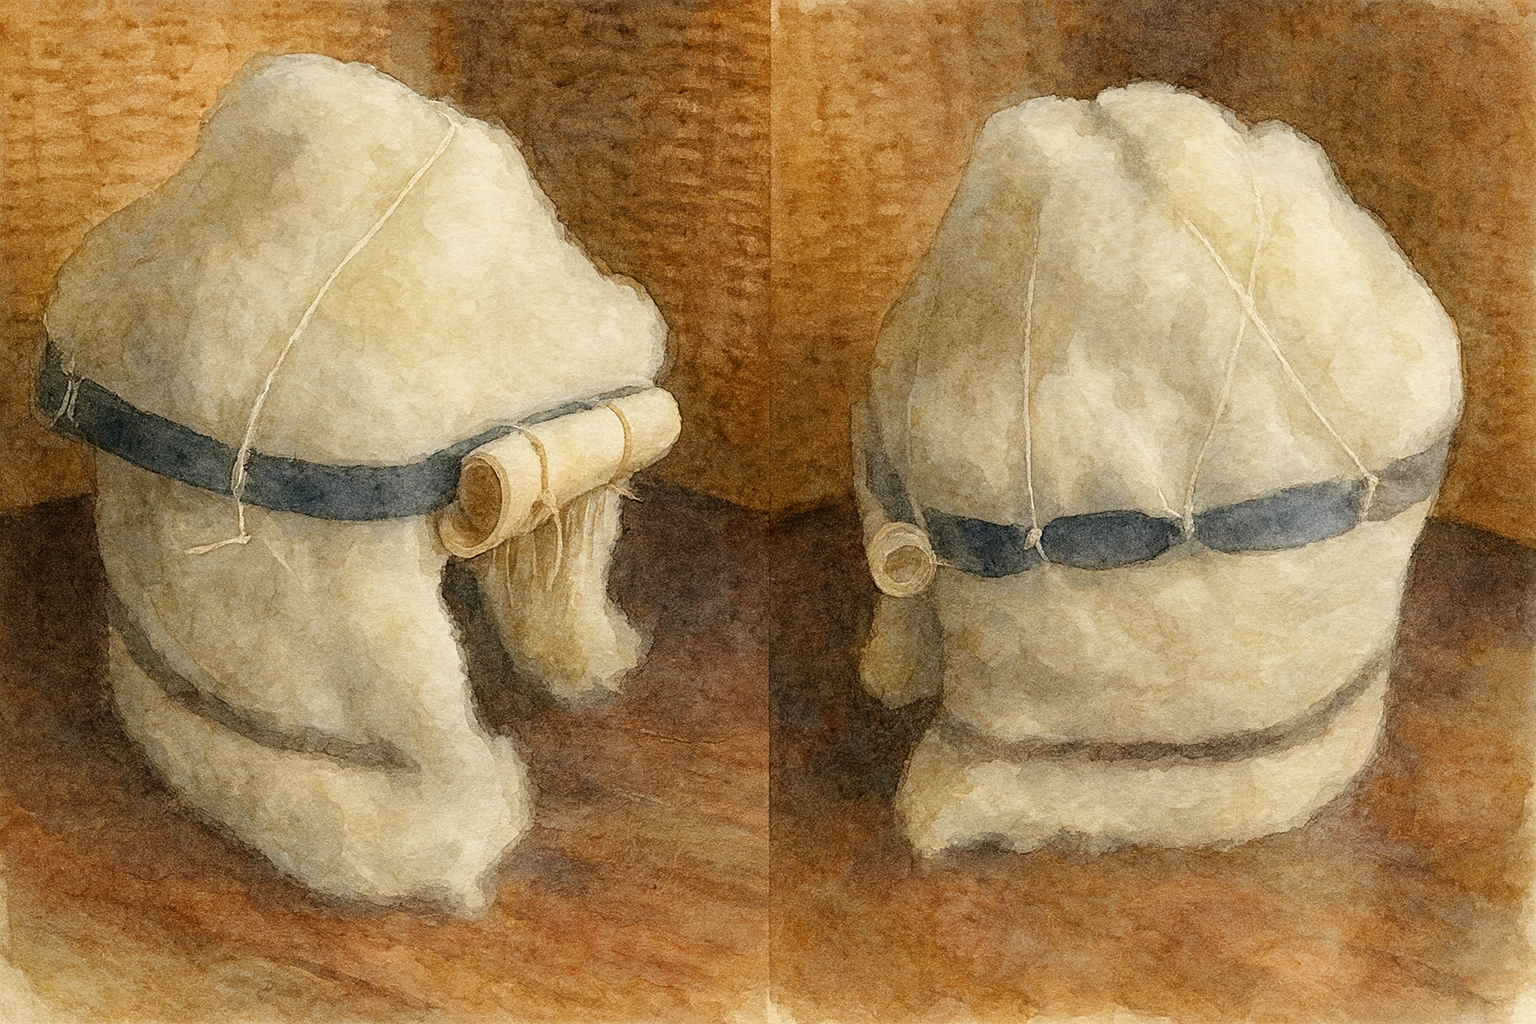
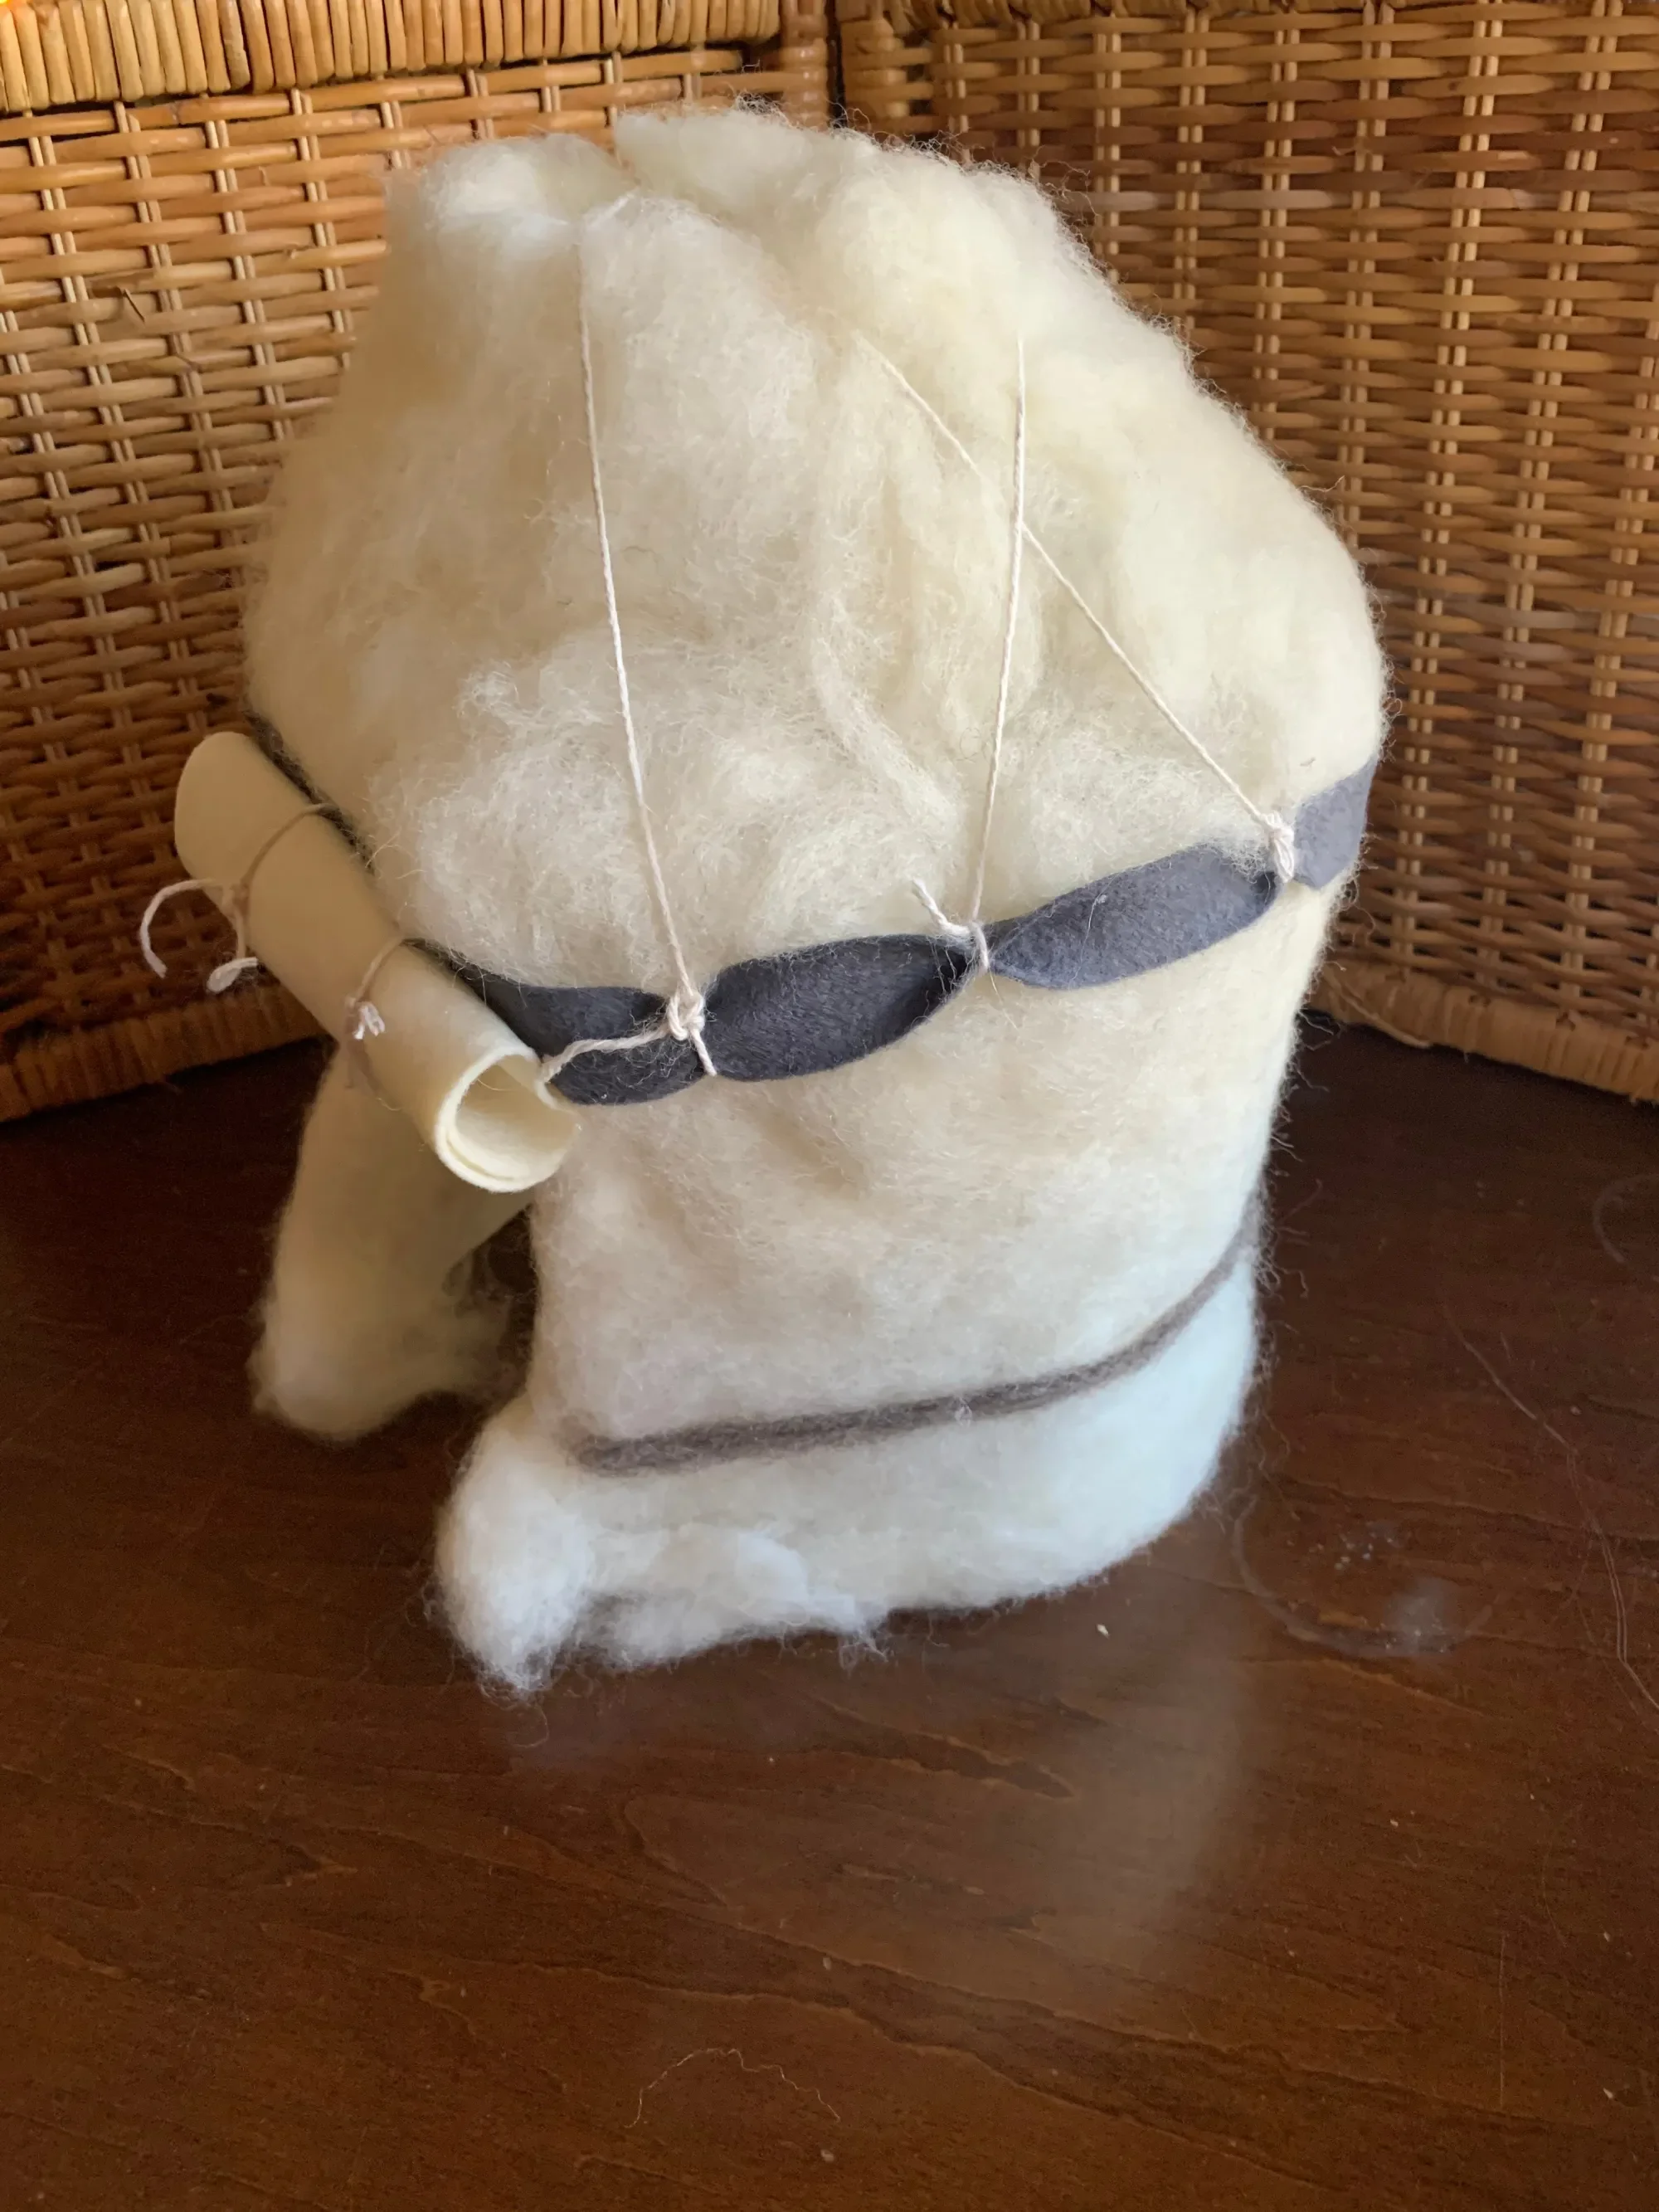
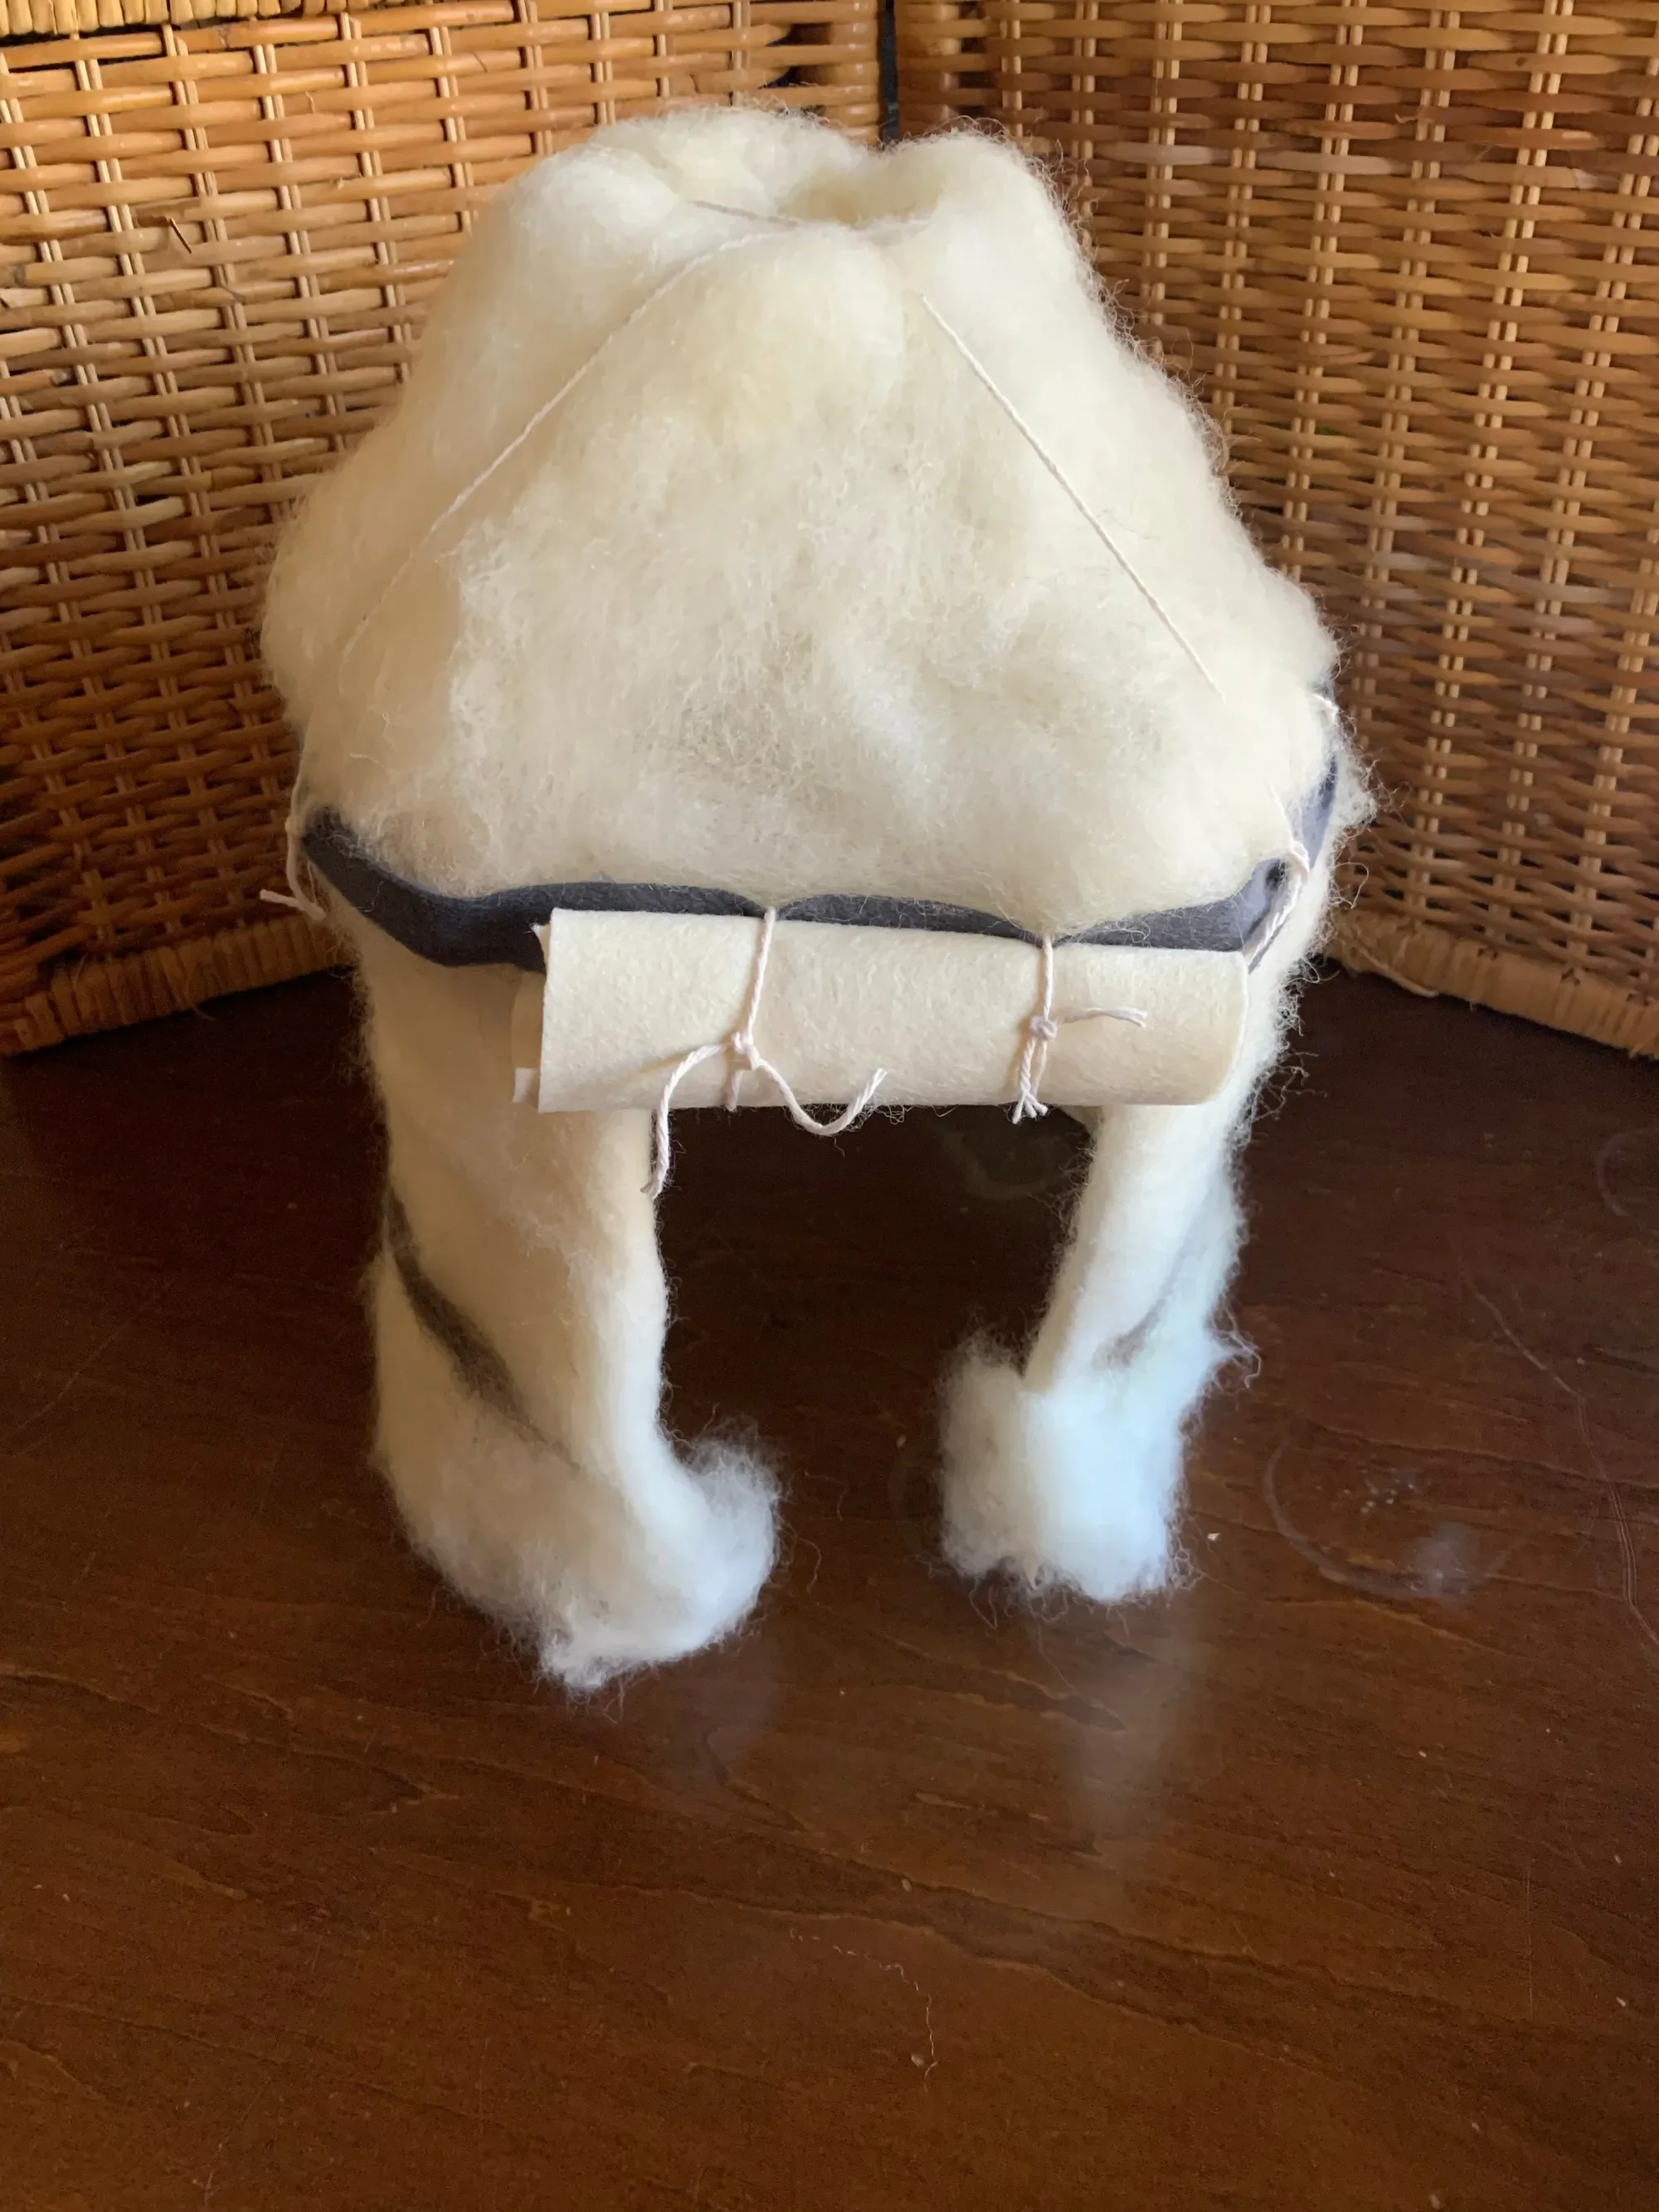
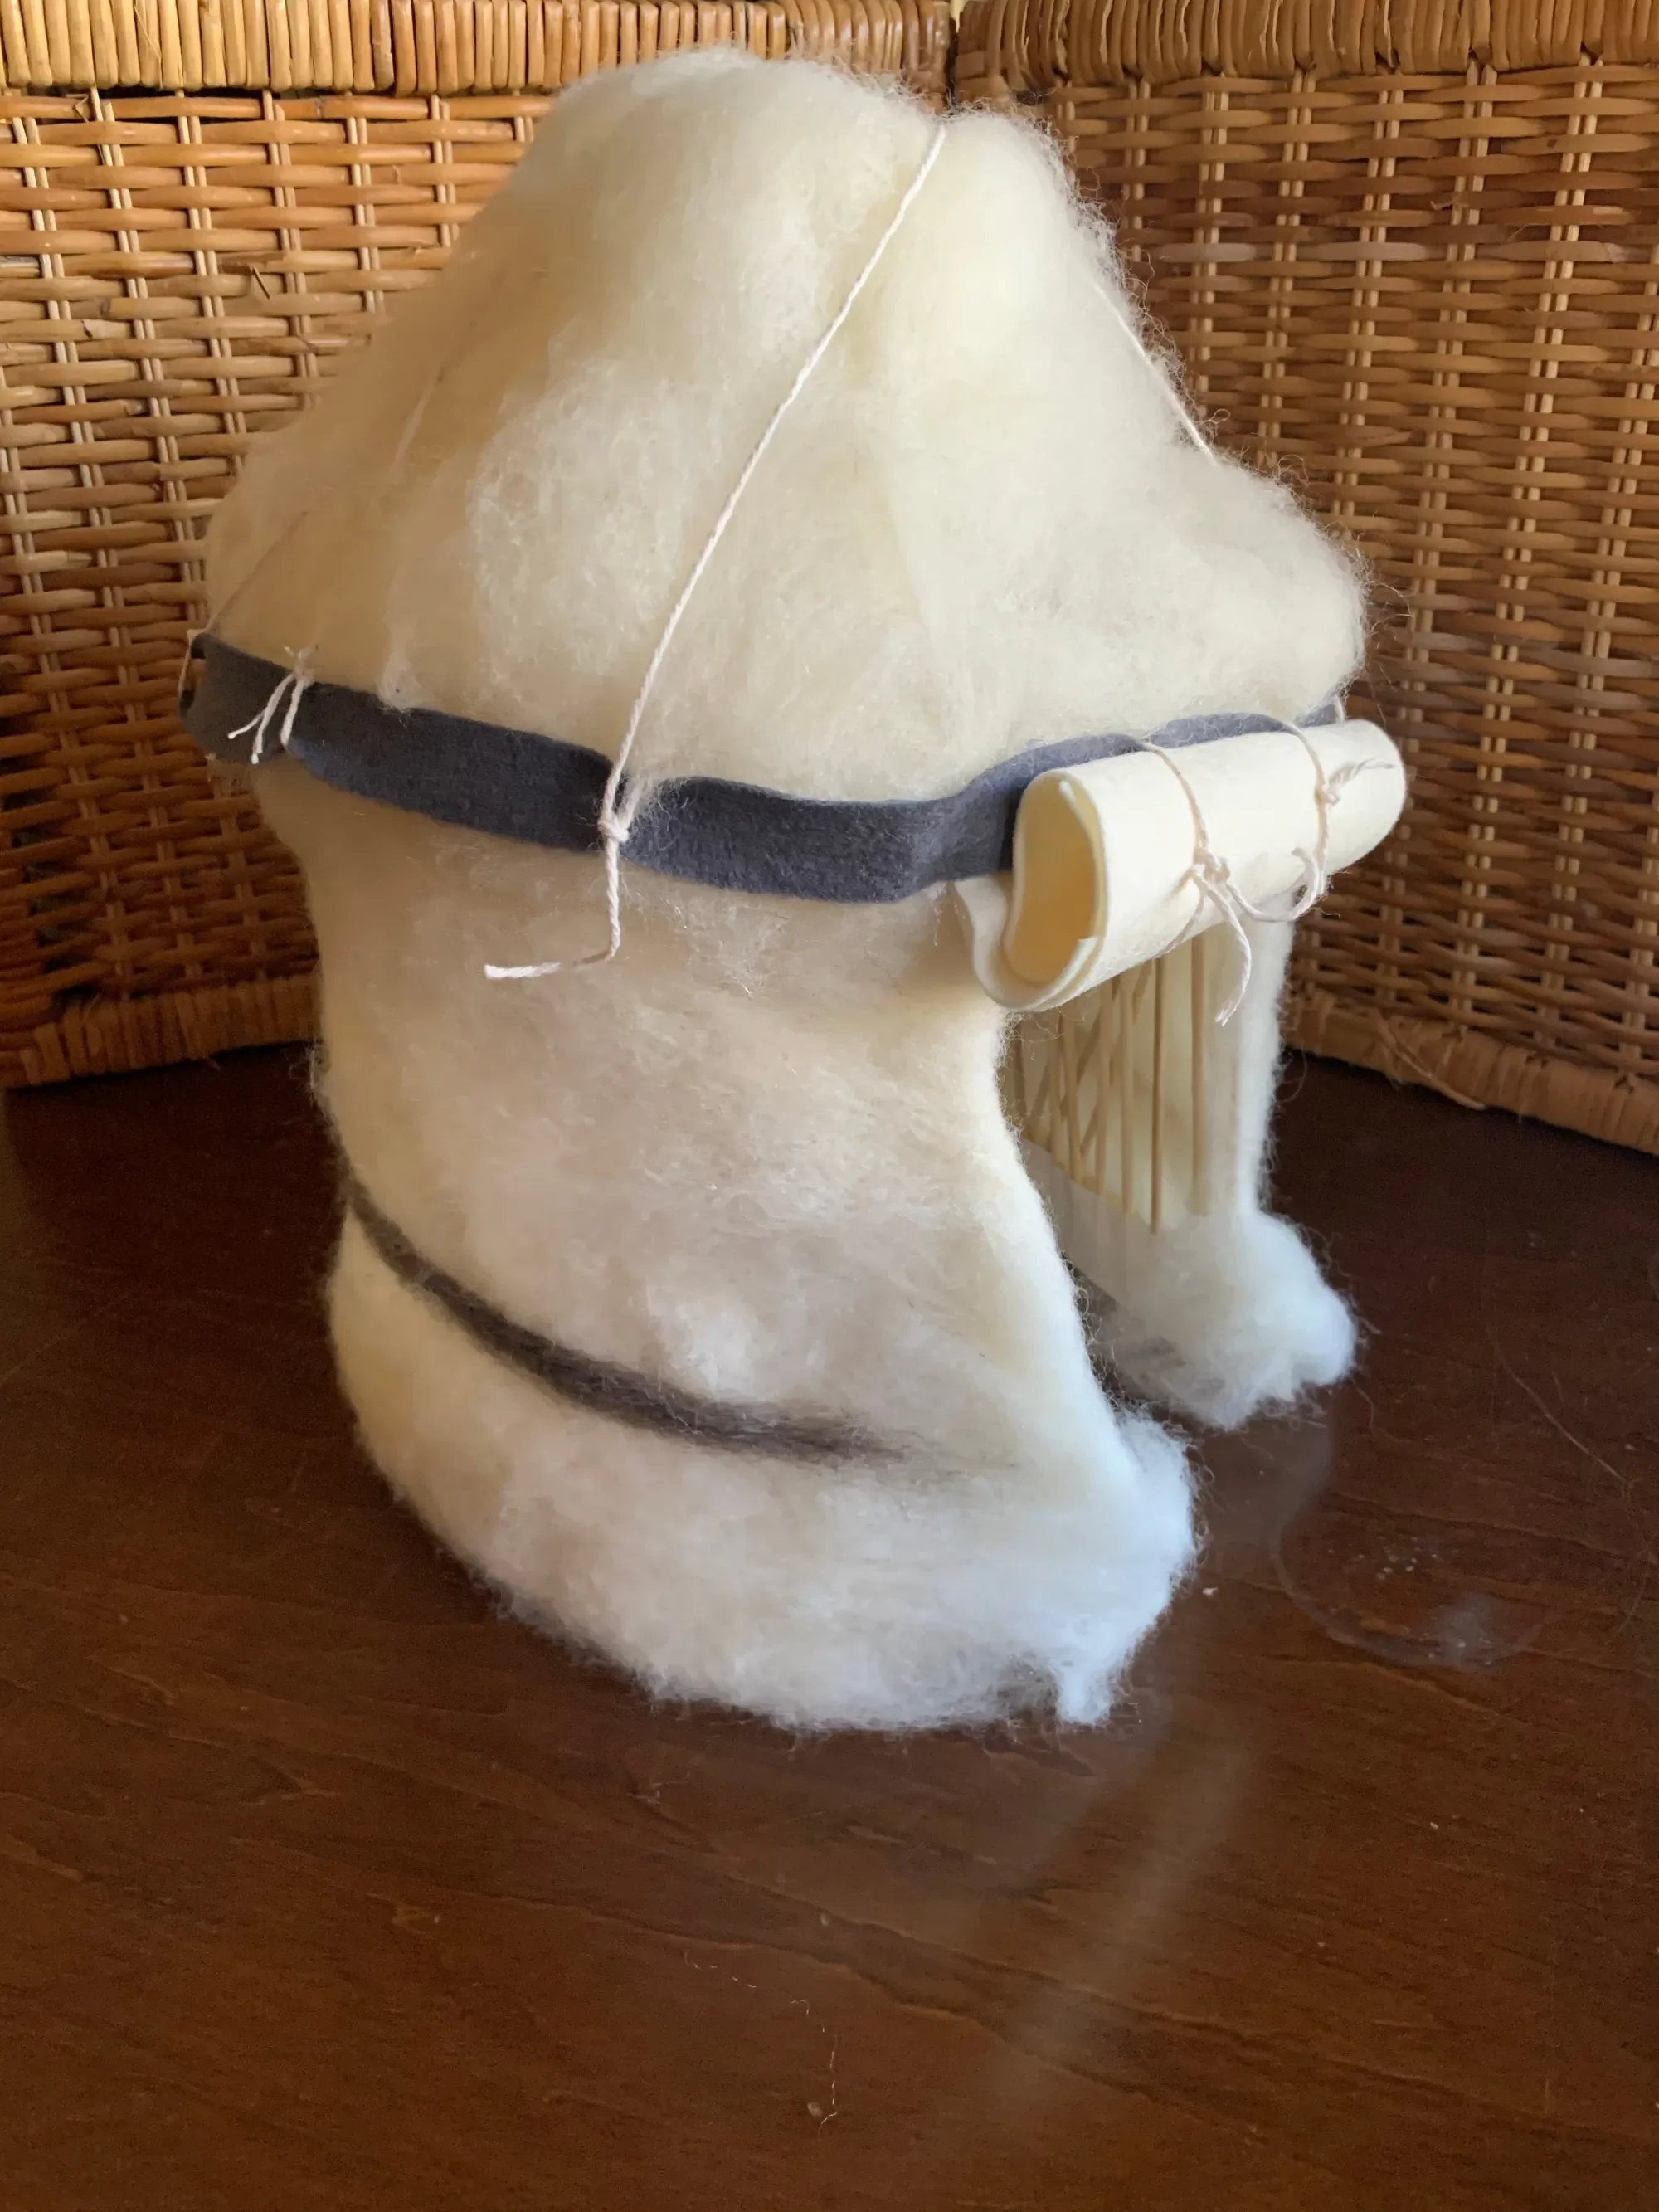
For our Silk Road and Marco Polo units, we did several hands on projects. One of them was to make a model yurt or ger. For the second time in seven years, we are doing this project. The first time we did it, we did a more simplified version that my then 8 and 12 year old sons did on their own with little help. This time around it’s my 14-year-old son (the one who was 8 the first time) and his 9-year-old sister who are doing this project with me. While they did the structure of the yurt, I did the roof and the door. We love making our projects group endeavors. This way, everyone can participate in whatever capacity they are able. This project comes from the book The Silk Road Explore the World’s Most Famous Trade Route by Kathy Ceceri. We love this book for the simple projects it provides and easy, yet informative text. For this project, we used 100% undyed wool for the exterior of the yurt. We needle felting it and placed it around the 76 3″ bamboo skewers. We also used 100% Holland felt in grey for details. You also need hot glue, tape and string for this project.
Check out the complete Ibn Battuta and North Africa Unit Study playlist, the China Unit Study playlist, the Silk Road Unit Study playlist, the Islamic Empire Unit Study playlist, and the Marco Polo & Genghis Khan Unit Study playlist as all these unit studies work well together.
DIY Historic Kaaba
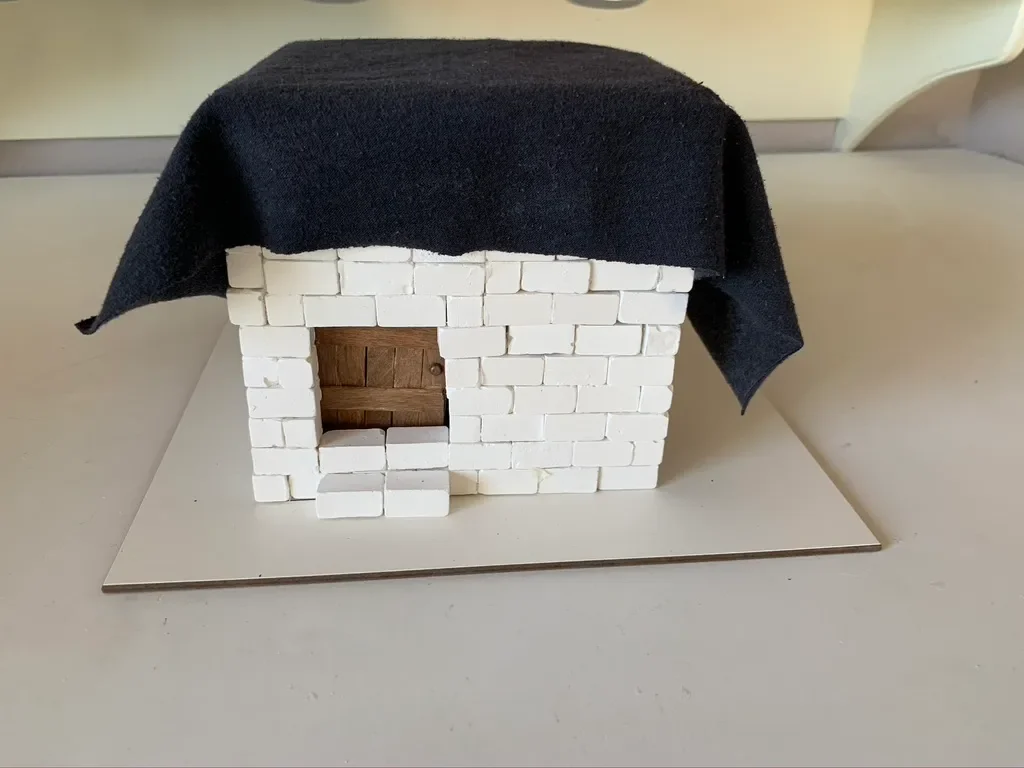
While working through our West Africa main lesson block, we learned about Mansa Musa and his great pilgrimage to Makkah to perform Hajj. He is reportedly the wealthiest man in recorded history and carried so much gold to give as charity that he crashed the markets in Egypt with in the influx of gold. This was in the 14th century at a time when Europe was still experiencing its Dark Ages. To see the rest of the world prosper, gain wealth and knowledge and make great discoveries in science and medicine was a stark difference from what was transpiring in Europe. I’m disappointed that the Middle Ages is focused on Europe as if the rest of the world didn’t exist. In fact, because of the Silk Road, travel and trade, there was much exchange of goods, ideas and resources. While studying the rest of the world during the Middle Ages, we came up the empires of Ghana, Mali and Songhai. While learning about these, we discovered the wealthiest man, Mansa Musa, and his massive caravan to Makkah.
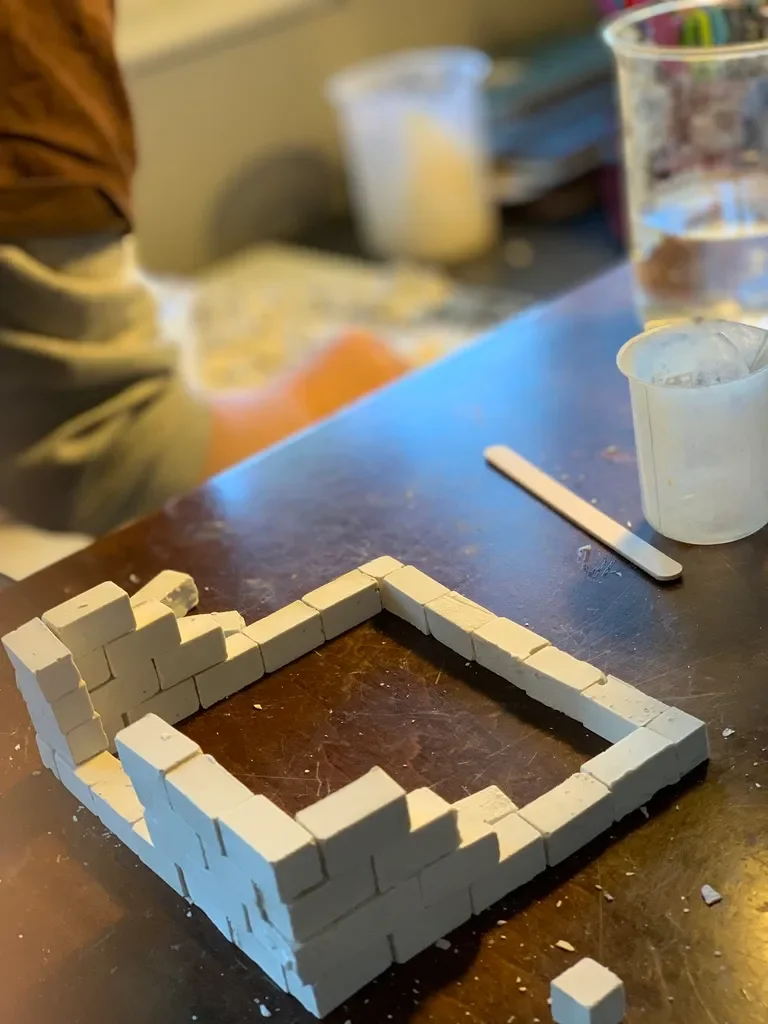
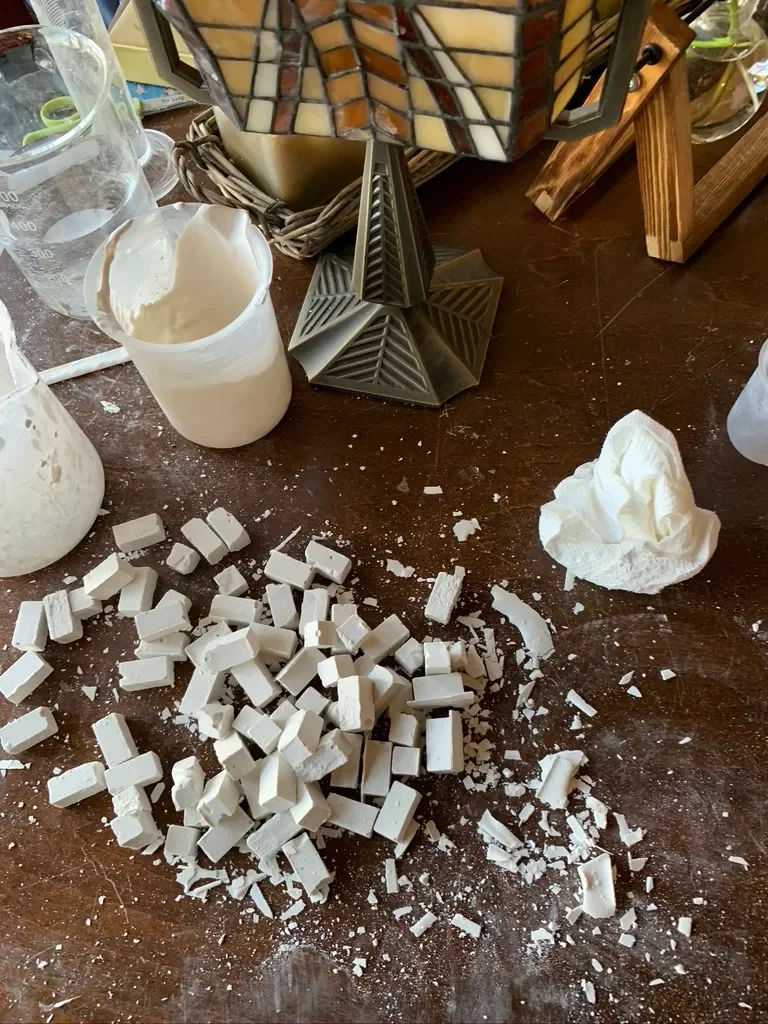
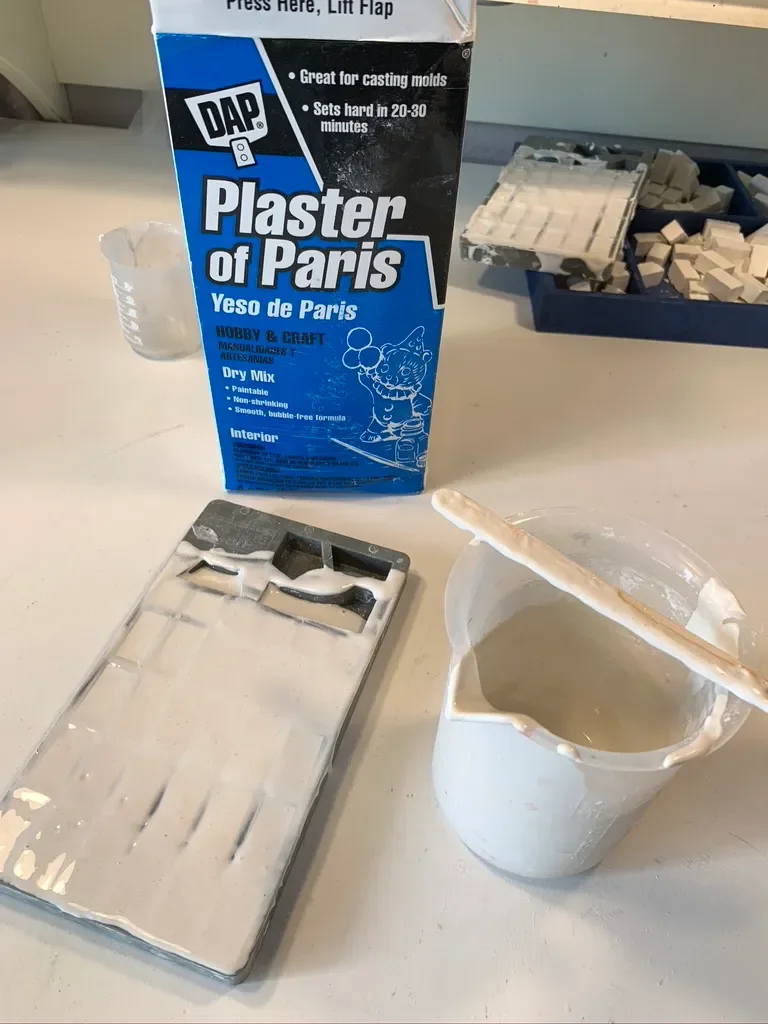
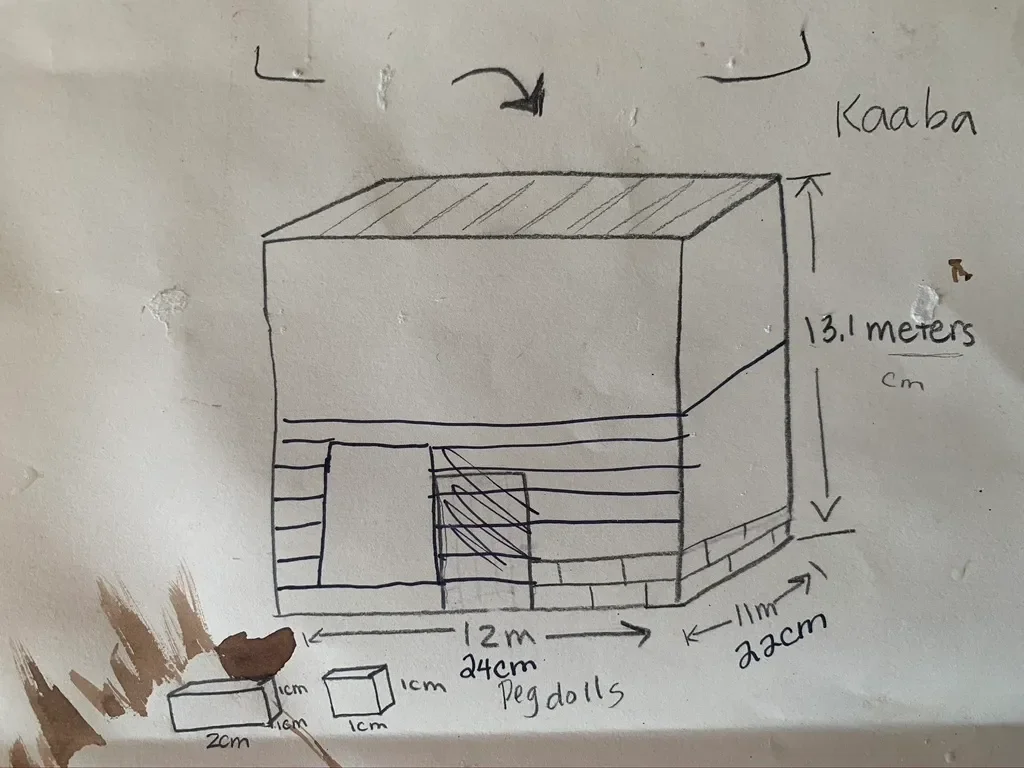
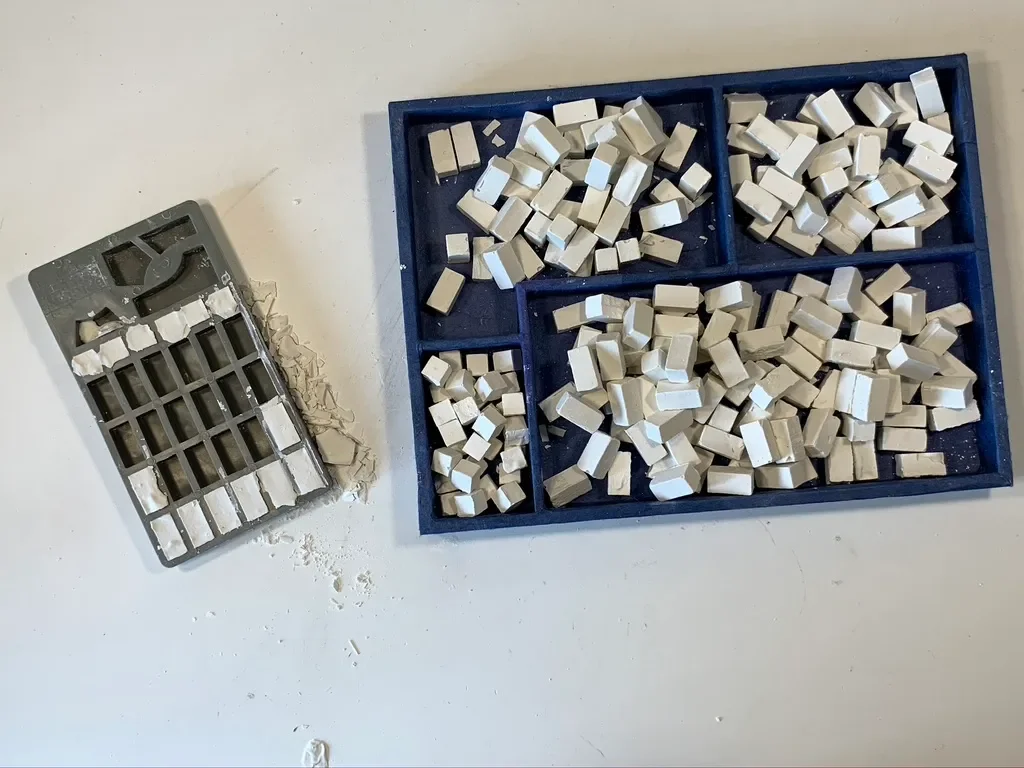
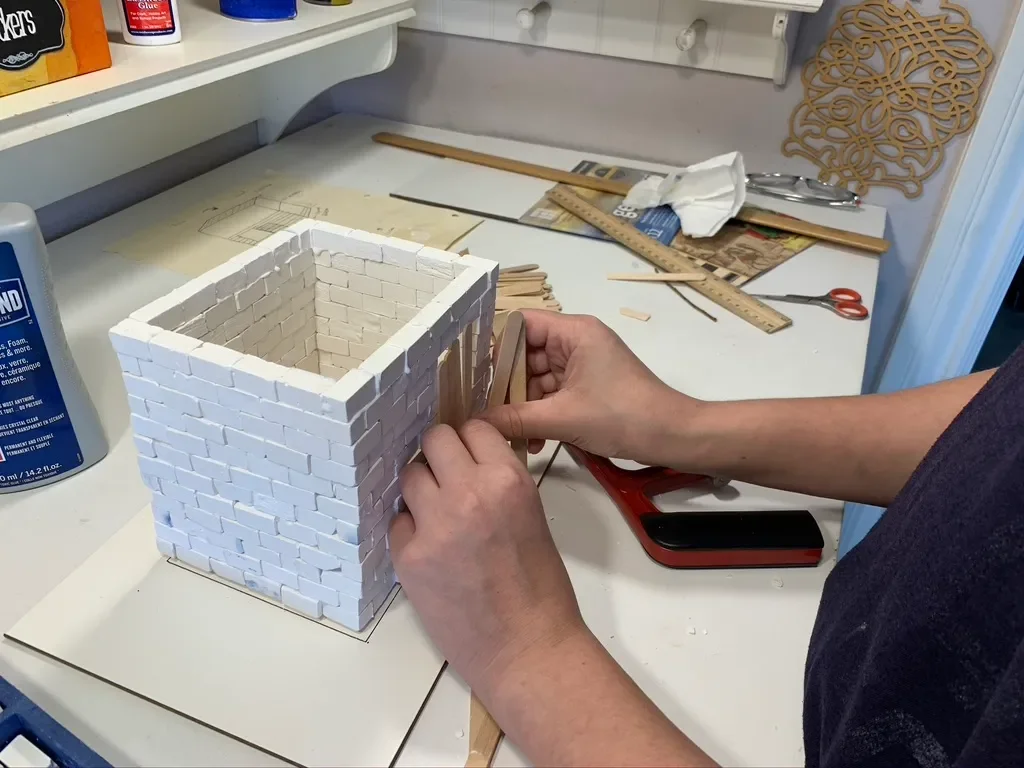
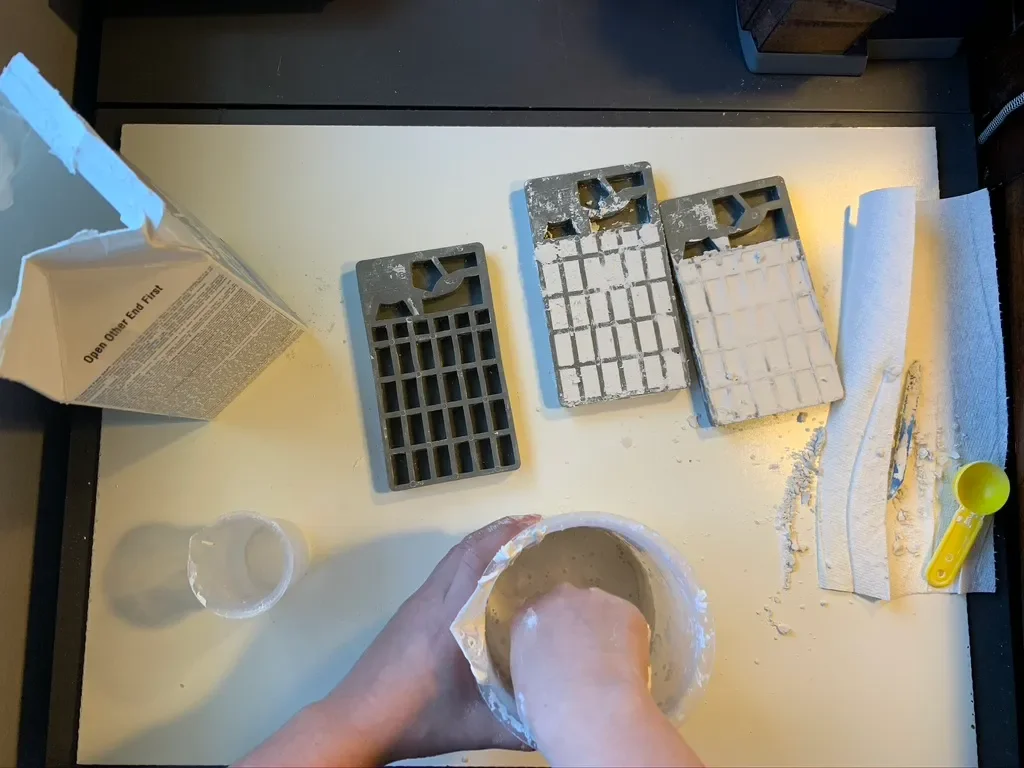
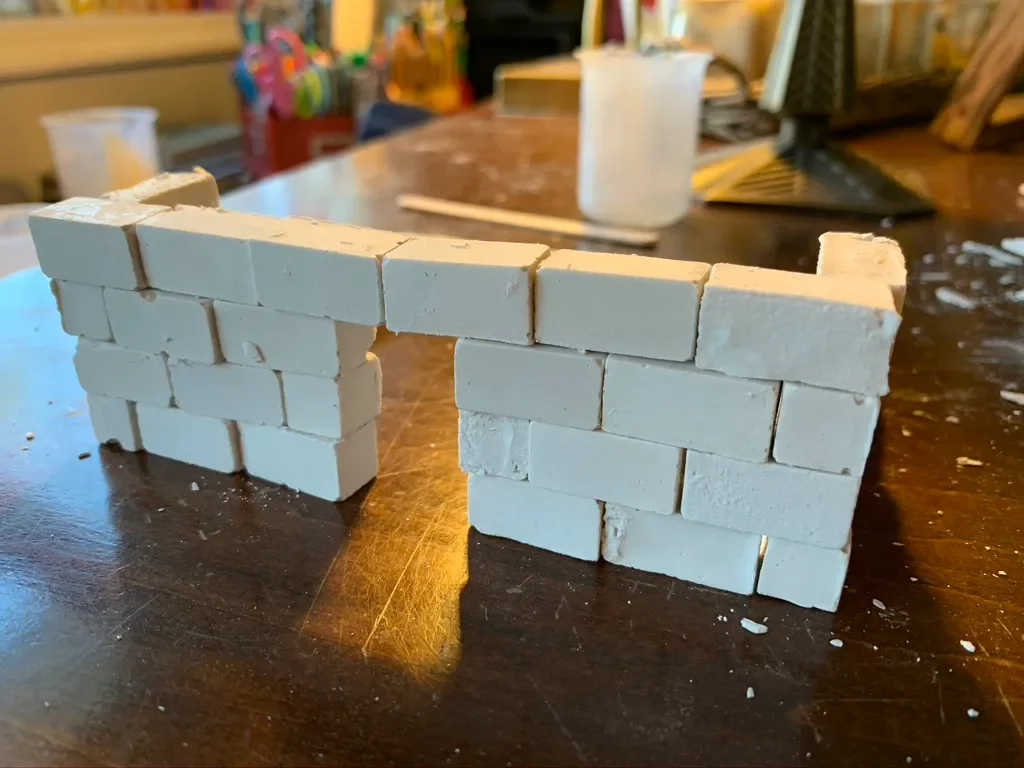
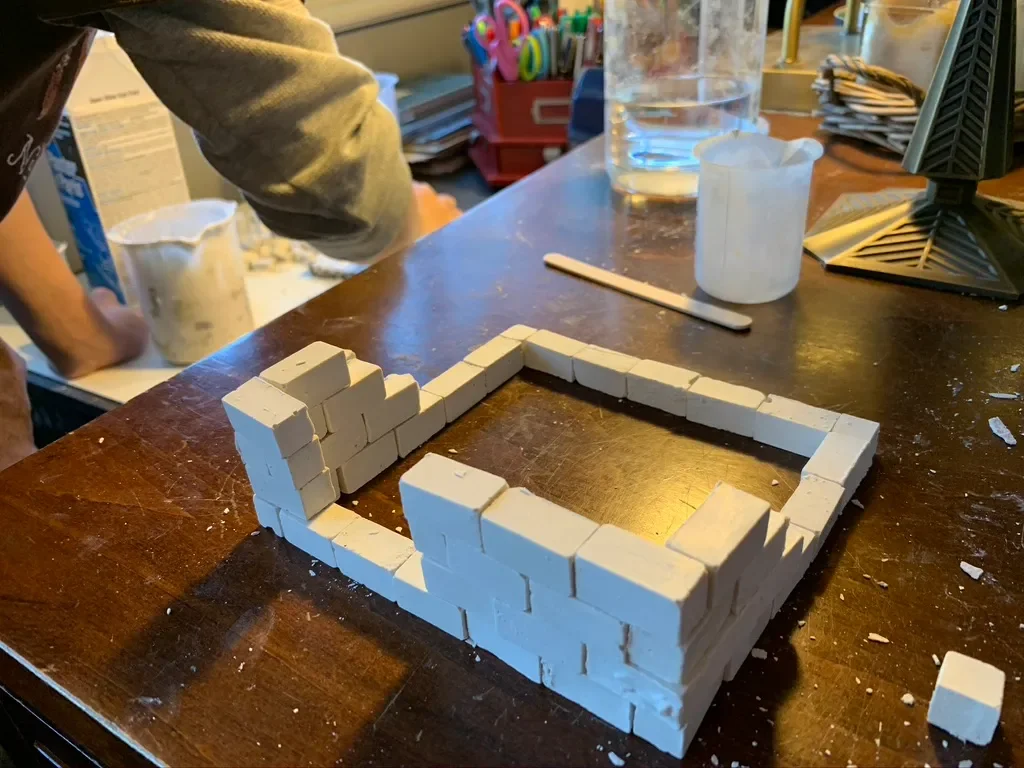
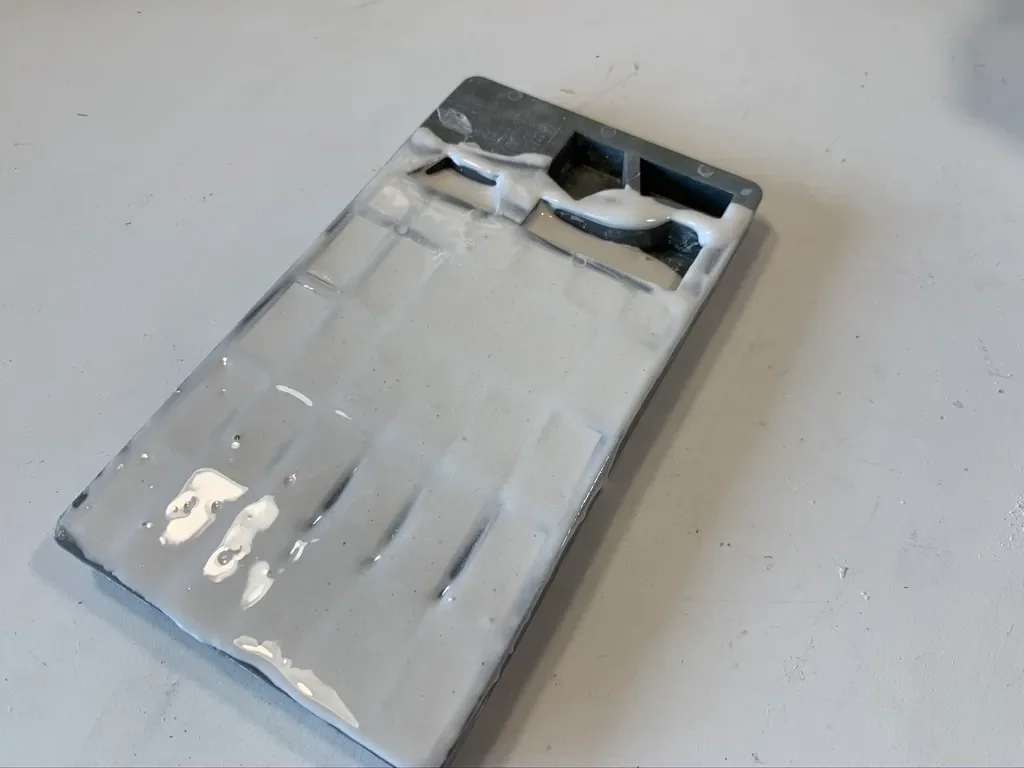
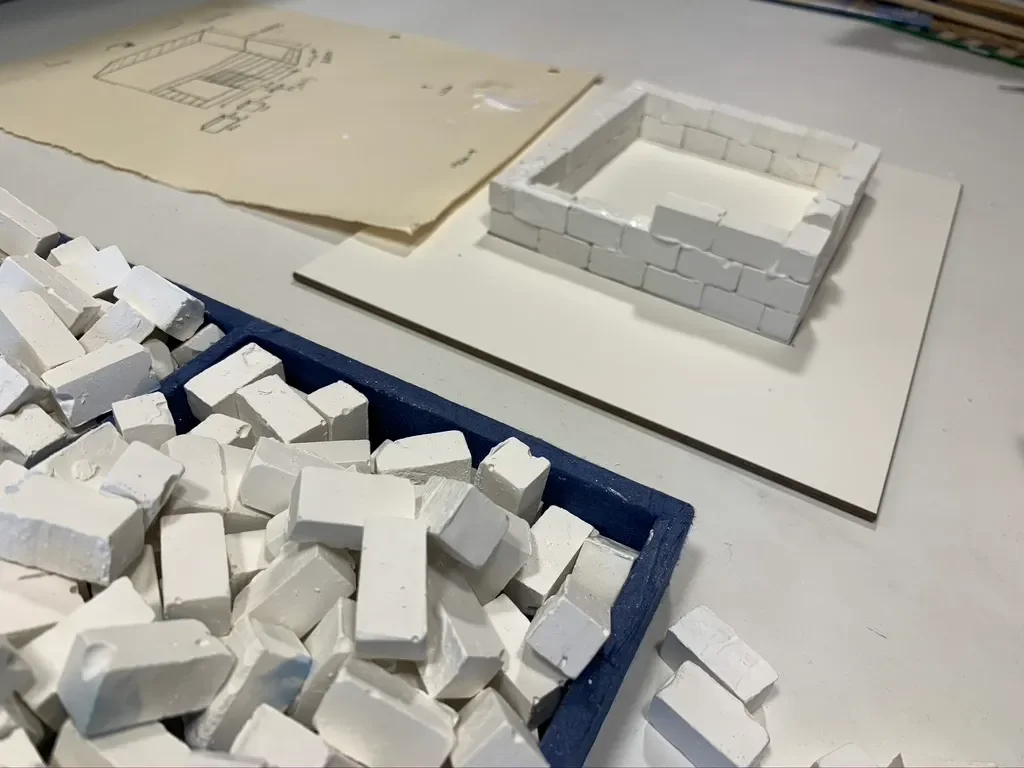
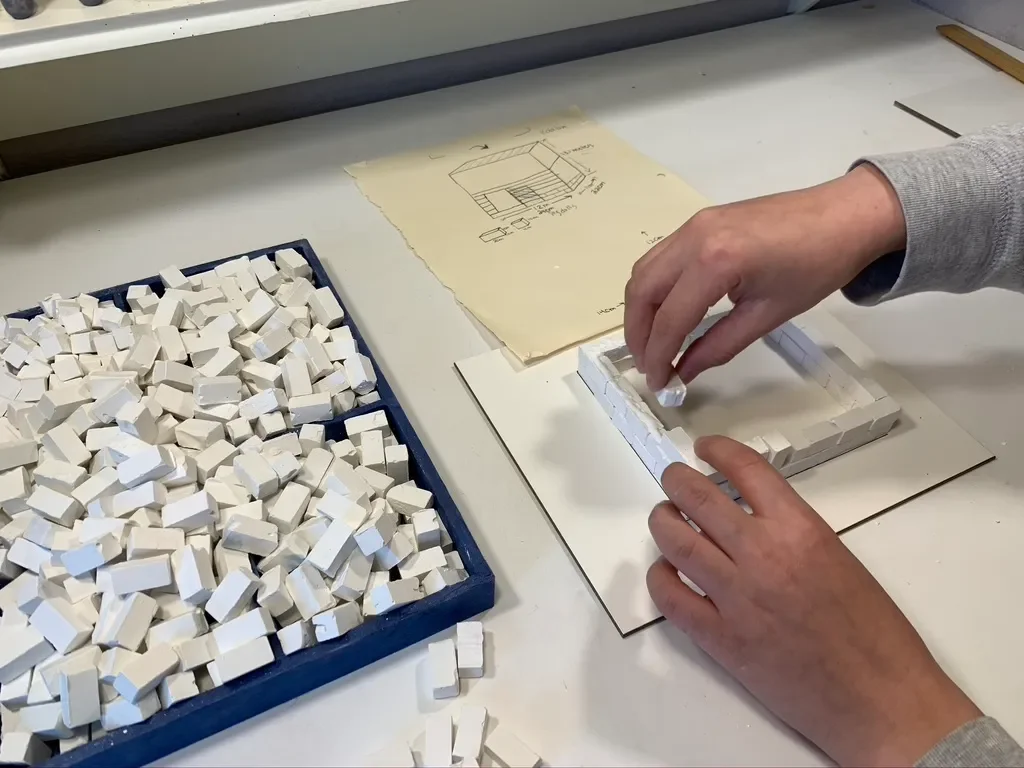
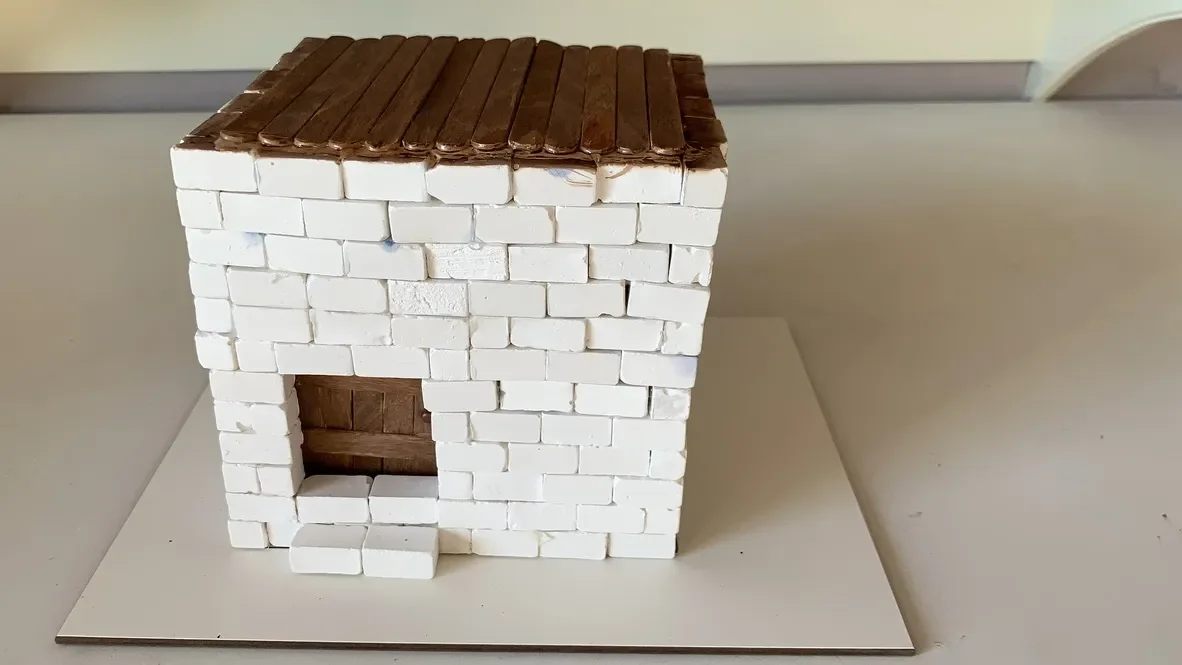
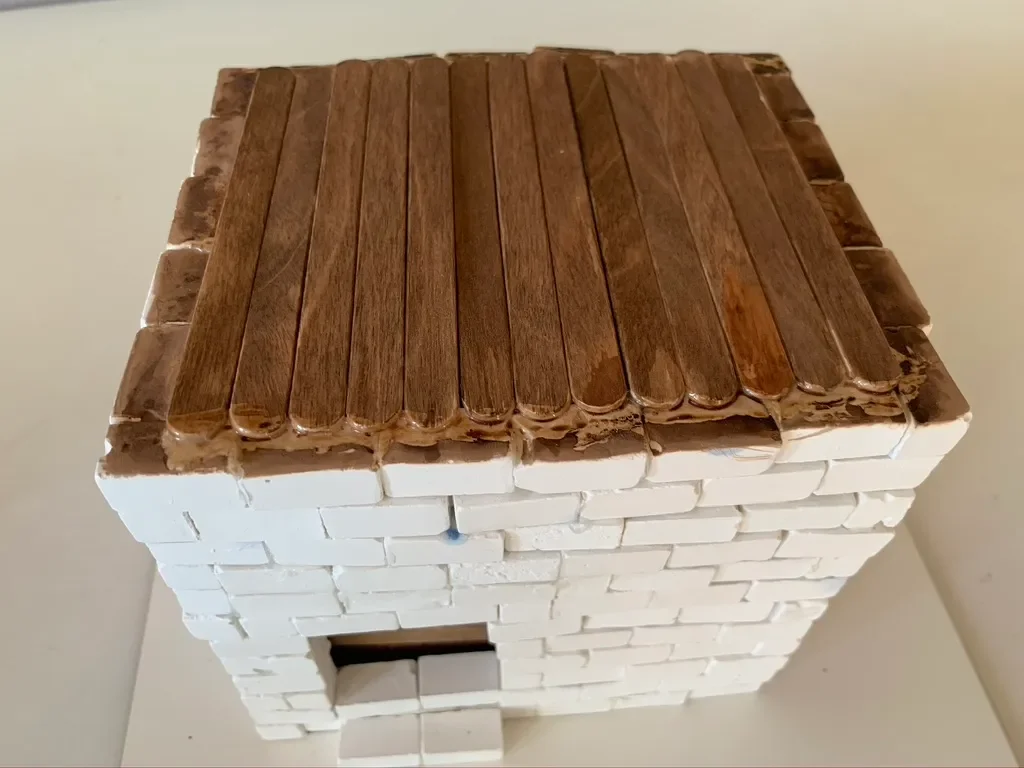
For our main lesson block on West Africa and the empire of Mali and the leader Mansa Musa, we collected a number of resources to use. What we couldn’t find, we hands-on kits and projects for with to supplement our unit. As a result, I repurposed a Medieval castle building kit to make our replica model of the Kaaba. While I’m pleased with our ingenuity and creativity, I’m not super pleased with the end result. Our Kaaba doesn’t look like the Kaaba. It’s quite plain in our attempt to recreate a historically accurate depiction of what the Kaaba might have looked like in the 1300s. We did cut a piece of black T-shirt material to drape over the top, but that looked worse. I also wanted to put the Black Stone on the southeast side of the Kaaba, but didn’t find a way of recreating the encasement. We chose a limestone color for our bricks, but they may have been more grey. We used a brick mold from our castle kit and undyed plaster of Paris. We stained popsicle sticks for the roof and made our door with them as well. In the end, I’m glad we made it, but I wish there was a pre-made kit available with more historically accurate supplies.
Check out the complete Ibn Battuta and North Africa Unit Study playlist, the China Unit Study playlist, the Silk Road Unit Study playlist, the Islamic Empire Unit Study playlist, and the Marco Polo & Genghis Khan Unit Study playlist as all these unit studies work well together.
What's Inside a Silkworm Cocoon
Recently my 6-year-old girl was playing with silk cocoons. She was curious what was inside the cocoon as it rattled while she played with them. I thought, "why not open one up and show her?" We were all surprised and slightly grossed out at what we saw. We have some dyed cocoons from a creative silk pack purchased from A Child's Dream as well as a natural silk cocoon which came in the nature kit Forest In A Box by Nature-Watch. We opened one of each and examined the contents. What do you think? Personally, it made me rethink silk!
This was an educational demonstration that sparked curiosity and led to further discussions on silkworms and cocoons.
You can see the rest of our Botany Main Lesson block which we are working through currently.
You can find the silk cocoons as part of the Creative Silk Pack from A Child's Dream:
Sadly this product is no longer available.
You can find the Forest In A Box kit from Nature-Watch.
Check out the complete Ibn Battuta and North Africa Unit Study playlist, the China Unit Study playlist, the Silk Road Unit Study playlist, the Islamic Empire Unit Study playlist, and the Marco Polo & Genghis Khan Unit Study playlist as all these unit studies work well together.
4D Imperial China Puzzle
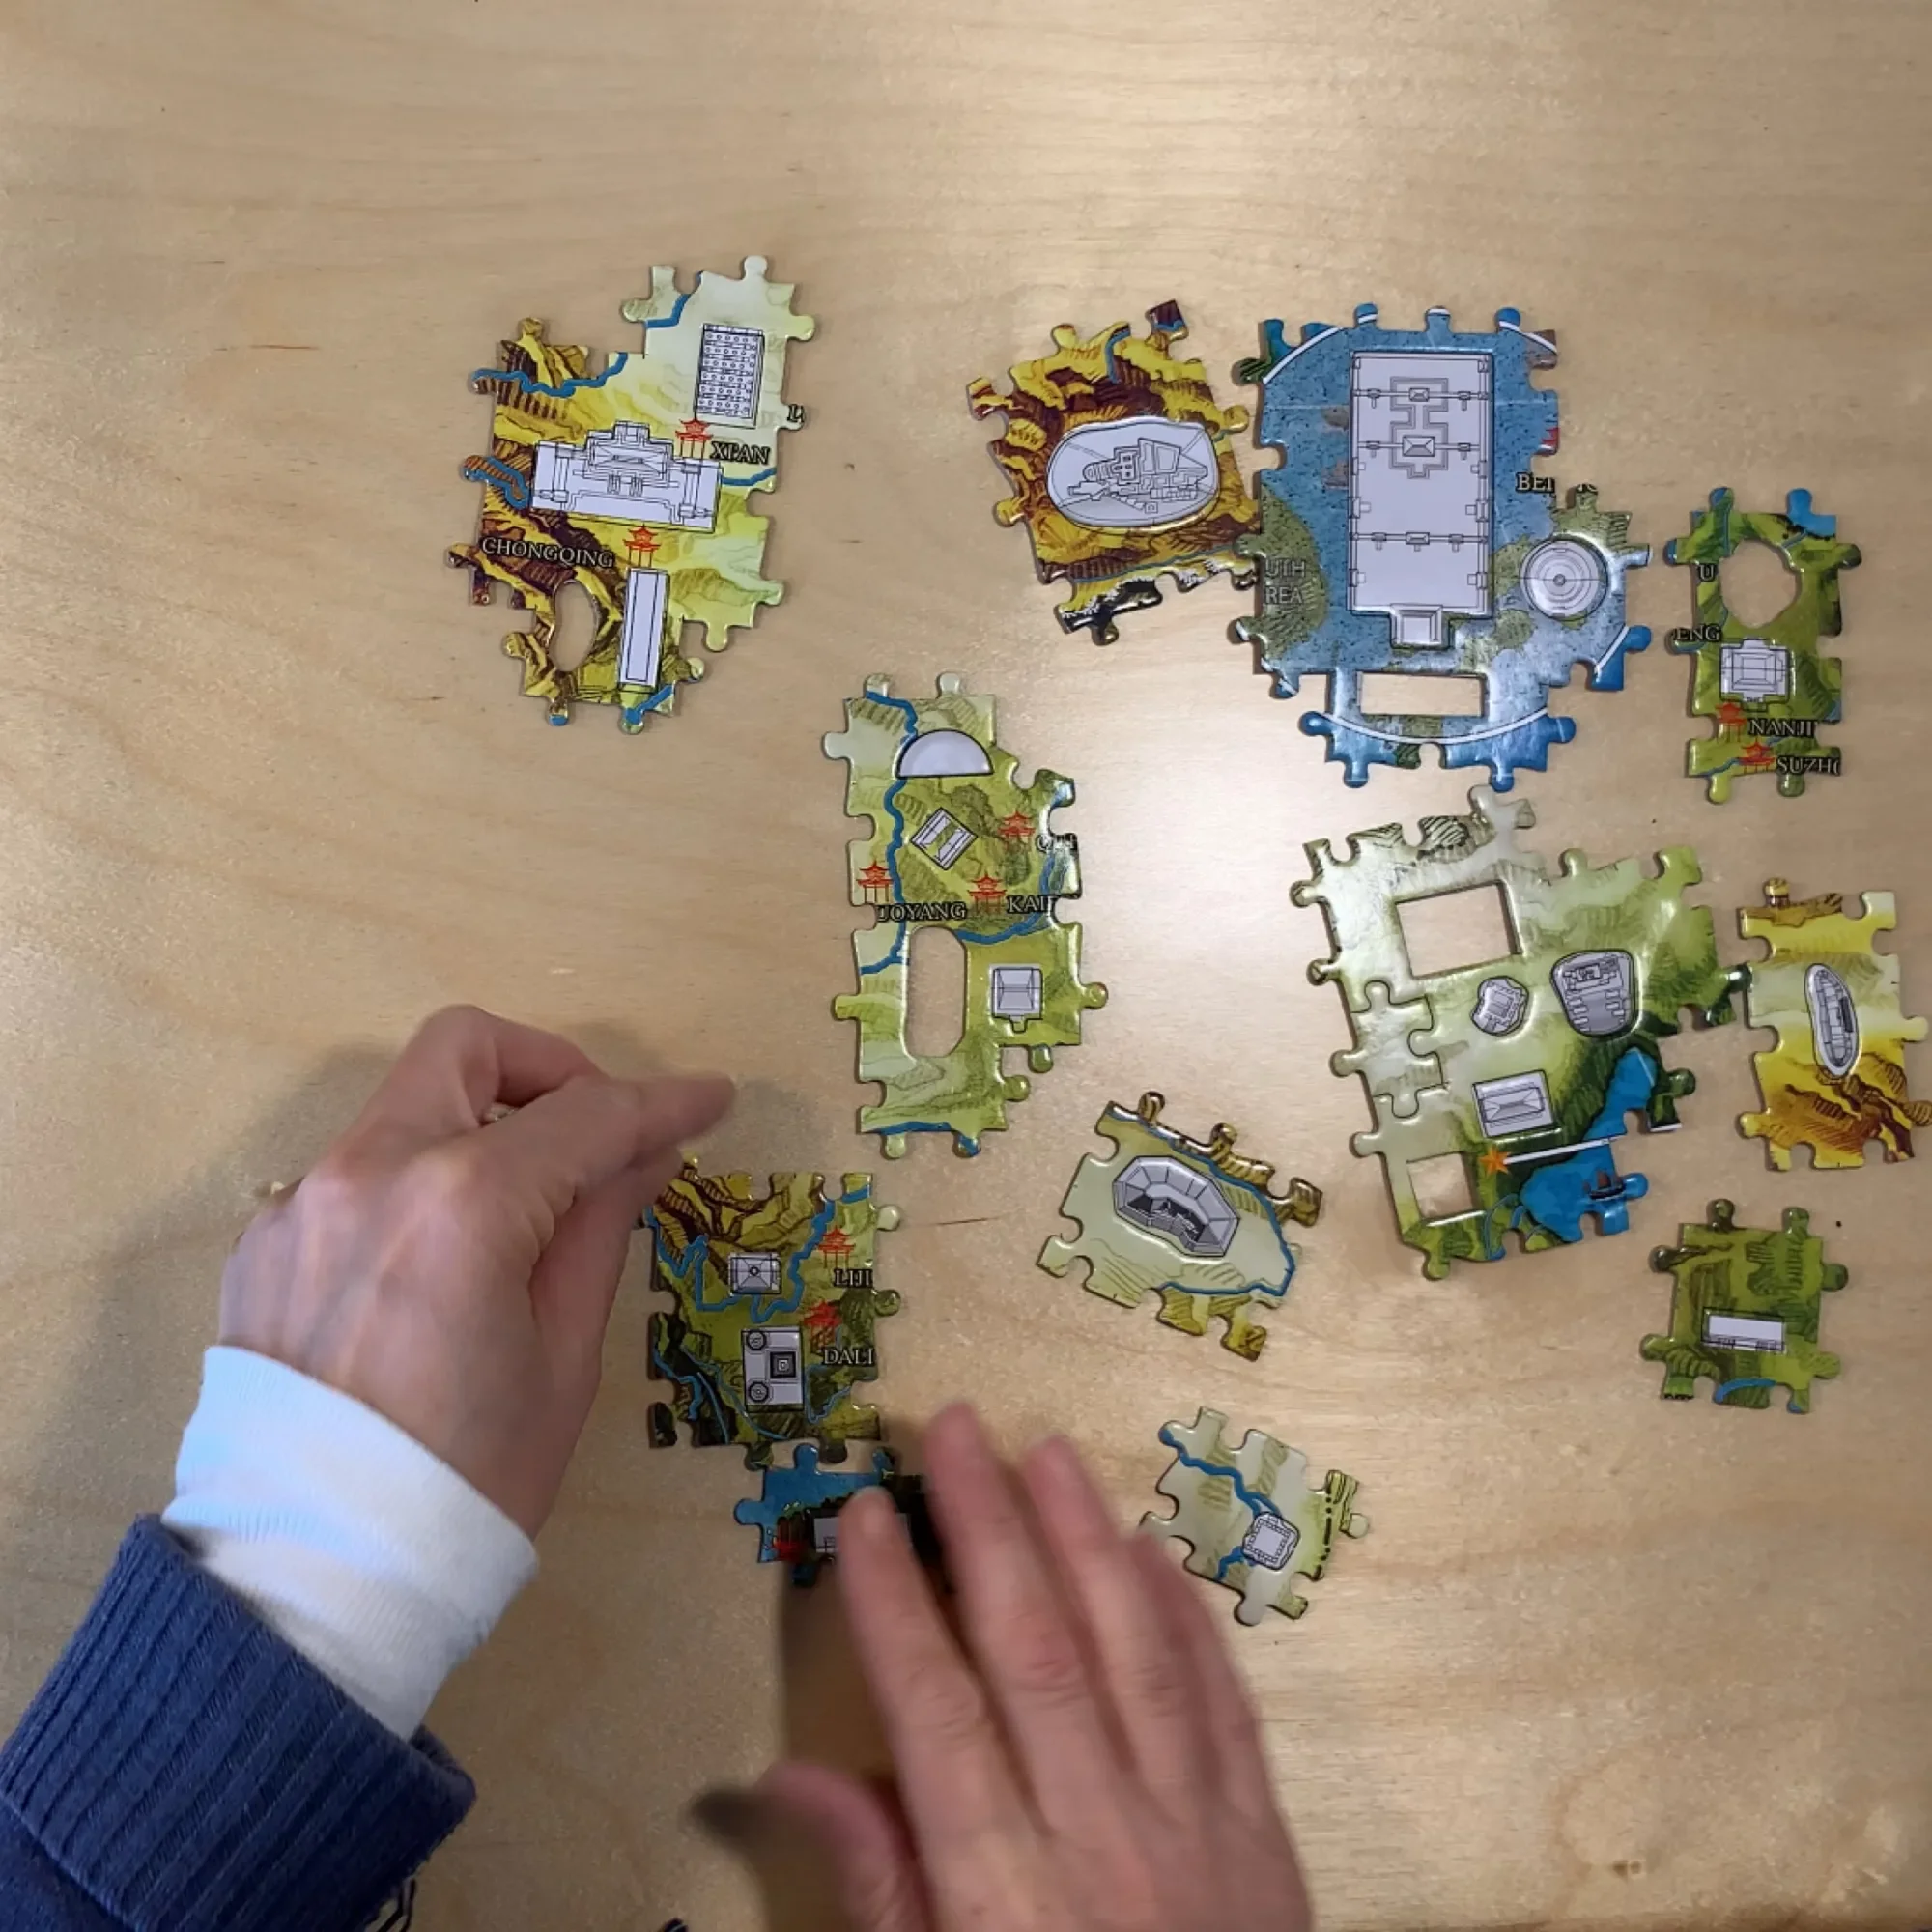
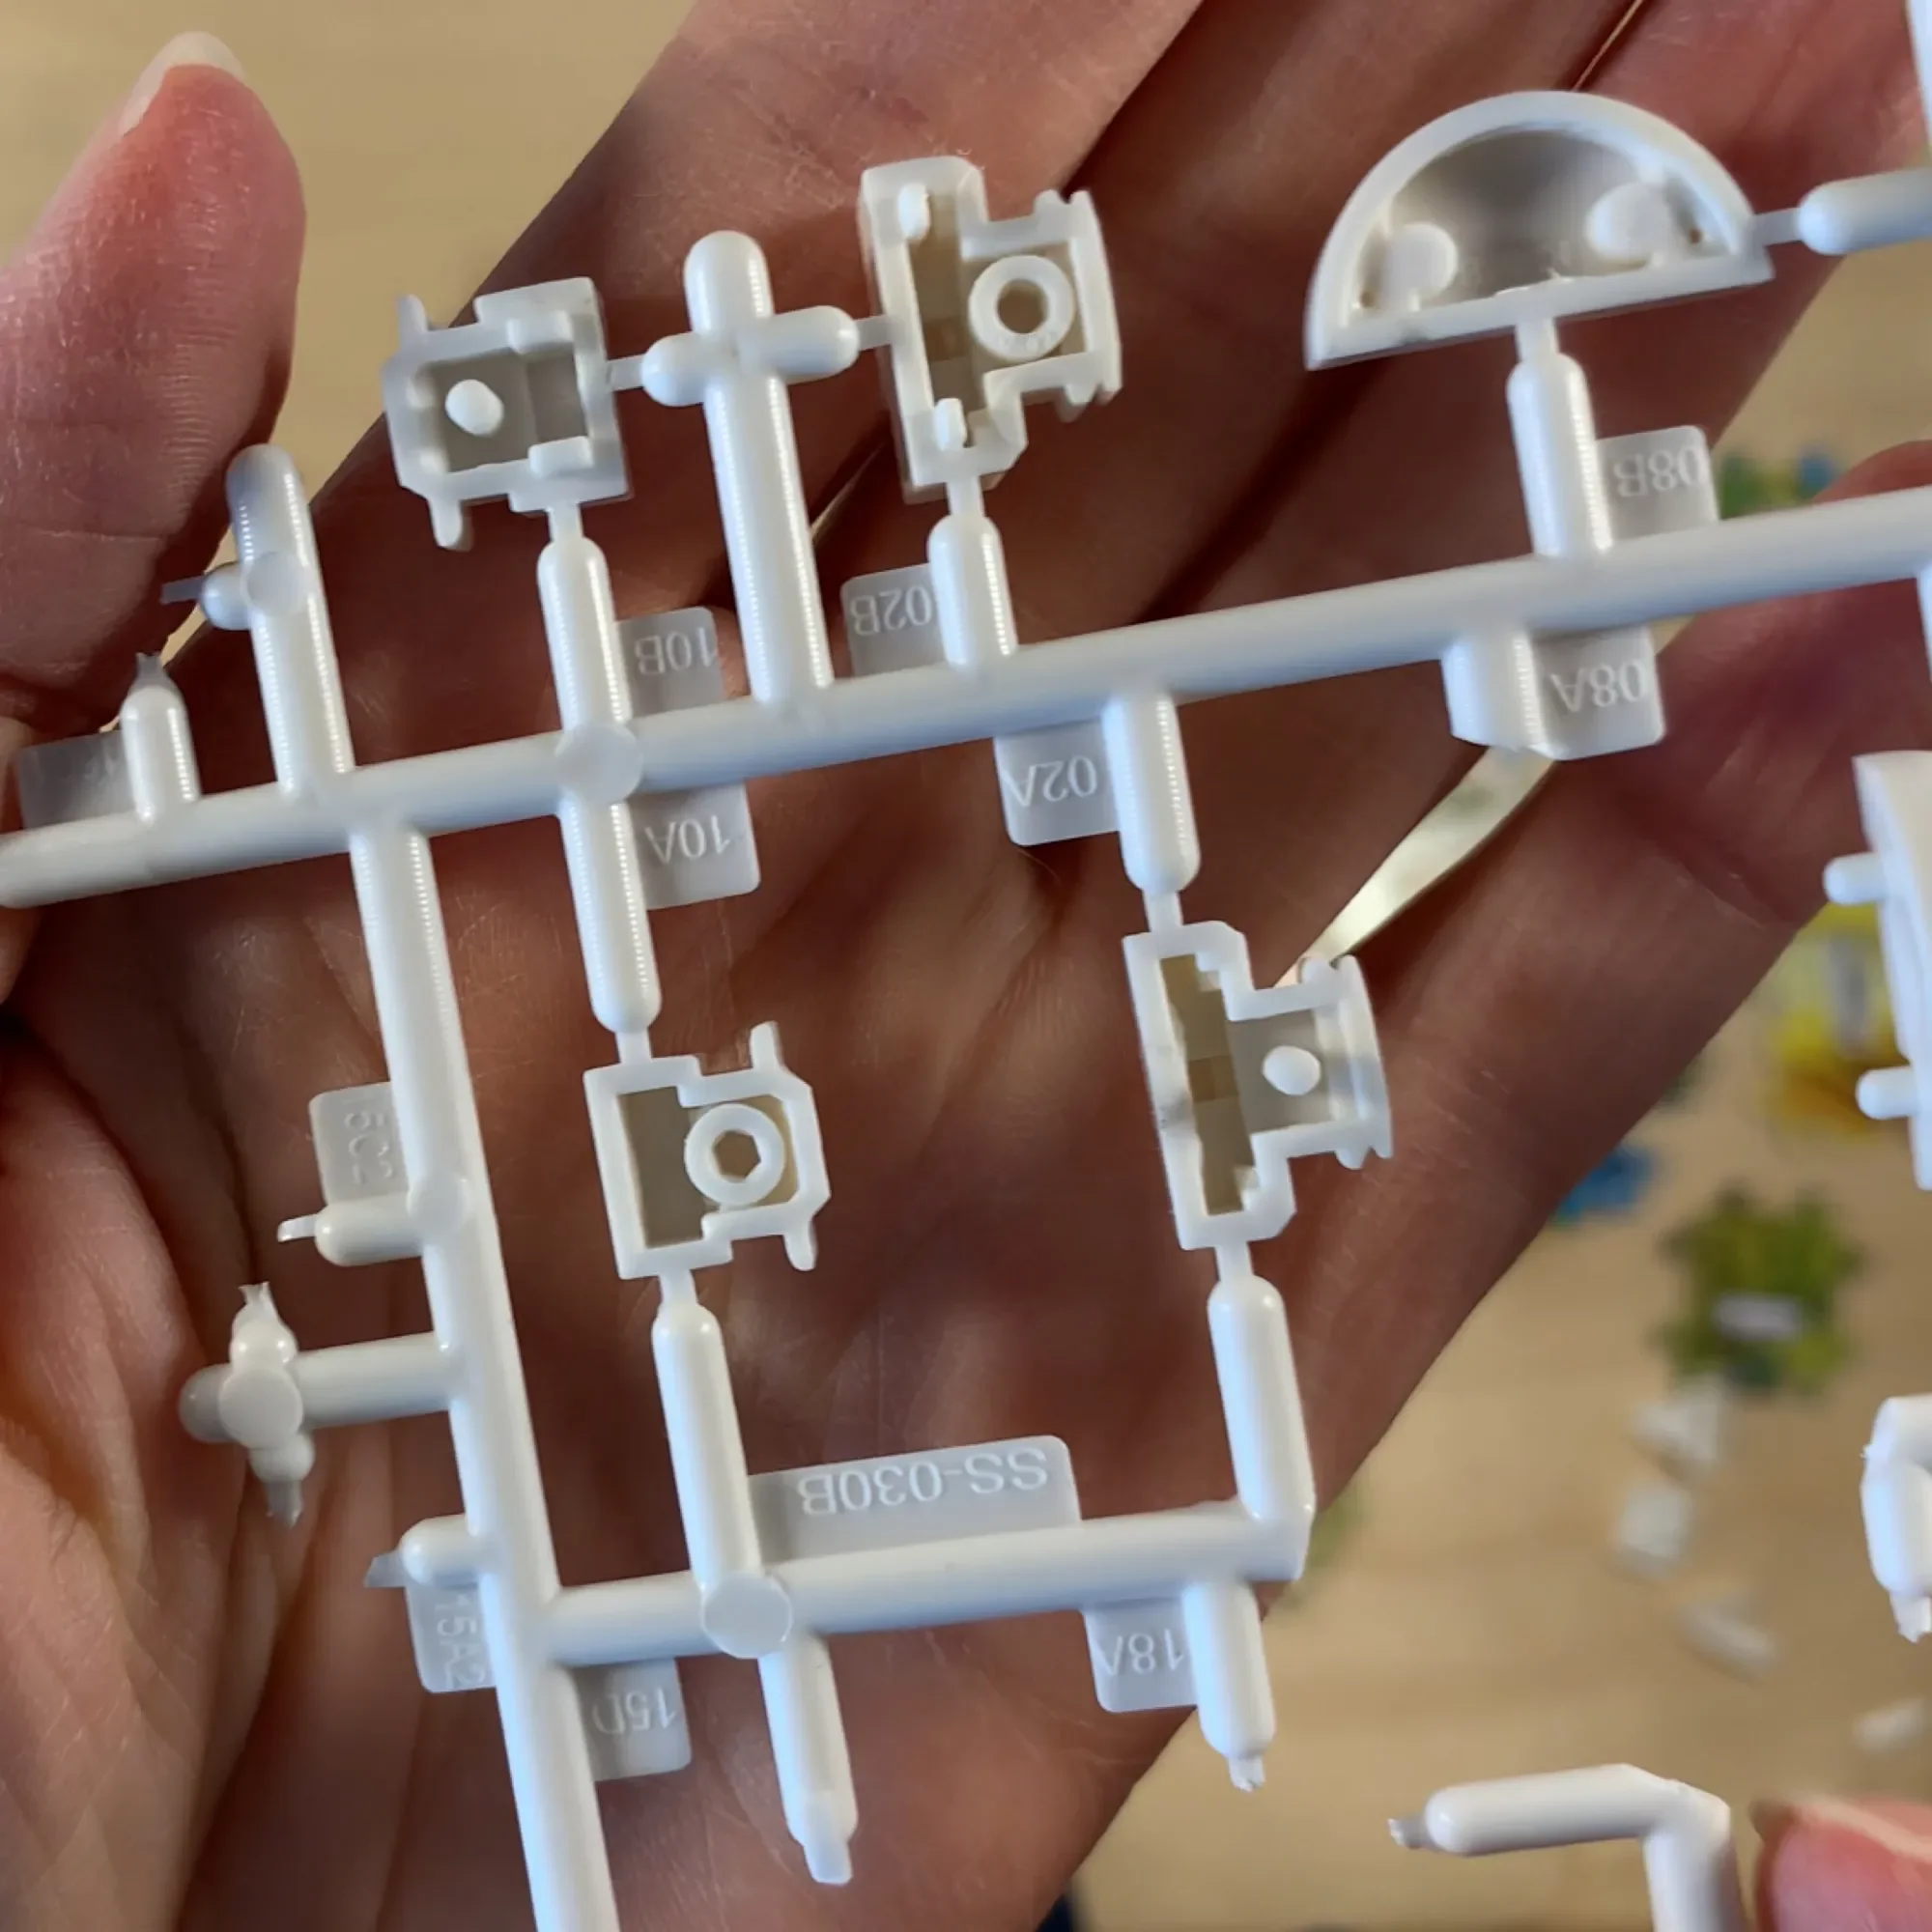
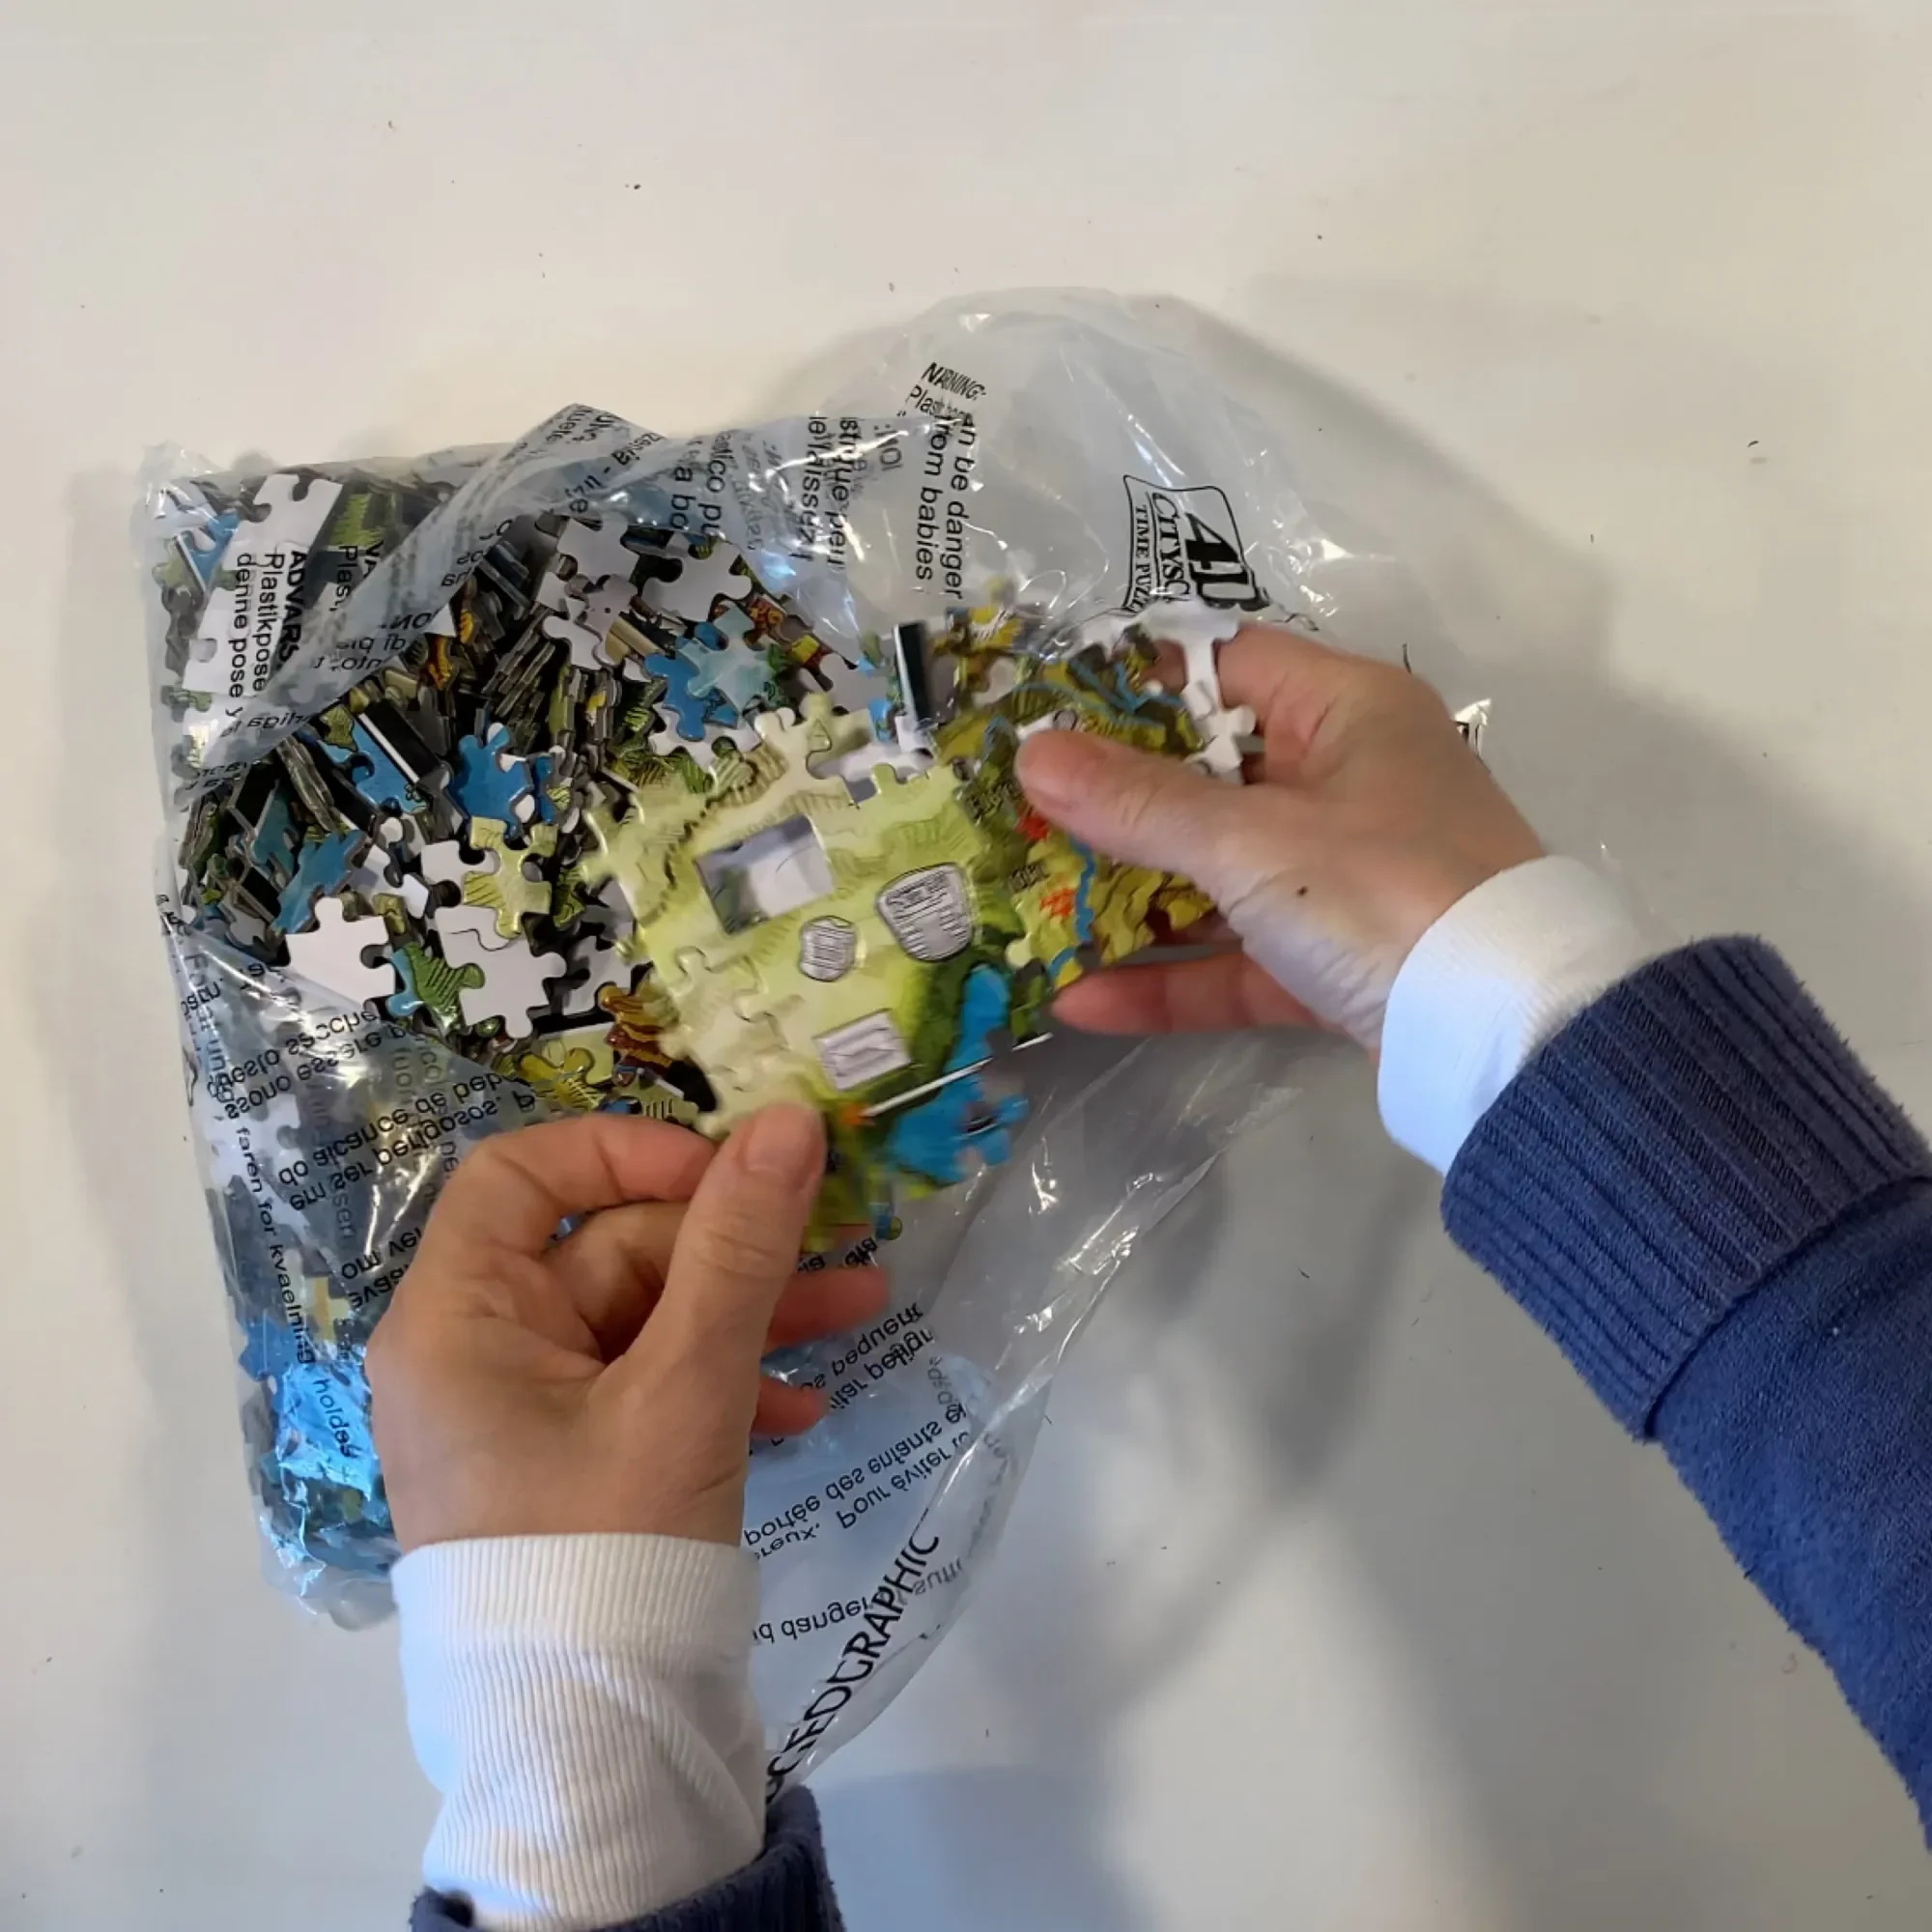
I had high hopes for this project. Sure, assembling the puzzle was fun enough and the bonus was the three dimensional plastic pieces that fit perfectly into holed out pieces on the puzzle, but we did this puzzle for one reason…to see it through our iPad using the app suggested on the box. After searching for the app in all forms of the app’s name, and though the 3D CityScapes website, we couldn’t find the app anywhere! We were so disappointed. We did find other apps that seemed promising, but overall it wasn’t what we expected.
Check out the complete Ibn Battuta and North Africa Unit Study playlist, the China Unit Study playlist, the Silk Road Unit Study playlist, the Islamic Empire Unit Study playlist, and the Marco Polo & Genghis Khan Unit Study playlist as all these unit studies work well together.


How to Make Chinese Ribbon Dance Sticks
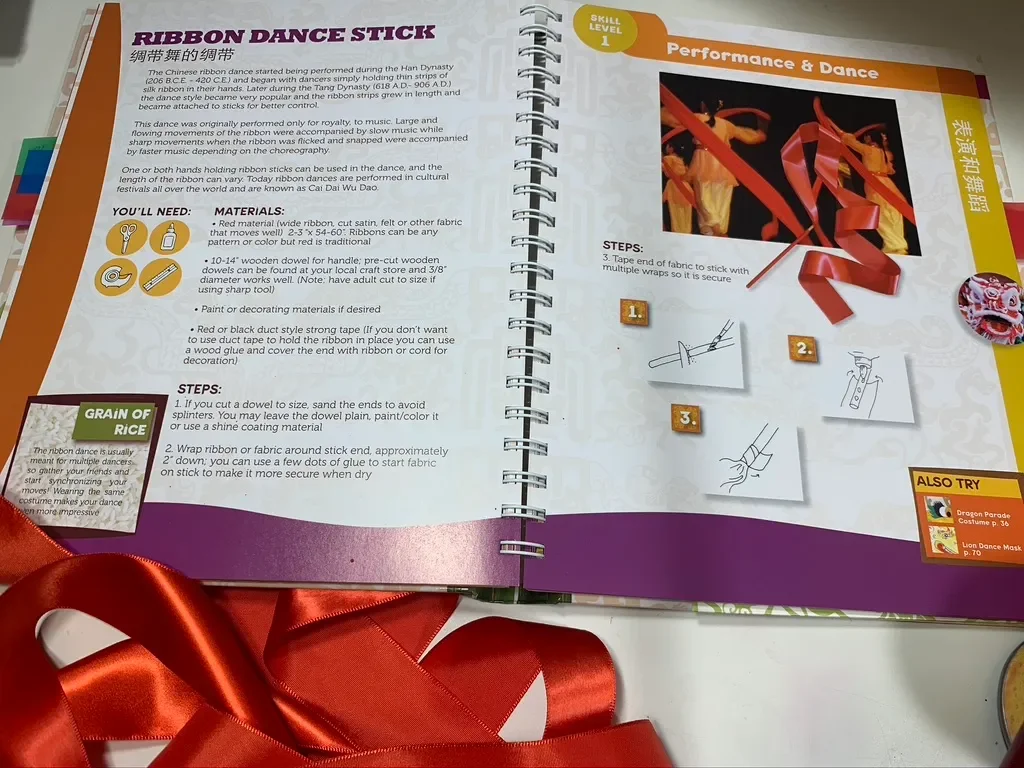
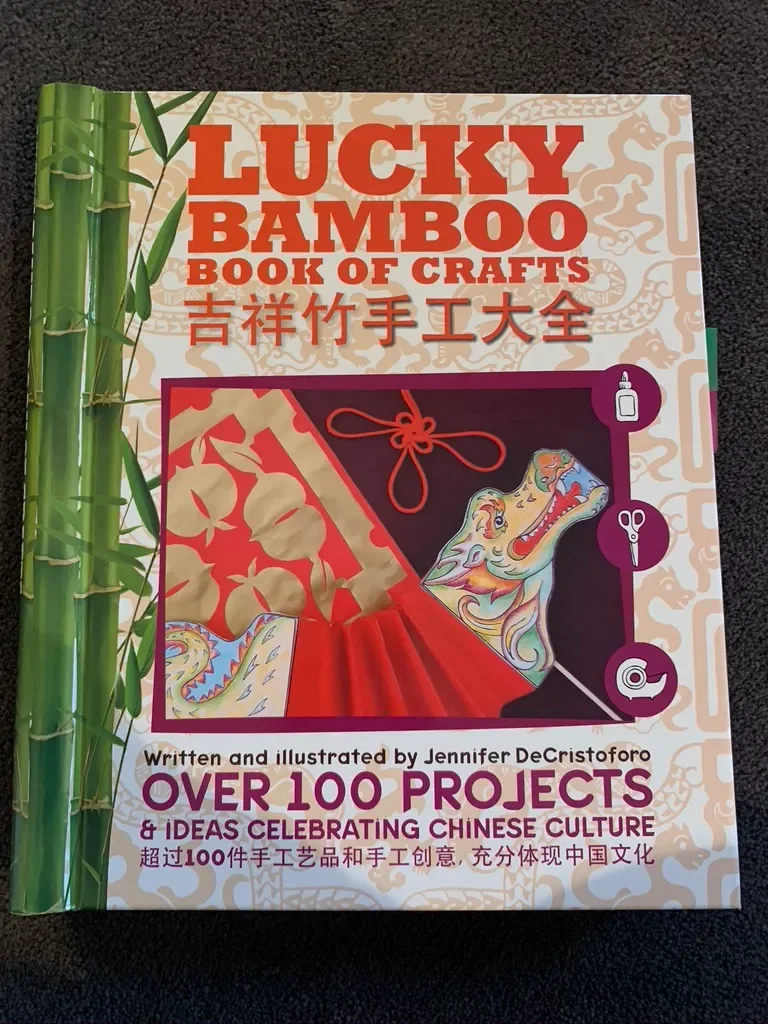
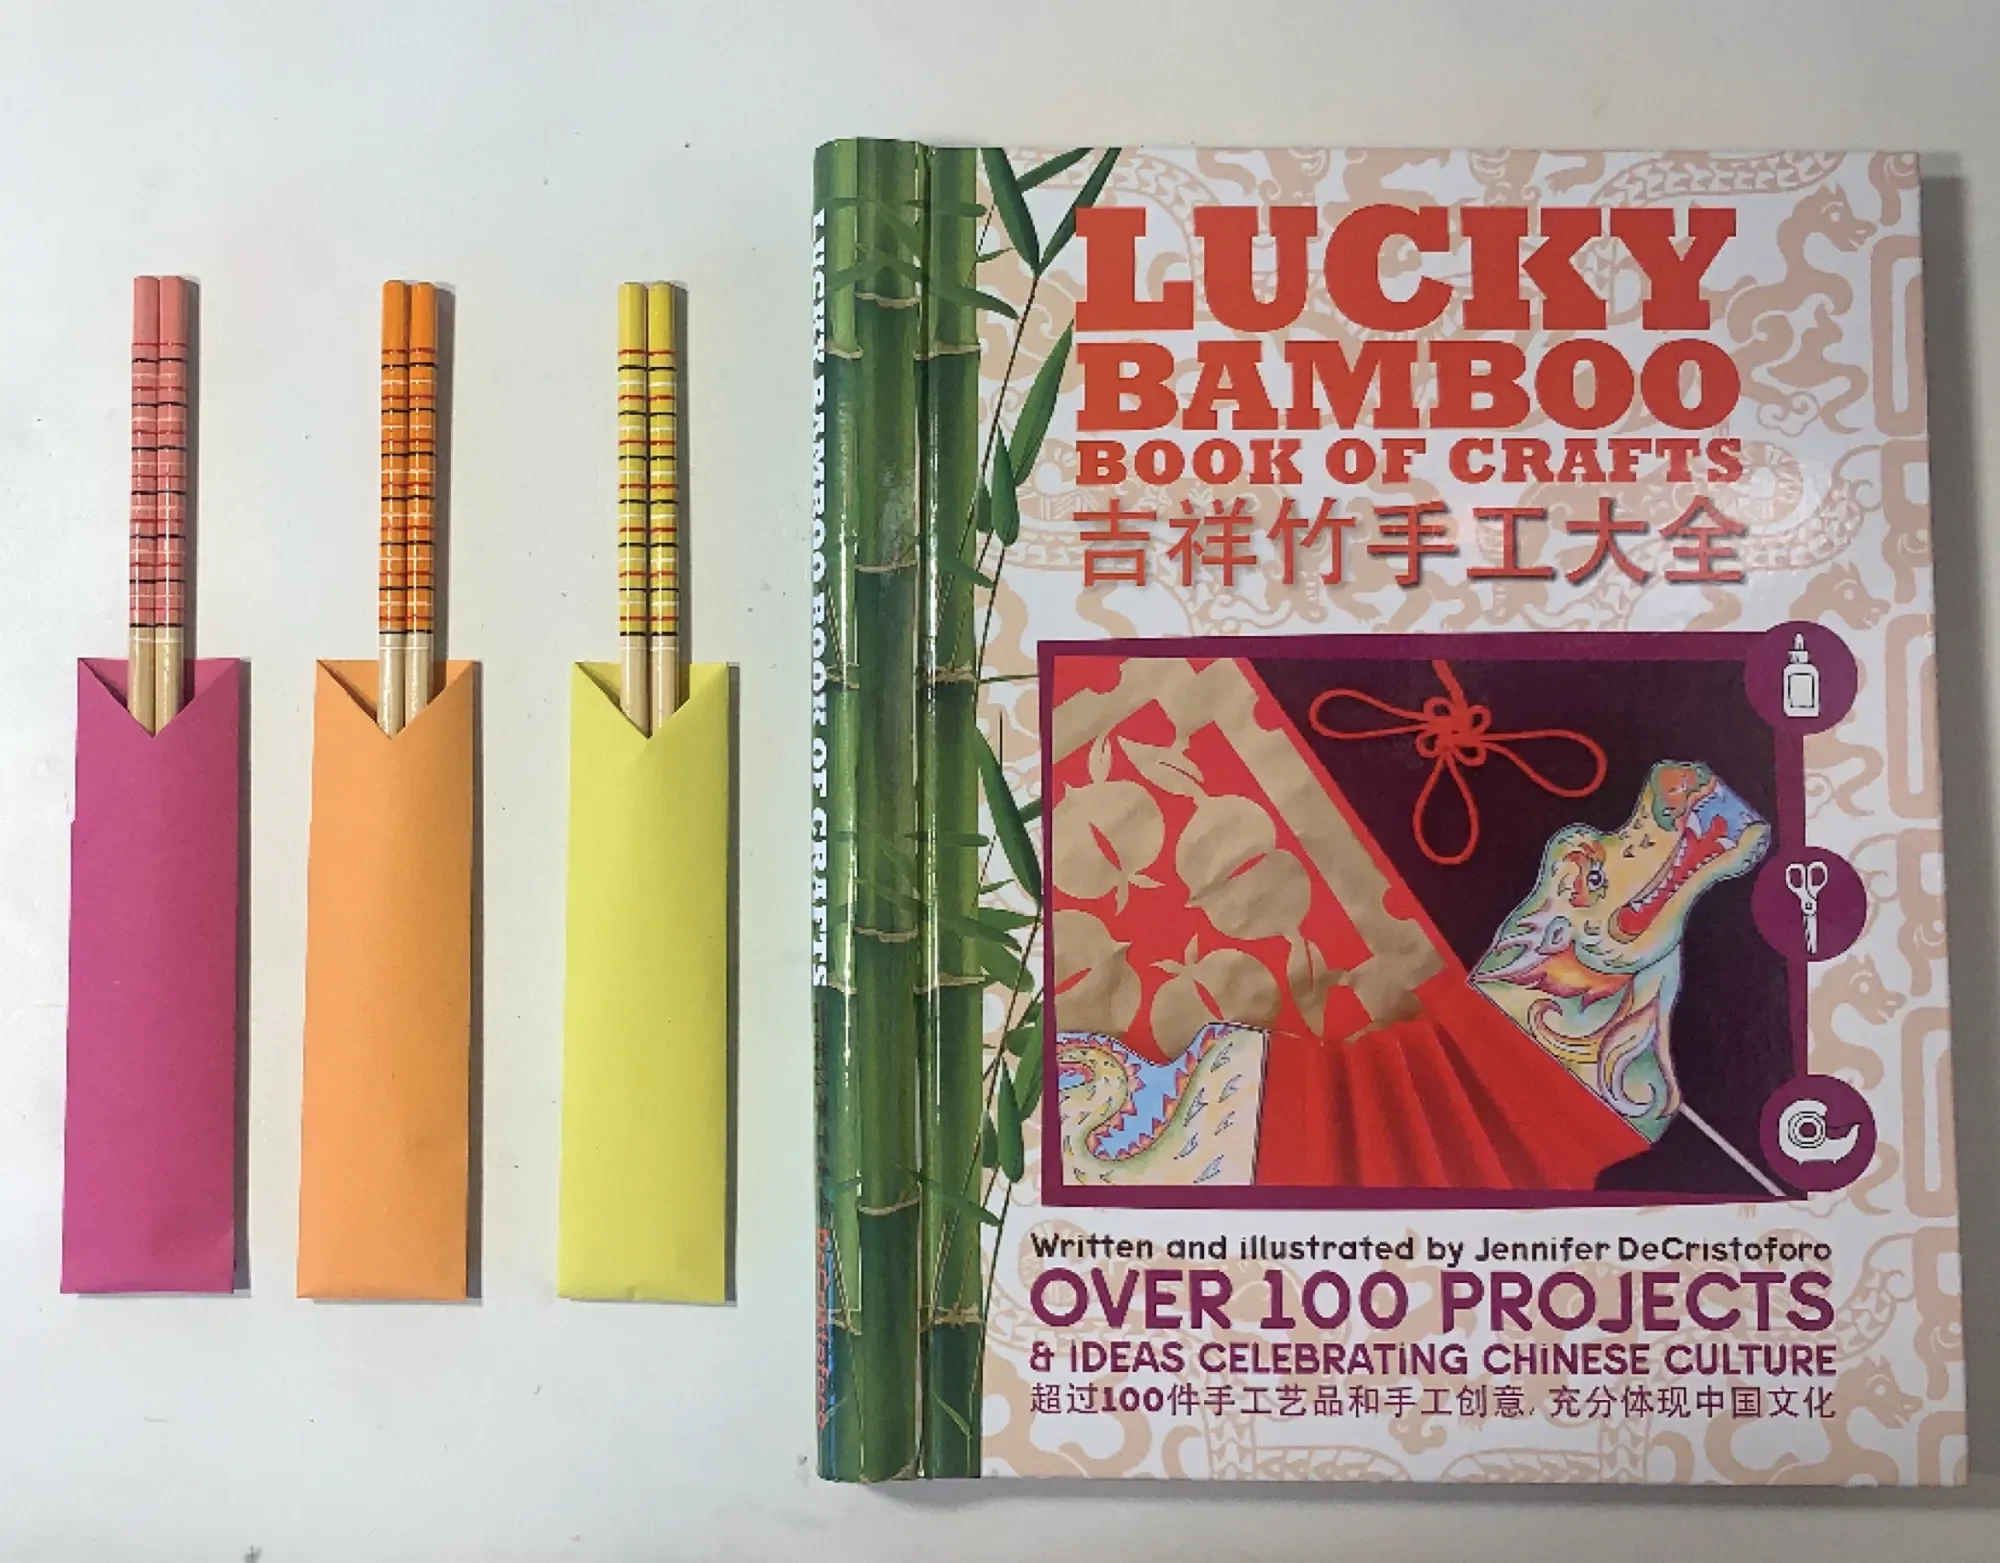
When we do our history units for homeschool, I aim to include a craft book or kits. I love hands on activities and feel it enhances a curriculum. For this unit (including China, Ancient China and the Silk Road), I found this gem of a craft book. Lucky Bamboo Book of Crafts by Jennifer DeCristoforo is expertly laid out. The quality is superb! The book itself is high quality with thick sturdy pages spiral bound for ease of use and covered with a vibrant durable cover. You get to meet Jennifer in the opening pages of the book which I really appreciated and gave me a deeper fondness for the book and its aims. The craft ideas are simple, well explained and include step by step directions.
This has been one of the most easily incorporated craft books we have used as my 10-year-old daughter started making the projects easily and on her own before we began working on projects together. The back of the book includes templates you can copy and cut out. I appreciated having that available so we could complete crafts easily and beautifully.
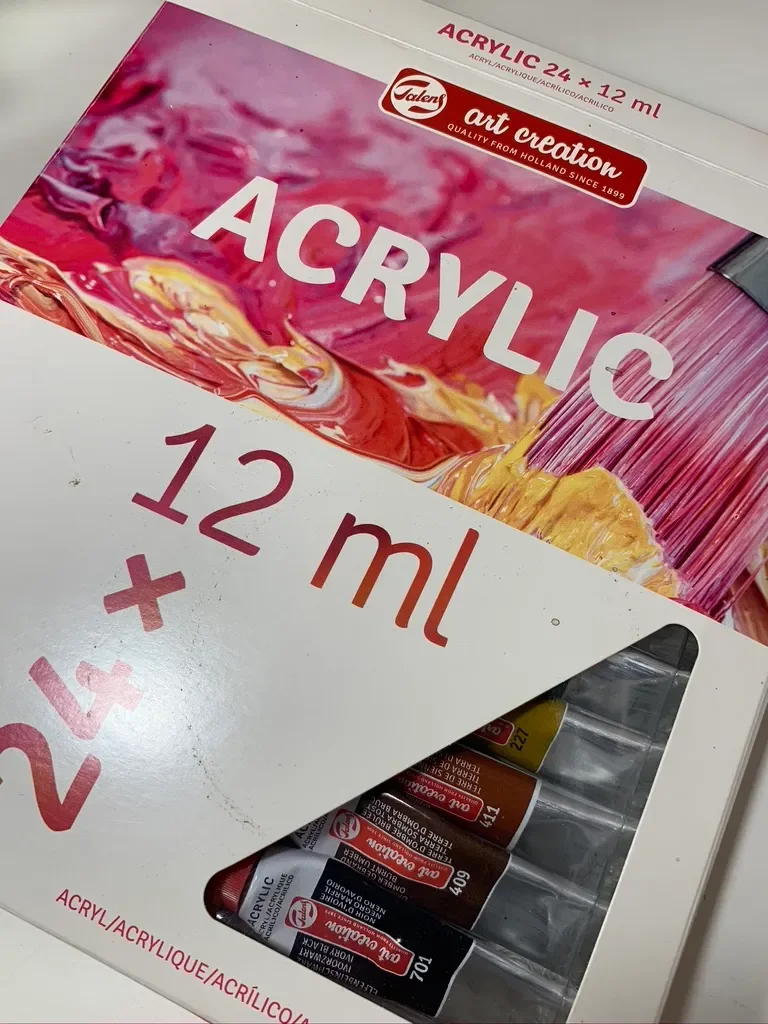
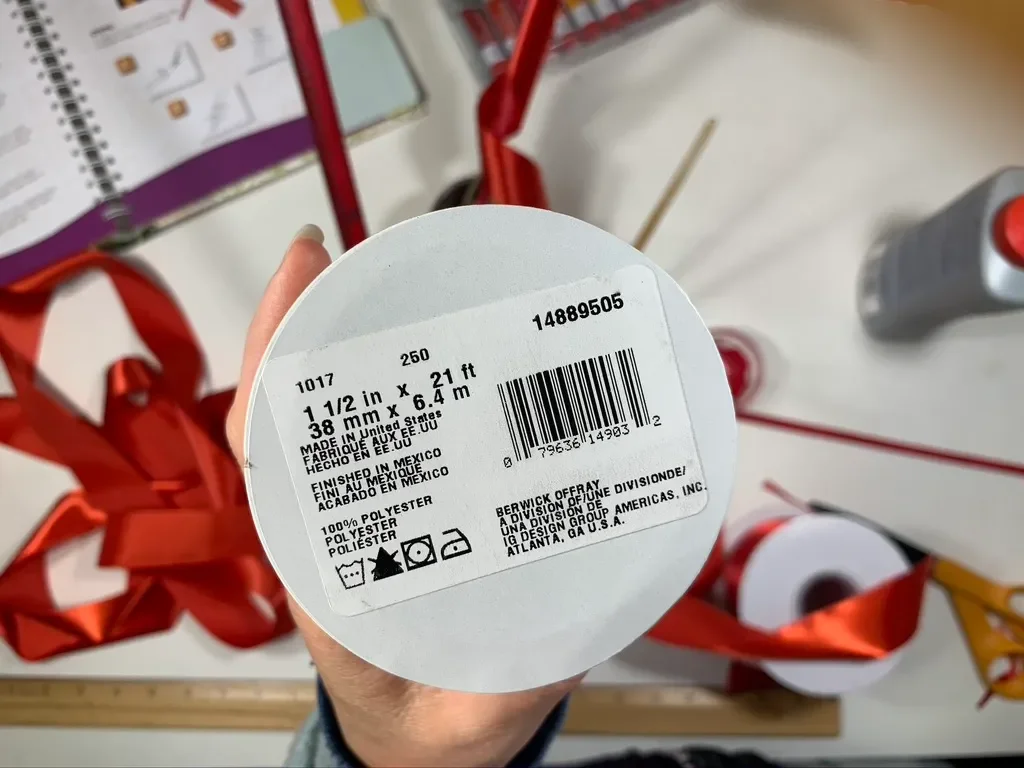
Today’s project is the Ribbon Dance Sticks. While this project was simple and quick, we did need to give ample time for the paint to dry and even more time for the glue to dry. We used 12 inch 1/4″ diameter dowels (I mistakenly said 3/8″ in the video) painted red using Lyra watercolors and acrylic paint. I bought 3″ red ribbon, but once we started the project I noticed the ribbon size suggested was 2″ to 3″ inches. Given the smallness of our dowels, I paused the project and headed to a local craft store (Jo-Ann), and picked up 1.5″ satin ribbon. We made ribbon sticks using both sizes of ribbon. The book suggests 54-60 inches of ribbon, but we made ours 6 feet long with one at 15 feet! I also found a 15 inch dowel with a larger diameter in my supplies, so I painted that up and used the wider ribbon on that one.
Once we looked up Chinese ribbon dances we noticed that the silk or cloth or ribbon is actually much larger than 3″, so you could also try making it with a long strip of silk cloth. If you adhere it carefully to a stick, you can use it temporarily without damaging the cloth, or, as an alternative, you could hold the cloth. We used our Sarah’s Silks in red to try this out as an alternative. It was enjoyable learning different techniques and when you work together to choreography a dance, it looks especially beautiful.
Check out the complete Ibn Battuta and North Africa Unit Study playlist, the China Unit Study playlist, the Silk Road Unit Study playlist, the Islamic Empire Unit Study playlist, and the Marco Polo & Genghis Khan Unit Study playlist as all these unit studies work well together.


How to Make Ancient Chinese Ming Porcelain
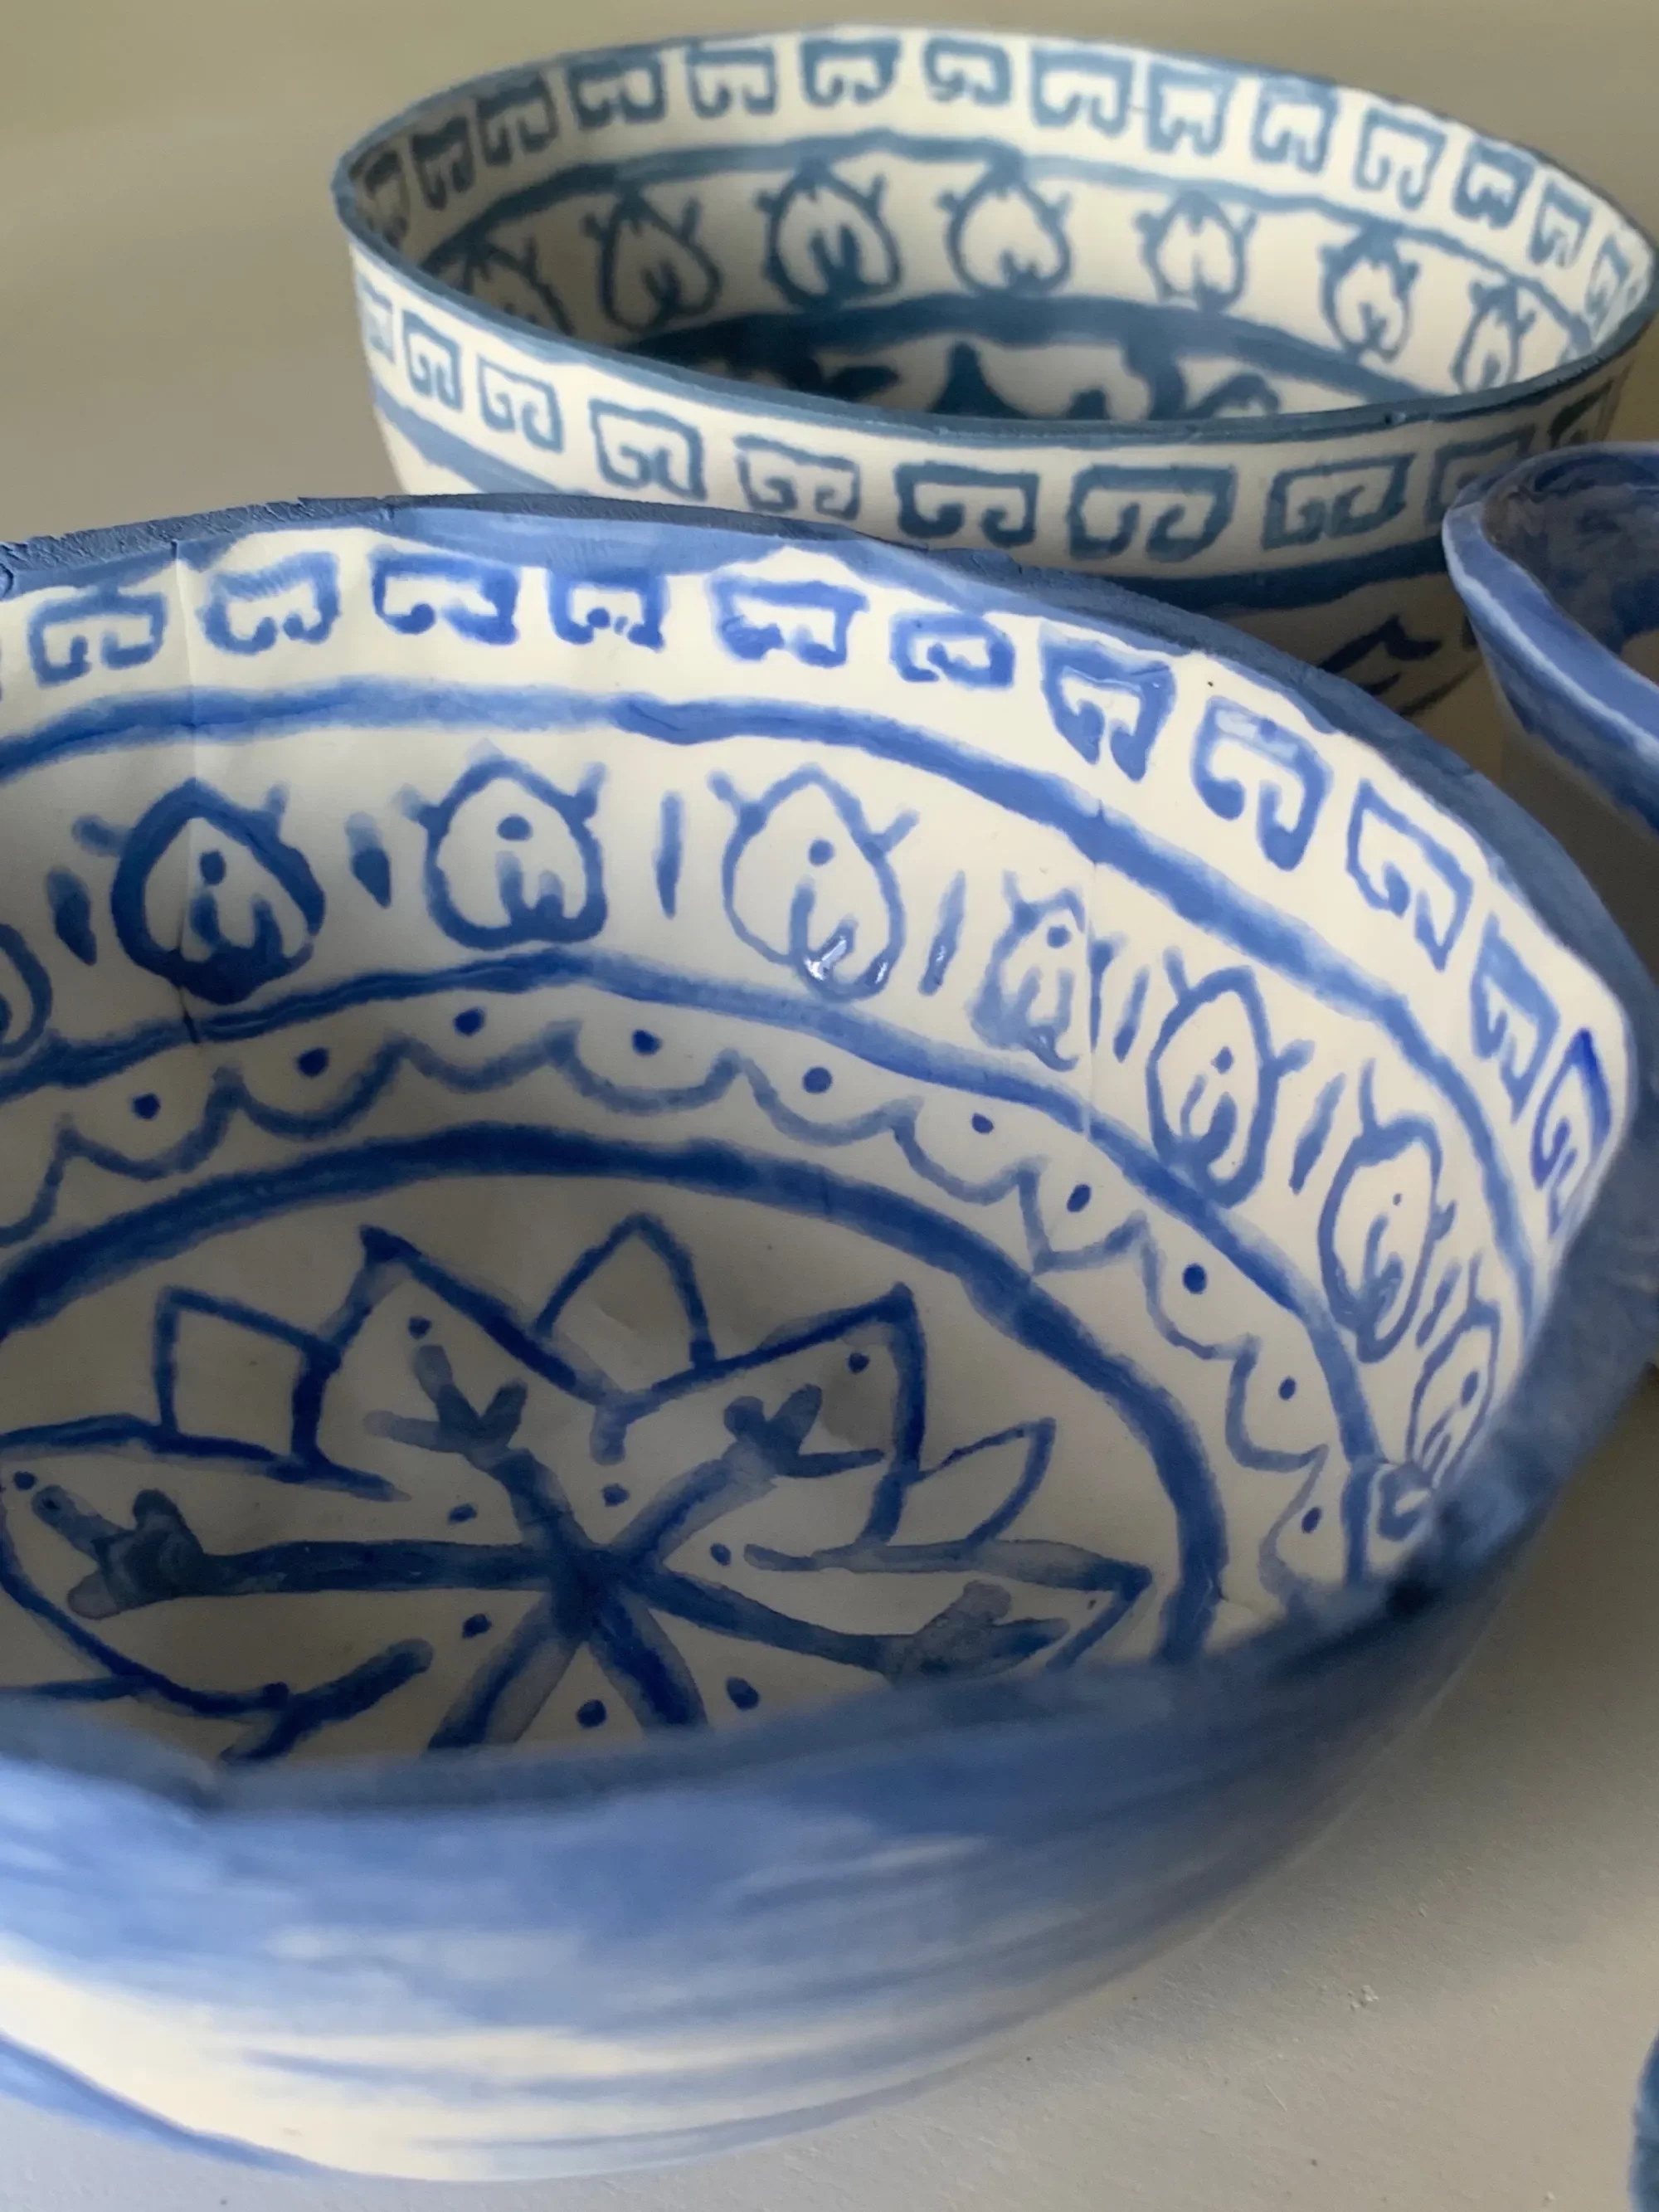
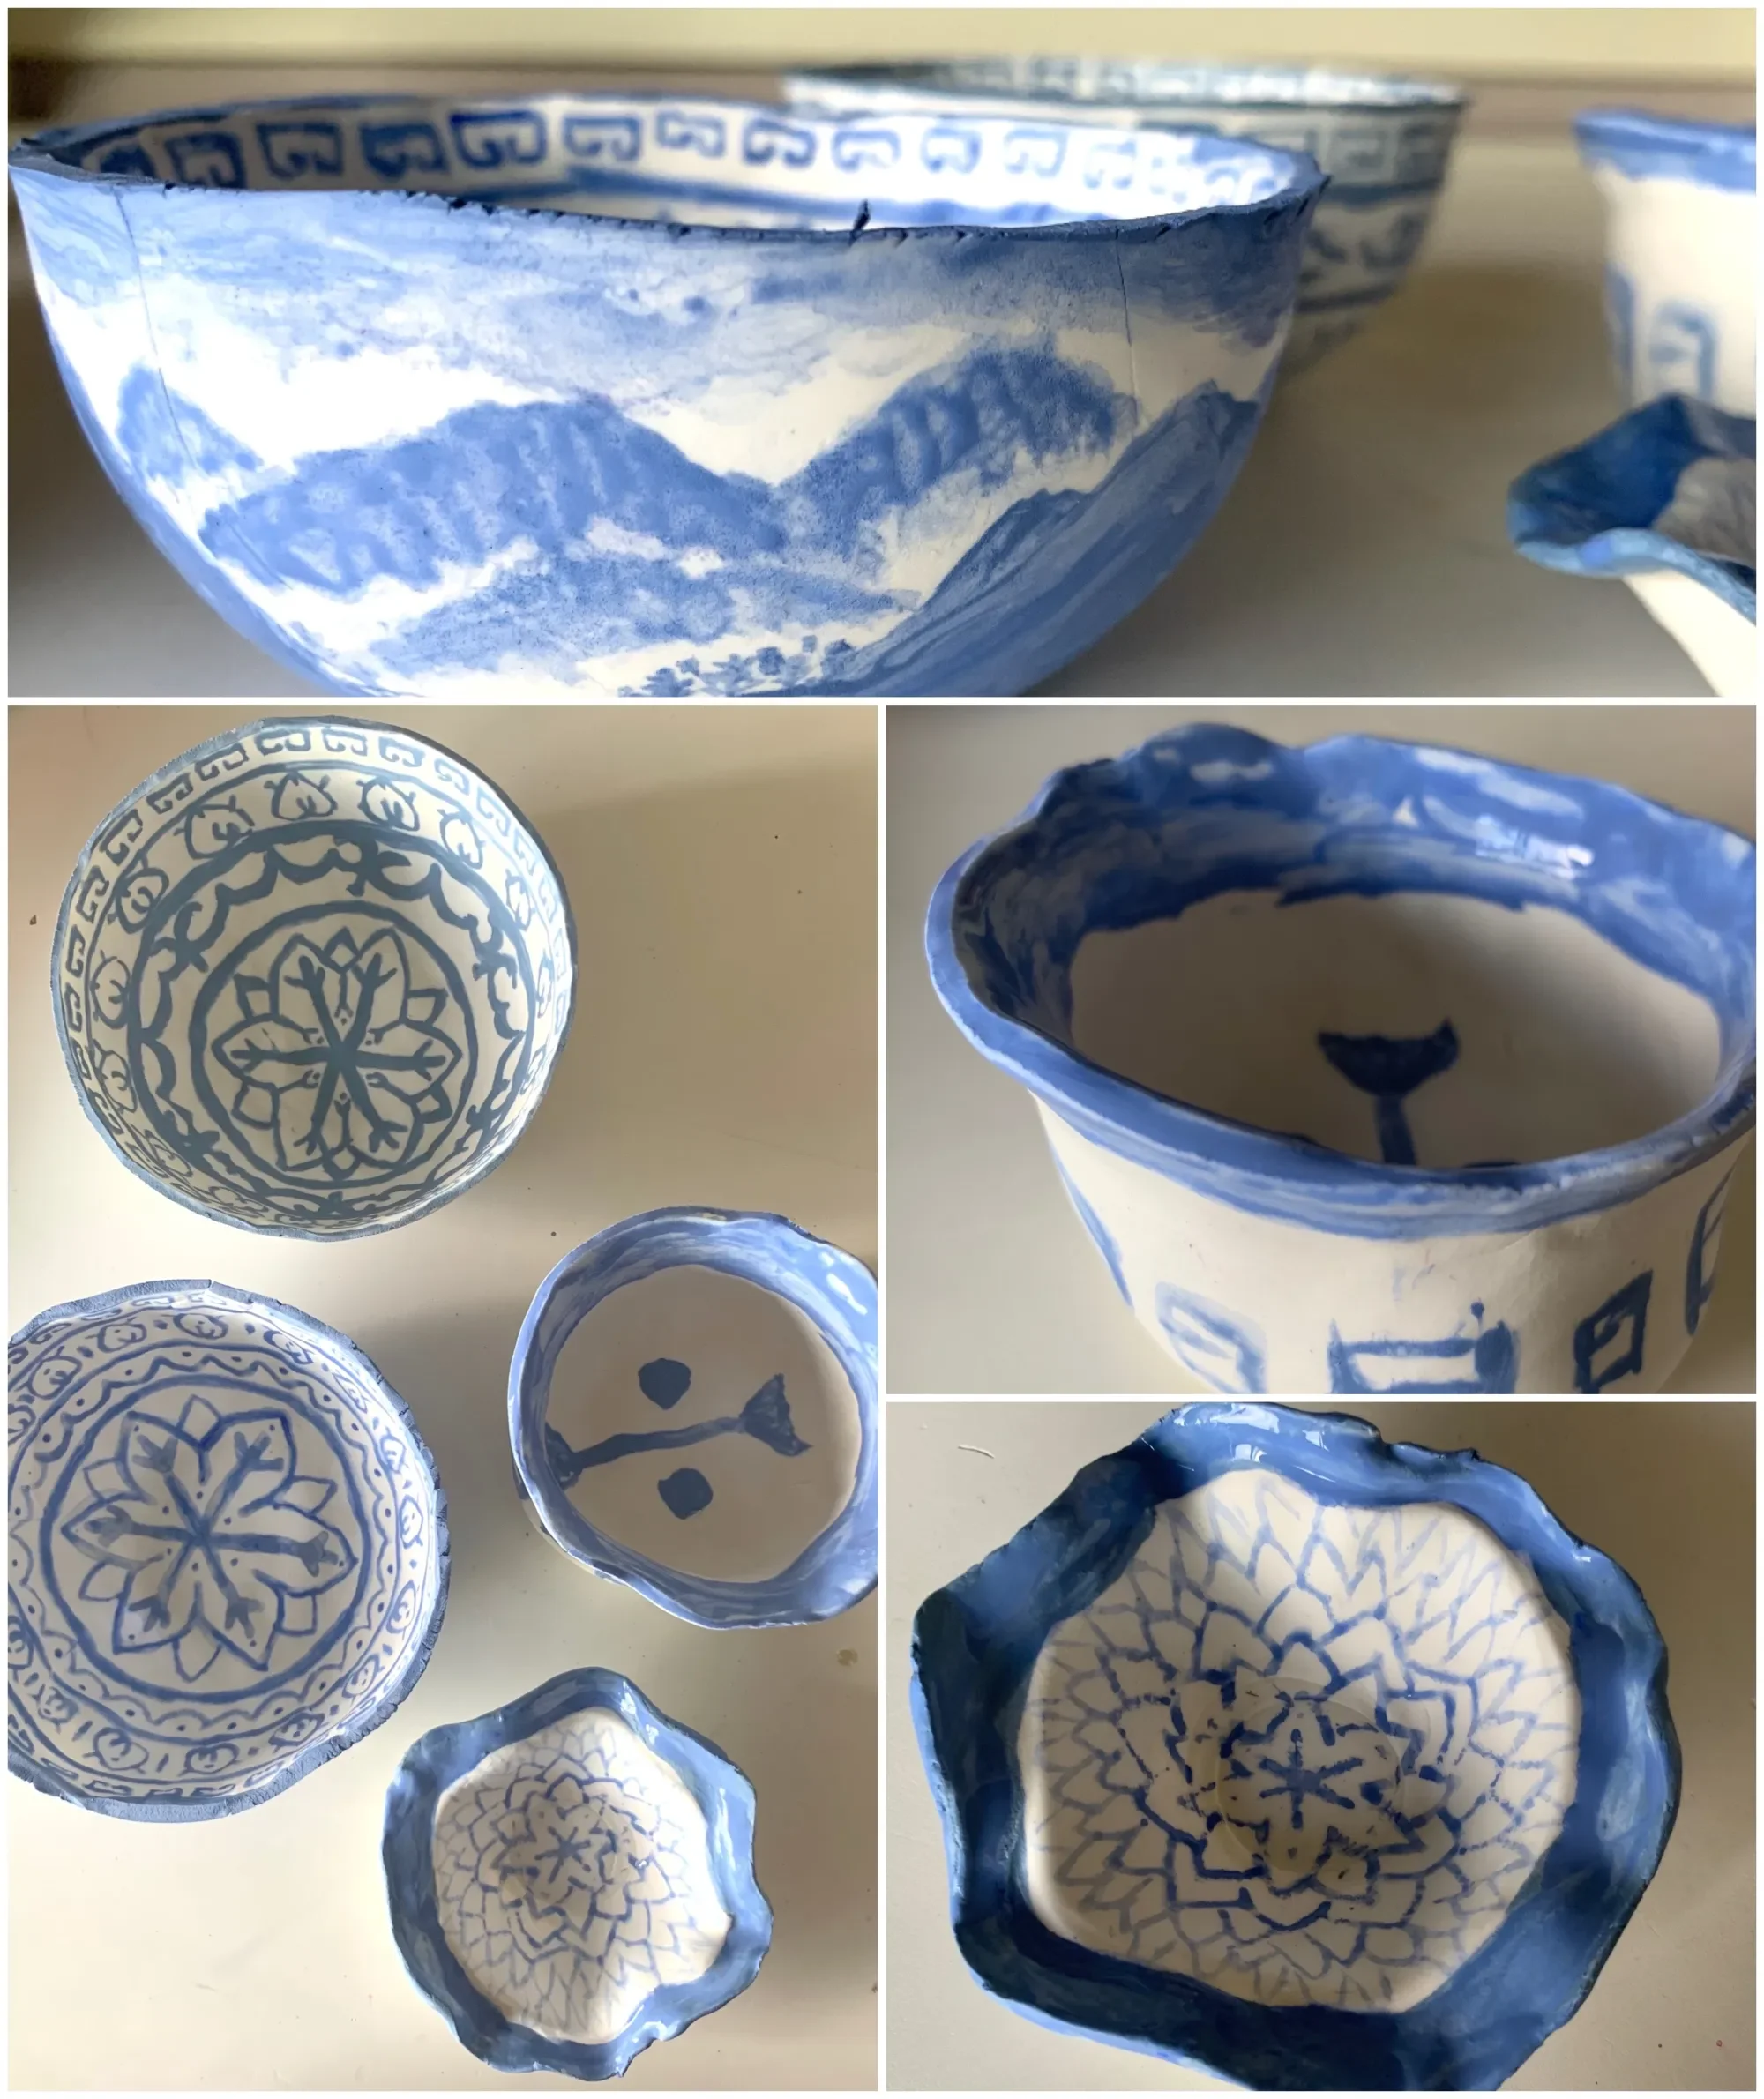
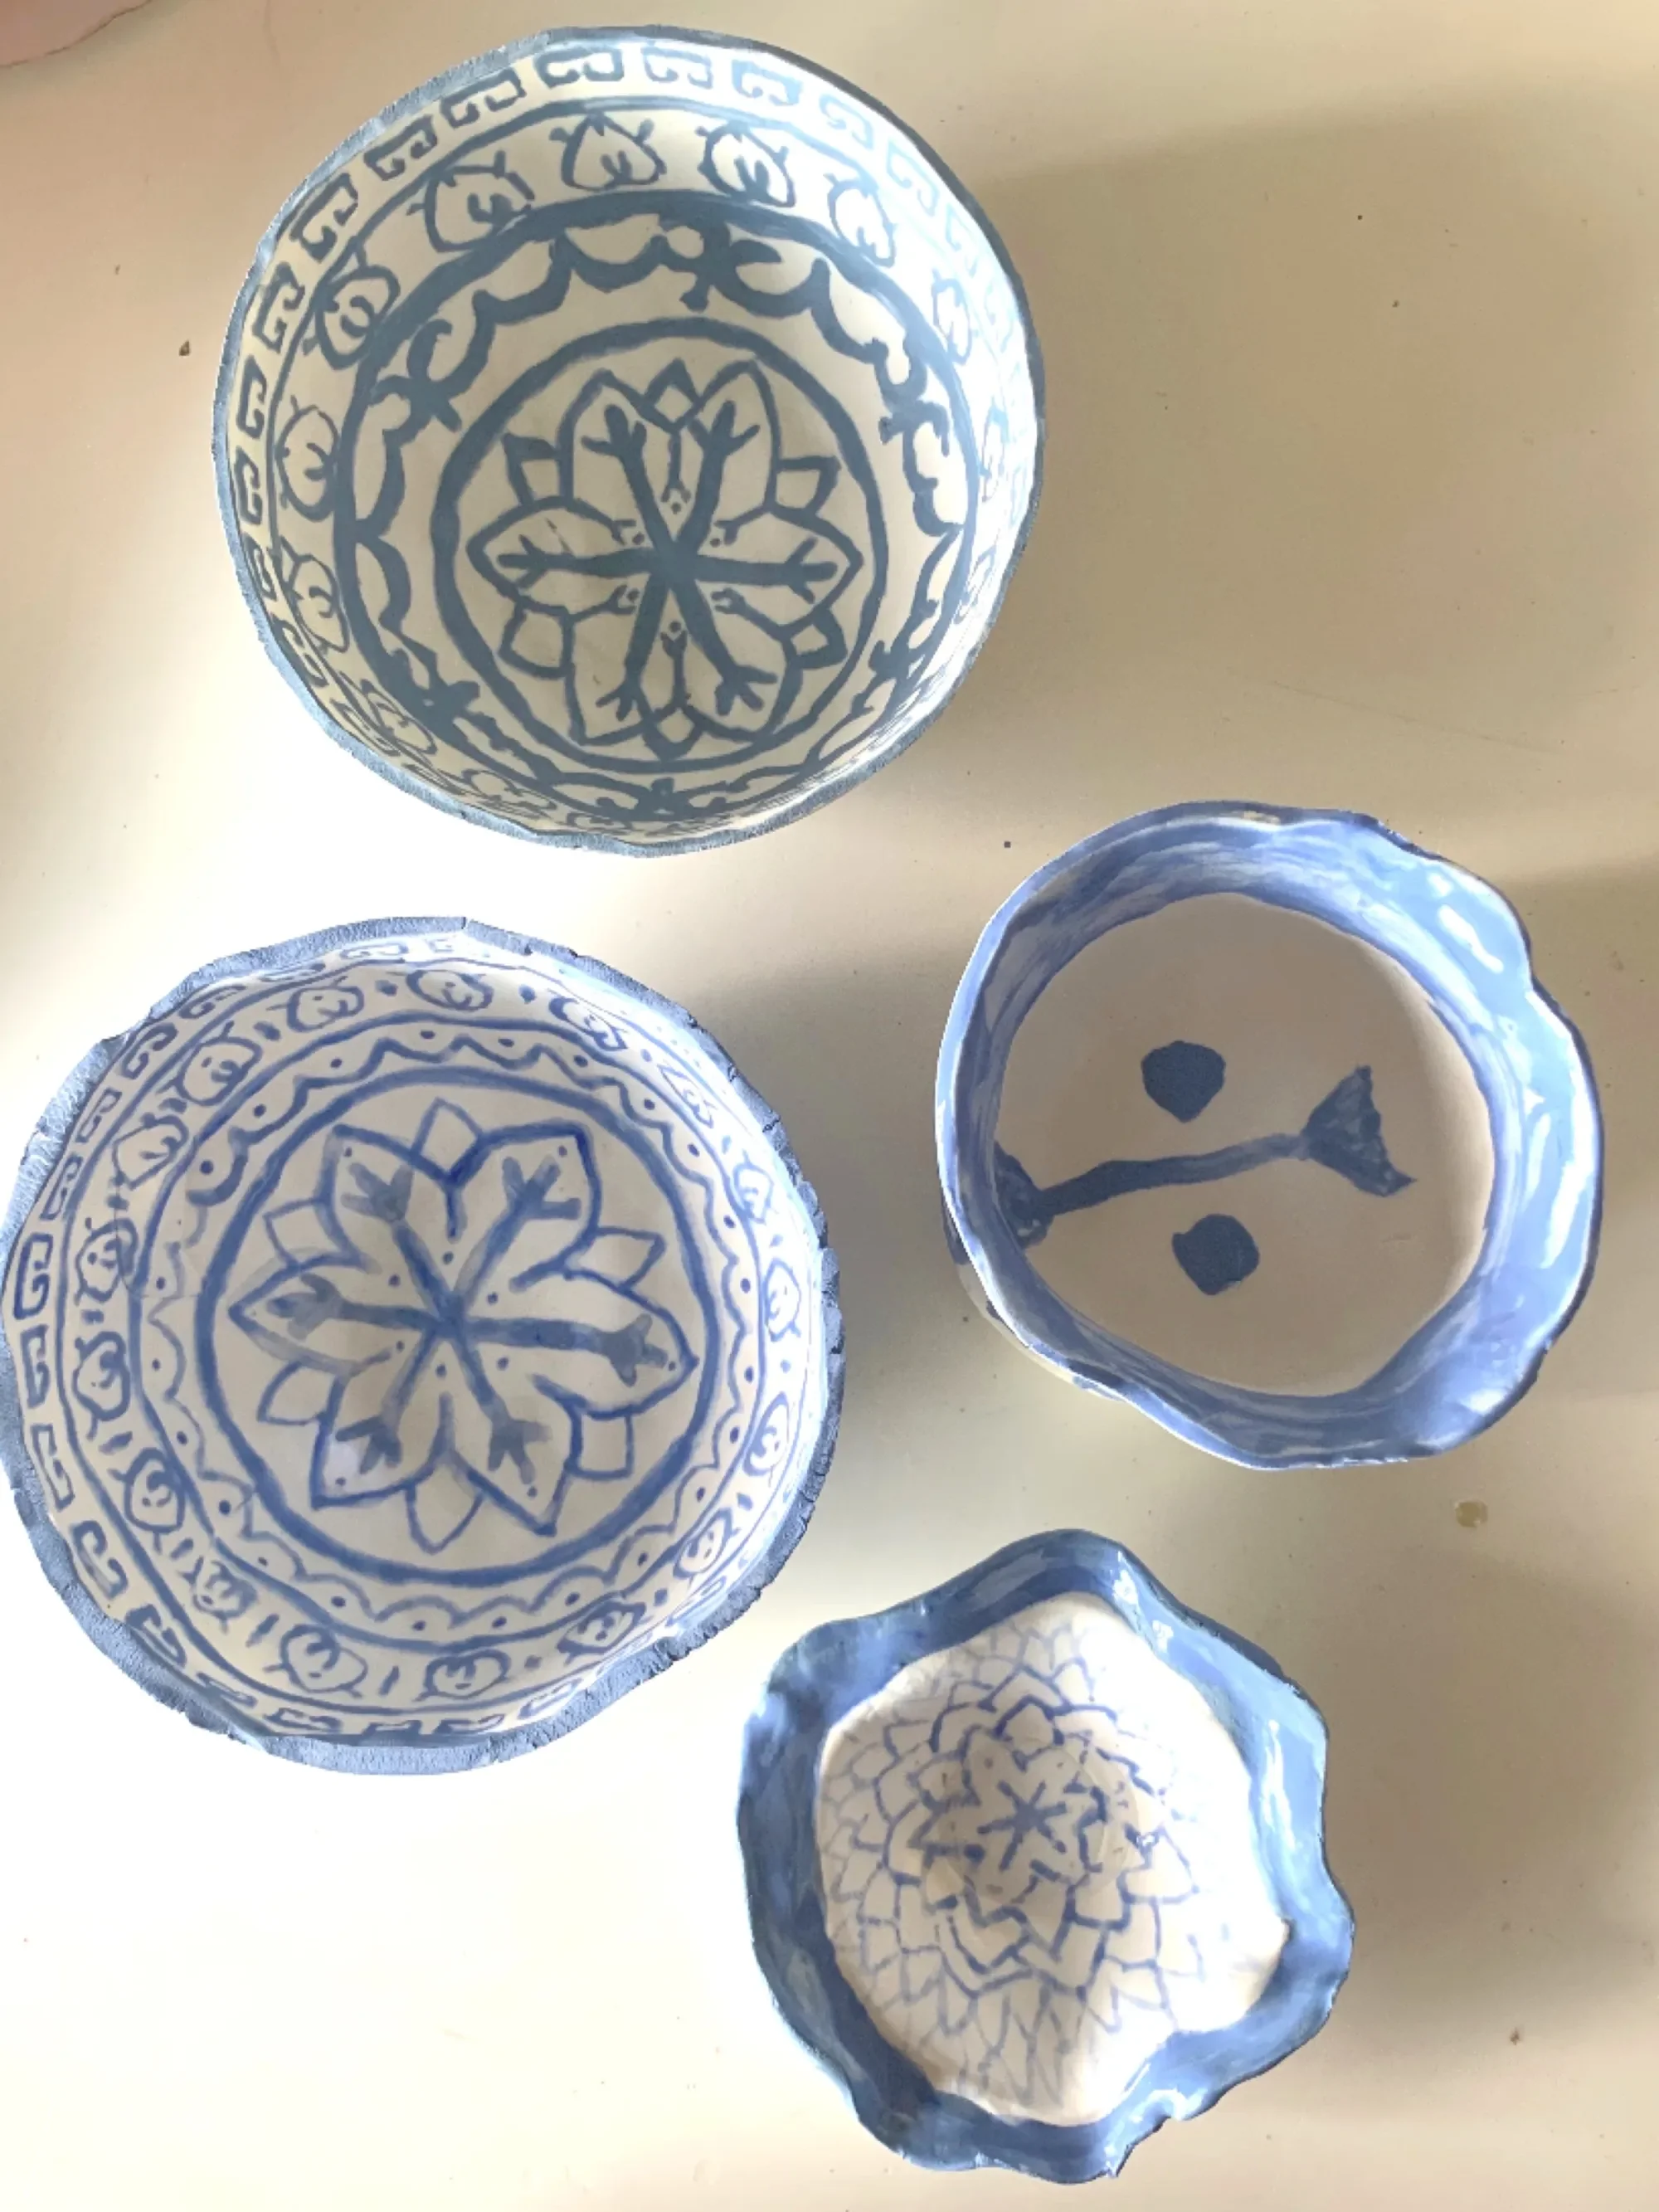
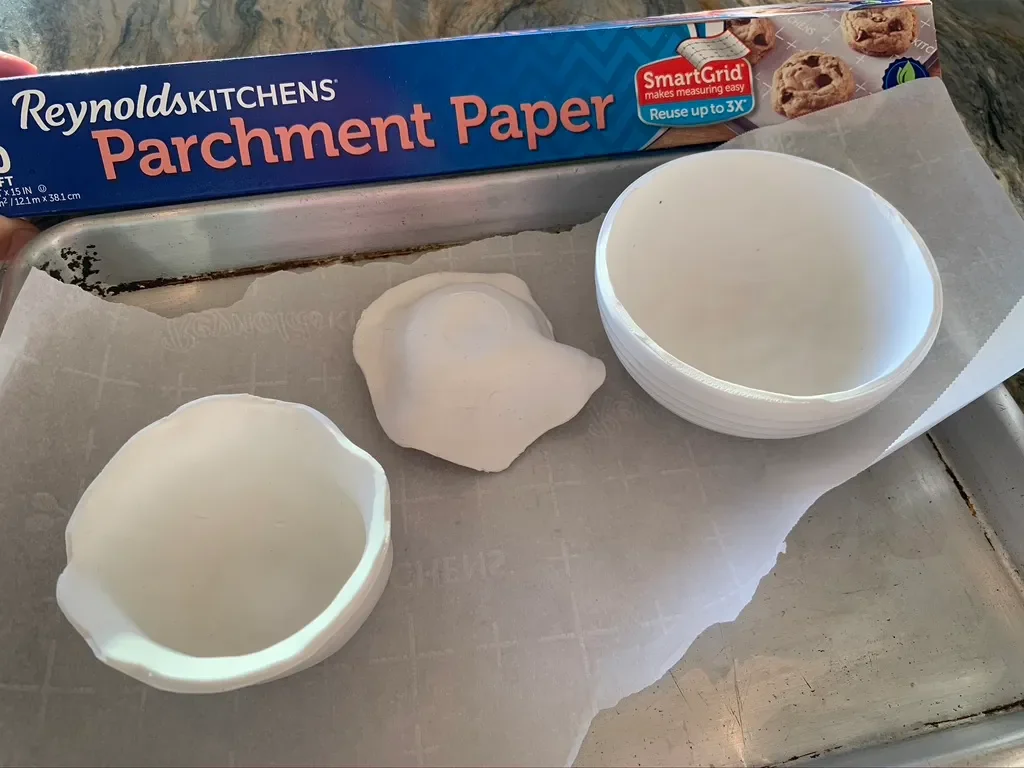
Spoiler alert: This project was a success and it turned out 100 times better than I expected! I can’t believe we made stunning faux Chinese Porcelain from the Ming Dynasty using Sculpey Soft Oven Bake Clay and acrylic paints. Instead of forming a bowl the way the book Lucky Bamboo Crafts by Jennifer DeCristoforo, I shaped it into a small oven safe bowl. I wasn’t sure it would work to bake the clay in the bowl and have the bowl release, so I tried two other methods: I laid the clay over the outside of a smaller bowl and with the third, I lifted the clay out before baking.
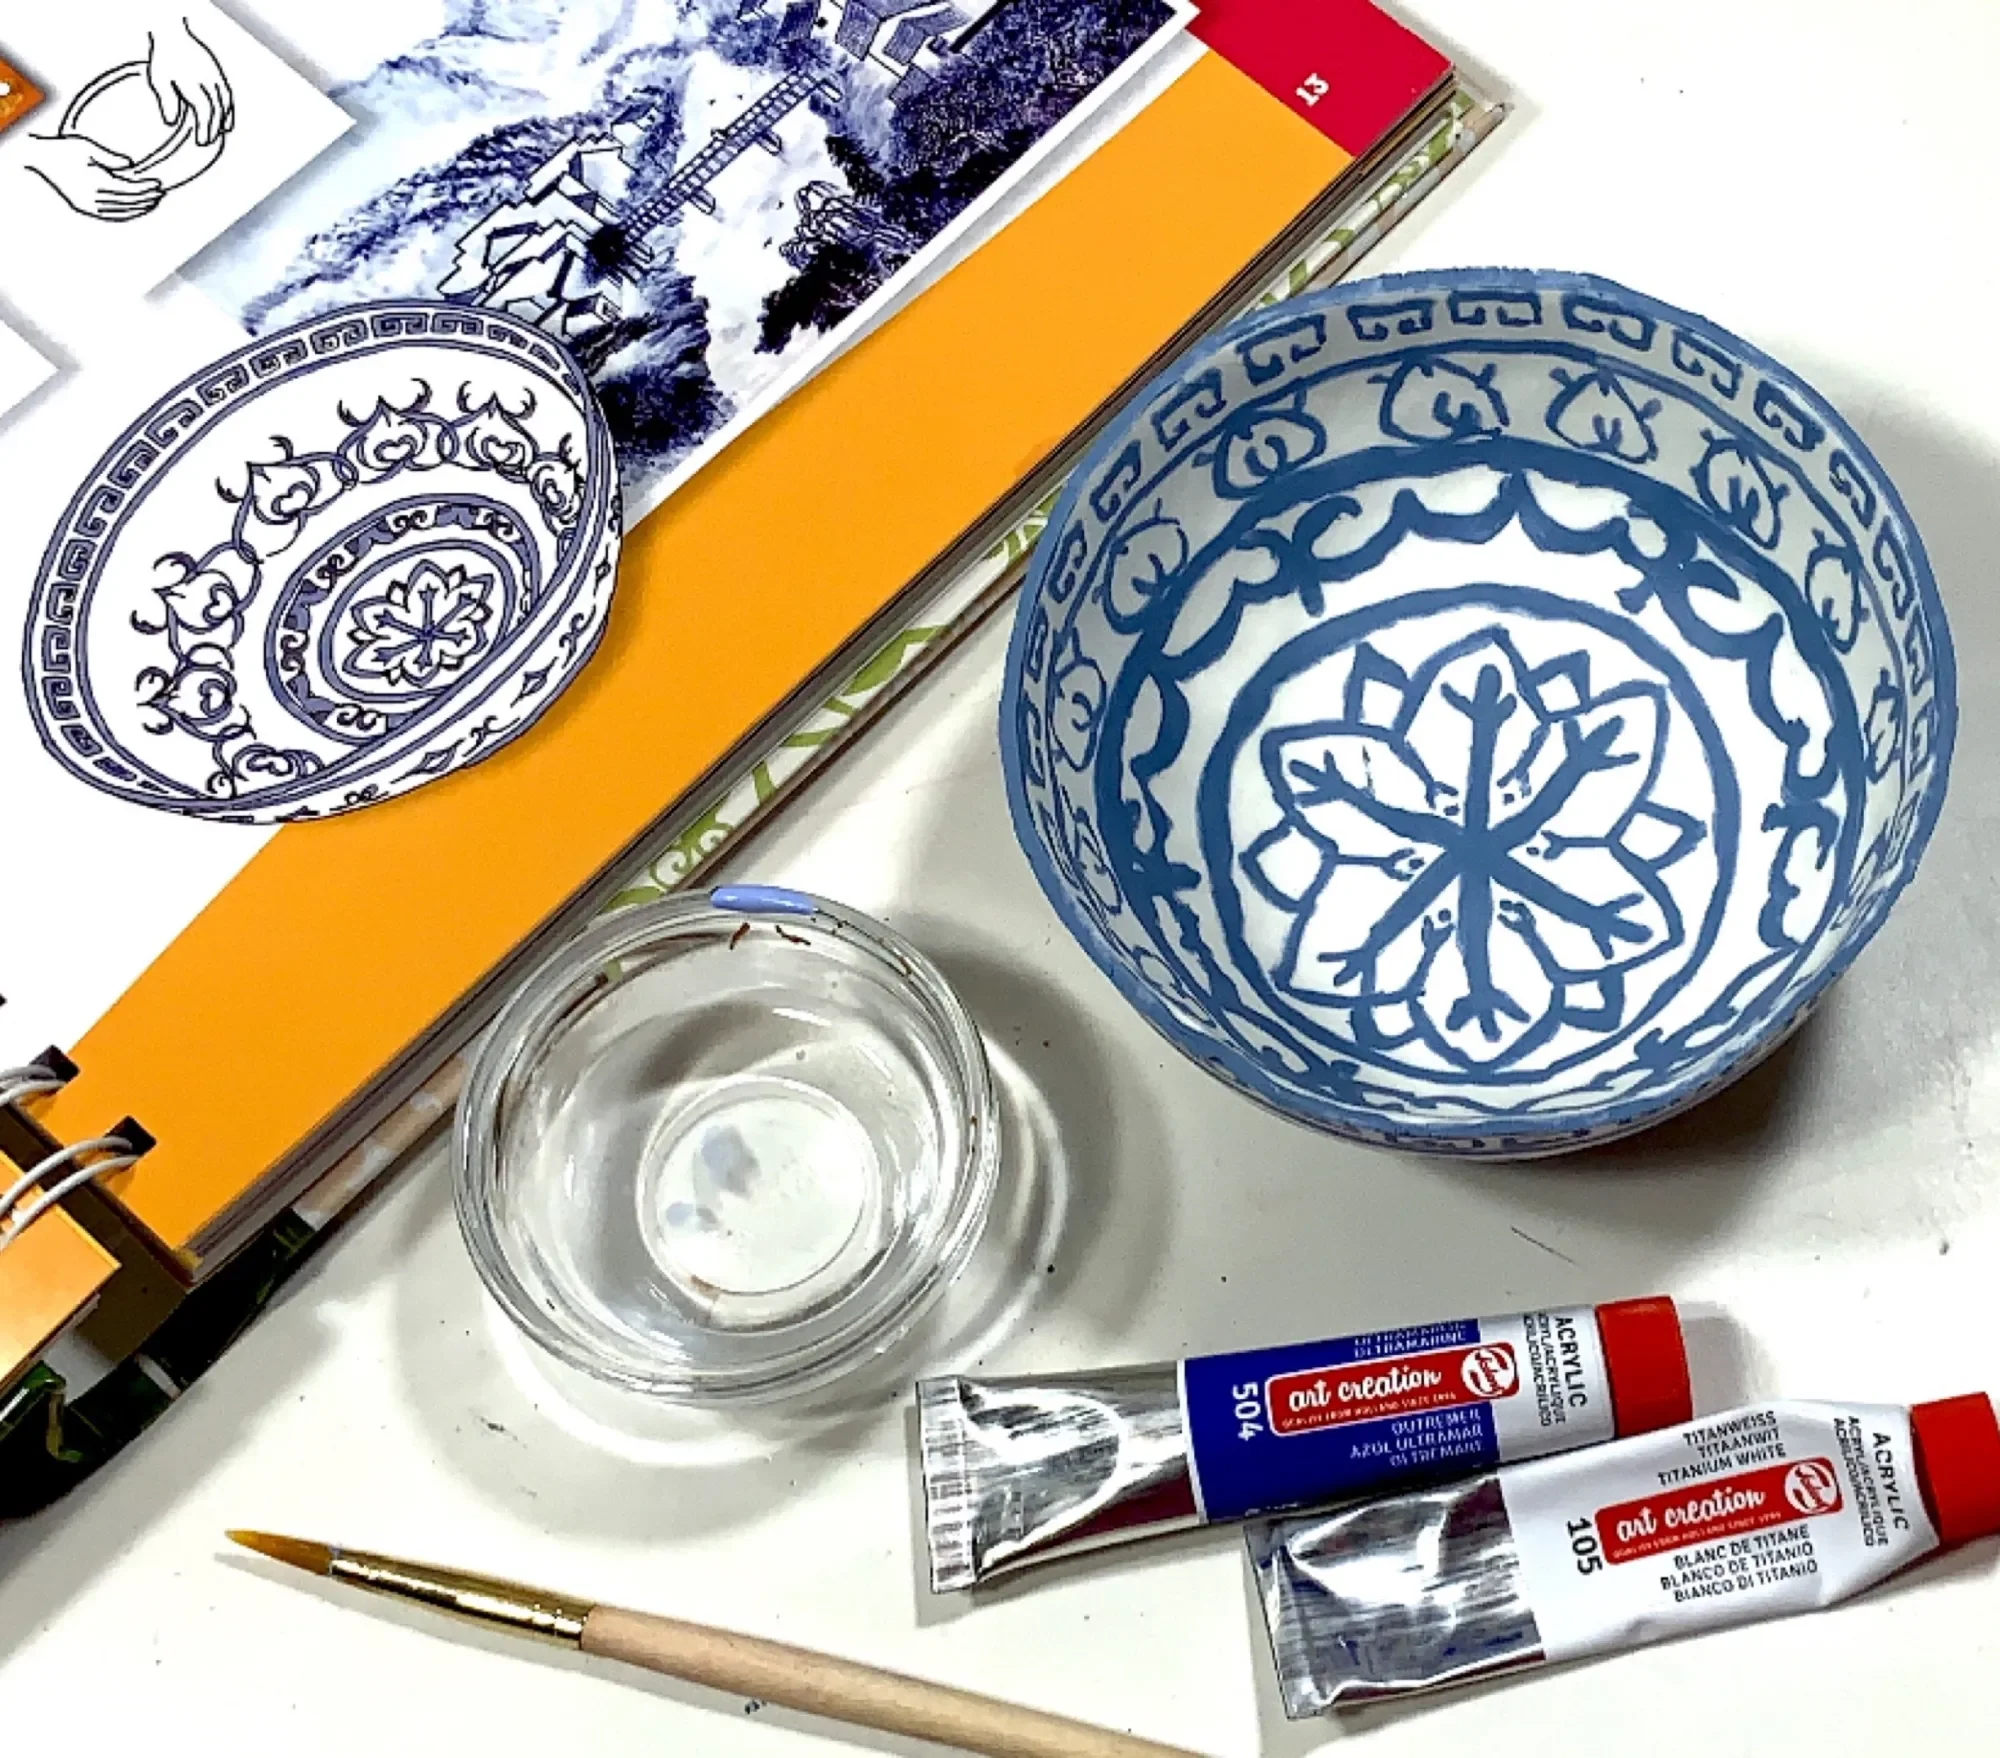
Once we baked the clay for 15 minutes at 275 degrees, I carefully separated the clay bowl from our existing bowl. It was hot and more malleable as a result and I kept at it, gently pulling and lifting, all the while avoiding breaking the clay. Soon I could feel all the parts release and after pulling against the small vacuum that had been created, I released the clay bowl. It was fantastic! The outside of the bowl was smooth and porcelain like. The inside was matte and textured with fingerprints and impressions. It looked just like a small bowl and was ready for painting. I used my acrylic paints from Blick Art Materials and mixed blue and white with a touch of black to get the iconic blue that is recognizable as Chinese porcelain.
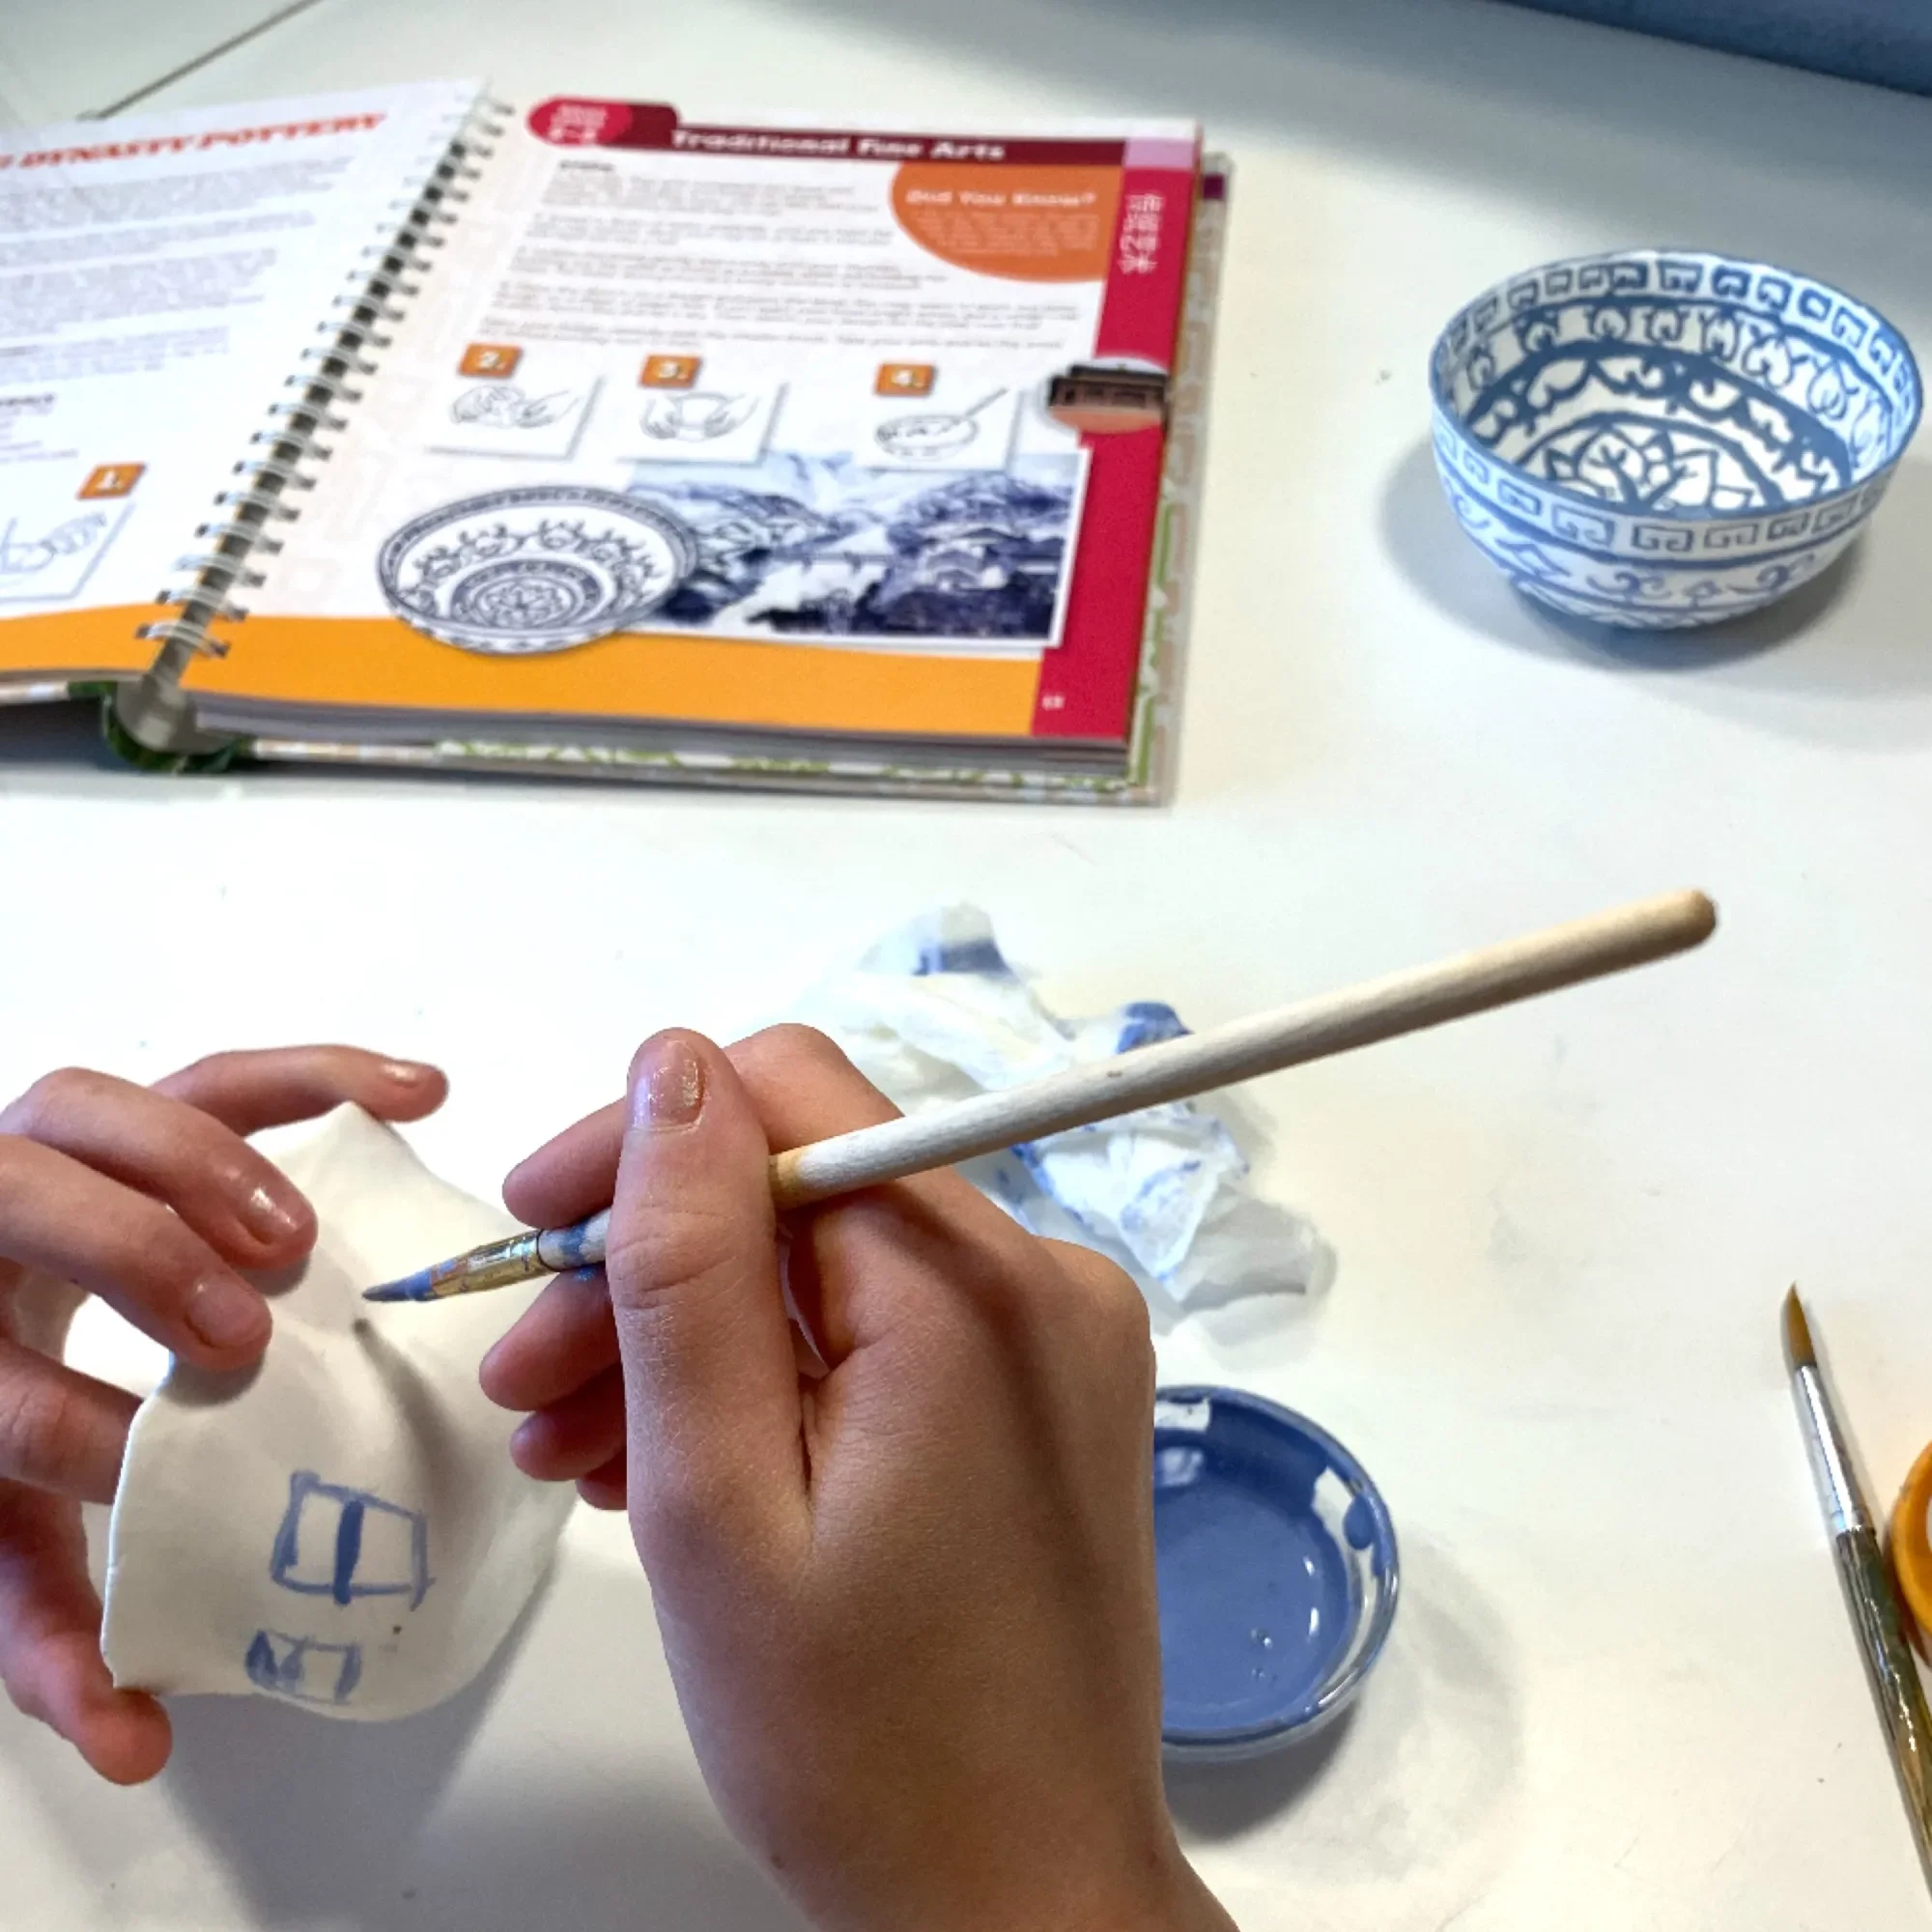
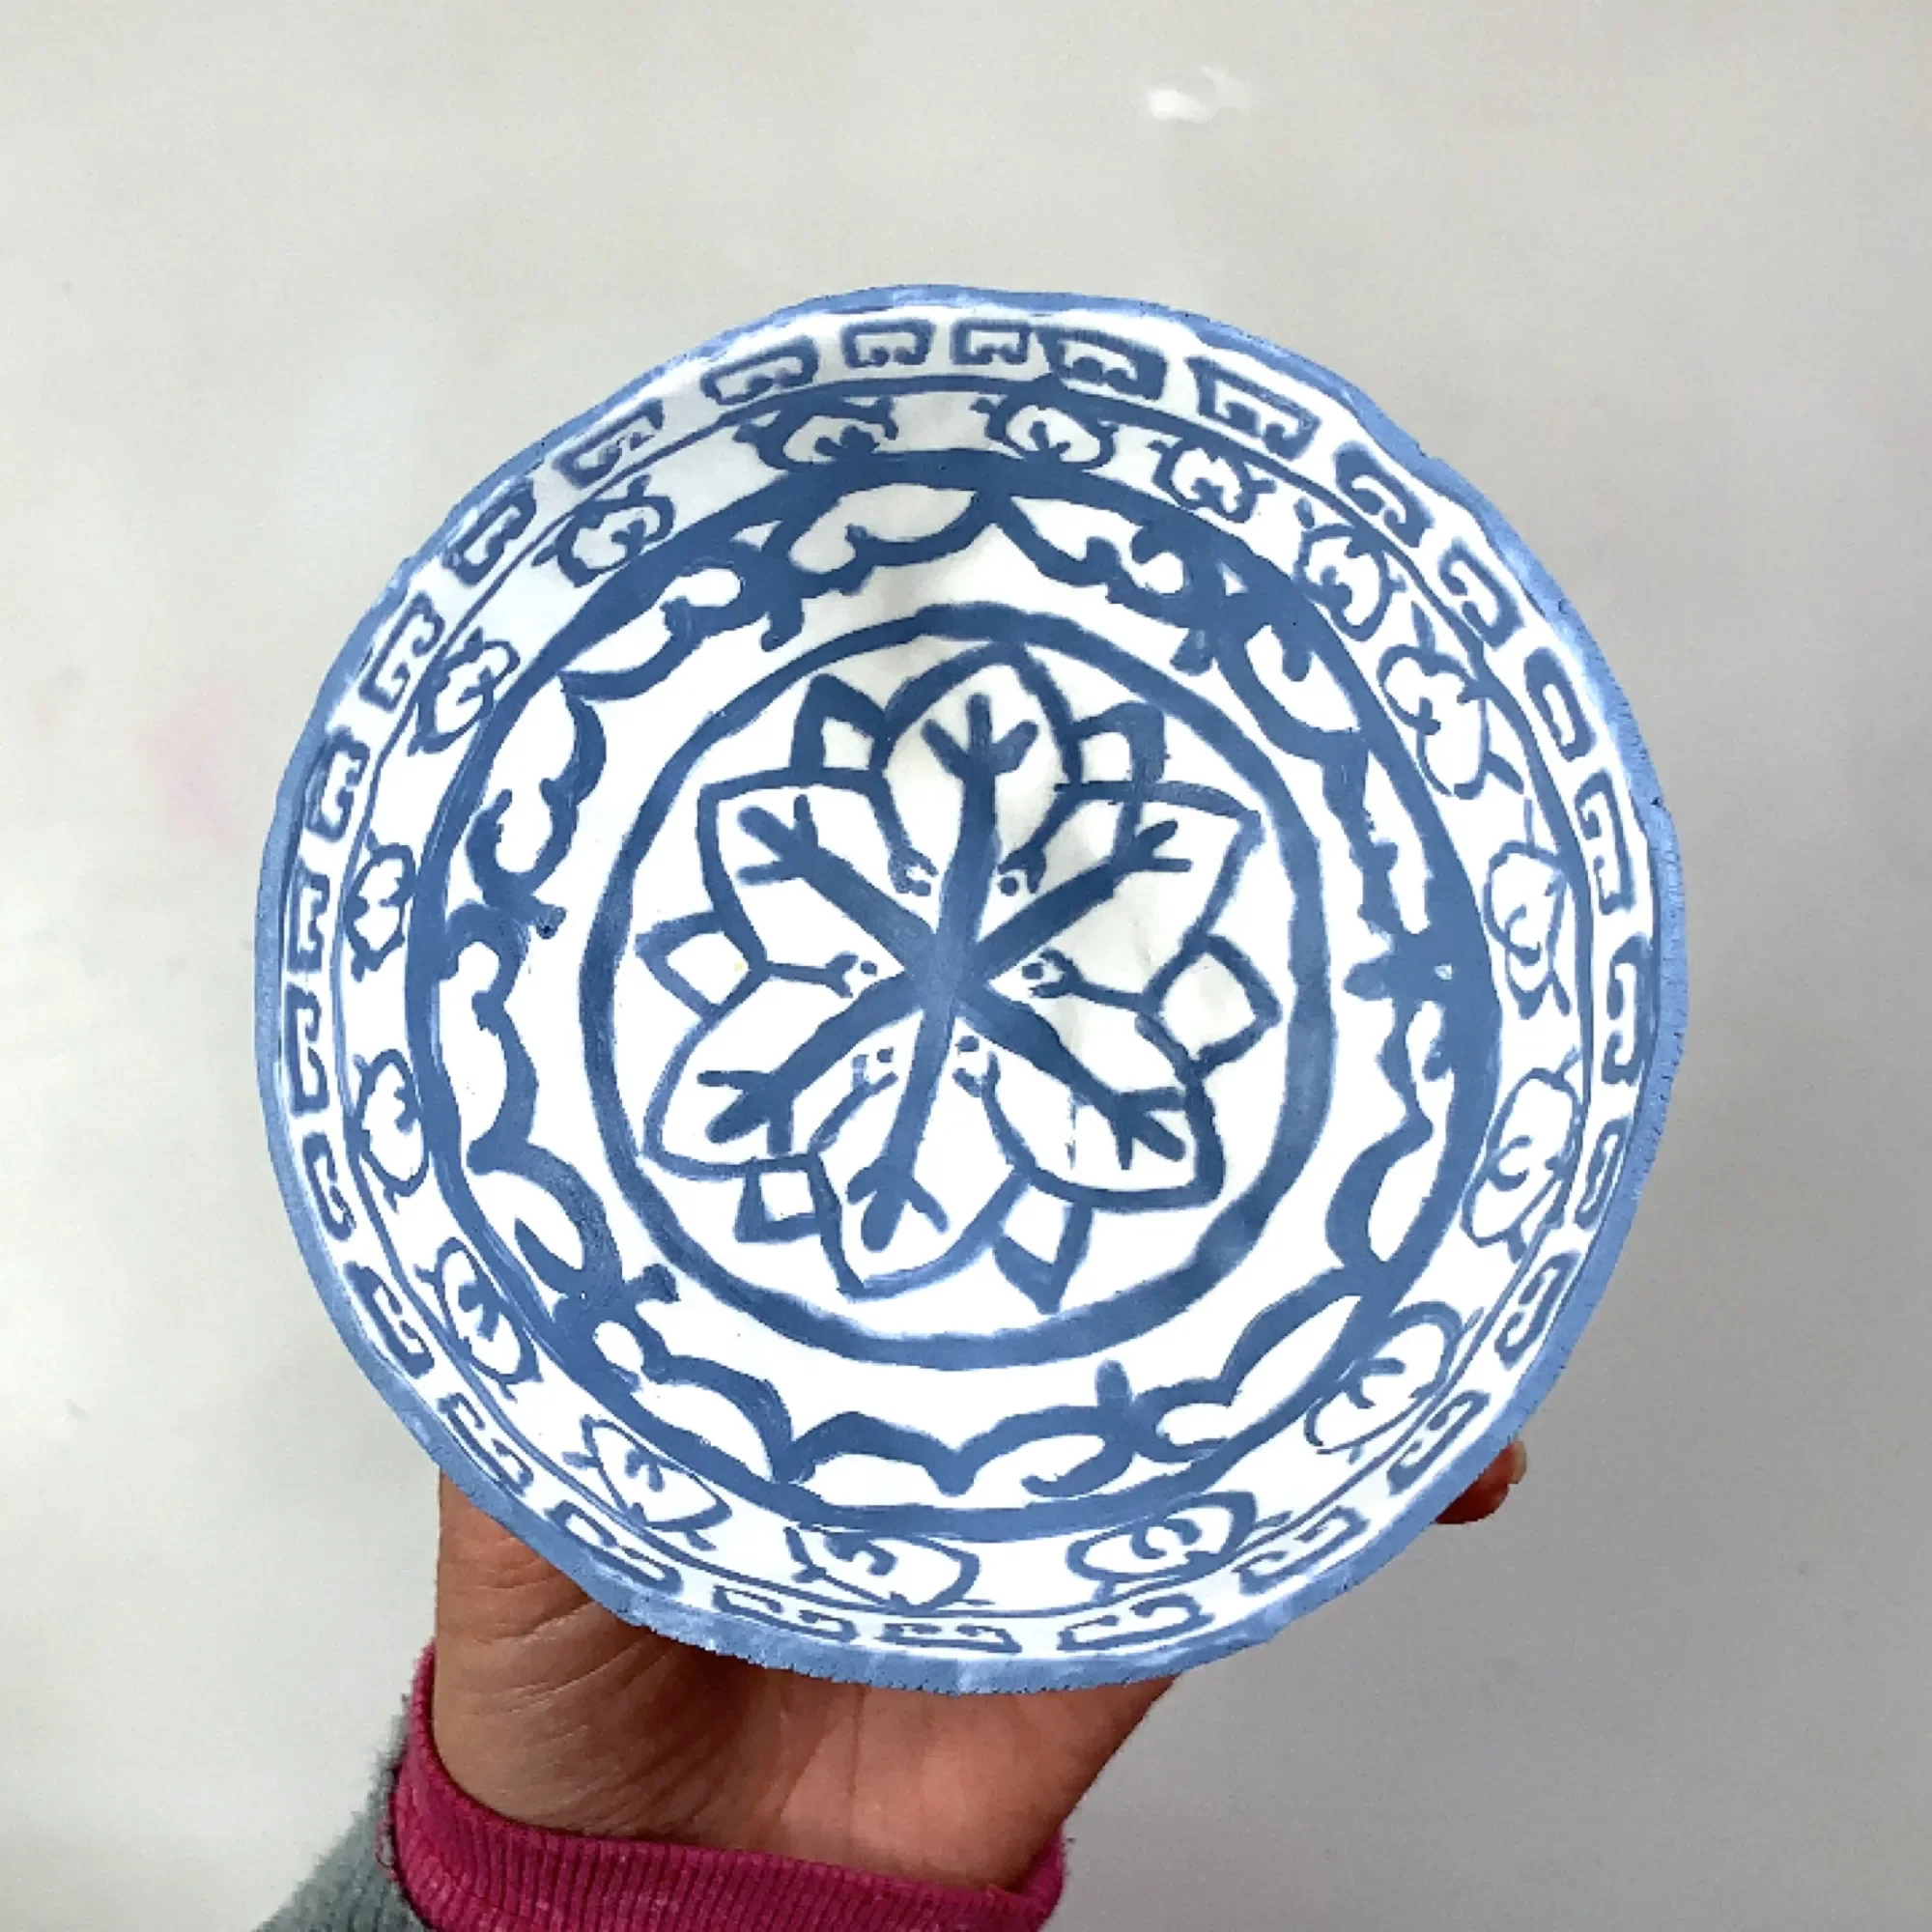
I began painting a motif similar to the one in the book and found that it was easier to paint if I watered down my paint. Take care not to over dilute it or your paint will run and drip. At first I thought the painting looked sloppy and rough, but once the bowl was complete it looked stunning and authentic. All the little mistakes and brush slips are not noticeable when you look at the completed bowl…from afar. Upon close inspection, you can certainly see all the imperfections, but as an educational activity, I found it to be profound. Even for such a simple project, it ended up taking hours to complete.
I worked with my 10-year-old daughter who is doing this China unit study for homeschool, but my 14-year-old-son initially chose not to do this project. I quickly realized that the detail I had achieved in my bowl was not going to be attainable from either of my children. My daughter modified the motif and make two bowls. I found that the effort, time and patiences were an insight in how these arts were performed in modern and ancient times. From the molding, to the baking (firing) to the painting, this project was a lengthy process and mirrors the time and effort and skill required by artisans. While this is only a rough replica, we are really pleased with the outcome. We did modify the project found in the book Lucky Bamboo Crafts as we did not make our own dough/clay, and rather bought and used my favorite oven bake clay by Sculpey.
Check out the complete Ibn Battuta and North Africa Unit Study playlist, the China Unit Study playlist, the Silk Road Unit Study playlist, the Islamic Empire Unit Study playlist, and the Marco Polo & Genghis Khan Unit Study playlist as all these unit studies work well together.
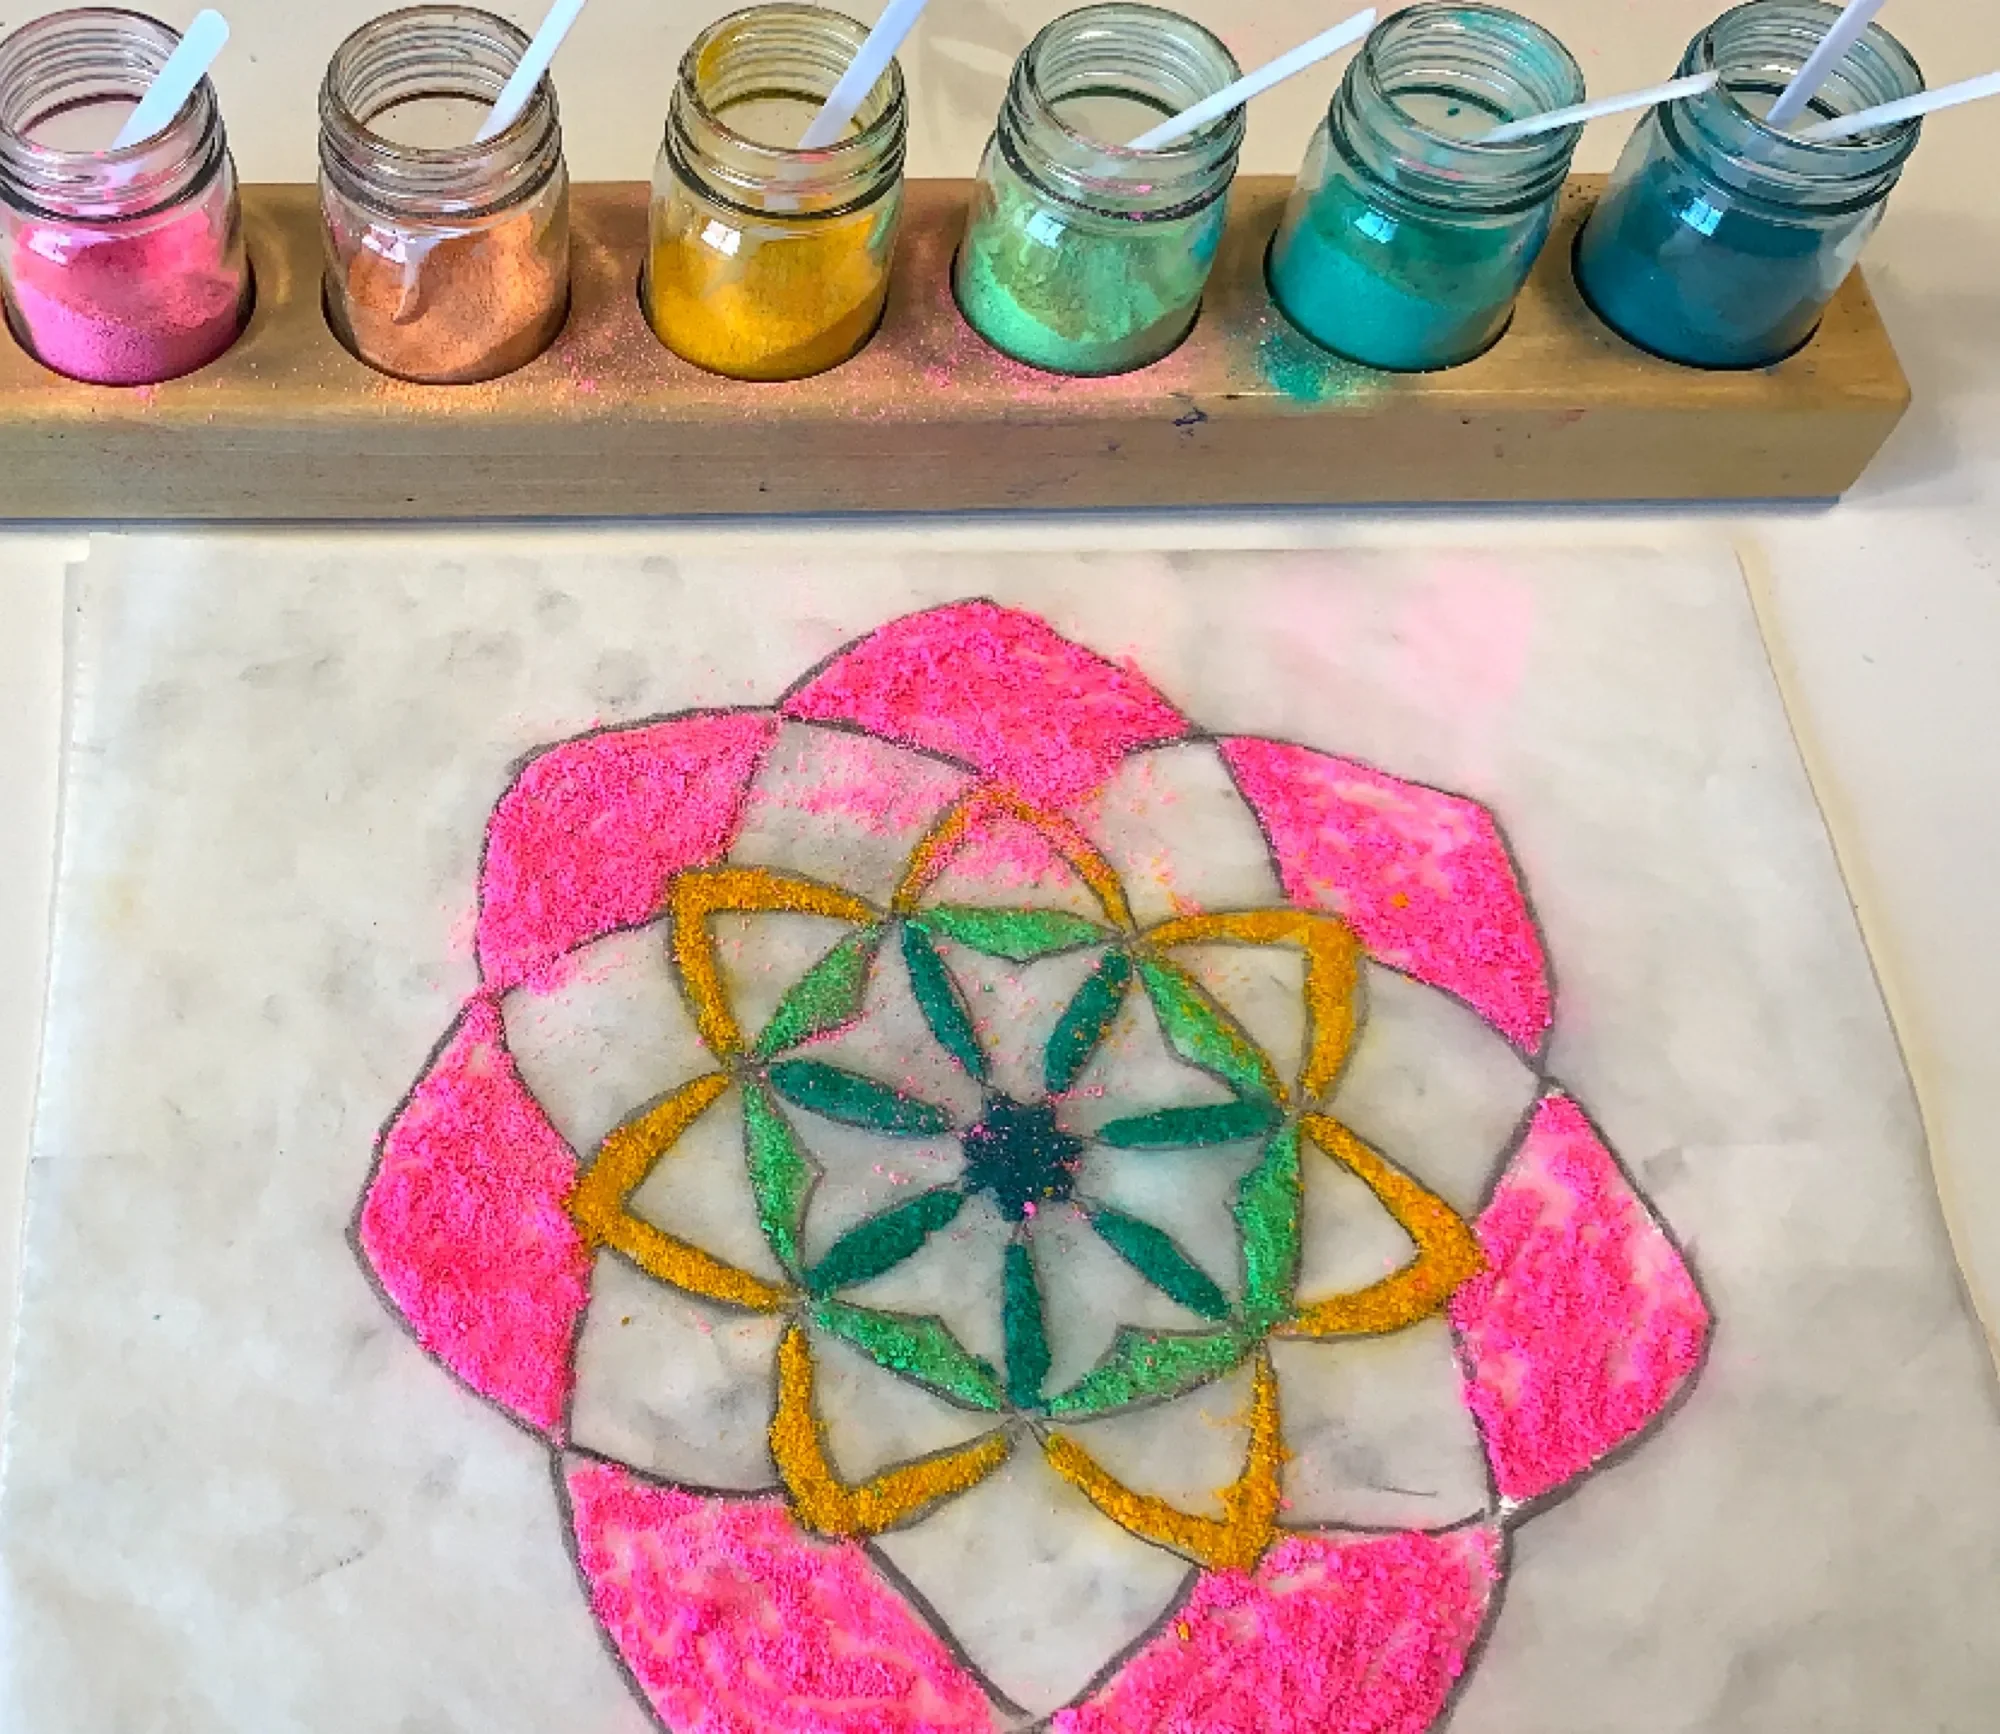
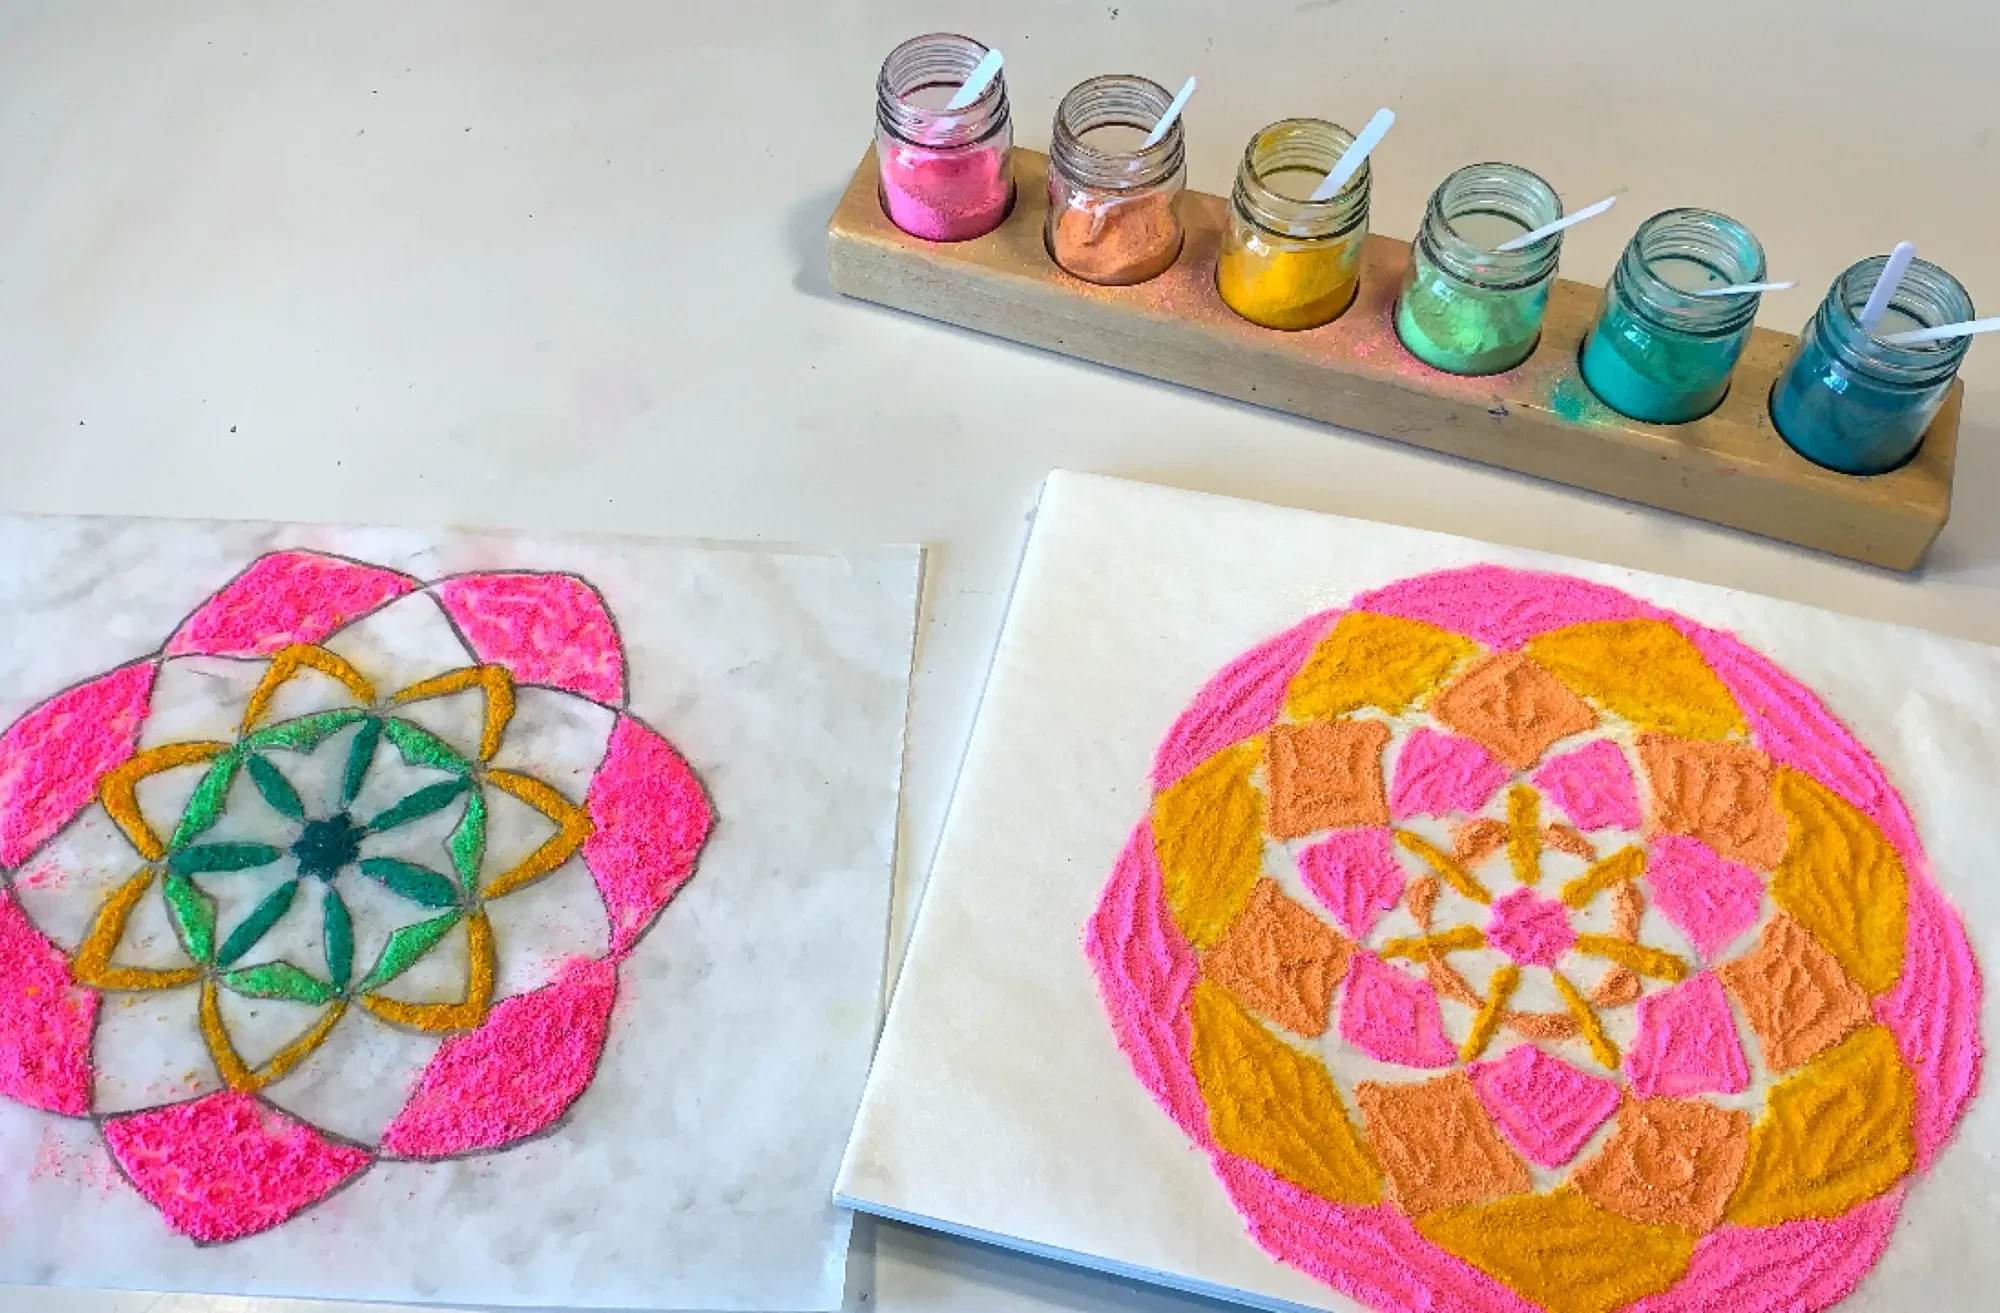
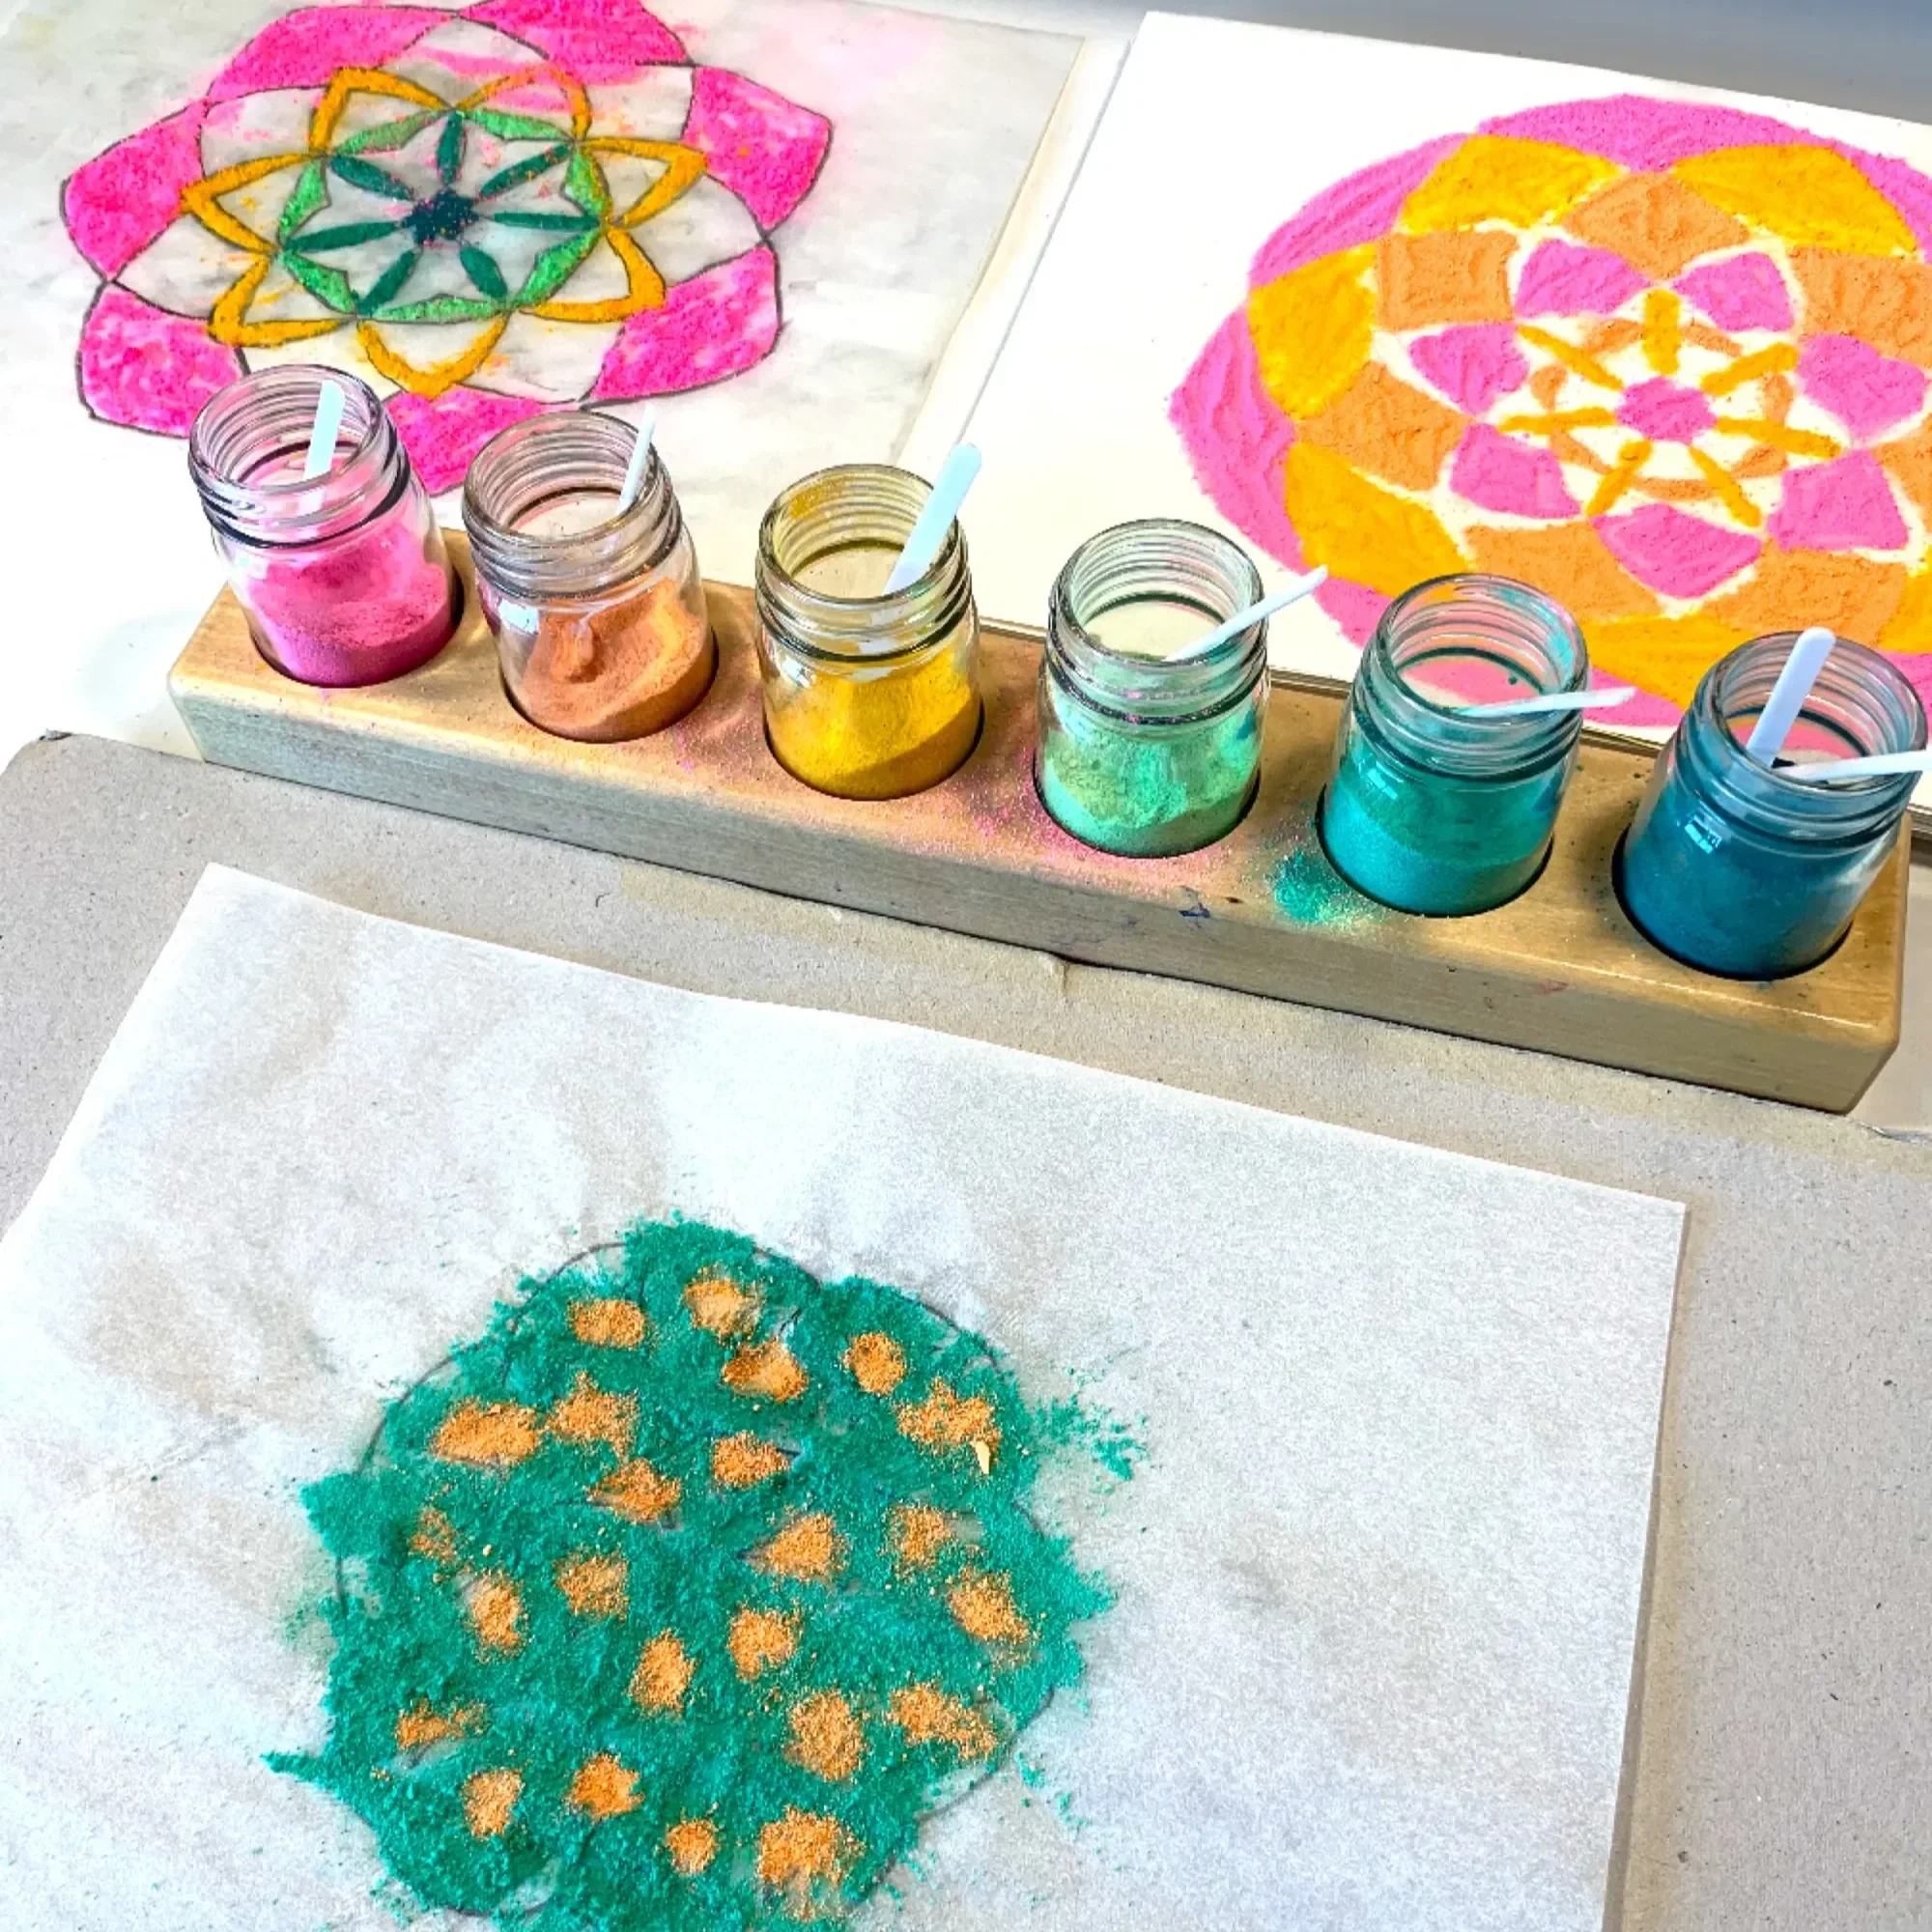
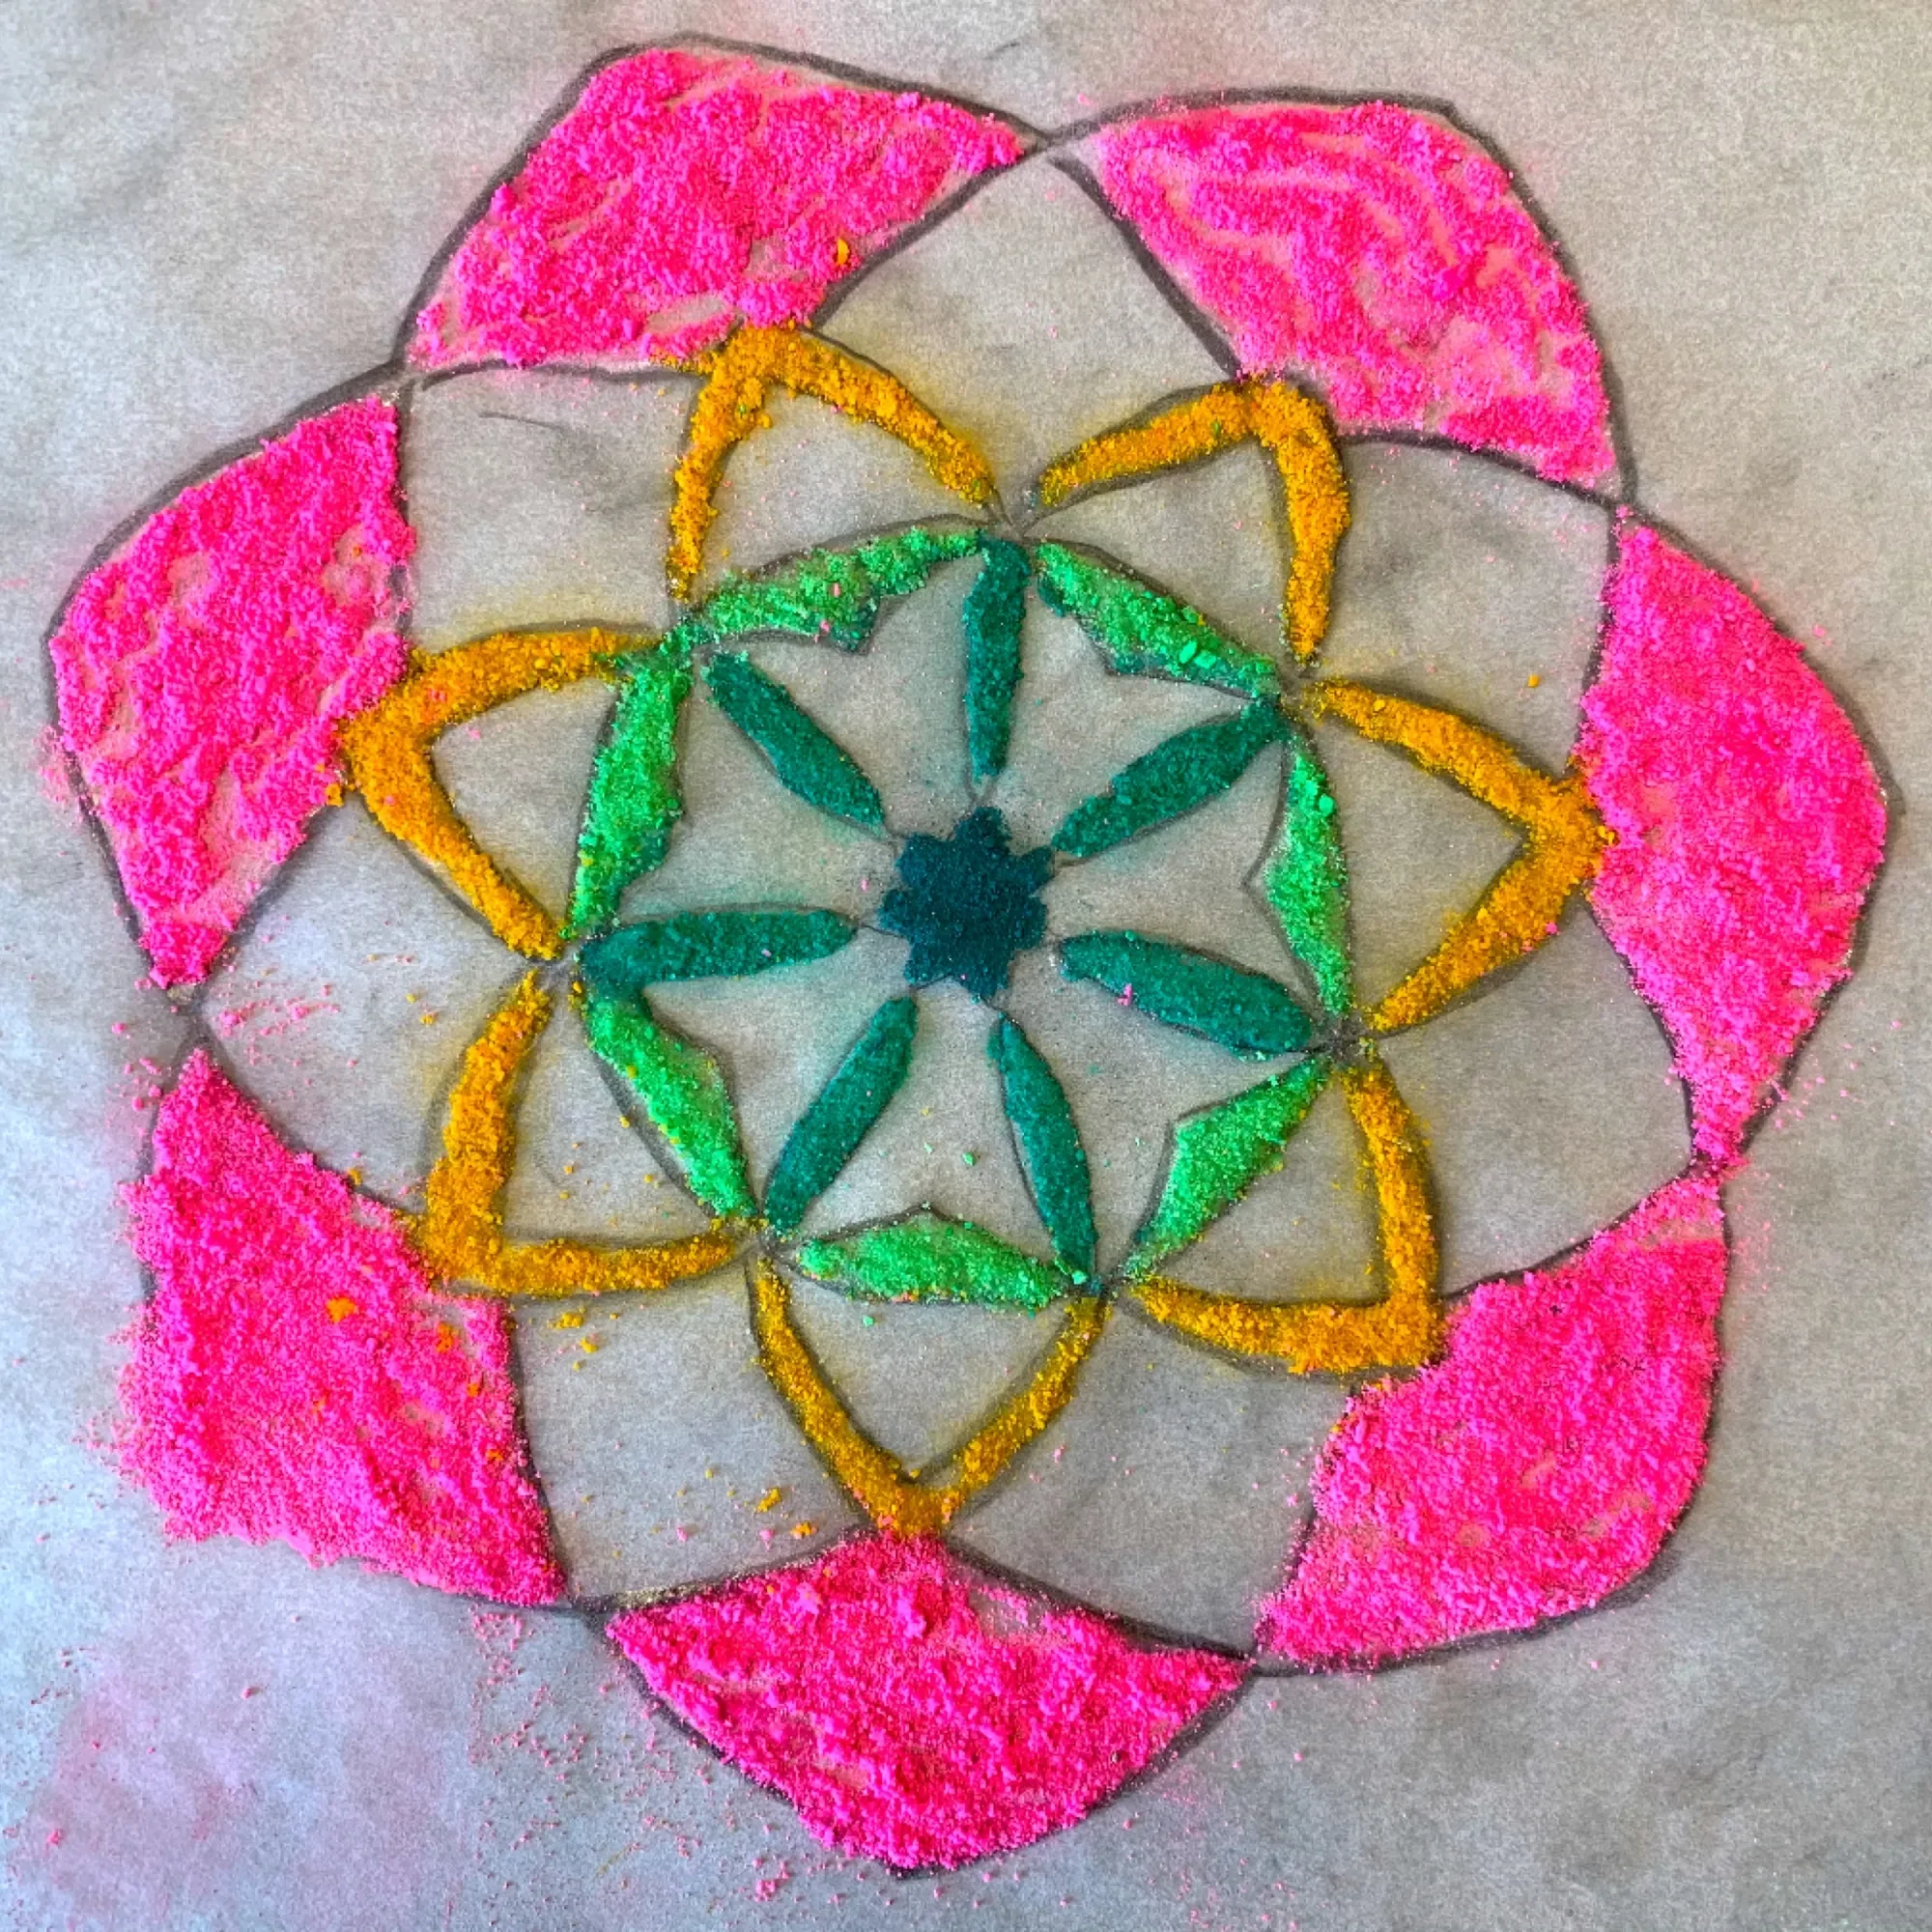
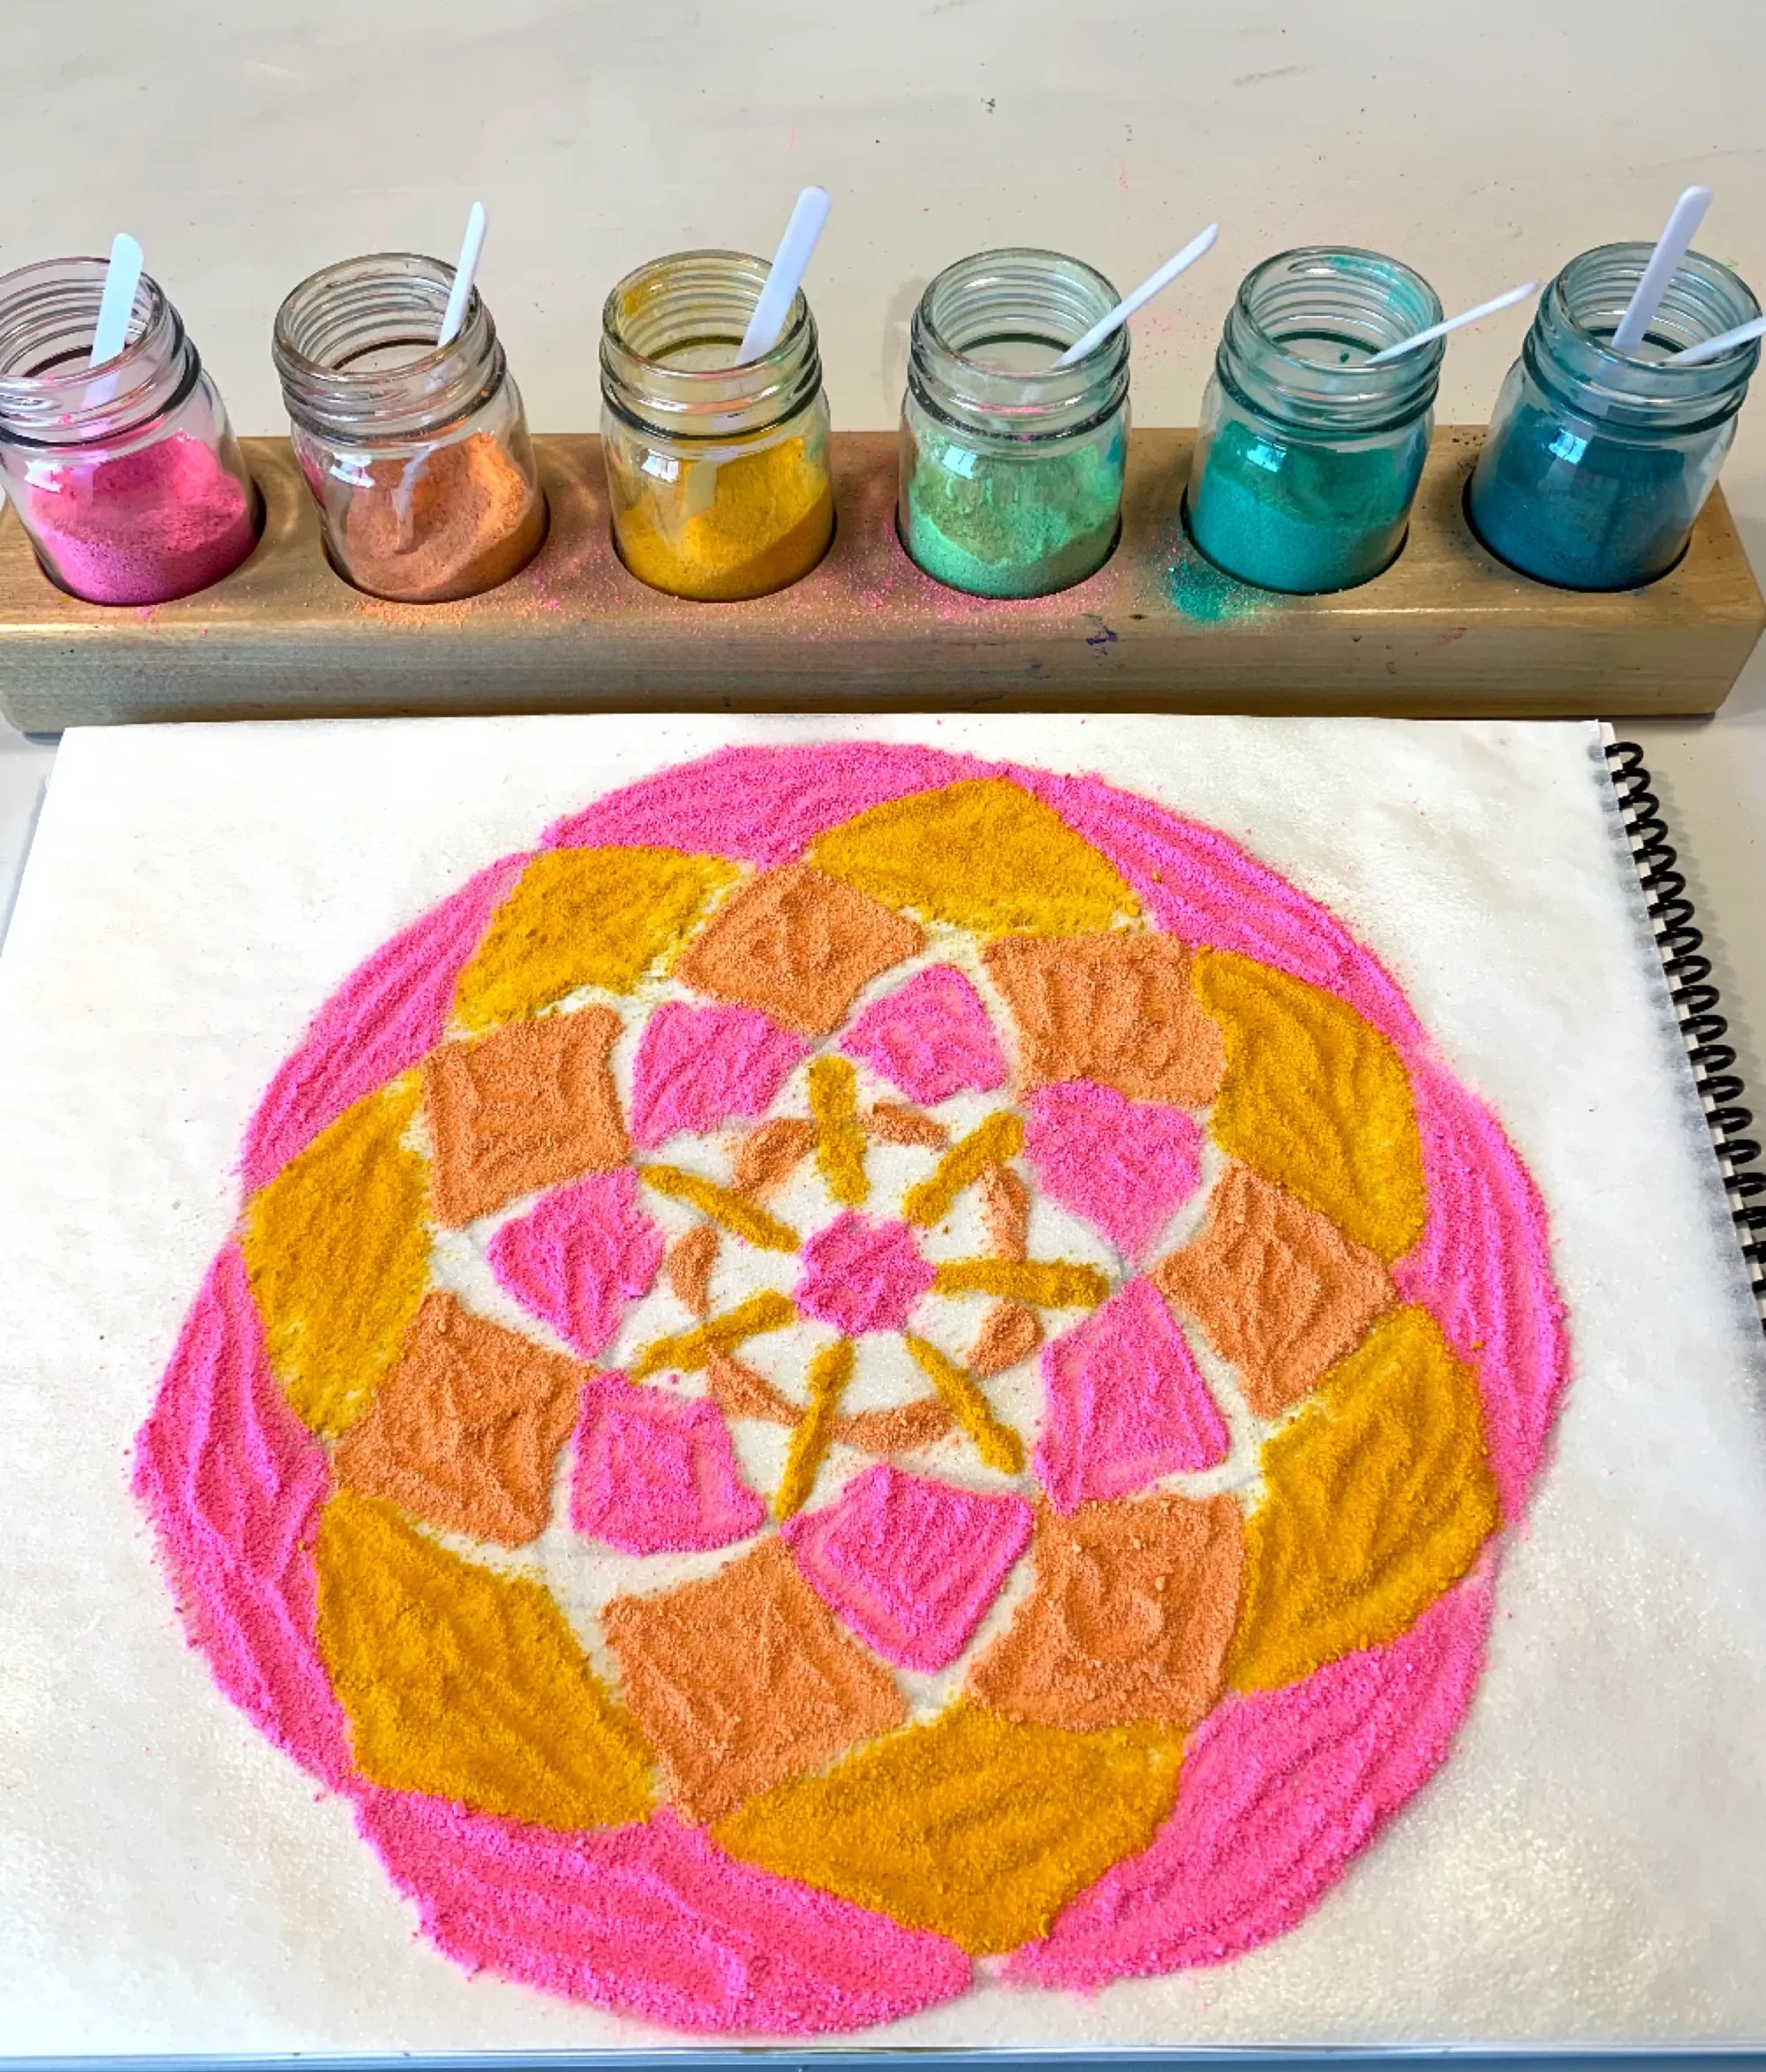
How to Make A Sand Mandala
We've made Mandalas before as part of our geometry unit, but this was our first time making them with sand...or in our case, salt. I have a bag of sand in the backyard we have for various projects and when I went to collect a beaker full I found it soaking wet. Indeed it rained recently and while we rarely get substantial rain in Southern California, this storm was a doozy. I laid out a bunch of sand to dry in the sun, but looked for an alternative in the meantime. I wanted to do this project with the materials I had on hand rather than buy special sand for it. I used my Sargent Art Chalk Pastels to color my sand by crushing the chalk with a small scrapbooking hammar. Once it was powdery soft I placed it in paint jars available from A Child's Dream. Instead of using sand, I decided to try salt. It worked great!
This project is from the book Marco Polo for Kids His Marvelous Journey to China by Janis Herbert. This book is packed with information plus 21 activities. I love adding hands on projects to our lessons and this book delivers. It wasn't always a book I liked though. When we first read it in 2014, I didn't find it appealing. While talking about Marco Polo, it also talks about all the other history going on at that time or even before. It gives a lot of context for the information which at the time, I didn't appreciate as much as I do now. It is one of our best resources for this unit.
The activity, Make a Mandala, can be found on page 69 and suggests using 4 different colors of colored sand. Instead, we used our left over chalk (the pieces or rather the colors we always have left over after our chalk drawings) and make 7 colors. Two of the colors were so similar, they could have been combined. We used our geometric designs as templates for these mandalas and traced our designs on tracing paper. I covered the page with glue so we could keep the designs, but ended up releasing two of them to the wind as is the tradition with madalas. Though we didn't release the sand ceremoniously, I did find it curiously liberating and freeing. We did keep one design and after shaking off the excess salt, we laminated it.
Check out the complete Ibn Battuta and North Africa Unit Study playlist, the China Unit Study playlist, the Silk Road Unit Study playlist, the Islamic Empire Unit Study playlist, and the Marco Polo & Genghis Khan Unit Study playlist as all these unit studies work well together.
The Great Wall of China
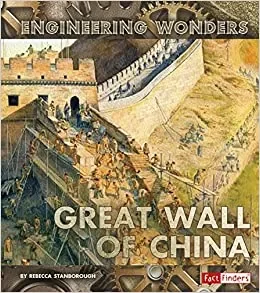
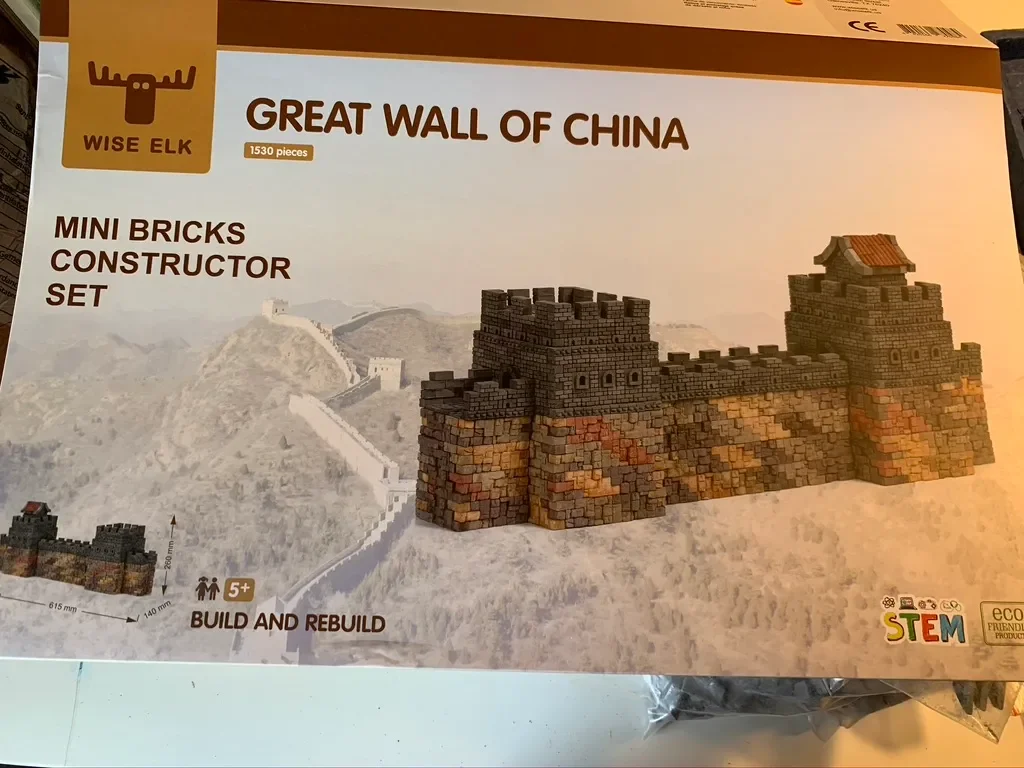
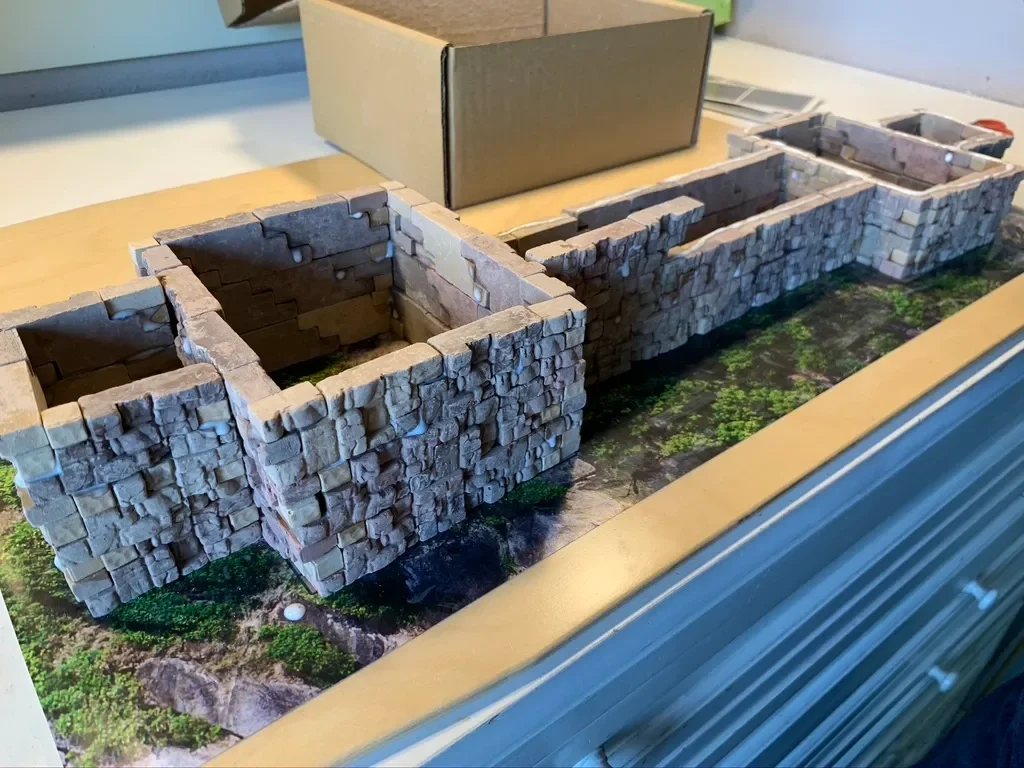
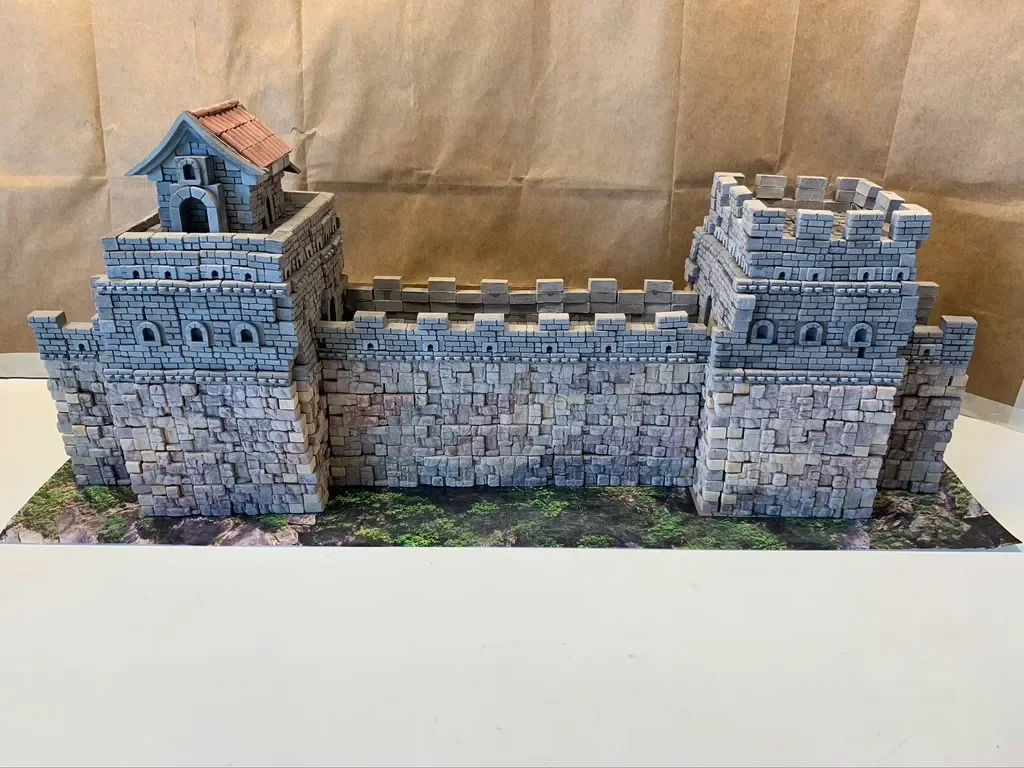
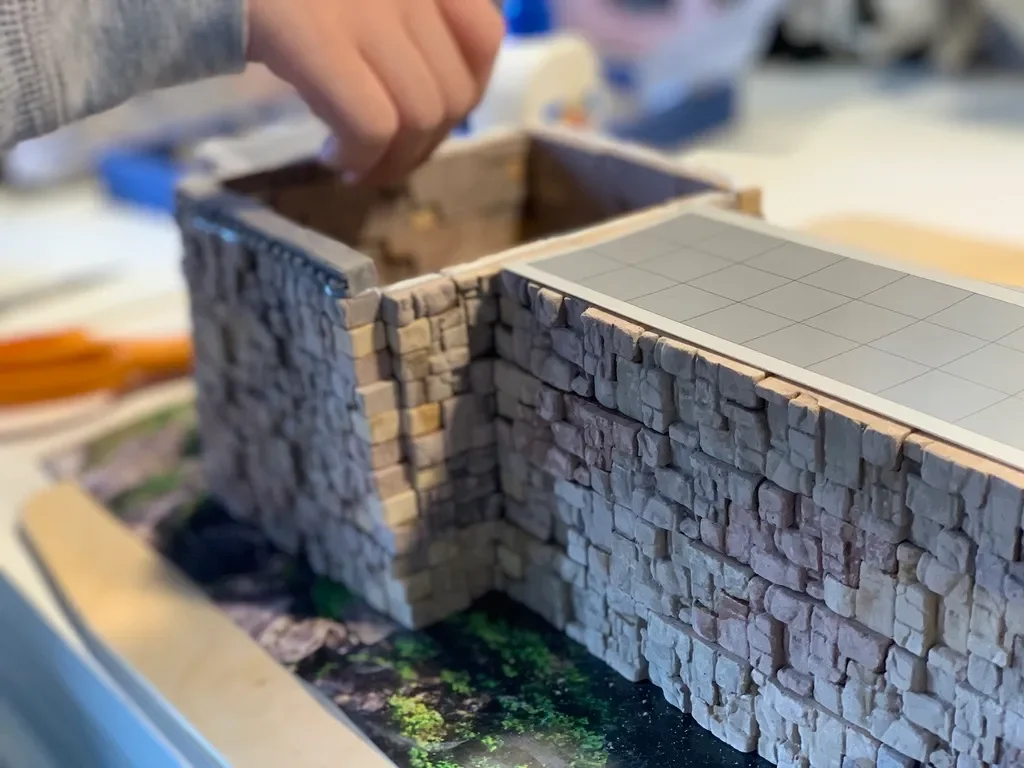
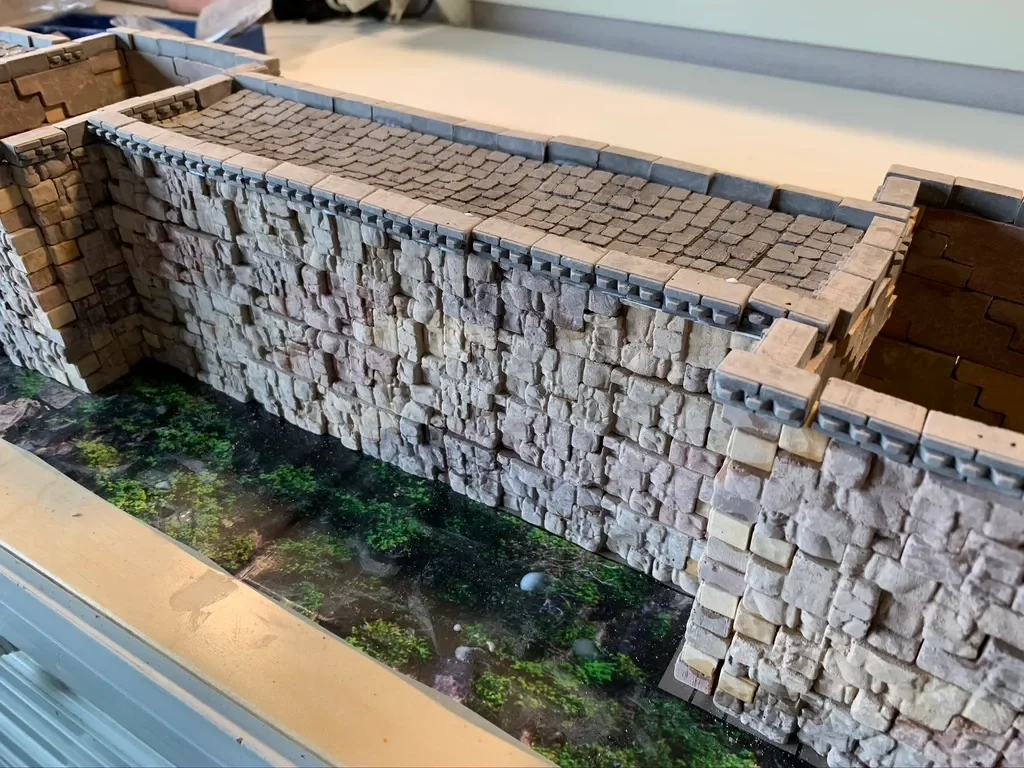
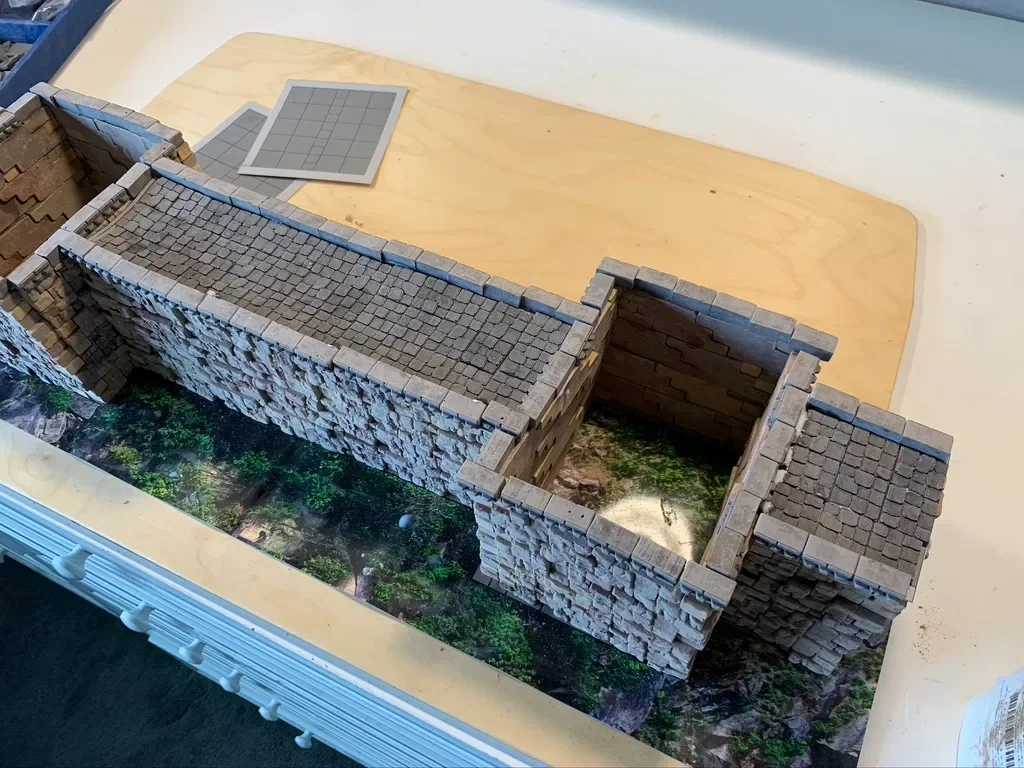
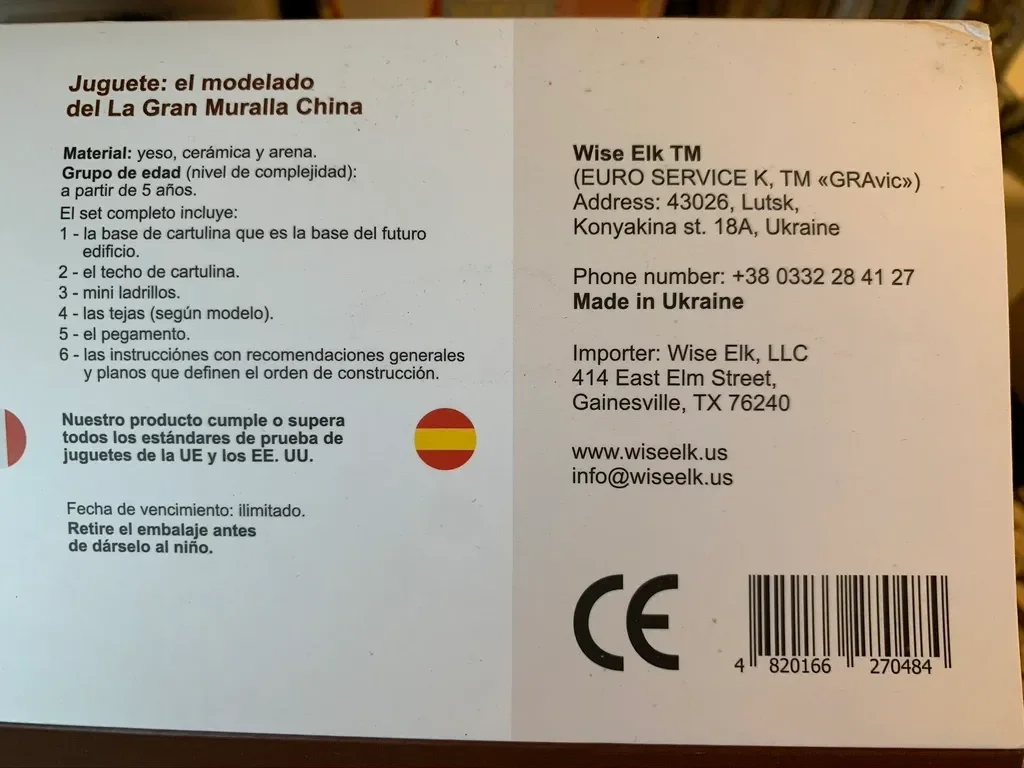
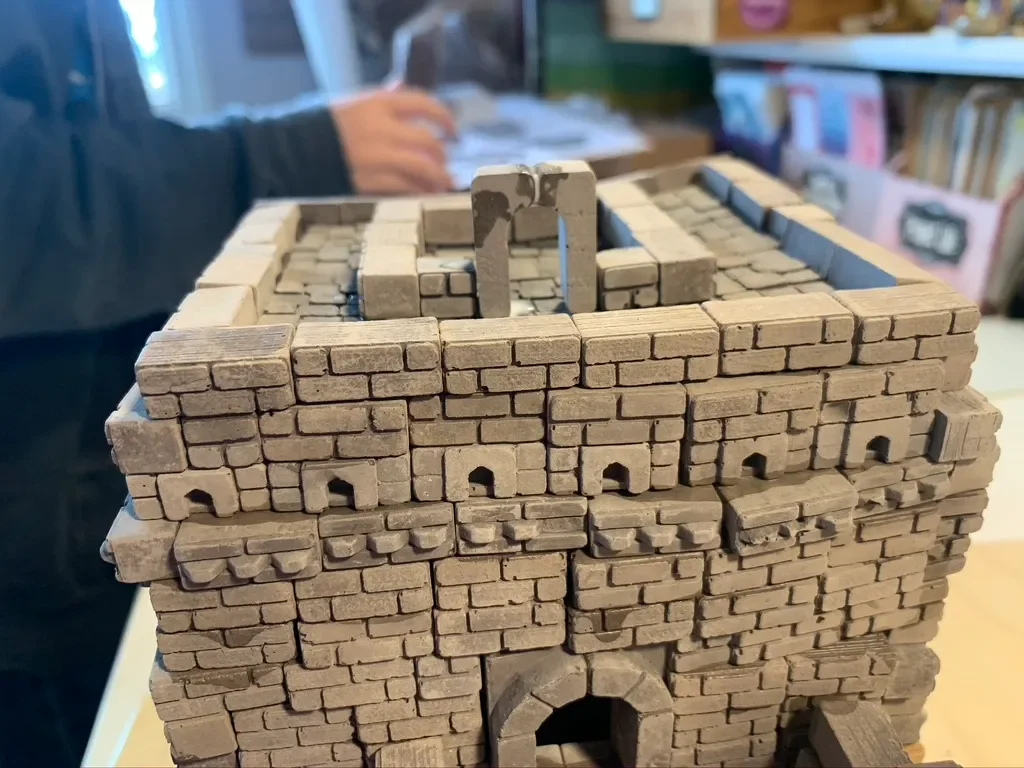
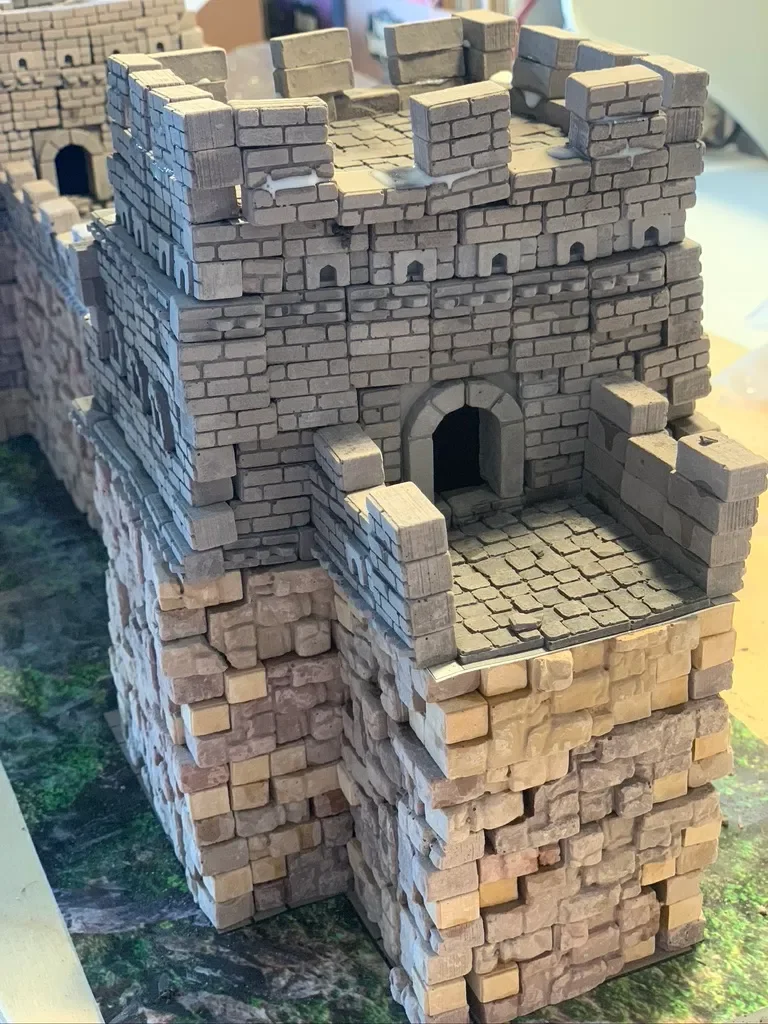
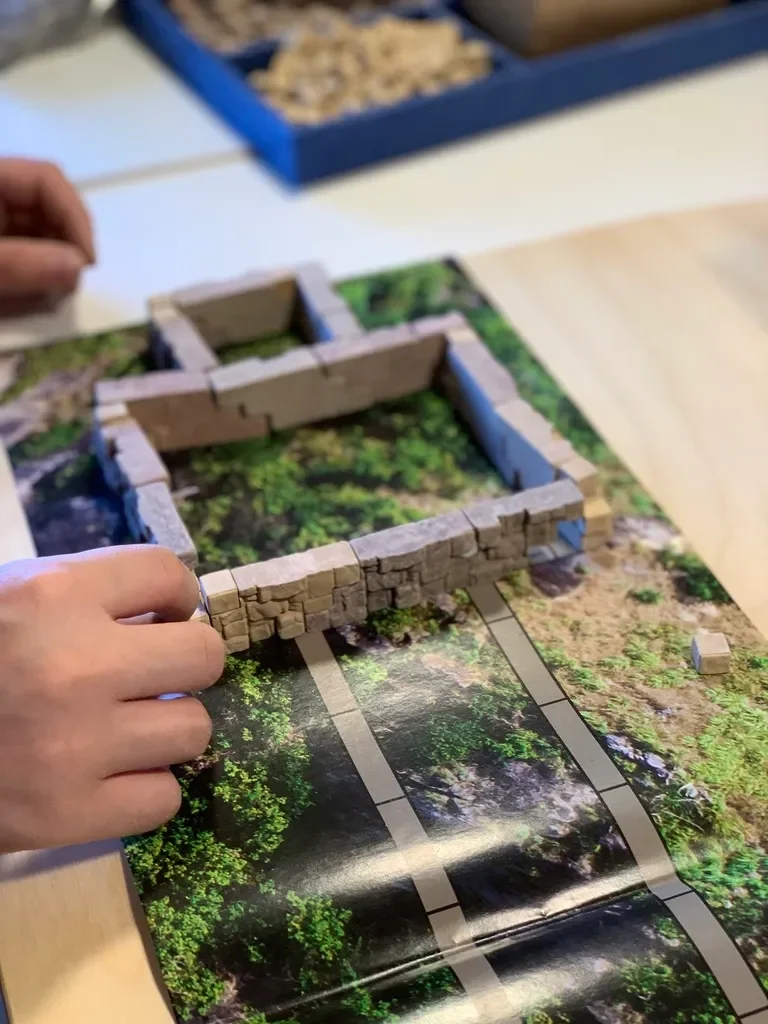
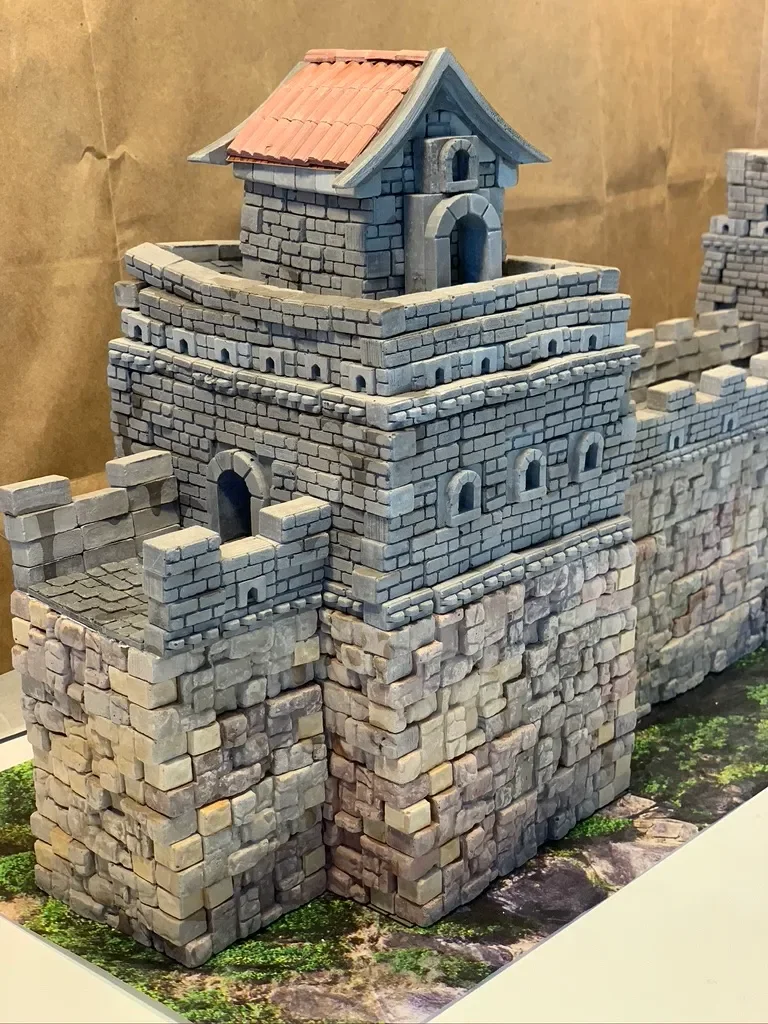
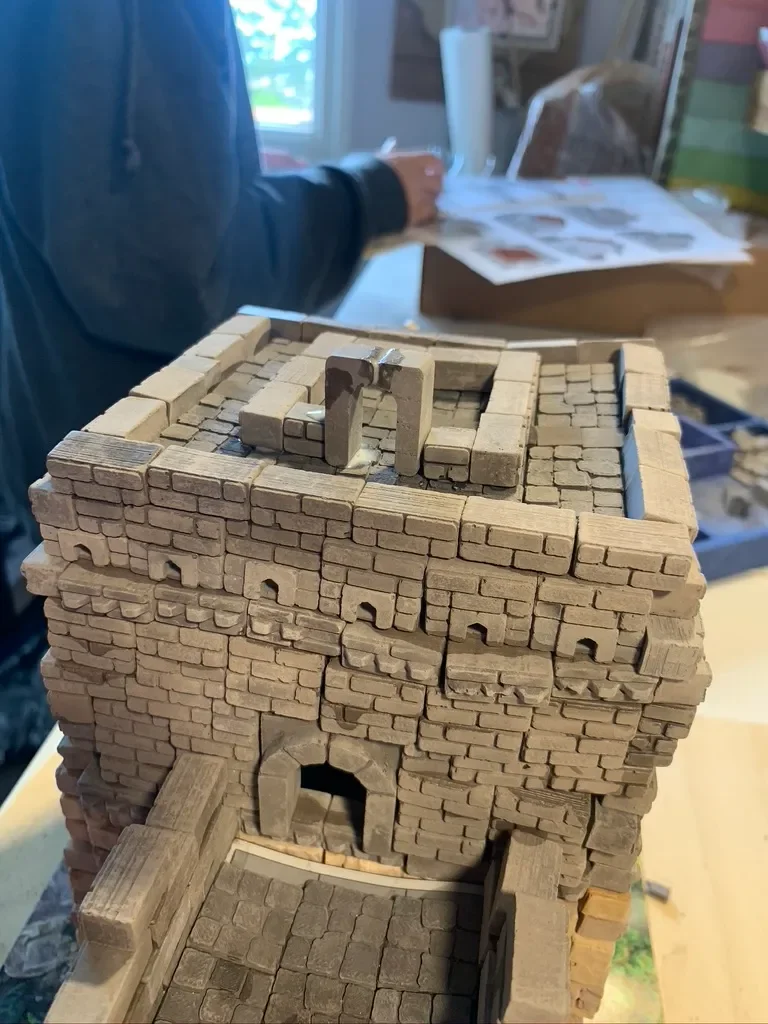
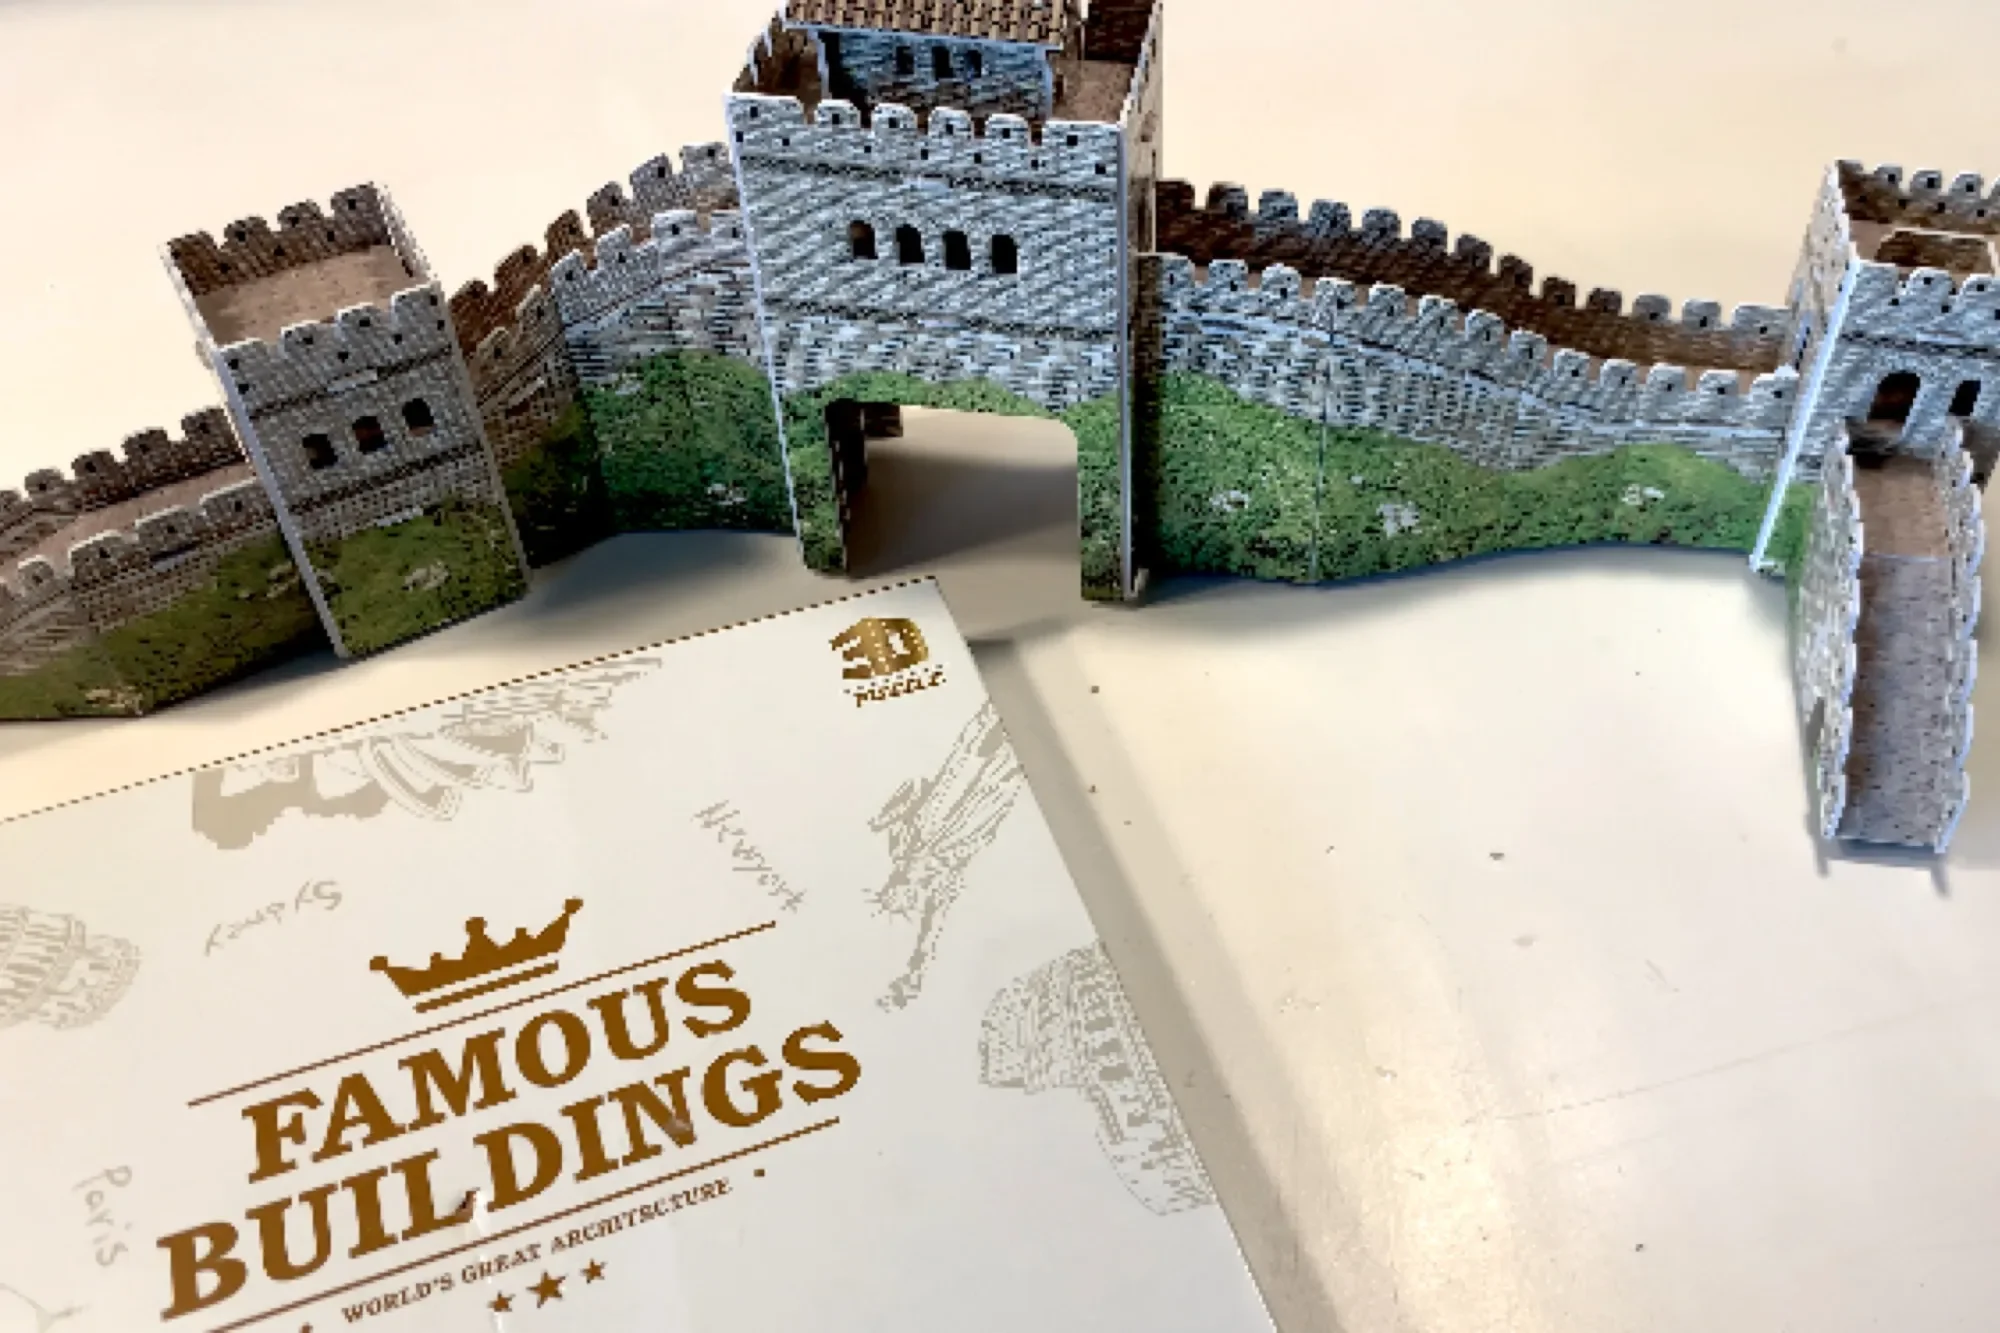
I love this kit!! We’ve done our fair share of build kits and what I love about this one is how lovely this looks in the end. But that’s not all. This Great Wall of China kit by Wise Elk considers the project, the storage and multiple uses of it by providing versatility with this kit. The bricks are premade and are were both durable yet cut easily if necessary, and when assembled with the glue provided, the end result was stunning. But once the project was complete, you could soak the bricks in water and the glue would loosen. Once the bricks were clean and dry, they could be used again for new building projects. While this project is suitable for children 5 years and up, I imagine young children will need a fair amount of supervision or assistance.
My 14-year-old did this project entirely on his own and while he’s been capable of doing more of these kinds of projects on his own since he was about 9 or 10 years old, my 9-year-old daughter would not have been able to do this on her own and would have felt discouraged along the way. Since you are building from the bottom up and each brick needs to be precisely placed, if you aren’t accurate to begin with, you’ll get a slanted wall or pieces that don’t fit well together. This project took many hours over several days even weeks to complete. As my son worked through the building, he stopped for days to let the glue dry and set completely before continuing to build up. In the end, I think this was a fabulous addition to our main lesson block and I definitely recommend it. I thought the materials were all high quality, authentic looking and helped create a realistic finished project. We like it so much, we have other products from Wise Elk on our wish list.
Check out the complete Ibn Battuta and North Africa Unit Study playlist, the China Unit Study playlist, the Silk Road Unit Study playlist, the Islamic Empire Unit Study playlist, and the Marco Polo & Genghis Khan Unit Study playlist as all these unit studies work well together.


Excavating China's Terracotta Soldiers
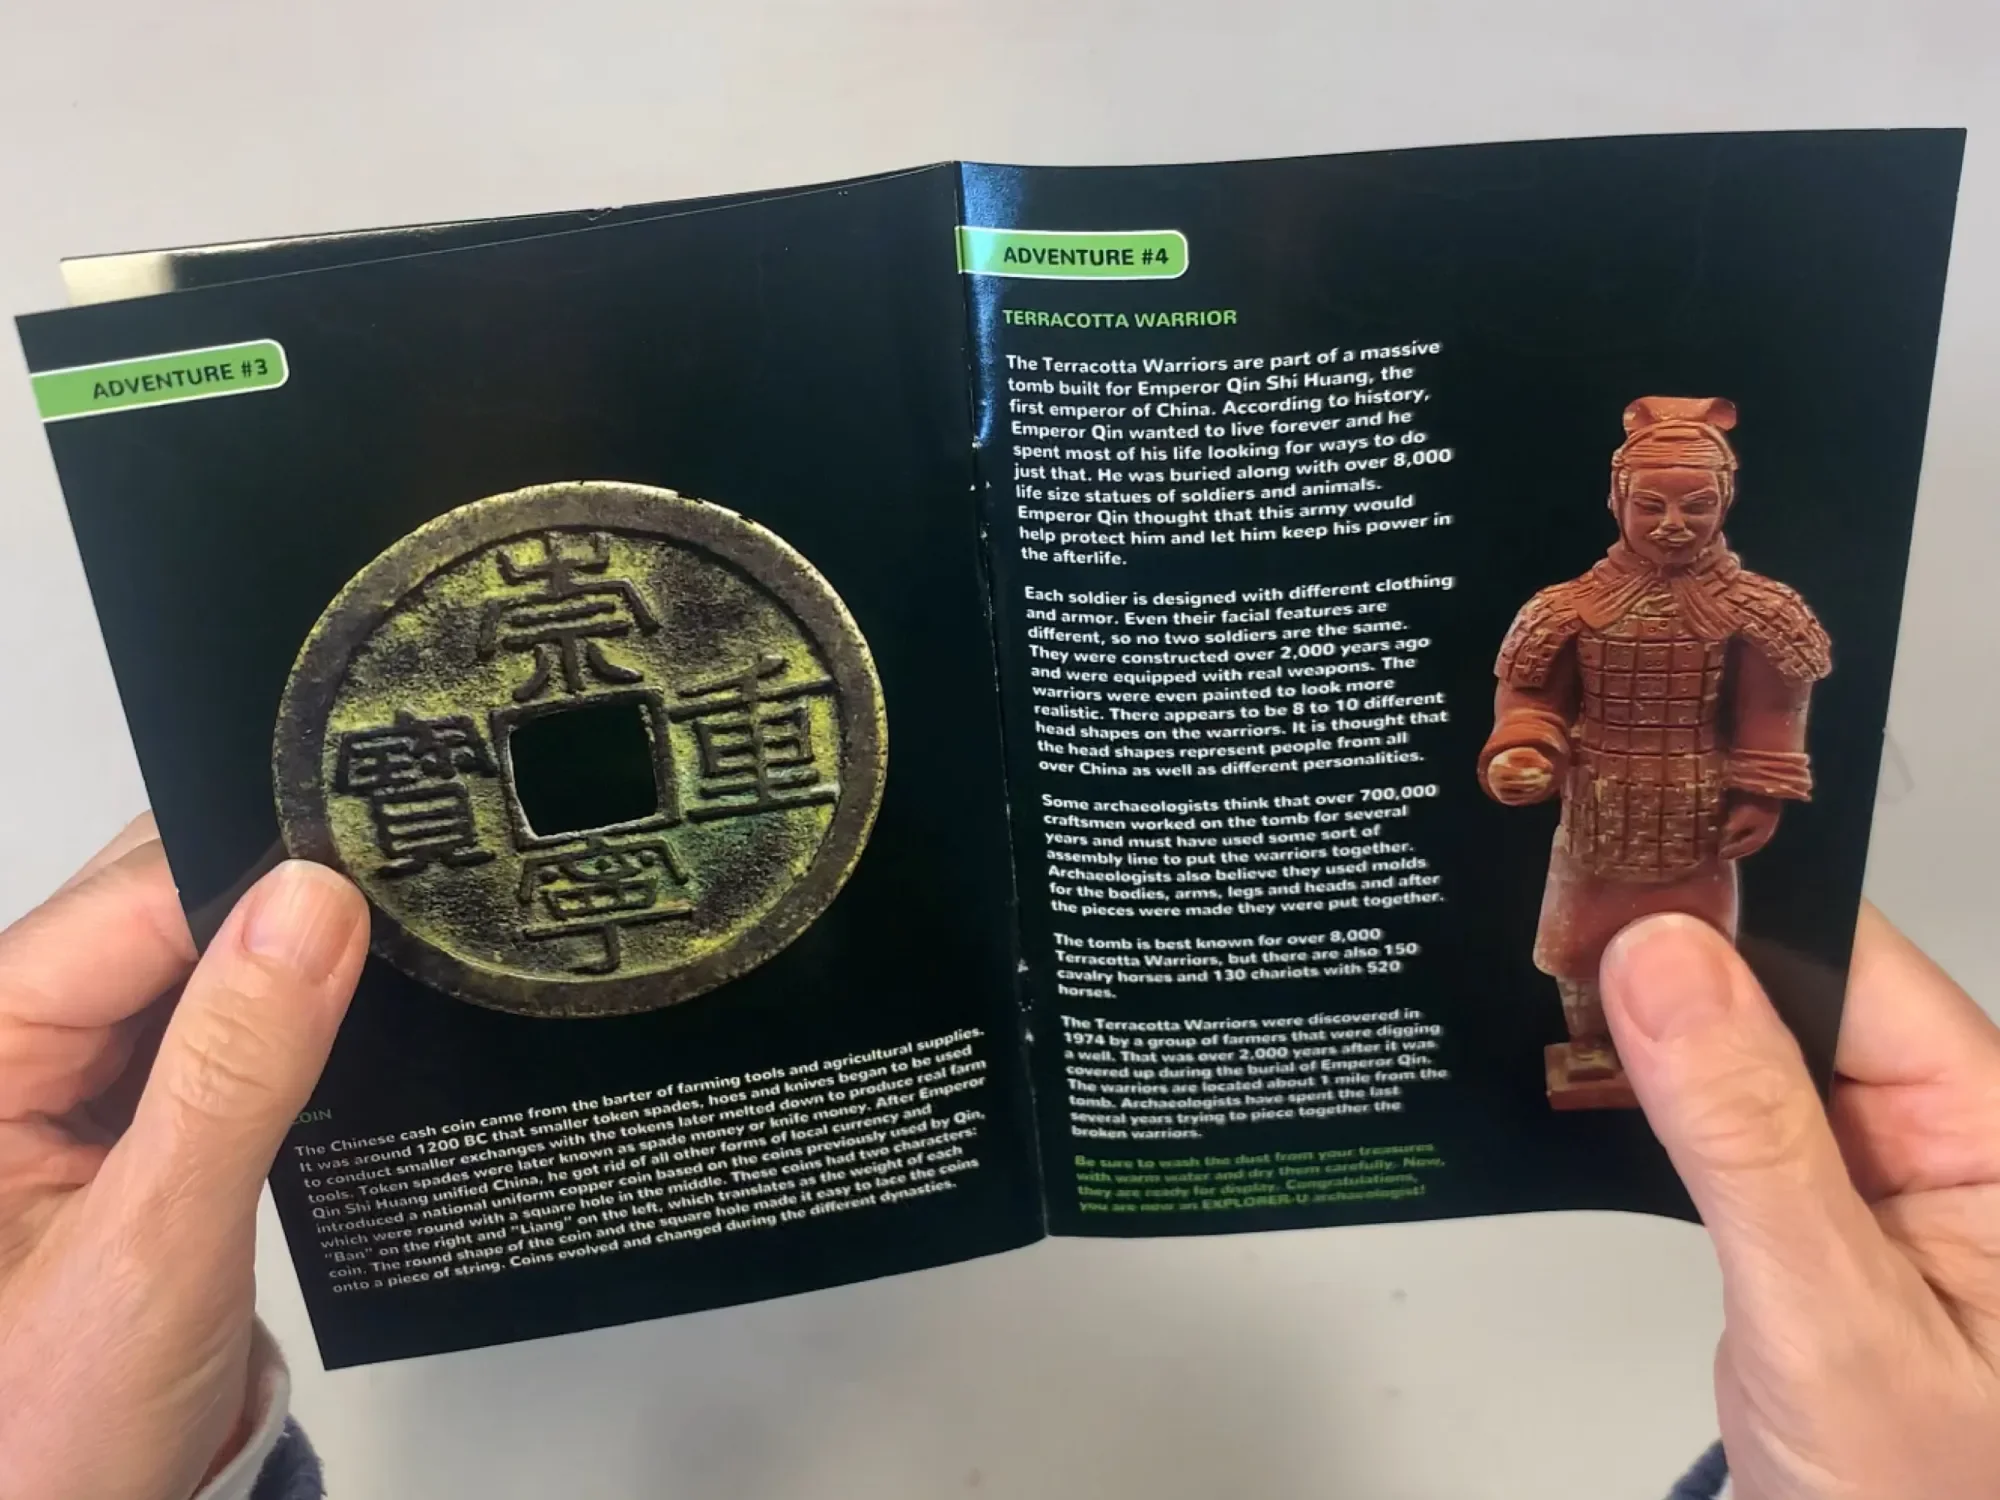
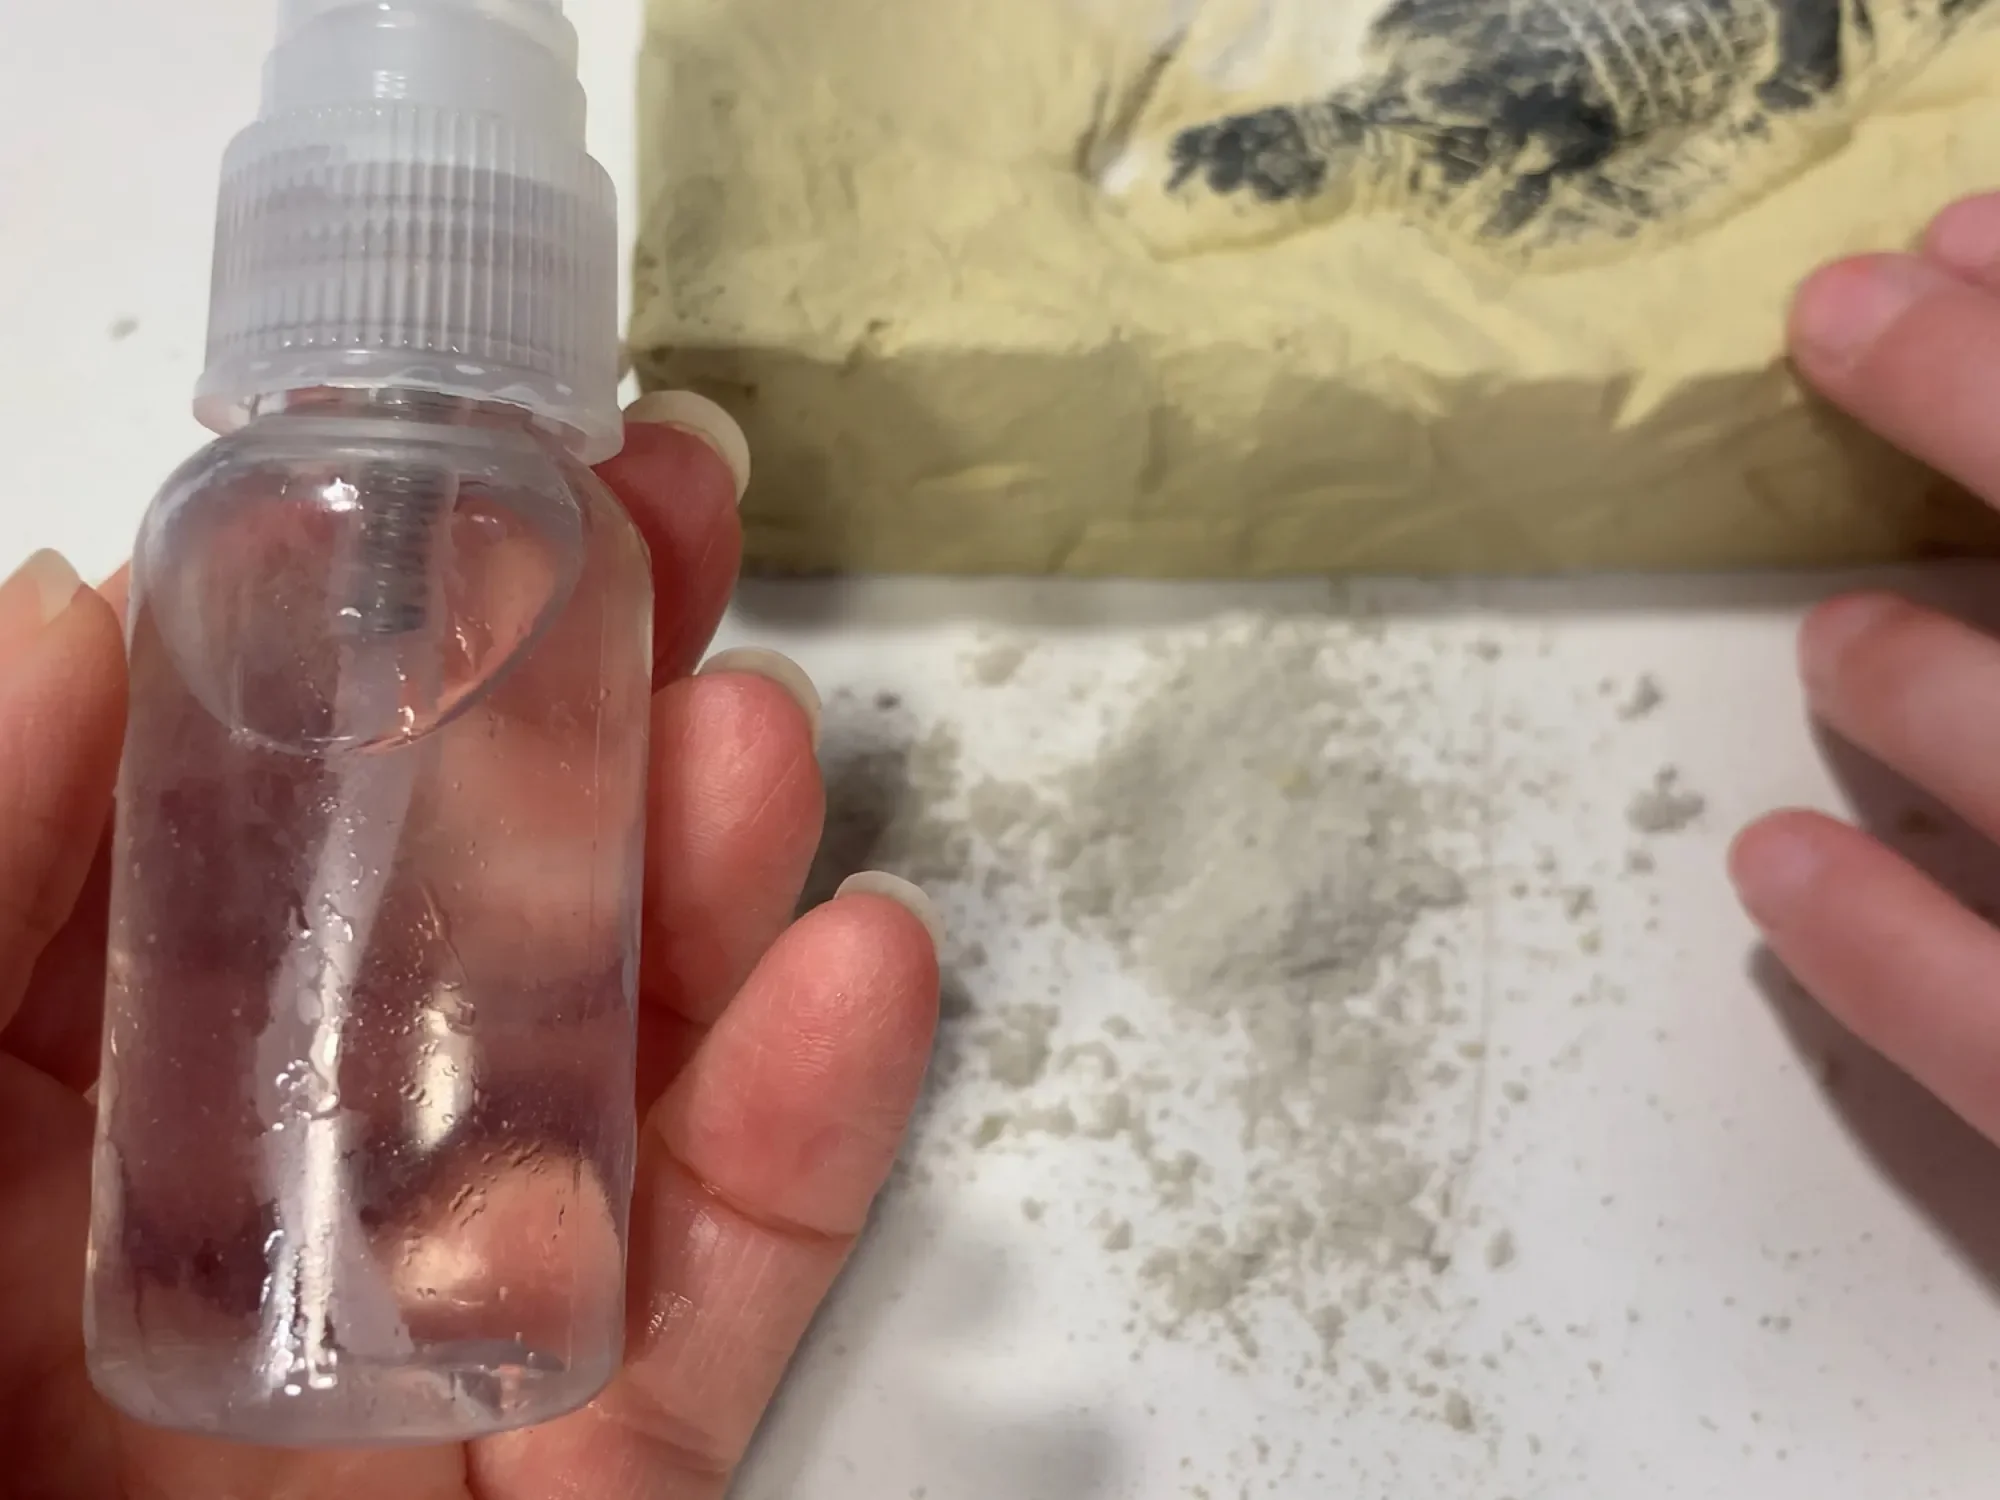
We’ve been adding dig kits to our lessons for years and they never get old. While each company has its own unique way to do an archaeological dig kit, I especially liked this one called Discover China Ancient Dig Kit by Explorer by Tedco because the artifacts were high quality and the clay/plaster was just the right balance been hard and easy. It took my 9-year-old daughter two days to finish her excavation, she worked less than an hour each time. She did accidently break the ceremonial wine goblet, but I fixed it with Tombow Mono Adhesive. She also broke or lost the coin that came as well and I wonder if maybe she missed it while excavating. Overall, I really liked this kit and the value it brought as a hands on project for this Ancient China unit study.
Check out the complete Ibn Battuta and North Africa Unit Study playlist, the China Unit Study playlist, the Silk Road Unit Study playlist, the Islamic Empire Unit Study playlist, and the Marco Polo & Genghis Khan Unit Study playlist as all these unit studies work well together.


Ancient China Terracotta Warriors
Clay Warriors Qin Dynasty
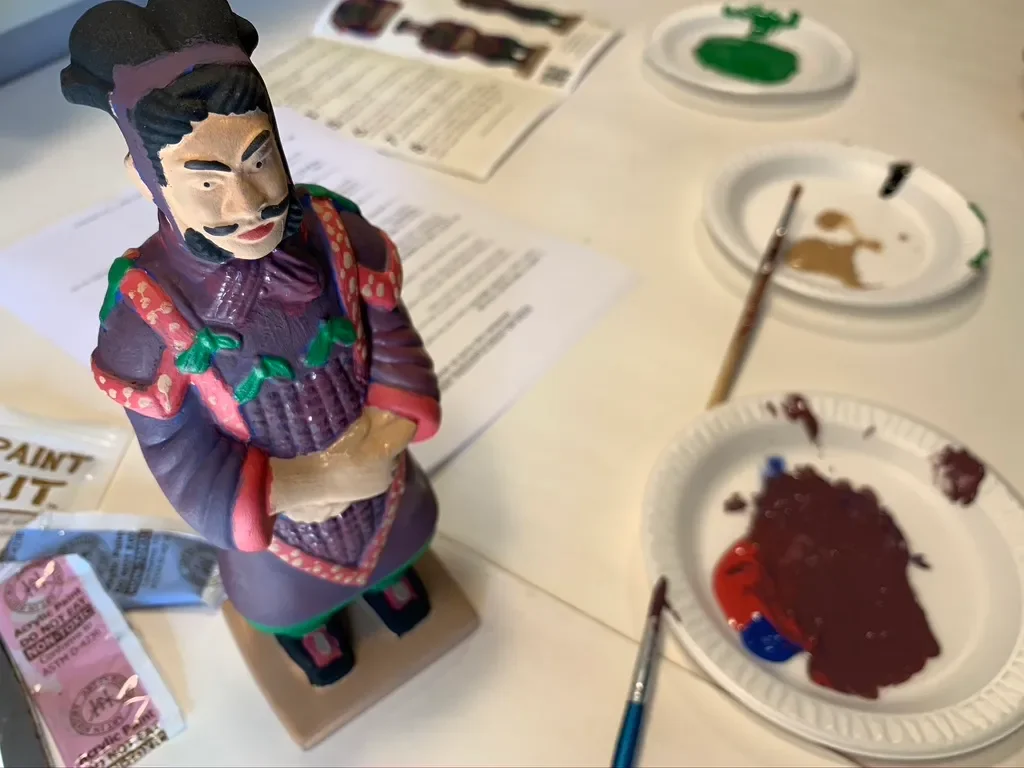
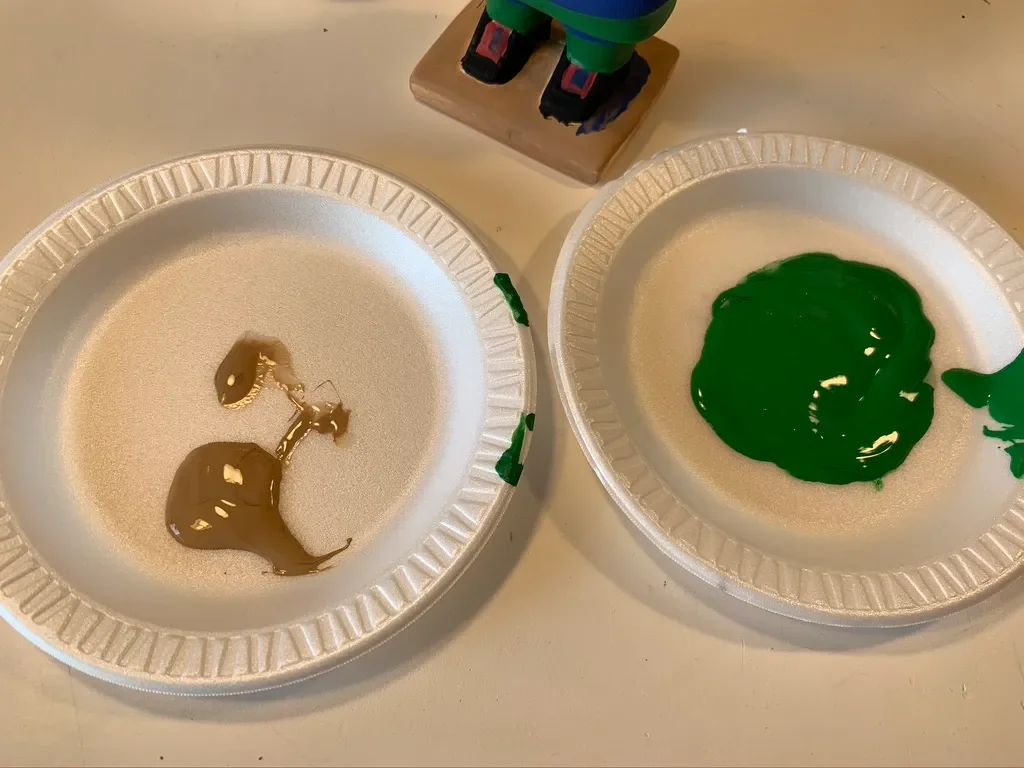
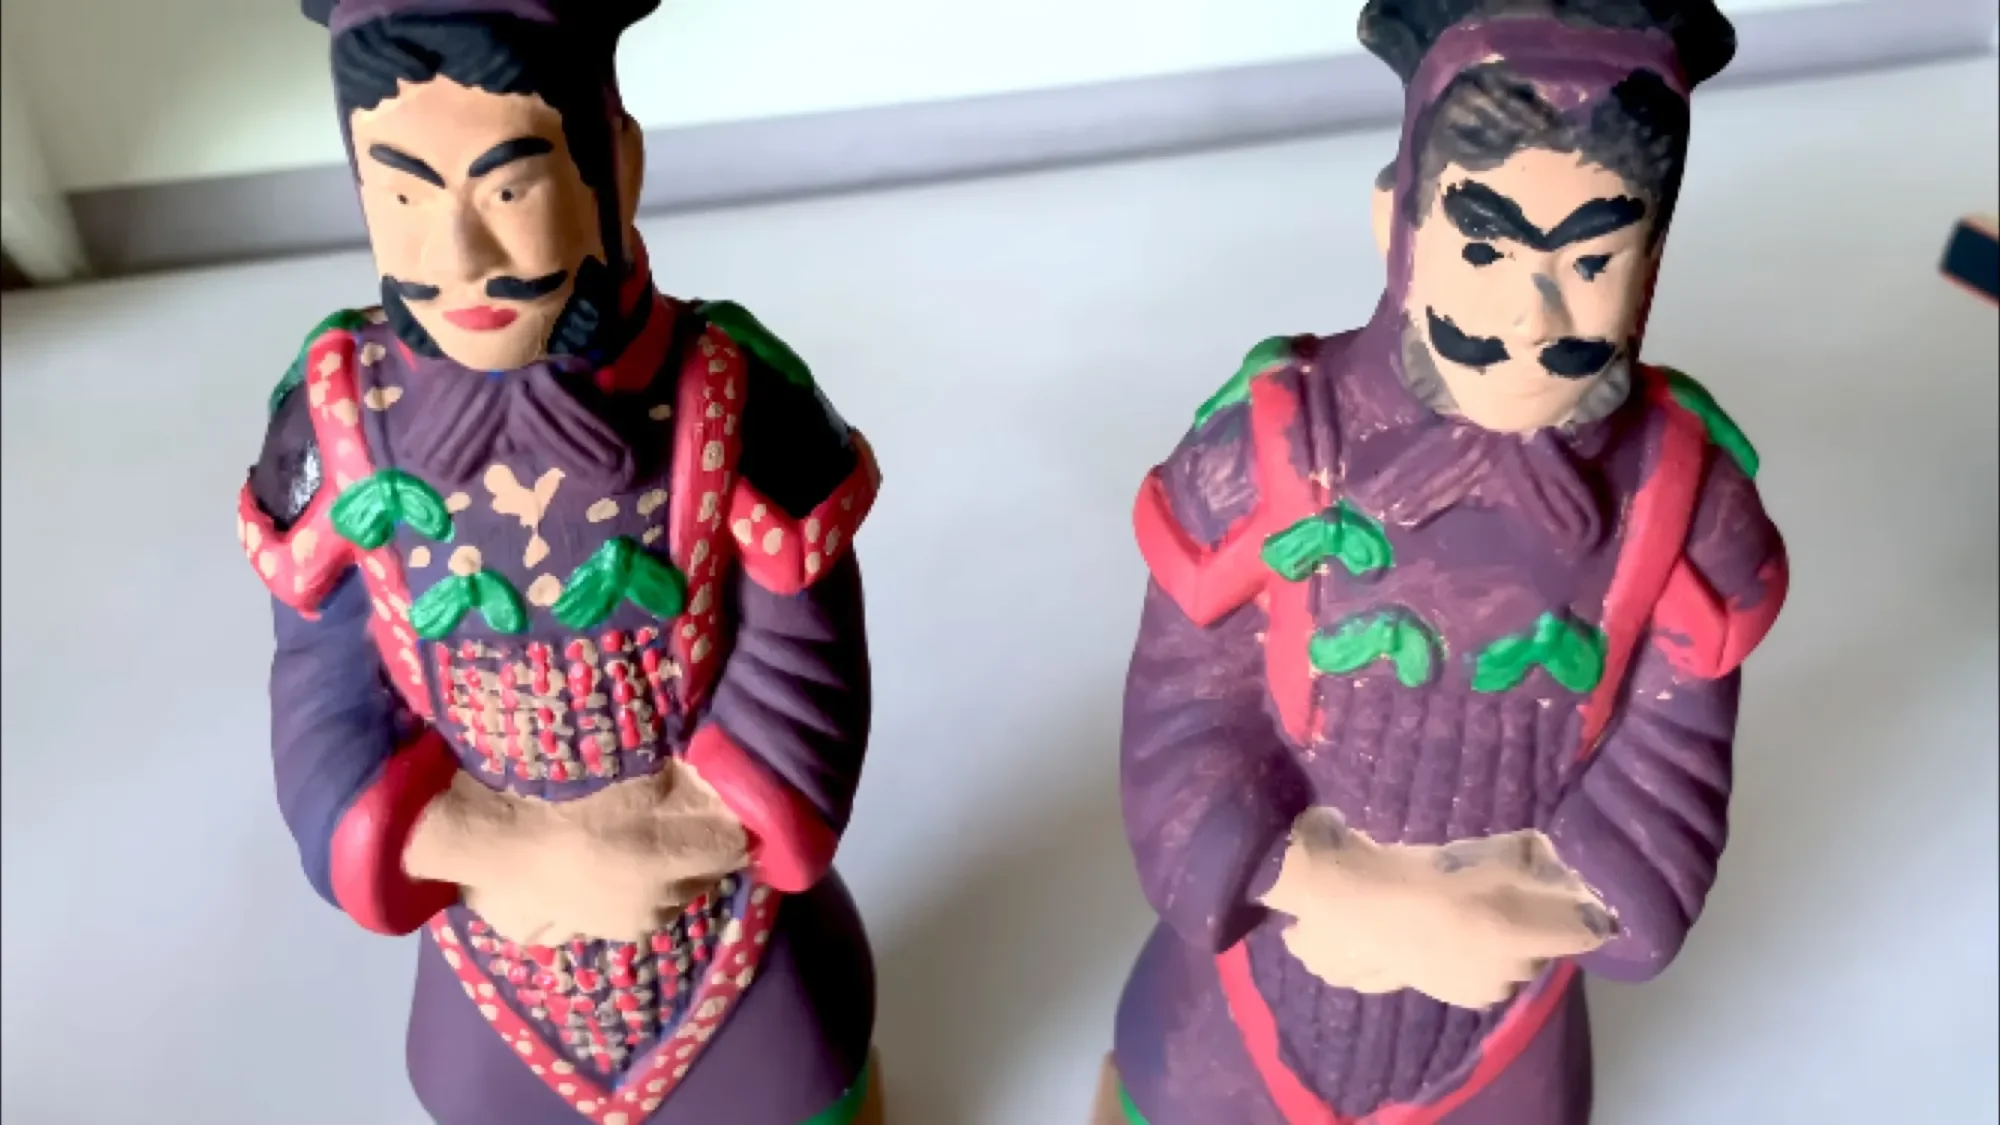
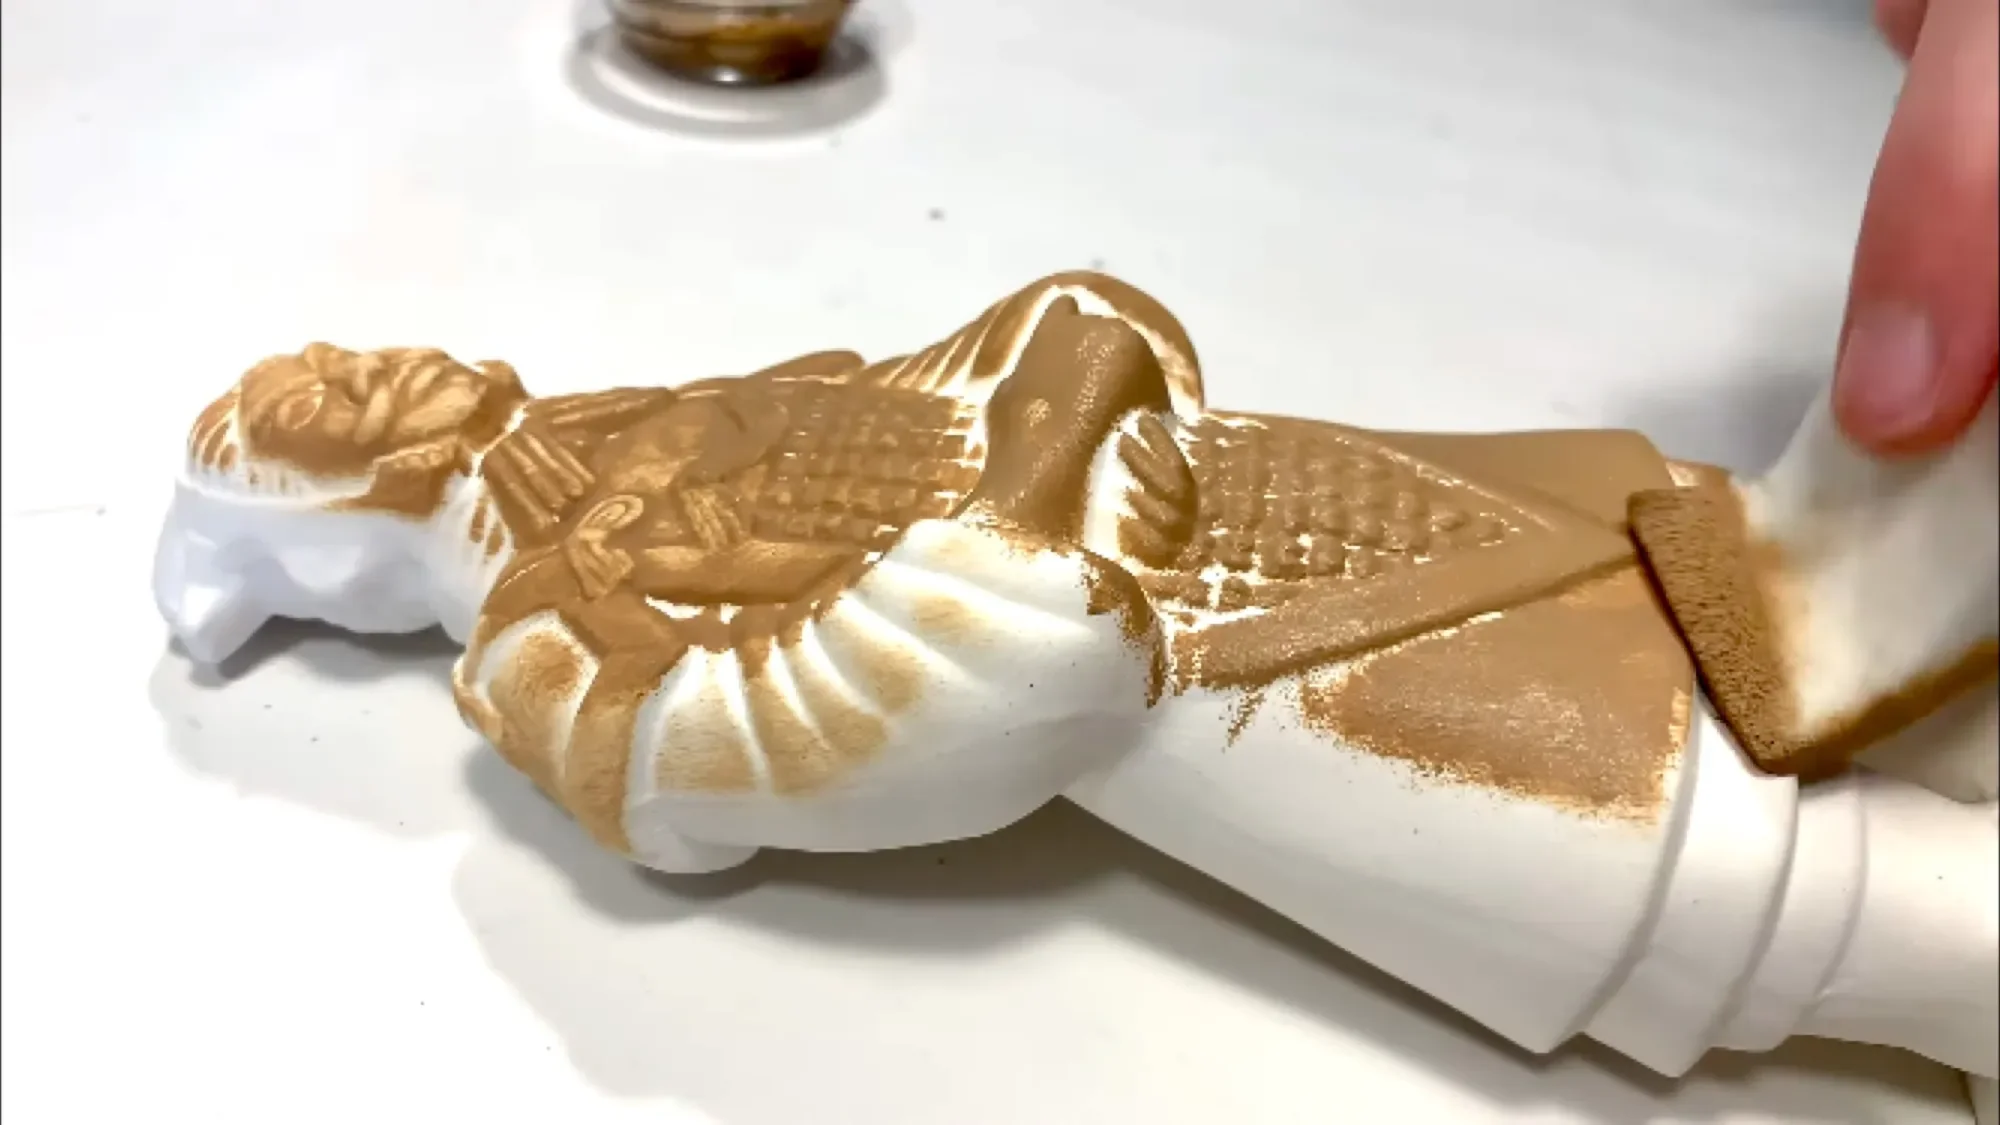
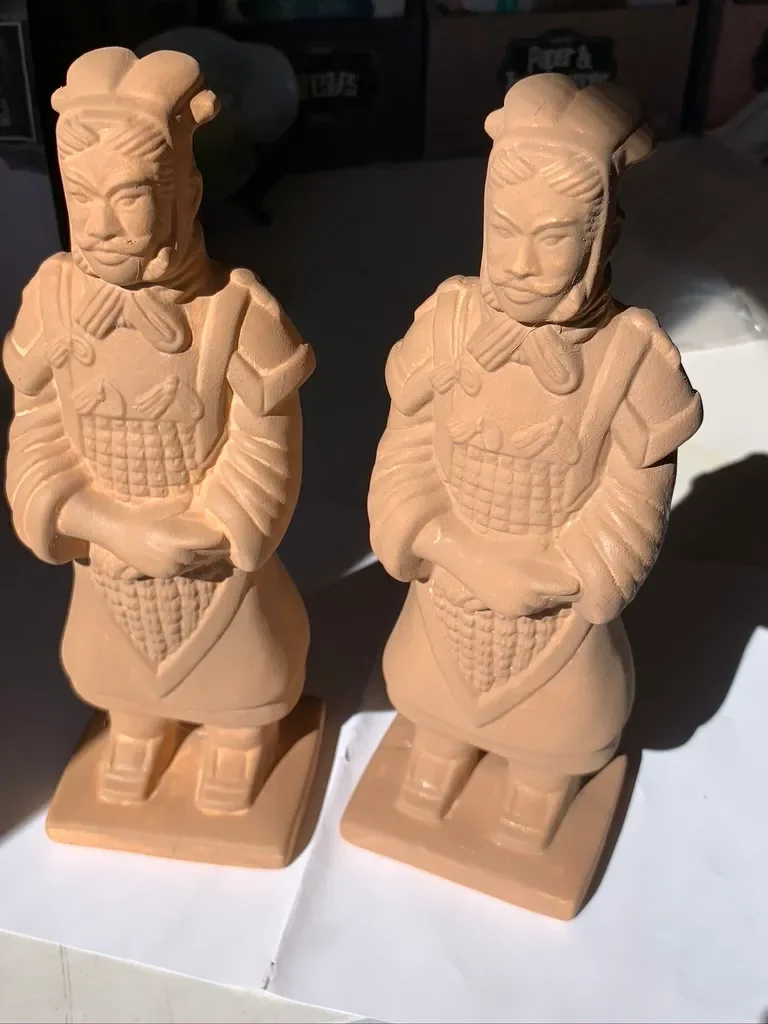
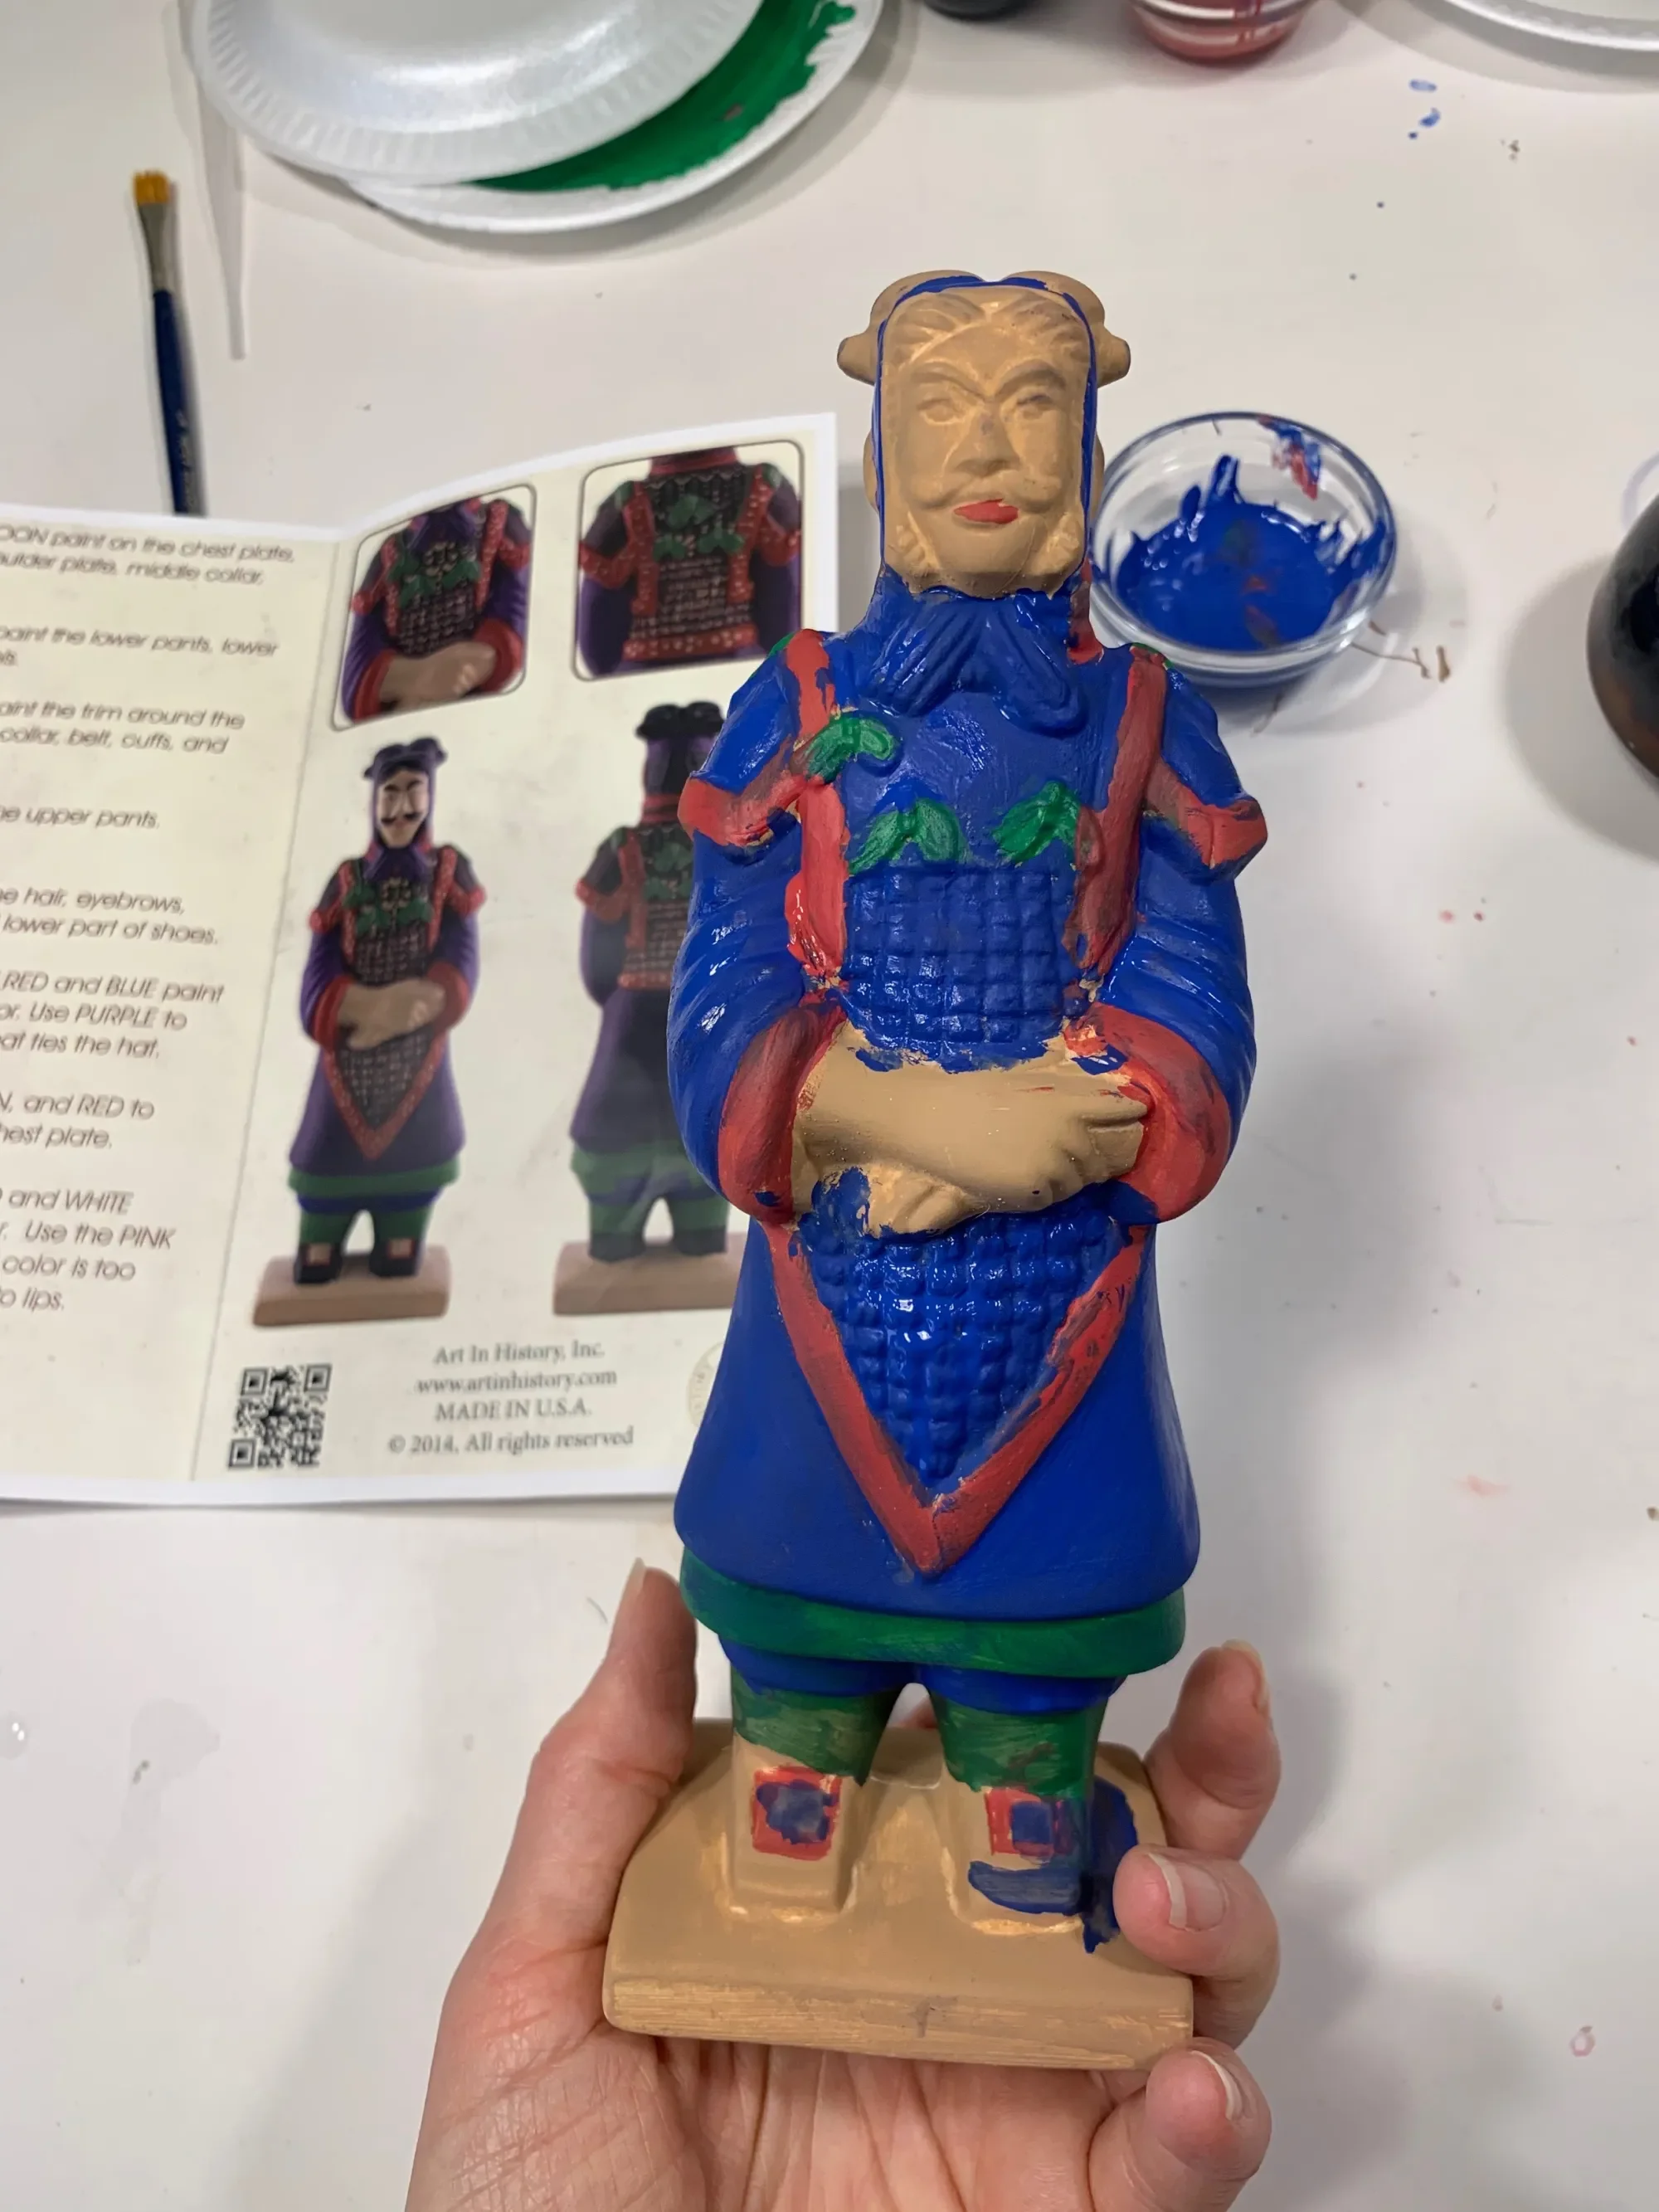
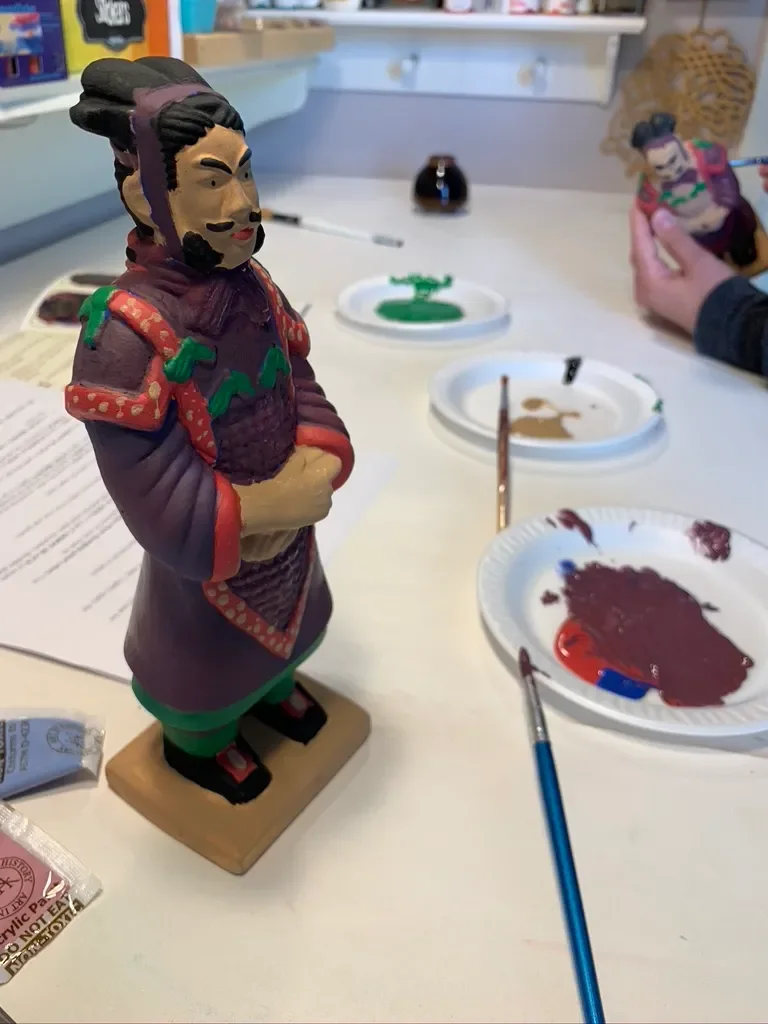
These Art in History Terracotta Warriors replicas were one of the best projects we did for our Ancient China unit. They are quite large measuring about 8 inches (21 cm) and look impressive once painted. Actually the end project looks nothing like what you see in photos depicting the Terracotta Warriors of the Qin Dynasty. That’s because the paint has deteriorated over the thousands of years they have been underground. No doubt some parts were preserved as the archeologist were able to decren the colors the clay warriors were painted. While we made some mistakes while painting, and granted it wasn’t the easiest, I think the end results were wonderful.
This project is suitable for students in elementary school through high school. It supports a hands on approach to learning history. You can find these for about $12 a kit which includes high quality supplies and materials. It comes with an abundance of paint, but be sure to cover extra paint, or only put how much you are using on a plate while working or the paint will dry up as this project was done over several days and even weeks. Each layer needs times to dry to account for this when doing the project. We would work for 15-20 minutes during each session until the project was complete.
I worked with my 10-year-old daughter and 14-year-old son. My daughter had trouble getting some of the details, but her first pass was beautiful. I did help her add details and at the end you can see both my son’s and daughter’s project and how different they look with and without the added detail suggested in the instructions. The kit also comes with a code you can enter on the website for additional information on the Terracotta Warriors. While we have used Art in History kits before, this was the first time we used the Lesson Plan Download access. The added information, history, maps and instructions added to our project. It is especially helpful if you do not have any other resource on the Terracotta Warriors. Since we had studied this in the books we used for our unit, the lesson plans were an added bonus. There was new information we hadn’t seen in books regarding the painting techniques used by the craftsmen and artisans that were insightful for us. I hadn’t know that they were all painted in vibrant colors or that a river of mercury circled around a miniature of the imperial grounds in the tomb. Overall my children enjoyed the hands on approach to this lesson and we look forward to adding more Art in History kits to our units.
Check out the complete Ibn Battuta and North Africa Unit Study playlist, the China Unit Study playlist, the Silk Road Unit Study playlist, the Islamic Empire Unit Study playlist, and the Marco Polo & Genghis Khan Unit Study playlist as all these unit studies work well together.
Knot Tying A Traditional Chinese Art
I forget that before machines did much of the work for us, we once learned how to do things by hand. Over time, we honed and improved our skills. The Chinese square knot, made using a small square template about 1/2 an inch square with four holes punched on each side, is a beautiful and unique knot that decorates clothes and lanterns. While I show you a basic version of this knot using the book Lucky Bamboo Crafts by Jennifer DeCristoforo, I also share with you some tassels with more intricate knots we purchased online which will decorate our lanterns. We used a thin waxed thread rather than a thicker satin cording. While our knots stayed secure, they were not as thick and beautiful as the store bought knots.
Check out the complete Ibn Battuta and North Africa Unit Study playlist, the China Unit Study playlist, the Silk Road Unit Study playlist, the Islamic Empire Unit Study playlist, and the Marco Polo & Genghis Khan Unit Study playlist as all these unit studies work well together.
DIY Great Wall of China Foam Building Kit
We’ve done a number of Great Wall of China project kits and while this one was the most affordable and quickest of them all, it was also our least favorite. This one is made of high quality printed material over a foam core. The kit says it suitable for children 6 years and up. I would imagine that young children will benefit from adult or older child help. As I’m currently homeschooling my 9-year-old daughter and 14-year-old son, they both can do most of these hands on projects easily and with little adult assistance. I do partake in the projects on occasion and sometimes we make our projects group projects, so that we are just working on one project which saves time and money and allows all ages and skill sets the opportunity to help with the group project. My 14-year-old son completed this Great Wall project in less than an hour. It measures about 18″ by 6″ (about 45 cm by 15cm). While we didn’t bend any of the foam tabs, that is usually a concern with a project made from this material. In my opinion, it is not suitable for young children or as a play item as it’s too delicate and will get damaged.
Check out the complete Ibn Battuta and North Africa Unit Study playlist, the China Unit Study playlist, the Silk Road Unit Study playlist, the Islamic Empire Unit Study playlist, and the Marco Polo & Genghis Khan Unit Study playlist as all these unit studies work well together.
How To Make Chopstick Holders | Origami Chopstick Cases
We are loving the craft book Lucky Bamboo Crafts by Jennifer DeCristoforo. We are getting tons of inspiration from this book and while we have some video tutorials to share with you, the majority of the projects we did, we didn’t make a video tutorial to accompany this blog post. What I’m enjoying about the book, aside from the superior quality (spiral bound so it lays flat, thick glossy pages so they last and won’t tear with student use), I find that this book was especially inviting to my 10-year-old daughter who worked through several projects entirely on her own with great success. She was dedicated and motivated and her projects turned out beautifully.
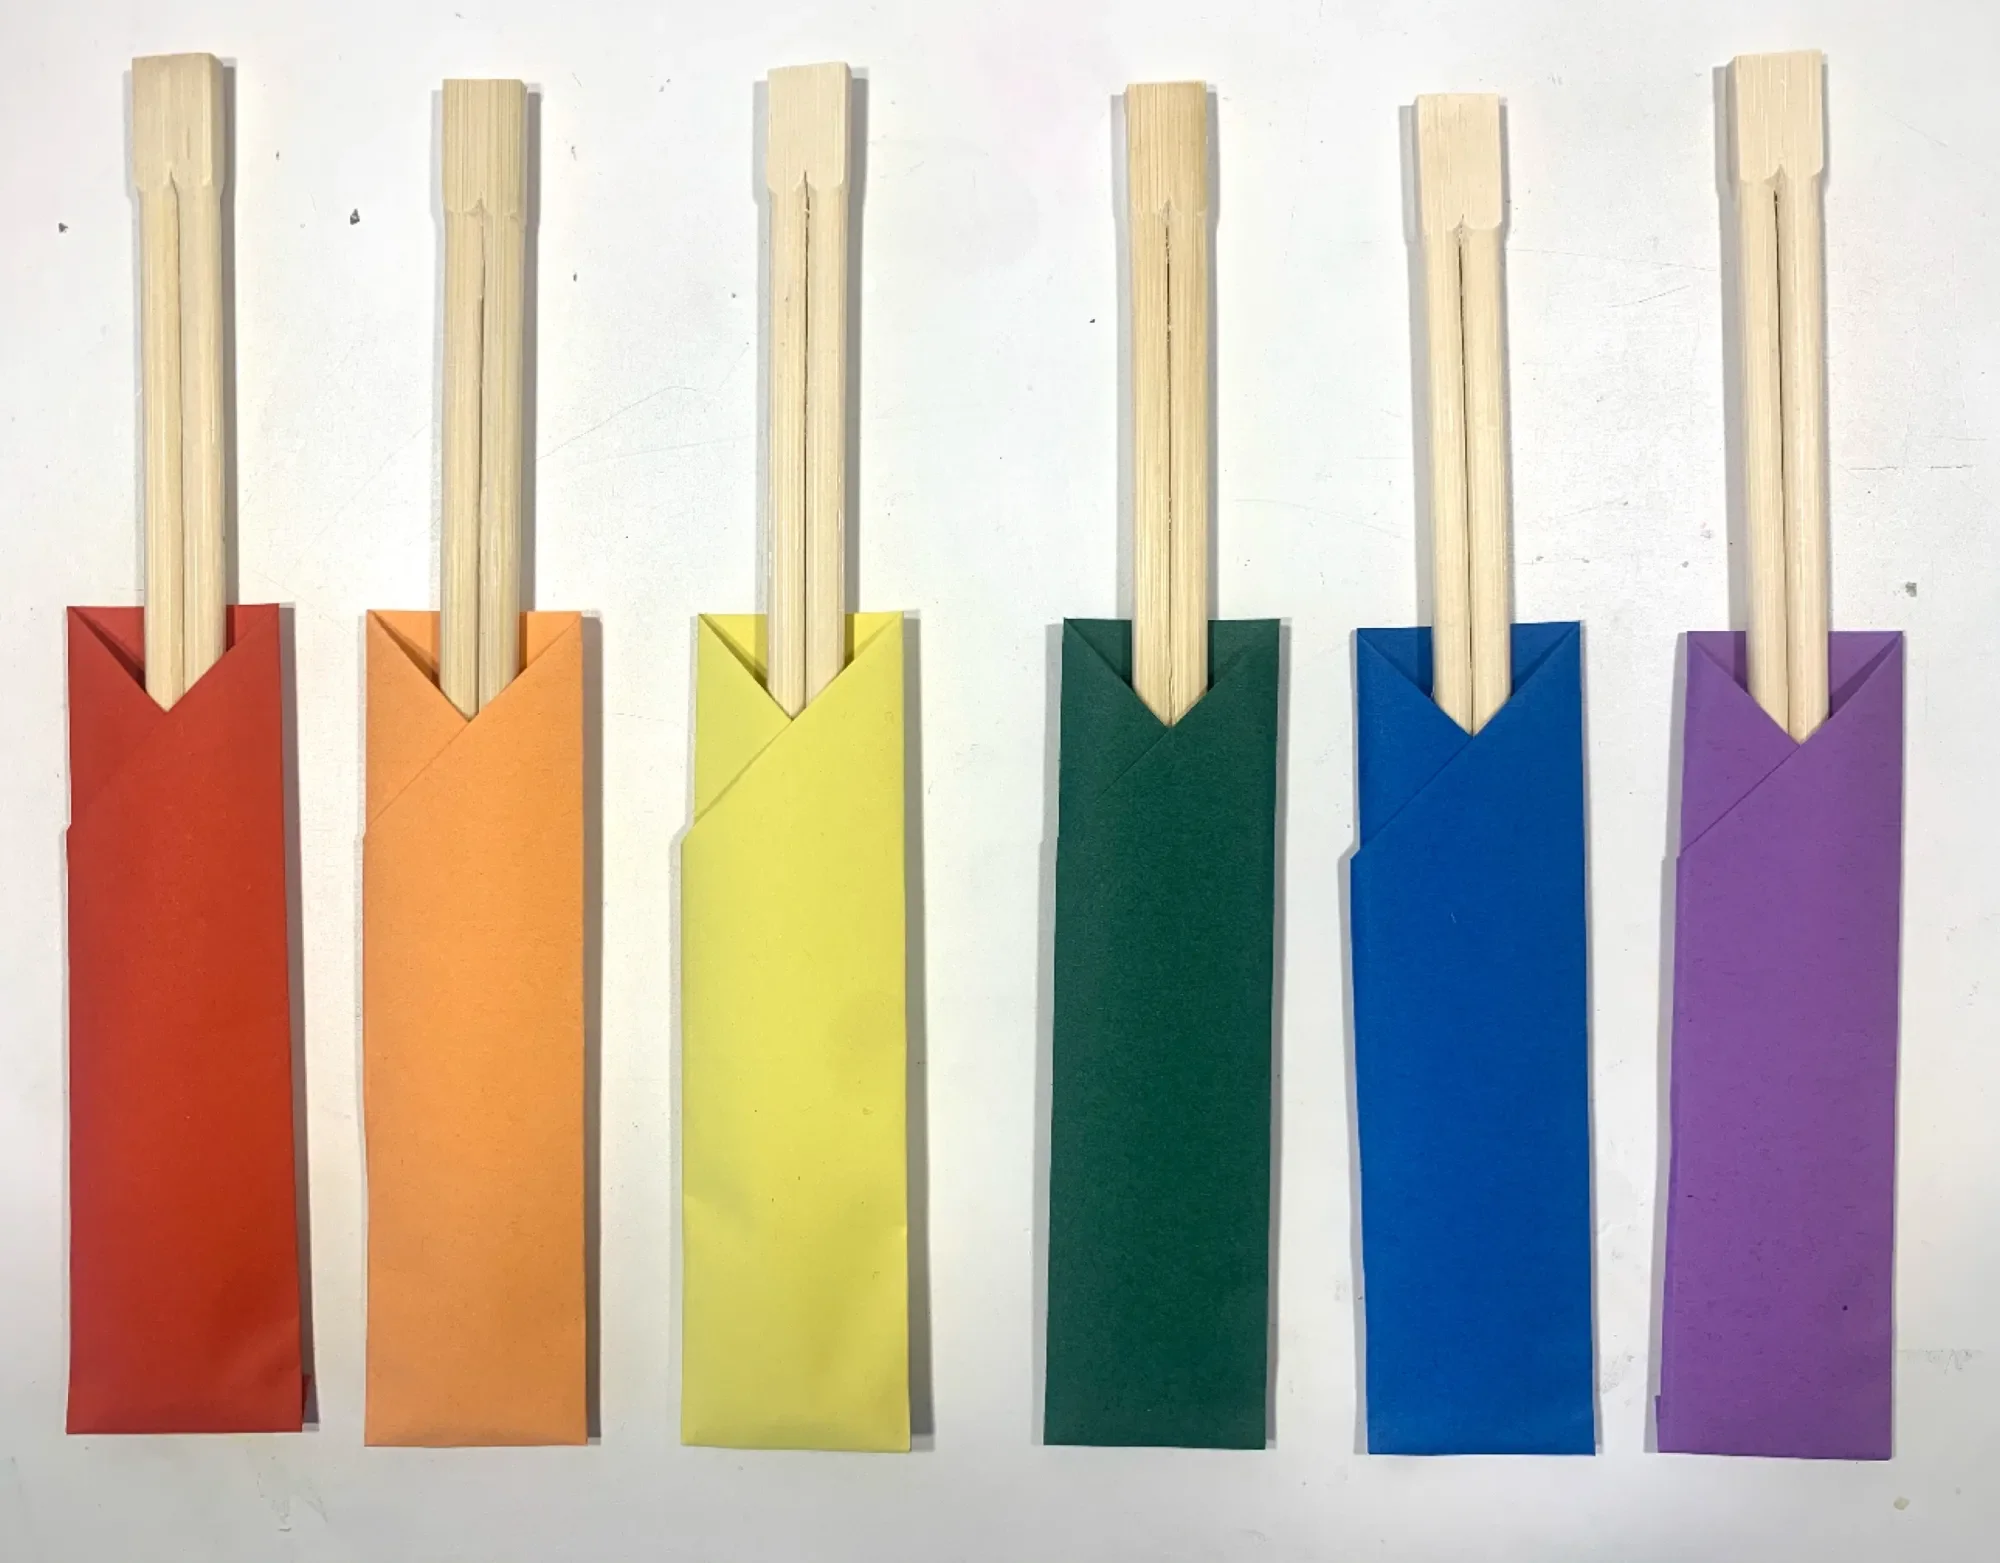
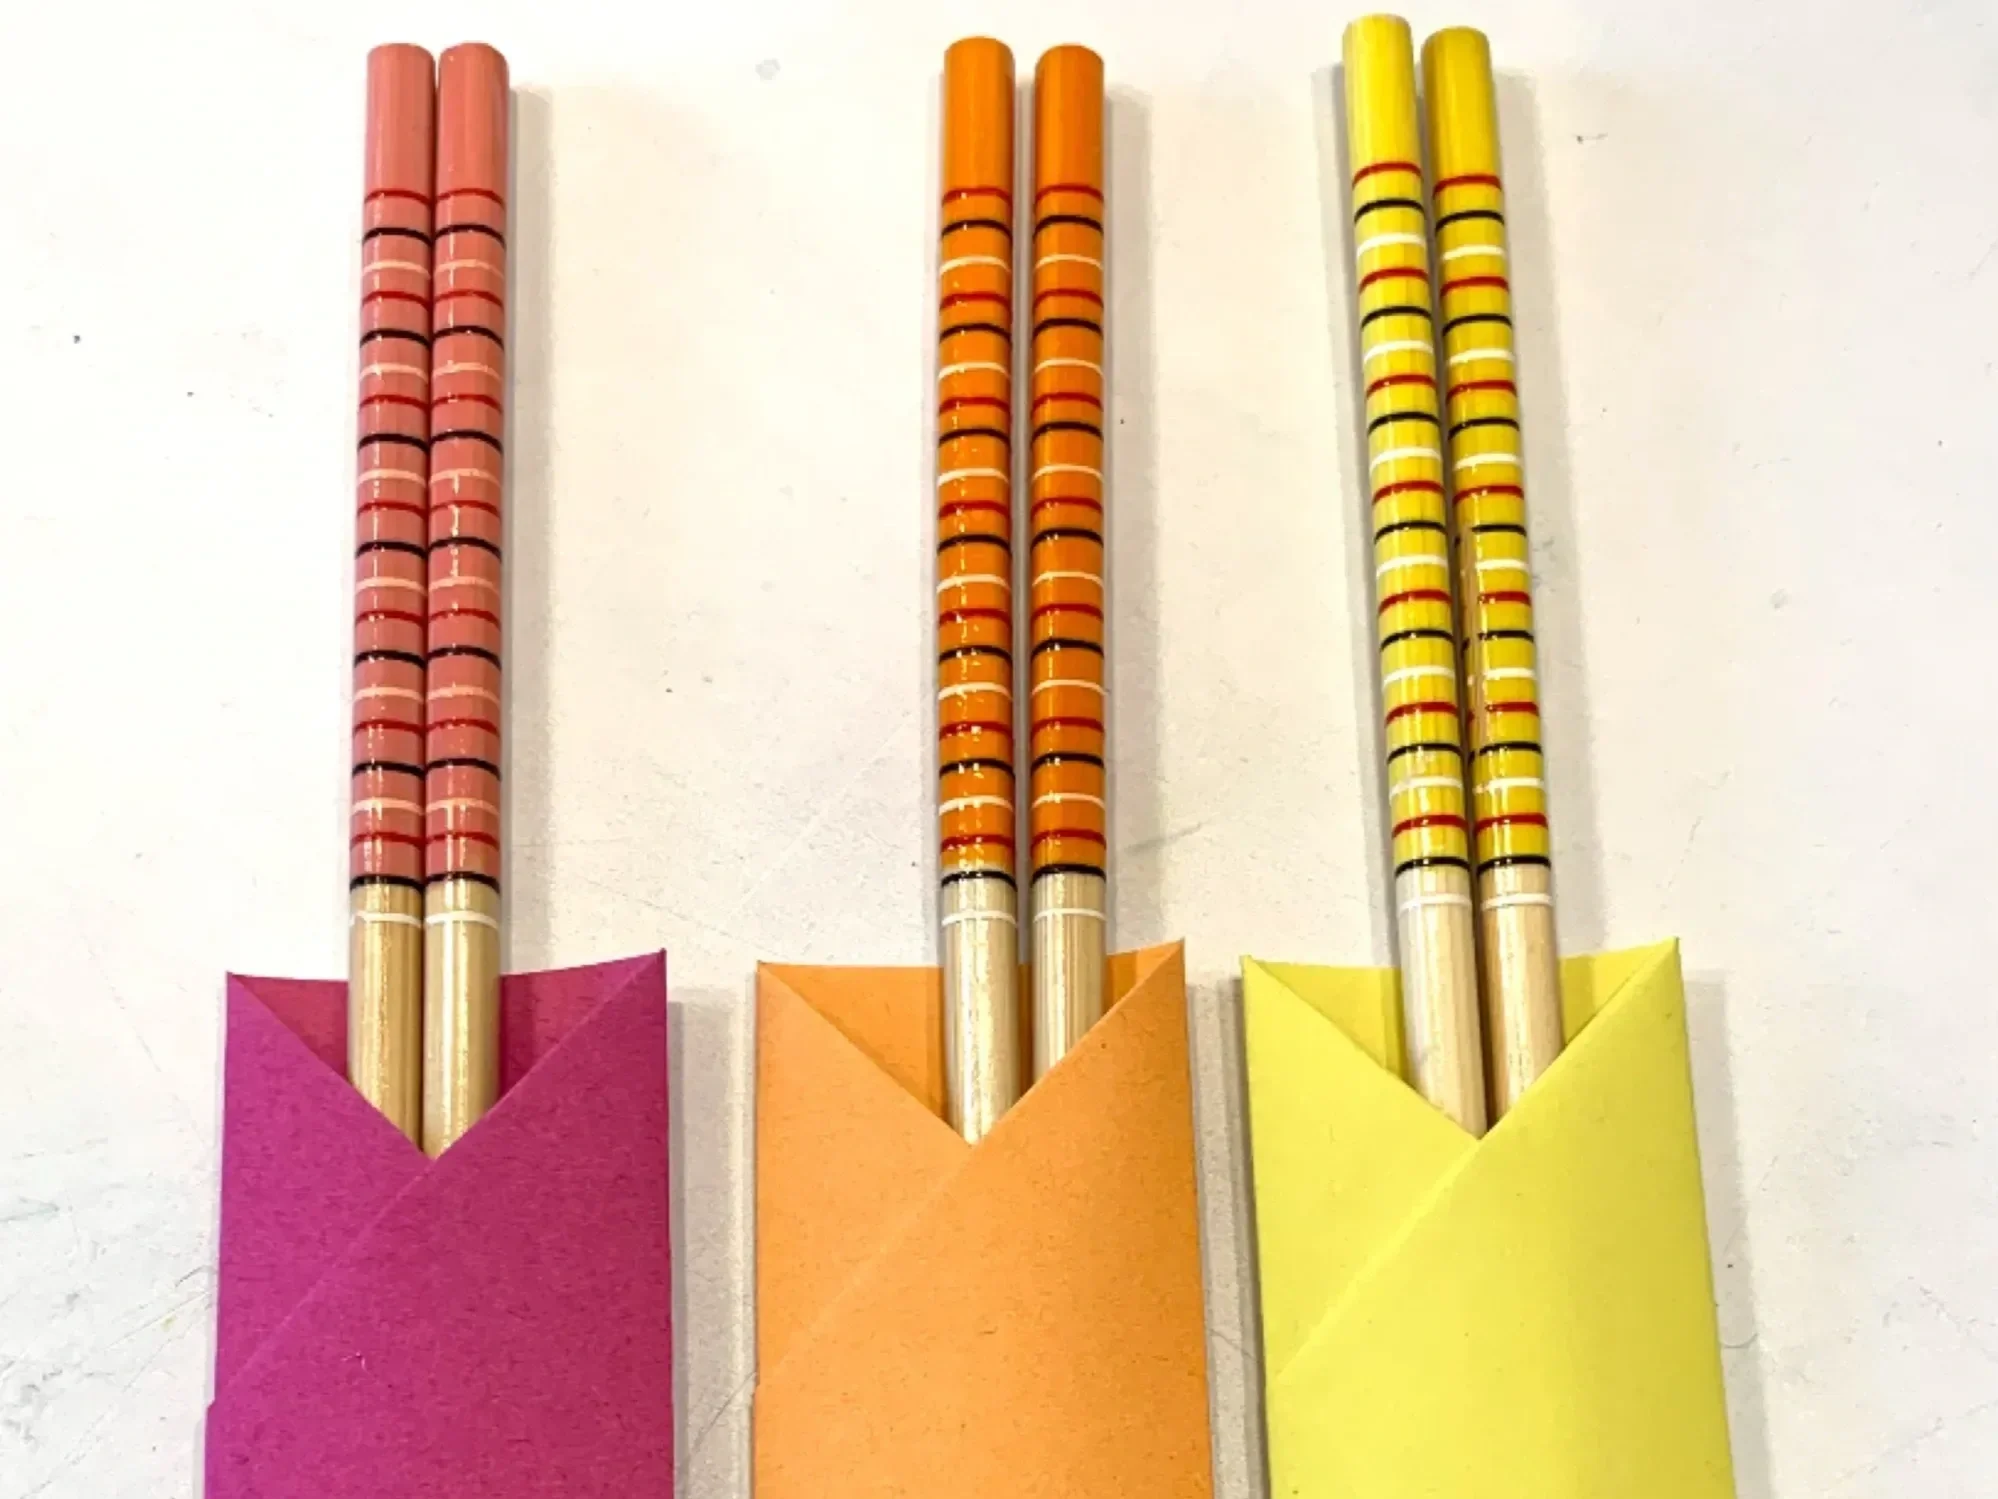
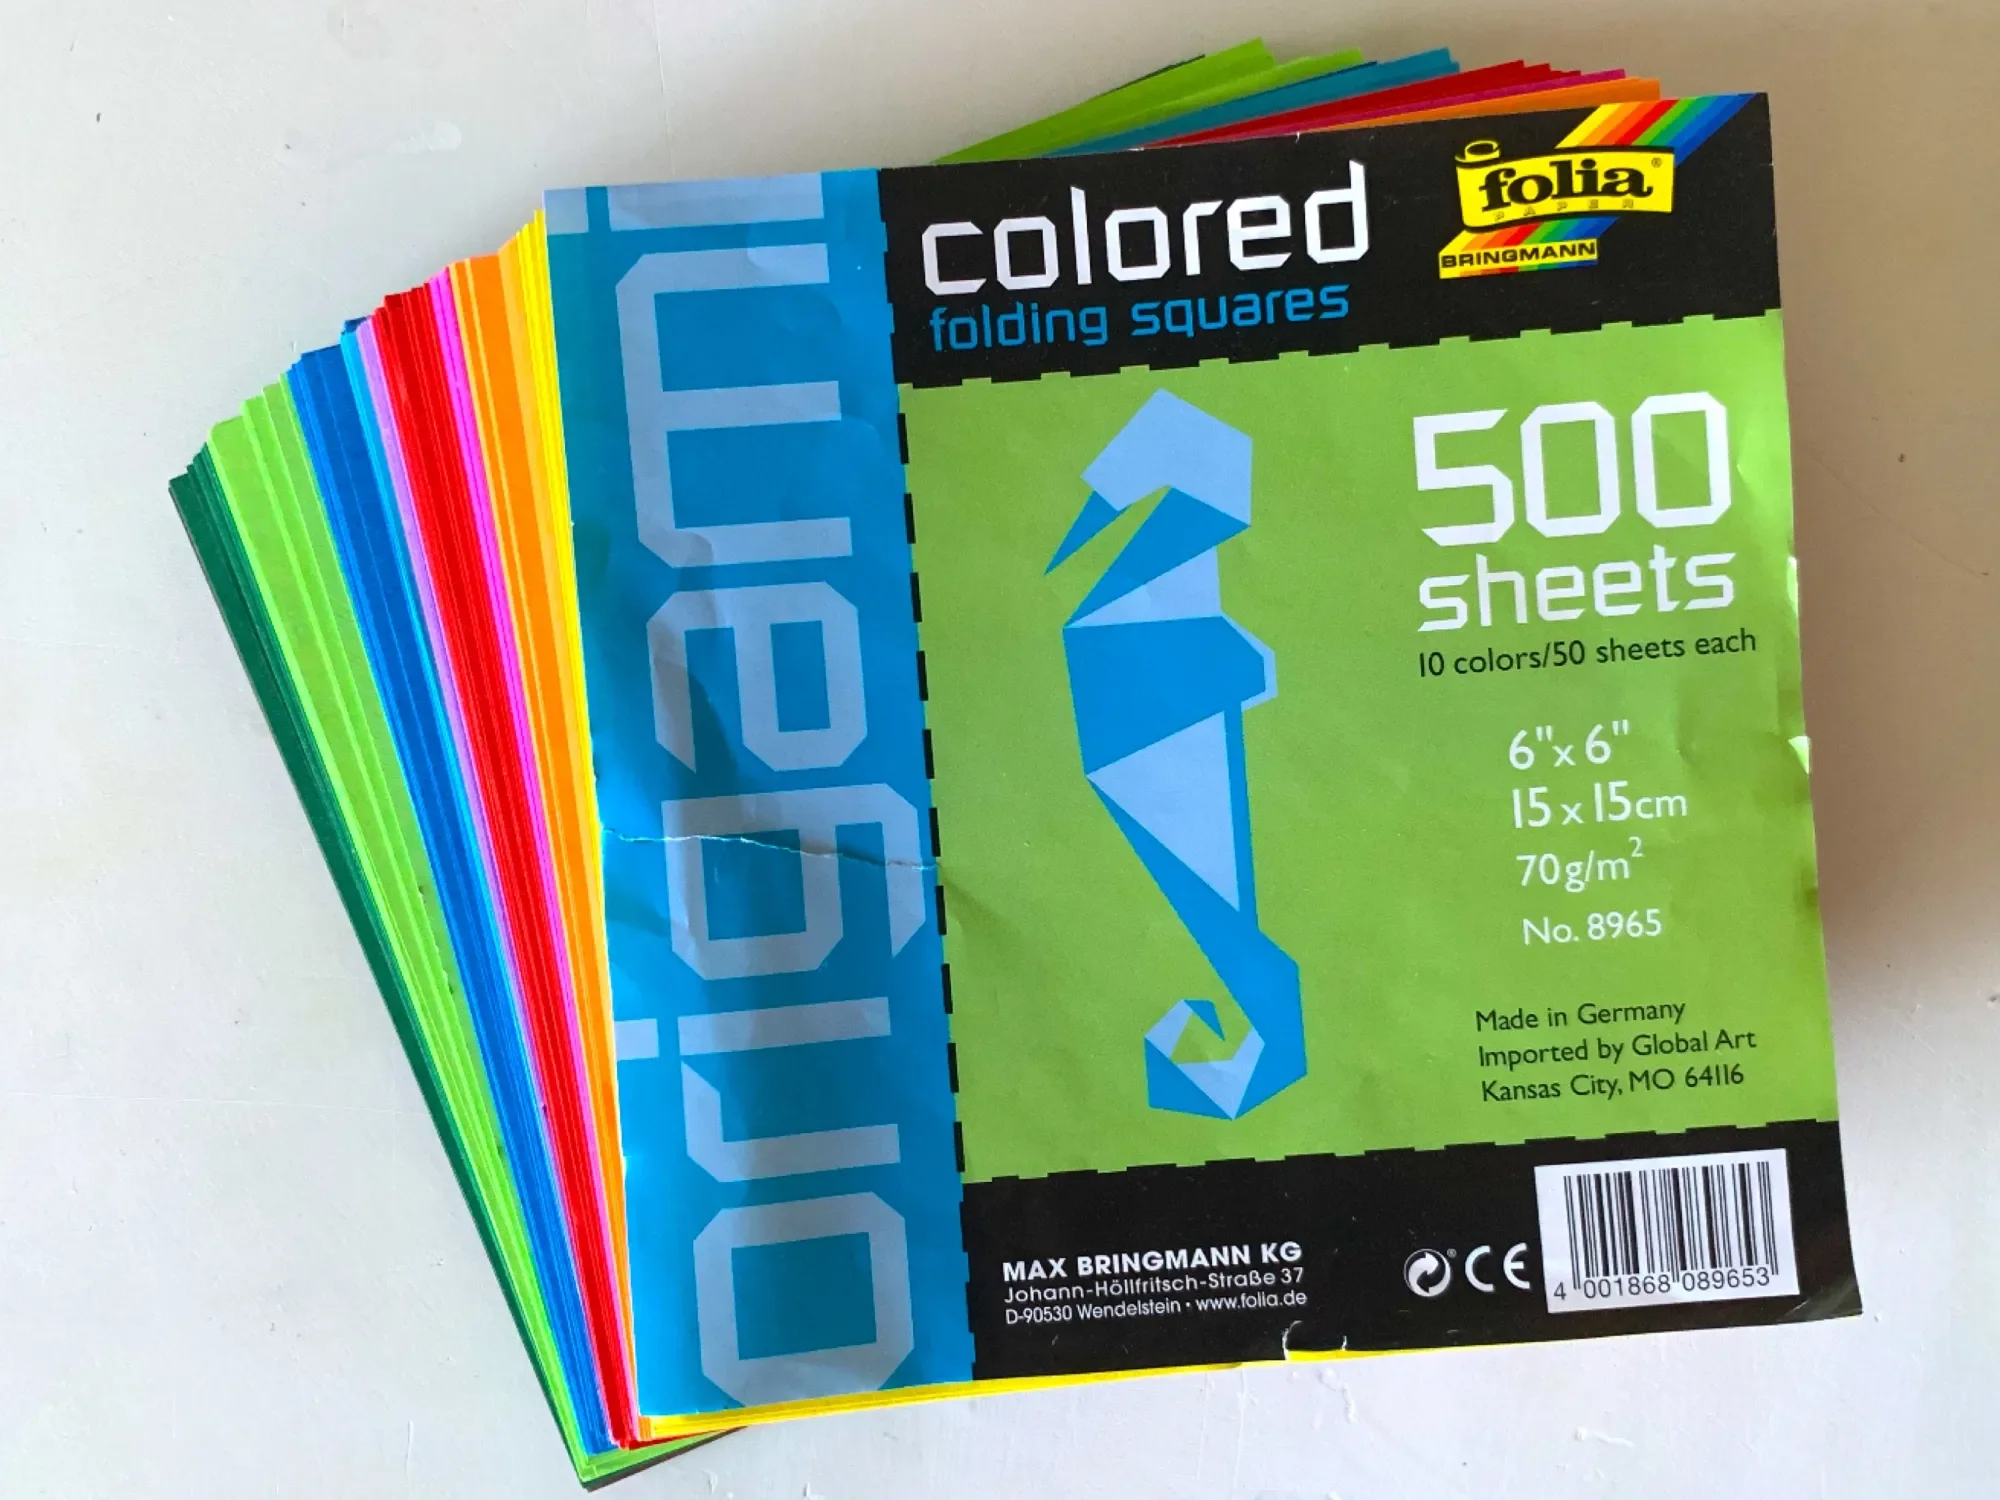
Today’s project is another she can do on her own, but I decided to share this super easy origami tutorial on how to make chopstick cases. I’m using Folia Origami Paper from A Child’s Dream which measures 6″x6″ which is slightly small for this project but you’ll still get great cases. I used a bit of glue to secure the back flap. A glue stick works great for that. I added a bit of gold washi tape as a decoration to secure the folded up bottom as an additional measure to just using glue for that piece.
I made three to match the chopsticks I bought over 10 years ago from a local shop, but when my children made theirs, the filled them with disposable chopsticks we’ve collected from the years of eating out at Asian restaurants.
Check out the complete Ibn Battuta and North Africa Unit Study playlist, the China Unit Study playlist, the Silk Road Unit Study playlist, the Islamic Empire Unit Study playlist, and the Marco Polo & Genghis Khan Unit Study playlist as all these unit studies work well together.
Chinese Brush Painting
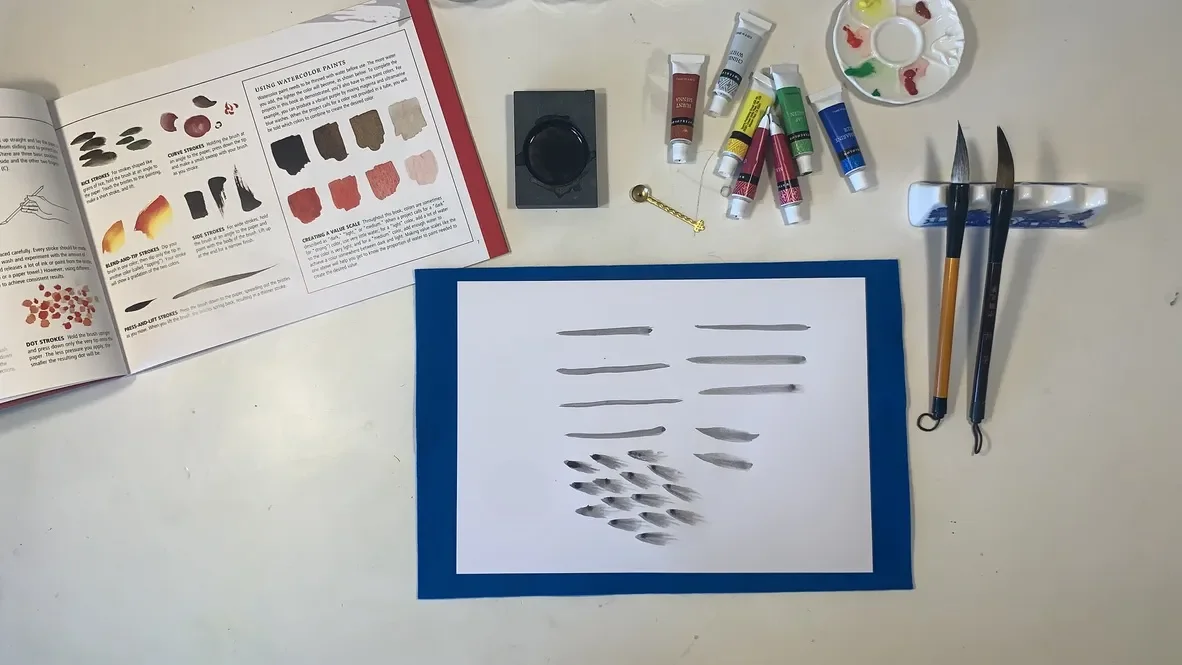
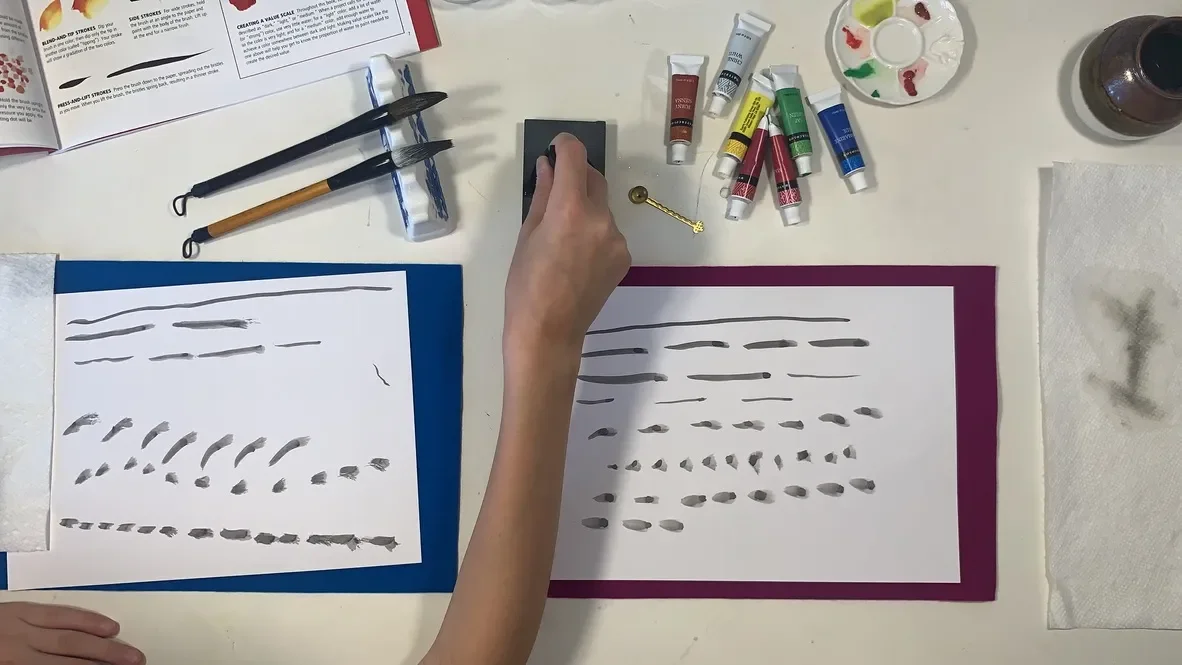
Chinese brush painting was my favorite of all the hands on projects we did for our Ancient China unit study for homeschool. We got this Chinese Brush Painting kit from Barnes and Noble. It comes with basic supplies of which I don’t know of the quality. Being that we were beginners, it appeared the supplies we used were good enough for our endeavor, but you can find high quality professional supplies from Oriental Art Supply.
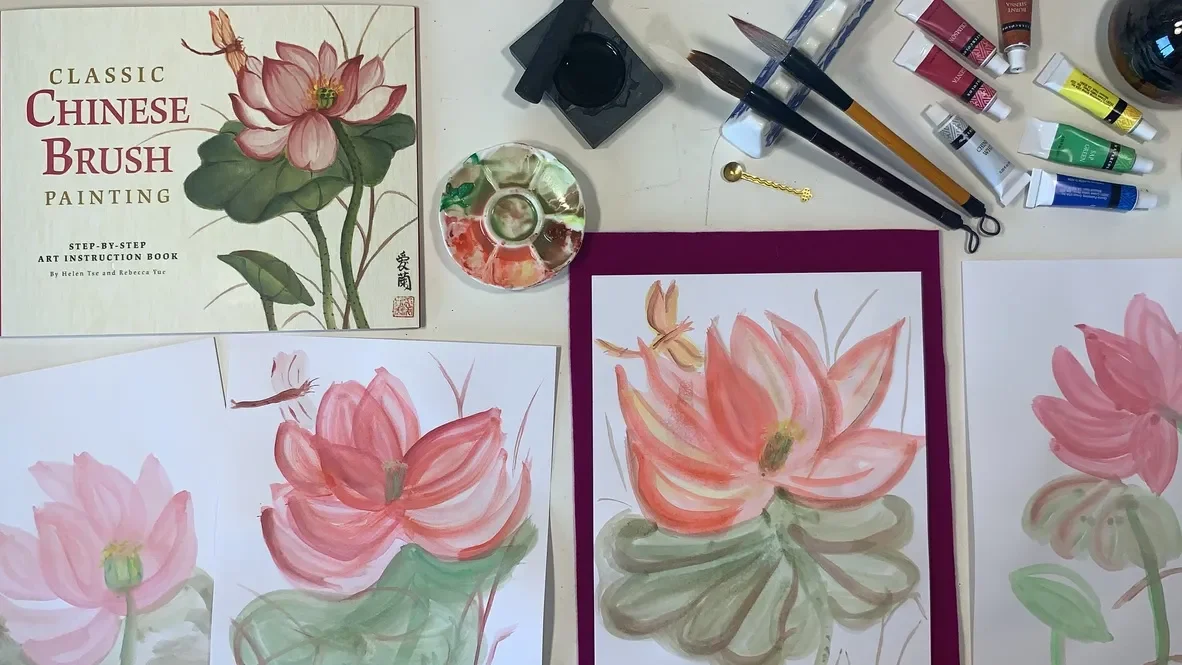
For this lesson, we explored how to make simple brush strokes using the three different hand/finger positions indicated in the book. Once we practiced those stokes, we attempted the lotus flower. It was challenging for us to find success with this project for many reasons. First, we didn’t practice the basics enough. Second, we were too hasty and did everything in one day rather than doing several short lessons for the course of a week. And third, it takes years of practice to make it look easy! The images in the book are beautiful and while some look basic, it wasn’t easy to achieve what we wanted…even with something easy. This left me deeply impressed and in appreciative of the time and skill it takes to learn this art form, master it and produce work that looks effortless. If you haven’t tried Chinese brush painting, I recommend you try it out!
Check out the complete Ibn Battuta and North Africa Unit Study playlist, the China Unit Study playlist, the Silk Road Unit Study playlist, the Islamic Empire Unit Study playlist, and the Marco Polo & Genghis Khan Unit Study playlist as all these unit studies work well together.


Recipes
Azerbaijan Meat Kebabs with Mint | The Silk Road Gourmet
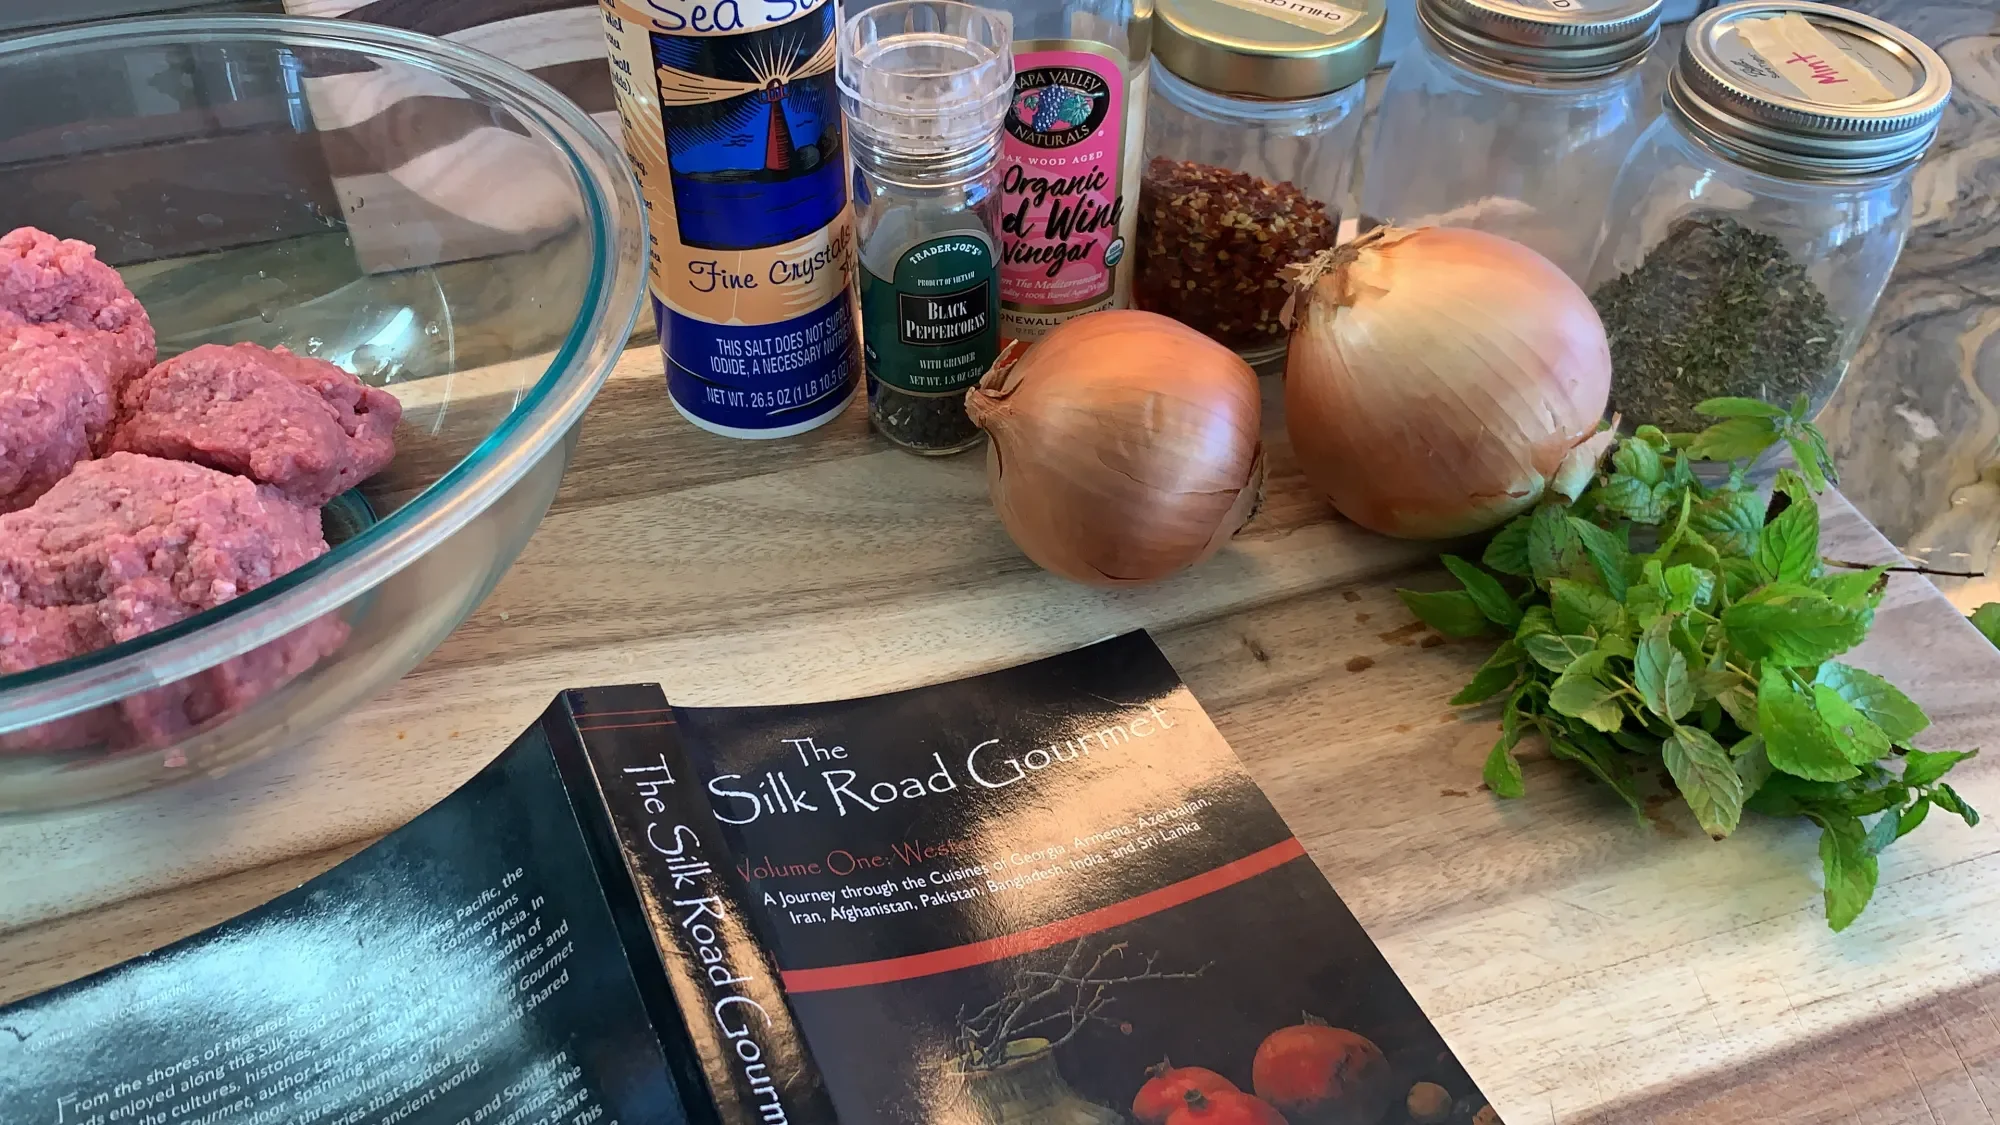
So far these are the best kebabs I’ve made my family. We got the recipe from The Silk Road Gourmet by Laura Kelley, a cookbook that brings recipes from the Silk Road to the modern cook. The book covers nine different regions: Republic of Georgia, Armenia, Azerbaijan, Iran, Afghanistan, Pakistan, Bangladesh, India and Sri Lanka.
This cookbook is packed with recipes and information about the different countries these recipes are inspired from. For today’s kebabs, we are using an Azerbaijan recipe which calls for either ground beef or ground lamb.
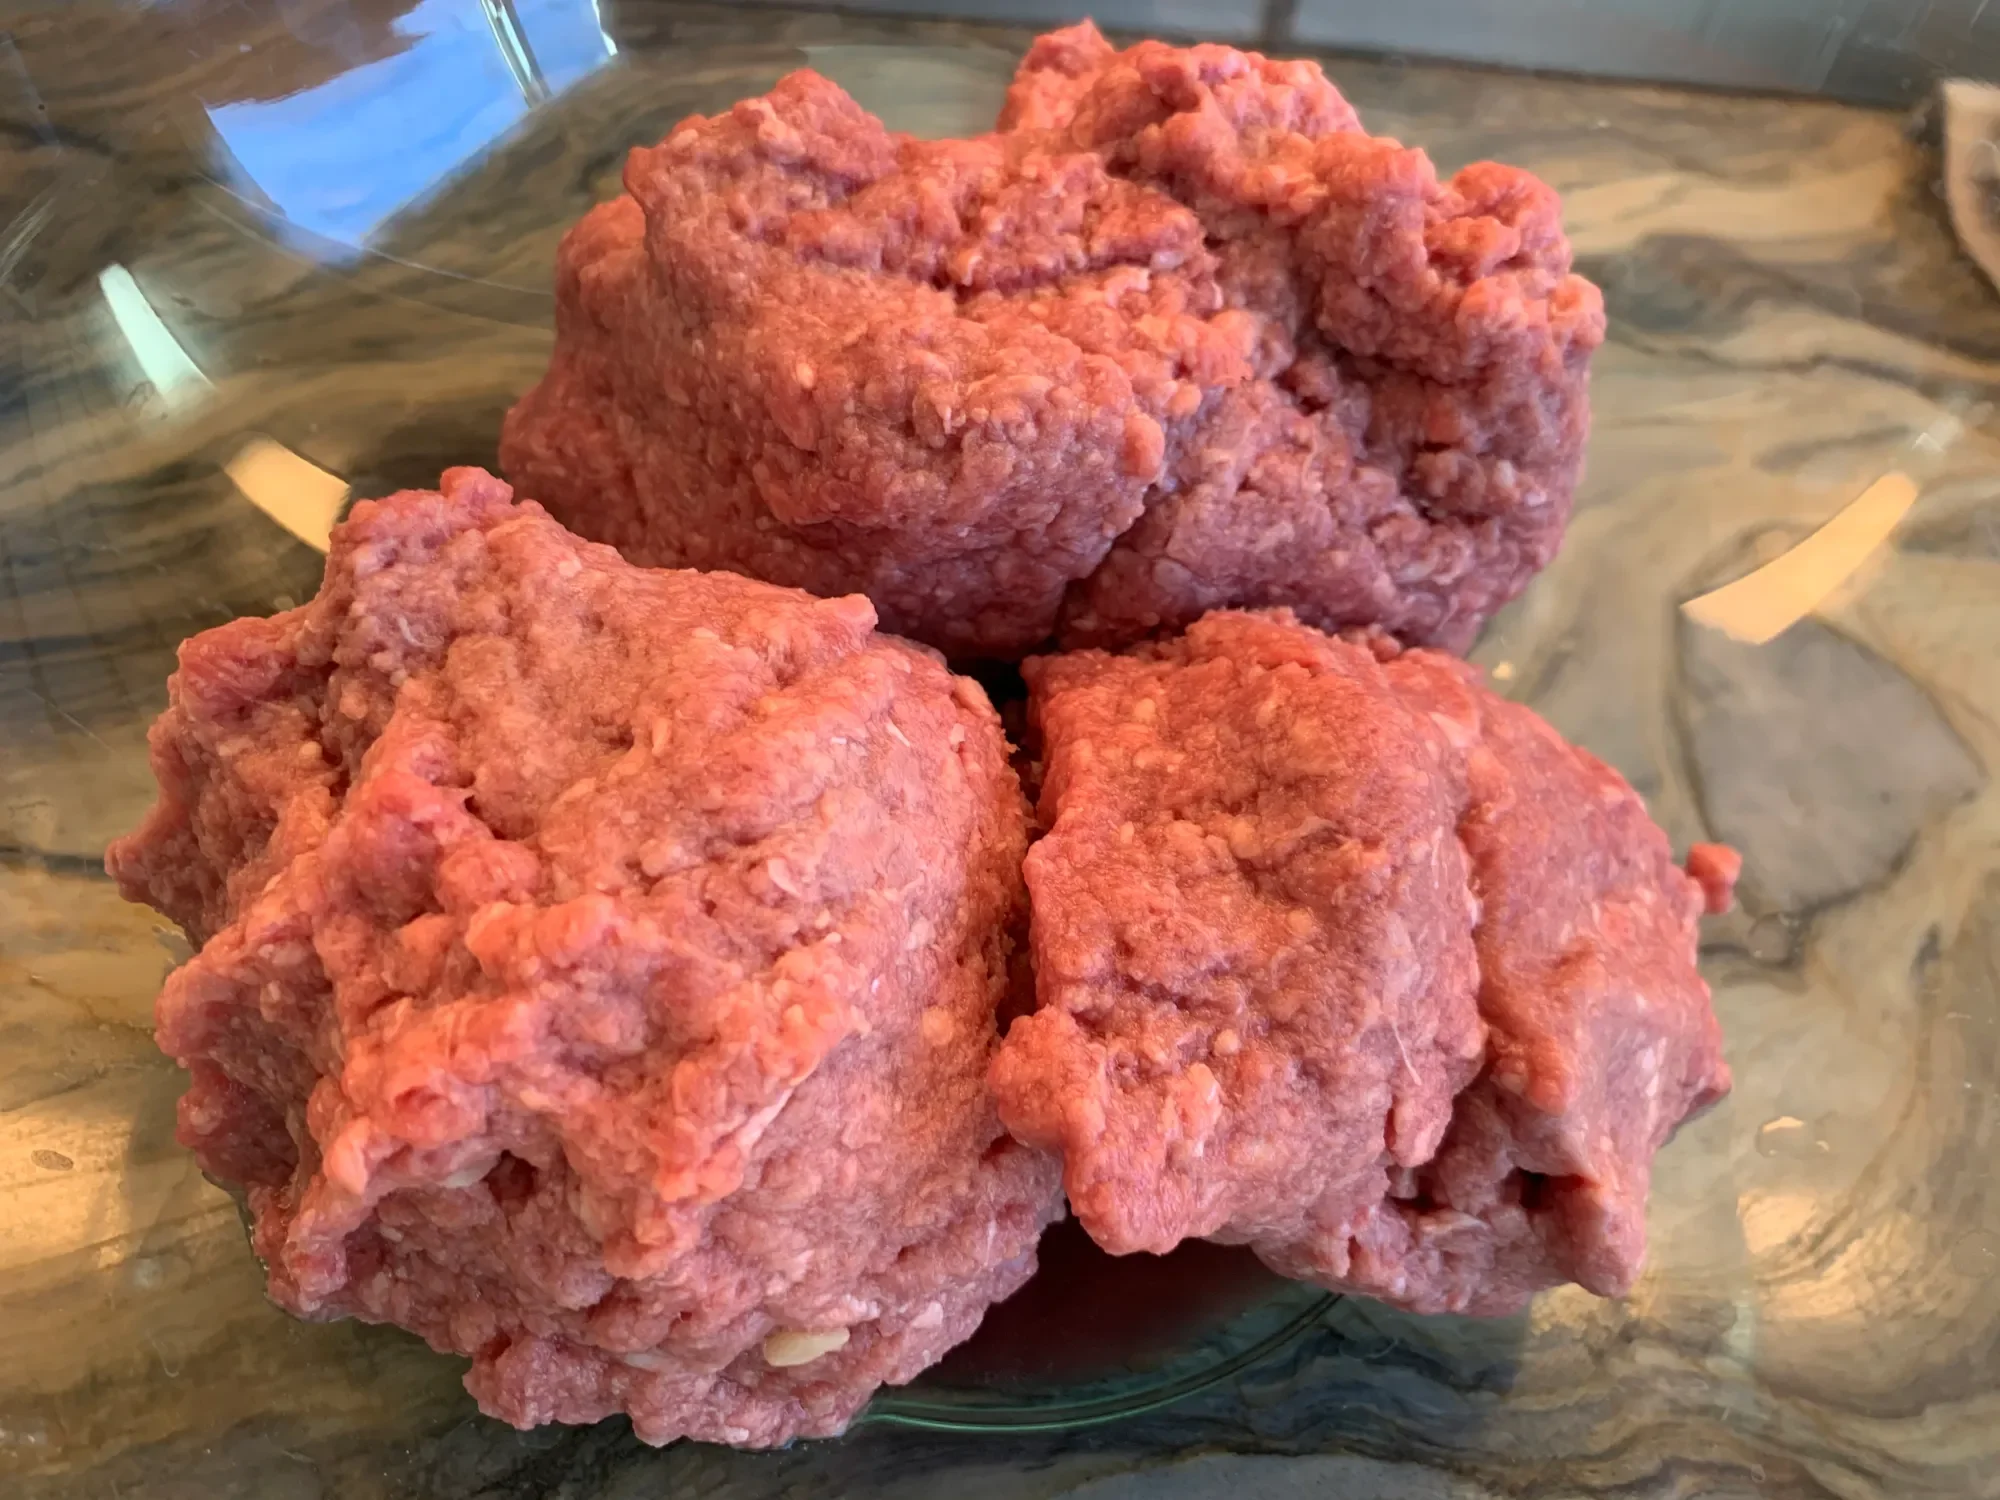
We are using two pounds of ground beef which is twice what the recipe calls for.
My alterations to the recipe are as follows:
2 pounds of ground beef,
4 teaspoons of salt,
2 tablespoons of dried mint,
1 tablespoon of fresh mint,
4 tablespoons of crushed chilli peppers,
2 teaspoons of ground pepper,
1 teaspoon of cumin and
3 tablespoons of red wine vinegar.
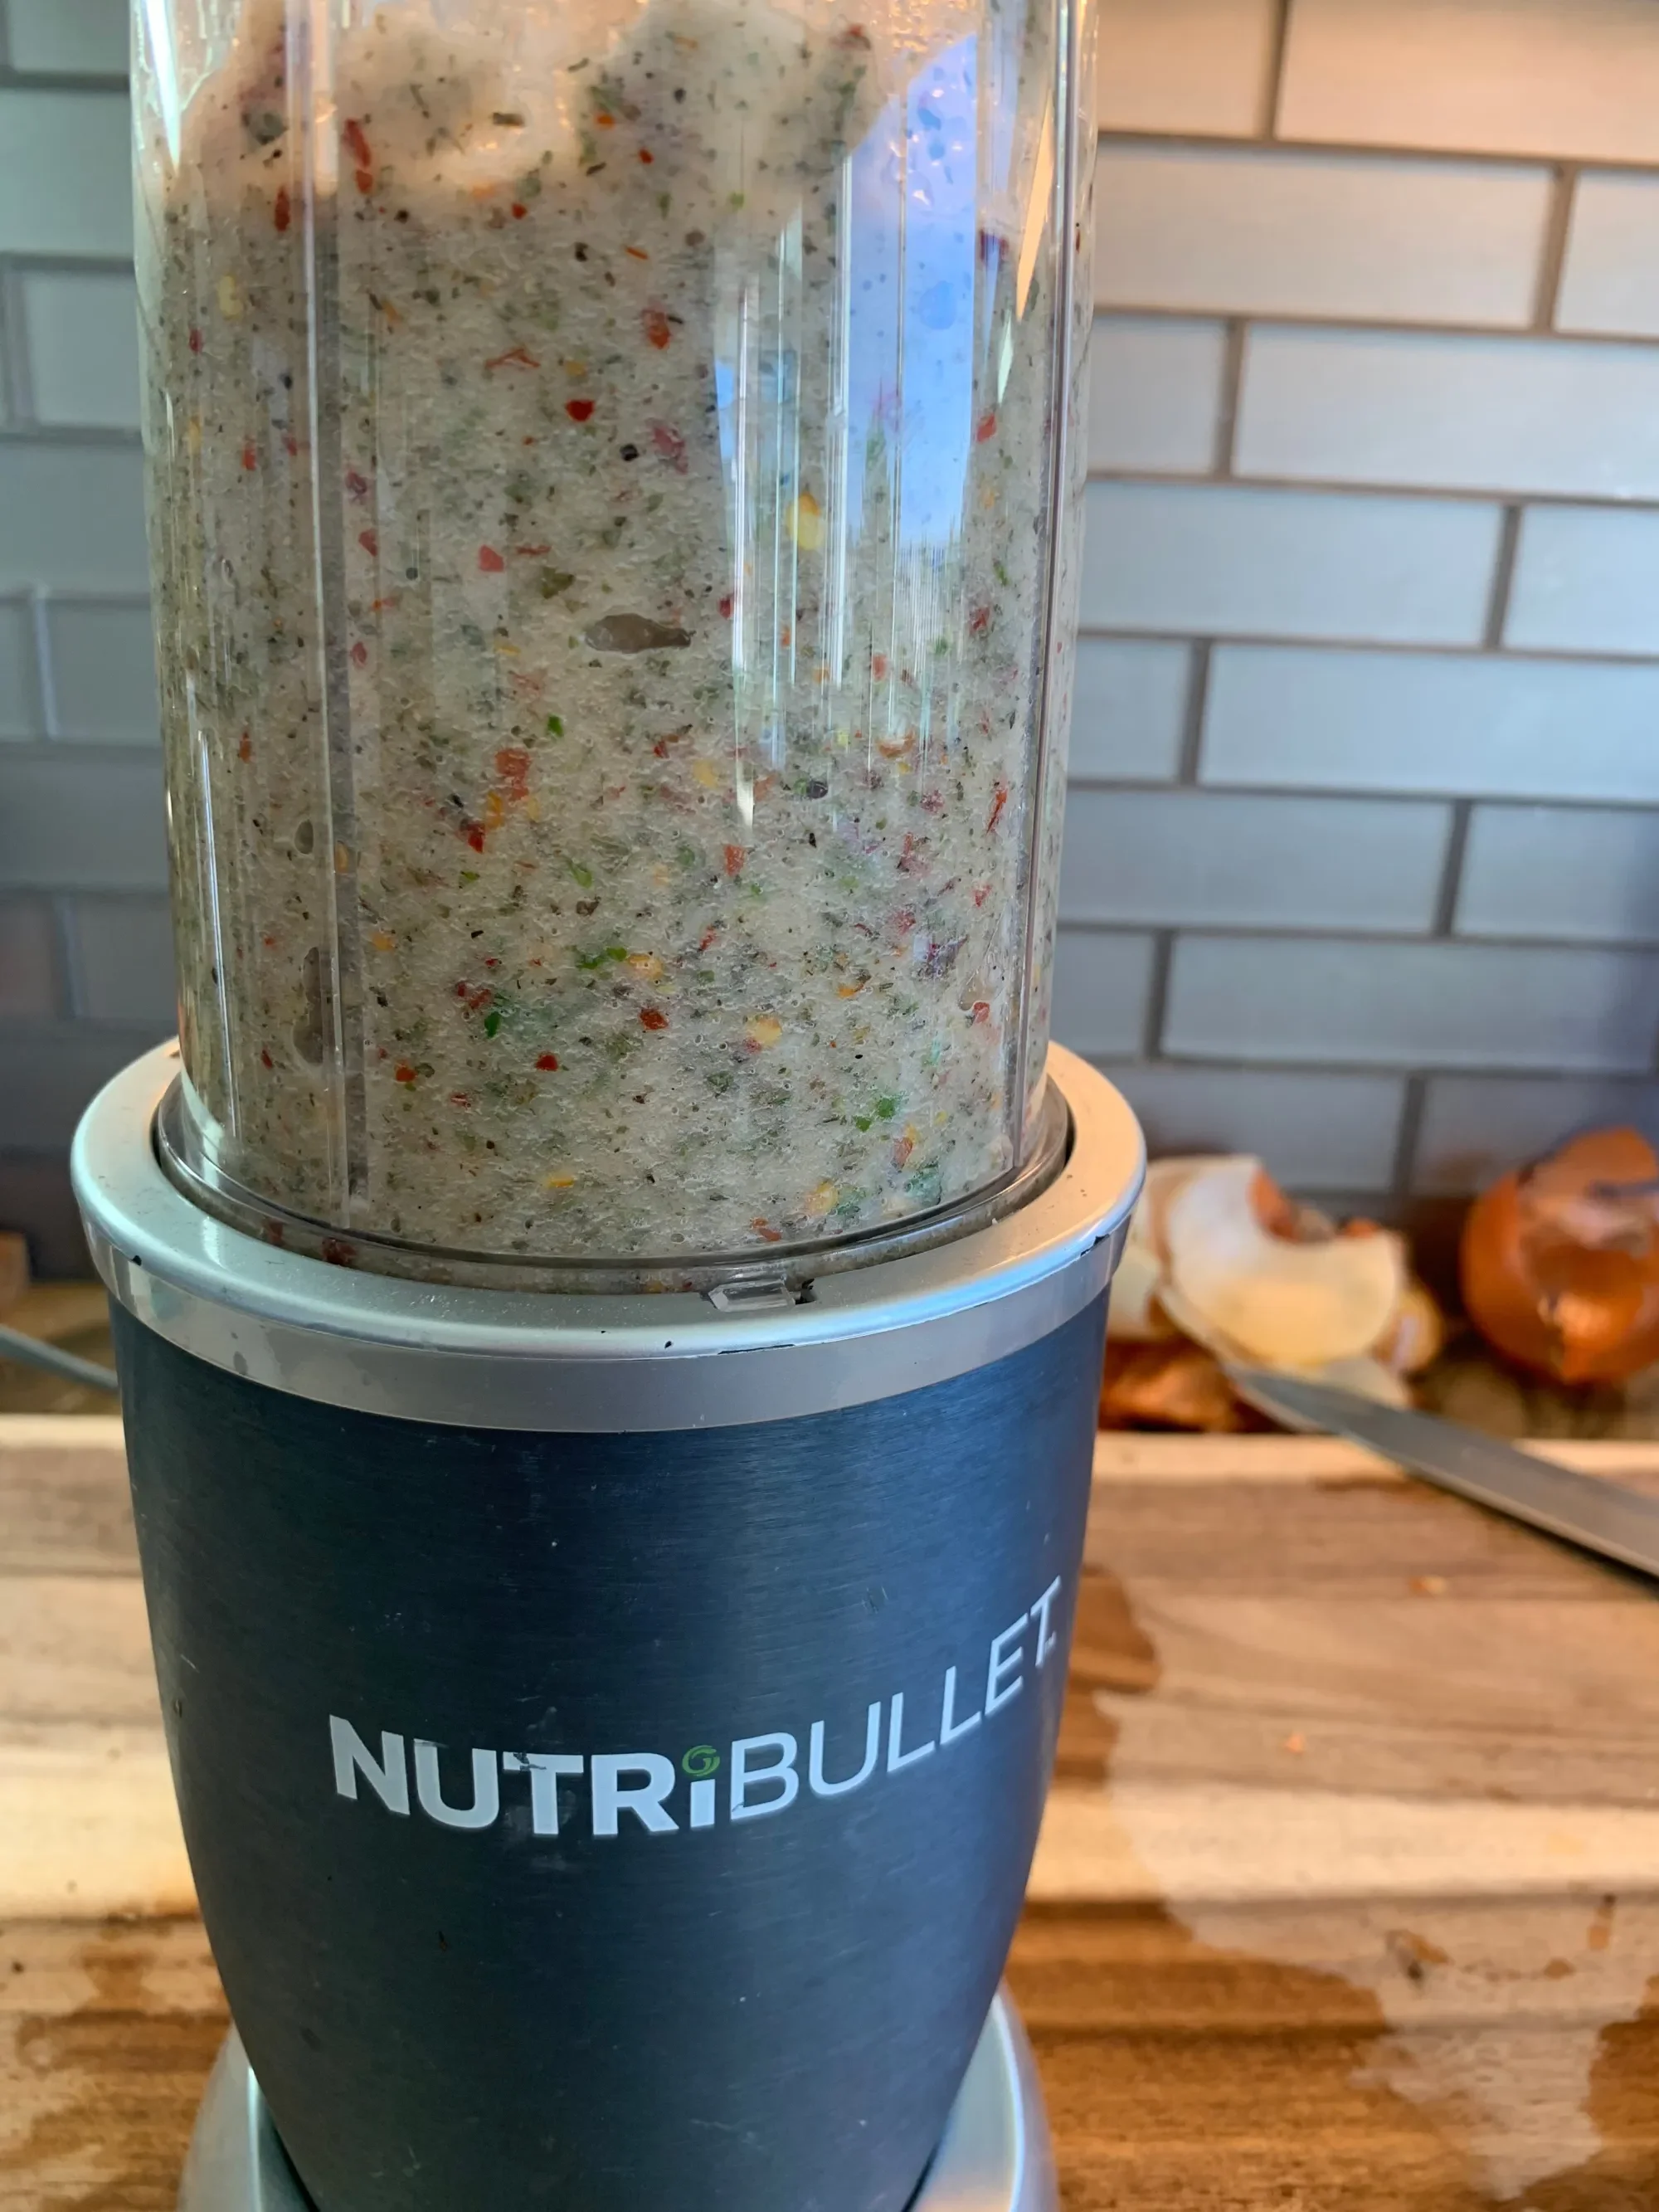
Use a food processor to mix spices and roughly chop two onions. Combine mixture with meat. Mix well. Form kebabs using about 3 tablespoons of meat. Place on a tray and refrigerate for 2-4 hours. A lot of liquid will come out. Transfer to a tray for baking after the kebabs have chilled. Set your oven to the highest broil temperature and broil the kebabs for five minutes on each side. They will produce a lot of liquid so you may choose to do fewer kebabs on each tray. Serve with rice or seasoned rice immediately and enjoy this mouthwatering super easy recipe.
Baghali Polo | Persian Rice with Dill Weed and Fava Beans
Nearly all my Persian recipes come from my friend Teyebeh who often gets from her mom, and I'll take a good guess and assume she gets them from her mom. What's special about this is that you'll find tips and techniques that fall through the cracks when finding recipes in cookbooks or other ways. What I've learned from watching my friends prepare food is the special technique whether is be how to slice an onion or broil chicken before baking that sets learning from someone apart from learning from a book. What I learned from my friend, Teyebeh, for this recipe is the importance of gently layering the fava beans and dill weed on each layer of rice to avoid rice breakage and for maximum flavor.
Here's the recipe! I hope you enjoy it.
Please know that the water to rice ratio varies depending on whether you are cooking on the stove, cooking with an open pot, boiling your rice and draining or using your Instant Pot. Some trial and error is possible.
3 cups basmati rice (long grain is best and parboiled works well for wet recipes or for prolonged soaking and Instant Pot cooking)
rinse and soak
3 cups of water
1-2 tablespoons of olive oil/grapeseed oil
1 sprinkle of salt
Use "Rice" setting on Instant Pot
While the rice is cooking, bring to a simmer one bag of frozen peeled green fava beans
Time to layer rice, salt, olive oil, generous amount of dill weed and fava beans. Repeat until each layer is complete. Gentle toss to mix everything together taking care not to break the rice grains.
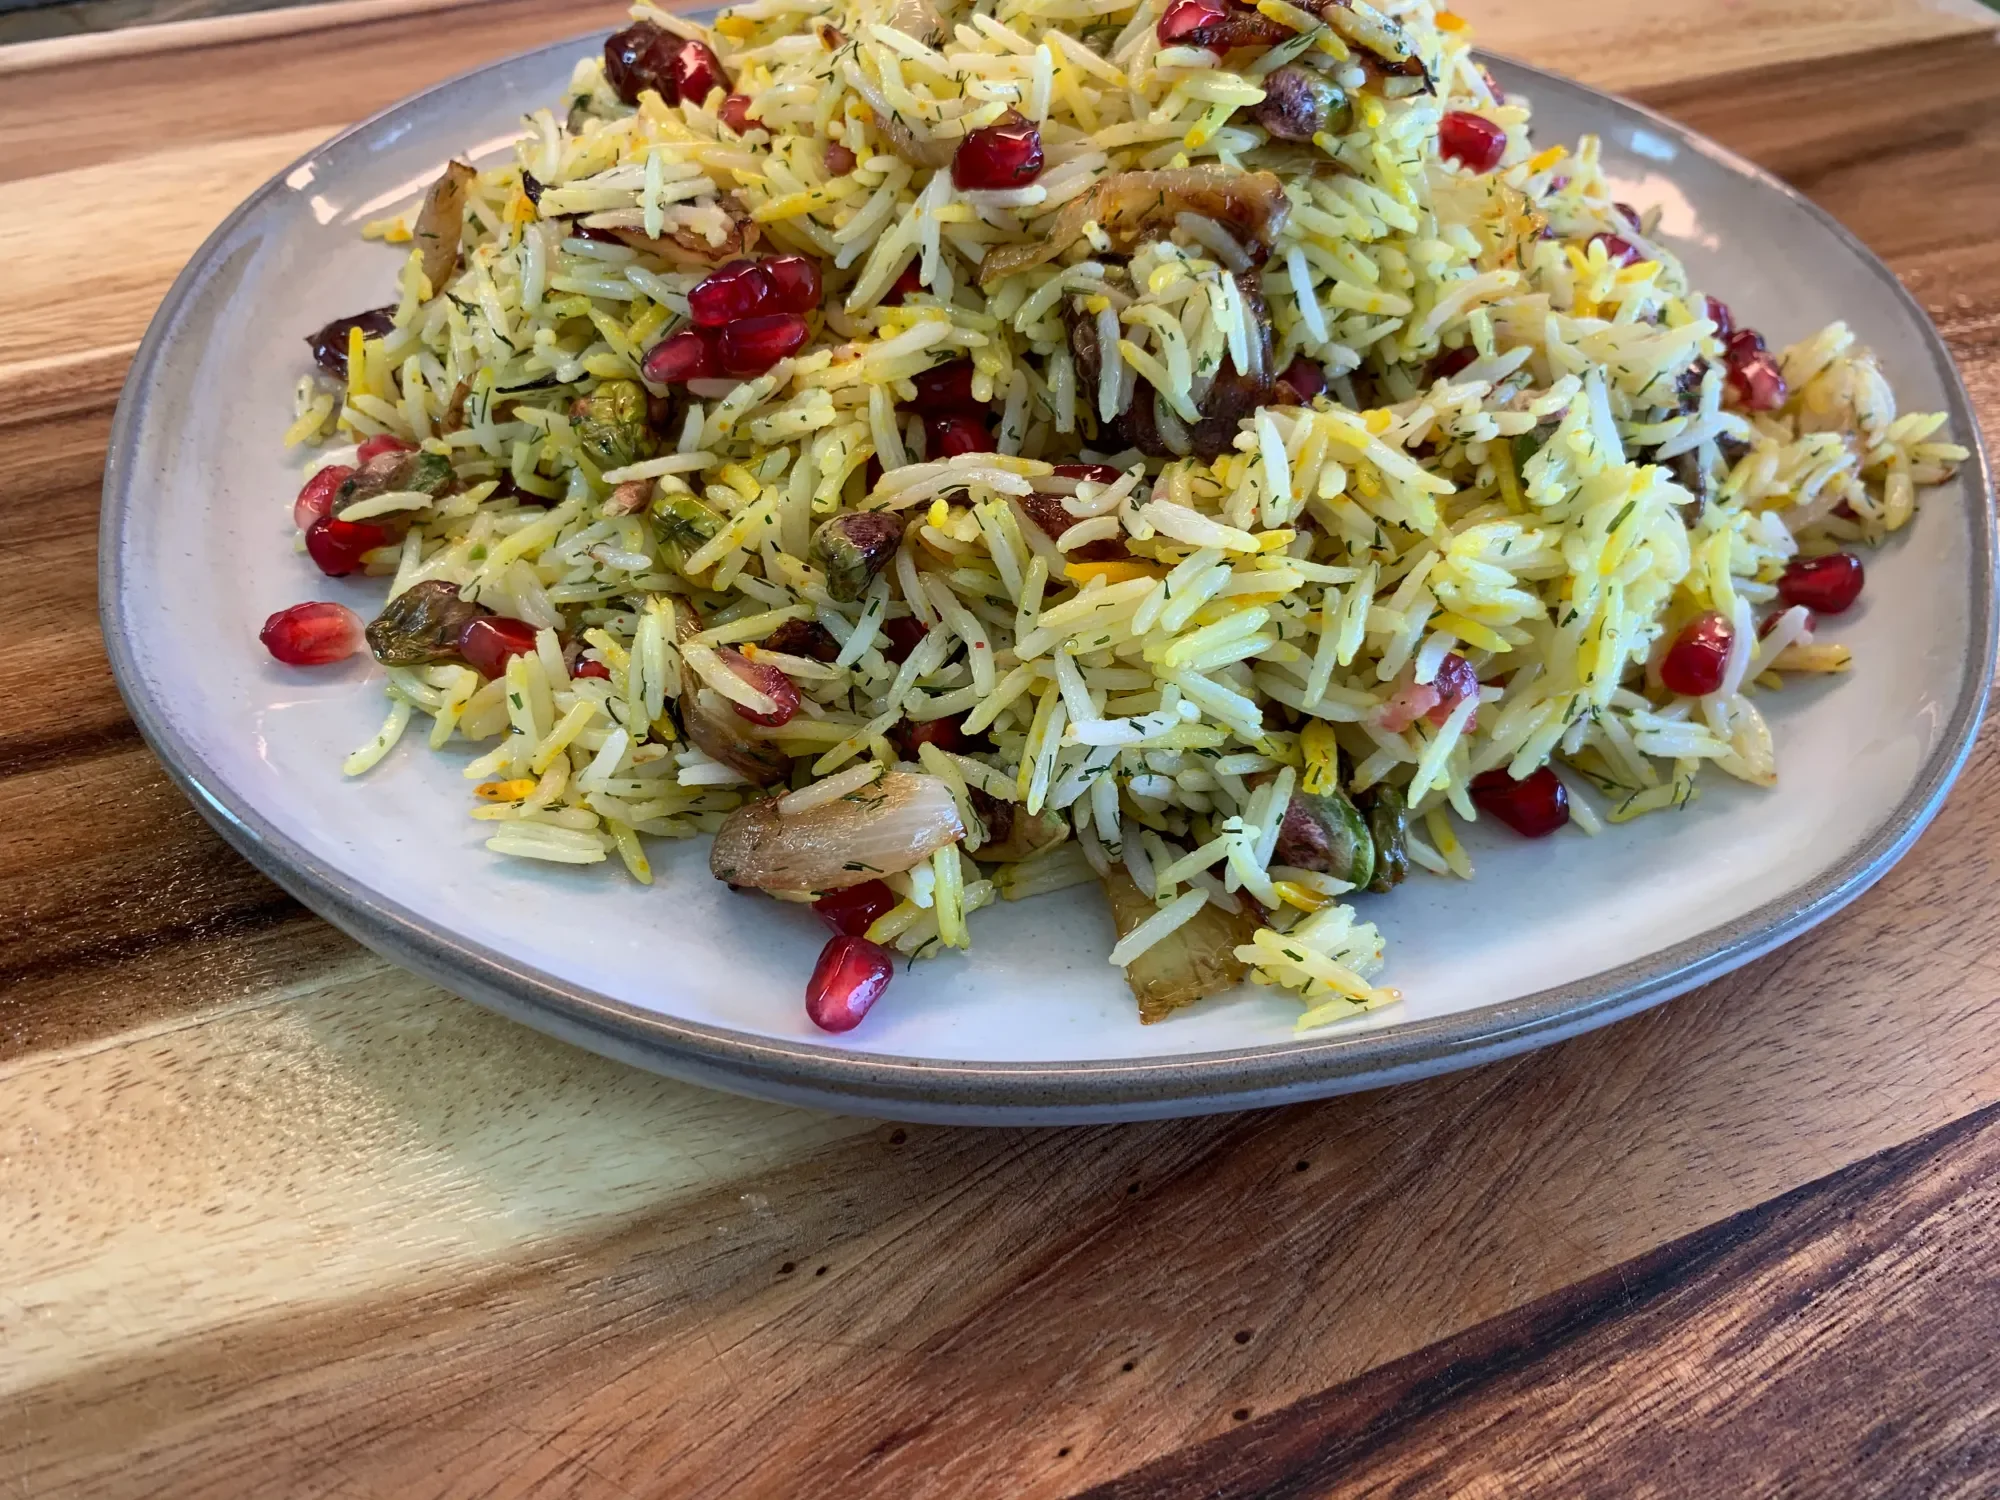
Pomegranate, Date & Pistachio Rice
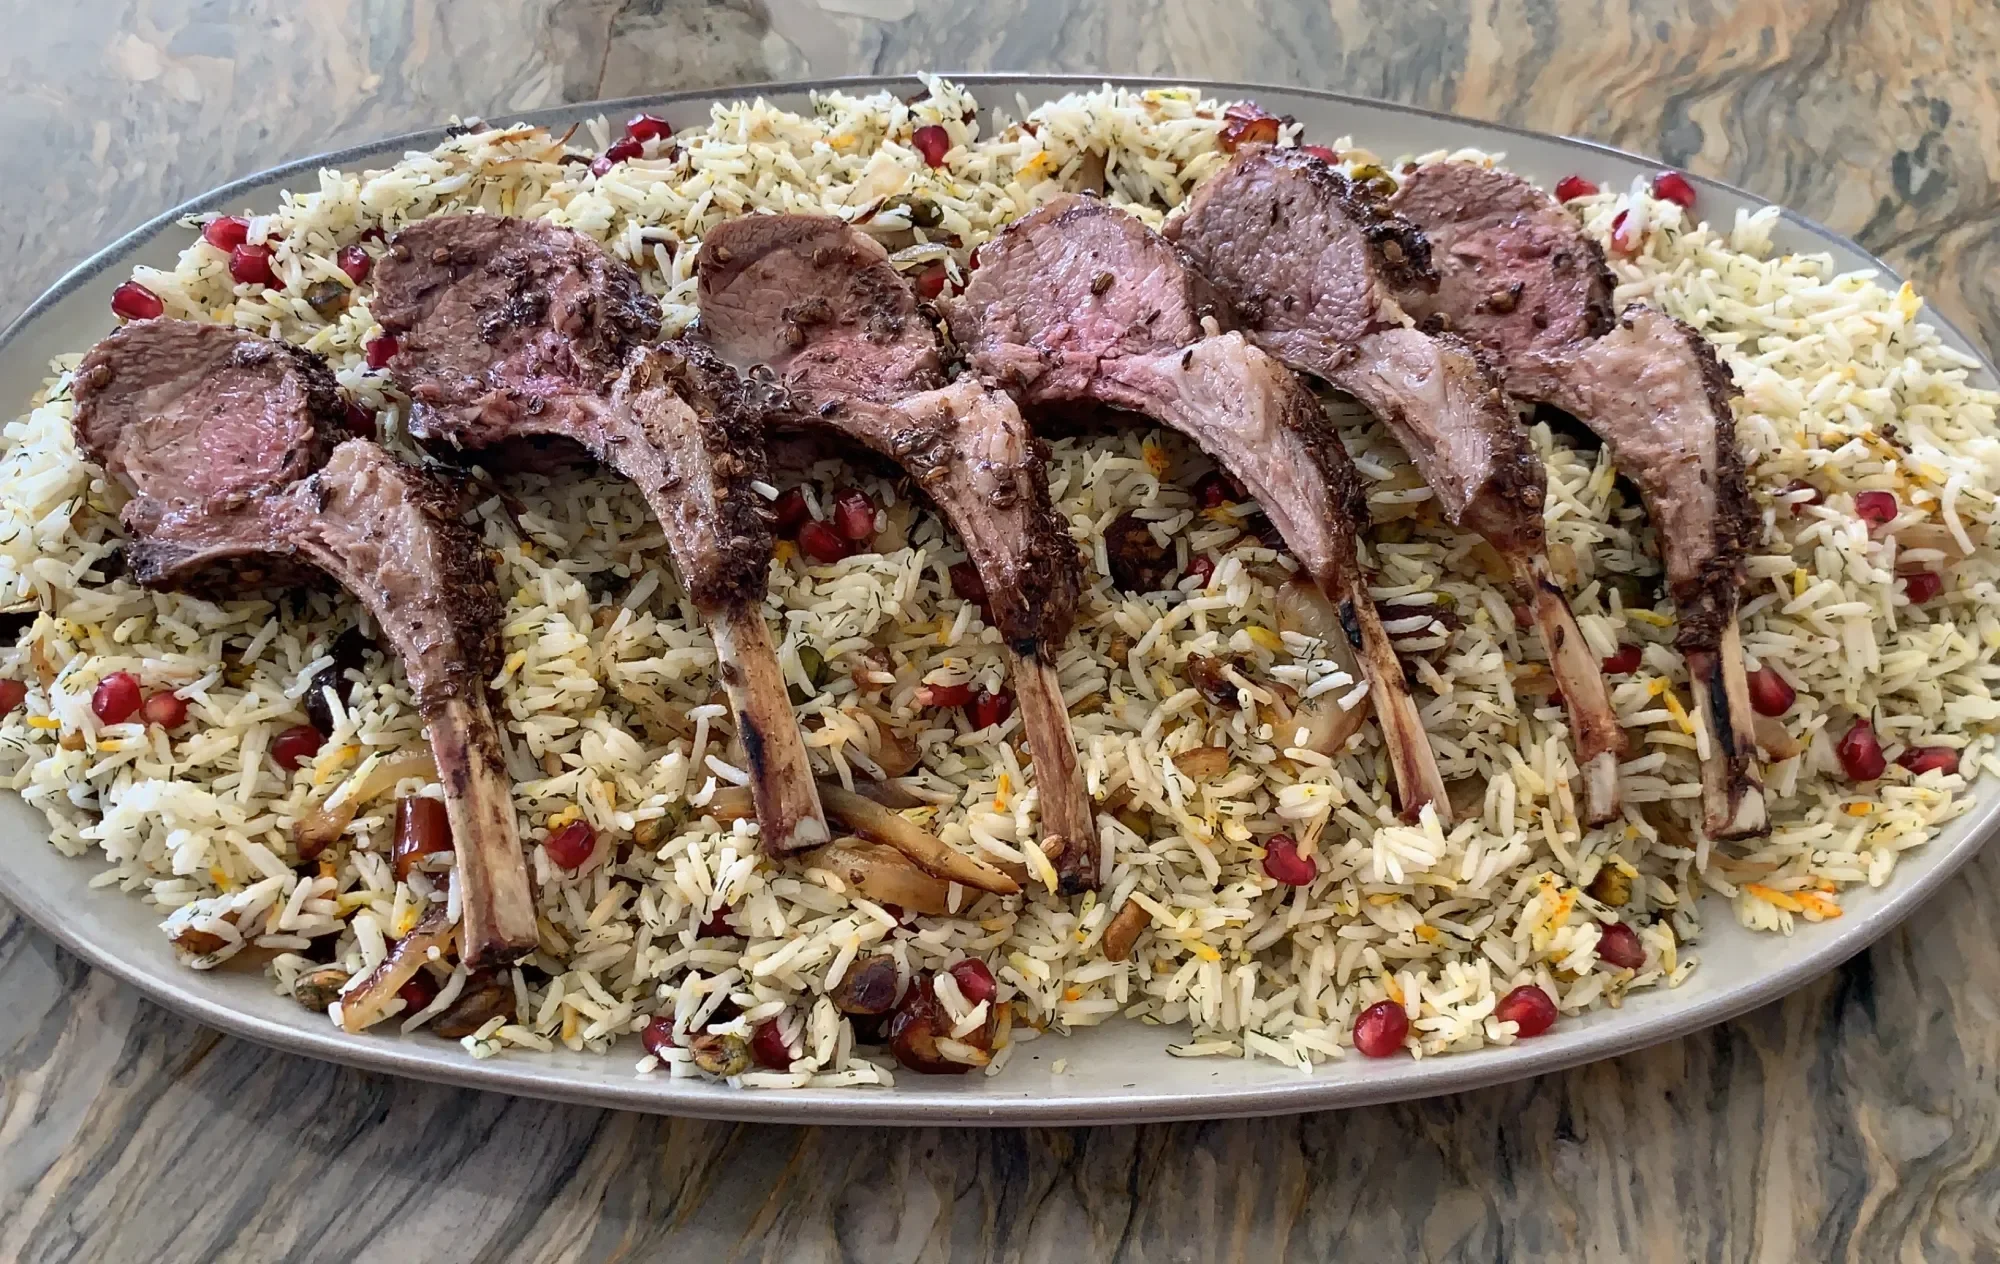
This is one of our favorite recipes!! I've only added fried onions to the recipe as well as a sprinkle of saffron. If you don't have fresh dill, I've swapped it out for dried dill on many occasions. We pair this with a rack of lamb. We got this recipe from the Martha Stewart Living magazine and it's become on of our favorite recipes ever!!
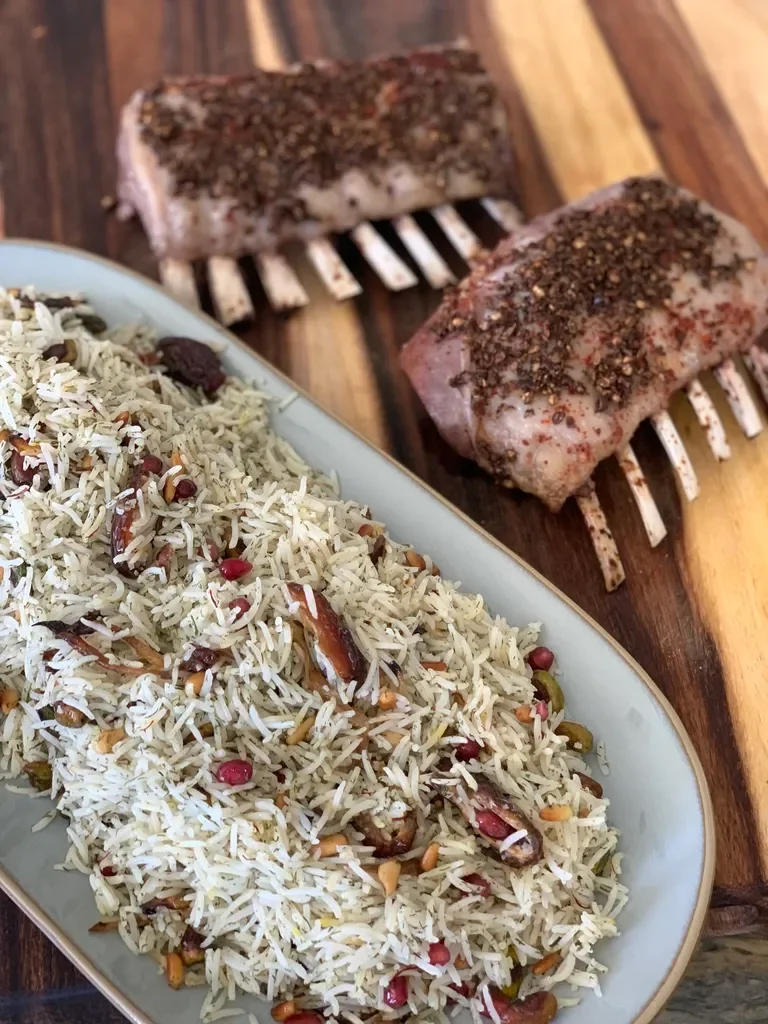

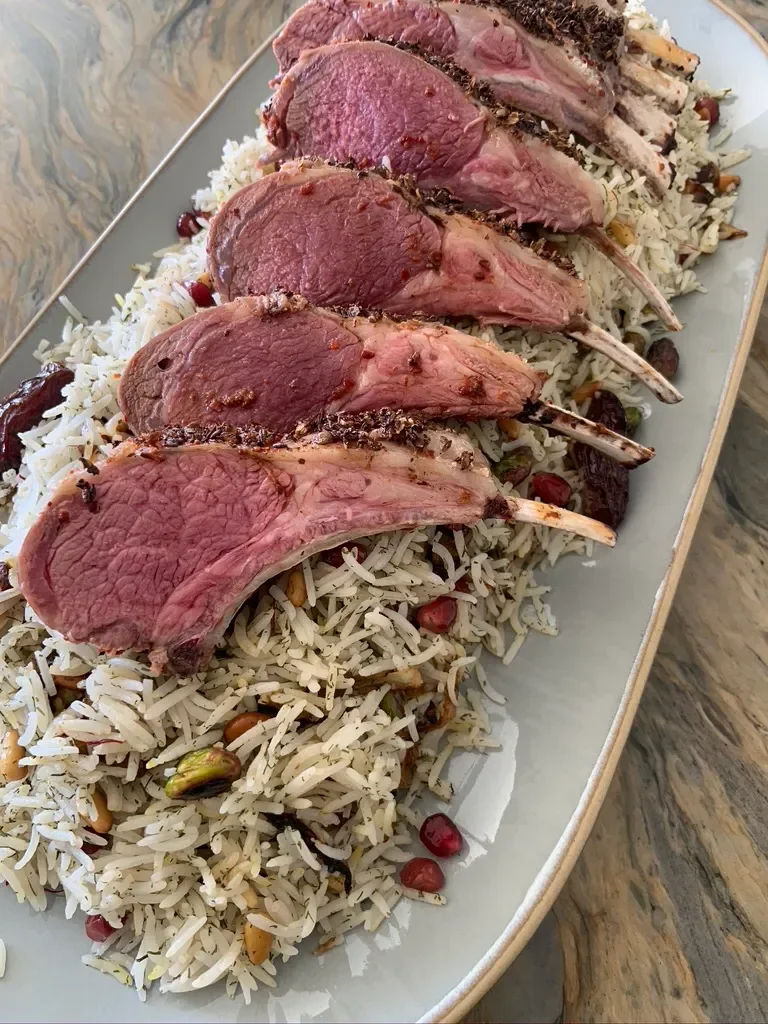
Silk Road Lamb Recipe | Amazingly Delicious and Easy!
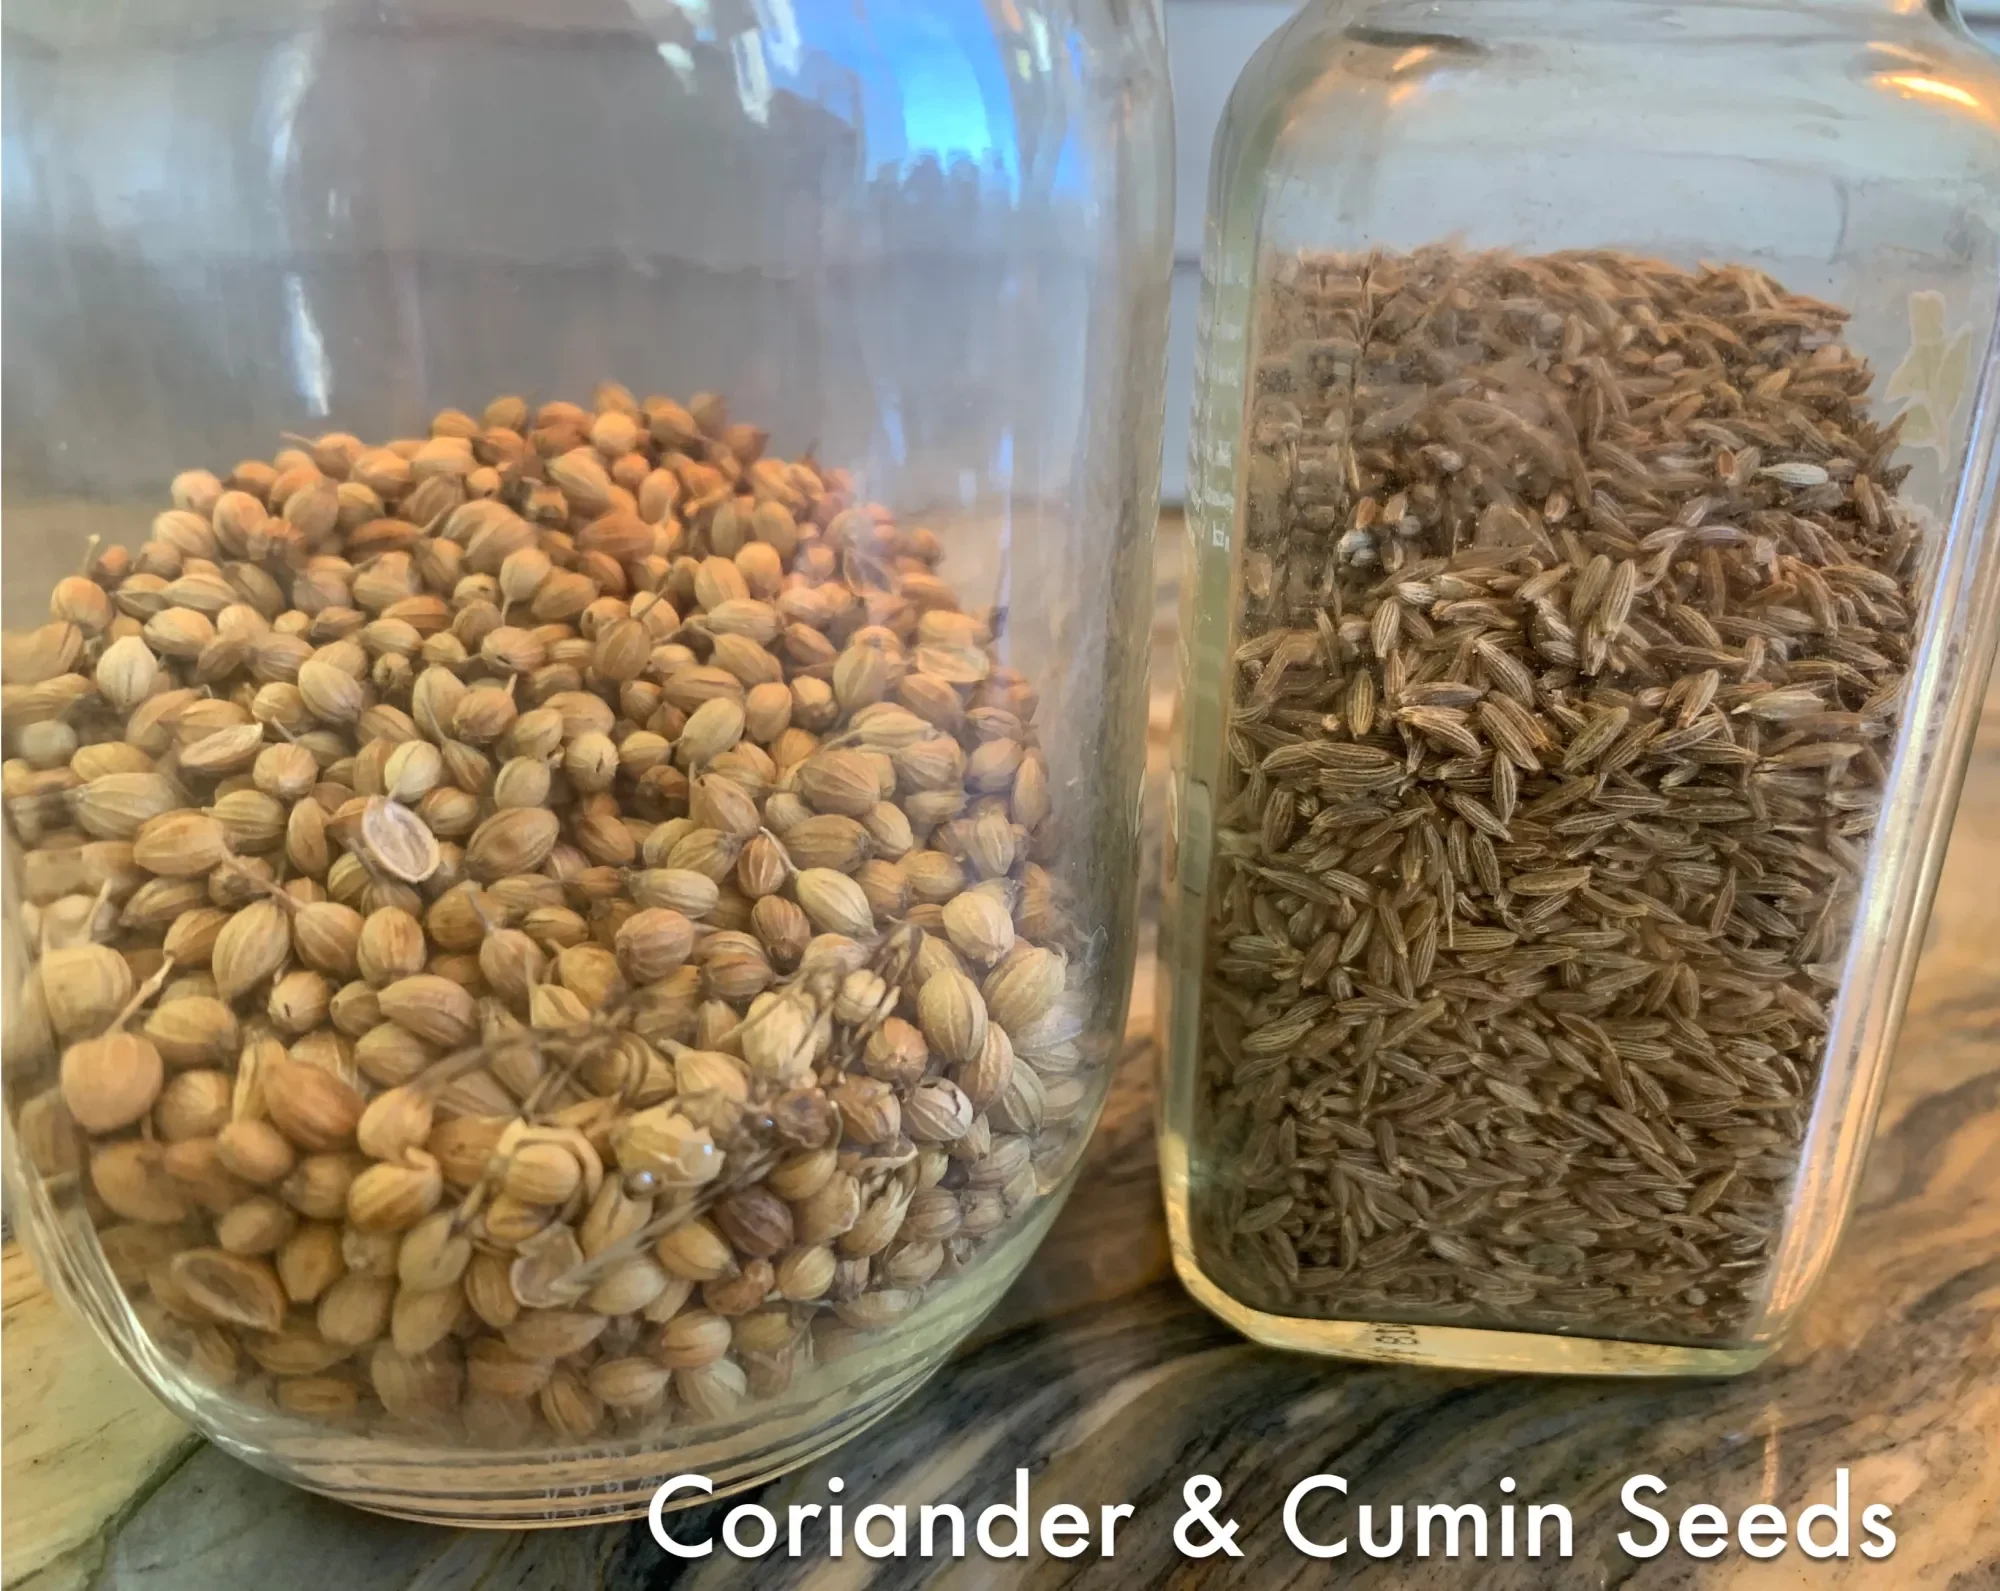
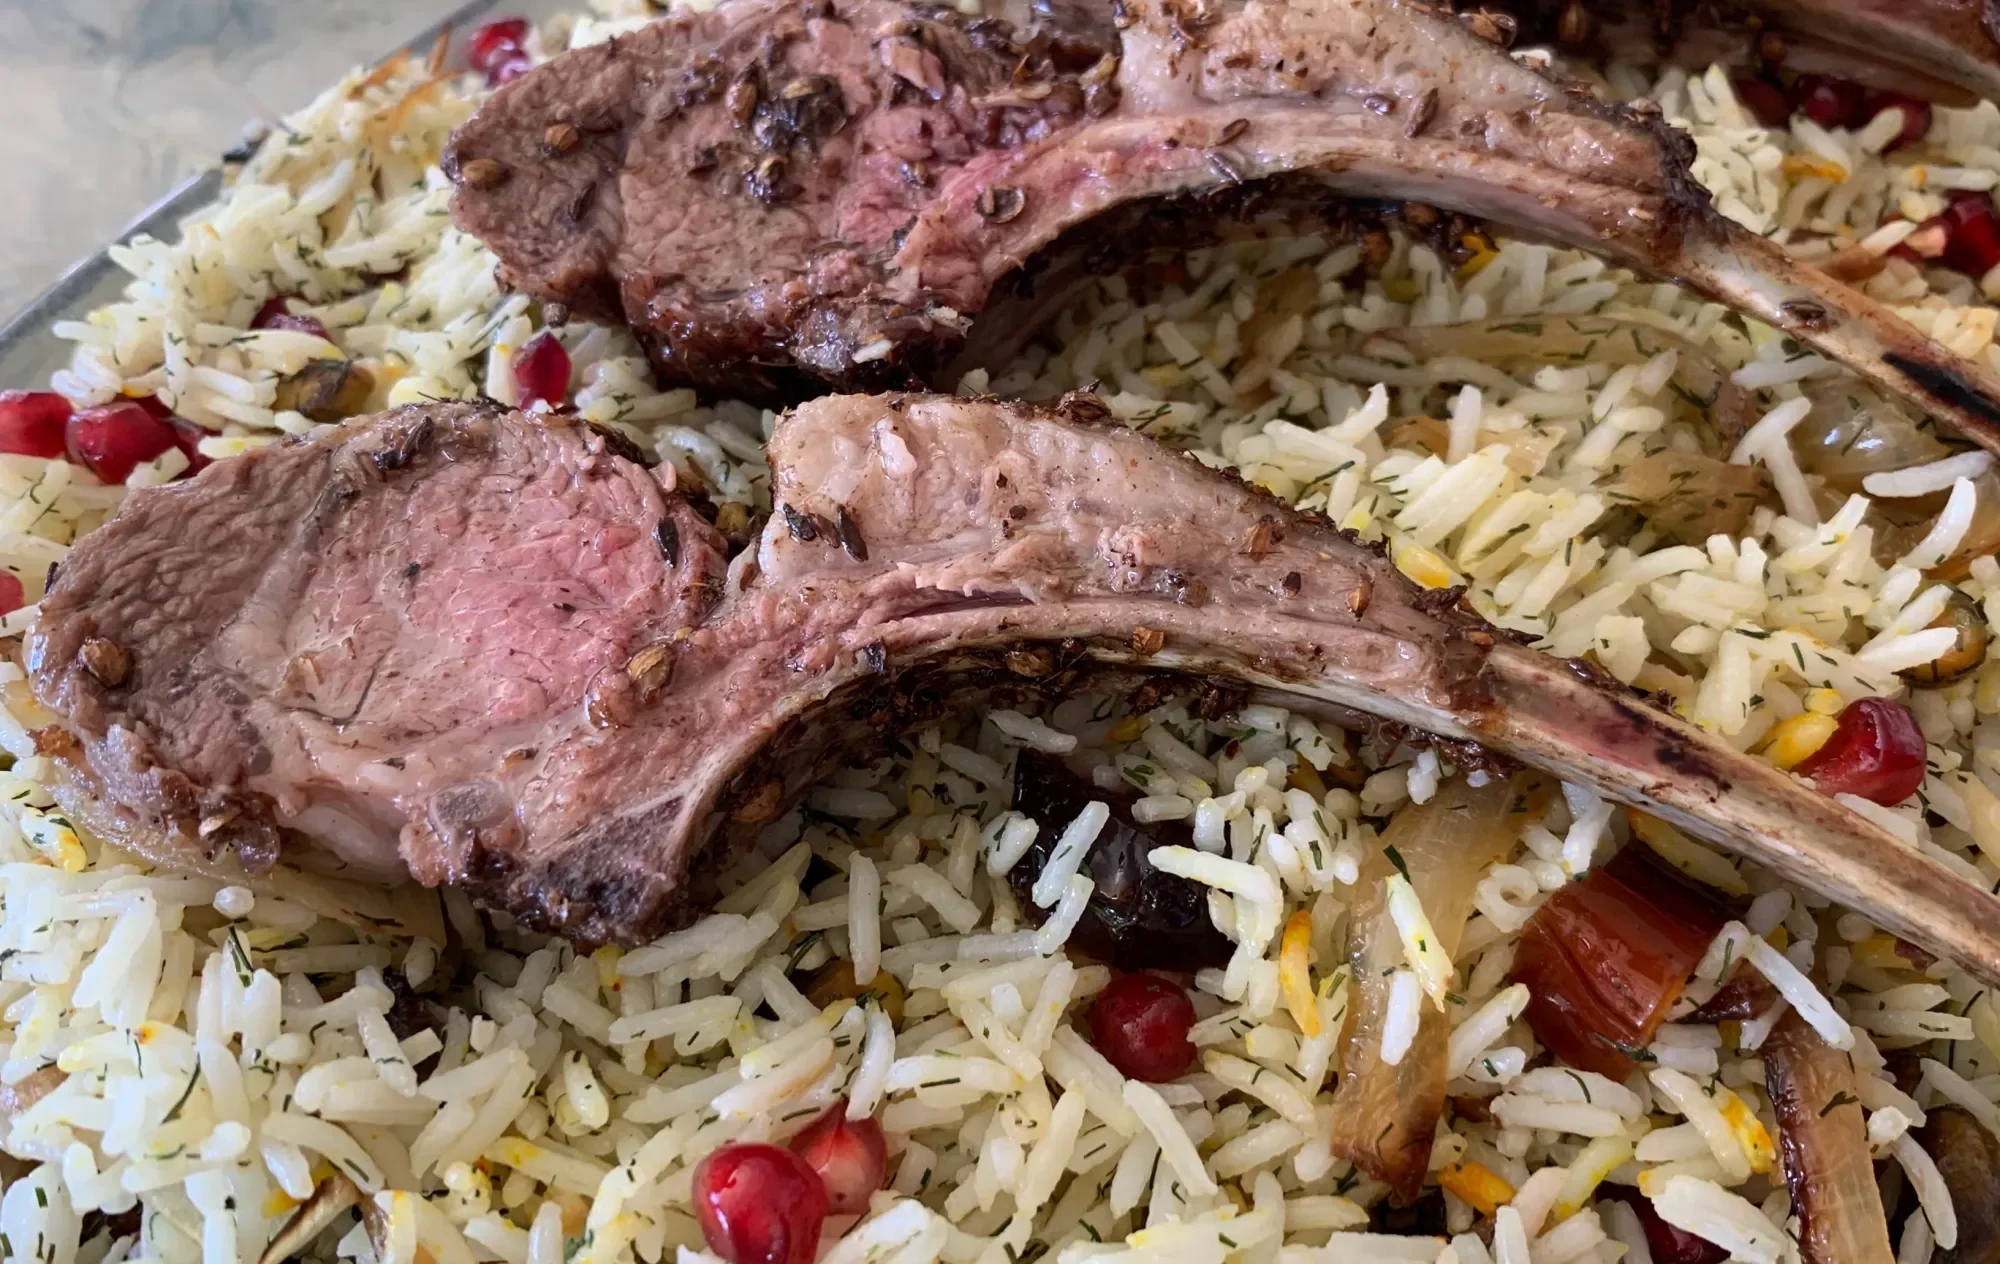
This recipe is hands down my family’s favorite recipe of all time. There’s never enough even when I double the recipe. It’s just one of those special treats that we can only do once in a while because a rack of lamb is quite pricey. For me too, it’s one of the most delicious recipes I’ve ever had. What takes it over the top is the pomegranate rice that we pair with it. The first rack of lamb recipe in the video is from the Martha Stewart Living magazine and that’s also where I learned how to make the pomegranate rice (which I’ve altered a bit). The rack of lamb is easy: it’s just 2 teaspoons of cumin and coriander seeds which have been heated to release their aromas and crushed to make a dry or wet rub (I used olive oil and heated them on the stove). Season with salt and pepper, and that’s it! Bake at 375 or 400 for about 20 minutes, until the internal temperature reaches 145 degrees Fahrenheit. Watch it! You don’t want to overcook this recipe.
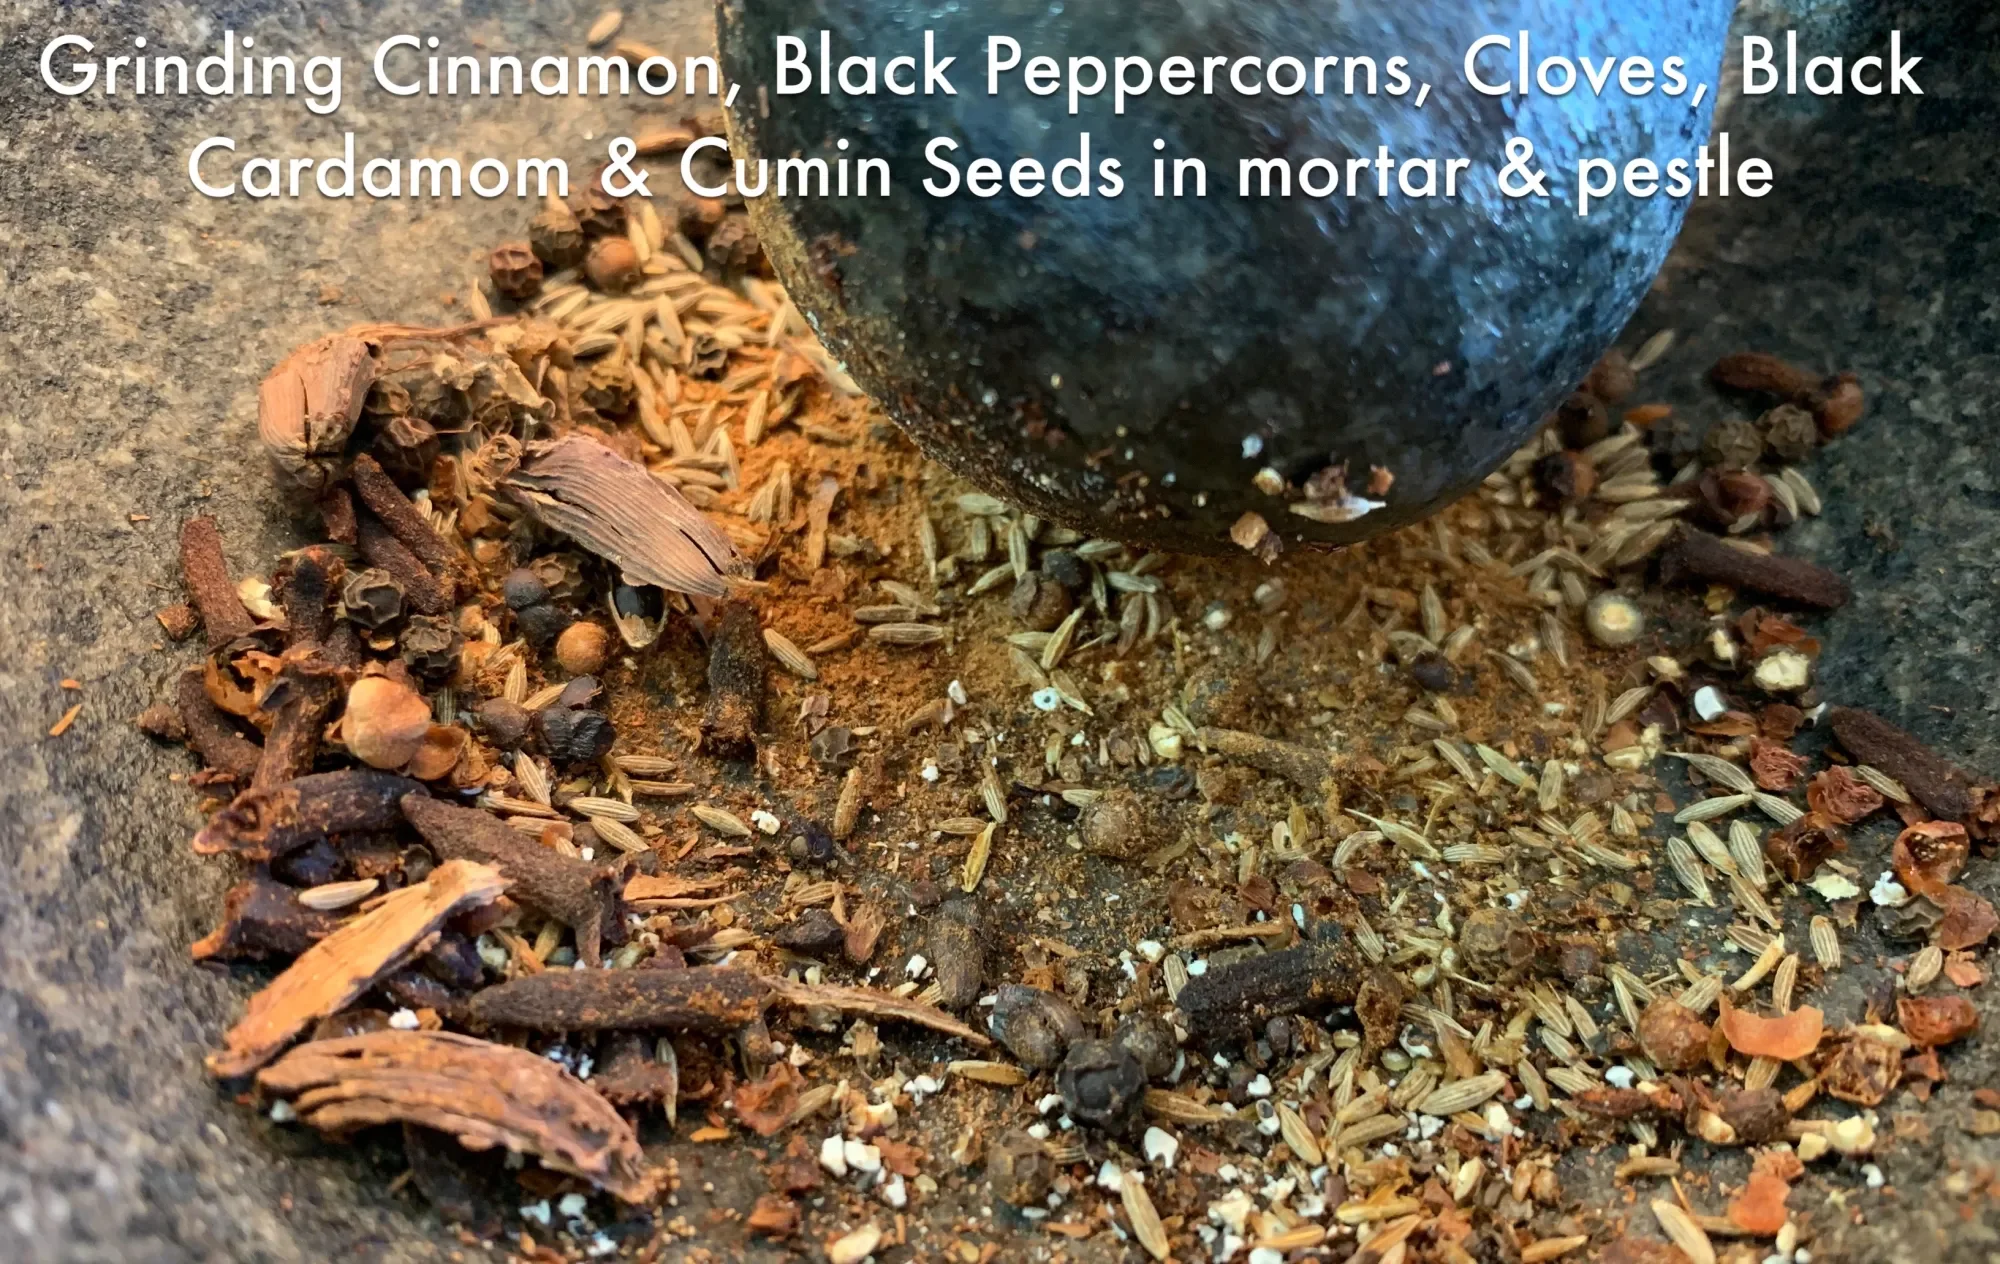
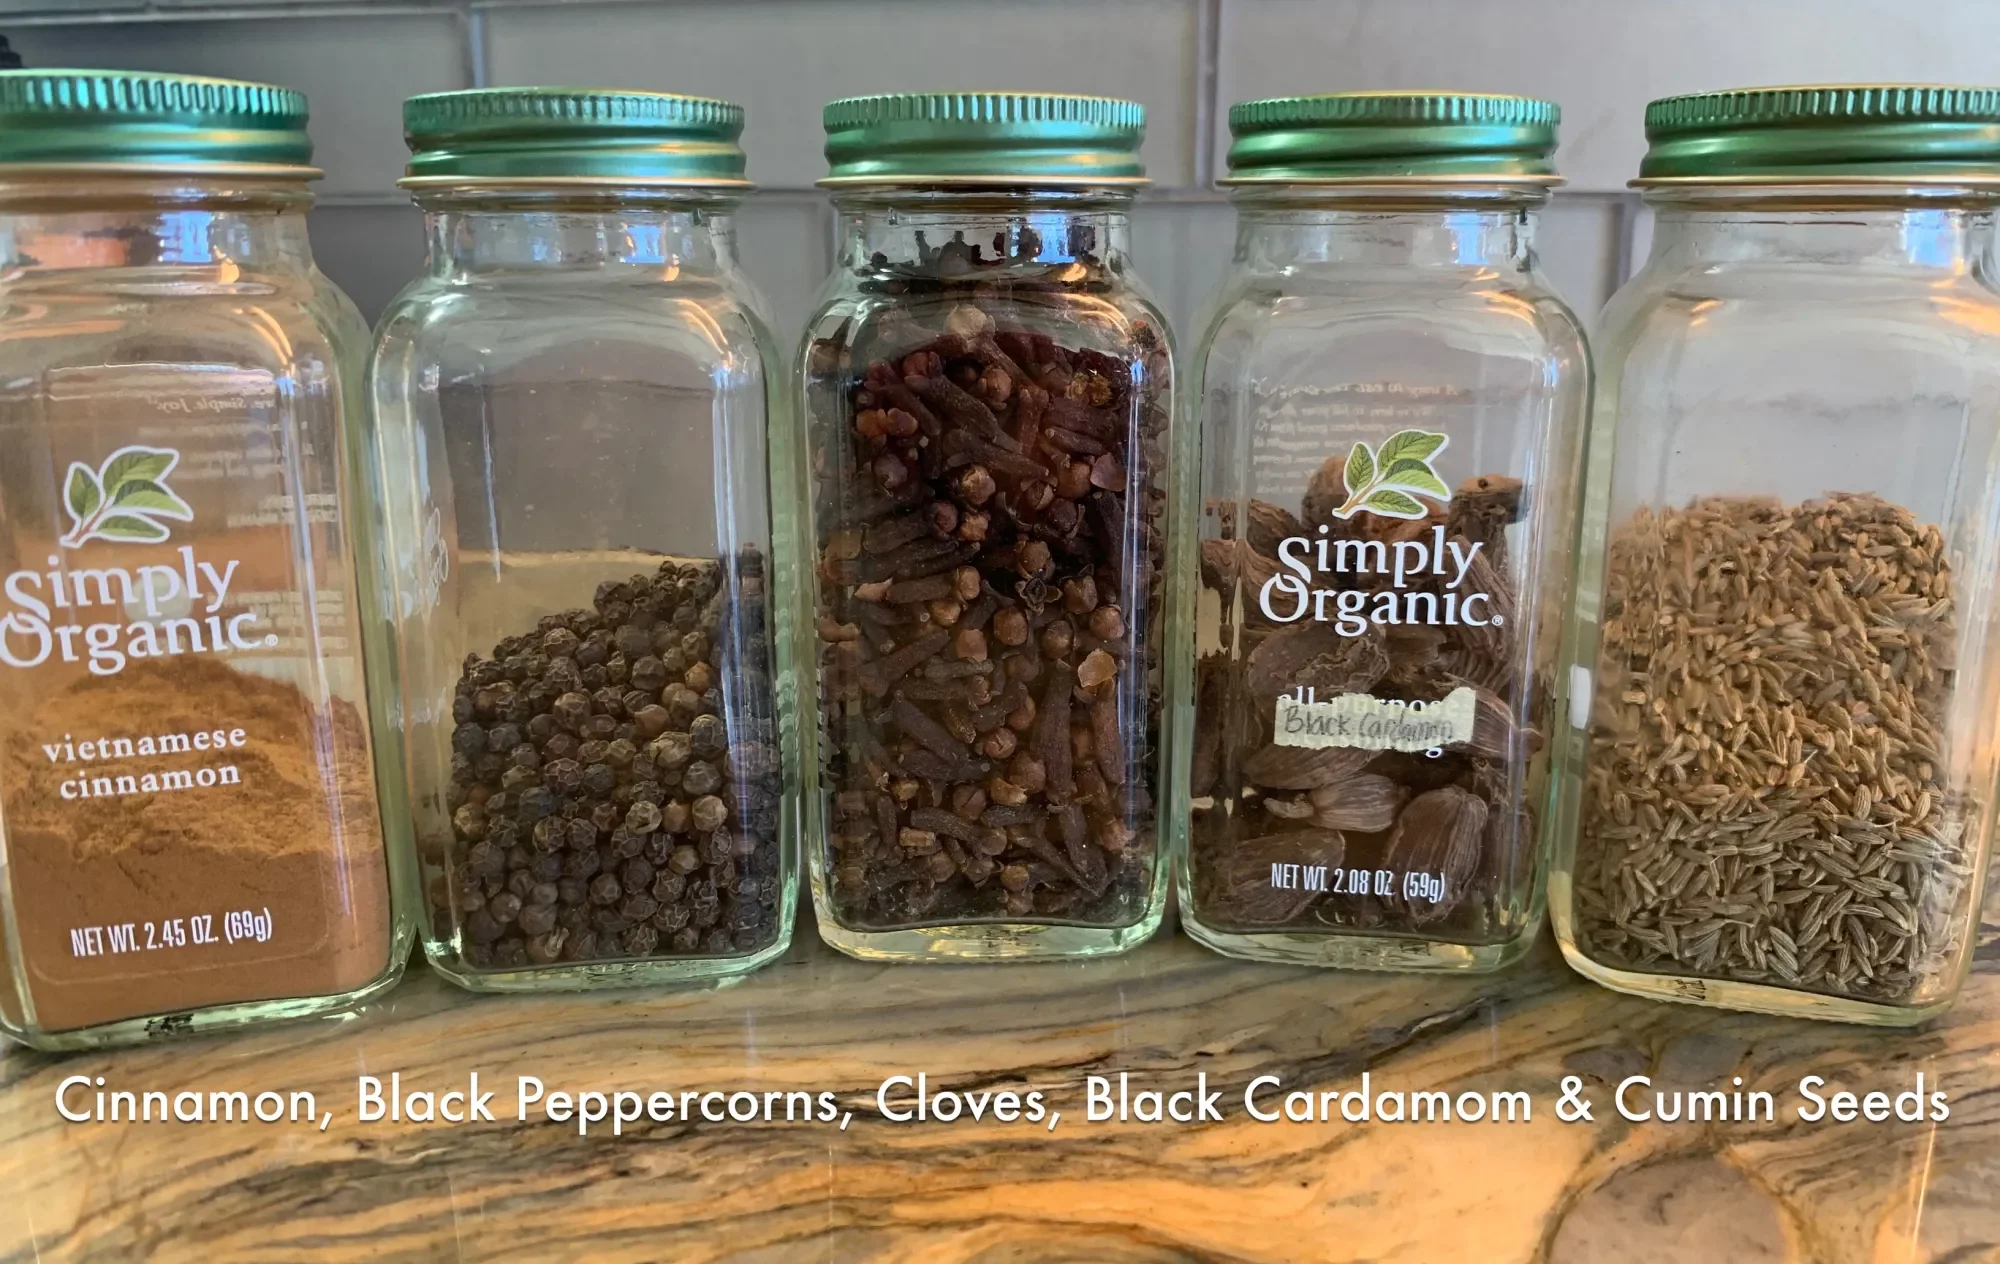
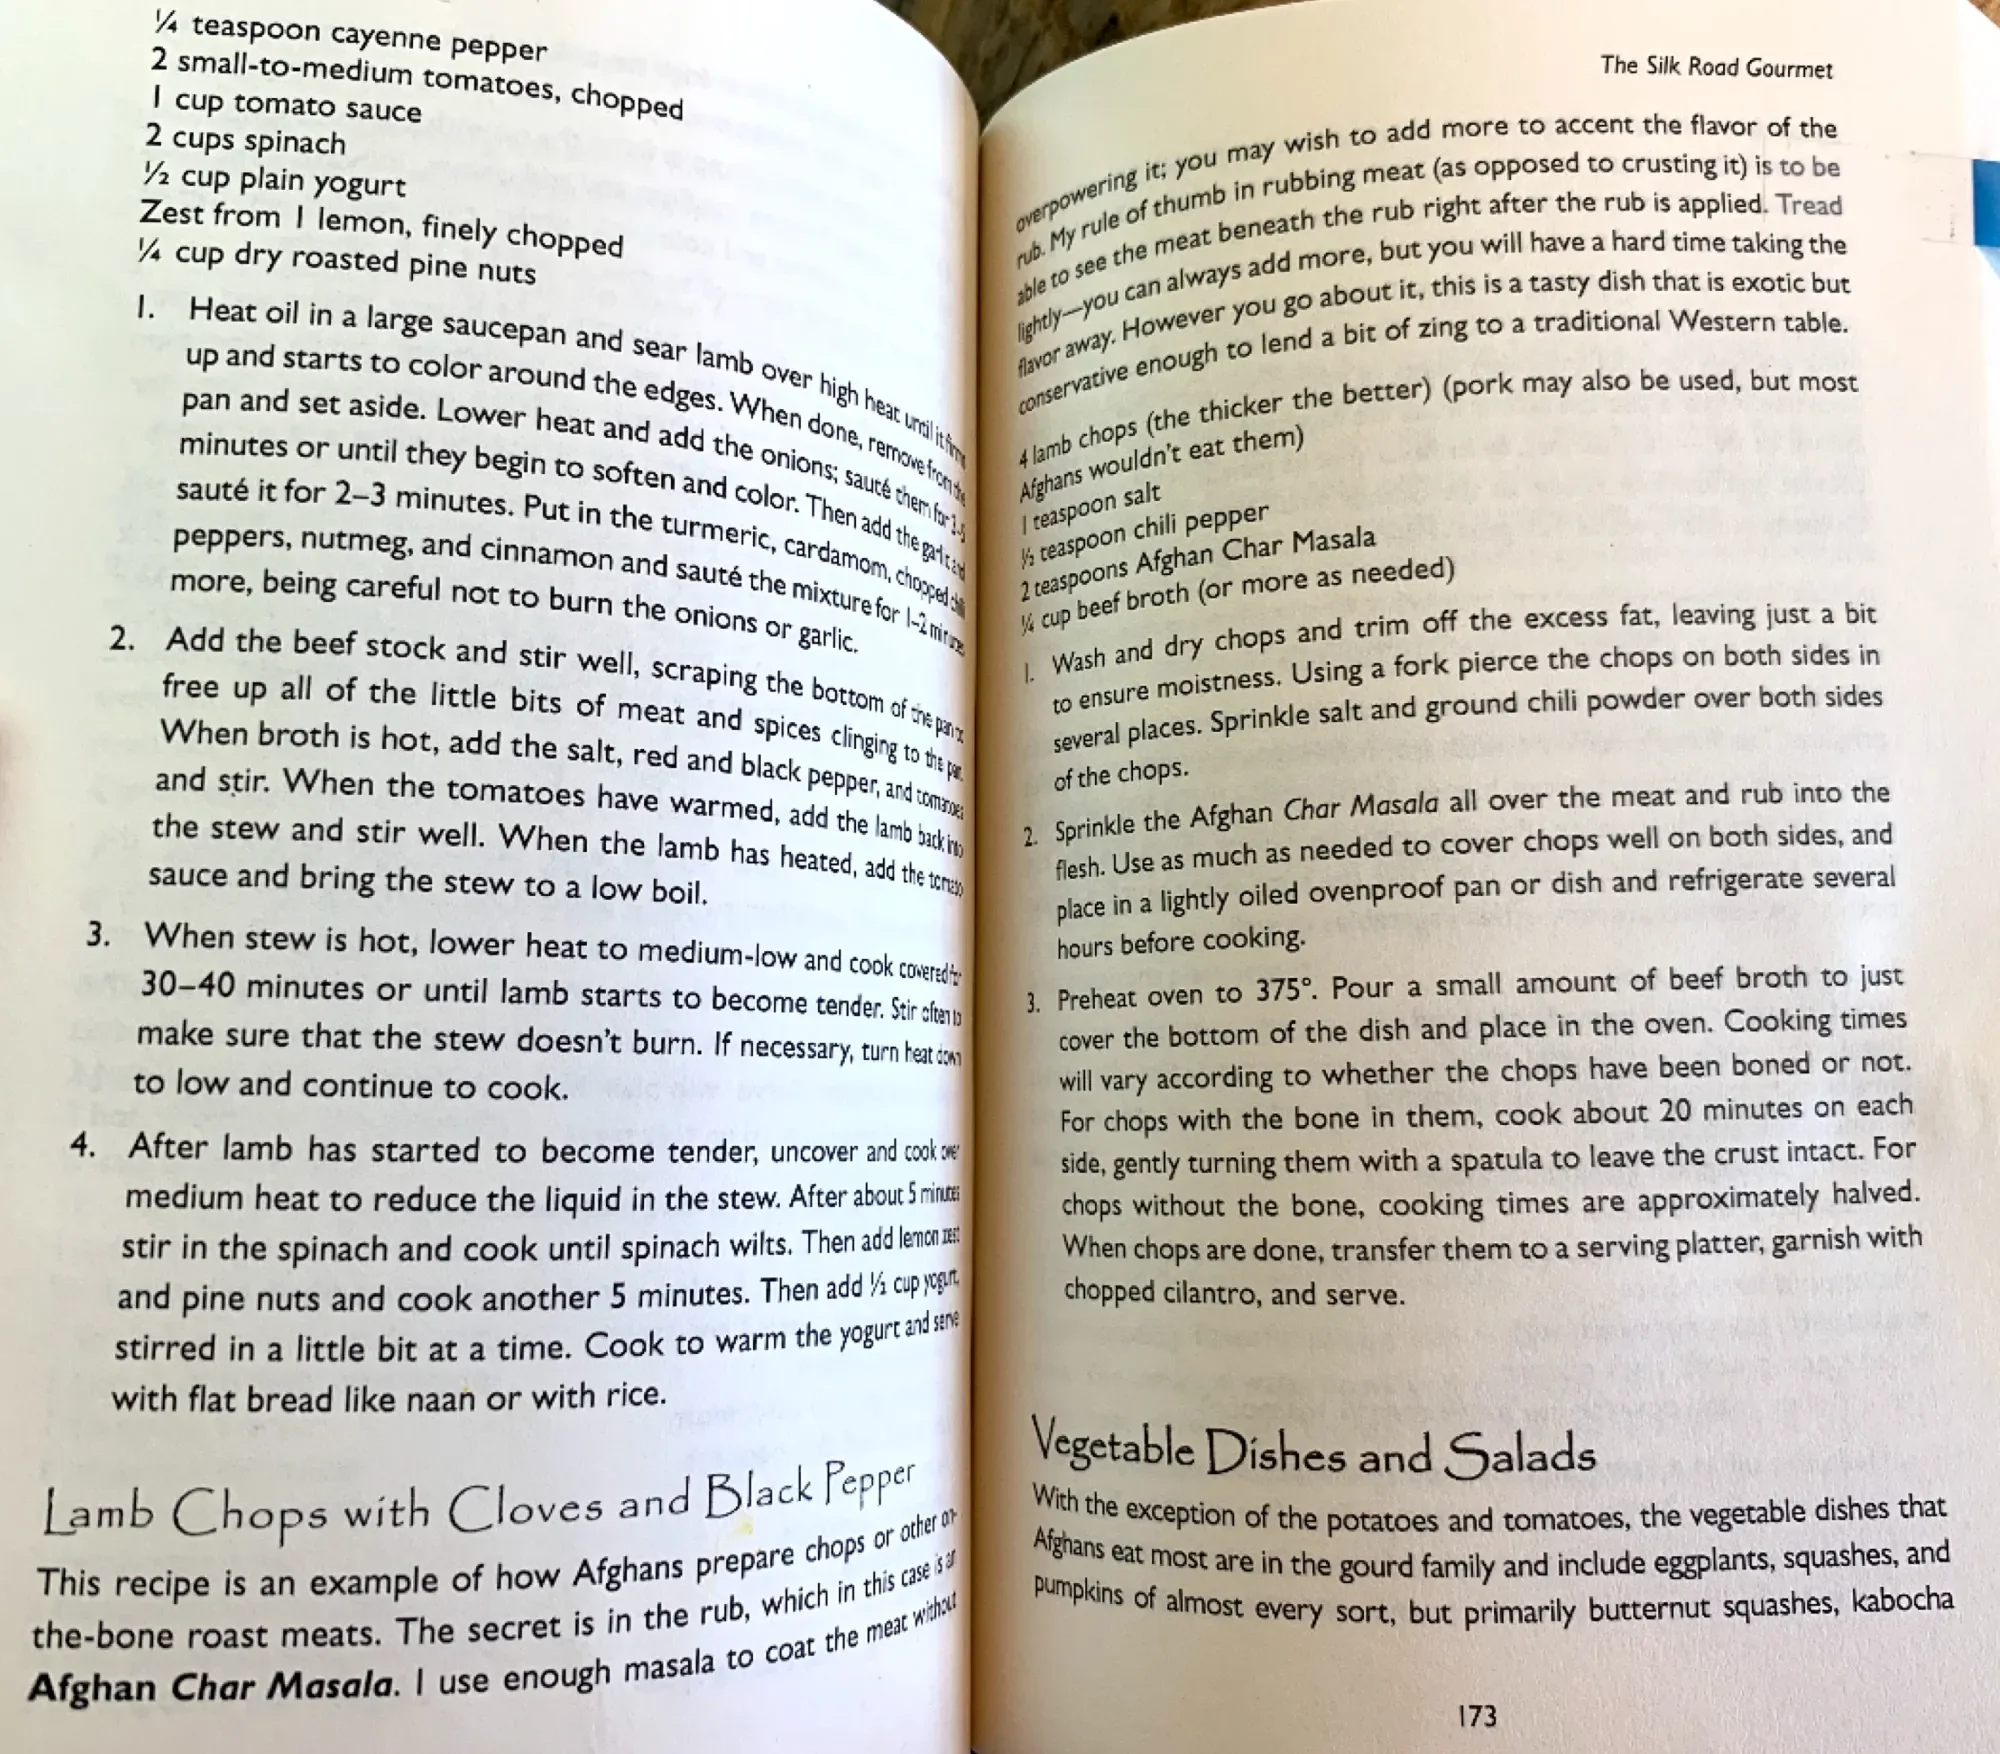
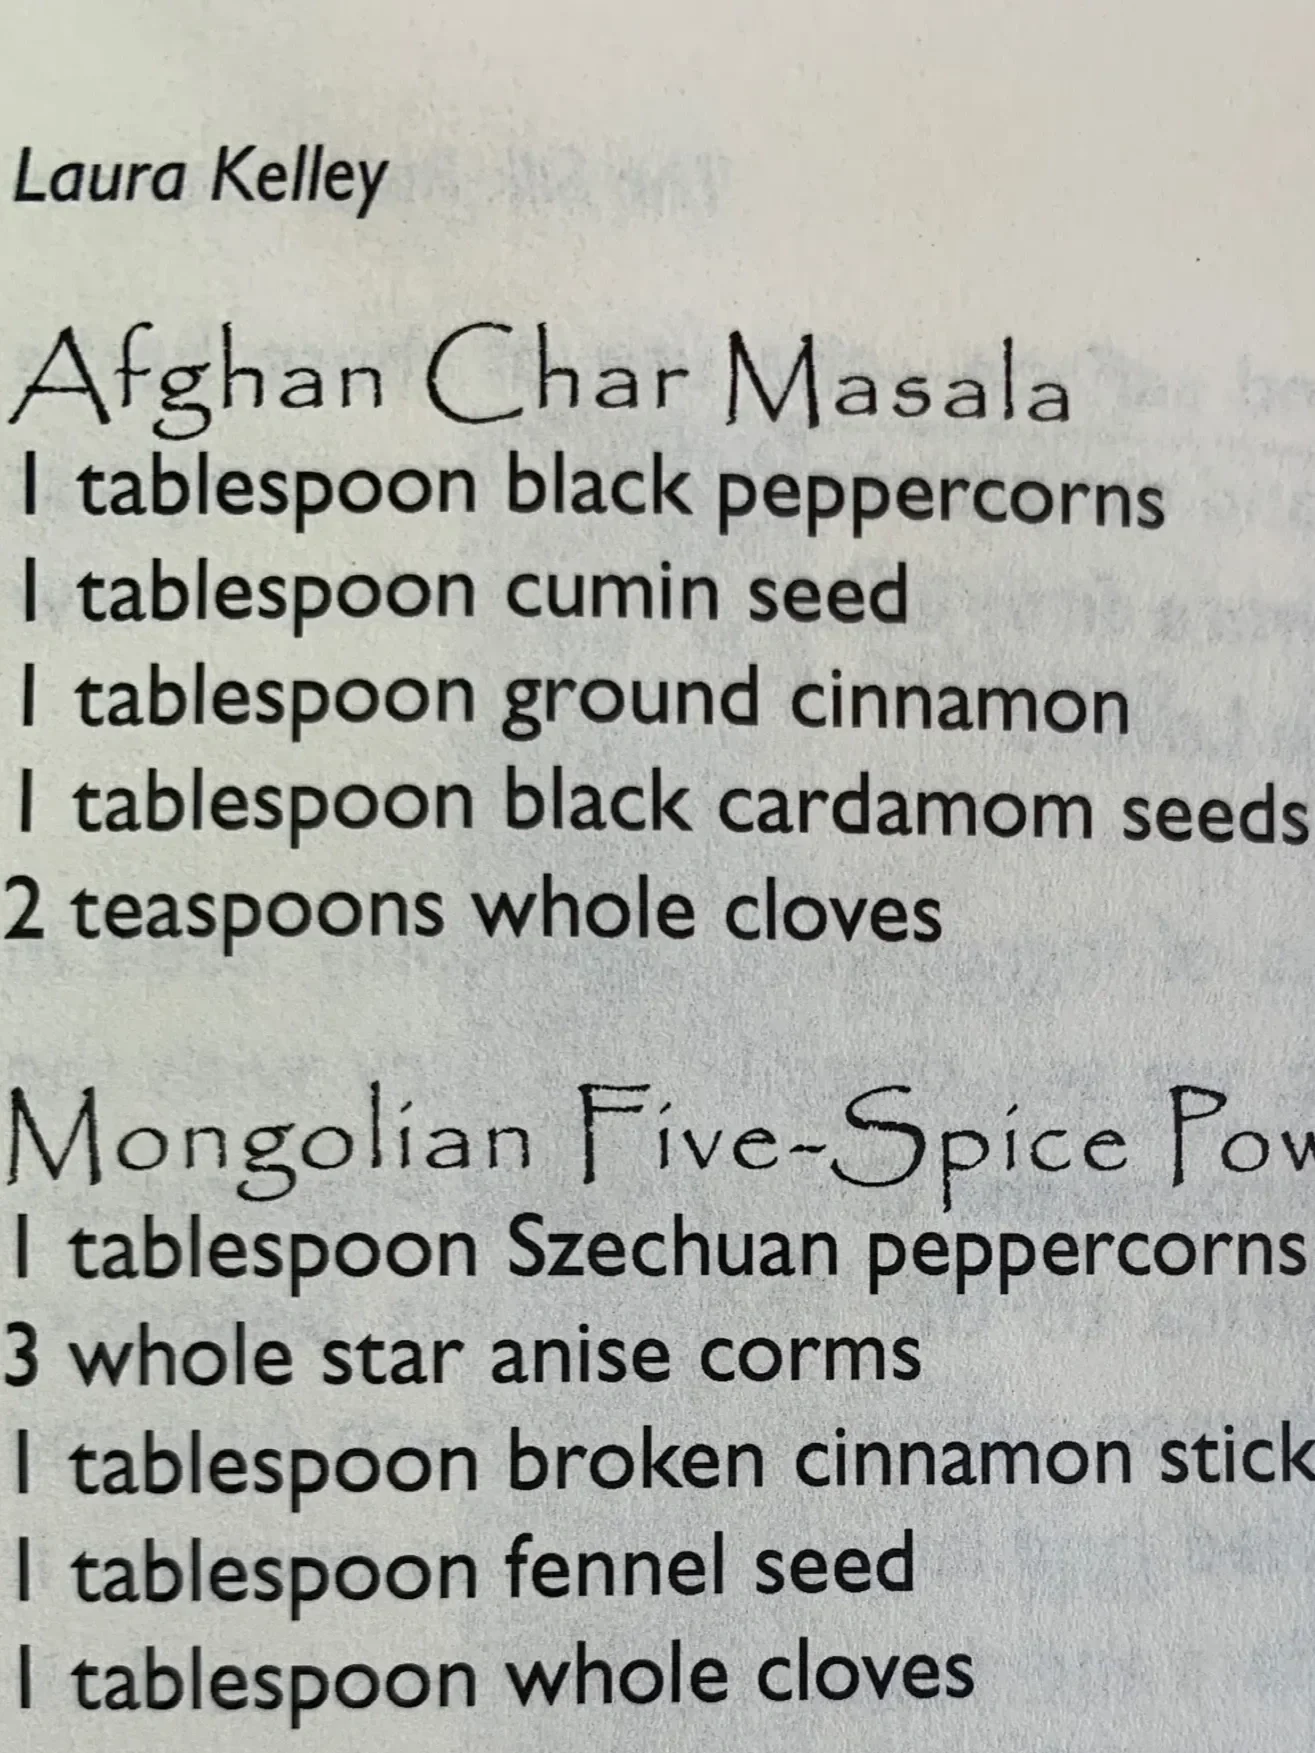
For the second rack of lamb, I used the book The Silk Road Gourmet by Laura Kelley. It is an Afghan recipe which calls for 2 teaspoons of cloves and a teaspoon each of cumin seeds, black cardamom, cinnamon and black peppercorns. I crushed the seeds using my granite mortar and pestle. I seasoned the rack of lamb with cayenne pepper and salt, then coated it with the spice mixture before baking until the internal temperature reached 145 degrees Fahrenheit.


How to Cook Ground Lamb
I've altered a recipe we love from the Martha Stewart Living magazine which is an herbed rack of lamb that is paired with a pomegranate rice. We love that recipe so much we cook it often. One day, I made the pomegranate rice but didn't have anything except ground lamb. So, this is the recipe I came up with to pair with the rice. It's a distance second to the rack of lamb recipe, but good in a pinch.
Persian Mint Meatballs
This recipe is from the book The New Persian Kitchen by Louisa Shafia. We do a lot of cooking anyway, but especially with our homeschooling. While doing our ancient Persia lessons, we got this and other Persian cookbooks to try some new recipes.
This recipe calls for soaked uncooked rice. It's the first time I tried this and I may have done it wrong or misread the recipe because that part wasn't super well received by my children. They could feel the granules of rice that didn't blend well.
The one thing that turned out amazing was the tomato sauce!
That recipe is one we've made again since, but we paired it with a different meat dish.
Tomato sauce:
Sauté half a large sliced onion in grapeseed oil
Add one can of tomatoes: I used whole tomatoes, with 1-2 teaspoons of dried dill weed, 1 teaspoon of cinnamon and 1 teaspoon of turmeric. Season with salt and pepper and cook everything through.
Meatballs:
1 pound of ground lamb, 1 egg, season with salt and pepper. Blend half onion with 6 garlic cloves, and 1 bunch of mint. Mix thoroughly together.
Form into meatballs or kebabs and cook thoroughly and browned on outside before serving with tomato sauce and basmati or baghali polo rice.
Persian Orange Chicken Koresh
I do love adding sweet to savory and even like orange flavored Chinese chicken, but I didn't seem to like this dish quite as much. However, my 18-year-old son said it was the best chicken I ever made. So the following day, I made the recipe again and cut down on the orange accents.
I left off the orange segments which garnished the dish (and of which I used only 1/6 of what the recipe called for), but still I wasn't satisfied. I think for my next attempt, I'll skip the boiled chicken (my alteration of the recipe) and stick to chicken breast as the recipe called for. I didn't have Persian lime powder, so I used two alternatives together to make up for the loss. Overall this recipe was deeply flavorful and textured and was a needed departure from our typical chicken recipes.
This recipe is from The Silk Road Gourmet by Laura Kelley and we have been using this book as inspiration for our Silk Road main lesson block in homeschool. We love adding regional and historical recipes when doing our history units and this book has been a gem. It covers several countries including Azerbaijan, India, Bangladesh and more.
We paired our orange chicken koresh (page 130-131) with another Iranian recipe: Chickpea and Dill Rice Pilaf found on page 111 in the book. While both recipes are flavorful, I feel there would be better paired with plain dishes (plain rice with the orange chicken and plain chicken with the chickpea rice), however my children loved the combination and asked for the chicken again the following day and the day after that. The book didn't pair these recipes together, it was my own thought to do so.
Together, the cooking time was nearly 3 hours to make the chicken and rice dish. The second day I made this, the cooking time was just over an hour. If you use canned chickpeas and chicken breast as the recipe calls for rather than boiling a chicken, I think you could get your cooking time down even further.


Persian Chickpea and Dill Rice Pilaf
As a self proclaimed "Not-a-Rice-Fan", I do make the exception when it comes to Persian rices. They are my favorite and this one did not disappoint. I also don't care for chickpeas, but when paired with light basmati rice, onions and tomatoes, this rice recipe becomes a meal unto itself. With a slight modification of the recipe, you can make this a vegan or vegetarian recipe easily. As it's written it calls for chicken broth which infuses the rice with rich flavor that is balanced by the addition of lemon and tomatoes. Onions impart flavor whether they are raw, cooked, sauteed or fried. With a base of tomatoes, onions and garbanzo beans, the rice sits safely on top as the steam cooks the rice to perfection. This recipe was such a hit that my family requested it three days in a row after making it for the first time.
We paired it with orange chicken koresh which is a sweet dish which probably would be better balanced with a plain rice dish, but my children loved the combination. Both recipes are from the book The Silk Road Gourmet by Laura Kelley. We are using this book as part of our Silk Road unit study for homeschool and are loving the recipes we are trying out from this book. It contains recipes from several different countries along the ancient Silk Road like Iran, Sri Lanka, Armenia and more.

Tomato & Cucumber Salad
This is one of the most refreshing salads you’ll ever taste! What I love about Persian food is that the ingredients are simple, flavorful and nourishing. Salad Shirzi or Cucumber Salad as I like to call it accompanies many Persian meals. It’s one of two salads you’ll typically find on Persian menus, and this one is so easy to make, you’ll wonder why you don’t have it all the time!!
You can make this as big or small as you like it and with whatever ratio you want, but if you want a basic guideline, here it goes:
2 Persian cucumbers
1 medium flavorful tomato
1 lemon
salt to taste
olive oil optional
That’s it!! One thing to note about this salad is that the cucumbers are finely diced. It really does matter how you cut them if you want to be authentic 🙂 The tomatoes are also finely diced, but not as small or they’ll turn to mush. The flavor of the tomatoes matters. Try your best to find ripe, firm and good tasting tomatoes.
For this recipe, avoid the cherry tomatoes and grape tomatoes. As tempting as it will be to use them, the sweet tart taste of cherry tomatoes overpowers the other other flavors. Of course, you may do as you wish!! Lemon is really important in this recipe. If your lemons are not juicy, use more. You can’t overdo it on the lemons, so squeeze away! The more the better. And did I mention how good lemons are for you? They are cleansing and detoxifying, so use as many as you can. Persian cucumbers may be a novelty at most grocery stores, so if you can’t get them, English cucumbers are a good alternative. If you must use the standard cucumbers, then I recommend peeling them, but otherwise, for the Persian and English ones, keep the skin on. Add salt to taste, but if you are making this in advance, don’t salt until close to serving time. The salt extracts the liquid from the tomatoes and cucumbers, and you will be left with a bland salad if you salt it too early.
Persian Rice
This has got to be the best tastiest rice in the world!! I’m not a fan of rice, but this is one rice dish, I’ll gladly eat. Packed with dates, currants, lentils and fried onions, what’s not to love?! I season mine with olive oil, grapeseed oil, salt and saffron. Occasionally if I make a whole roasted chicken to go along with this rice, I’ll add my secret ingredient: pan drippings! It’s amazing. And if you leave out the pan drippings, this rice dish is vegan.
Ingredients:
1 cup brown lentils 3-4 cups basmati rice (you can adjust proportions)
2 cups dates (cut in half or thirds)
2 onions (sliced and fried)
1/2-3/4 cup of currants
salt,
grapeseed oil,
olive oil and
saffron
Boil lentils for 20-30 minutes until soft and just splitting, but do not overcook. In a separate pot, boil water in excess of rice. We are going to drain the rice, so the rice needs room to move when the water has boiled. If you want to soak your rice, you can soak it and rinse it several times for an hour and up to overnight in the refrigerator. Being that I’m lazy, I usually skip this. Also, I usually don’t wait for my water to boil before putting it in the water, lol, but you can wait until the water is boiling before adding the rice. You can salt the water as well. When the rice is cooked ‘al dente’, where it’s just done, but not too soft, you can drain the rice. This takes about 15 minutes. Be sure to test the rice from 10 minutes on. You do NOT want overcooked rice.
In the meantime, fry two onions in oil (I like grapeseed oil). This takes about 15 minutes. You want them very brown, but not burnt. Use extra oil to ensure they won’t burn. At the end of the browning process you can add olive oil to taste. Pit and slice dates. I like to lightly fry the dates and currants in the leftover oil from the onions. Be sure to watch them closely as currants will burn fast. Add a bit of ground saffron. Time to assembled the rice: Add a small ‘mountain’ of rice at the bottom or a large pot. Top with dates, currants, onions and lentils. Add layer of rice. Add sprinkling of salt, ground saffron, grapeseed oil and olive oil. Repeat till all ingredients are used up. Let sit for a few minutes so the flavors can mingle and for the saffron to color the rice. Then toss in the pot by flipping the pot towards you. Avoid mixing using a spoon. You do not want to break the rice. If your rice need a little more time to soften, put the lid on and leave it for 10 minutes. Serve with chicken or on it’s own.
Turmeric Chicken
Did you know turmeric is so good for you? Aside from being an antioxidant, it’s full of other other benefits for your body and brain. I tend to overdo my turmeric consumption, and this is one chicken recipe that’s full of it! This chicken dish perfectly accompanies Adas Polo, Zeresh Polo and Baghia Polo.
Ingredient:
Onion (sliced)
Chicken (pieces with skin on)
salt (to taste)
oil (grapeseed oil and olive oil)
turmeric (1-2 Tablespoons)
optional: saffron (pinch)
Directions: Saute 1-2 onions in oil until translucent or even a bit more. Place chicken in the pan with onions, skin side down. Add oil as needed. Season with salt and generous amounts of turmeric. Brown chicken on both sides. Sprinkle with ground saffron. Add about 1/2-1 cup of water after about 5-10 minutes. Transfer browned chicken to baking tray. Be sure to get all the pan drippings onto the chicken. Add 1/2 cup of water for a saucier sauce. Bake uncovered for 30-45 minutes uncovered if skin is on or covered if skin is off. Serve with Adas Polo..
How to Make Garlic and Mint Meatballs | Afghan Meatballs
This recipe is significant. It’s marks the point when we have had the most success with a cookbook. That cookbook is The Silk Road Gourmet by Laura Kelley. When putting together our history units, I like to find regional cookbooks as a way to include cooking foods from that culture, region or period in time. There are many ways to connect and experience a culture. It could be through art, music, handwork or my favorite: Food! When we taste food from different parts of the world, it is a connection point for me that I like to share and experience with my children. Each of us have a unique set of interests and passions, and for me including food (and handwork) into our homeschool lessons is close to my heart and one of my oldest homeschool goals.
So today I bring you Afghan Garlic and Mint meatballs. I love mint, but mostly in my tea. I don’t usually cook with mint. The Silk Road Gourmet cookbook has changed that. A number of recipes call for mint, and I have been pruning my mint plant to keep up with the demand. These meatballs are also spicy! They call for quite a bit of chilis which my children love.
Usually when I try a new recipe I cut it in half or even more to see how we will like it. Either the portions are smaller in this cookbook, or I have rightful anticipated that my family will love it because I have been doubling and tripling these recipes with great success. While you can find the complete and unmodified recipe in the cookbook The Silk Road Gourmet on page 169, I’ll share my version here.
I made the seasoning mix first adding 1 chopped red onion per 2 pounds of ground beef rather than 2 yellow onions per pound. I grabbed a handful of fresh mint (plus another teaspoon or so of dried mint) and a handful of fresh cilantro from my garden and added that to my NutriBullet to blend. I added a whole head of garlic plus the juice of 3 limes. The recipe calls for less garlic and lemon rather than lime. I added 4 teaspoons of coriander, 1 teaspoon of freshly ground black pepper and 2 teaspoons of salt. I didn’t have any tomatoes, so I used cherry tomatoes in lieu of one tomato. The recipe calls for a 1:1:1 ratio of beef, tomato and onion. When I’ve done that in the past, I end up with a very wet meat mixture which sweats a lot of moisture when cooking. I don’t end up with the nice browned look you get when you barbeque or broil. By chance, because I didn’t have more onions of tomatoes, I ended up liking this mix quite a bit. I still plan to make them in the future with more onions and tomatoes, but I was pleasantly surprised at the outcome.
Once everything was mixed together, I added it to the ground beef and chilled it for an hour. Then I rolled them into meatballs and set them on a tray lined with parchment paper. I broiled them for 10 minutes. I served this with Afghan Carrot and Raisin rice.
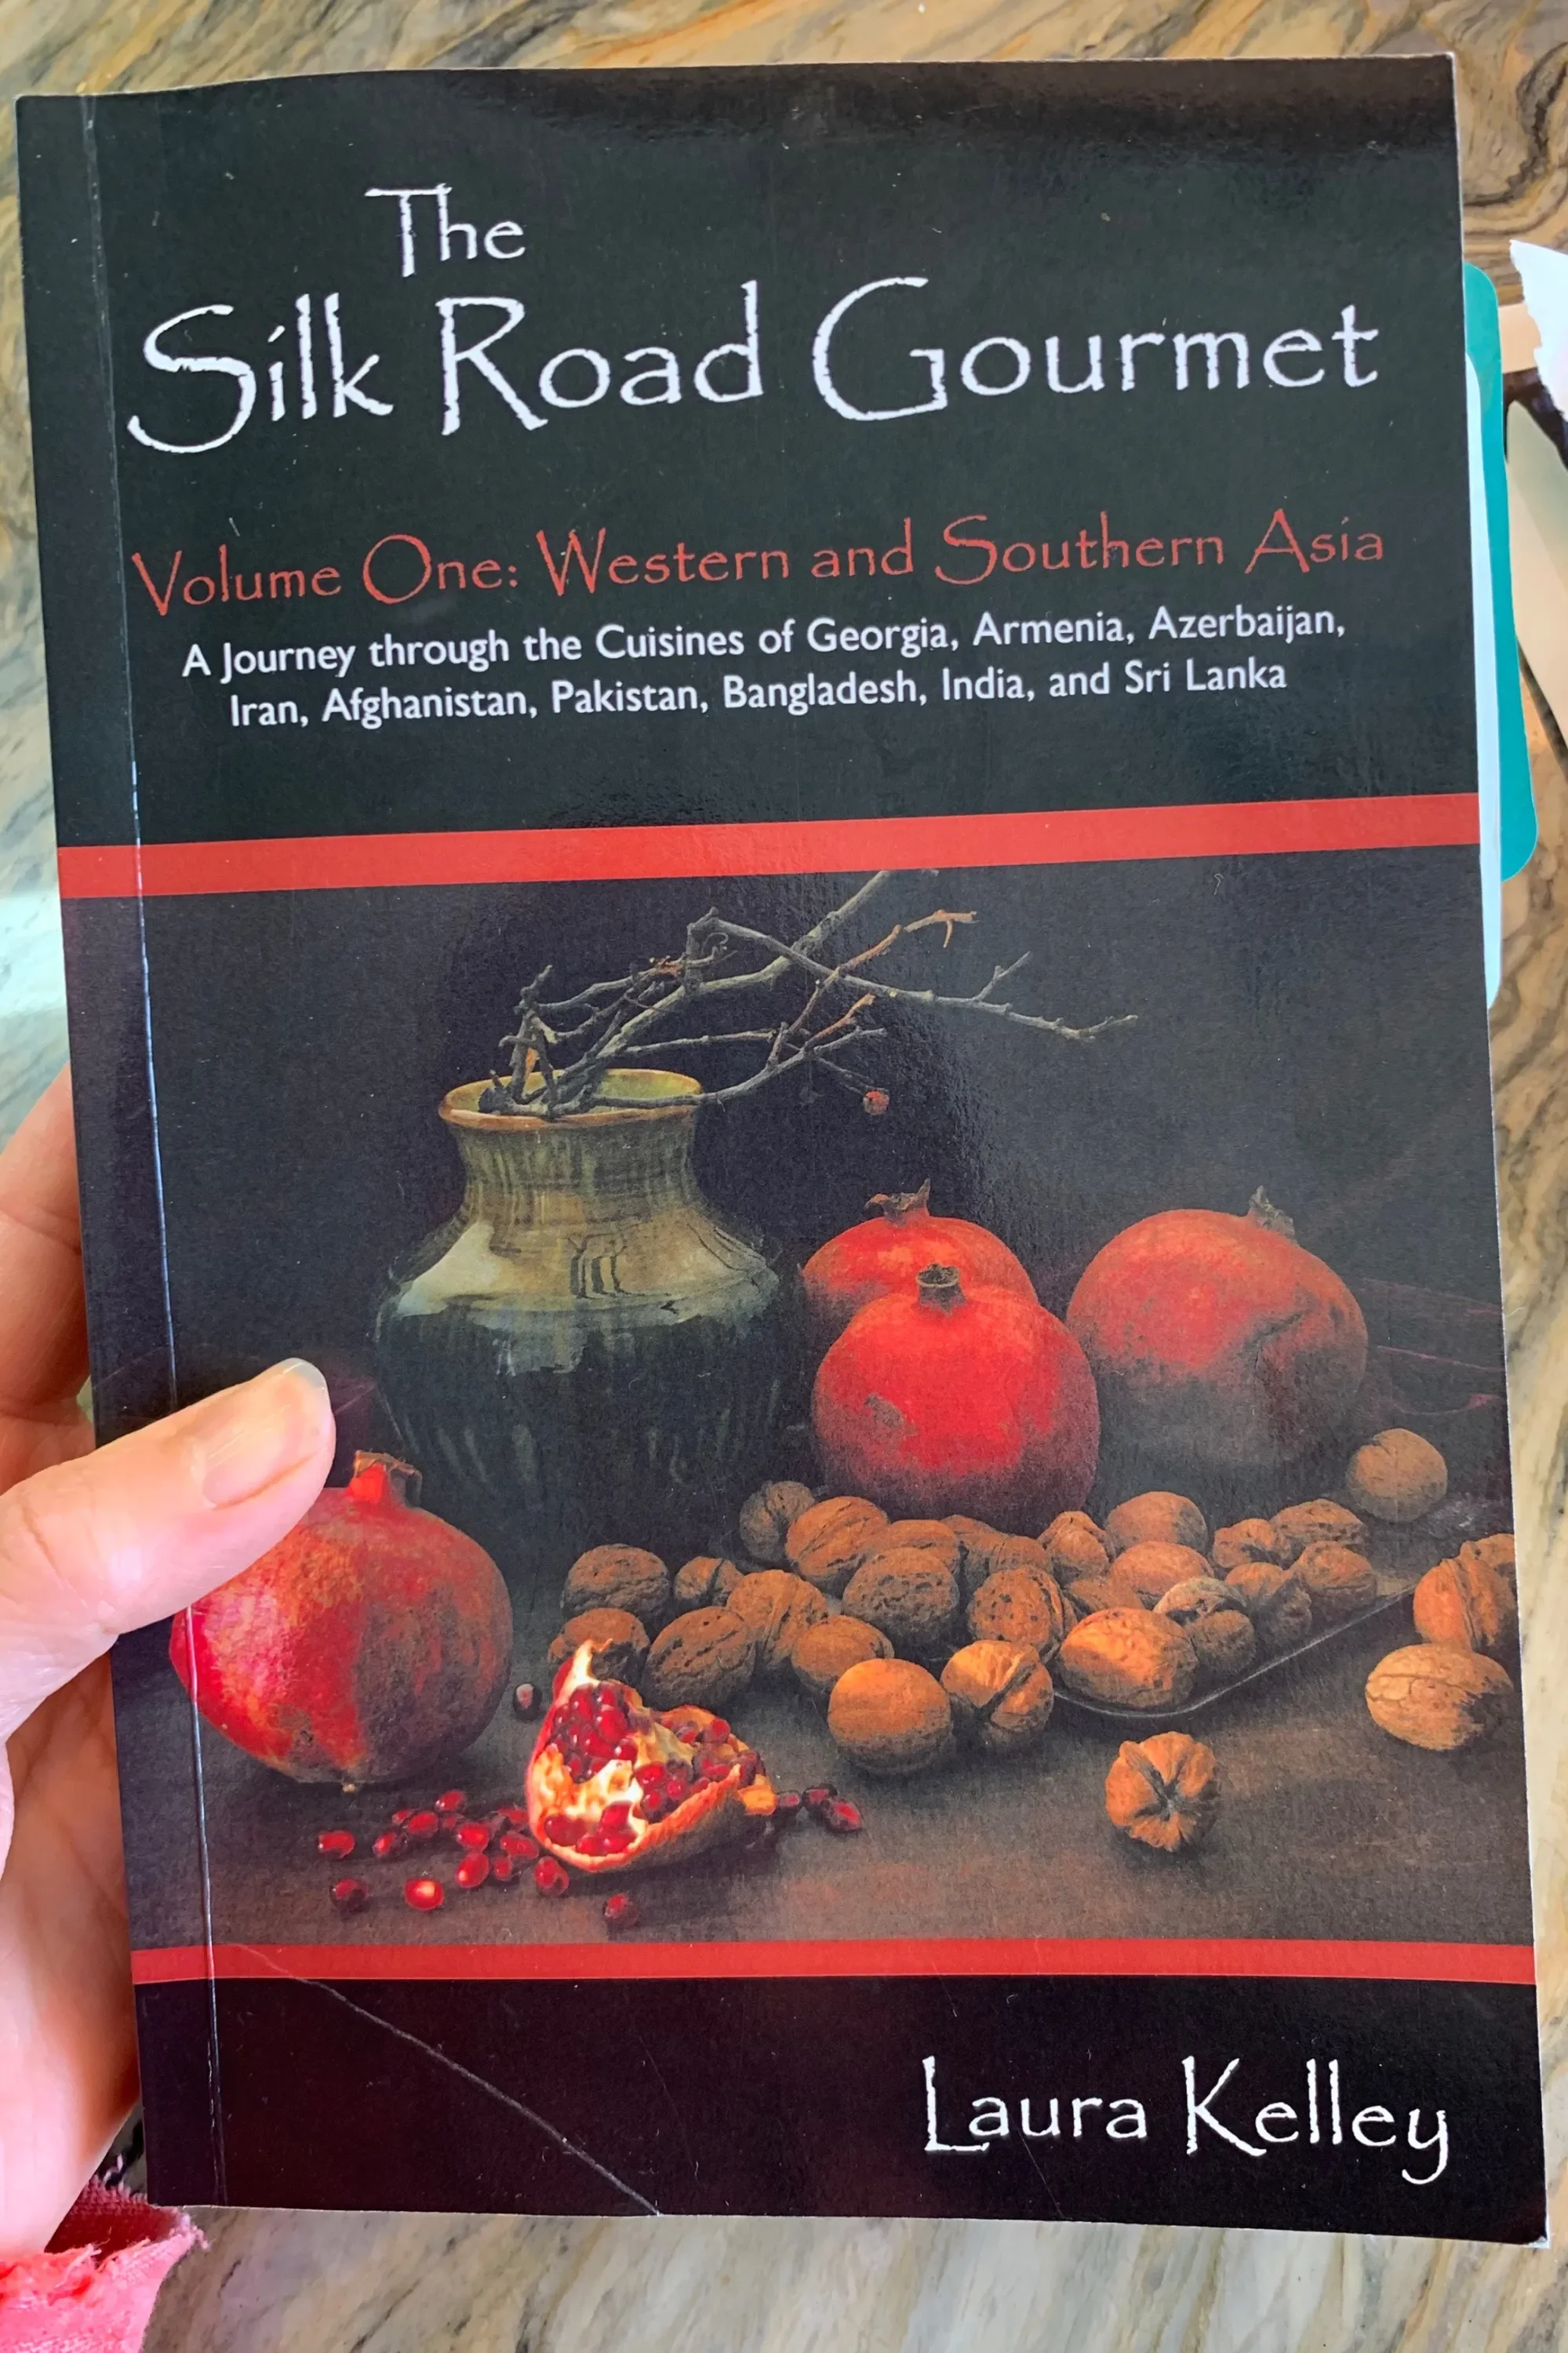
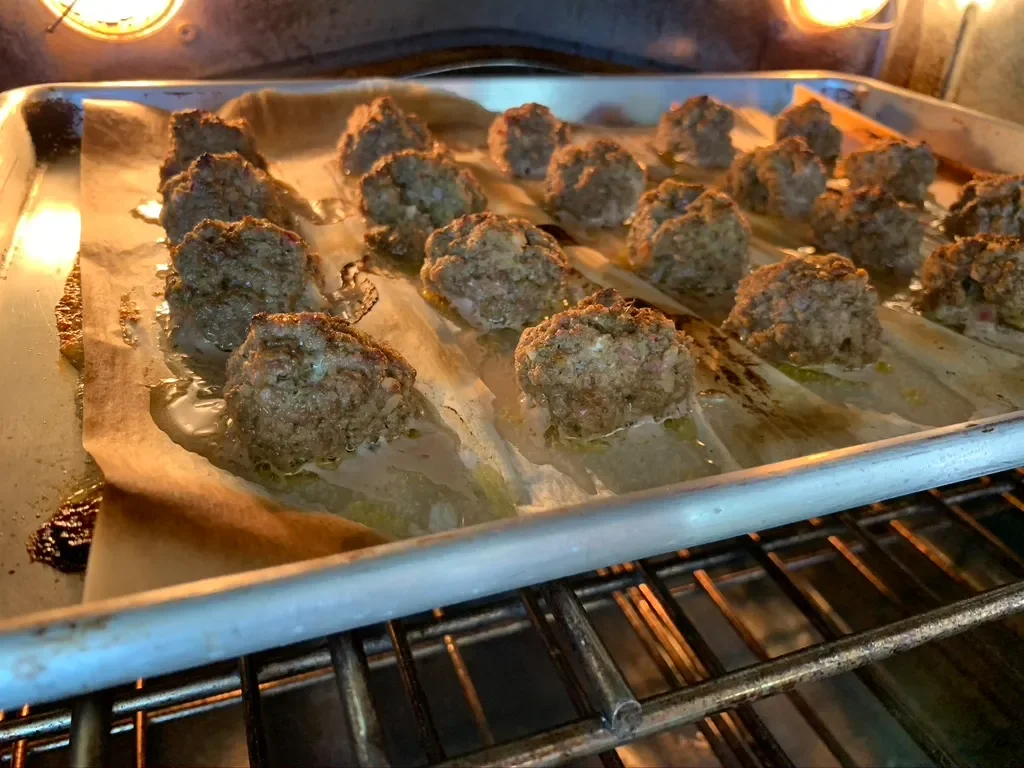
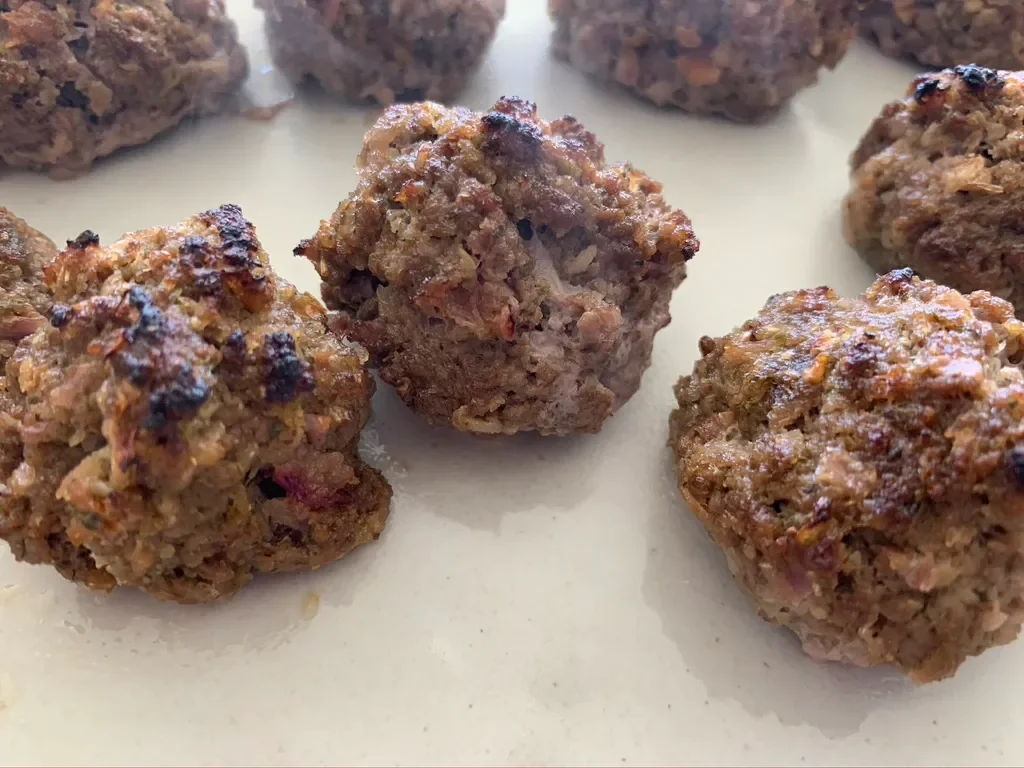
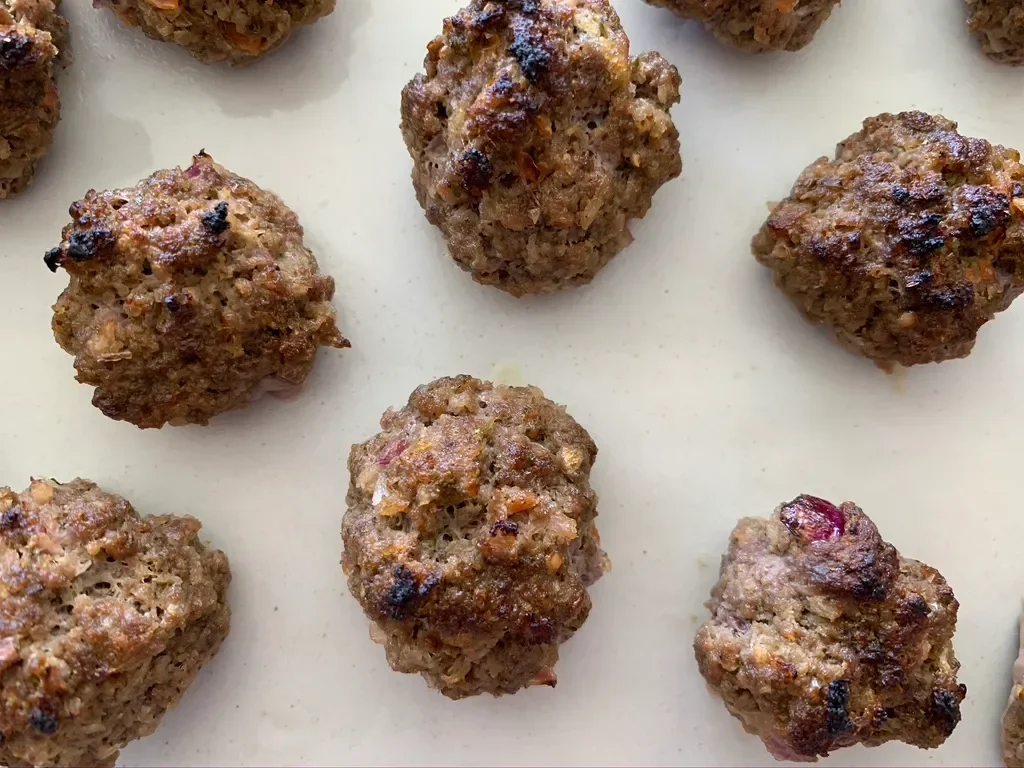
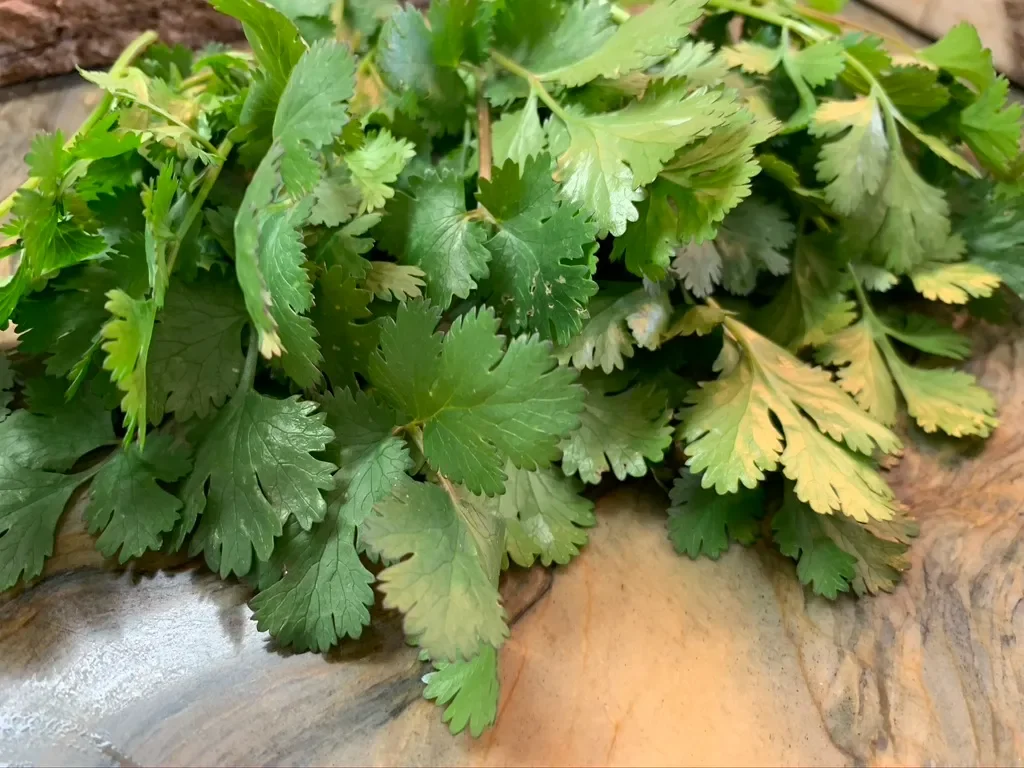
Cardamom Oatmeal Raisin Chocolate Chunk Cookies | Indian Cookies

Cardamom Oatmeal Raisin Chocolate Chunk Cookies, that’s a mouthful! And these cookies are worth it. I love how unique they are, for me that is, as we settle into sugar cookies, chocolate chip or white chocolate chip cocoa cookies. This cookie recipe is is full of flavor and seldom used ingredients. I would suggest omitting ingredients you don’t have or substituting as I did. I used raisins rather than golden raisins and chocolate chunks from a Swiss bar of chocolate with almonds rather than chocolate chips. I would try to source good quality cardamom. I got mine on a trip to Dubai and shelled dozens of cardamom pods and ground it myself so the flavor of the cardamom was strong and amazing, but not stronger than the cinnamon which overpowered the other flavors. I’m using the book Vibrant India: Fresh Vegetarian Recipes from Bangalore to Brooklyn, and the recipe is in the dessert section titled Cardamom Oatmeal Cookies.
Recipe: Warm two sticks of butter until lightly brown. Add 1 cup of raisins, 1/2 teaspoon of cinnamon, 1/2 teaspoon of ground cardamom, 1-2 teaspoons of molasses, 1/4 teaspoon of vanilla paste or powder, and 1 cup of brown sugar. In a separate bowl, beat two eggs lightly. In another bowl combine 2 cups of oats and 4-6 ounces of chocolate chips or chocolate chunks with almonds. In a third bowl, sift 1.5 cups of flour. Remove butter mixture from stove and let it cool a bit. Add eggs and combine well using fork or spoon. Slowly add flour 1/3 cup at a time until incorporated. Add oats with chocolate. Refrigerate for 6 hours. Add 6 1-inch balls to a parchment lined sheet pan and bake for 12 minutes at 350 degrees. Cool before serving. Best with coconut or pistachio ice cream.
Shamee Kebabs | Indian Foods
I made a huge batch of shami kebabs! You can cut this recipe down quite a bit, but whenever I make these, because they are so labor intensive to begin with, I make a huge batch and freeze them for easy meals. The trick is freezing them flat as kebabs so they freeze easily (once par-frozen on a sheet pan, I place them in a freezer bag), and defrost easily (and quickly) making them great for those days when we haven't planned a meal.
Shami Kebabs:
5 pounds lamb stew (cooked in pressure cooker for 40-50 minutes)
5 russet potatoes (peeled) (cooked until soft)
1 cup garbanzo beans (soaked with water and baking soda for at least 1 hour and cooked on high pressure for 1 hour)
1 cup red lentils toasted on stove until 1-2 brown, then let cool and blend to a flour in blender
2 large onions diced and sautéd
2 heads of garlic and equal amount ginger, ground to a paste
spice mix: salt and pepper to taste, cayenne pepper and/or chilis to taste, 5-8 black cardamom (just the seeds), 10 green cardamom (just the seeds), 3 tablespoons coriander, 2 teaspoons cumin seeds, 1 tablespoon black seeds, 1-2 tablespoons fenugreek seeds, 1 teaspoon of ajwain seed
Instead of using all the spices separately, I recommend a shami kebab spice mix. Or, to make it more simple, just use cumin and coriander along with salt and pepper to taste making it as spicy as you wish.
5 eggs lightly beaten
Once all ingredients are cooked and a bit cooled, mix them together with raw eggs. Form into patties and fry until golden brown. Serve with lentils and rice. Freeze kebabs flat then transfer to freezer bag.
Indian Red Lentil Daal | Dahl Recipe
Are you looking for a tasty, filling vegan meal? Try Indian Daal! It's fast (if you use my fast recipe), nutritious and delicious.
Here's the fast recipe you can make in a mini rice cooker.
Are you looking for a tasty, filling vegan meal? Try Indian Daal! It's fast (if you use my fast recipe), nutritious and delicious. For this recipe, I included many toppings and garnishes we love to include when making Daal, but only if Daal is going to be the main dish rather than a side dish because all these extras that I show take a long time to make.
Let's start by getting the things that take the longest to cook on their way:
-Boil or cook in the Instant pot 2 peeling russet potatoes.
-Sauté a large yellow onion in oil of choice (on the side of the pan, I sautéd about 1/2 teaspoon of cumin seeds and 3 chili peppers)
-Soak 1.5 cups of red lentils.
-Cut half (or whole) cauliflower into medium pieces and fry or sauté until very brown. A lot of oil is needed for this, so you may choose to oven bake them if you prefer not to sauté or fry them, but honestly they taste amazing fried.
-smash 3-5 garlic cloves and equal amount of ginger and add to a hot pan with oil and 3 chili peppers. Add spice mix: 1/2 teaspoon of cumin, paprika and turmeric, season with salt, pepper and cayenne pepper to taste.
-Add rinsed lentils and 2 cups of water. Watch while cooking so it doesn't get too dry or overcooked.
-cut in half 1-2 cups grape or cherry tomatoes. Sauté 1 teaspoon-1 tablespoon of sliced ginger. Add tomatoes, salt and generous amount of paprika (about 1/2-1 teaspoon).
-Prepare garnishes: diced jalapeno, quartered lemon or lime, roughly cut cilantro.
Serve with basmati rice or pita bread, or naan or all!
How To Make Samosas | Indian Food
So the thing is that I only make these during Ramadan, but really, you can make them any time of year. This year, I didn’t make them once for Ramadan. And now that Ramadan is over, I’m making up for lost time and turning out samosas like it’s nobody’s business. This recipe utilizes leftover ground beef or freshly made with a sprinkling of Indian spices and good old fashioned Mission Tortillas. I’ve tried three different varieties of tortillas and the Mission brand is hands down the best. They are light, airy and soft and fry up really nice and crispy. These have been a family favorite and crowd pleaser for many years now.
I have my mother in law to thank for this recipe (and many besides). The ingredients and directions are simple, and if you are only making enough for your family, not too time consuming. I’ve made these in the past for big dinner parties, and that’s quite the commitment.
Here’s what you need (for this recipe, but you can cut it down easily): 2 pounds ground beef (I used 15% fat, but I’ve used ground sirloin with only 5% fat) 1-2 teaspoons of the following spices (I recommend starting with 1 teaspoon of each and tasting as you go until you reach the desired flavor). Cayenne, cumin, turmeric, ginger, garlic, salt and paprika You can use a serrano pepper or a jalapeno pepper for added kick and for a rich authentic flavor, you can use fresh ginger and garlic or ginger garlic paste. 1 large onion diced, or two small onions Add hidden veggies in the form of 1 green bell pepper or a zucchini. Dice them small and sauté with the onion. 10 tortillas flour and water oil
Directions: Sauté onion in a large flat pan with oil of your choice. Meanwhile, rinse ground beef and break it up so it’s smooth. Use a metal strainer to keep from losing the meat. Drain well. I usually work the meat with a wooden spoon and let is rest in the sink draining while the onions fry. Fry other veggies at this time too. Prepare the spice mix by adding 1 teaspoon of each spice into a small dish. You can add more to taste once the meat starts cooking. Turn the heat up to high and add the meat to the browned onions. Work the meat and add the spices. It takes about 5-10 minutes to cook down. Remove from heat and allow the meat to cool so you can work with it. If there’s too much liquid, continue to cook it until the liquid evaporates. Avoid draining the liquid because the flavor will drain with it.
While the meat cools, prepare the tortilla and ‘glue’. Cut the tortillas in half and set aside. In a small bowl add 1 cup of flour and slowly add 1 tablespoon at a time of water until you create a thick paste. If the paste is too runny, it won’t seal the tortillas.
Add a thin line of paste along the edge of half the tortilla. Add about 1-2 heaping tablespoons of meat (keema) to the tortilla and fold the tortilla over and seal it shut. Let it rest for a bit to make sure the seal keeps.
To a pan add as much oil as needed to fry samosas. Heat to medium heat, but watch it constantly. If it’s too hot, it will burn or brown quickly, but the inside will be cool or not warm enough. If the oil is too cool, it’ won’t fry properly and absorb too much oil. Make sure the samosas are sealed completely before frying. Fry for a minute or so on each side. Remove and let drain on metal rack or paper towel. Serve hot with your choice of garnish. I like them plain, but some of my kids enjoy ketchup.
For more recipes, check out this playlist.
Yogurt Tortilla| Hyderabadi Appetizer | Dahi Pulki | Indian Food
Dahinki Pulke or Yogurt Tortilla is a family favorite, especially during Ramadan. We like to break fast with fruit chaat and this layered tortilla dish that’s thick with yogurt and fried onions. While this appetizer is a Ramadan family favorite of ours, you could really have it any time of year. It’s simple to make and other than frying the onions, it’s really fast too. Wow your friends and family at your next dinner party with this crowd pleaser. It’s lightly toasted tortillas layered with yogurt, cilantro, jalapeño or serrano peppers, and fried onions. Layer three times and then let it chill or rest for 20 minutes until the tortillas are moistened by the yogurt. You can also prepare this up to one day in advance by storing it in the refrigerator, but I prefer to eat mine fresh. Just know that you don’t have to eat it directly after making it. The only thing difficult about this dish is cutting it! Oh and eating it! It’s a bit messy, but oh so worth it!
Coconut, Cashew & Curry Rice with Lime | Indian Food
I’m may not be a fan of rice by my family is! Being married to an Indian, I quickly learned how to make the perfect basmati rice from my mother-in-law. Thereafter, I sort of stalled in my skills for rice making and for years made simple basmati rice. Then my Iranian friend, Teyebeh, taught me how to make several Persian rices and suddenly I had found a rice a liked! And now with The Silk Road Gourmet by Laura Kelley cookbook, I’m learning to make even more flavorful and robust rices. Ones that could be a meal by themselves.
Today’s recipe is inspired by the cookbook The Silk Road Gourmet by Laura Kelley. I say inspired by because I had to make a number of changes to the recipe to suit the ingredients I had on hand to suit our family’s dietary needs. In case I haven’t mentioned it before, when possible, I make our main dishes dairy free to accomodate my son’s dairy allergy. When it comes to Indian and Pakistani cooking, that’s actually more challenging than you think. We learned the hard way that most dishes have dairy in them, from the biryani to the chicken to the bread, even the meat, all of it has some form of dairy. I’ve learned alternatives throughout the years, and certainly it’s changed the flavor of the food.
Today’s curry and lime rice calls for curry leaves which I didn’t have. However, years ago, I planted a curry bush, not to be mistaken for the tree/strub which the curry leaves come from. This curry bush I have resembles rosemary in form, but in smell and taste, it’s unmistakably curry. I’m adding a sprig or two of curry, plus 3 teaspoons of turmeric and 2 teaspoons of salt to a pot of boiling water. We are boiling and draining our rice similar to how you make pasta. So add enough water so that the rice can move freely. Once the rice is al dente, drain in and set it aside. I have soaked 3 cups of rice for this recipe and drained and rinsed it, but sometimes I don’t soak it first. In a separate saucepan, melt 2 tablespoons of coconut oil (that’s our coconut flavor, but the recipe calls for coconut pieces), and saute 2 teaspoons of fenugreek (the recipes calls for fenugreek seeds which I didn’t have), and 1-2 tablespoons of chili flakes (the recipe calls for red chilis which I can’t source easily here). To that quickly add 4 tablespoons of red lentils (the recipe calls for lentils that are ground and almost powdery or like flour, but mine didn’t grind well so I left them whole). Add the juice of 5 limes. I also added a sprig or two of curry and a dash of curry powder. Saute until softened. I added water and cooked them until they were soft. Next, add the lentil mixture to the rice in layers and toss gently until well incorporated. Do not mix! We don’t want to break the rice. Lastly, saute in coconut oil until brown a cup of cashews (I used unsalted and raw and another time I used salted and roasted), and add that to the rice as a garnish on top or mixed in.
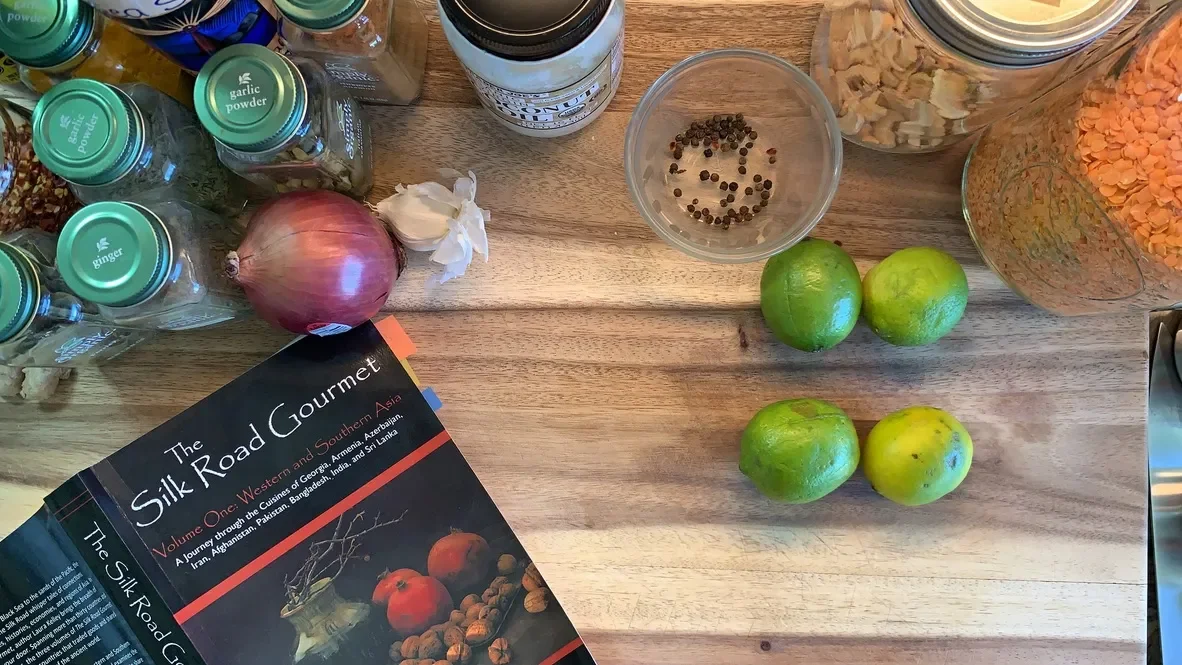
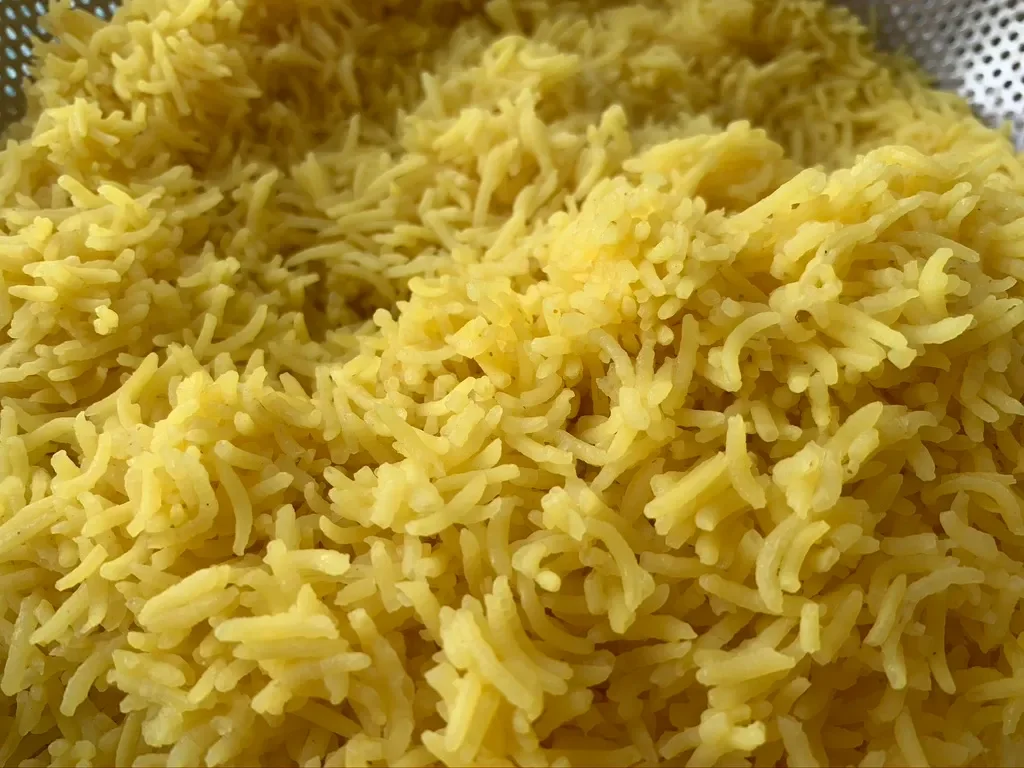

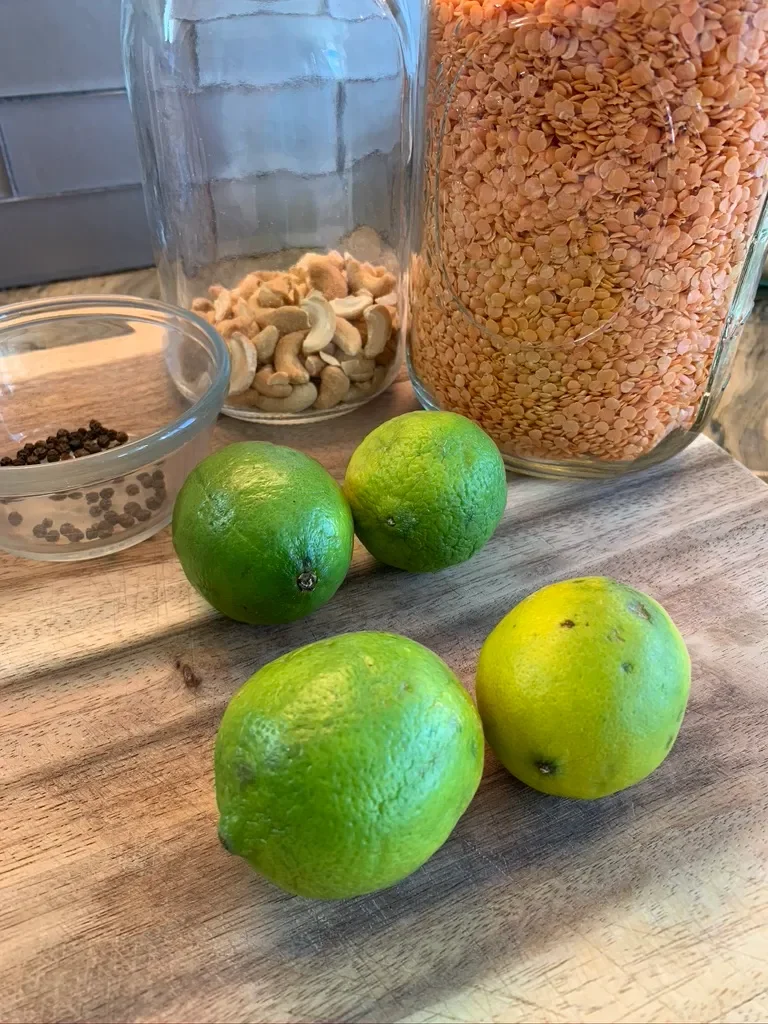

Keema | INDIAN GROUND BEEF | 10 Minute Recipe
If you're in a pinch to make dinner, I recommend learning this recipe! It's my fast version to making Indian ground beef (keema). It's usually served with rice, which could take 15 minutes to make, so if you are really short on time, serve it with naan which you can find in the frozen section of many grocery stores. While my mother in law taught me how to make this using fresh ginger and garlic, I find that in a time pinch, using powdered ginger and garlic work just fine. In fact, they work even better if you have a child (or adult) who is picky about their food and doesn't like the stringy nature of fresh ginger or the bite of garlic.
Here's the super easy recipe:
For every pound of ground beef (you can use any fat content), season with:
1 teaspoon garlic powder
1 teaspoon ginger powder
1 teaspoon paprika (optional and not shown in the video)
1/2 teaspoon cayenne
1 teaspoon turmeric
1 1/2 teaspoon of cumin
Start by lightly frying a whole medium diced onion. Add beef with seasoning. Cook until nearly done (5 minutes or so), and add fresh chopped cilantro to finishing it off.
Check out my other cooking videos here.
Indian Fruit Salad | Fruit Chaat
If you’ve never tried fruit salad with spices, I encourage you to try this. You fruit will get a kick out of it, and so will you! You’ll impress your taste buds with cayenne, salt and pepper mixed with sugar and the sweetness of seasonal fruit and fresh juice. Here’s the recipe:
Ingredients:
1 lemon-squeezed
1 apple-diced
2 oranges-diced
2 cups grapes-sliced in half
1 banana-sliced and reserved for just before serving
Season fruit like strawberries, kiwi or anything you’d like, I find melons don’t work as well with this recipe, but you may like the spicy/sweet combo!
2-3 tablespoons of juice
Cayenne pepper, black pepper, salt and sugar
You can see the cayenne pepper sticking to the fleshy parts of the fruit…yum!
Squeeze lemon into serving dish and remove seeds. Add apples and coat with lemon juice to prevent browning. Add oranges and grapes and other sturdy seasonal fruit if you wish. Add spices. Start with a sprinkle, you can always add more. But if you’ve added too much, don’t worry, you can wash your fruit or add more juice to dilute the spice. Add juice and toss salad.
You can store in the fridge for a few hours, but longer than that and the fruit won’t look as good. You definitely can still eat it and even save it for a day and still enjoy it, but I find the flavors mix too much by then. Just before serving (and after you’ve mixed the spices in), add your sliced bananas. If your banana is overripe, avoid tossing it, if it’s still firm, you can lightly mix. Serve and enjoy! If you plan on pre-making this fruit salad, wait to add the banana until you are ready to serve or eat it.
The first time I tried this salad, I was hooked! That was back in 2003. My sister-in-law made this salad, and I couldn’t get enough of it. I ate everyday for days. While I do like fruit, I don’t seem to eat a lot of it, so spicy, flavorful fruit salad like this certainly helps me get my five servings of fruits and veggies. What’s more, is that it’s hydrating.
I’ve found that fruit chaat is especially good during Ramadan or anytime of year in which you are fasting. Either to start or break your fast, this Indian inspired fruit salad will keep you hydrated longer than just drinking water, at least, that’s what I’ve experienced. There are so many varieties of this beloved Ramadan iftar recipe. I hope you find a combination you love as much as I love this one.
Fruit Chaat with Yogurt Tortilla. Two Ramadan family favorites for iftar.
Curious about the yogurt tortilla dish at the end of this video? That’s another Ramadan family favorite for iftar and while you can enjoy it any time of year, we tend to make it just for Ramadan.
Want to see more recipes? I keep adding recipes to a YouTube Playlist. You can find my most requested recipes as well as ones we hardly make anymore!

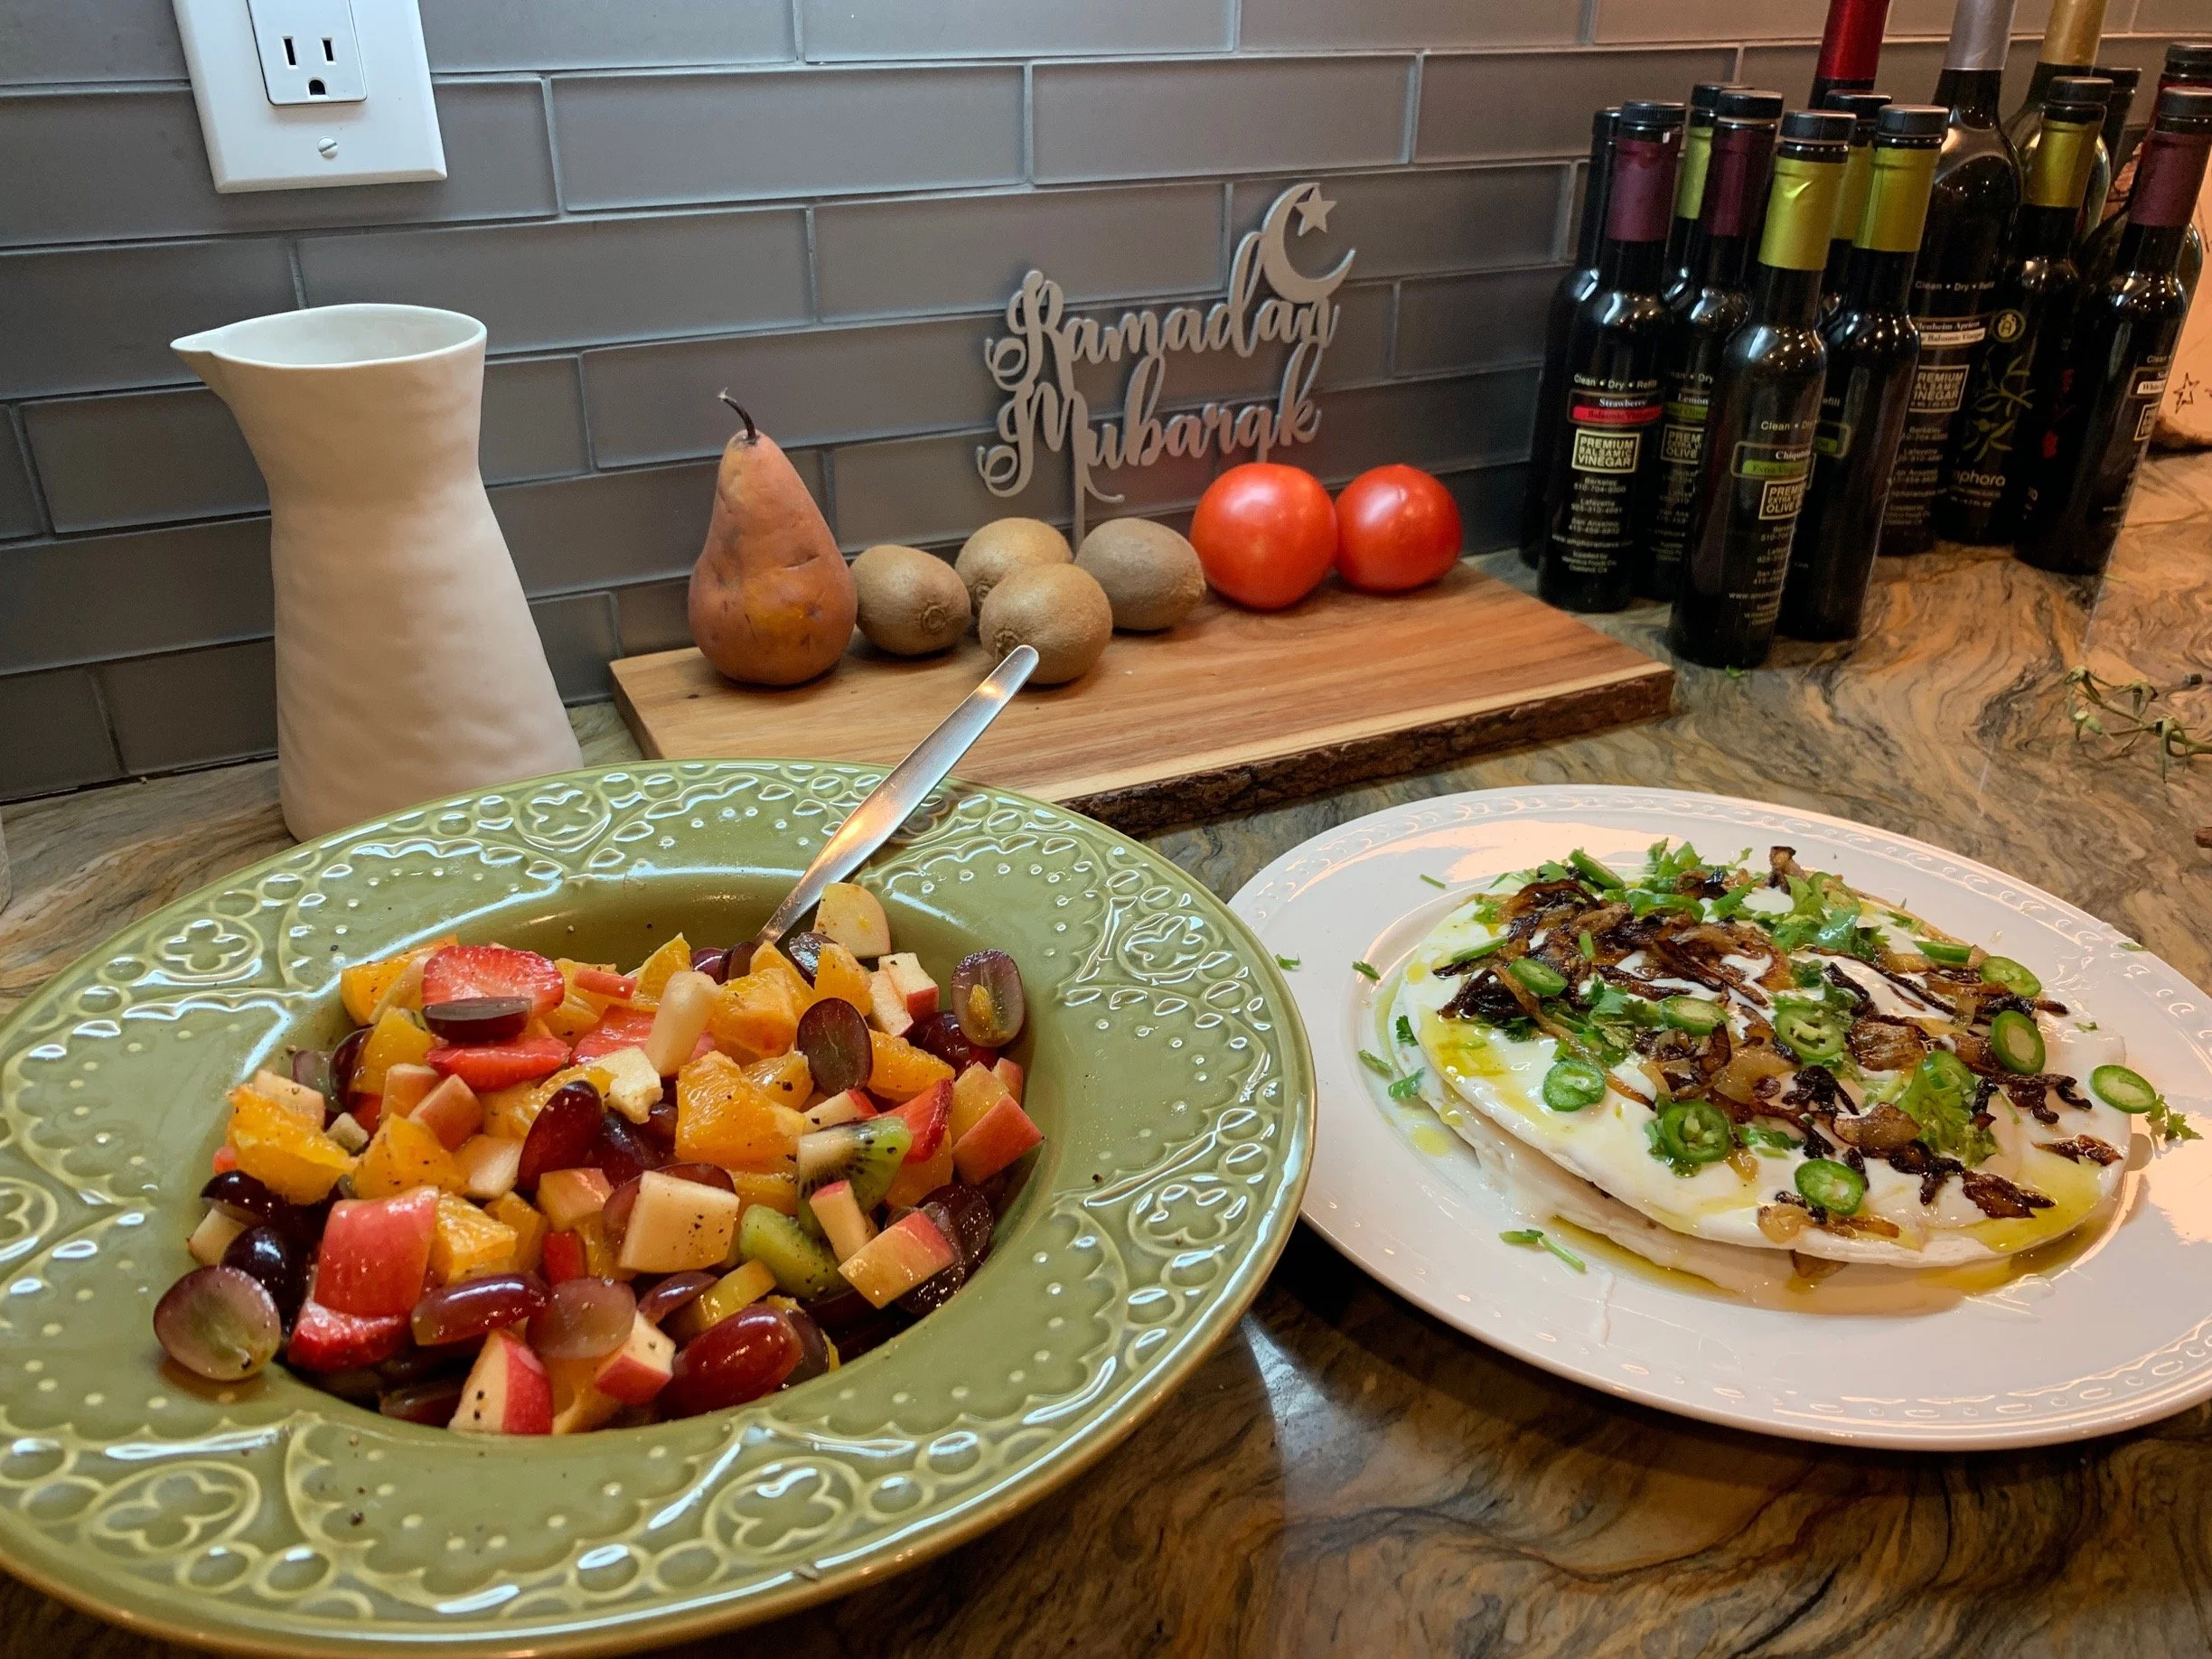
How to Make Indian Garbanzo Bean Salad | Cholay | Chana Chaat
There are some dishes I tend to make just during Ramadan. This is one of them. It’s an Indian inspired recipe was shared with my by my sister-in-law who knows how to make good food, fast! I even have a secret shortcut to this recipe that you can find on the blog post that accompanies this video tutorial.
Cholay is a garbanzo bean side dish that can be served hot or cold and has several varieties. Today’s is a cold version that can be stored in the fridge for hours or even a day or two and the flavors just get better over time. This version may be better known at Chana Chaat. Either way, it’s a delicious protein rich side dish or a meal in itself.
Recipe:
2 cans of garbanzo beans
1 finely diced onion
4 cloves of mashed garlic
3-4 diced tomatoes
handful of chopped cilantro
1 finely diced jalapeno
2 lemons (squeezed)
season with salt, cayenne, cumin and paprika
Mix all ingredients together and drizzle with olive oil. Let sit for 15 minutes or refrigerate for up to one day before serving.
My sister-in-law is not only a great cook, she’s a smart cook. As a full time working mom of four, she knows just the shortcuts she needs to take in order to have nutritious fresh food without spending hours in the kitchen. Here’s her time-saving tip: Buy fresh salsa and mix it with a can of garbanzo beans, and voila! You have cholay!
To see more cooking tutorials, click here!


How To Make Chai Tea | Indian Tea
I've been both praised and despised for my tea. Praised because it always tastes so good, cursed because it's so strong that my tea drinkers are usually up until the wee hours of the morning, tossing and turning because they can't sleep. So with caution and fair warning, here's my tea recipe (which is a combination of tea recipes from my sister in law and a couple of close friends):
2-4 cups of water
5-8 peppercorns
2-3 crushed green cardamom
3-6 cloves
1 cinnamon stick or a generous sprinkle of cinnamon powder
2 teaspoons of loose black tea
2 tablespoons of brown sugar or more or less of your desired sweetener
3 tablespoons of heavy cream or similar creamer
Add all spices (not tea, sugar or cream) to a pot of water. Bring to a boil. Cover and let simmer for as long as you'd like (sometimes I give it 5 minutes, other times, I put it on the lowest flame and leave it for 30 minutes or more while I do something else). Add tea and cover. Remove from heat and let it steep for 3-5 minutes. Next, add cream and sugar and bring back up to a boil. Reduce heat and let it simmer for a couple minutes. Using a strainer, pour into a cup and enjoy!
You can get creative with your chai! Some people like a bit of fresh ginger as well. You can also make this tea with tea bags. In my experience, you need more tea bags than typical to get the desired strength and color.
Smashed Cucumber Salad | Garlic and Sesame Seeds
We love adding recipes from across the world when studying our history units. We love heading to the kitchen for other units as well. Our China unit was supposed to be its own unit at another time, but once we started our Middle Ages unit a few years ago, it just kept growing until that unit became a world history unit. While I have plenty of resources for this unit, there are other materials I wish to add that details the history in addition to the historical facts that are interspersed in this unit. And while I sourced some amazing hands on projects (better than all the other Silk Road units combined), I did overlook one very important resource: a cookbook. Sure my 25 year old Chinese cooking recipe cookbook is suitable, but when I dove into that book to find current inspiration, I found it lacking. Much of what I found in our cookbook are modern recipes you’re likely to find in equivalents an American restaurant. So while I’ll be adding a new cookbook to this unit (along with other materials), I’m currently sourcing my recipes from multiple places.
I’ve been on the hunt for a cucumber salad recipe that tastes just like the one I love from a local Shabu Shabu restaurant. While this recipe, from RecipeTinEats, is so tasty, it’s not quite the same. My 10-year-old daughter, however, loved it soooo much and asks me to make it everyday. This recipe is super easy and quick, but it will take time to chill to allow all those flavors to mix and develop. For that reason, you may want to make this in the morning or the night before, or how we made it where we only let it chill for about an hour or less.
I smashed three Persian cucumbers with a volcanic rock pestle from my mortar and pestle. I roughly sliced them and tossed them in a bowl with toasted sesame seeds heated in olive oil (about 1/4 teaspoon) with raw sesame seeds (1/4 teaspoon), salt, 1-2 tablespoons rice wine vinegar, 5 cloves of smashed garlic and optionally a splash of soy sauce. I altered the recipe and swapped ginger for garlic and omitted the soy sauce this time. I think ponzu sauce might be a nice alternative too. Enjoy!
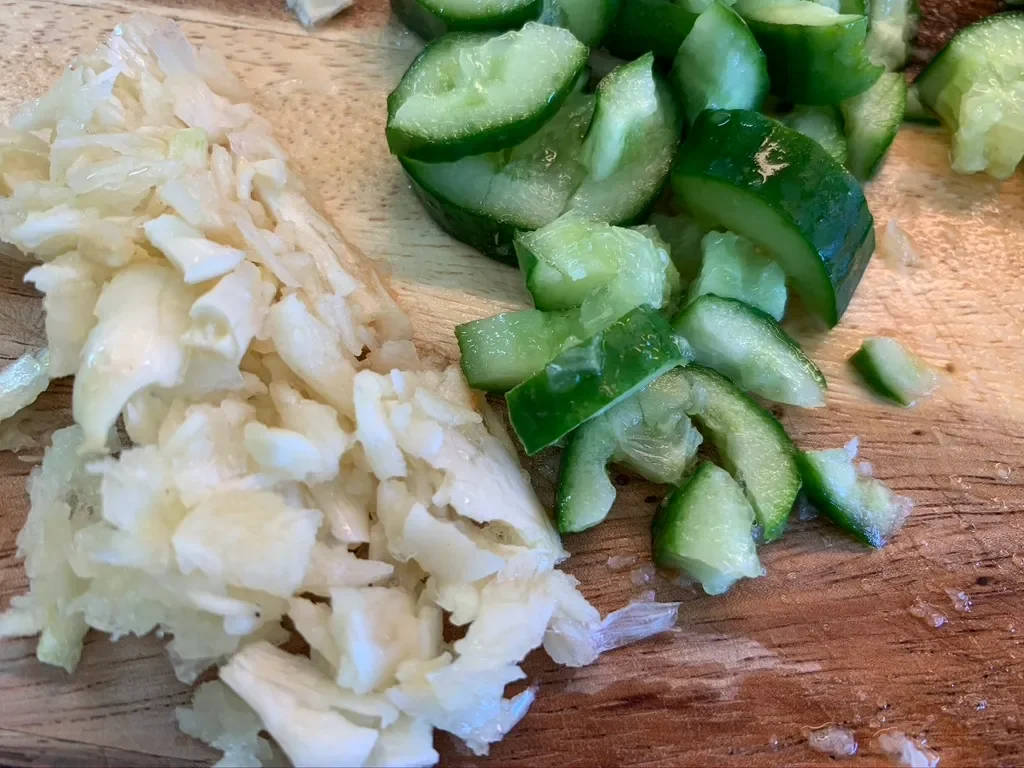
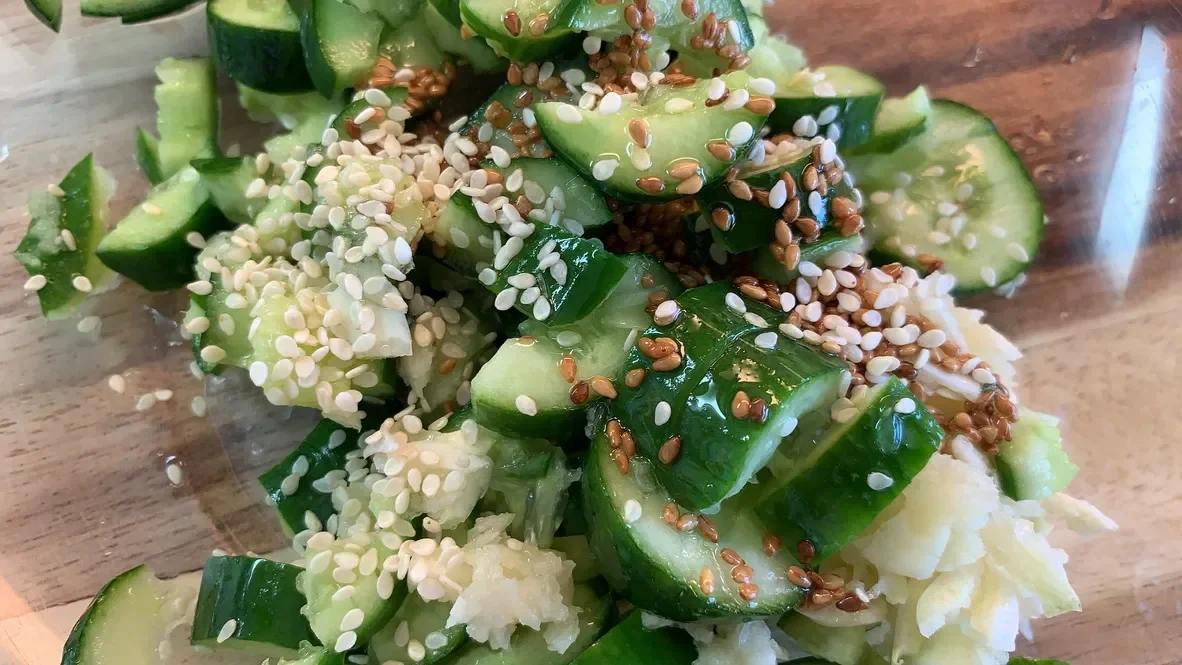
How To Make Lebanese Meat Pies
These Lebanese meat pies were an immediate winner in our home. Everyone loved them and in the years since we've learned how to make them, we still do with some modifications. The dough is a dense, dry and flavorful dough that bakes up smooth and delicious. It calls for yogurt and oil which provide a rich flavorful base for the meat. In the years that followed us making this recipe for the first time, I regularly omitted the yogurt because our son has a life threatening dairy allergy. Because the meat is so flavorful, we aren't missing the yogurt in the dough, though I do prefer it. Also, some of my children don't care for tomatoes, so we often leave them out and the lastly, if I don't have lamb, I'll use ground beef which is a distant second option.
The flavor the lamb is incredible compared to ground beef. If you don't have access to pomegranate syrup you can leave it out, but it adds a sweet tanginess that distinguishes these meat pies, as does the seasonings which are ones we don't typically use in our cooking, so these are unique for us. However, if you cook with allspice, cumin and cinnamon often, these meat pies might not be as special for you as they are for us. Lastly, the pine nuts add a buttery soft crunch that's the perfect garnish to this appetizer or side dish. This recipe accompanies our history unit studies and is from the book Arabesque, a Taste of Morocco, Lebanon and Turkey by Claudia Roden.
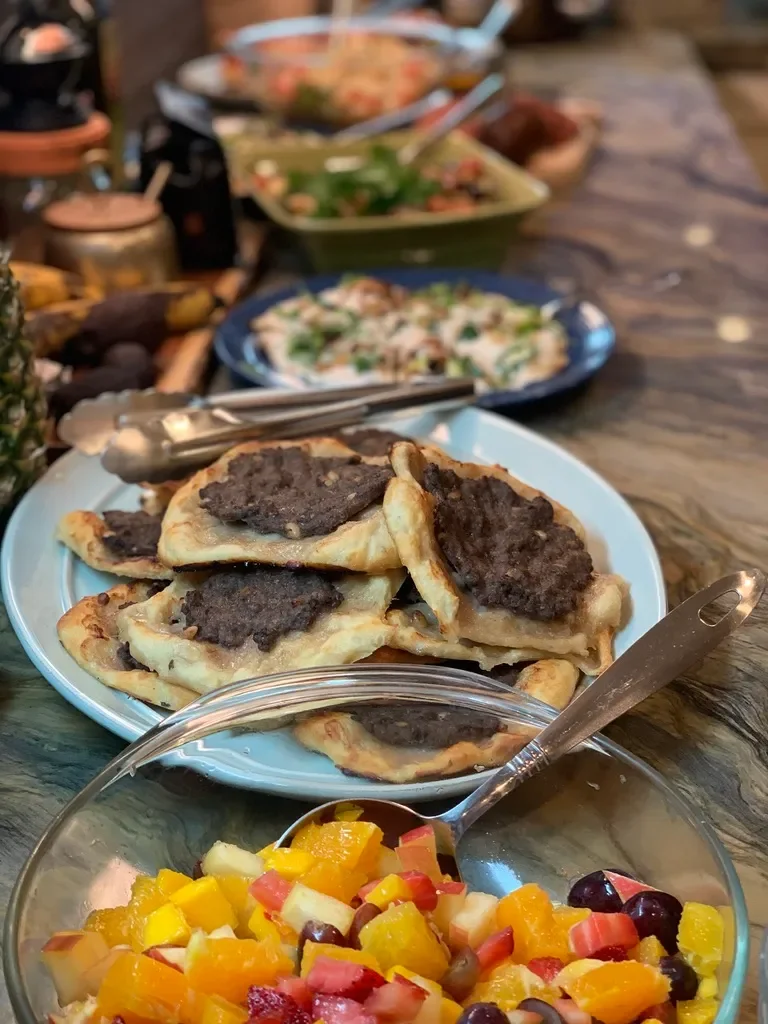
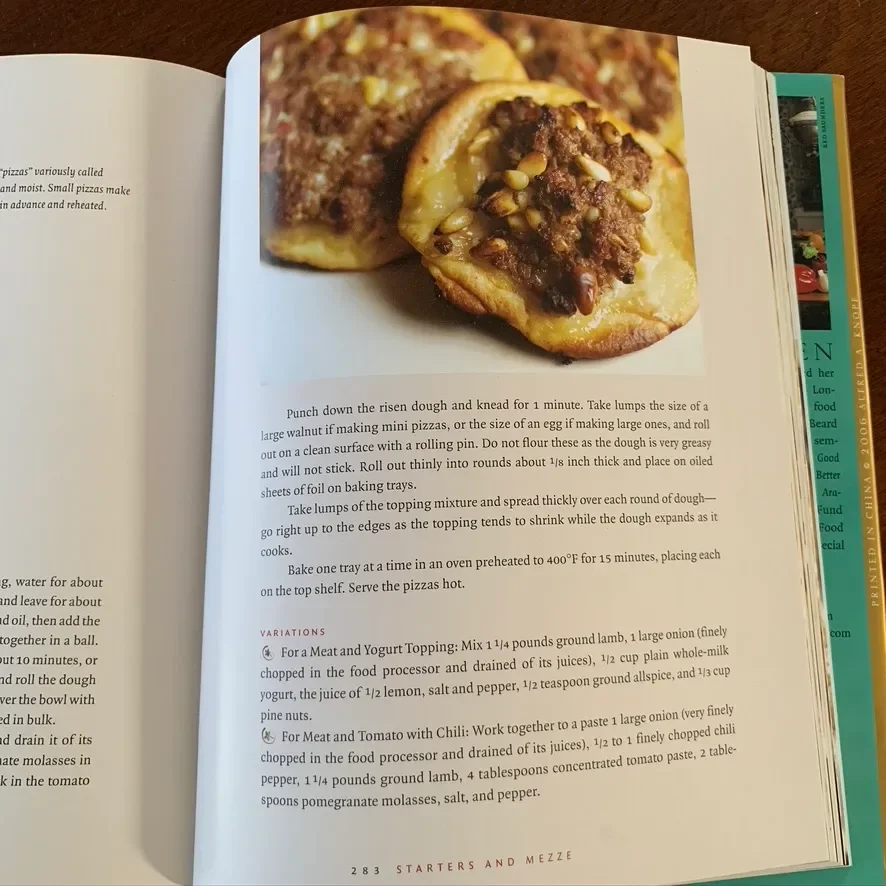
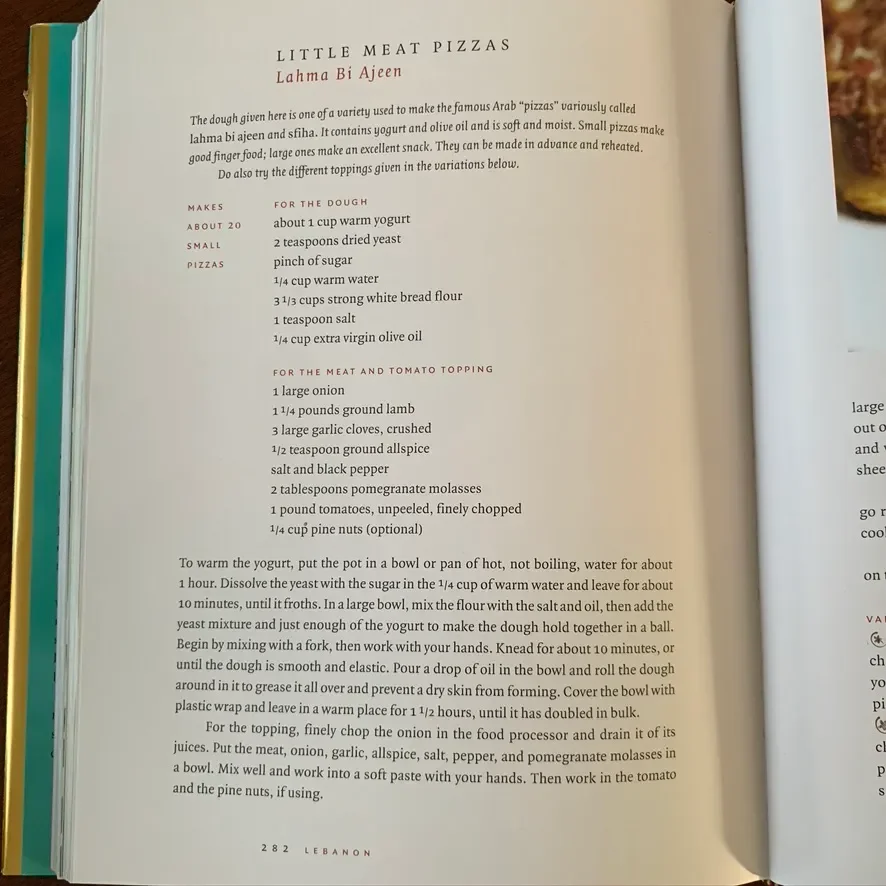
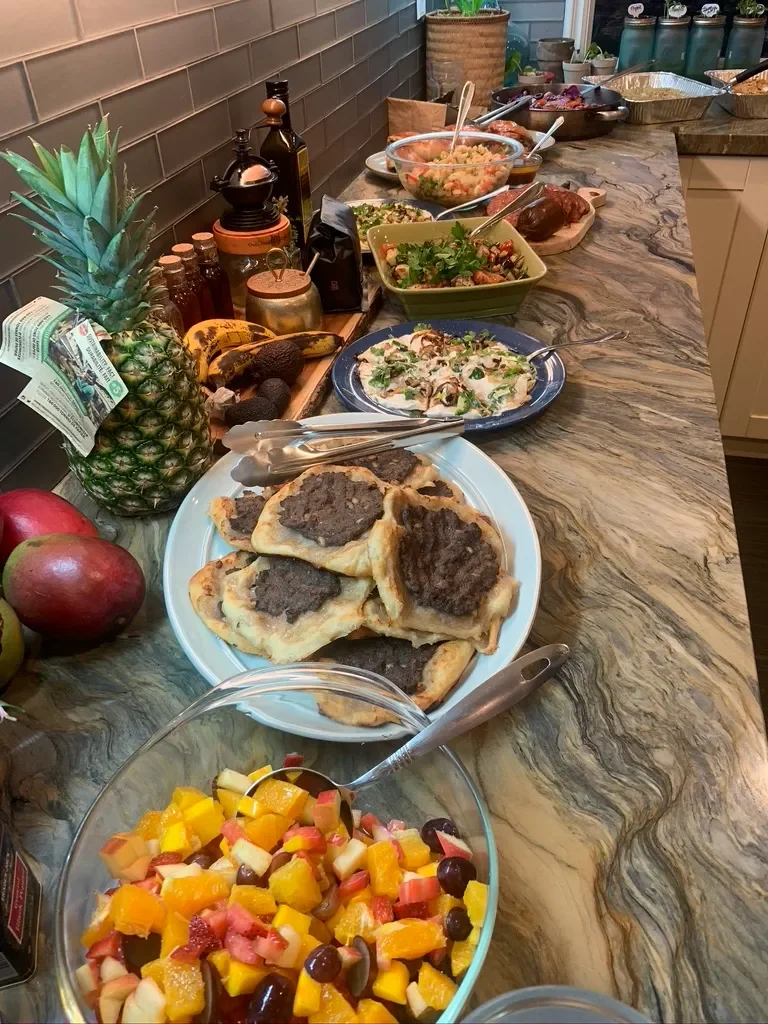
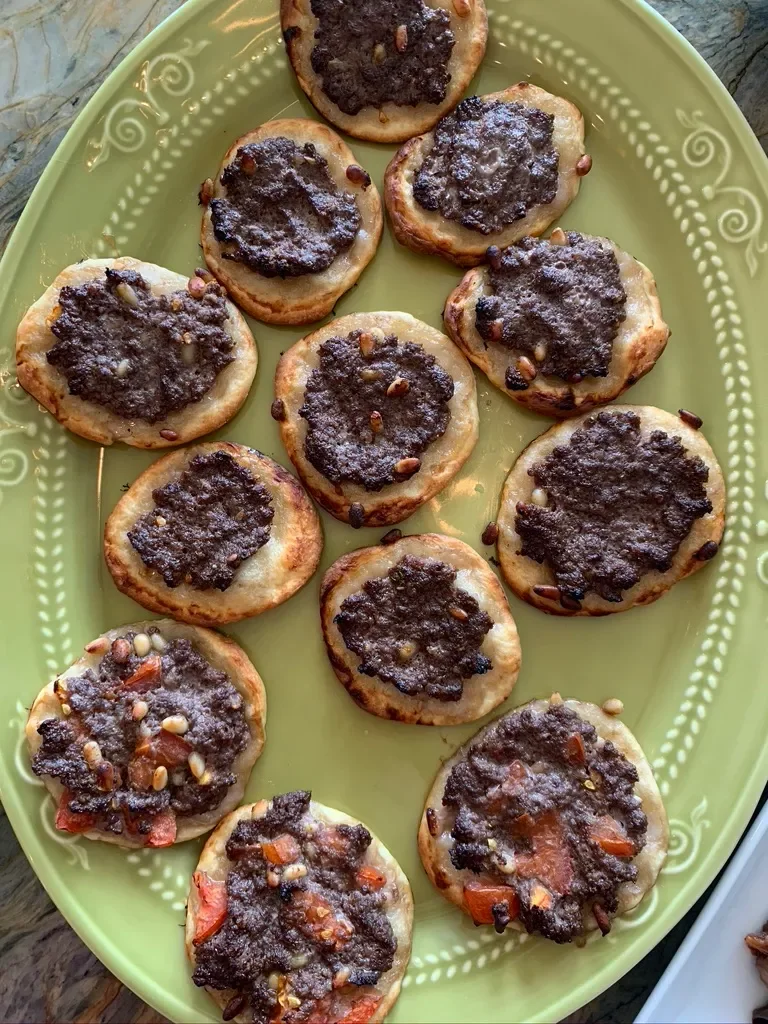
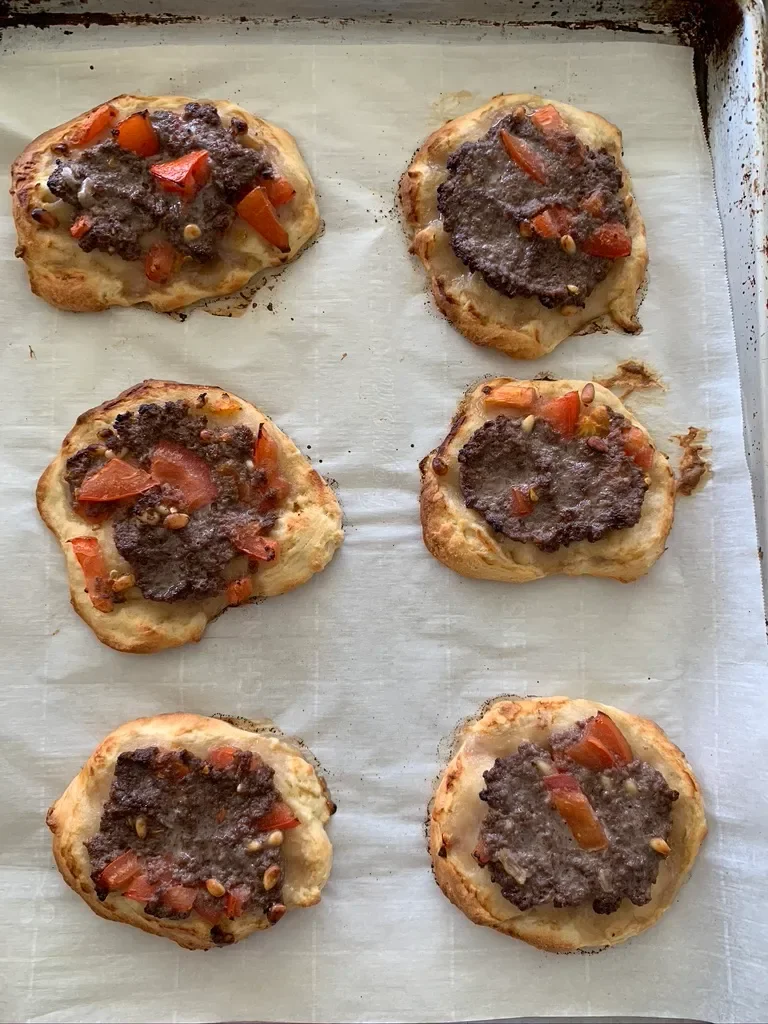
How to Make A Hummus Chicken Bowl
This recipe for a chicken hummus bowl was such a winner in our home, we have since made it often with great success! One thing that will make preparing this dish even faster is to use store bought hummus or make it from a can. I make mine from scratch so I have to plan ahead when I made this. This recipe is from the September 2020 issue of the Eating Well magazine. I made some changes to the recipe as I always seem to do. I added harissa to the spice mix and to the lemon sauce.
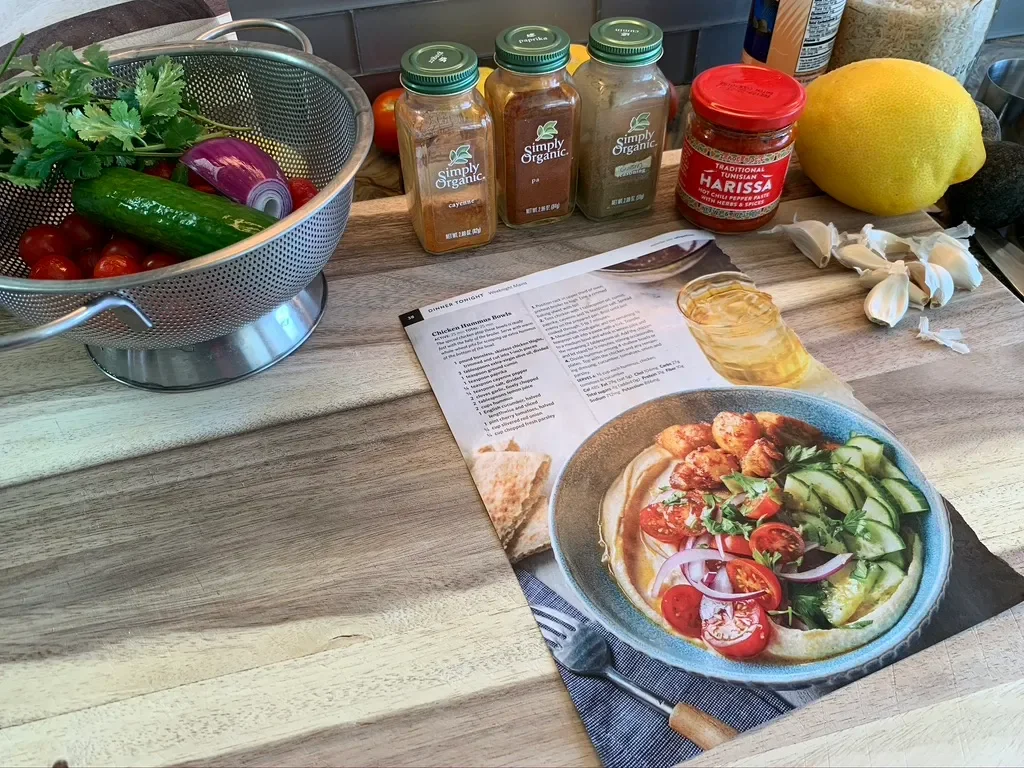
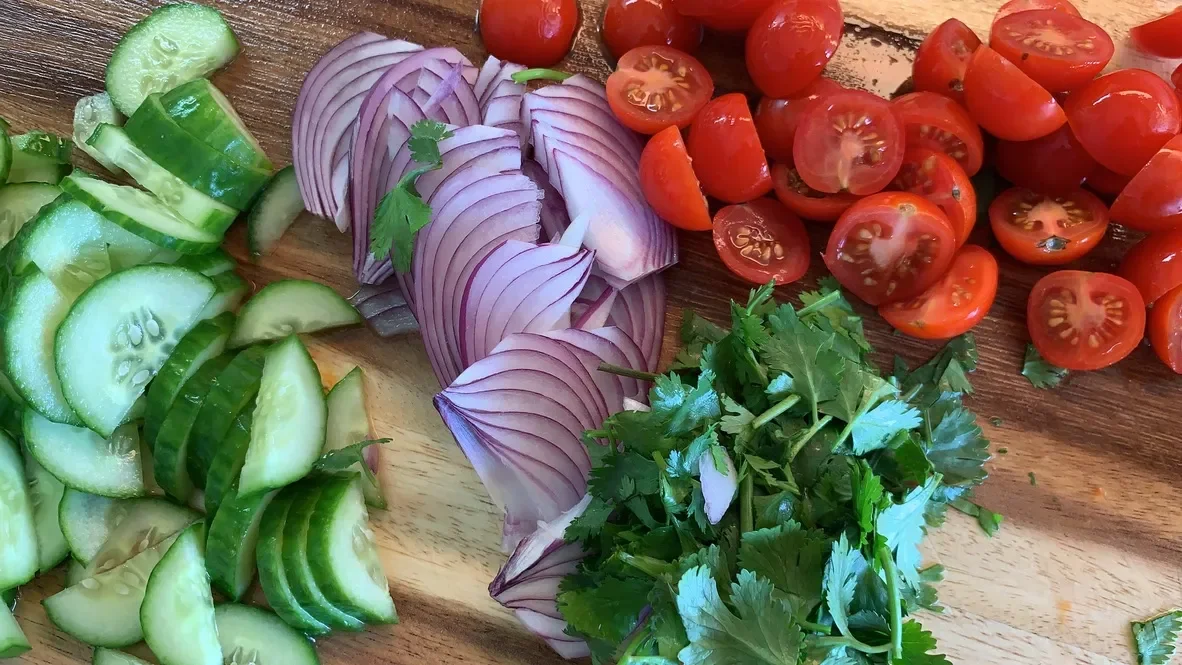

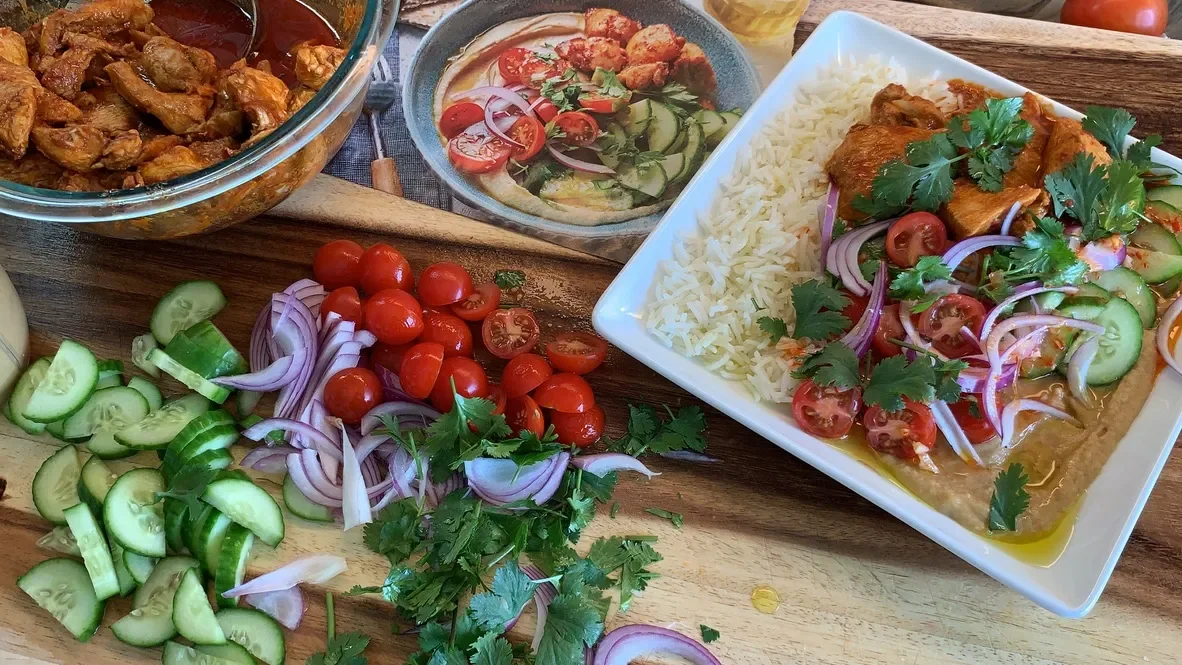
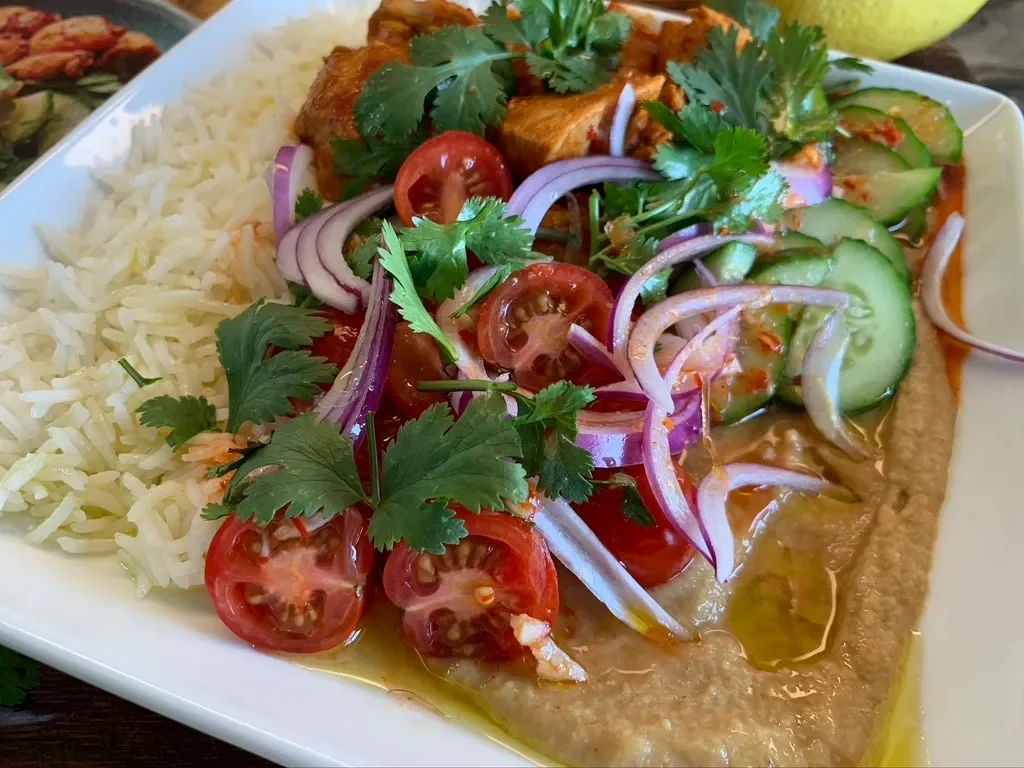
How to Make Hummus | Sesame-free | Allergy-free
This isn’t your traditional hummus recipe. For one thing, you’ll find that I didn’t use tahini. While I love tahini and add it often to our homemade hummus, I omitted it this time, and it tastes just as good! Hummus as a food is generally pretty safe for most known allergens. It’s one food my son (who has many allergies) can eat often and safely. But if you have a sesame seed allergy, you know that you can’t even be around people who are eating hummus. So this recipe features the basics of the beloved hummus ingredients with no tahini (sesame seed paste). It’s possible I like it even better! One thing I do like is using a lot of lemon and garlic. While I share my version of hummus, you may find that you prefer more of one ingredient and less of another.
One version my family loves is with curly parsley. We learned that version of hummus from our Palestinian friend. If you want to make this recipe even faster, just use canned chickpeas. I would recommend you warm them up first. One thing you’ll find about using canned chickpeas is that they are make a smooth hummus. I found that I could never achieve a smooth hummus cooking my garbanzo beans on the stove, even for hours. But once I started using my Instant Pot, I found that my hummus was much smoother, though maybe not quick as smooth as store bought. The basic ingredients I use for hummus are garbanzo beans, lemon, garlic, cumin and salt. I use a dash of paprika and cayenne, but those are optional. They do make nice garnishes sprinkled on top with a sprig of parsley and a pickle. -April 2021