Anatomy

Anatomy
Anatomy the Waldorf way is comprised of three main topic areas: Health and the Human Body, Nutrition and Physiology and Muscles and Bones: Anatomy. It's not correct to call this an Anatomy Main Lesson Block, as anatomy is only one aspect of it. And it's not a Physiology main lesson block either. Anatomy focuses on the structure of the body, muscles and bones, while physiology focuses on how those structures support life. Anatomy is what the body is made of and physiology is how the body works.
This Main lesson block is essentially Nutrition, Anatomy and Physiology, but for the purposes of this post, it will be referred to as Anatomy Main Lesson Block. And while I also share resources for an Anatomy Unit Study, some of those resources may be used for our Waldorf main lesson block, especially the anatomy books which may be used by the teacher/parent as a resource guide in preparation for lessons. Additionally, I have opted to add a workbook to this block that my student may work on as part of daily work. This is my own innovation and is not inline with the Waldorf approach.
The two main resources I am using for this block is the Live Education Waldorf Curriculum for grade 7 Hygeia: Nutrition and Physiology and Live Education Waldorf Curriculum for grade 8 Human Anatomy and Physiology and the Charles Kovacs book on Muscles and Bones. While the Live Education curriculum has an anatomy block in both 7th and 8th grade, I'm starting with the grade 7 block at the moment.
Anatomy Resources
-
Waldorf Anatomy Main Lesson Block
Anatomy the Waldorf way is comprised of three main topic areas: Health and the Human Body, Nutrition and Physiology and Muscles and Bones, Anatomy. It's not correct to call this an Anatomy Main Lesson Block, as anatomy is only one aspect of it.
-
How to Put Together an Anatomy Unit Study
Additionally, I have a separate video that shows all the resources we are using to put together an anatomy unit study. You may wonder why the two separate videos and separate set of resources.
-
Anatomy Review | Waldorf Curriculum | Charlotte Mason Living Books
Even though we are officially done with our Waldorf inspired anatomy main lesson block, there are still some lessons that have yet to be included in our main lesson book. This actually happens frequently when we complete a main lesson block.
Anatomy Lessons
-
Anatomy Lesson 1 | Waldorf Main Lesson Block
For Lesson 1, we read the Charles Kovac's book Chapter 1 Uprightness and the Spine in the section on Health and the Human Body. While the chapter is short, we included many historical and religious references to add to this lesson which ended up taking over an hour whereas the reading would have taken less than 20 minutes.
-

Anatomy lesson 2 | Posture & Gait
For Lesson 2 of our Anatomy Main Lesson Block, we continued with Charles Kovacs book on Muscles and Bones chapter 2. In this chapter, Kovacs highlights the importance of posture in sitting and standing emphasising its importance on digestion and overall health.
-
Anatomy Lesson 3 | The Spine
While doing our lesson on Posture and Gait, we decided to add a lesson on The Spine. For this lesson, I used the book The Human Body by Five Mile Press for information on the spine, but more importantly as drawing inspiration for this lesson.
-

Lesson 4 | Head, Trunk and Limbs
For lesson 4 we read from Charles Kovacs book on Muscles and Bones chapter 3 on the Head, Trunk and Limbs. This lesson remarks on the uprightness of the human being.
-
Lesson 5 | The Manners of Sleep
In this lesson, we continue with Charles Kovacs book on Muscles and Bones chapter 4 on Sleep to explore when our vertical spine is horizontal. When we sleep our spine is at rest, and so are our limbs and so is our brain.
-
Lesson 6 | The Skin | Hand Self Portrait
Our lesson on Skin based on Chapter 5 and 6 in Charles Kovacs book on Muscles and Bones titled Skin and Care of Skin was expected to be a single page on written work with a small illustration.
-
Anatomy Lesson 7 | Epidermis and Dermis
Did you know that our dead skin, the outermost layer called the epidermis, not only acts as a first defense against germs, but protects our sensitive dermis, the middle layer of skin, which is more sensitive and tender than our epidermis.
-
Lesson 8 | The Skin | The Skin's Sensory Receptors
After our first hand self portrait was such a hit, we were sadly disappointed and humored and humbled by these efforts to draw the palm of our hand. We both found it challenging and un-enjoyable.
-
Anatomy Lesson 9 | Our Body, Our World
Did you know that the composition of our bodies mirrors the composition of the planet? The planet is roughly 2/3 water, 71% to be exact and our bodies are also roughly 2/3 water though the exact percent is a little more complicated as babies have a higher percentage of water versus adults.
-
Anatomy Lesson 10 | Digestion
We all know we need to chew our food before we swallow it. But why? In this lesson we cover the role of teeth, chewing, and saliva in the role of digestion. We learn how important it for our mouth to 'water' in anticipation of food and how we literally would not be able to swallow if it were not for our saliva.
-
Anatomy Lesson | The New Food Pyramid
The one book I didn't find to add to our main lesson block was a book on nutrition. They are out there! But the ones I found in abundance were either lifestyle nutrition books like going vegan, keto or carnivore, or ones related to weight-loss or anti-inflammatory diets or books that were similar.
-
Lesson 12 | The Circulatory System
For our lesson on the circulatory system and the heart, we used both Charles Kovacs book on Muscles and Bones and Anatomicum: Welcome to the Museum Hardcover – by Jennifer Z. Paxton.
-
The Lungs and the Respiratory System
We spent several lessons covering the rhythmic system of the body including the lungs and heart. We learned about blood, veins, arteries, carbon dioxide, oxygen, breathing, the pulse and much more.
-
Lesson 14 | Blood and the Heart Valves
We continue our lessons on the heart with this lesson detailing the movement of the blood through the heart and the heart as the center of the not just the circulatory system but the center of feelings. The heart may not travel throughout the body to know what is going on, yet all the blood travels through the heart twice on its journey.
-
The Liver | Lesson 15
We continue our lessons for our Anatomy Main Lesson Block in Anatomy with this lesson on the Liver. In Muscles and Bones by Charles Kovacs, the book is divided into three sections with the middle being 'Physiology' which includes a chapter on the liver and kidneys.
-
The Kidney | Lesson 16
We continue our lessons for our Anatomy Main Lesson Block in Anatomy with this lesson on the Liver. In Muscles and Bones by Charles Kovacs, the book is divided into three sections with the middle being 'Physiology' which includes a chapter on the liver and kidneys.
-

Waldorf Main Lesson Anatomy | Ears
As we progress with our Anatomy main lesson block, we have to pick up lessons we didn't include in our main lesson book. When working through a main lesson block, some lessons don't end up in the main lesson book, or others get consolidated so that several lessons have just one entry.
-
Waldorf Main Lesson Anatomy | Eyes
If I could do every lesson where it is possible to do a self portrait, I would do that. We've only done 3 self portraits during this unit, and if I ever do this main lesson block again, I will do every lesson (if possible) as a self portrait because the level of reverence for our body, the attention to detail and the observation necessary combined made these lessons some of the best from this block.
-
The Anatomy of Taste and the Other Senses
For this lesson on the five senses, we primarily use the book muscles and bones by Charles Kovacs. This is a Waldorf resource for the anatomy main lesson block. We also used for illustration inspiration.

Anatomy Resources
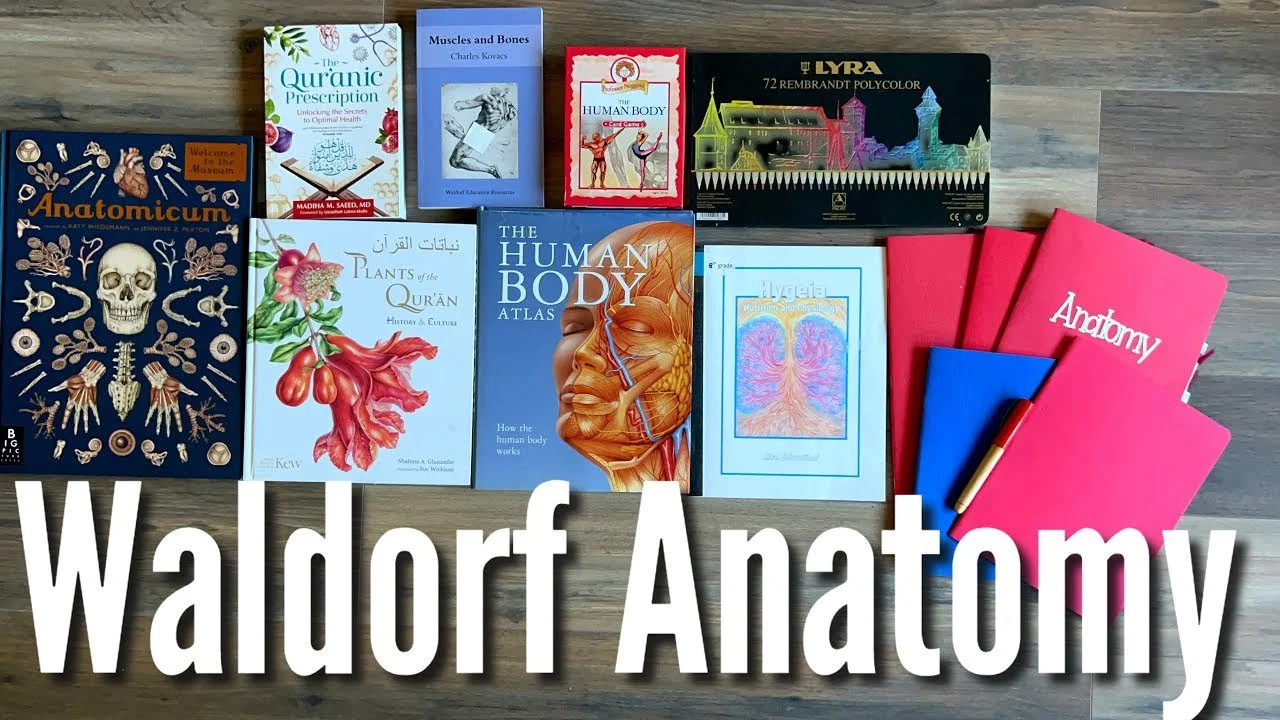
Waldorf Anatomy
The following are the resources we are using to put together our Waldorf Anatomy Main Lesson Block. For this block, I will be using a number of additional resources, especially religious texts or wisdoms to enhance the lessons. While you may not share the same spiritual beliefs, I encourage you to include relevant and personal stories, lessons and wisdoms. One notable resource that is missing from the list below is a a solid book on nutrition. While many of the books I found were diet related (either to achieve a health benefit such as weight loss or reduces inflammation), few were neutral nutrition books, as many has clear biases based on author’s view of plant based versus meat based diets for instance. The few books that were nutrition books that would have worked for this unit appeared to be college textbooks and were out of our budget for this block.
Resources (non-affiliate links except Amazon)
Live Education Waldorf Curriculum for grade 7 Hygeia: Nutrition and Physiology
Live Education Waldorf Curriculum for grade 8 Human Anatomy and Physiology
The Qur'anic Prescription: Unlocking the Secrets to Optimal Health by Madiha M. Saeed
Anatomicum: Welcome to the Museum Hardcover – by Jennifer Z. Paxton
The Human Body Atlas: How the human body works Hardcover – by National Geographic

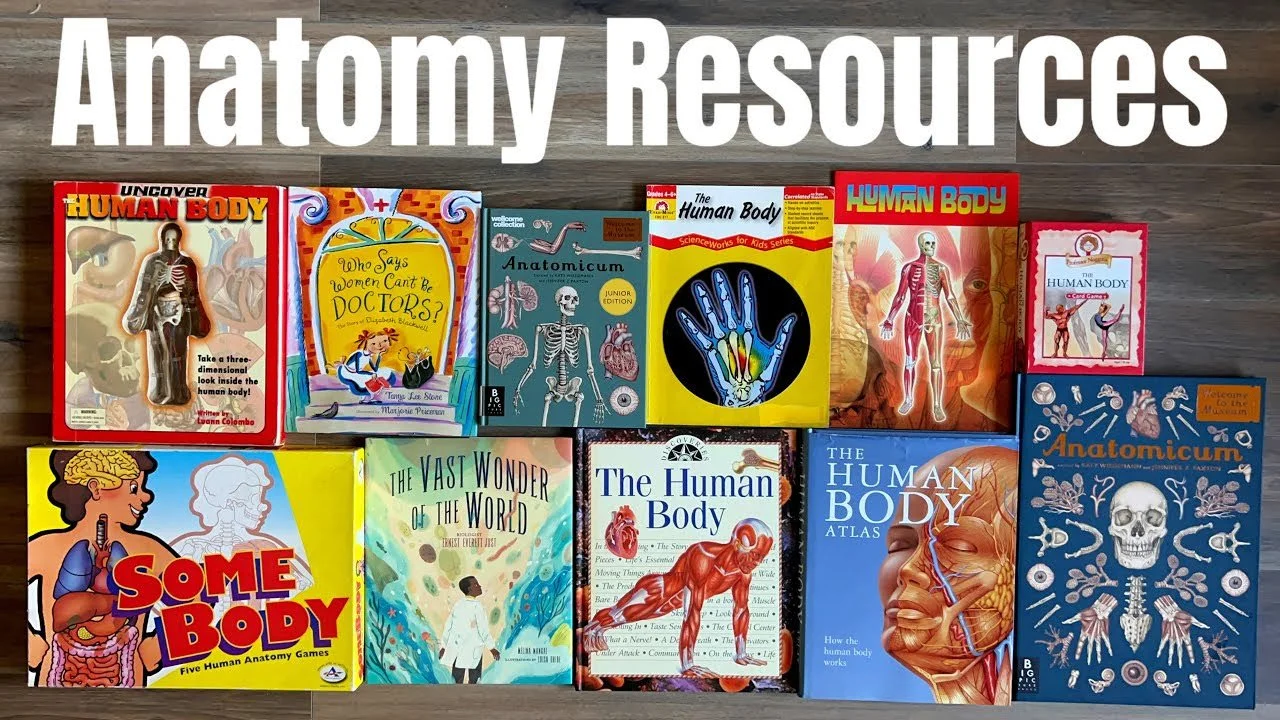
Anatomy Unit Study
Additionally, I have a separate video that shows all the resources we are using to put together an anatomy unit study. You may wonder why the two separate videos and separate set of resources. Anatomy is only one topic area of many that are covered in the Waldorf Main Lesson Block, but if you chose to focus only on anatomy, these resources would be sufficient. While I will use some of the Anatomy resources, I know that a broader resource guide will support the Waldorf approach more holistically.
Resources (non-affiliate links except Amazon)
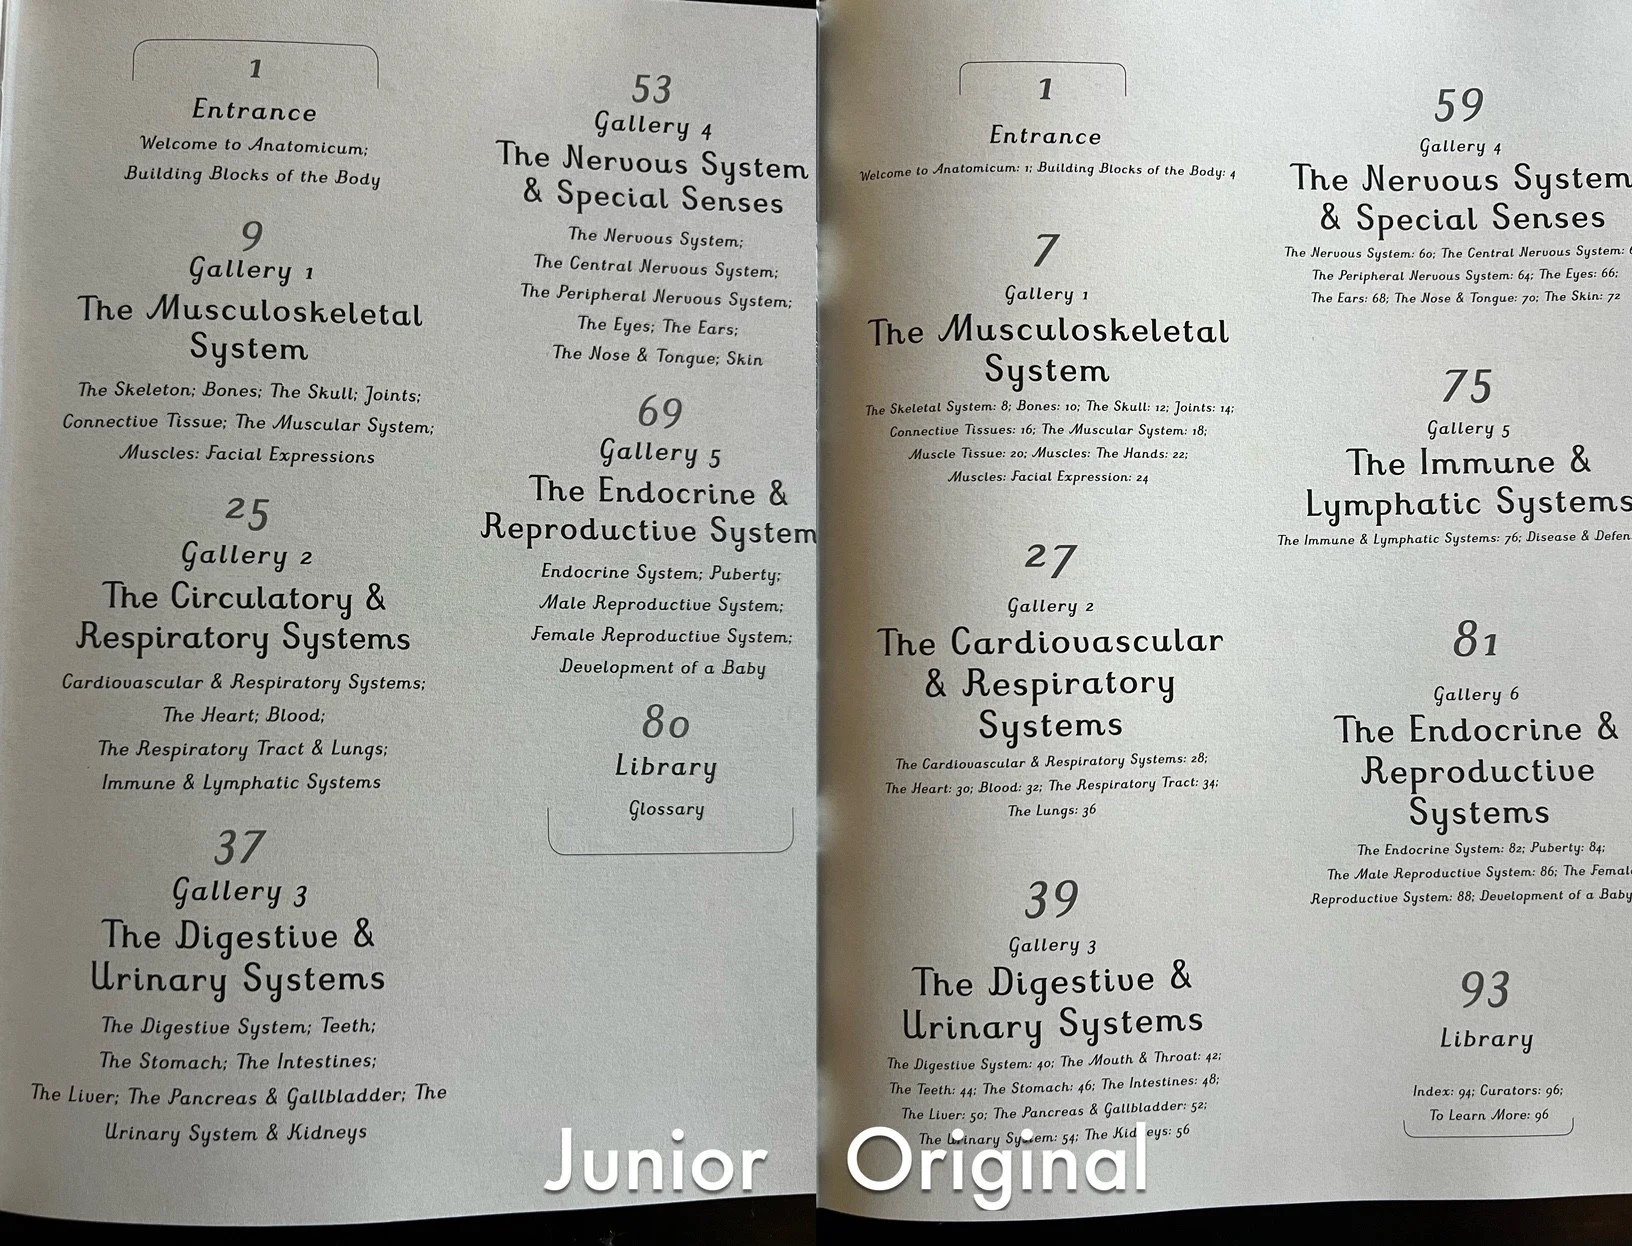
Anatomicum Junior (Welcome To The Museum) Hardcover – by Jennifer Z Paxton
The Human Body Atlas: How the human body works Hardcover – by National Geographic
Anatomicum: Welcome to the Museum Hardcover – by Jennifer Z. Paxton
Food Anatomy: The Curious Parts & Pieces of Our Edible World by Julia Rothman

In case you are wondering how similar the Anatomicum books are (original versus Junior Edition), it turns out they are almost identical. All the illustrations I've seen so far are the same and the content is either the same for some sentences, similar or shortened for the junior edition. Because they are essentially the same, I'll have returned the junior edition. But you may see for yourself in the following pictures.


Anatomy Review
Waldorf Curriculum & Charlotte Mason Living Books
Even though we are officially done with our Waldorf inspired anatomy main lesson block, there are still some lessons that have yet to be included in our main lesson book. This actually happens frequently when we complete a main lesson block. The lessons are done; however, the work is not complete. Usually that work goes over into the new main lesson block. In this case, it will roll over into the new school year!
While this is not ideal, this is our current reality, so, we will begin our school year with work in the two main lesson blocks that completed our previous school year: anatomy and chemistry.
In order to do this, and because so many months have passed, we will complete our work by reviewing these lessons using a few resources. We will use the book by Charles Kovacs to review the lessons in the third section of the book called “muscles and bones “. We will also use the new resources that I purchased while we were completing this main lesson block by troll publishers. These are used vintage books that are no longer in print; however, I really liked the way. The books were written, the content and the illustrations.
For this main lesson block in anatomy, we primarily use the book muscles and bones by Charles Kovac’s rather than our Live education world of curriculum for anatomy. Since we will be reviewing and completing our work, I will choose a few lessons from the Live education board of curriculum to include in these remaining lessons.
Per usual, I like to include Living books and projects and our main lesson blocks and unit studies. I noticed that as my students got older, their enthusiasm for hands-on projects diminished. There is a greater appreciation for demonstrations and experiments rather than hands-on activities. For that reason, I will be including some of the Lesson activities that I hope we’ll have a deeper impact. For instance, for the lesson on digestion and nutrition, we will be logging our meals and observing how we feel after those meals. We will also break down the macro content of those meals to see if we are hitting our nutritional goals.
Any illustrations that will be completed with the remainder of the lessons will be self portraits when possible. If those self portraits are not possible, then I will see about sourcing x-rays. I have taken over the years and use those if relevant. As my daughter has not had any x-rays done we will have to use Ones that we have had as a family. And if that is not possible, then reviewing x-rays, rather than looking at illustrations seems like a better opportunity to explore these lessons from a practical perspective. It also allows us to explore at the other sciences when it comes to optics from a physics perspective as x-rays are a form of light wave.
When using Living books to support a main lesson block, you can easily get overwhelmed by the amount of content you are covering. The best way I’ve seen to incorporate Living books is using them in one of two ways. The first way is to use them as part of your opening activities. Reading a few pages from each of the books or a picture book or illustrated book is a great way to include those Living books as part of your lesson. The other way is to use those resources as a research material for the teacher. Often I like the way books are written for a younger audience, as they are simplified, easy to understand and relevant for the student.


Anatomy Lessons
Anatomy Lessons
-
Anatomy Lesson 1 | Waldorf Main Lesson Block
For Lesson 1, we read the Charles Kovac's book Chapter 1 Uprightness and the Spine in the section on Health and the Human Body. While the chapter is short, we included many historical and religious references to add to this lesson which ended up taking over an hour whereas the reading would have taken less than 20 minutes.
-
Anatomy lesson 2 | Posture & Gait
For Lesson 2 of our Anatomy Main Lesson Block, we continued with Charles Kovacs book on Muscles and Bones chapter 2. In this chapter, Kovacs highlights the importance of posture in sitting and standing emphasising its importance on digestion and overall health.
-
Anatomy Lesson 3 | The Spine
While doing our lesson on Posture and Gait, we decided to add a lesson on The Spine. For this lesson, I used the book The Human Body by Five Mile Press for information on the spine, but more importantly as drawing inspiration for this lesson.
-
Lesson 4 | Head, Trunk and Limbs
For lesson 4 we read from Charles Kovacs book on Muscles and Bones chapter 3 on the Head, Trunk and Limbs. This lesson remarks on the uprightness of the human being.
-
Lesson 5 | The Manners of Sleep
In this lesson, we continue with Charles Kovacs book on Muscles and Bones chapter 4 on Sleep to explore when our vertical spine is horizontal. When we sleep our spine is at rest, and so are our limbs and so is our brain.
-
Lesson 6 | The Skin | Hand Self Portrait
Our lesson on Skin based on Chapter 5 and 6 in Charles Kovacs book on Muscles and Bones titled Skin and Care of Skin was expected to be a single page on written work with a small illustration.
-
Anatomy Lesson 7 | Epidermis and Dermis
Did you know that our dead skin, the outermost layer called the epidermis, not only acts as a first defense against germs, but protects our sensitive dermis, the middle layer of skin, which is more sensitive and tender than our epidermis.
-
Lesson 8 | The Skin | The Skin's Sensory Receptors
After our first hand self portrait was such a hit, we were sadly disappointed and humored and humbled by these efforts to draw the palm of our hand. We both found it challenging and un-enjoyable.
-
Anatomy Lesson 9 | Our Body, Our World
Did you know that the composition of our bodies mirrors the composition of the planet? The planet is roughly 2/3 water, 71% to be exact and our bodies are also roughly 2/3 water though the exact percent is a little more complicated as babies have a higher percentage of water versus adults.
-
Anatomy Lesson 10 | Digestion
We all know we need to chew our food before we swallow it. But why? In this lesson we cover the role of teeth, chewing, and saliva in the role of digestion. We learn how important it for our mouth to 'water' in anticipation of food and how we literally would not be able to swallow if it were not for our saliva.
-
Anatomy Lesson | The New Food Pyramid
The one book I didn't find to add to our main lesson block was a book on nutrition. They are out there! But the ones I found in abundance were either lifestyle nutrition books like going vegan, keto or carnivore, or ones related to weight-loss or anti-inflammatory diets or books that were similar.
-
Lesson 12 | The Circulatory System
For our lesson on the circulatory system and the heart, we used both Charles Kovacs book on Muscles and Bones and Anatomicum: Welcome to the Museum Hardcover – by Jennifer Z. Paxton.
-
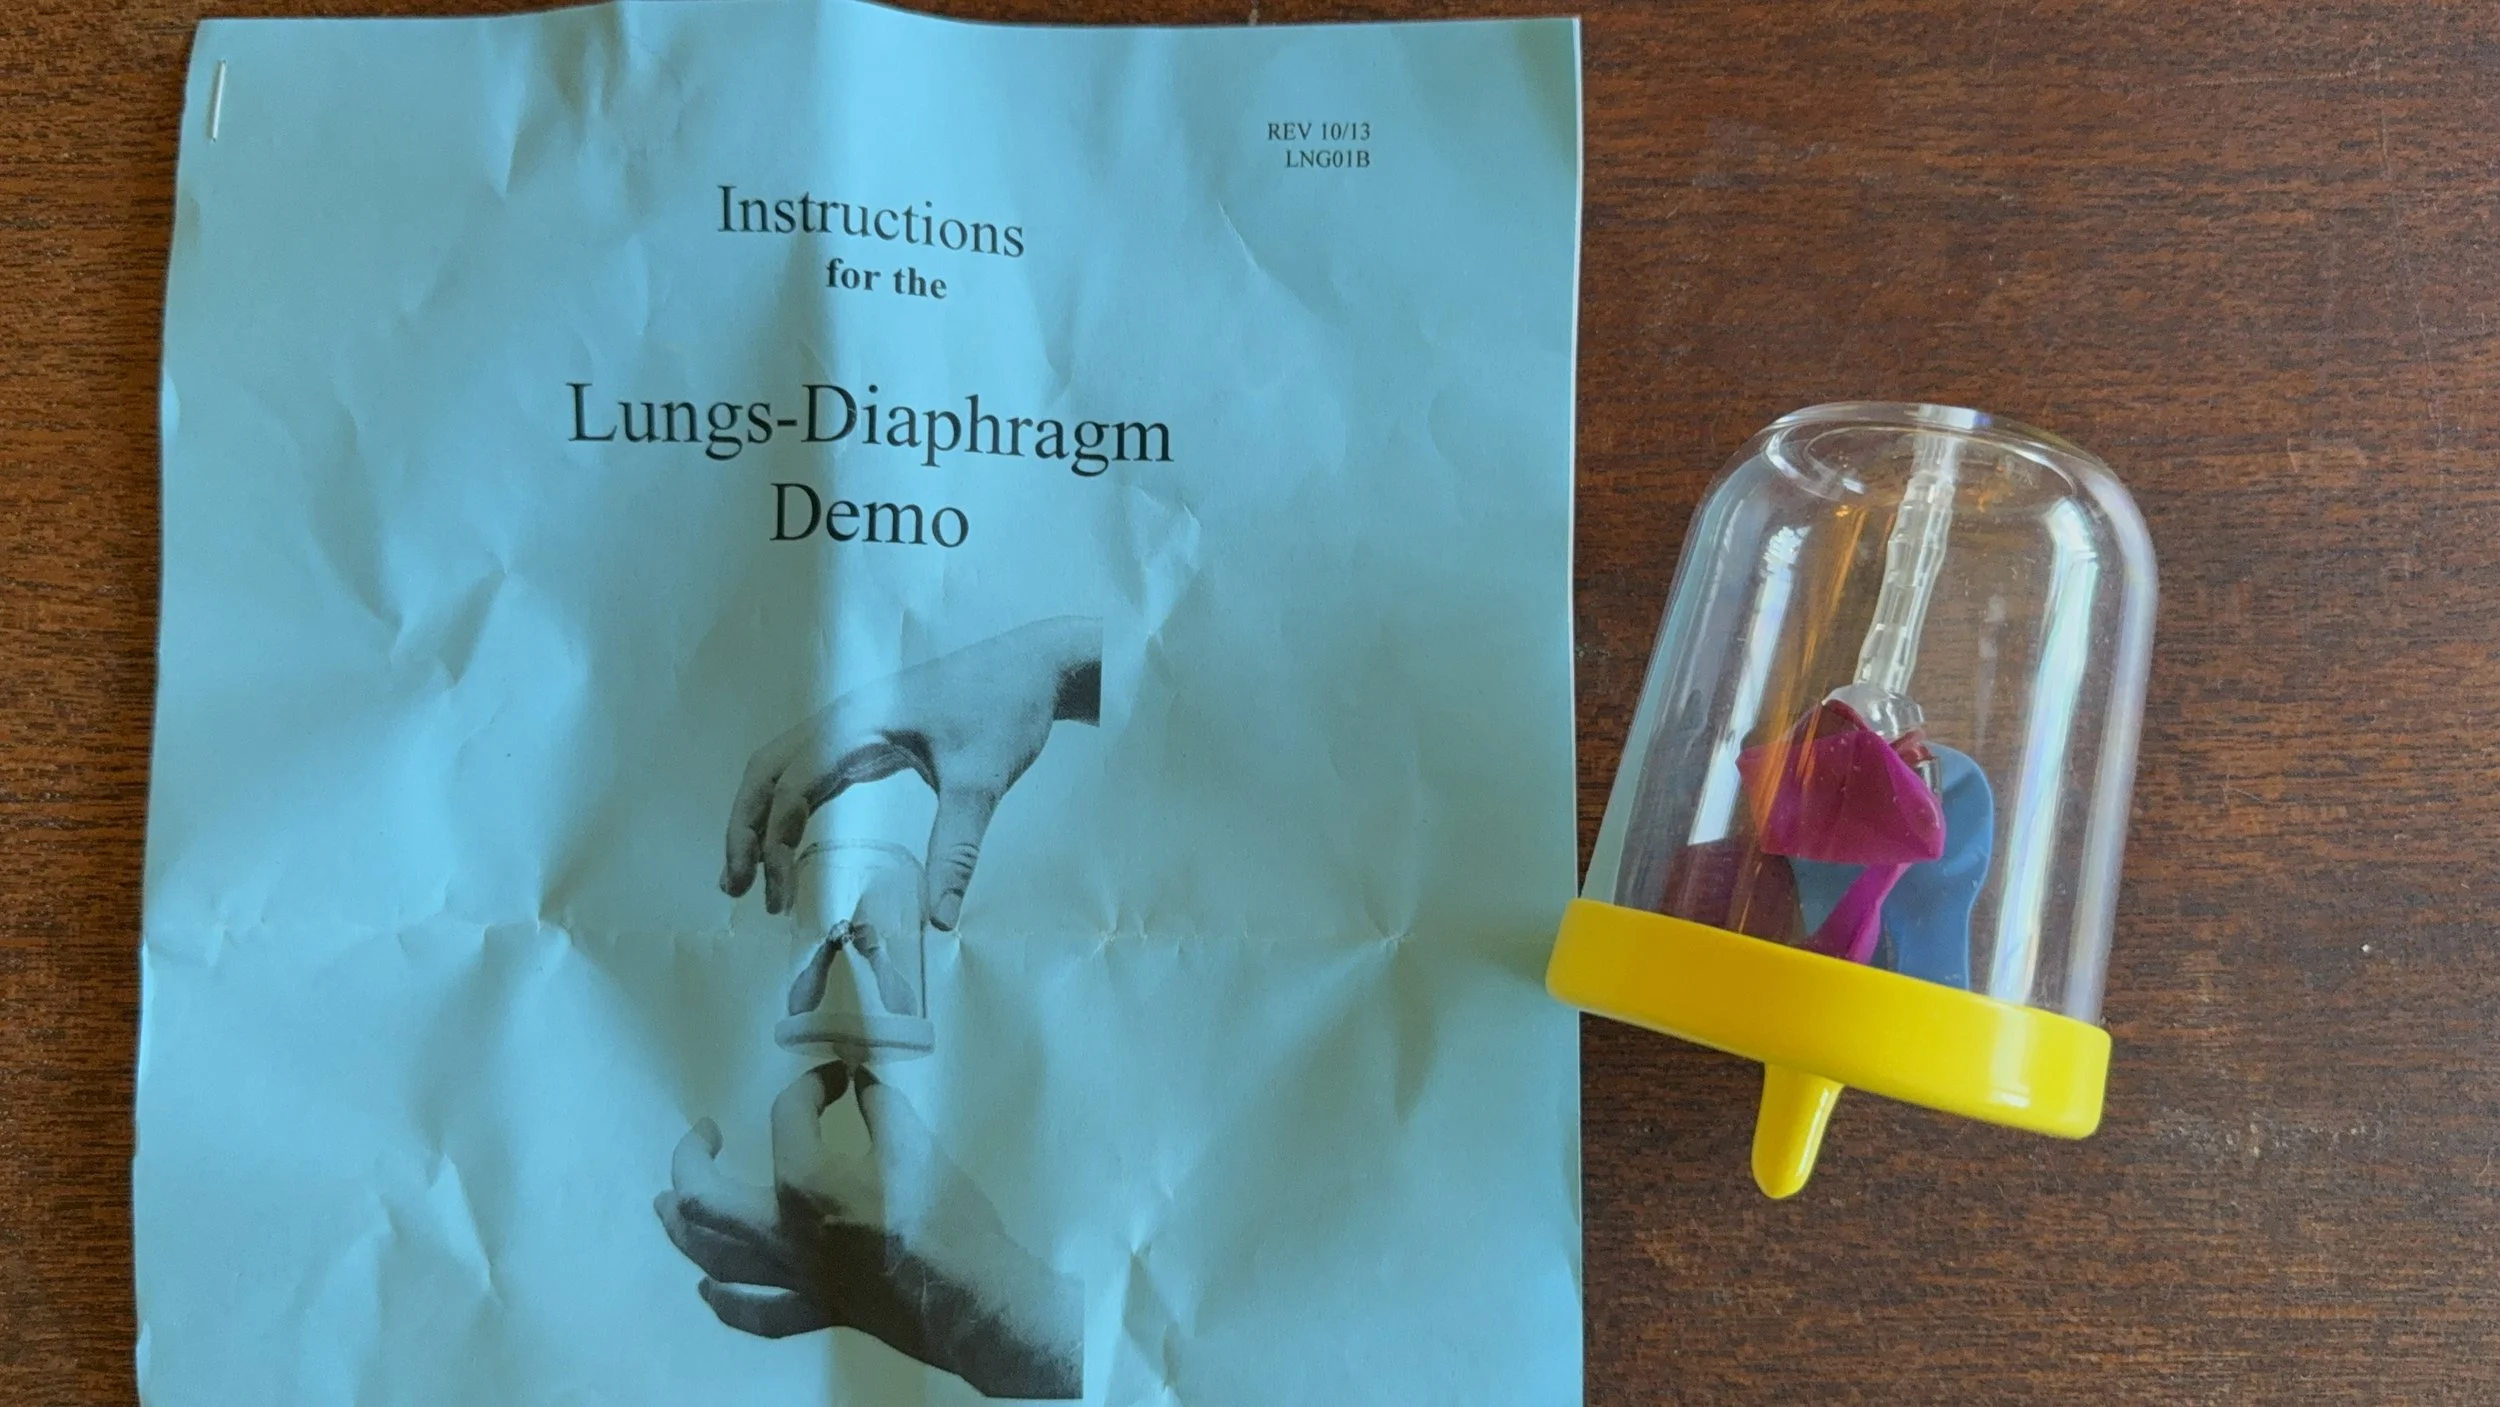
The Lungs and the Respiratory System
We spent several lessons covering the rhythmic system of the body including the lungs and heart. We learned about blood, veins, arteries, carbon dioxide, oxygen, breathing, the pulse and much more.
-
Lesson 14 | Blood and the Heart Valves
We continue our lessons on the heart with this lesson detailing the movement of the blood through the heart and the heart as the center of the not just the circulatory system but the center of feelings. The heart may not travel throughout the body to know what is going on, yet all the blood travels through the heart twice on its journey.
-
The Liver | Lesson 15
We continue our lessons for our Anatomy Main Lesson Block in Anatomy with this lesson on the Liver. In Muscles and Bones by Charles Kovacs, the book is divided into three sections with the middle being 'Physiology' which includes a chapter on the liver and kidneys.
-
The Kidney | Lesson 16
We continue our lessons for our Anatomy Main Lesson Block in Anatomy with this lesson on the Liver. In Muscles and Bones by Charles Kovacs, the book is divided into three sections with the middle being 'Physiology' which includes a chapter on the liver and kidneys.
-
Waldorf Main Lesson Anatomy | Ears
As we progress with our Anatomy main lesson block, we have to pick up lessons we didn't include in our main lesson book. When working through a main lesson block, some lessons don't end up in the main lesson book, or others get consolidated so that several lessons have just one entry.
-
Waldorf Main Lesson Anatomy | Eyes
If I could do every lesson where it is possible to do a self portrait, I would do that. We've only done 3 self portraits during this unit, and if I ever do this main lesson block again, I will do every lesson (if possible) as a self portrait because the level of reverence for our body, the attention to detail and the observation necessary combined made these lessons some of the best from this block.
-
The Anatomy of Taste and the Other Senses
For this lesson on the five senses, we primarily use the book muscles and bones by Charles Kovacs. This is a Waldorf resource for the anatomy main lesson block. We also used for illustration inspiration.
Anatomy Lessons
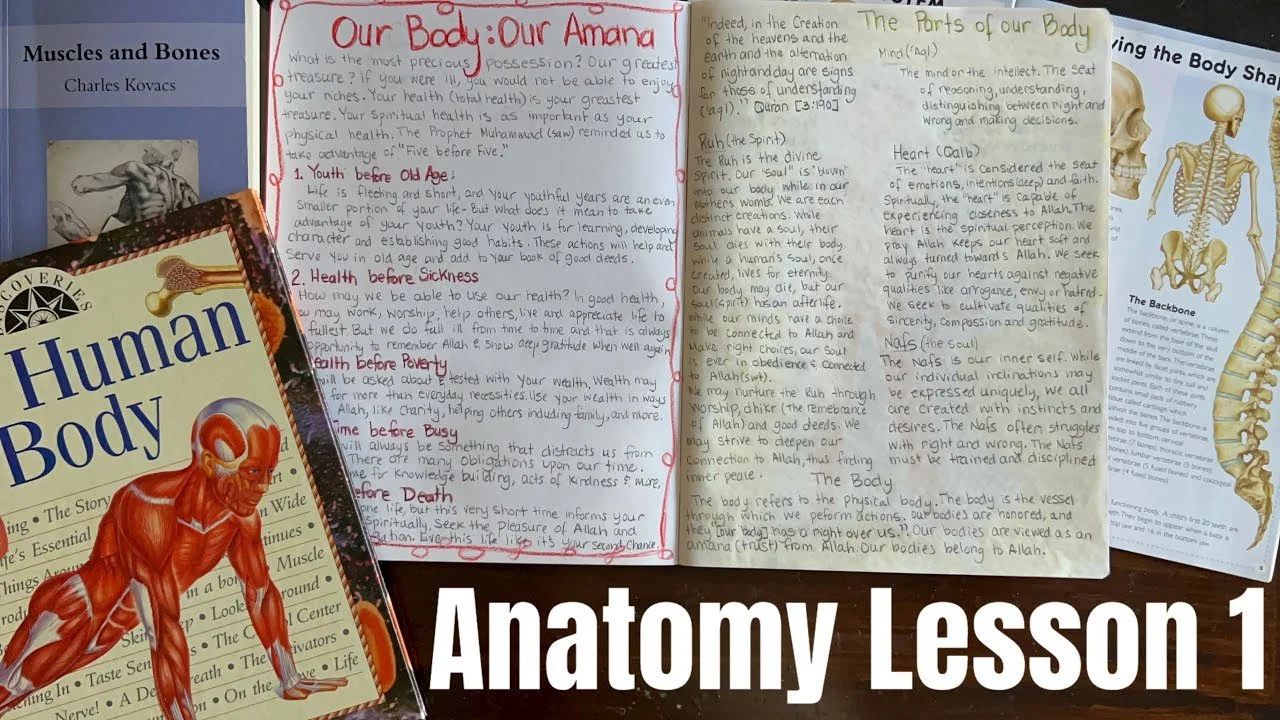
Anatomy Lesson 1
Our Body
For Lesson 1, we read the Charles Kovac's book Chapter 1 Uprightness and the Spine in the section on Health and the Human Body. While the chapter is short, we included many historical and religious references to add to this lesson which ended up taking over an hour whereas the reading would have taken less than 20 minutes. While I had intended to draw an illustration of the spine and go into detail about the wonders of our vertical upright spine and form, I opted for a simple human form in which we talked about (and later wrote about) the aspects of the human body from a religious (and secular) perspective. The body is composed of the physical, mental, emotional, spirit and soul. The physical makes up our physical body: torso, limbs, head and everything within. Our Mental may be imagined as our intellect. Our emotional is often equated to our heart. Our spirit and soul make up our individual essences and the secret of what makes us alive. If you are interested in the additional religious content we used in identifying the parts of the human and the parts of the soul, you may view my notes here. Here are the notes on "Five Before Five".
Anatomy Lesson 2
Posture & Gait
For Lesson 2 of our Anatomy Main Lesson Block, we continued with Charles Kovacs book on Muscles and Bones chapter 2. In this chapter, Kovacs highlights the importance of posture in sitting and standing emphasizing its importance on digestion and overall health. Types of shoes, the structure of the foot and gait were focused on in this chapter as well. For this lesson we did an activity in which we wet our feet on walked on concrete to see our gait and whether we walked straight or whether our feet were angled outward or inward. We also practiced standing on one leg with the other one raised and bent (think the Karate Kid), and practiced balancing with eyes open and closed and compared the difference. We also practiced "Heart to the Horizon" for sitting or standing to ensure correct posture. This is a tip I learned from a practitioner and when we bring your heart up to the horizon, your back and shoulders naturally assume proper posture. We practiced bending from the hips not the waist while sitting to avoiding placing undue pressure on our backs and ensuring correct posture even while sitting.
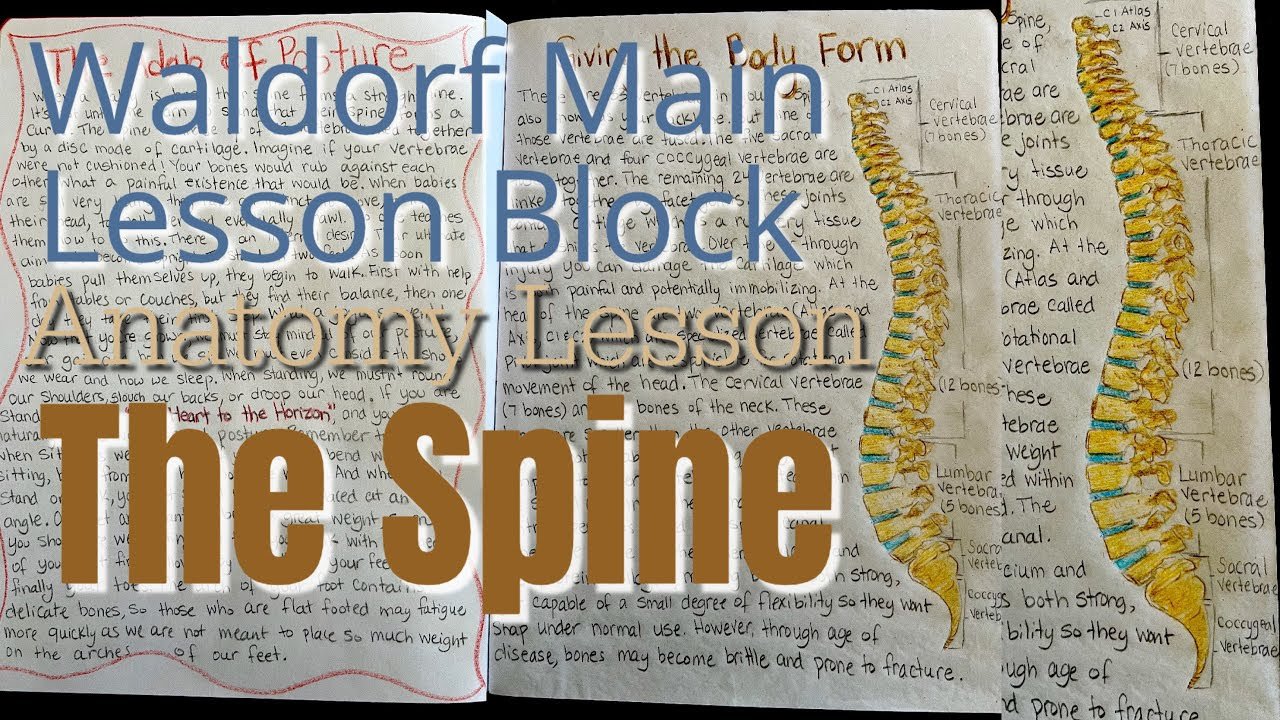
Anatomy Lesson 3
The Spine
While doing our lesson on Posture and Gait, we decided to add a lesson on The Spine. For this lesson, I used the book The Human Body by Five Mile Press for information on the spine, but more importantly as drawing inspiration for this lesson. For this lesson, I wanted to have an illustration that was anatomically accurate so I opted to do something we haven't done before and trace it. For this to work, you need thin or somewhat translucent paper. Tracing paper or even light weight printer paper would work. I found that the main lesson book paper was too thick, but the onion skin separating the pages was just right. So I slipped the book between the pages and traced the spine with a pencil. I came back in with our Lyra Colored Pencils and choose a light tan, yellow and blue to color in the spine. I was so pleased with the outcome, I plan to use this technique moving forward for this Main Lesson Block whenever we need to draw bone or muscular structures we wish to have accurate. My 13-year-old daughter used the same technique and hers turned out beautifully. For the written content, I used the following resources: Anatomicum Junior (Welcome To The Museum) Hardcover – by Jennifer Z Paxton, The Human Body Atlas: How the human body works Hardcover – by National Geographic, Uncover the Human Body: An Uncover It Book Board book – by Luann Colombo (Author), Jennifer Fairman (Author), The Human Body by Five Mile Press, and Discoveries: The Human Body Hardcover – January 1, 2003 by Steve Rose [Consulting Editor]; Parker (Author).
For lesson 4 we read from Charles Kovacs book on Muscles and Bones chapter 3 on the Head, Trunk and Limbs. This lesson remarks on the uprightness of the human being. Whereas animals have a horizontal spine and must use all their limbs for movement and to hold their bodies, humans have an upright vertical spine in which only our legs are needed to support our body and carry us from place to place. Our heads sit upon our trunk with our spinal column connecting the two, and this leaves our hands and arms free to do other things. We may use our hands in charity, in good works and for the betterment of ourselves, others and the world. Our uprightness frees some of our limbs that would otherwise be necessary for movement and stability.
Anatomy Lesson 4
Head, Trunk and Limbs
Anatomy Lesson 5
The Manners of Sleep
In this lesson, we continue with Charles Kovacs book on Muscles and Bones chapter 4 on Sleep to explore when our vertical spine is horizontal. When we sleep our spine is at rest, and so are our limbs and so is our brain. All our body needs rest to recover or heal or grow. If we don't get rest, we cannot function well and disrupt the healing and growing process. We explored the Islamic manner of sleep and sleep hygiene. If you would like to see my notes on the Adab of Sleep, you may see them here.
The Sunnah of Sleeping
In Islam, the Sunnah (practice of the Prophet Muhammad, PBUH) provides guidance on the best sleeping habits. Here’s a summary of what is recommended and discouraged, along with the evidence from hadith:
Sleeping on the Right Side (Sunnah)
The Prophet Muhammad (PBUH) recommended sleeping on the right side as a healthy and spiritually beneficial position.
Evidence: The Prophet said:
“When you go to bed, perform ablution as you do for prayer, then lie down on your right side and say: ‘O Allah, I submit myself to You…’”— Sahih al-Bukhari (No. 6311), Sahih Muslim (No. 2710).
“Lie on your right side when you go to bed.”
— Sunan Abi Dawood (No. 5040).
This position is considered Sunnah and may have known and unknown benefits.
Sleeping on the Left Side (Permissible but Not Preferred)
While sleeping on the left side is not explicitly prohibited, it is less preferred compared to the right side. Some scholars mention that the left side may place more pressure on the internal organs, which could be less ideal for digestion and heart function. However, it is not considered harmful or discouraged in a religious sense.
Sleeping on the Back (Neutral)
Sleeping on the back is neither encouraged nor discouraged in Islamic teachings. It is considered a neutral position as long as it does not lead to harm or discomfort.
Sleeping on the Stomach (Discouraged)
The Prophet Muhammad (PBUH) explicitly discouraged sleeping on the stomach, describing it as a posture disliked by Allah.
Hadith
“The Prophet passed by a man lying on his stomach and said, ‘Indeed, this is a position that Allah dislikes.’”
— Sunan Ibn Majah (No. 3723), Musnad Ahmad (No. 22265).
Another narration states:
“Do not lie on your stomach while sleeping at night or during the day; it is the way of lying that Allah dislikes.”
— Sunan Abi Dawood (No. 5041).
This position is discouraged for both spiritual reasons and potential physical health concerns, as it can strain the spine and neck.
Summary of Sunnah Sleep Practices:
Preferred: Sleep on the right side.
Permissible: Sleeping on the left side or back.
Discouraged: Sleeping on the stomach.
These guidelines are part of the broader Islamic tradition of incorporating mindfulness and healthy habits into daily life, including sleep.
Sleep as a Rest
The Quran references sleep in multiple verses, often highlighting it as a blessing from Allah, a sign of His mercy, and a reminder of the natural cycles created for humans. Here are some key verses:
Quran 30:23
“And of His signs is your sleep by night and day and your seeking of His bounty. Indeed, in that are signs for a people who listen.”
Sleep is one of Allah’s signs, it is a blessing to humans and essential for human rest and rejuvenation, occurring both at night and during the day. Naps or rest is recommended during the day and the night is reserved for sleep, rest and prayer.
Quran 25:47
“And it is He who has made the night for you as clothing and sleep a means for rest, and has made the day a resurrection.”
Here, Allah emphasizes that the night is meant for rest and sleep, symbolizing peace and protection, while the day is designated for activity. Night is as a clothing for people and sleep is a means of rest.
Quran 78:9-11
“And We made your sleep [a means for] rest. And We made the night as clothing. And We made the day for livelihood.”
These verses illustrate how sleep is a gift that provides rest, with the night like a covering, bringing calmness, while the day is meant for work and productivity. Each has its place and position in the day.
Quran 39:42
“It is Allah who takes away the souls at the time of their death, and those that do not die [He takes] during their sleep. Then He keeps those for which He has decreed death and releases the others for a specified term. Indeed in that are signs for a people who give thought.”
This verse draws a parallel between sleep and death, describing sleep as a temporary withdrawal of consciousness, illustrating a deeper spiritual concept.
These verses underscore the Quranic view of sleep as a divine provision for restoration, health, and spiritual reflection, with day and night cycles established as part of the natural order.
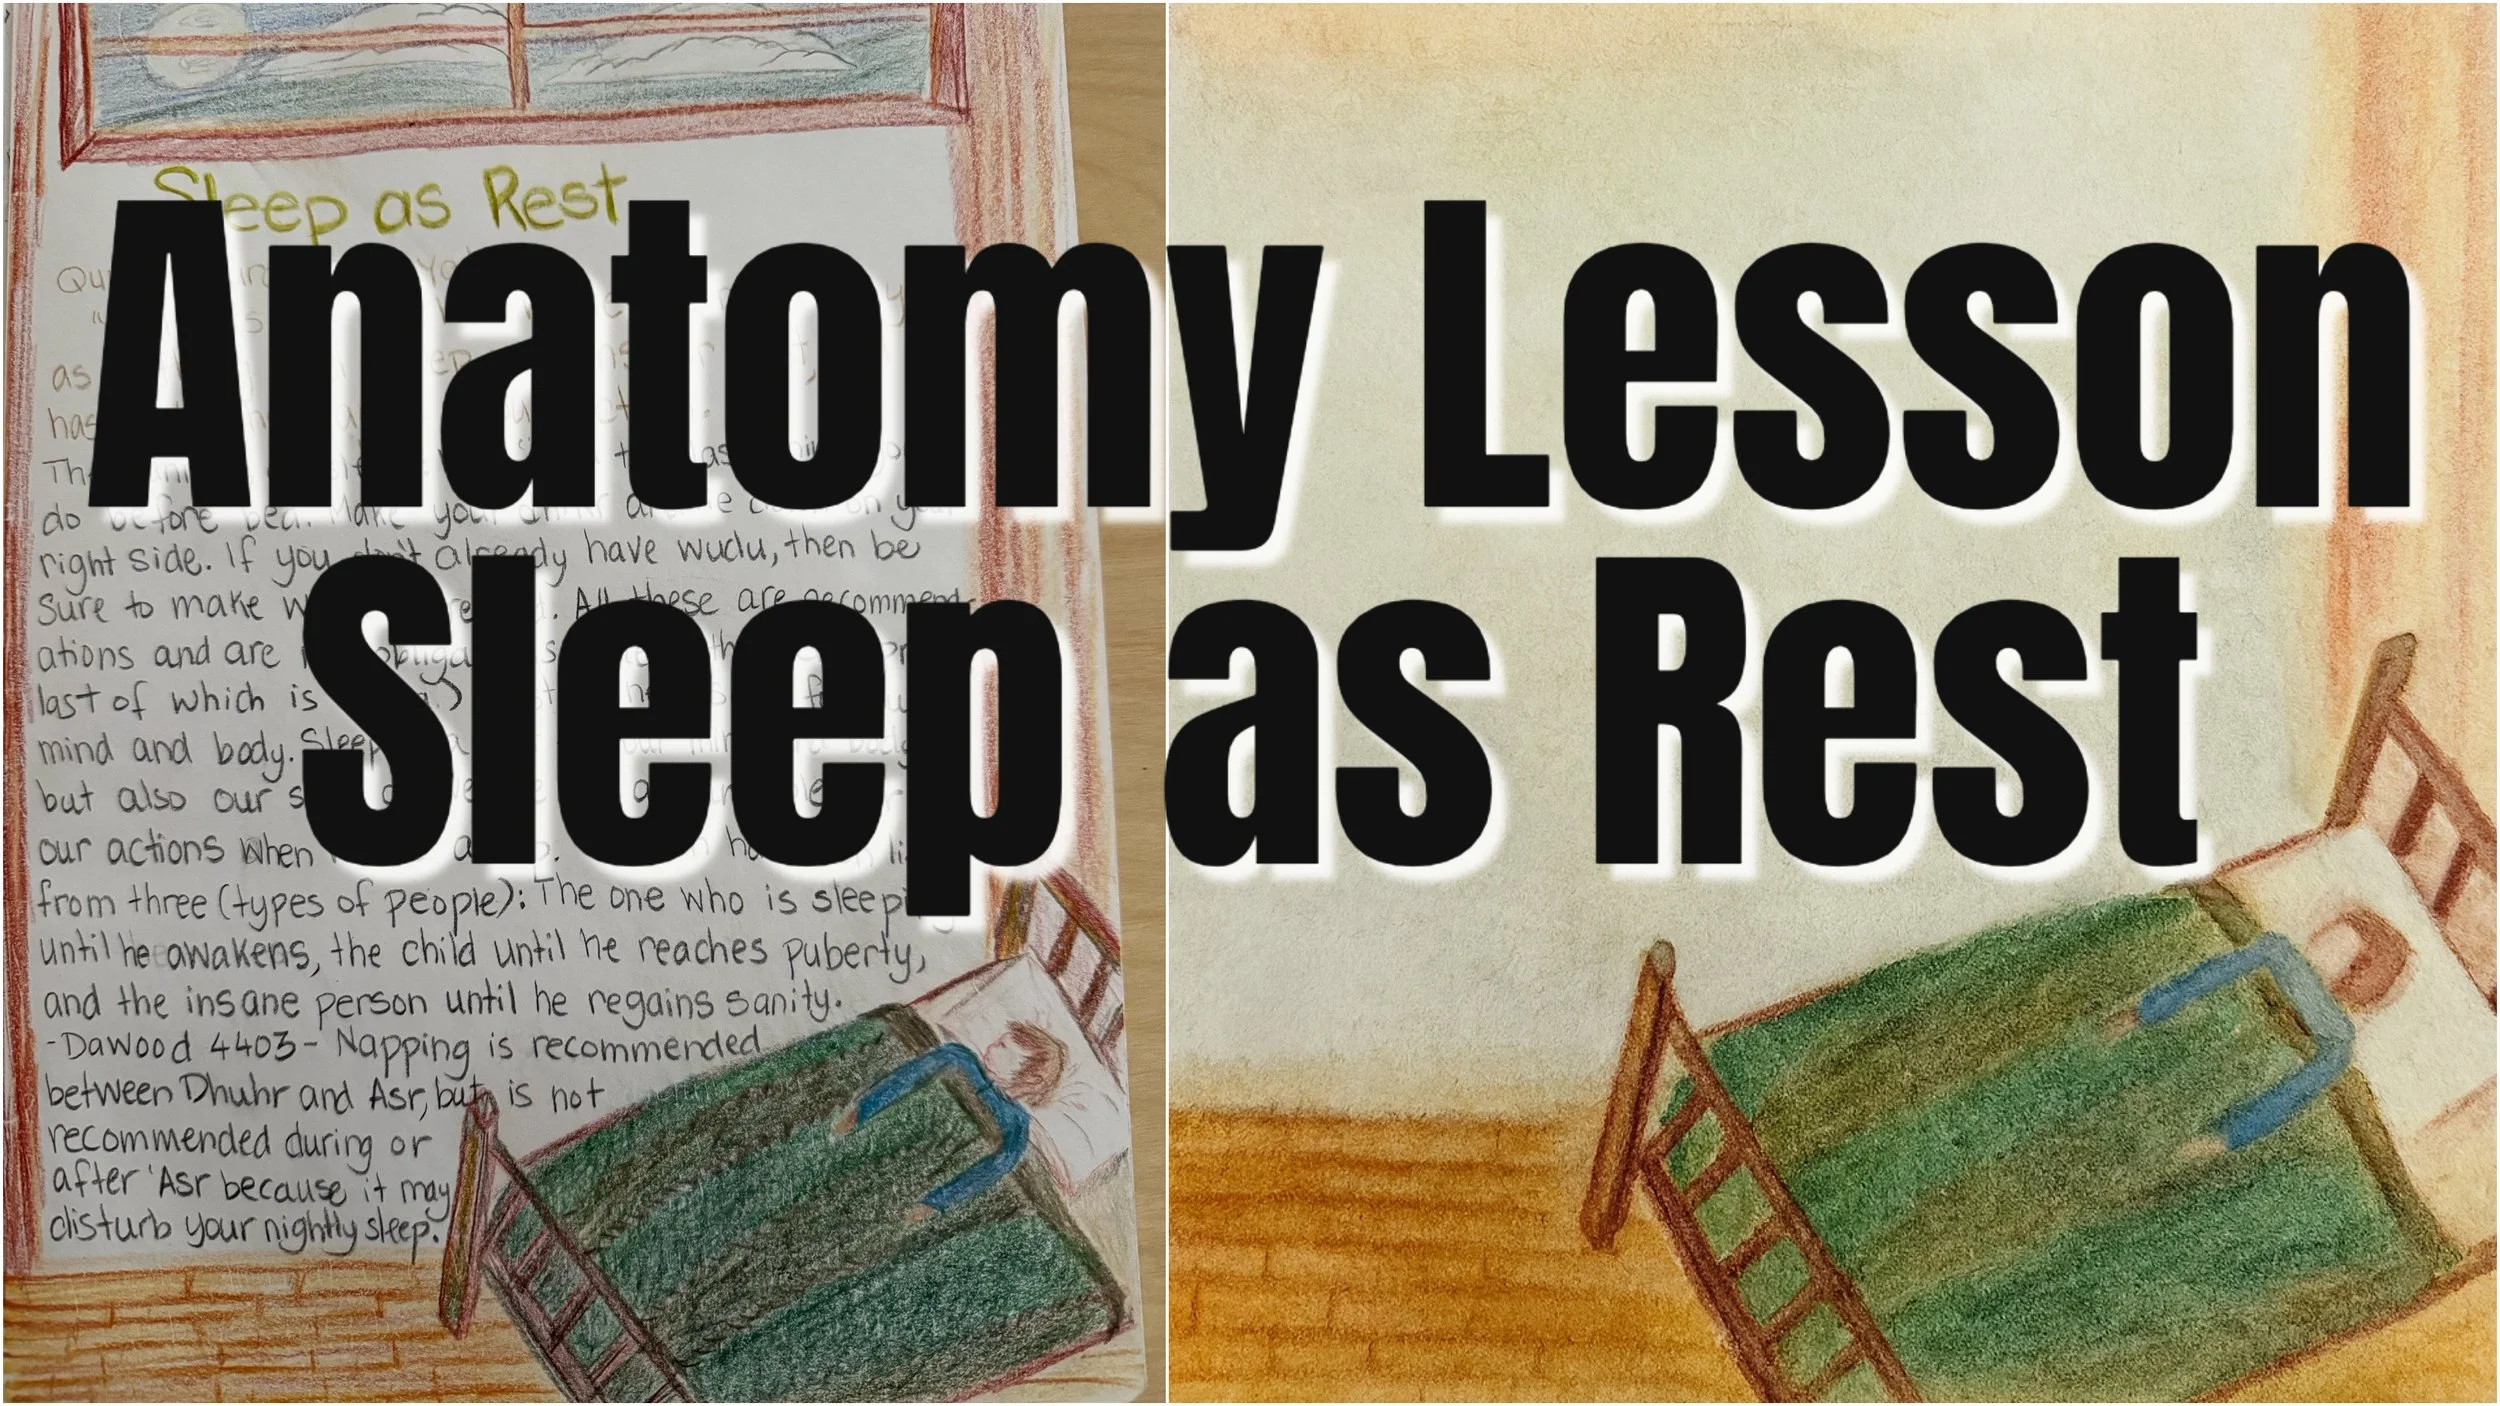
There is a well-known hadith that emphasizes the principle that people are not held accountable for actions done while they are asleep. The hadith, narrated by Aisha (may Allah be pleased with her), states:
“The pen has been lifted from three (types of people): the one who is sleeping until he awakens, the child until he reaches puberty, and the insane person until he regains sanity.”
— Sunan Abi Dawood 4403, Sunan an-Nasa’i 3432
In this hadith, Prophet Muhammad (peace be upon him) explains that accountability is waived for those who are not in control of their actions. This includes individuals who are asleep, as they are not aware of or responsible for what they may do during sleep. This concept shows the mercy of Islam in recognizing human limitations and circumstances where accountability would be unfair or inappropriate.
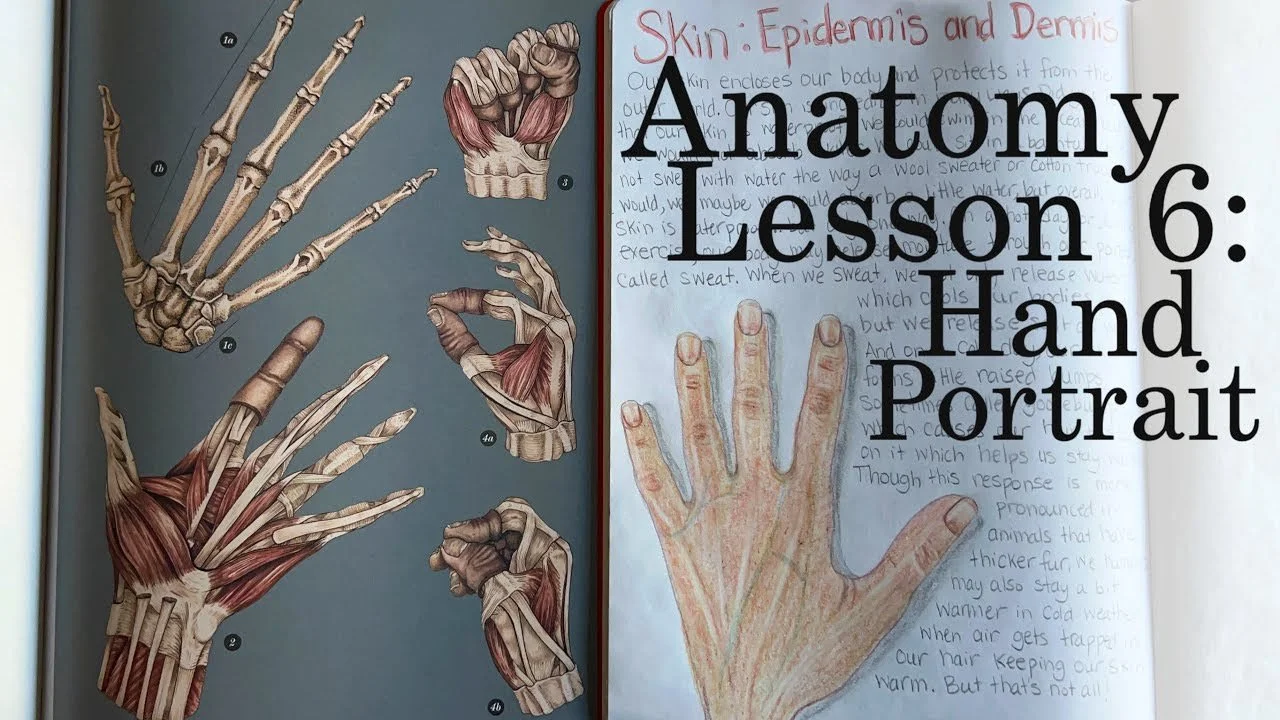
Anatomy Lesson 6
The Skin | Hand Self Portrait
Our lesson on Skin based on Chapter 5 and 6 in Charles Kovacs book on Muscles and Bones titled Skin and Care of Skin was expected to be a single page on written work with a small illustration. Instead these chapters turned into three lesson with detailed illustrations taking up three pages including the onion skin page between the two sheets. For this lesson we did a detailed hand self portrait of the back on our hands so we could include the nails as the nails were discussed in the chapter on Skin. We used our Lyra Color Pencils for this illustration using a few from our 72 piece set and a few from the Skin Tones Lyra Set. This has been my favorite lesson in anatomy so far and maybe my favorite lesson of all. The process was meditative yet called on our powers of observation and attention to detail. In the end, both our self portraits looked characteristically personal and accurate.
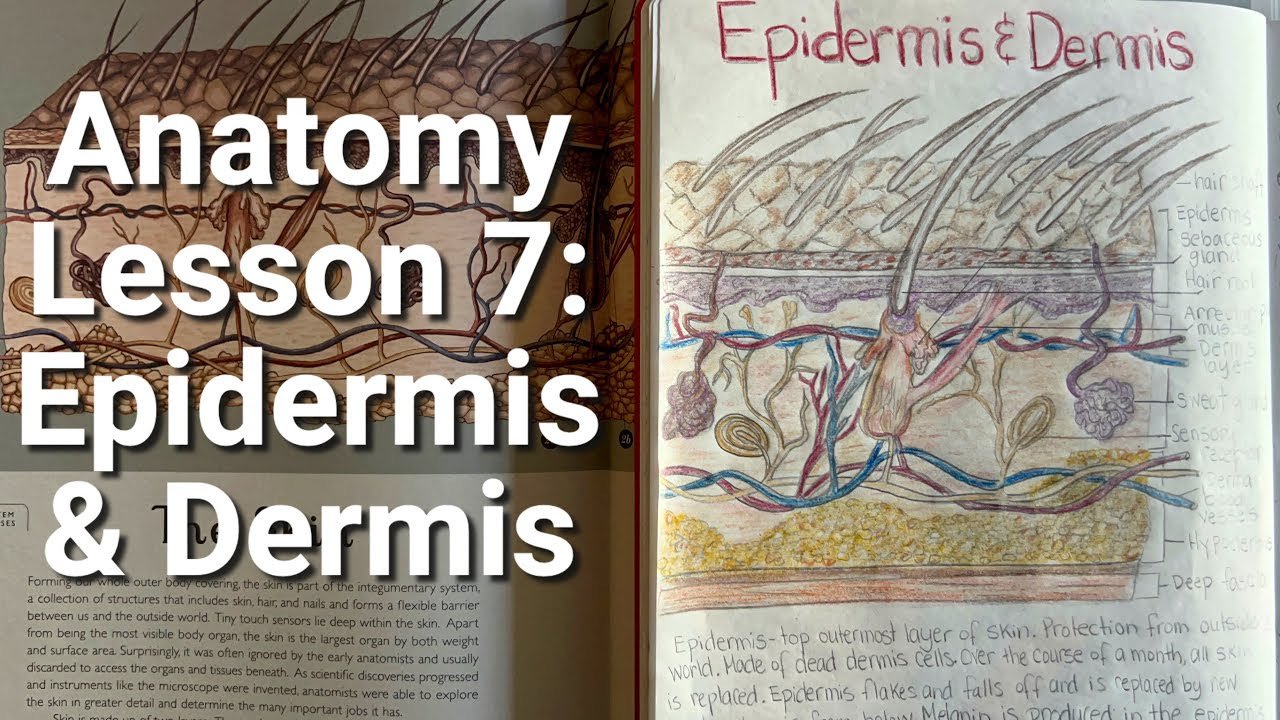
Anatomy Lesson 7
Epidermis and Dermis
Did you know that our dead skin, the outermost layer called the epidermis, not only acts as a first defense against germs, but protects our sensitive dermis, the middle layer of skin, which is more sensitive and tender than our epidermis. Did you know that if you walk barefoot or work with your hands with heavy work you will grow an extra layer of skin for protect. Sounds like superhero skills to me! In fact, if almost anywhere on your body is subject to increase friction or work, overtime, more skin will form in that spot. Even more intriguing to me is something I learned when my children were in Kung Fu. The instructor taught the class that a technique for increasing your strength is to spar with others, or yourself by striking body parts of your body like the forearms. The striking toughens the skin and bone and helps protect the bone from fracture or breaking when actual fighting occurs (which by the way, wasn't part of this dojo, as only sparing and forms were encouraged while the students were young). We used the book Anatomicum: Welcome to the Museum Hardcover by Jennifer Z. Paxton as illustration inspiration for this lesson as we copied the illustration on the layers of my slipping the book between the page and onion skin in the main lesson book. We traced and colored in the drawing, then labeled the drawing and wrote a short narration to accompany the lesson.
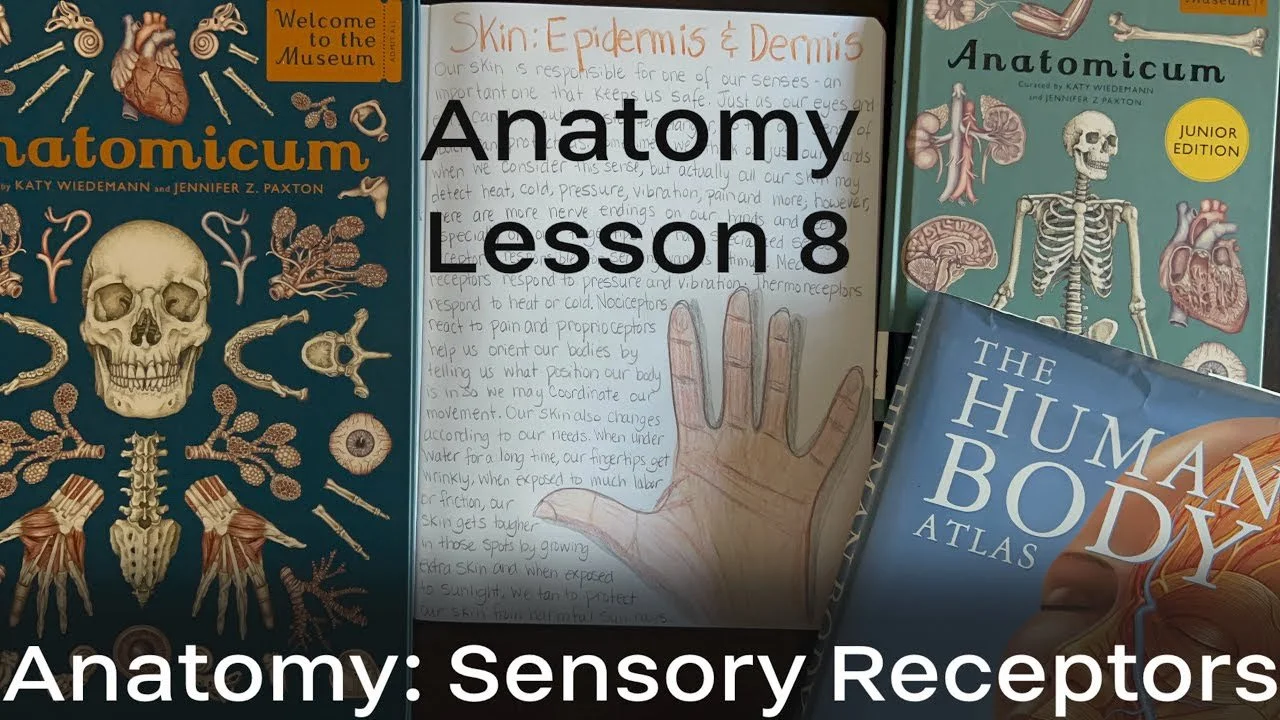
Anatomy Lesson 8
Sensory Receptors
After our first hand self portrait was such a hit, we were sadly disappointed and humored and humbled by these efforts to draw the palm of our hand. We both found it challenging and un-enjoyable. We worked through this illustrated portion of this lesson quickly and worked on the content which I found intriguing. When covering the skin as a sense organ, we often overlook it for our eyesight and hearing. However our sense of touch extended beyond our fingertips. Our skin is the largest by area and weight and covers our whole body. It takes in information about temperature, pressure and pain. We may not realized how my sensory input our skin is taking in consistently until we suddenly don't have access to those receptors in the case of spinal cord injury. This lesson concludes our three-part lesson on skin covering chapters 5 and 6 from Charles Kovacs book on Muscles and Bones and Anatomicum: Welcome to the Museum Hardcover by Jennifer Z. Paxton which provided the content on the various sense receptors and their specializations.
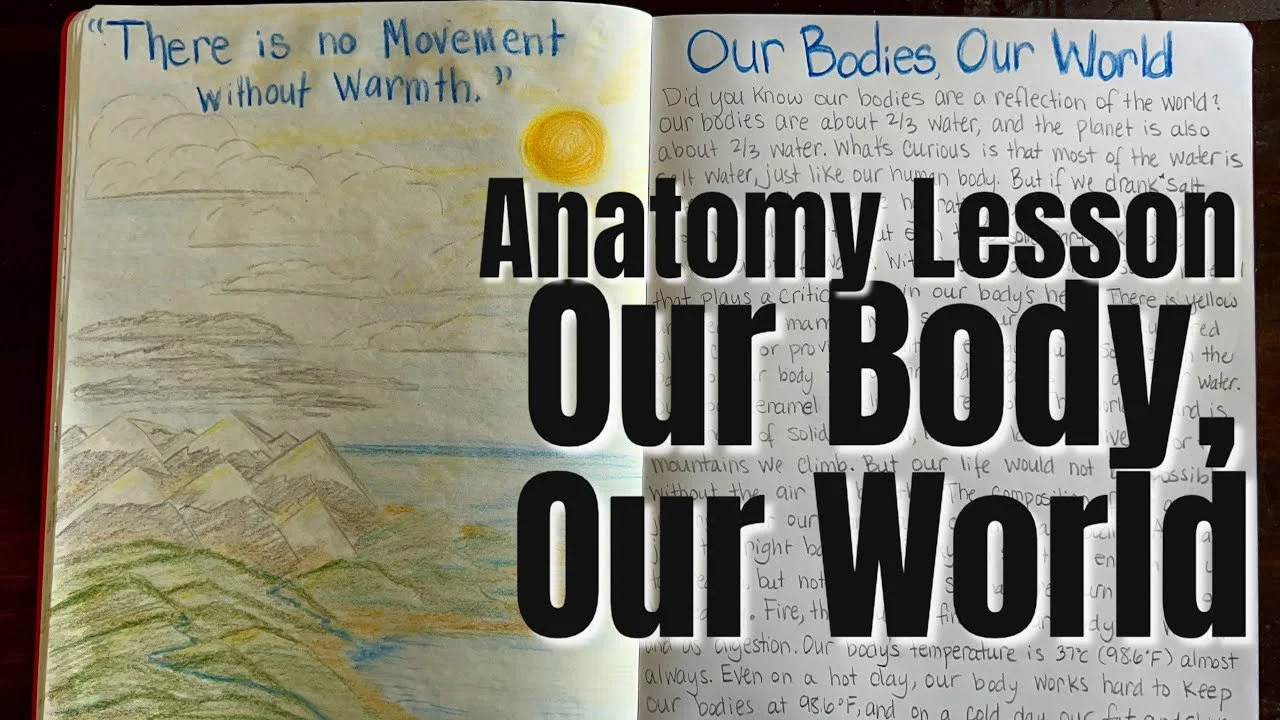
Anatomy Lesson 9
Our Body, Our World
Did you know that the composition of our bodies mirrors the composition of the planet? The planet is roughly 2/3 water, 71% to be exact and our bodies are also roughly 2/3 water though the exact percent is a little more complicated as babies have a higher percentage of water versus adults. And whereas roughly 60% of our bodies are water, of the 40% that's solid, approximately 50-60% of that is water, so our actual percent water is closer to 70%. What a beautiful relationship our bodies have to the world. What's more is that our body is also made of salt water like most of the water on the planet which is vastly abundant in ocean water but practically unusable for drinking (except for desalination plants) for humans and animals. If we taste our tears, we can taste the salt.
The water in our body must be renewed and every month or so, all the water in our body has been renewed and revitalized. The air we breathe must be renewed too, and far sooner. Every few seconds we take a breath in which moves from our lungs to our blood and to every cell of our body in one form or another. And if we don't breathe for even a few minutes, we may start to damage our bodies, and if we don't breathe for even a few minutes more, our bodies will cease to function. And what of the food we eat? We eat every day, and the energy we get from our food keeps our body warm and fuels our brain. Every few hours the warmth in our body has been renewed and revitalized by the food we eat. And the solid parts of our body...our bones, those are replenished every few months with minerals and nutrients. And in the course of seven years, all of our body has been replaced, renewed and exchanged! But we are still the same person. Our spirit is unchanged. Even if we change our preferences, we are still ourselves.
Anatomy Lesson 10
Digestion
We all know we need to chew our food before we swallow it. But why? In this lesson we cover the role of teeth, chewing, and saliva in the role of digestion. We learn how important it for our mouth to 'water' in anticipation of food and how we literally would not be able to swallow if it were not for our saliva. Saliva plays an important role in teeth hygiene as well. But saliva isn't just moisture. In our saliva are digestive enzymes which help break down our food before it is formed into a ball called a bolus by our tongue and swallowed down our esophagus where muscles squeeze our food into our stomach. Our epiglottis ensures that food travels down our esophagus and not trachea or windpipe or we could choke on our food or cause an infection.
Anatomy Lesson
The New Food Pyramid
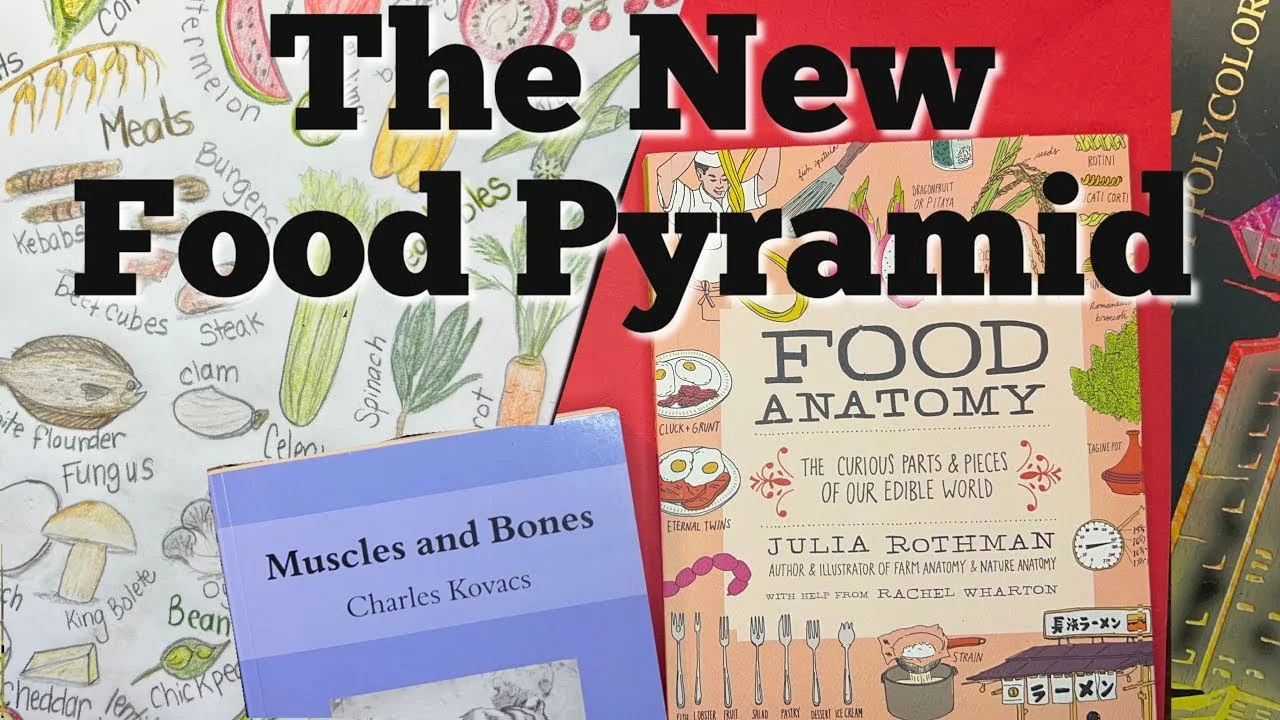
The one book I didn't find to add to our main lesson block was a book on nutrition. They are out there! But the ones I found in abundance were either lifestyle nutrition books like going vegan, keto or carnivore, or ones related to weight-loss or anti-inflammatory diets or books that were similar. The nutrition books I did find seemed to be college textbooks and were outside our budget. So when these lessons came about which focused on food, bread, food quality and drugs, alcohol and caffeine, I didn't have a suitable additional resource to supplement our lesson. However, Food Anatomy: The Curious Parts & Pieces of Our Edible World by Julia Rothman turned out to be an amazing late addition to our unit. We used this book for nearly all the illustration inspiration for this lesson and I'm so pleased with how the illustration turned out. One thing though...I wanted this lesson to be quick and easy and it wasn't! The illustration took over 2 hours and that was not my intention at all. To simplify it for my daughter, I asked to draw just 2-3 items per food group. When it comes to main lesson book illustrations, they should not exceed about 30 minutes. Any longer than that and you can expect that the illustration will be too detailed or involved which in some cases diminishes the effectiveness of an artistic lesson expression.
Anatomy Lesson
The Circulatory System
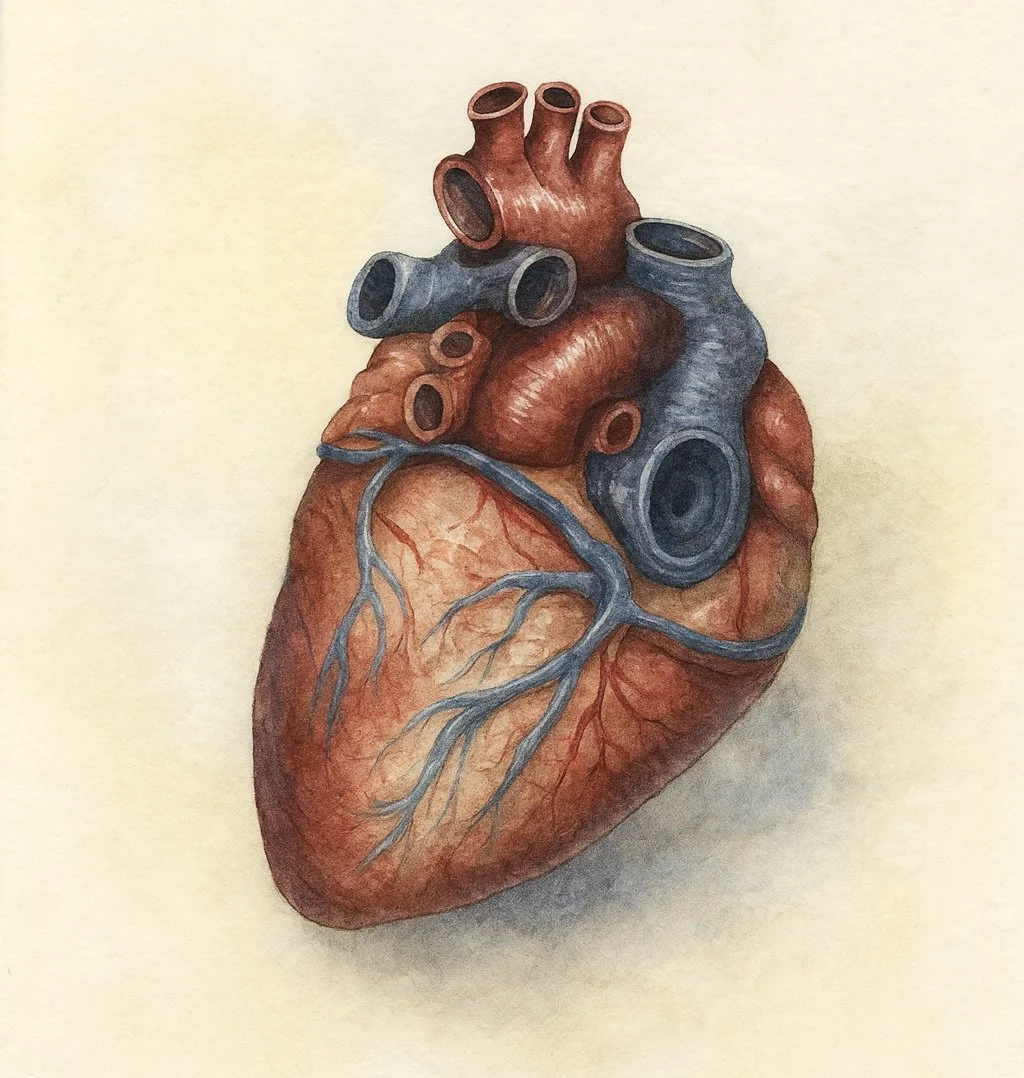
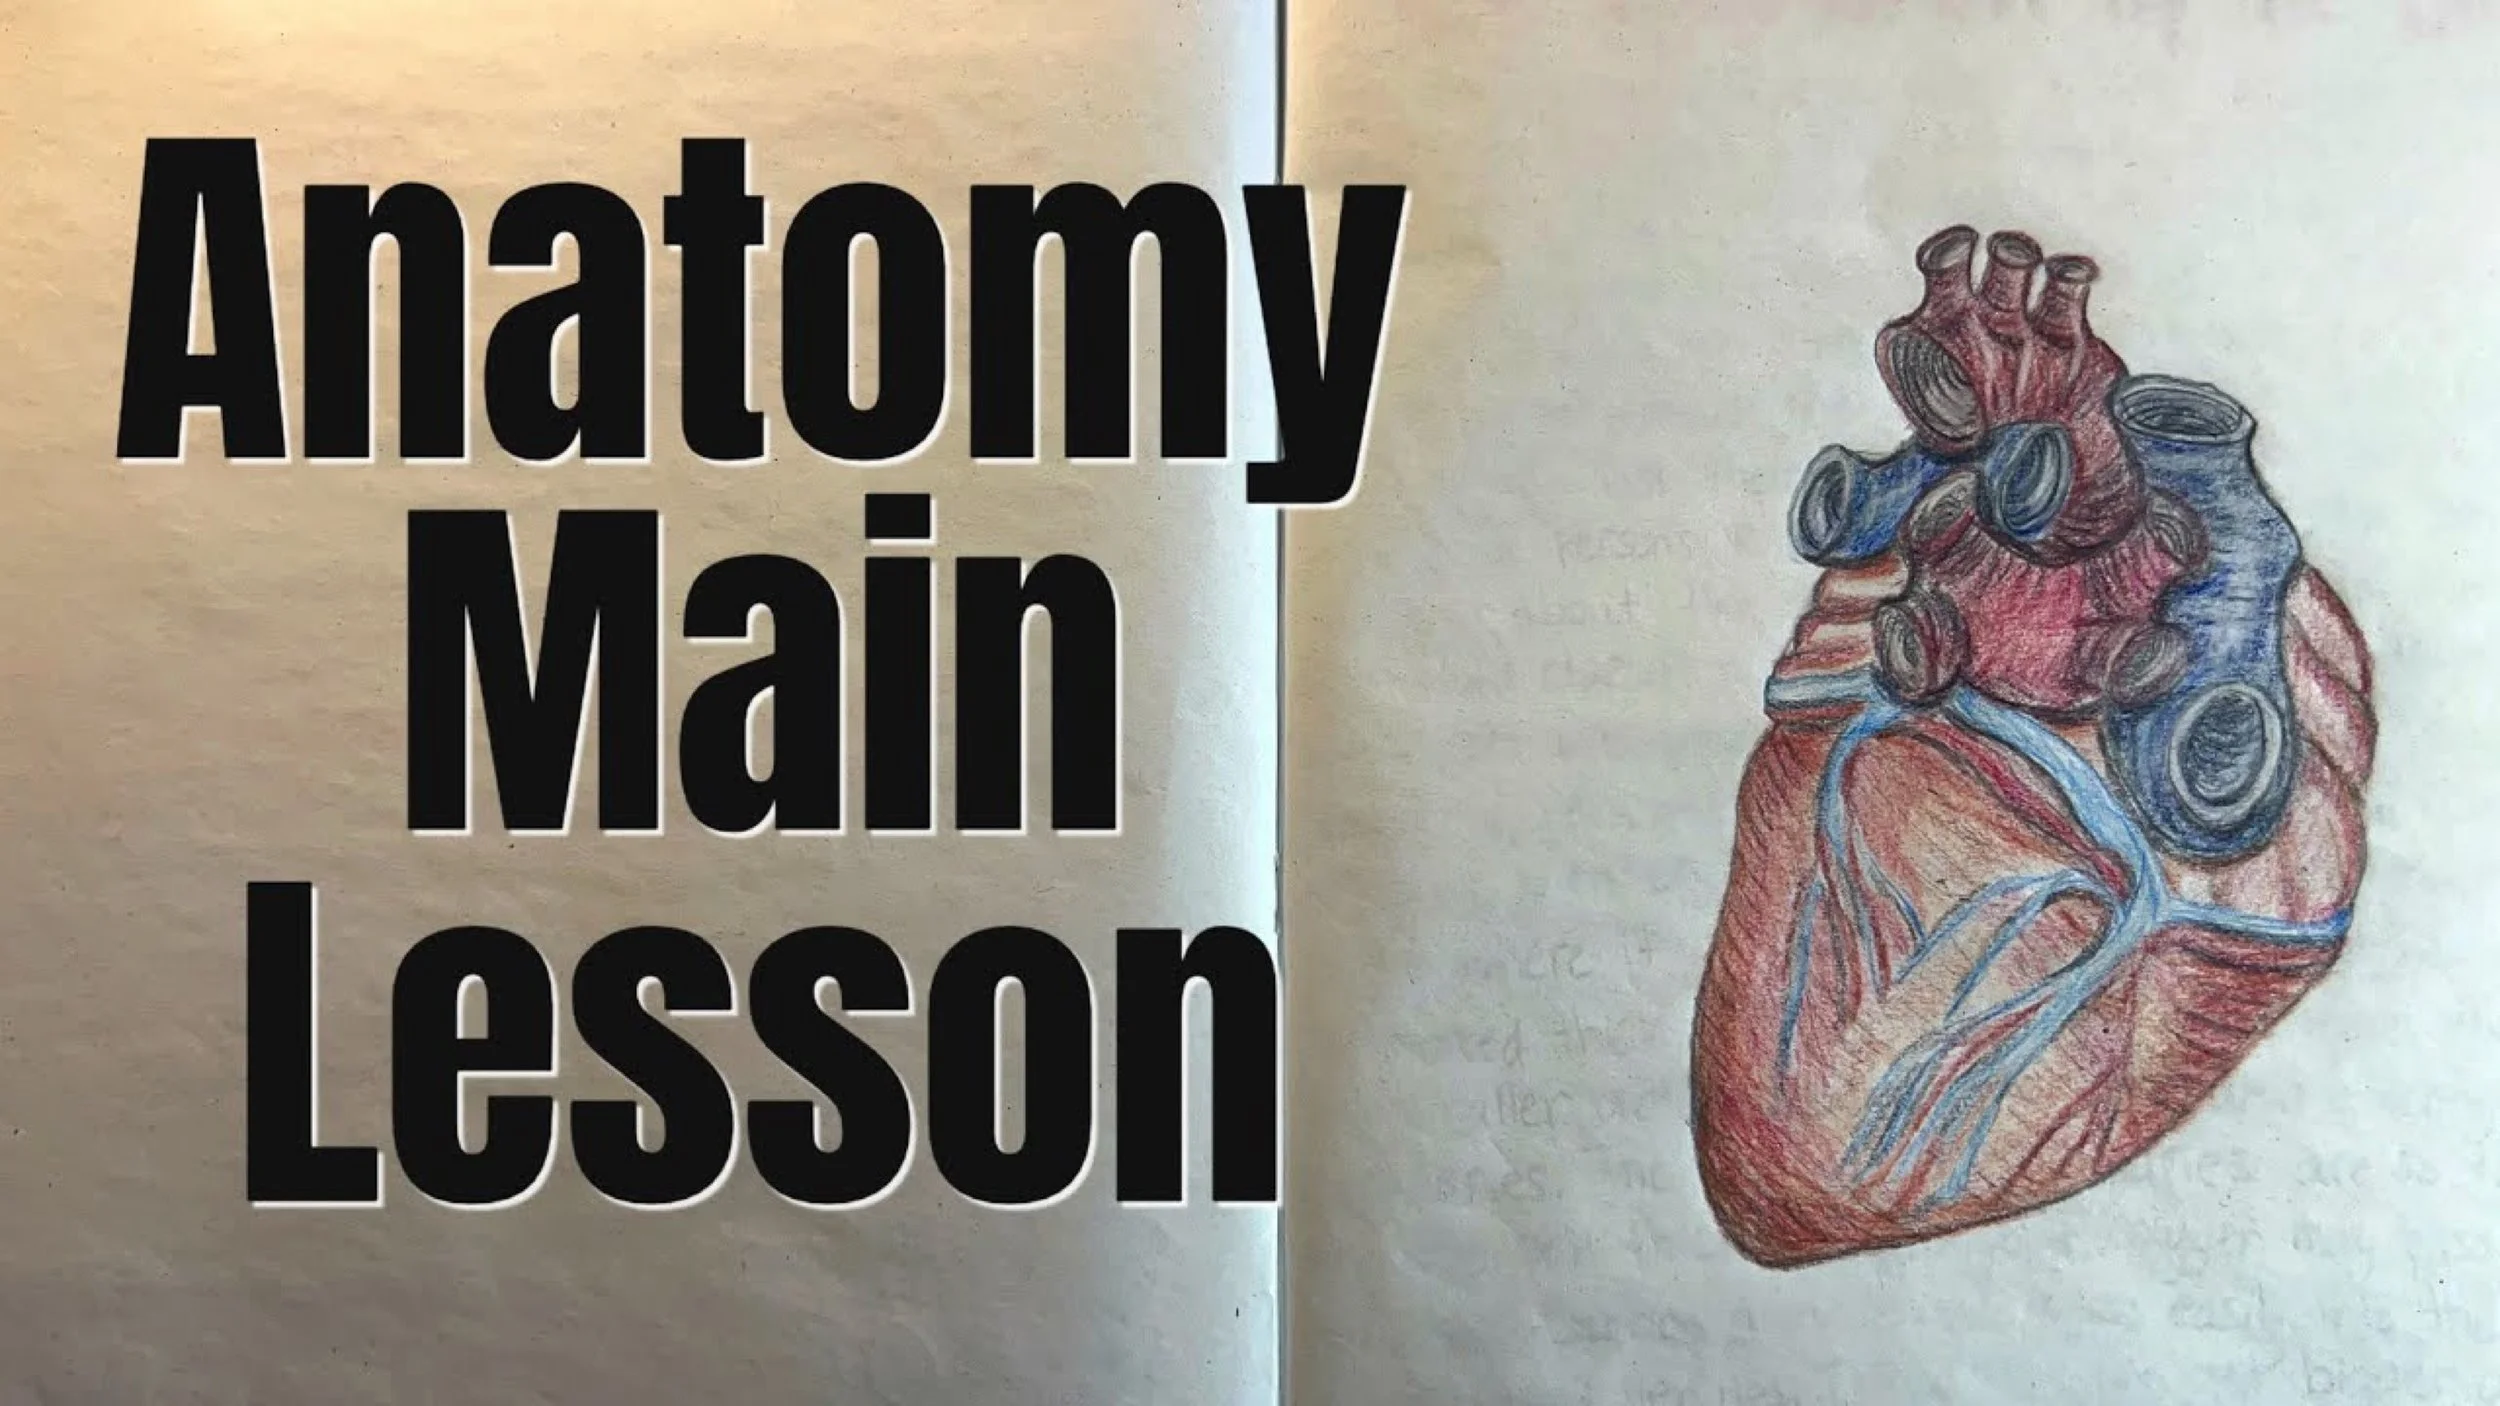
For our lesson on the circulatory system and the heart, we used both Charles Kovacs book on Muscles and Bones and Anatomicum: Welcome to the Museum Hardcover – by Jennifer Z. Paxton. The content in Muscles and Bones has formed the spine of our main lesson block and the book Anatomicum has been our illustration inspiration on many lessons. Because our lessons were getting long with illustrations taking 1-2 hours, we grouped several chapters together for this lesson as well as the lesson on Respiration. Together, the lesson on Circulation of the Blood and Respiration and the Lungs makes up the Rhythm of our body, with our lungs and heart working unceasingly until our last breath. For our bodies work without tiring, our heart and lungs work rhythmically.
Since our illustrations were getting too detailed and time consuming, I wanted an illustration that was about 30 minutes, simple and while detailed, not overly so. this illustration of the heart works wonderfully for this lesson, though it is not complete as we cannot see inside. A three-dimensional model would have been more instructive in understanding the inner workings of this truly amazing organ. Possibly multiple illustrations may have been helpful; however, in the interest of keeping it timely, we chose this illustration for the heart. It took 30 minutes to draw with an additional 30 minutes for the written narration. In taking 30 minutes to draw and 30 minutes to write, it gave us both amply time to contemplate the miraculous nature of our heart.
Anatomy Lesson
The Lungs & The Respiratory System
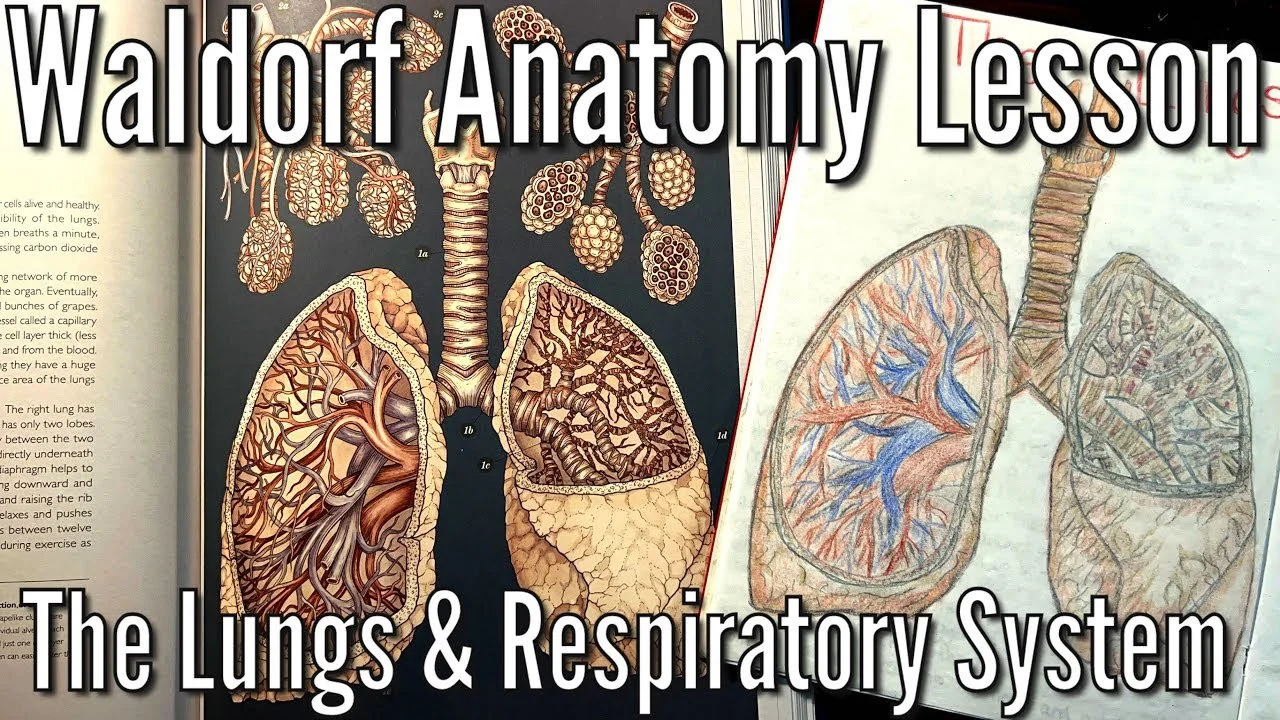
We spent several lessons covering the rhythmic system of the body including the lungs and heart. We learned about blood, veins, arteries, carbon dioxide, oxygen, breathing, the pulse and much more. The lessons were so rich, it took several chapters in Charles Kovacs book on Muscles and Bones to cover these topics and several pages in the main lesson book to illustrate and write these lessons. As the illustrations for this main lesson block were becoming quite intricate and time consuming, I'm making a concerted effort to keep the illustrations at about 30 minutes. This illustration took about 45 minutes and I used our Lyra Rembrandt Polycolor Colored Pencils for most of the illustration. I also used a soft lead pencil for outlining and details. I do the illustrations and narrations first, then my daughter copies them. This works well because I tend to spend more time on the illustration and this allows her to simplify the artwork to suit her ability level.
Once again we used the book Anatomicum: Welcome to the Museum Hardcover – by Jennifer Z. Paxton as illustration inspiration for this lesson. We also use the content in Anatomicum as well, but when we write our narrations, much of that content comes from the Charles Kovacs book. I had intended to use our Waldorf Live Education curriculum as well, but found that once we started with Muscles and Bones, I found it very easy to use and it supported our lessons very well.
Anatomy Lesson 14
Blood & The Heart Valves
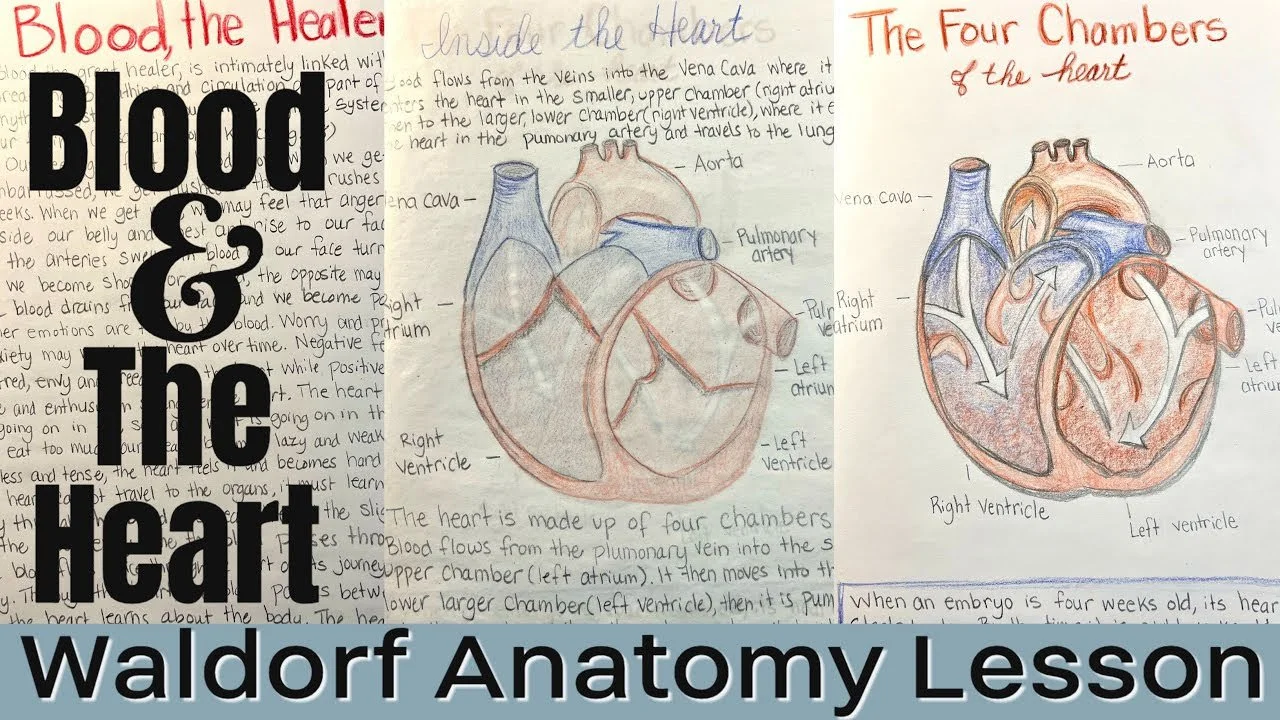
We continue our lessons on the heart with this lesson detailing the movement of the blood through the heart and the heart as the center of the not just the circulatory system but the center of feelings. The heart may not travel throughout the body to know what is going on, yet all the blood travels through the heart twice on its journey. And with every beat, the blood flow moves swiftly and pauses. It is in those pauses that the heart may know what is going on with the organs and the soul. The blood is affected by the feelings. When you feel embarrassed, your face turns red as blood rushes to your cheeks. And if you are angry, your blood may boil and the rage may erupt from your chest to your face as you turn red with anger. And likewise, if you are suddenly startled or afraid, the blood drains from your face and you become pale or grey. The heart knows what's going on in the soul because your blood is affected by your feelings.
For this lesson, I chose an illustration in the book Discoveries: The Human Body Hardcover by Steve Rose and Parker. The illustration shows a cross section of the heart with the four chambers exposed. My mistake was doing the two-part illustration with all four valves open and one illustration of the heart with all four chambers closed. It should have been two chambers open at a time. This lesson took longer than expected because it included two illustrations with captions and written work in addition to the full page narration.
Anatomy Lesson 15
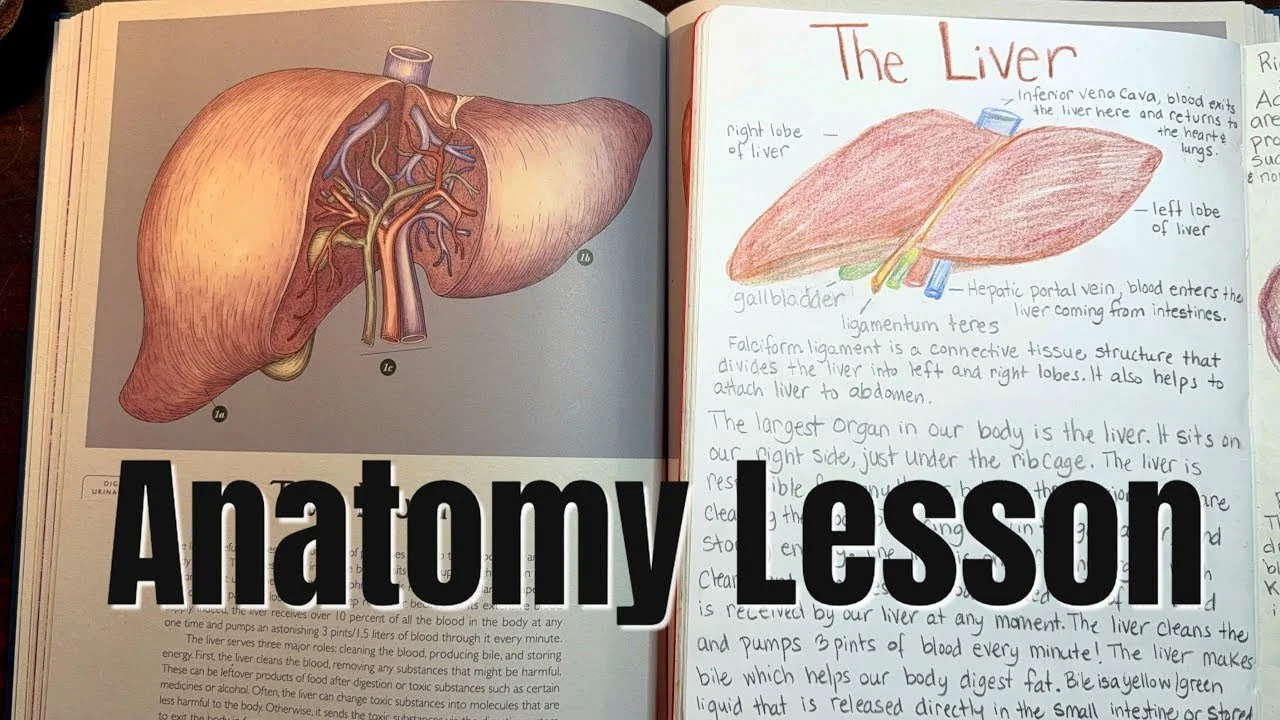
The Liver
We continue our lessons for our Anatomy Main Lesson Block in Anatomy with this lesson on the Liver. In Muscles and Bones by Charles Kovacs, the book is divided into three sections with the middle being 'Physiology' which includes a chapter on the liver and kidneys. This chapter covered the roll of the liver and kidneys in a holistic way using the Waldorf pedagogy. While it was interesting, it was not relevant or connecting enough for us to write up a lesson based on the content of this chapter. Undoubtedly, the liver and kidneys and other aspects of anatomy will be revisited in the last section of the Kovacs book which focuses solely on Anatomy rather than health, nutrition or physiology.
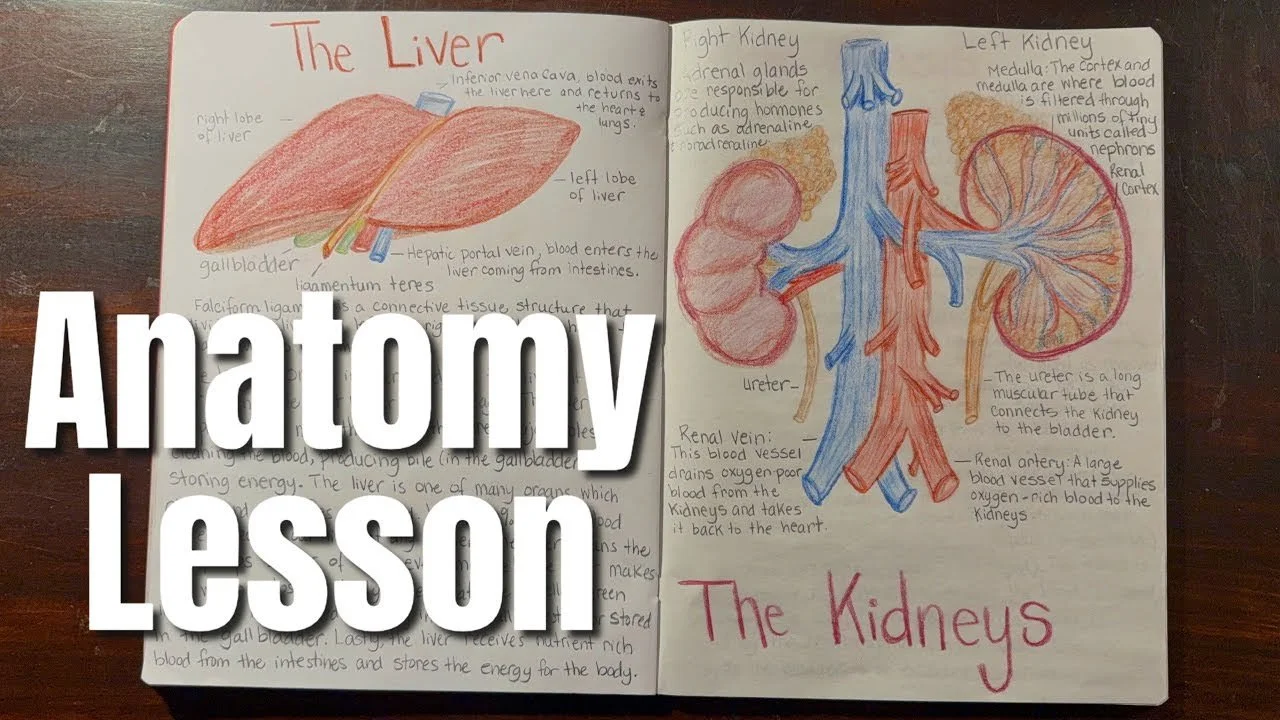
Instead, for this lesson we utilized two books to aid us in content as well as illustration inspiration: Anatomicum: Welcome to the Museum Hardcover – by Jennifer Z. Paxton and The Human Body Atlas: How the human body works Hardcover – by National Geographic. We used both books for content related to the Liver and the Kidneys.
For the lesson on the Liver, we used a single page for illustration and written narration. The illustration was simple and only took the top portion of the page and took maybe 20 minutes or less including labeling the illustration. The written content took about 30 minutes to complete. THe main lesson work came several weeks after the lesson was first delivered because of winter break and moving forward with other new lessons and still catching up on old lessons. Getting behind on work always happens starting midway in the main lesson block as it takes longer to complete work than to do a new lesson.
Anatomy Lesson 16
The Kidney
For the lesson the Kidneys, we utilized the onion skin for the drawing as it we traced the illustration from the book Anatomicum: Welcome to the Museum Hardcover – by Jennifer Z. Paxton. I folded the main lesson book so the onion skin rested over the book and then traced the image. I kept the details to a minimum as these illustrations can become detailed, complicated and lengthy. In total I aim to keep illustrations at 30-45 minutes with written content at 30-45 minutes, opening activities at about 30 minutes with about 20 minutes for the new lesson. In reality, the Main lesson work tends to take much longer often occupying the largest part of our school day.
Anatomy Lesson 17
The Ears
As we progress with our Anatomy main lesson block, we have to pick up lessons we didn't include in our main lesson book. When working through a main lesson block, some lessons don't end up in the main lesson book, or others get consolidated so that several lessons have just one entry.
When working through this block, we quickly realized that reading the Charles Kovacs book was going to be our main resource for our scope and sequence of this block, however, per usual, we include other resources often and when necessary. Since we are using a book with easy to read, short chapters, it was a guide to the length of our block.
When we had gotten through the sections on Health and the Human Body (chapters 1 -16) and Physiology (chapter 17-34), we took a 4 month break. We concluded the block in the spring with the section on Muscles and Bones: Anatomy (chapters 35-48). As we progresses with the last section, we came back to section 2 and included lesson write ups for content we felt needed to be included in the main lesson, or lessons we simply hadn't gotten to as we moved on to other main lesson blocks.
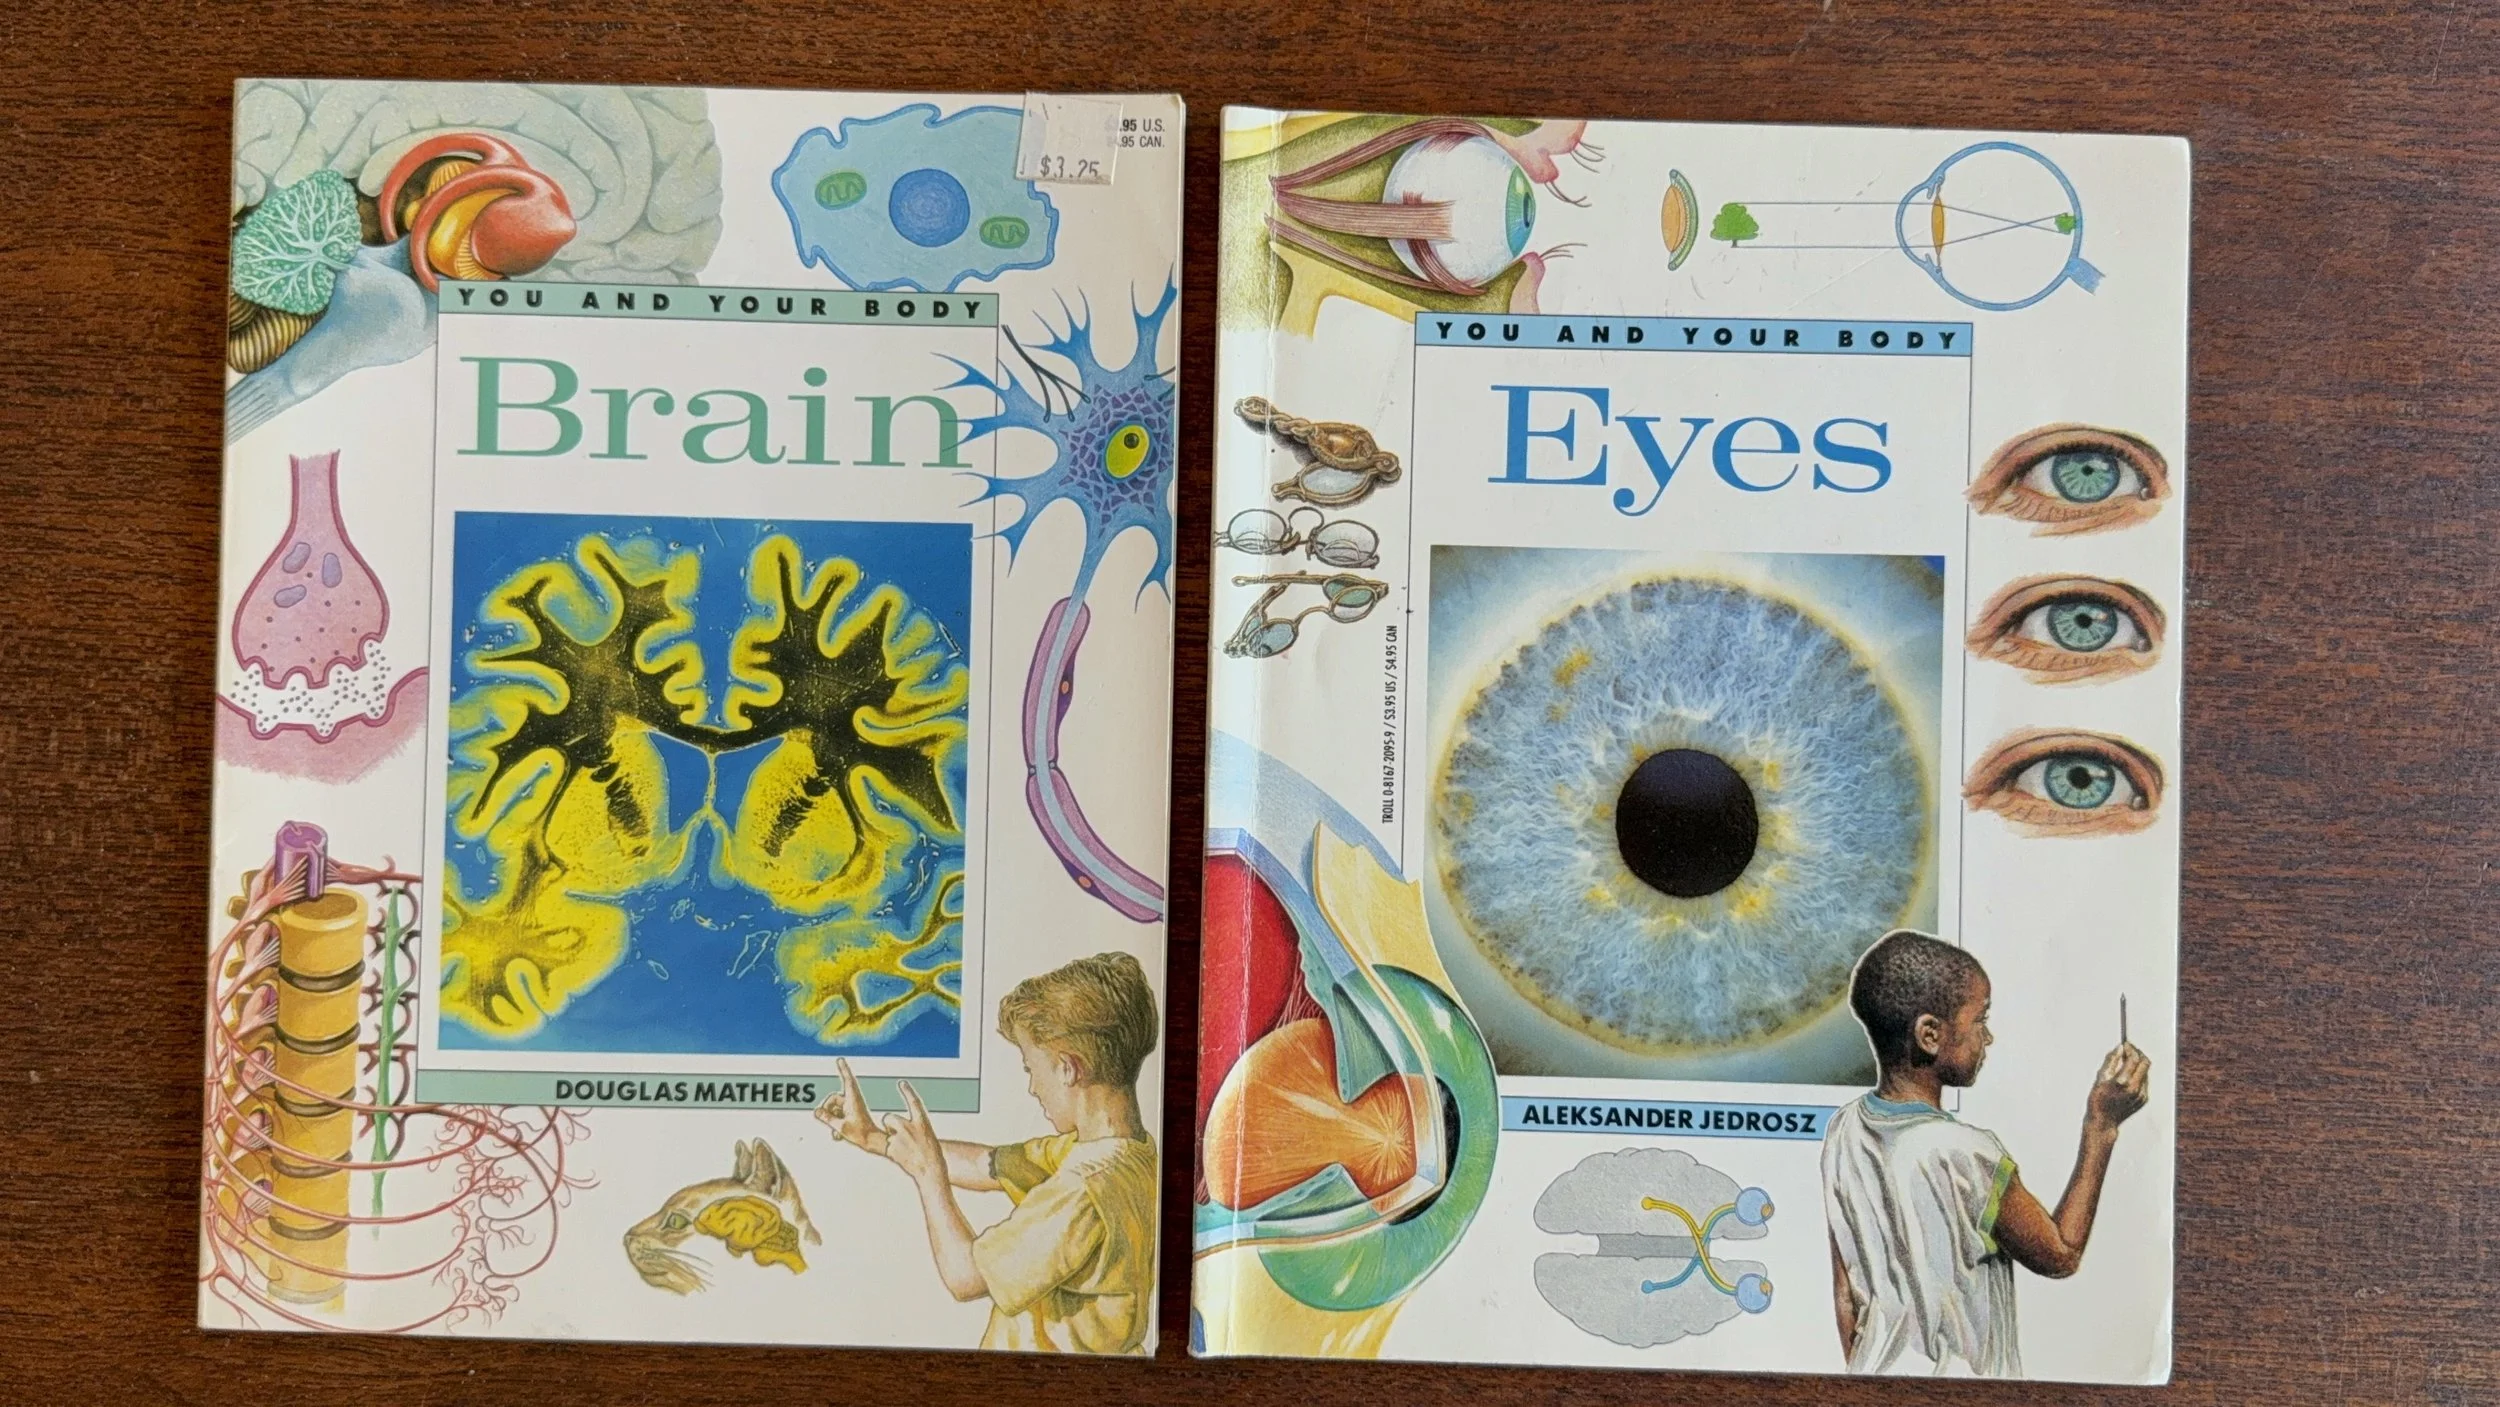
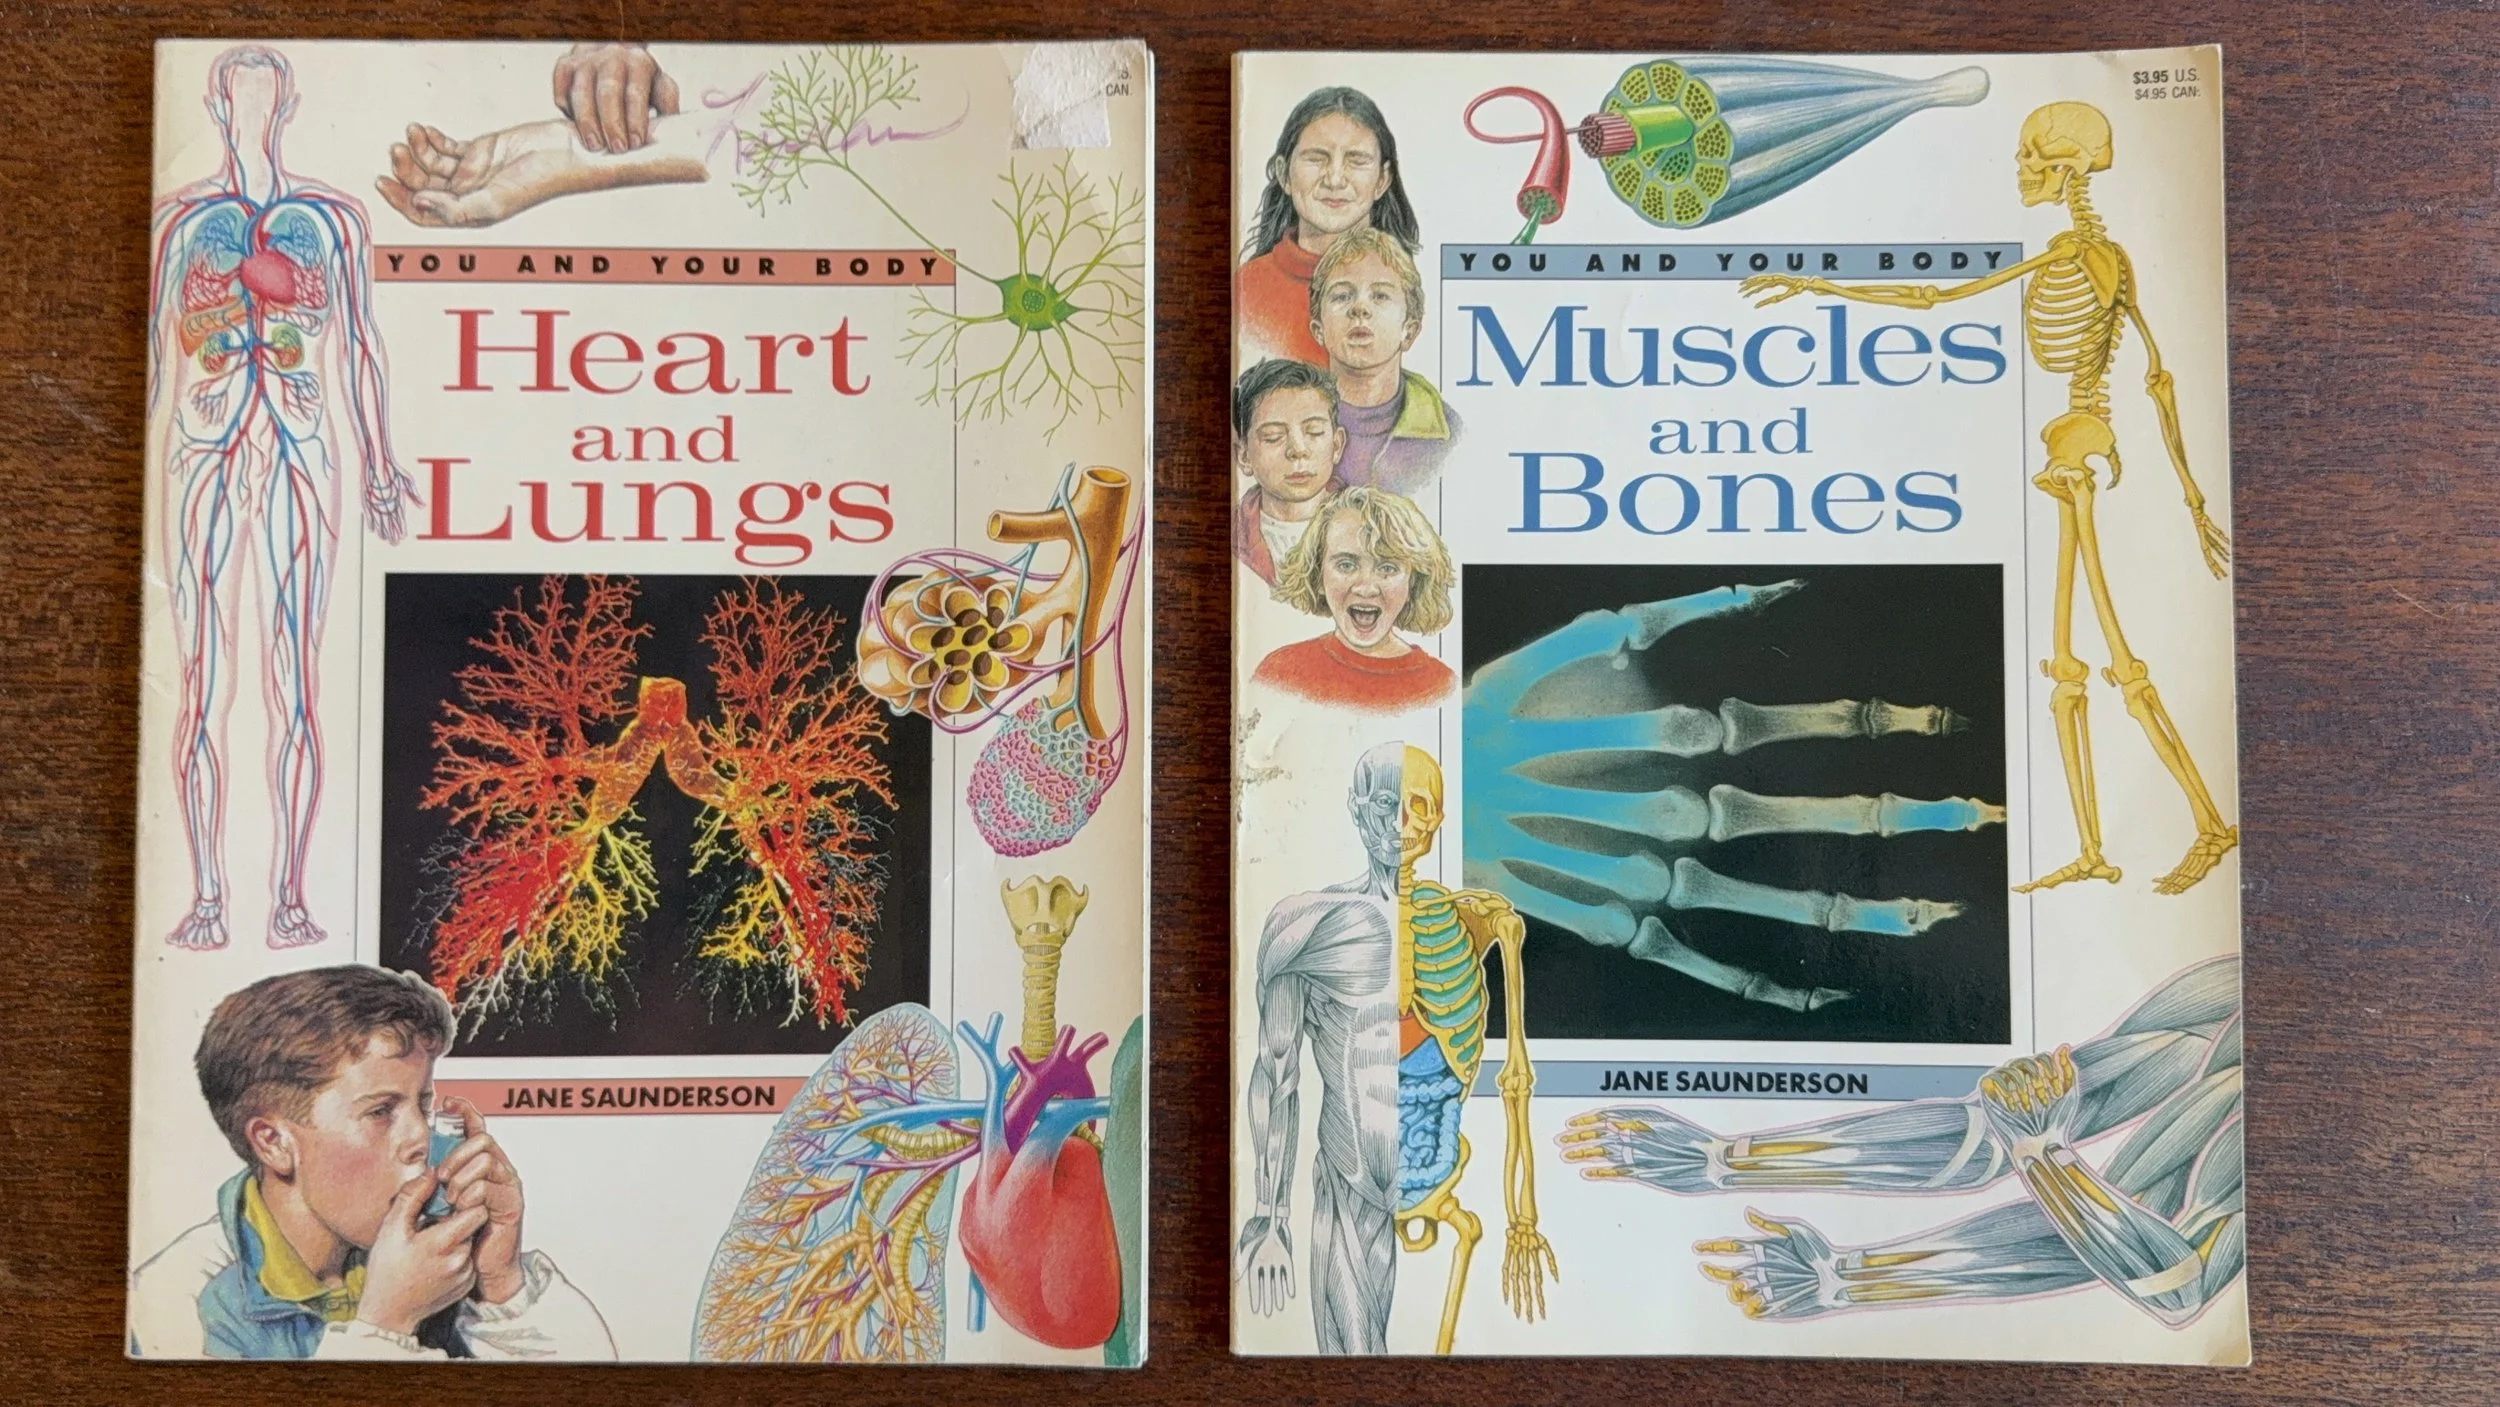
Working on the lessons with the five senses, we opted to reread the book You and Your Ears. While this book is out of print, You and Your Ears by Douglas Mathers can be found second hand on Amazon and thrift book retailers. This book ended up be a treasure! We bought second hand from a local thrift bookstore and once we had read it (twice!), I noticed there were others in the series of You and Your...by Troll Publishers. The Publisher was sold twice and the books is no longer in print as best as I can tell. But I tracked down the four others in this series and have included them in our main lesson block.
What I love about the Mathers book is the depth and breadth of the content. There were so many opportunities for hands-on demonstrations to better understand the sense of sound, how it travels, and how our ear and brain process sound. This book beautifully complements our physics main lesson block on acoustics.
Anatomy Lesson
Eyes
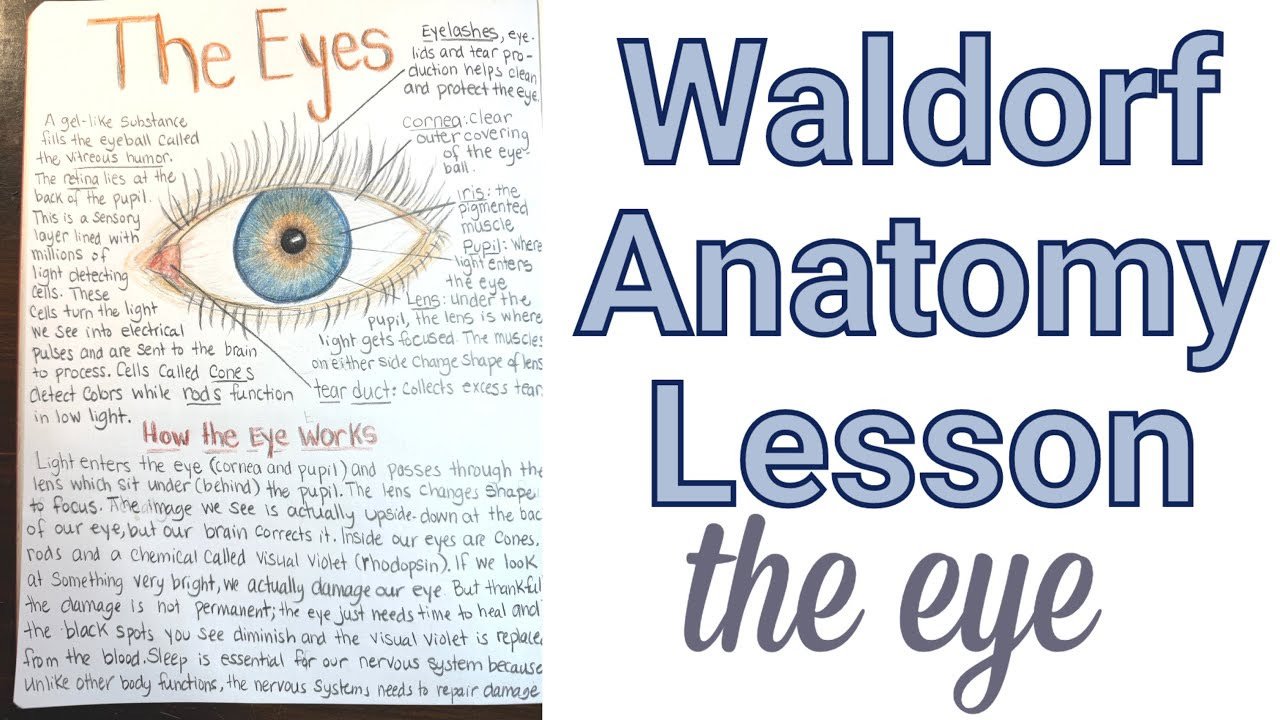
If I could do every lesson where it is possible to do a self portrait, I would do that. We've only done 3 self portraits during this unit, and if I ever do this main lesson block again, I will do every lesson (if possible) as a self portrait because the level of reverence for our body, the attention to detail and the observation necessary combined made these lessons some of the best from this block. My student and I noticed details we hadn't paid attention to before, we studied our eye intently, took close up images of our eye and spent a lot of time focused attentively as we drew our eye.
Aside from the beauty of lessons which include illustrations, the lessons when we take the time to make detailed illustrations, increases our reverence and deepens our understanding of how the body works. For this lesson, we included the book You and Your Eyes by Andrew Farmer We had picked up the book You and Your Ears by Douglas Mathers and had enjoyed that book so much, I looked for the other ones in the series.
Additionally, we use Anatomicum by Welcome to the Museum series for both content and illustration inspiration. We debated drawing another illustration that was a side profile of the eye to see the inner workings, but opted for only the self portrait. We used Lyra colored pencils and Koh-i-Noor Progresso colored pencils for the illustration and our A Child's Dream main lesson books (Portrait 9.5"x12").
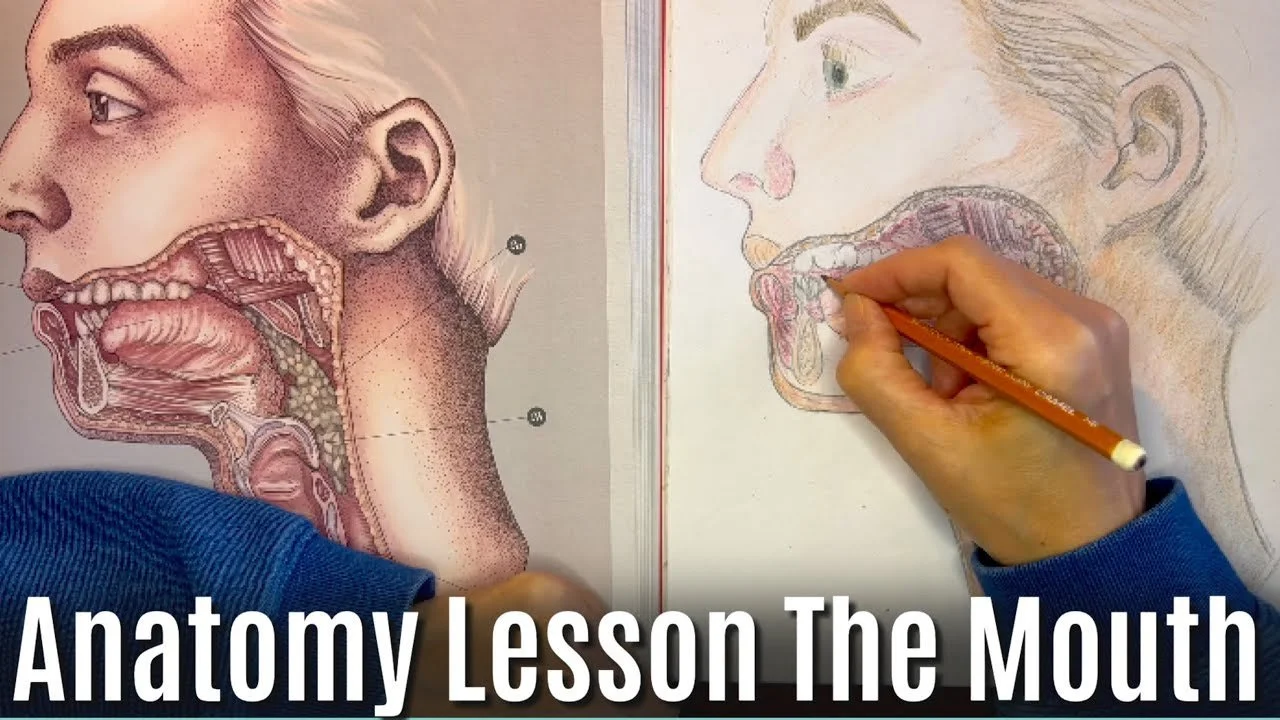
Anatomy Lesson
Taste & The Other Senses
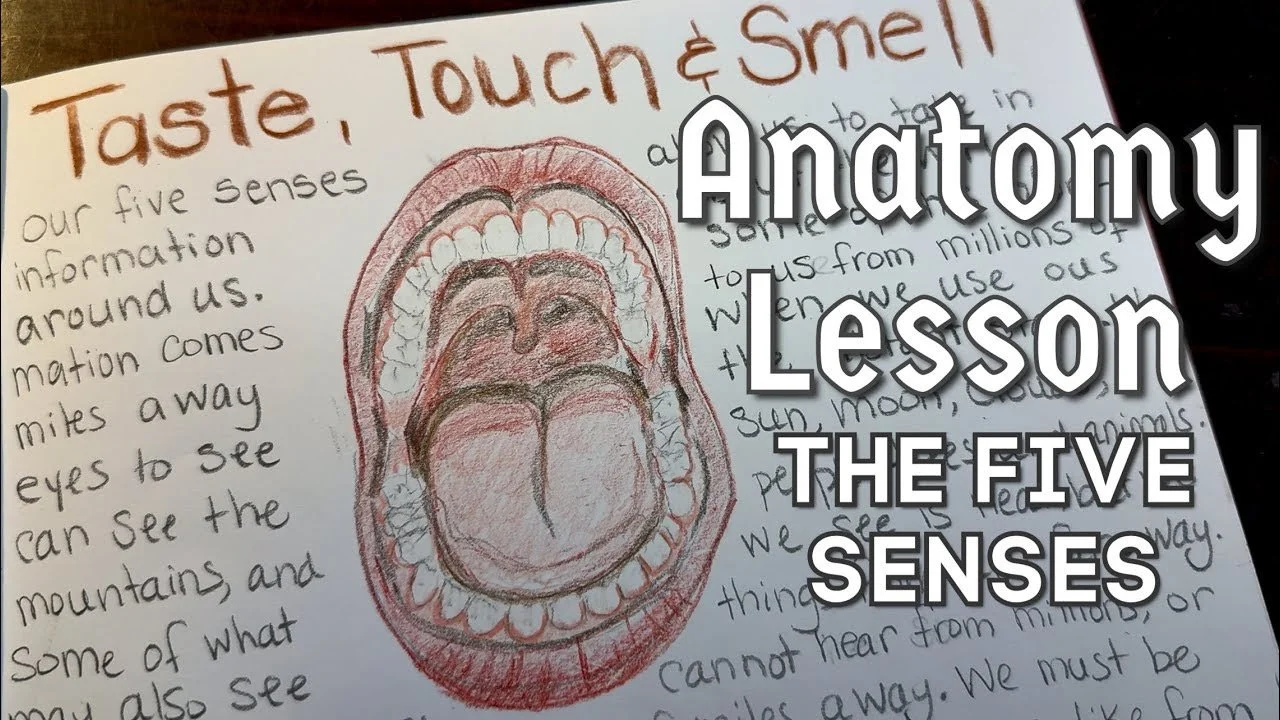
For this lesson on the five senses, we primarily use the book muscles and bones by Charles Kovacs. This is a Waldorf resource for the anatomy main lesson block. We also used for illustration inspiration. I would have rather done a self portrait, but we had limited time for this lesson so we opted to use The Human Body Atlas as illustration inspiration.
While I like the way, the illustration turned out in the end, and the fact that it was quite small, didn’t take too much time, and it’s really well with the text, I think that it would have been more important to maintain accuracy in depicting the number and shape of the teeth.
While doing this illustration, I was hasty. Which then, my daughter had an inaccurate illustration to copy into her main lesson book. These may seem like subtle or unimportant issues in a main lesson, but when it comes to the sciences, I think that accuracy and precision in both illustration and written work is as much a part of the lesson as the lesson content is itself.
As the middle school child grows and develops, the types of lessons, they engage in, reflect that growth and maturity. The days of whimsy and imaginative illustrations is replaced with accuracy, precision and true to life, illustrations and content. 
Additionally, we use Anatomicum by Welcome to the Museum series for both content and illustration inspiration. We debated drawing another illustration that was a side profile of the eye to see the inner workings, but opted for only the self portrait. We used Lyra colored pencils and Koh-i-Noor Progresso colored pencils for the illustration and our A Child's Dream main lesson books (Portrait 9.5"x12").