Grade 4 Handwork
Grade 4

The Grade 4 student who is now 10 years old and beyond the troublesome turmoil of the nine-year-change has a new sense of wonder in the world. However, there is a sense of falling from innocence and taking up the mantle of earthly responsibility. Handwork takes on a more structured and skillful form as students develop a deeper sense of themselves, their independence and their confidence.
The handwork in Grade 4 mirrors the developmental stage often described as “crossing the Rubicon” when children become aware of themselves in relation to the world.
In handwork, this transition is recognized, and the new skill of cross-stitch is taught, which demands an introduction to precision, attention to detail and pattern recognition.
As students continue to grow, their precision in handwork will increase. With cross-stitch, inconsistencies in precision will be noticed, but will not compromise the project. Therefore practicing precision in Grade 4 will allow the student to develop the skill of precision that will be necessary, especially in Grade 7 when students are working with quilt designs.
Handwork is always an opportunity for children to develop their will and practice their fine motor skills. Developing a sense of perseverance and accomplishment naturally comes with handwork. Teachers often need to encourage students to stay on task who take too much time deciding on colors or patterns or students who are easily distracted and end up lagging behind the class. For those students who have a strong will and finish their projects ahead of the class, the teacher has additional projects ready for those students to take on. These projects can either increase the skills that they are working on or provide a new project with the skills that they have previously learned.
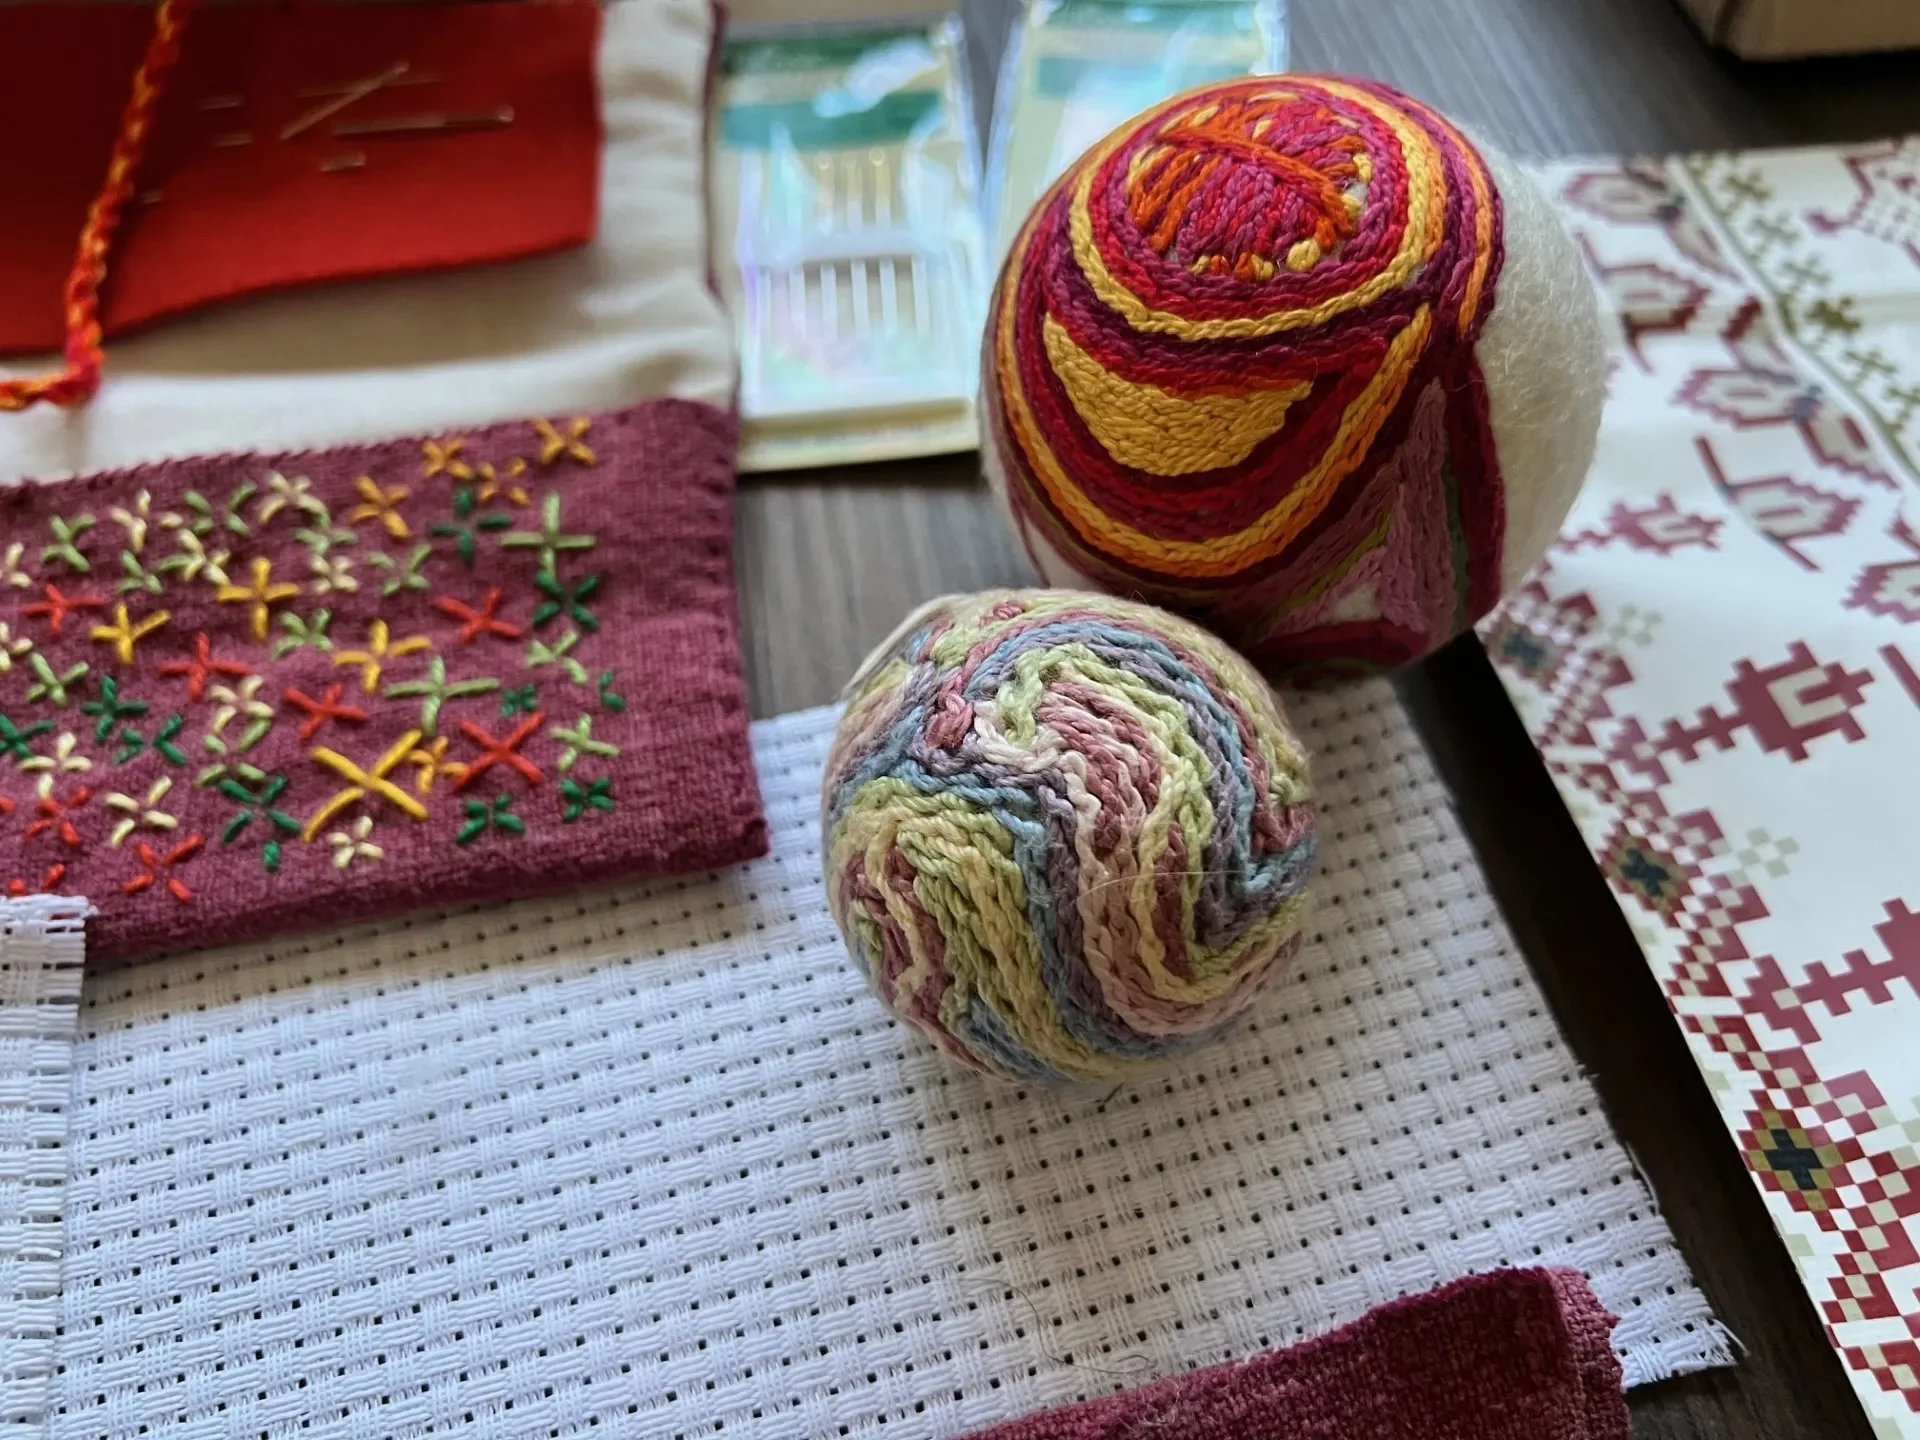
Grade 4 is a time of embellishment in handwork. Useful items are embellished with embroidery which requires both artistry and precision. Embroidery allows for individual creativity. But, embroidery is also practical. Embroidering one’s initials on music bags or pencil cases identifies the owner of the item and beautifies a utilitarian object.
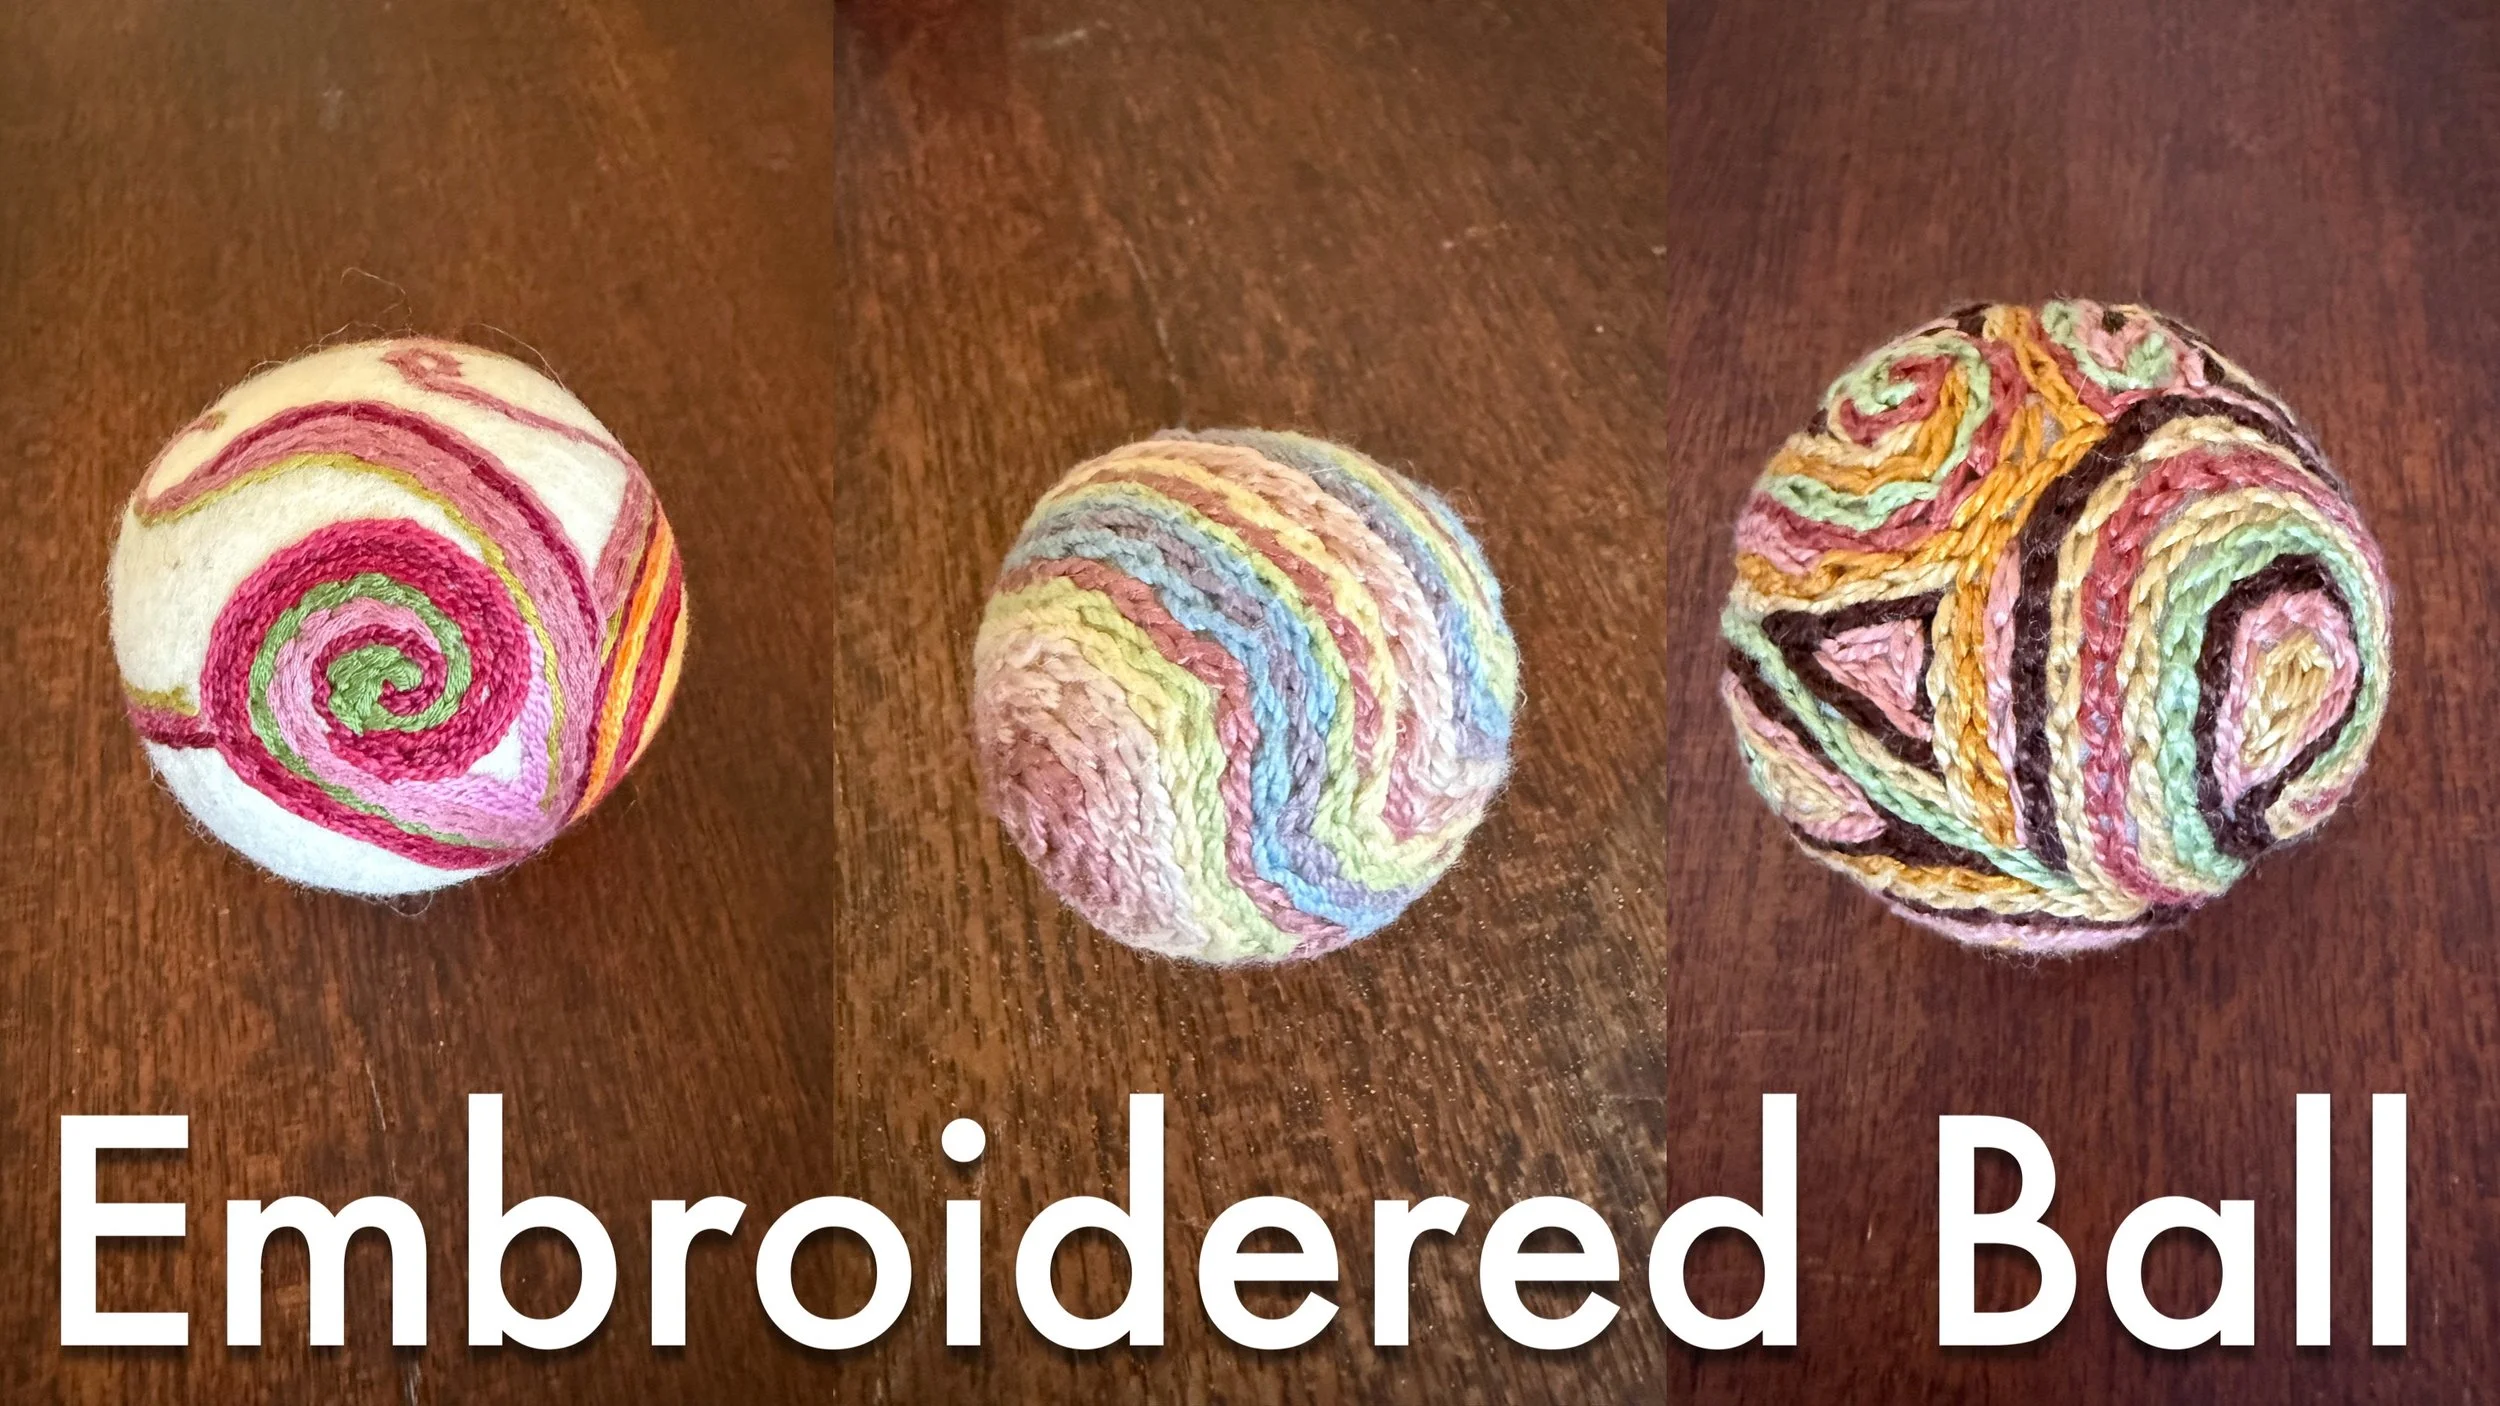
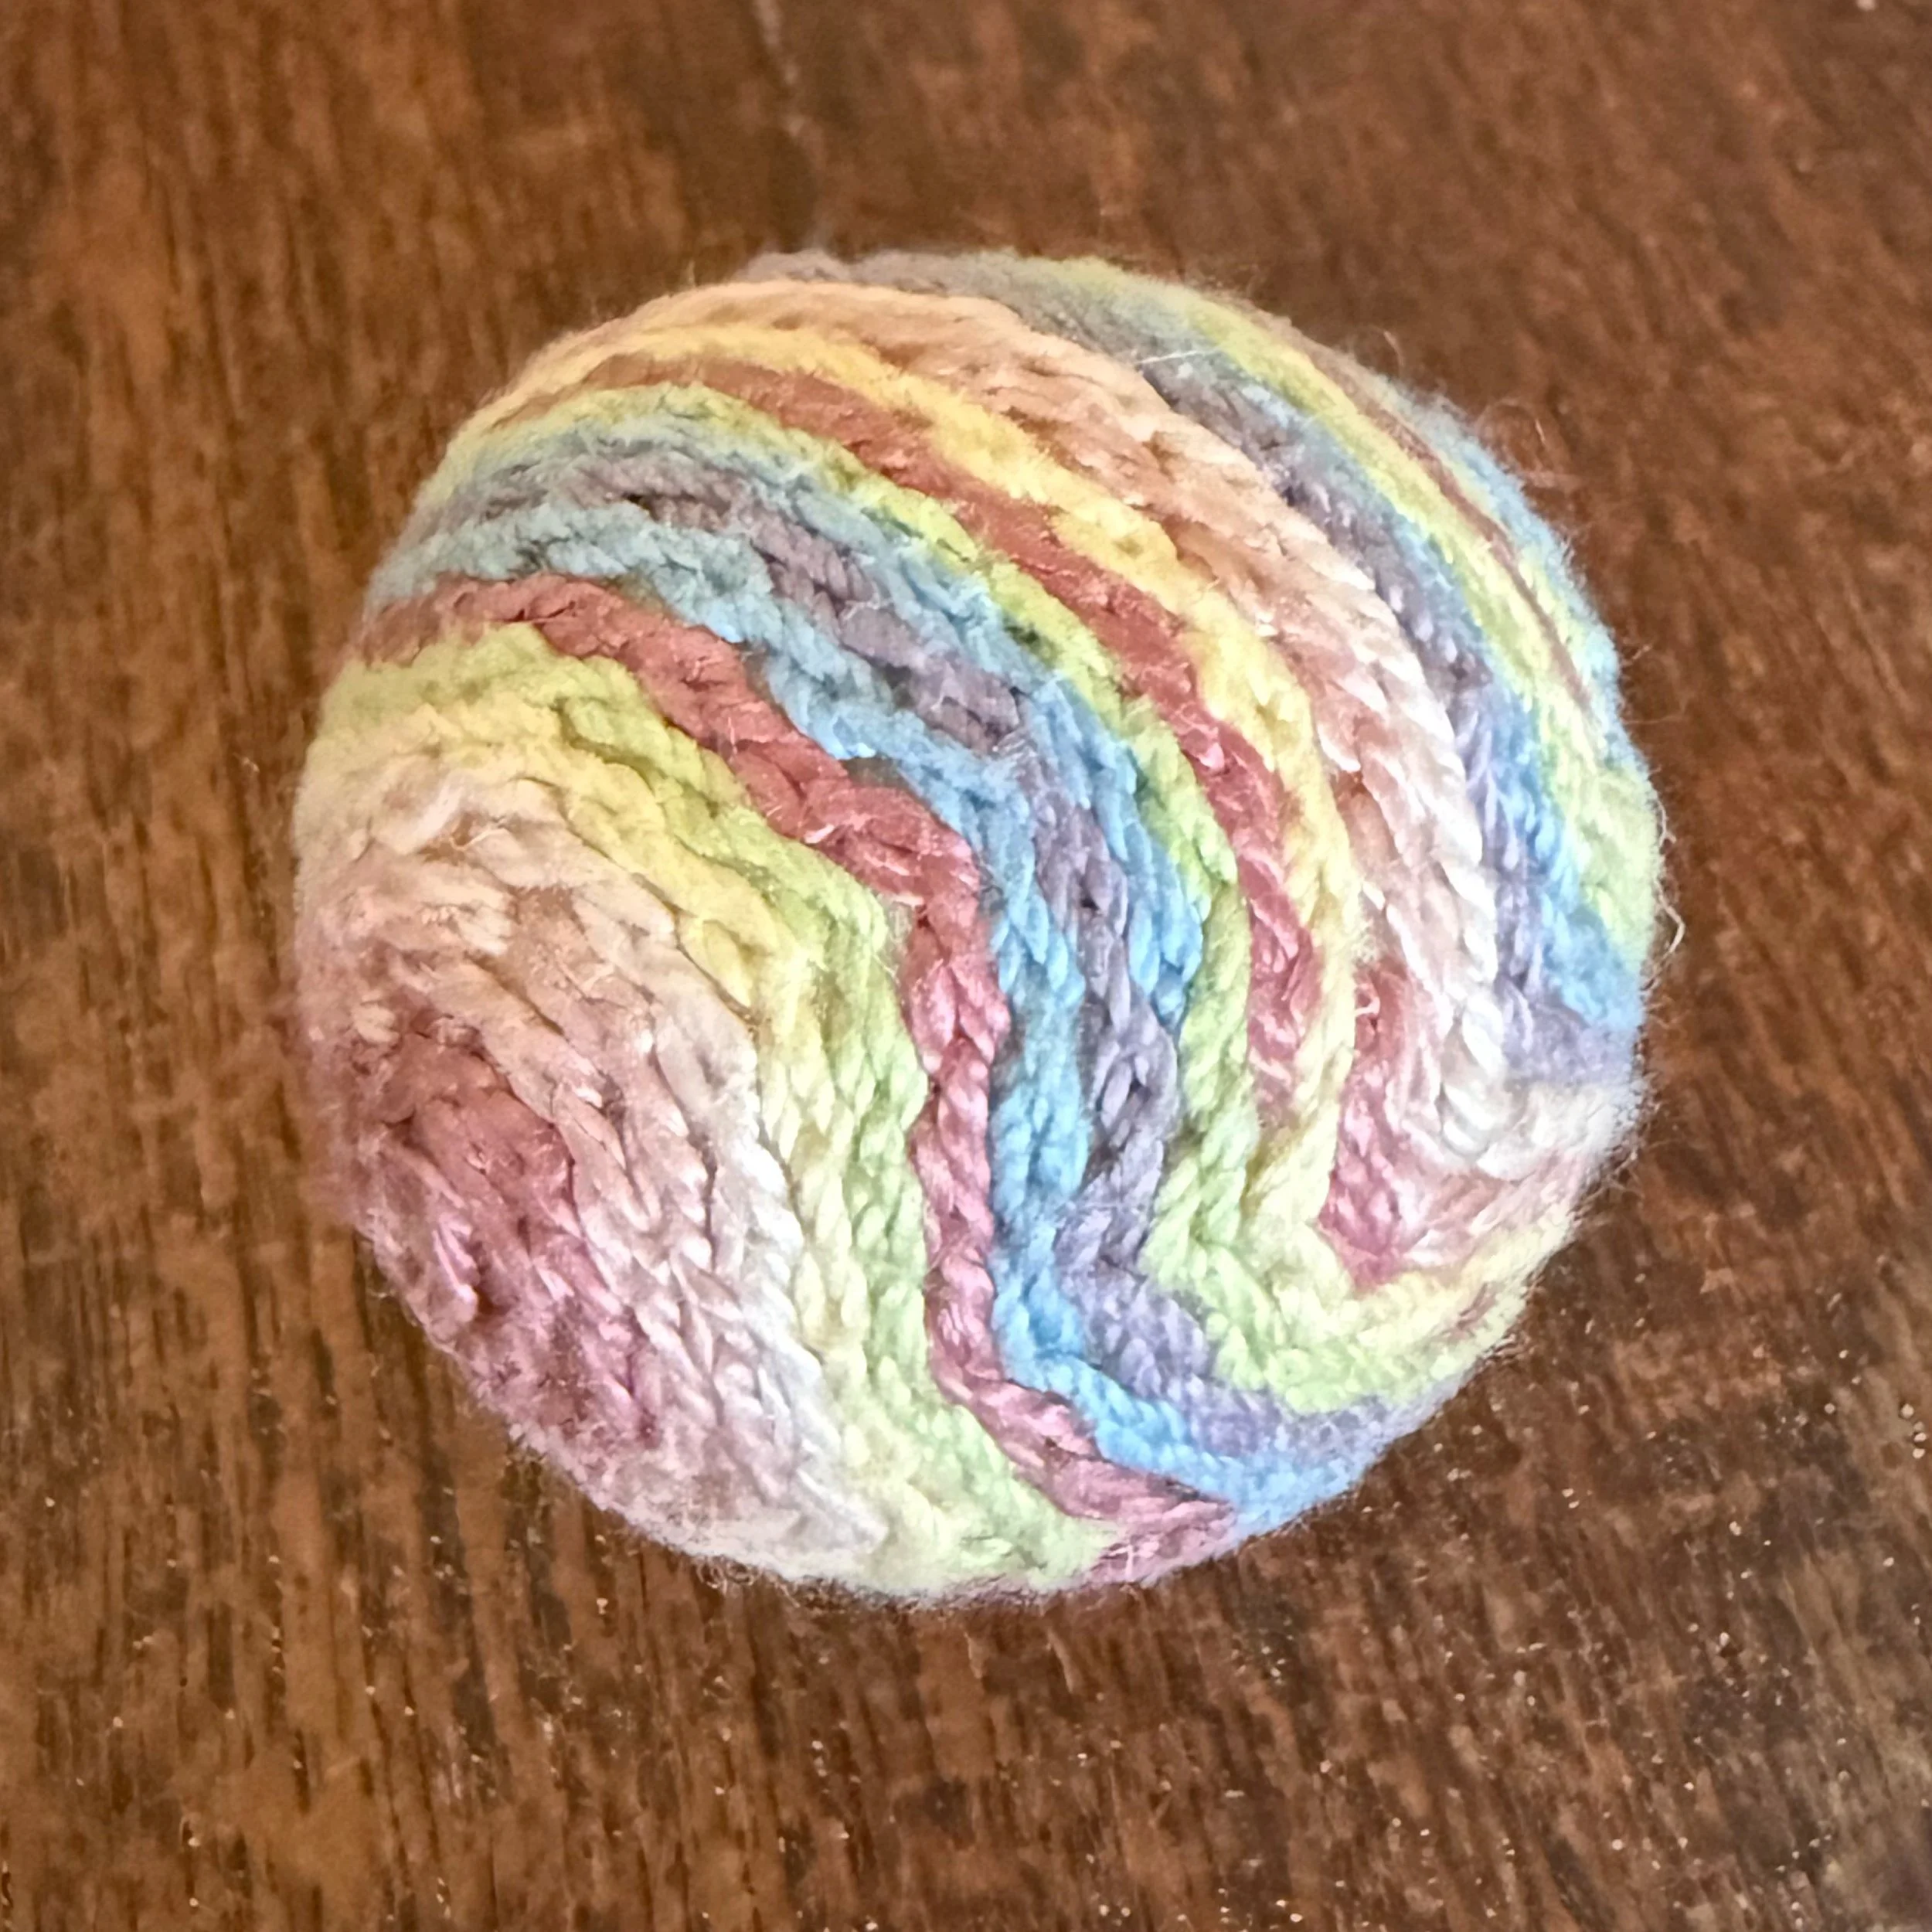
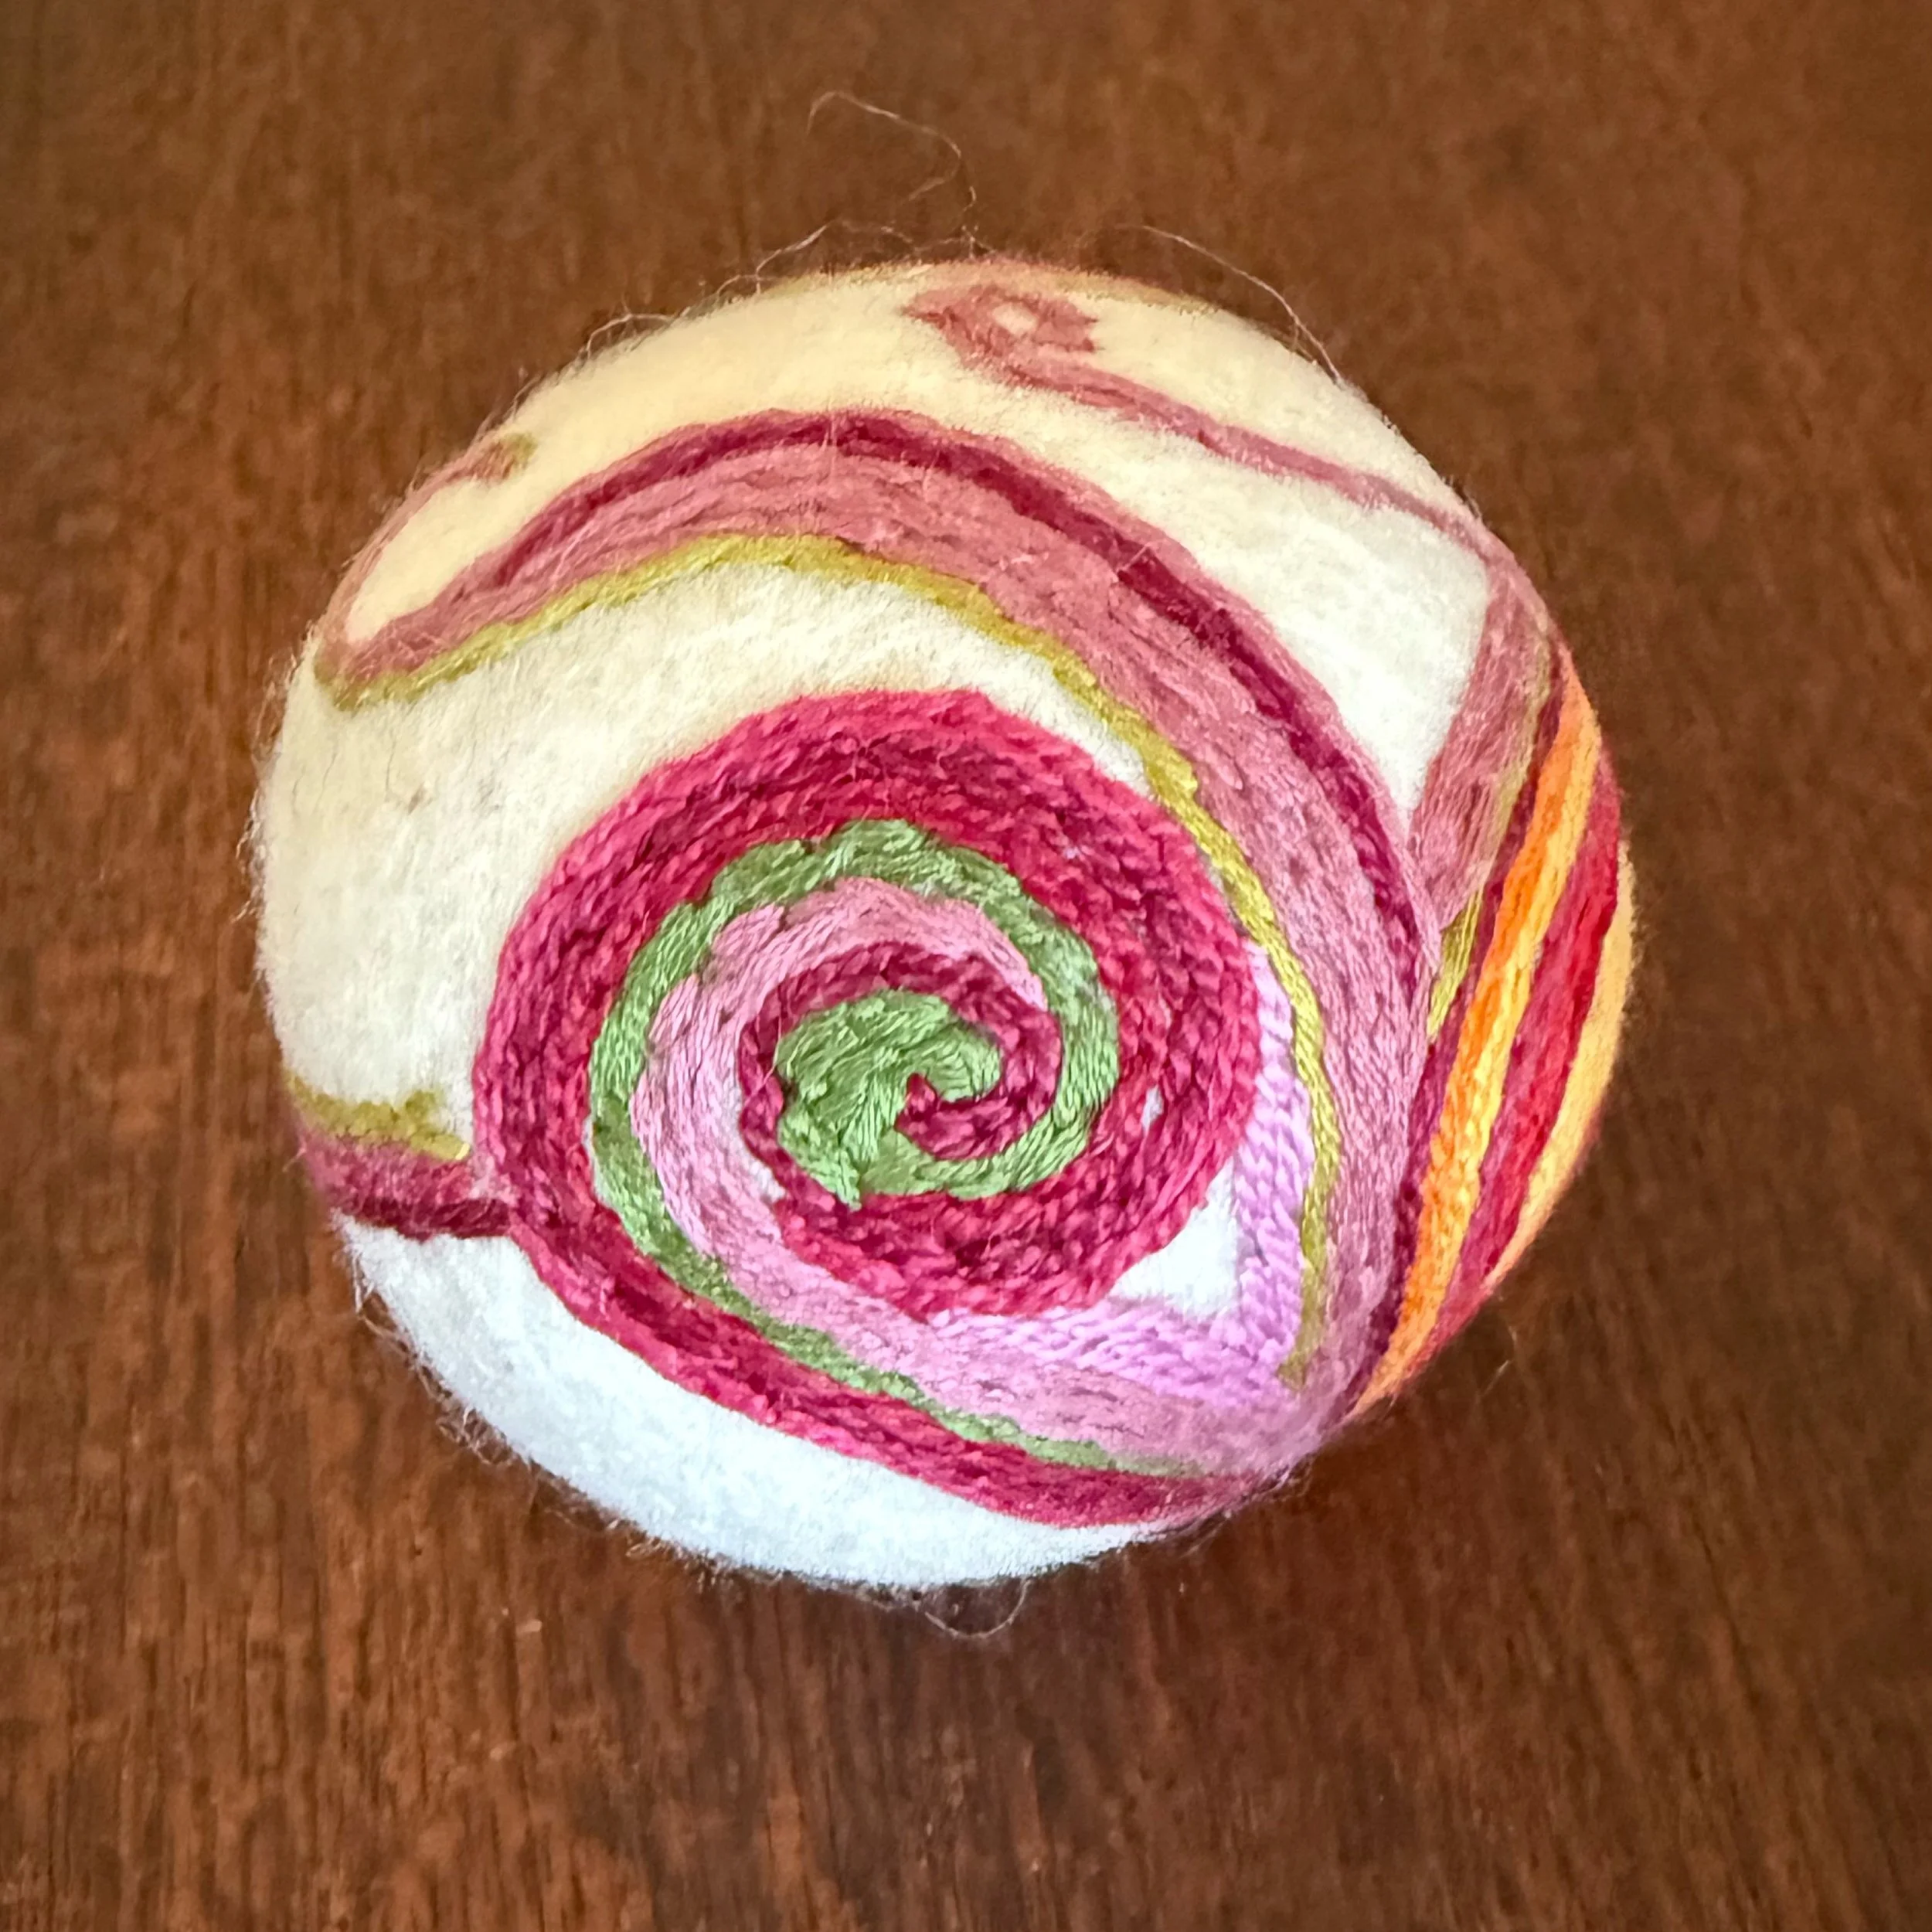
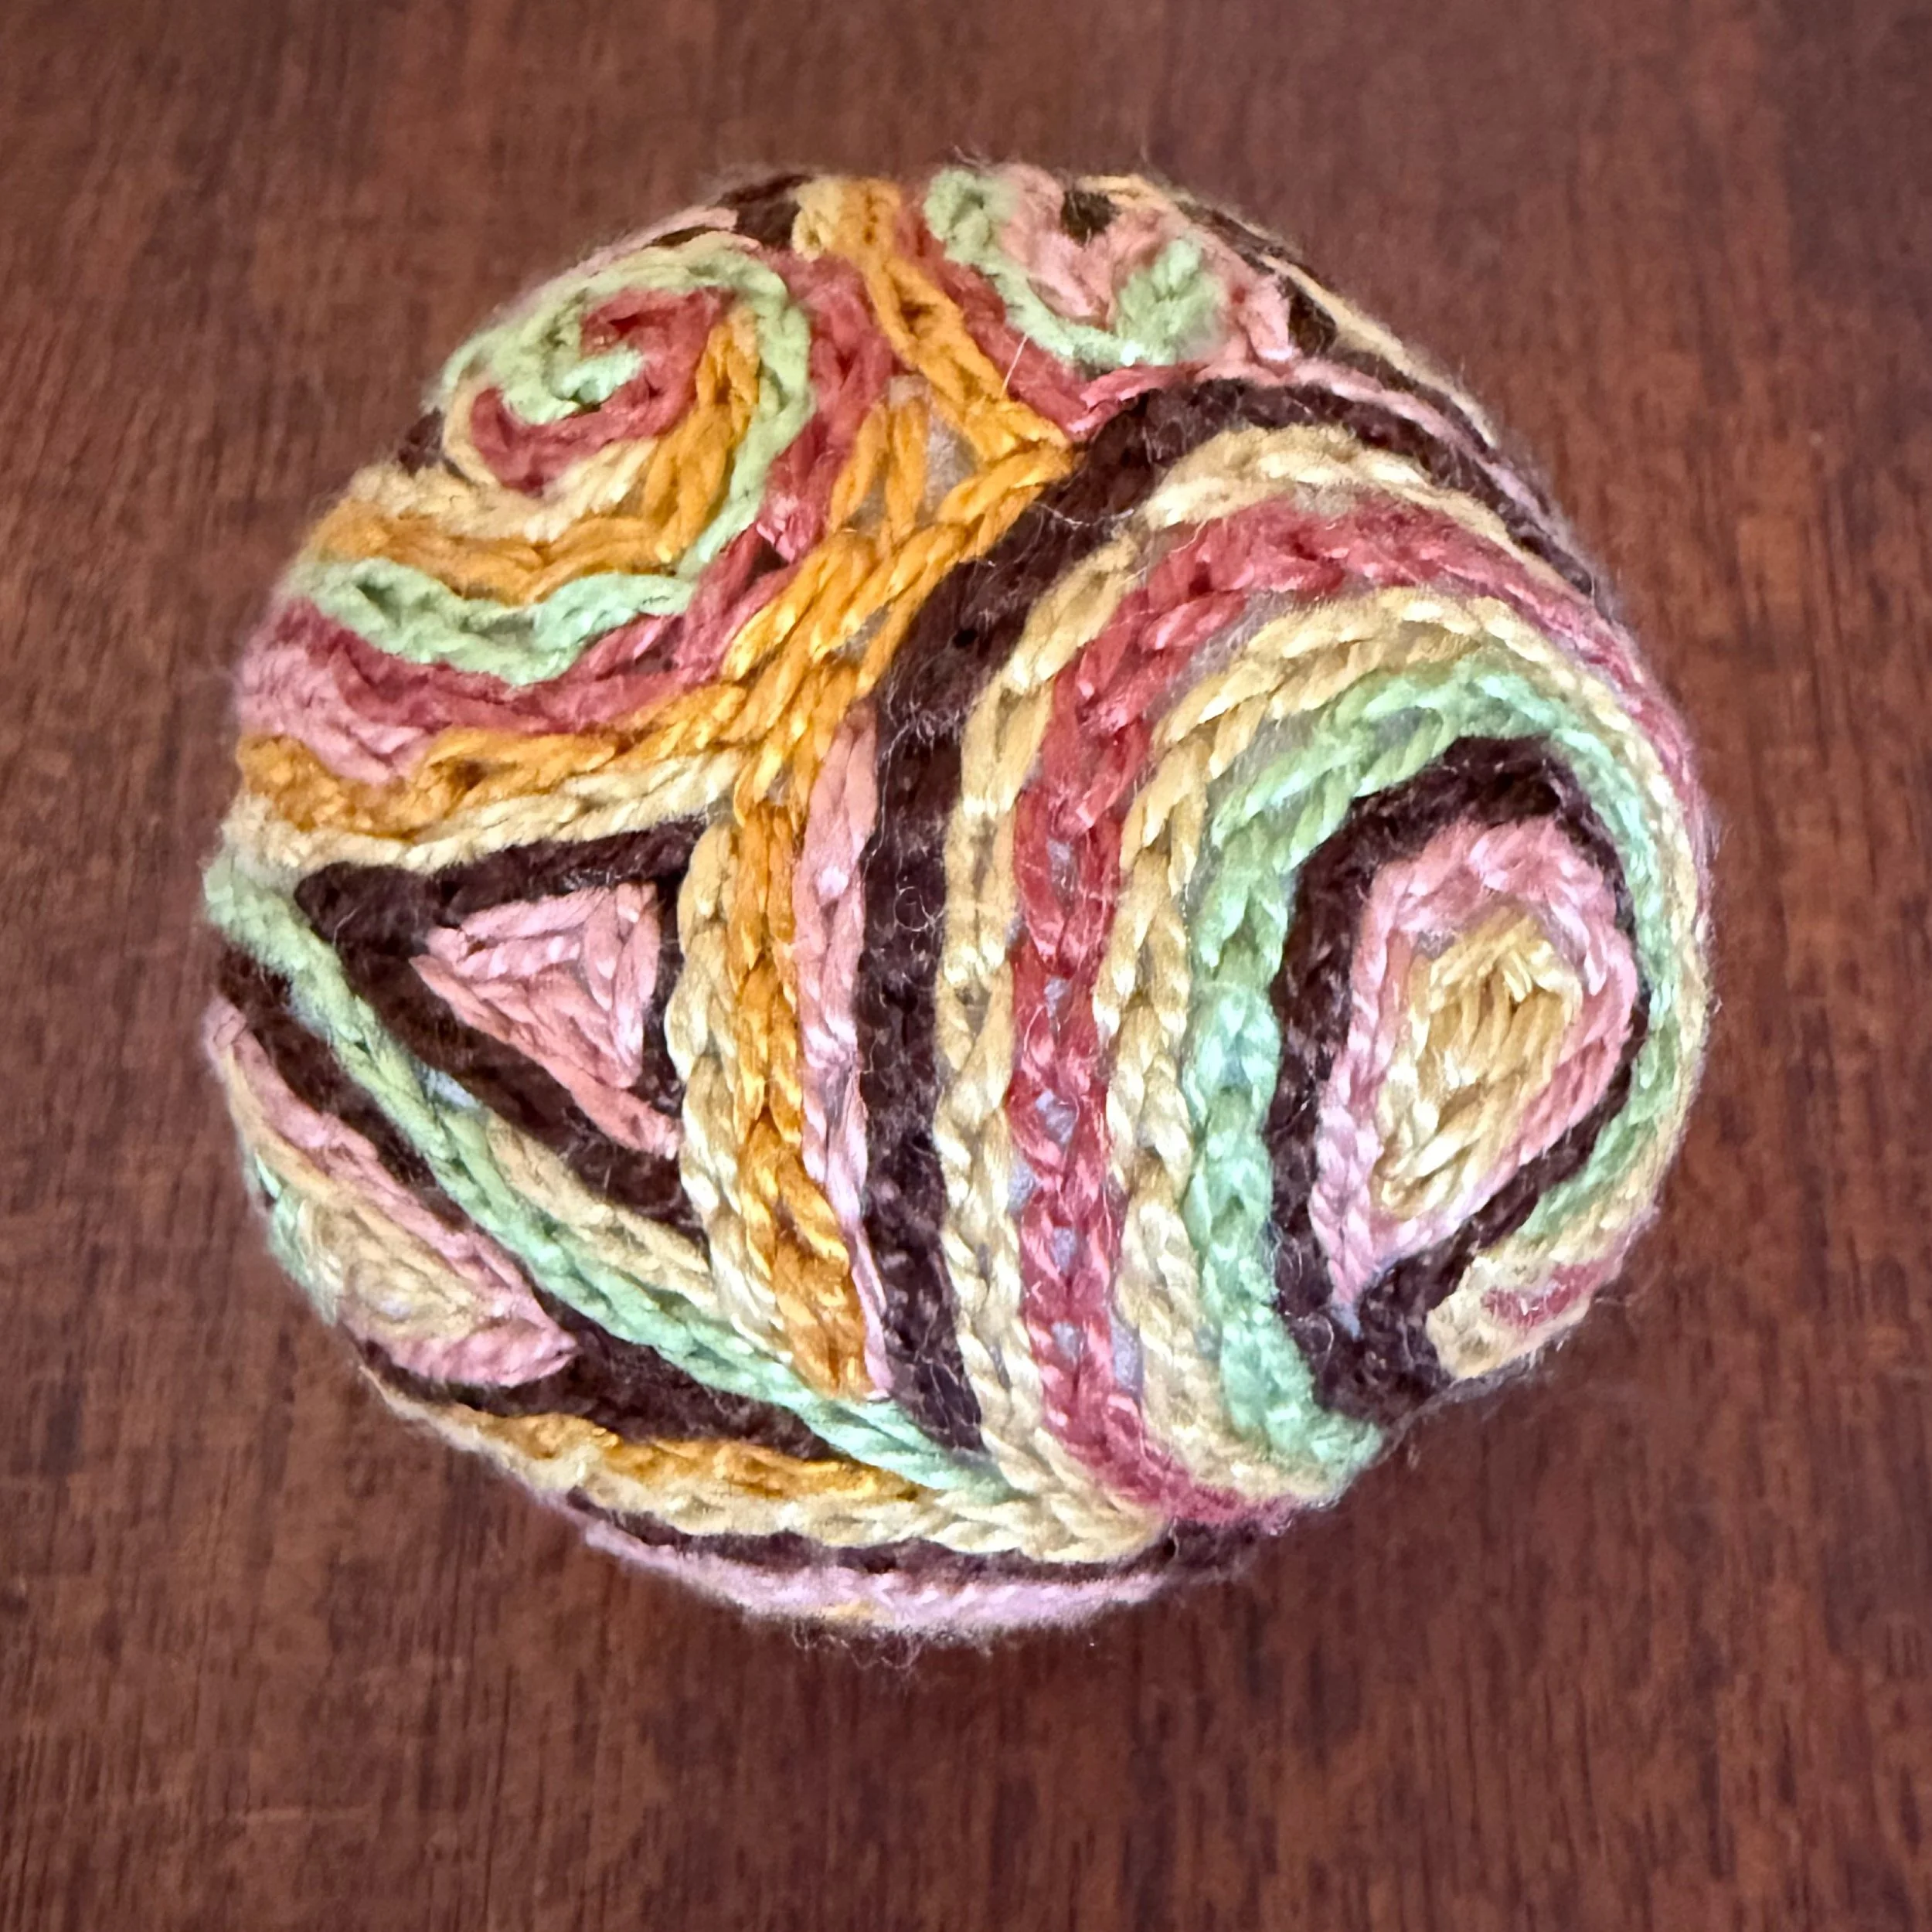
A common Grade 4 handwork project is the embroidered ball. Starting with wool freshly sheared from a sheep, students clean and card the wool before packing it down into a ball. Wet felting is one way to compact the ball, but there are other ways to prepare this project. Once the ball is prepared, the students embroider the ball using a chain stitch. This is one project that definitely calls upon the students will forces as persevering through this project can be difficult for some students. But finishing a project is of paramount importance.
To complement the main lesson blocks in Norse mythology, braiding and Nordic motifs may be included in the projects. Throughout all the projects and handwork, there’s always an emphasis on the process over the product; however, the teacher always encourages students to complete a project.
Grade 4
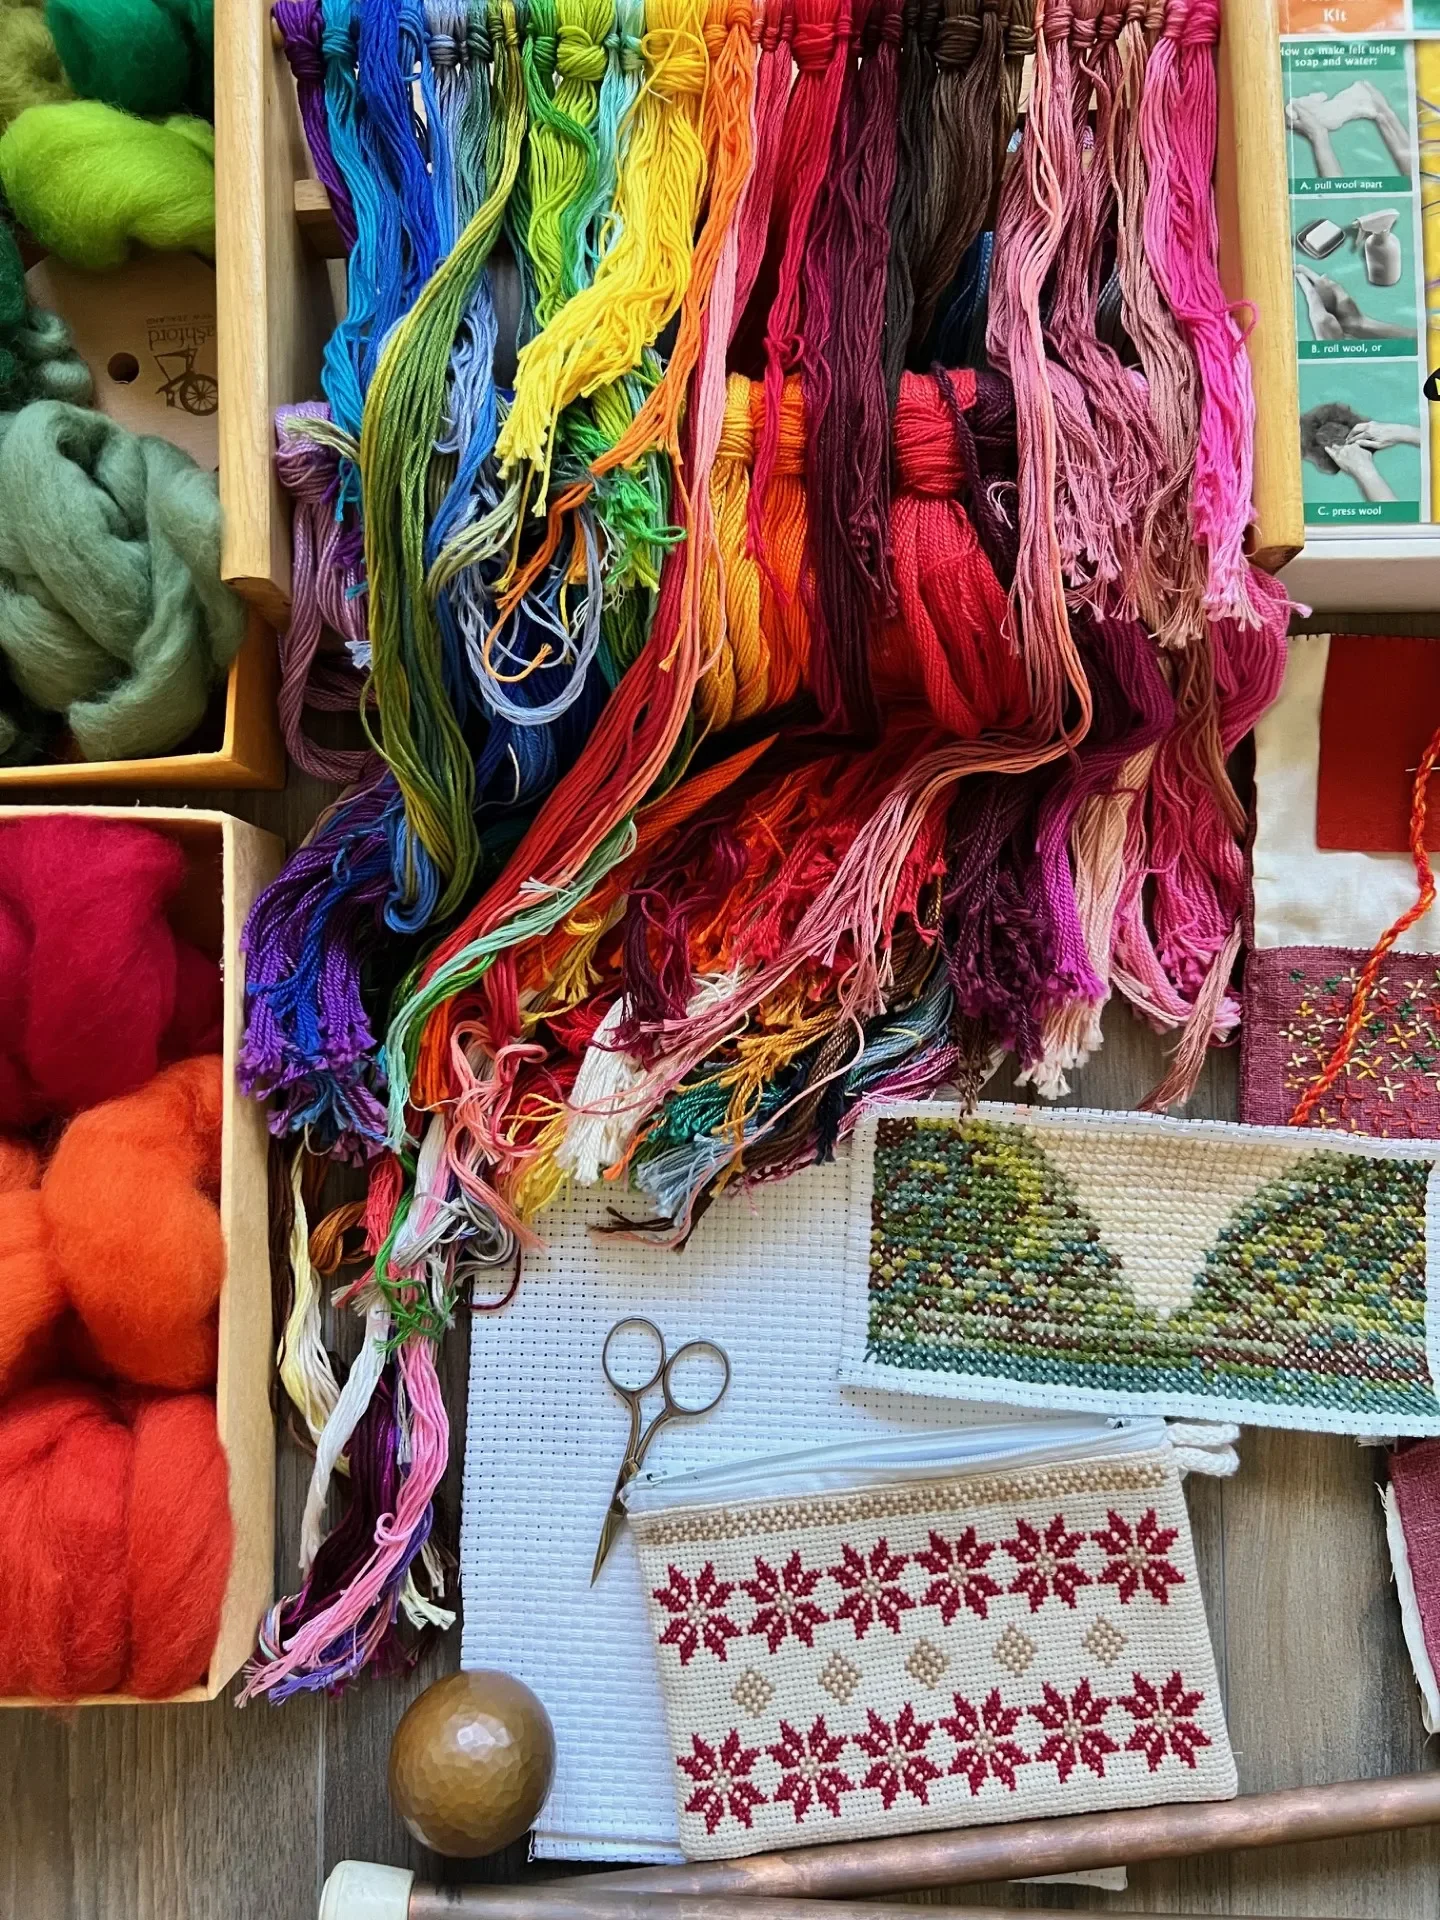
Handwork Materials

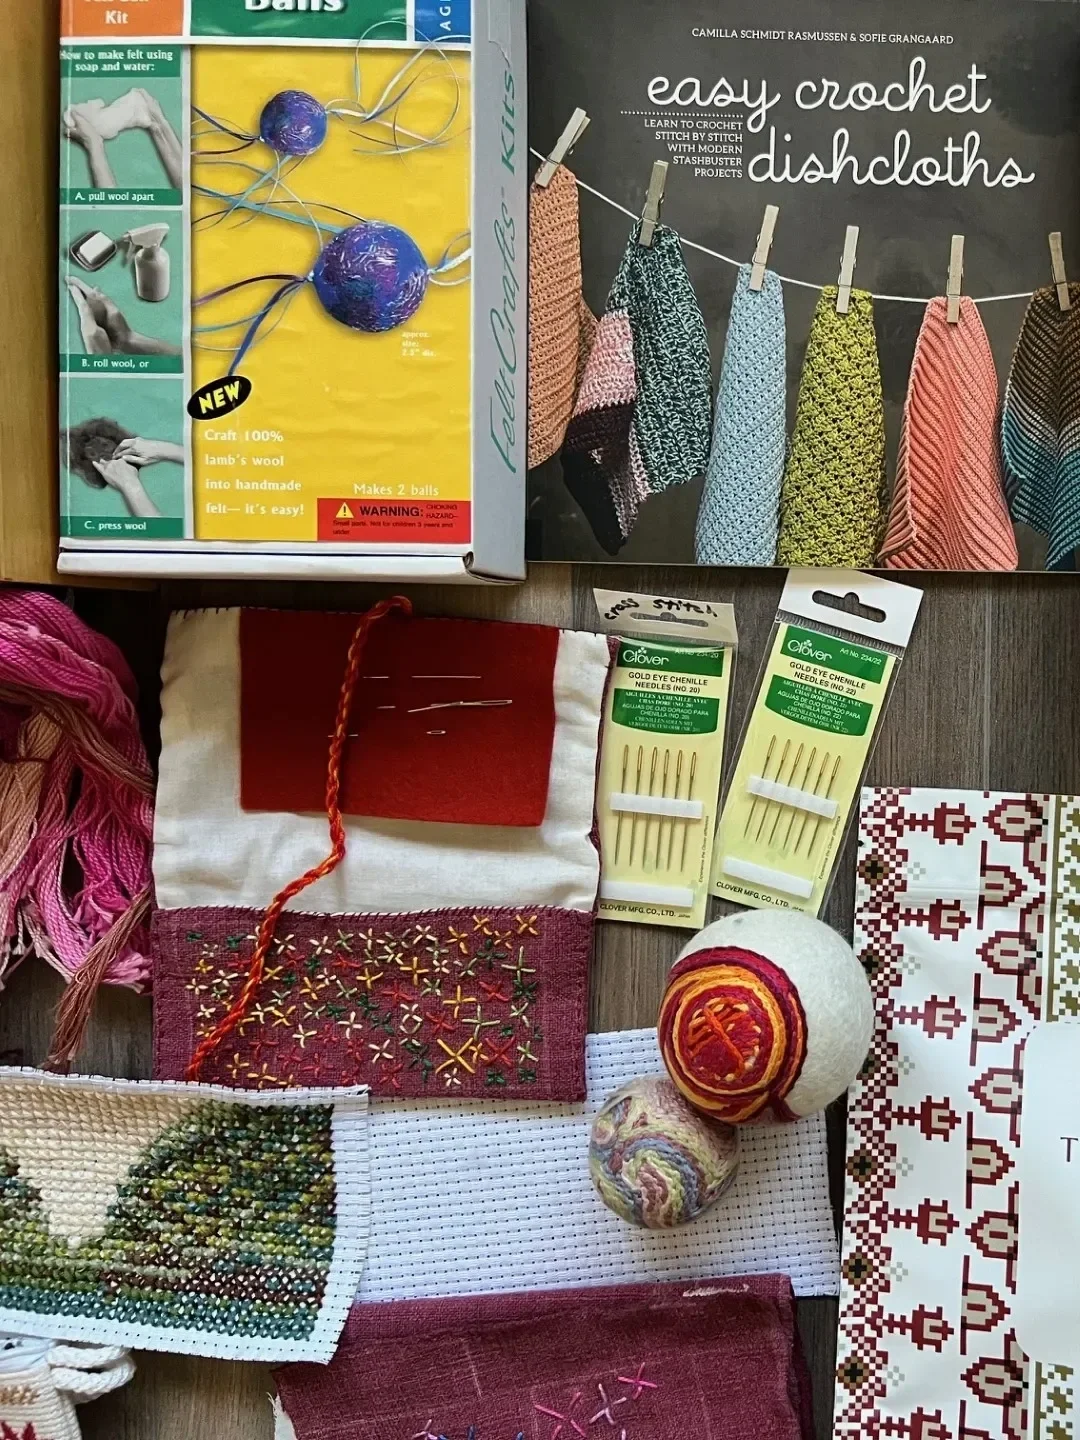
Handwork in Waldorf schools takes as much care in choosing the work that will be done as choosing the lessons. In some cases the lessons and the handwork coordinate beautifully. Cross Stitch and embroidery are the main projects for this grade. Felting a ball is the first step to an embroidered ball. This project may take weeks to months to complete. Cross stitch is a beautiful skill to develop at this age. Links to materials on blog post. Link below.
Handwork Projects | Grade 4
-

Handwork Resources | Waldorf Grade 4
Handwork in Waldorf schools takes as much care in choosing the work that will be done as choosing the lessons. In some cases the lessons and the handwork coordinate beautifully. Cross Stitch and embroidery are the main projects for this grade. Felting a ball is the first step to an embroidered ball. This project may take weeks to months to complete. Cross stitch is a beautiful skill to develop at this age.
-
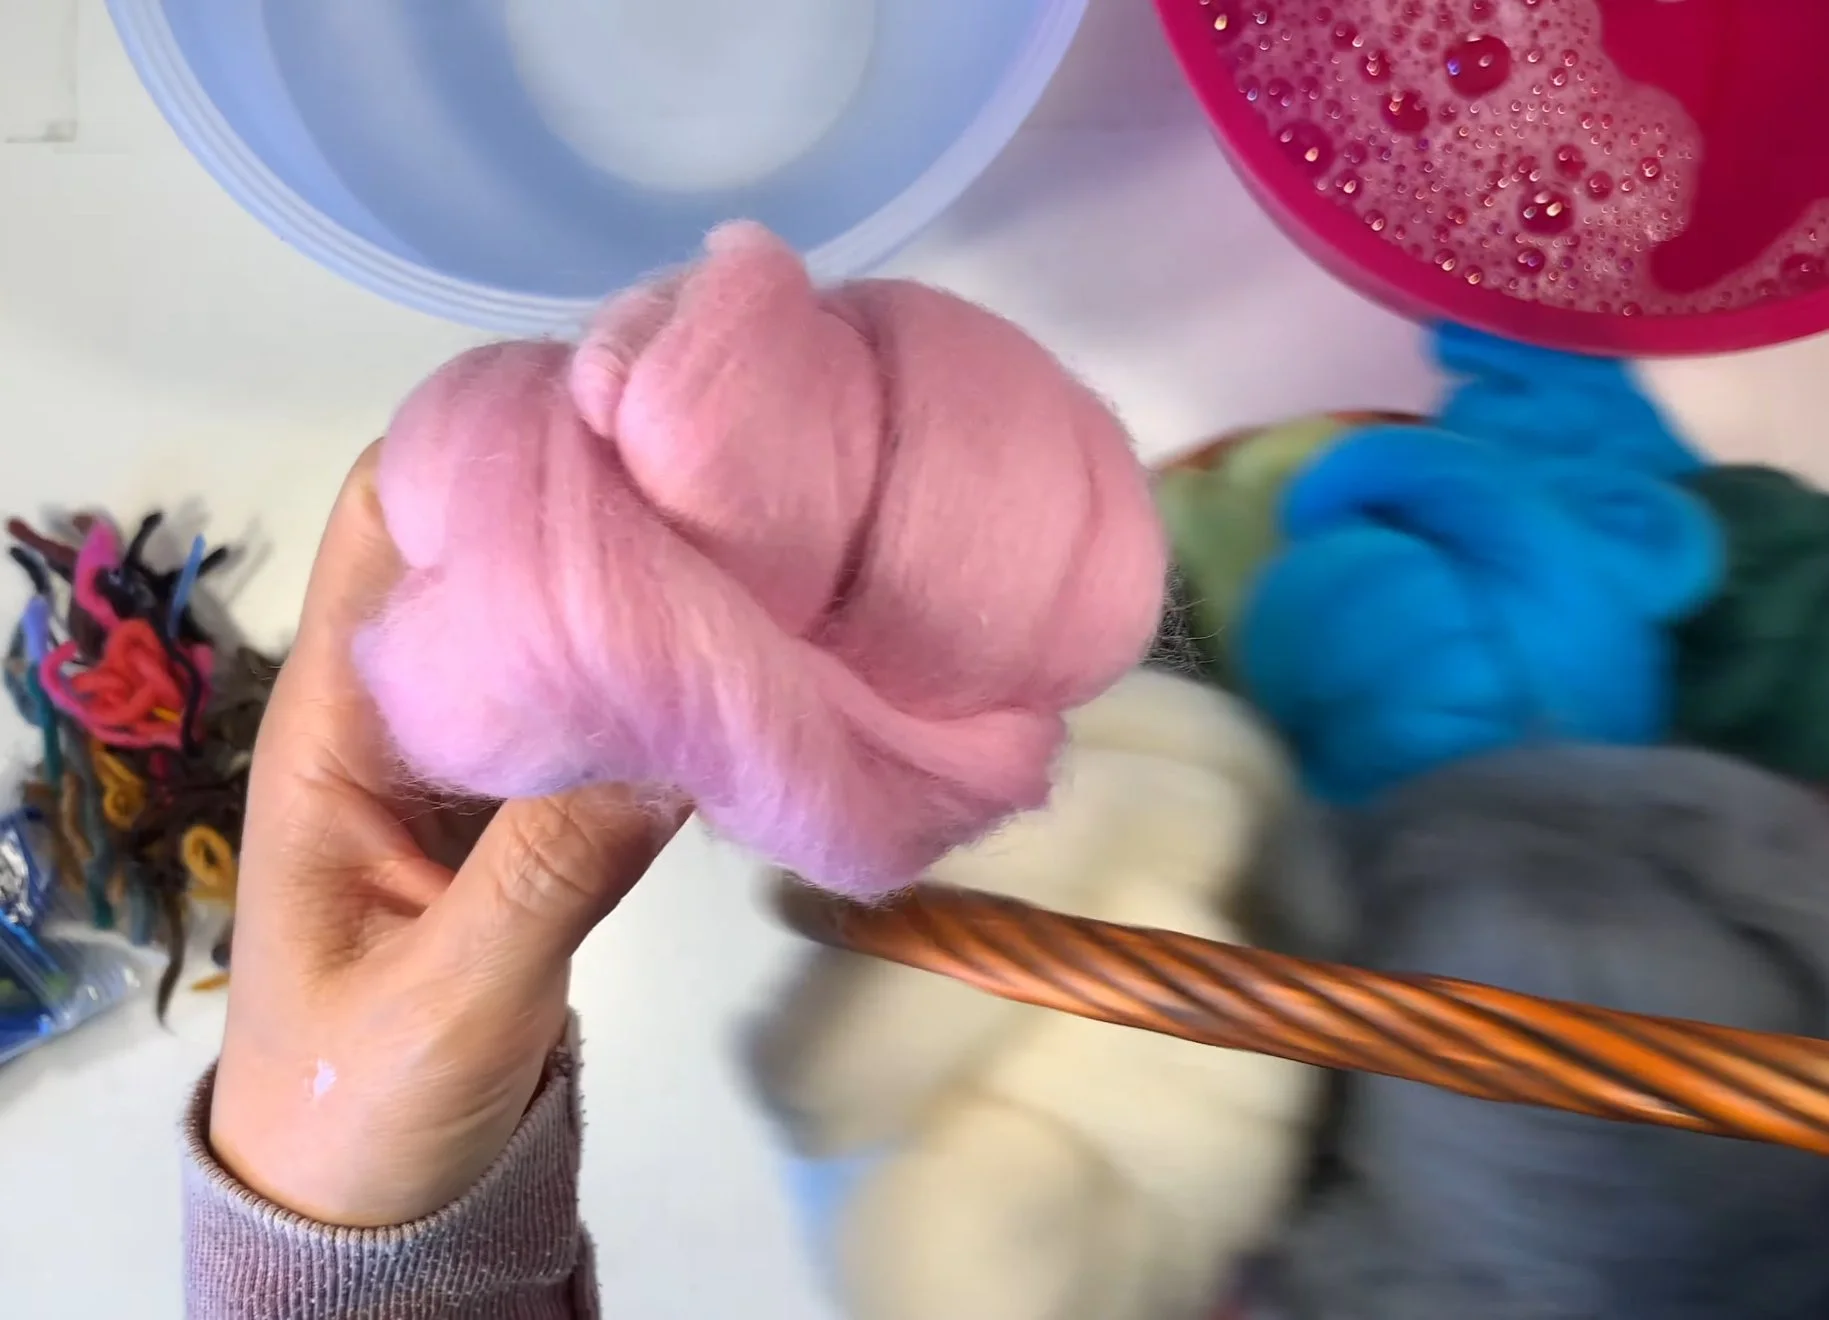
Wet Felting
Wet felting is such a fun engaging craft. With a bowl of warm/hot water and another bowl of cold water. You also need dish soap and wool. Children love the process of compacting the wool into a ball and bouncing it around once it’s firm enough and ready for drying.
-
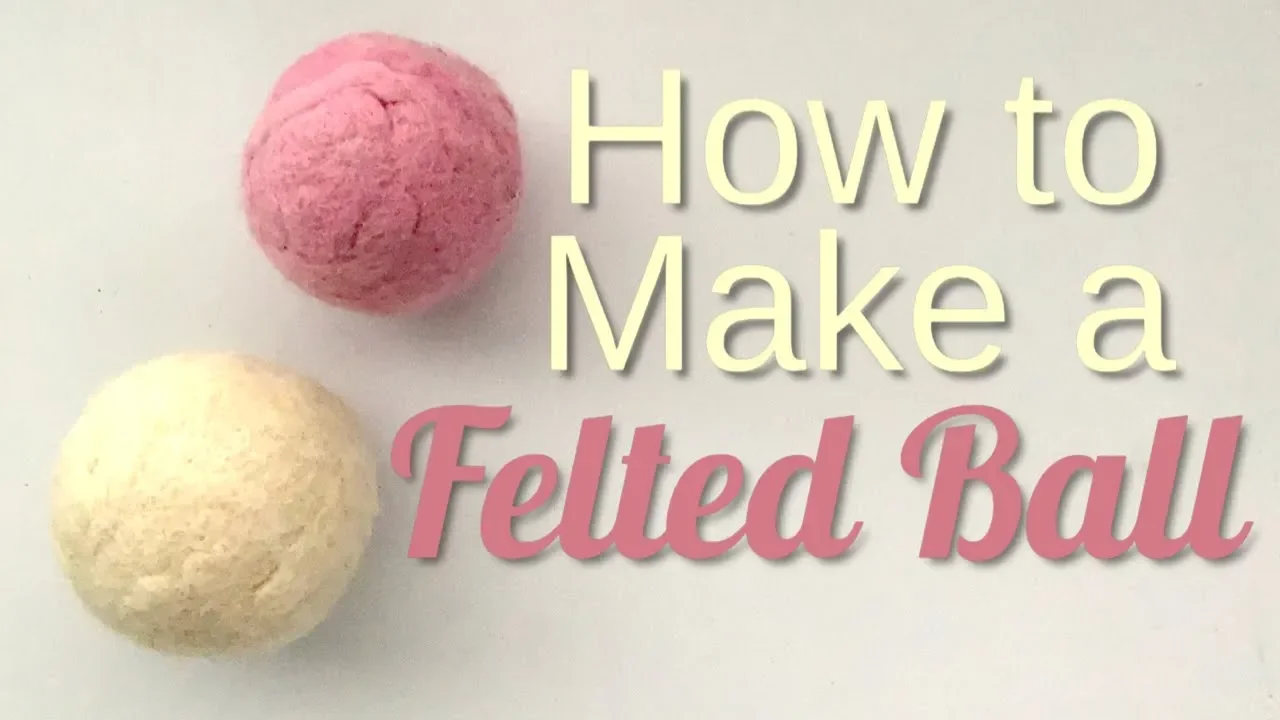
Wet Felted Ball
Some handwork projects span several weeks or months and others can be done in a day. Making a felted ball falls somewhere in between depending on how you make it and for what purpose. In grade 4 Waldorf schools, you may find students making and embroidering felted balls. These gorgeous masterpieces take months to do, but the end result is breathtaking.
-
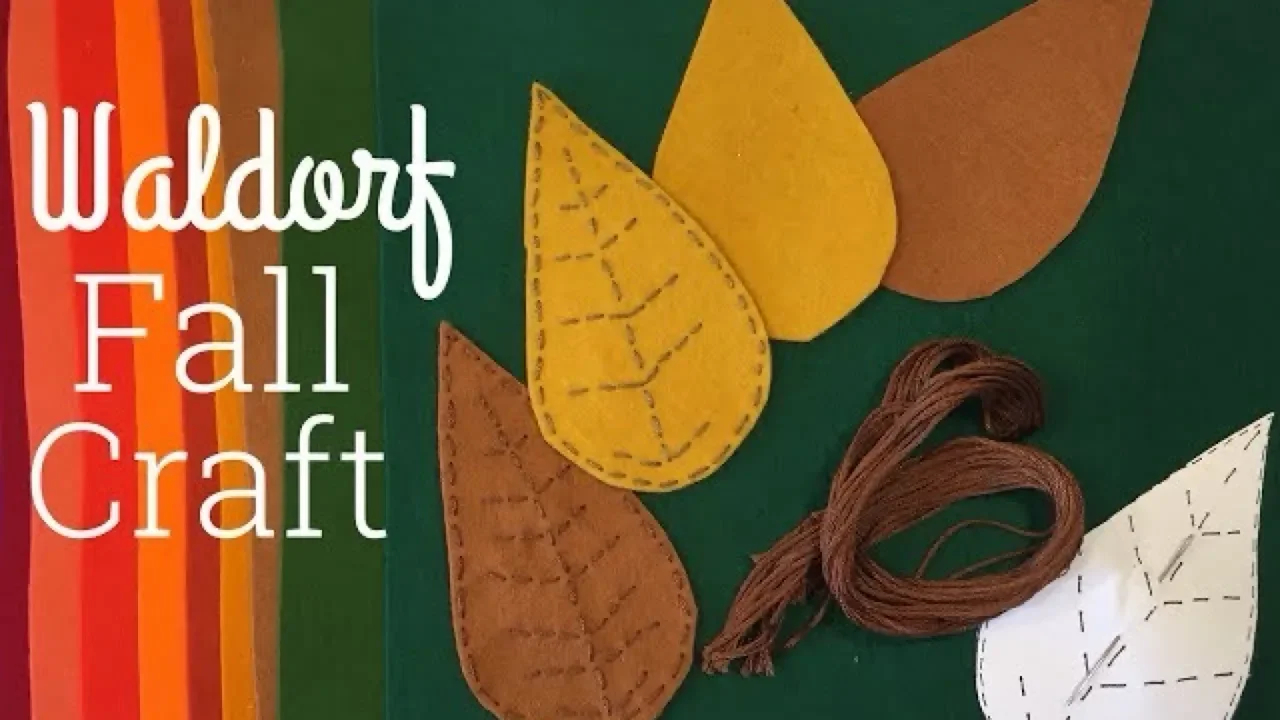
Stitching Leaves
Welcome autumn with this simple, yet beautiful handwork project that's great for children about eight years and up. All you need is felt and embroidery thread.
-
Embroidered Ball
In Grade 4 Waldorf Handwork, the embroidered ball project introduces students to three-dimensional shaping and decorative stitching, blending form and function in a joyful, tactile way. As they stitch panels together and embellish them with colorful embroidery, students refine fine motor skills, practice symmetry, and express creativity through pattern and color.
-
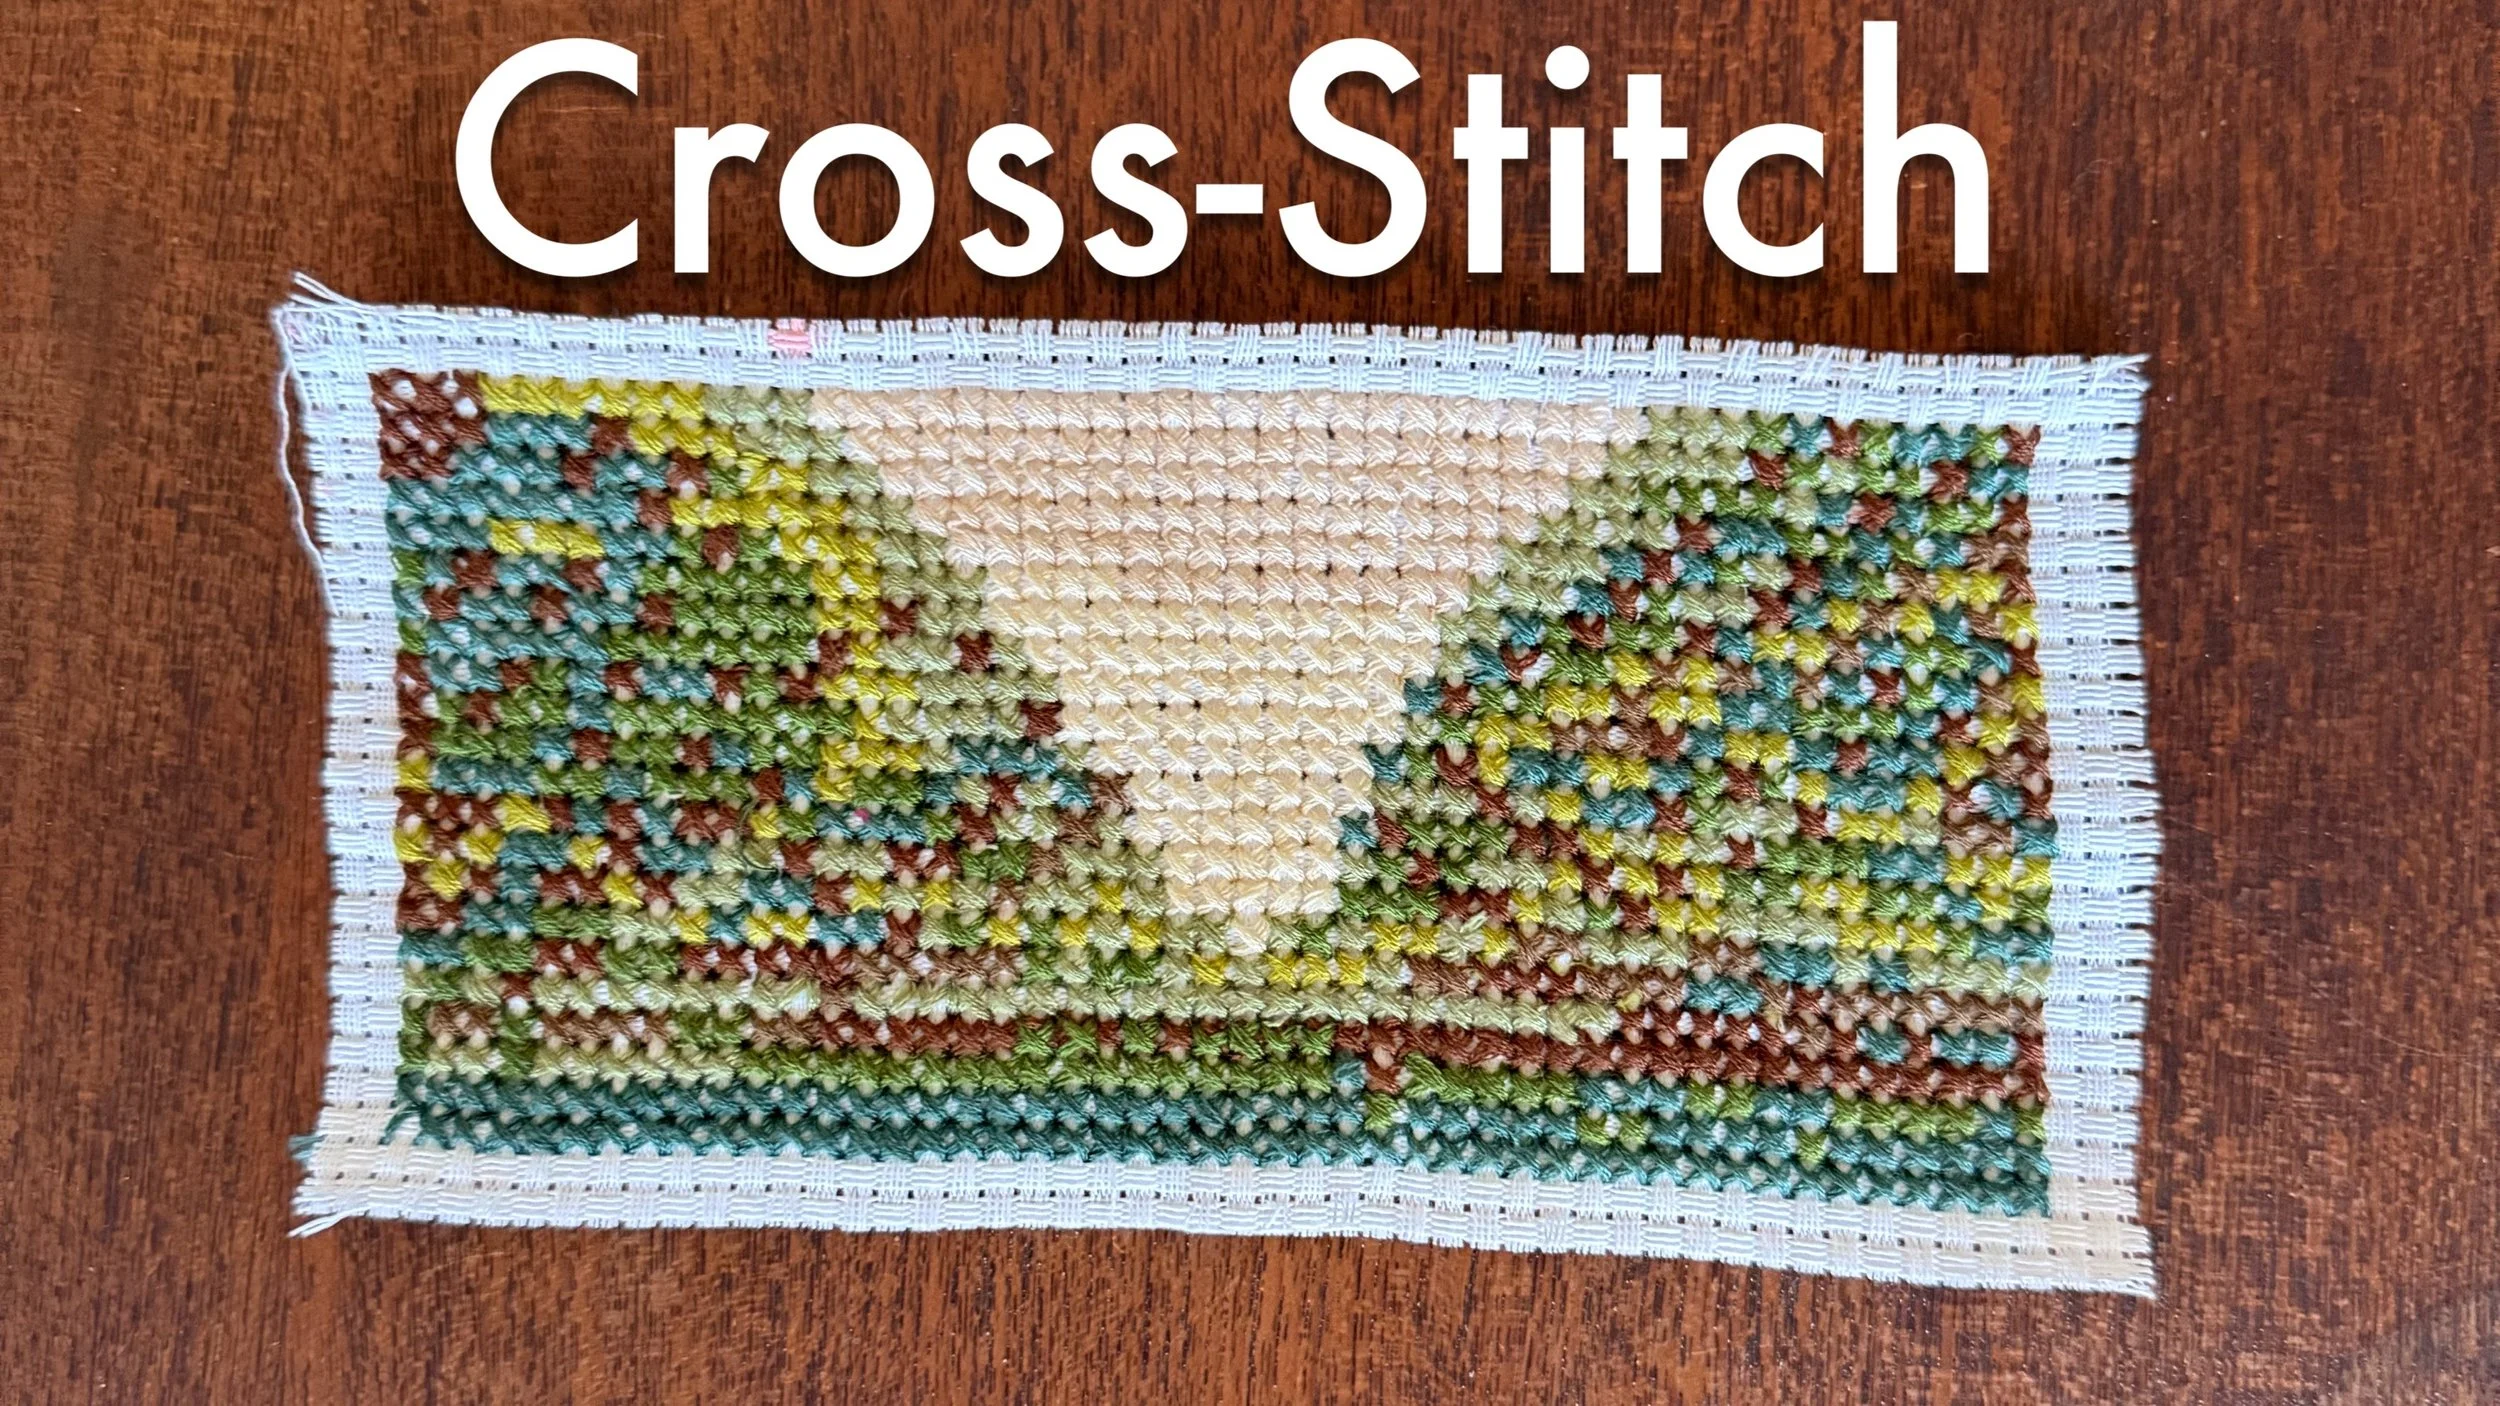
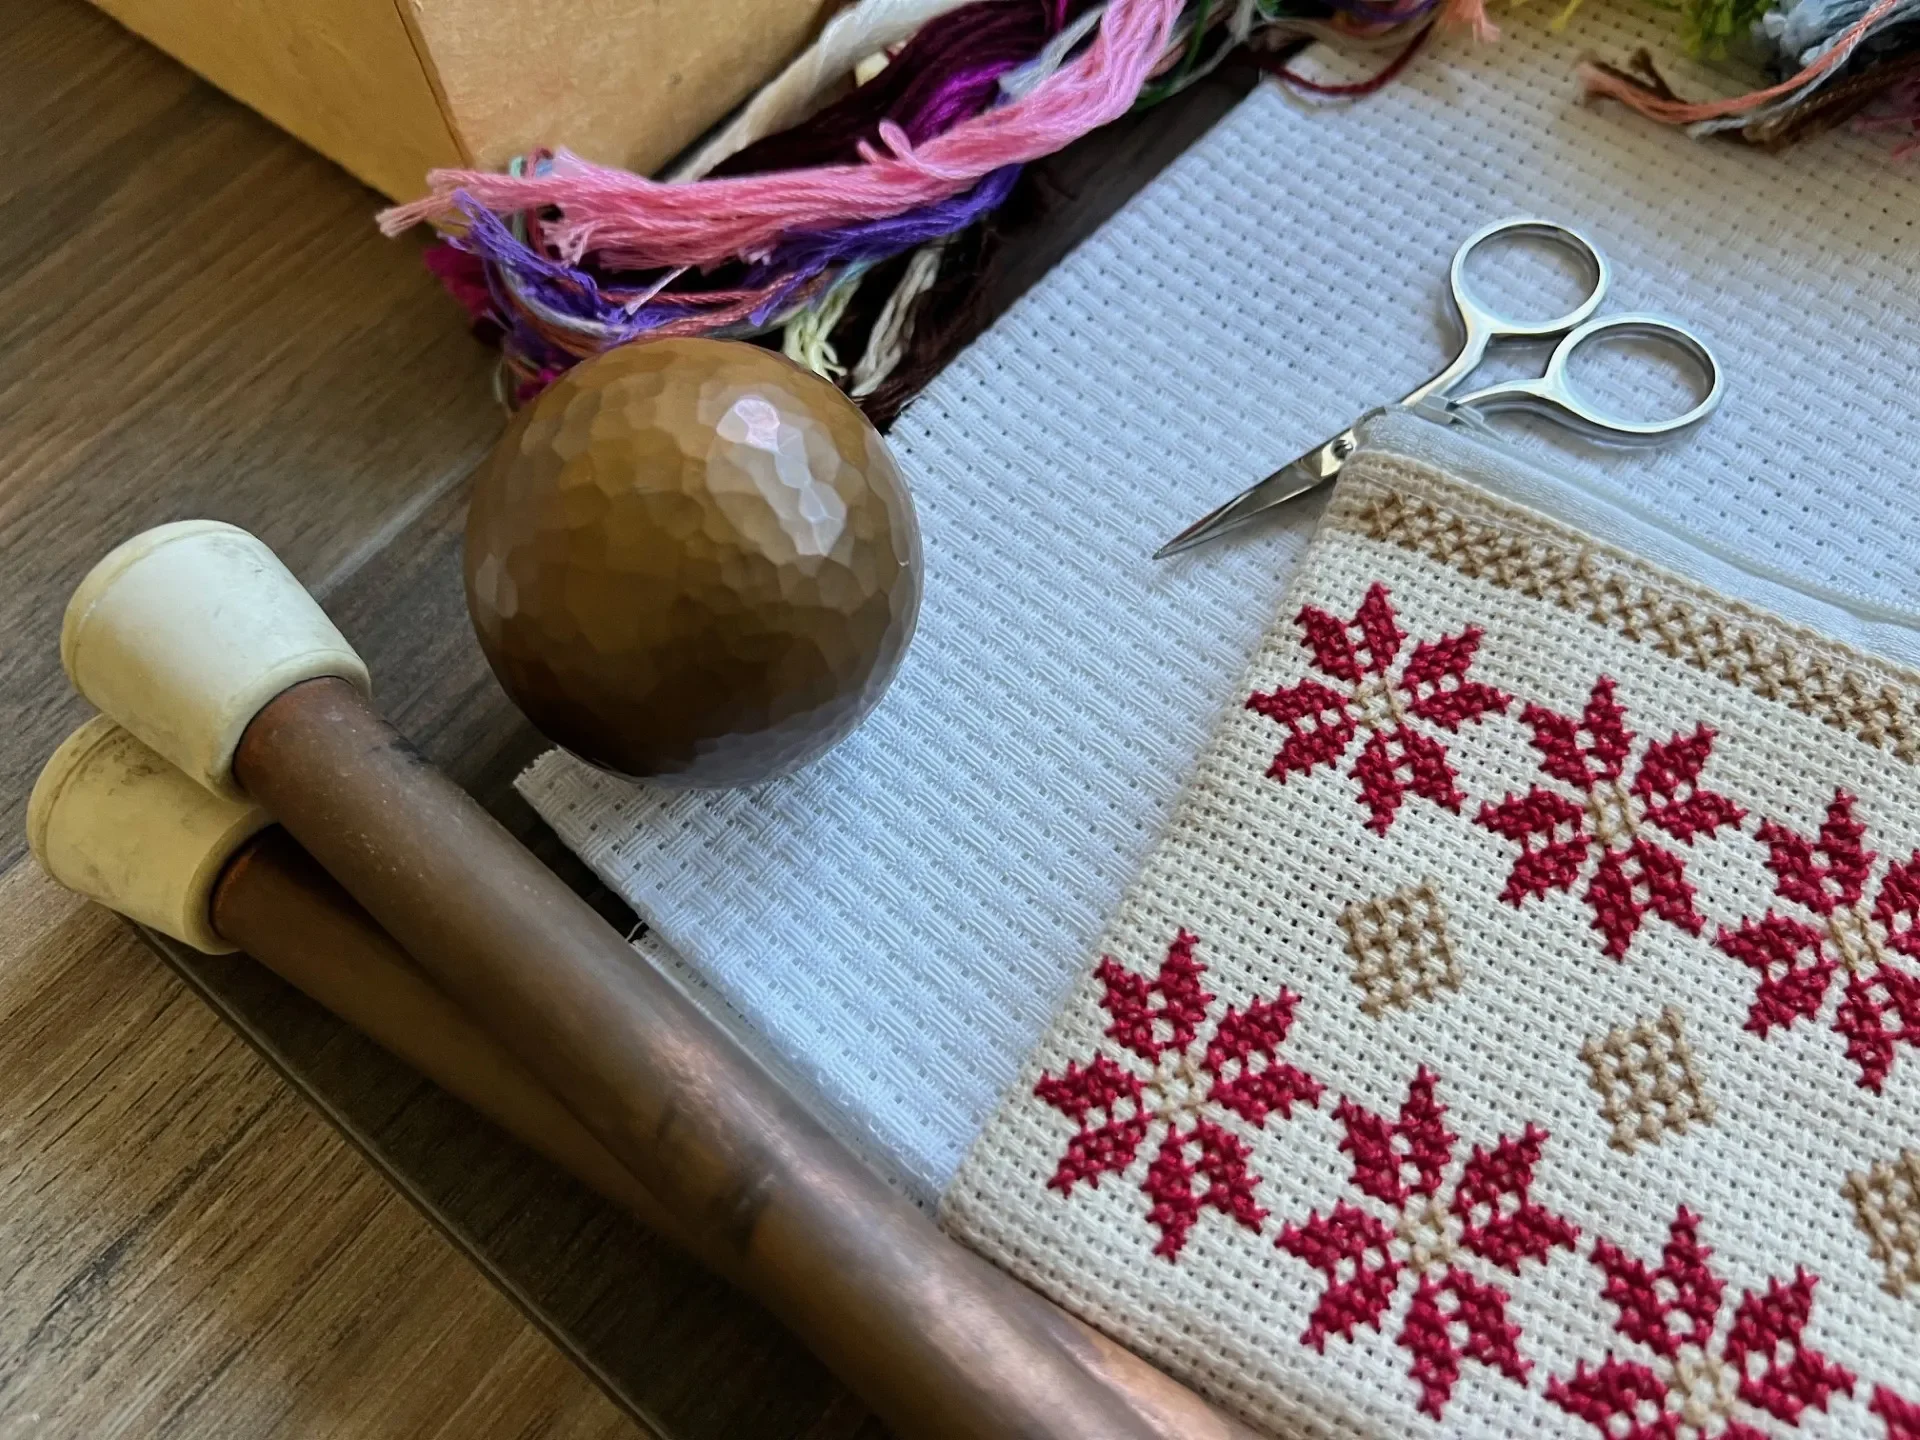
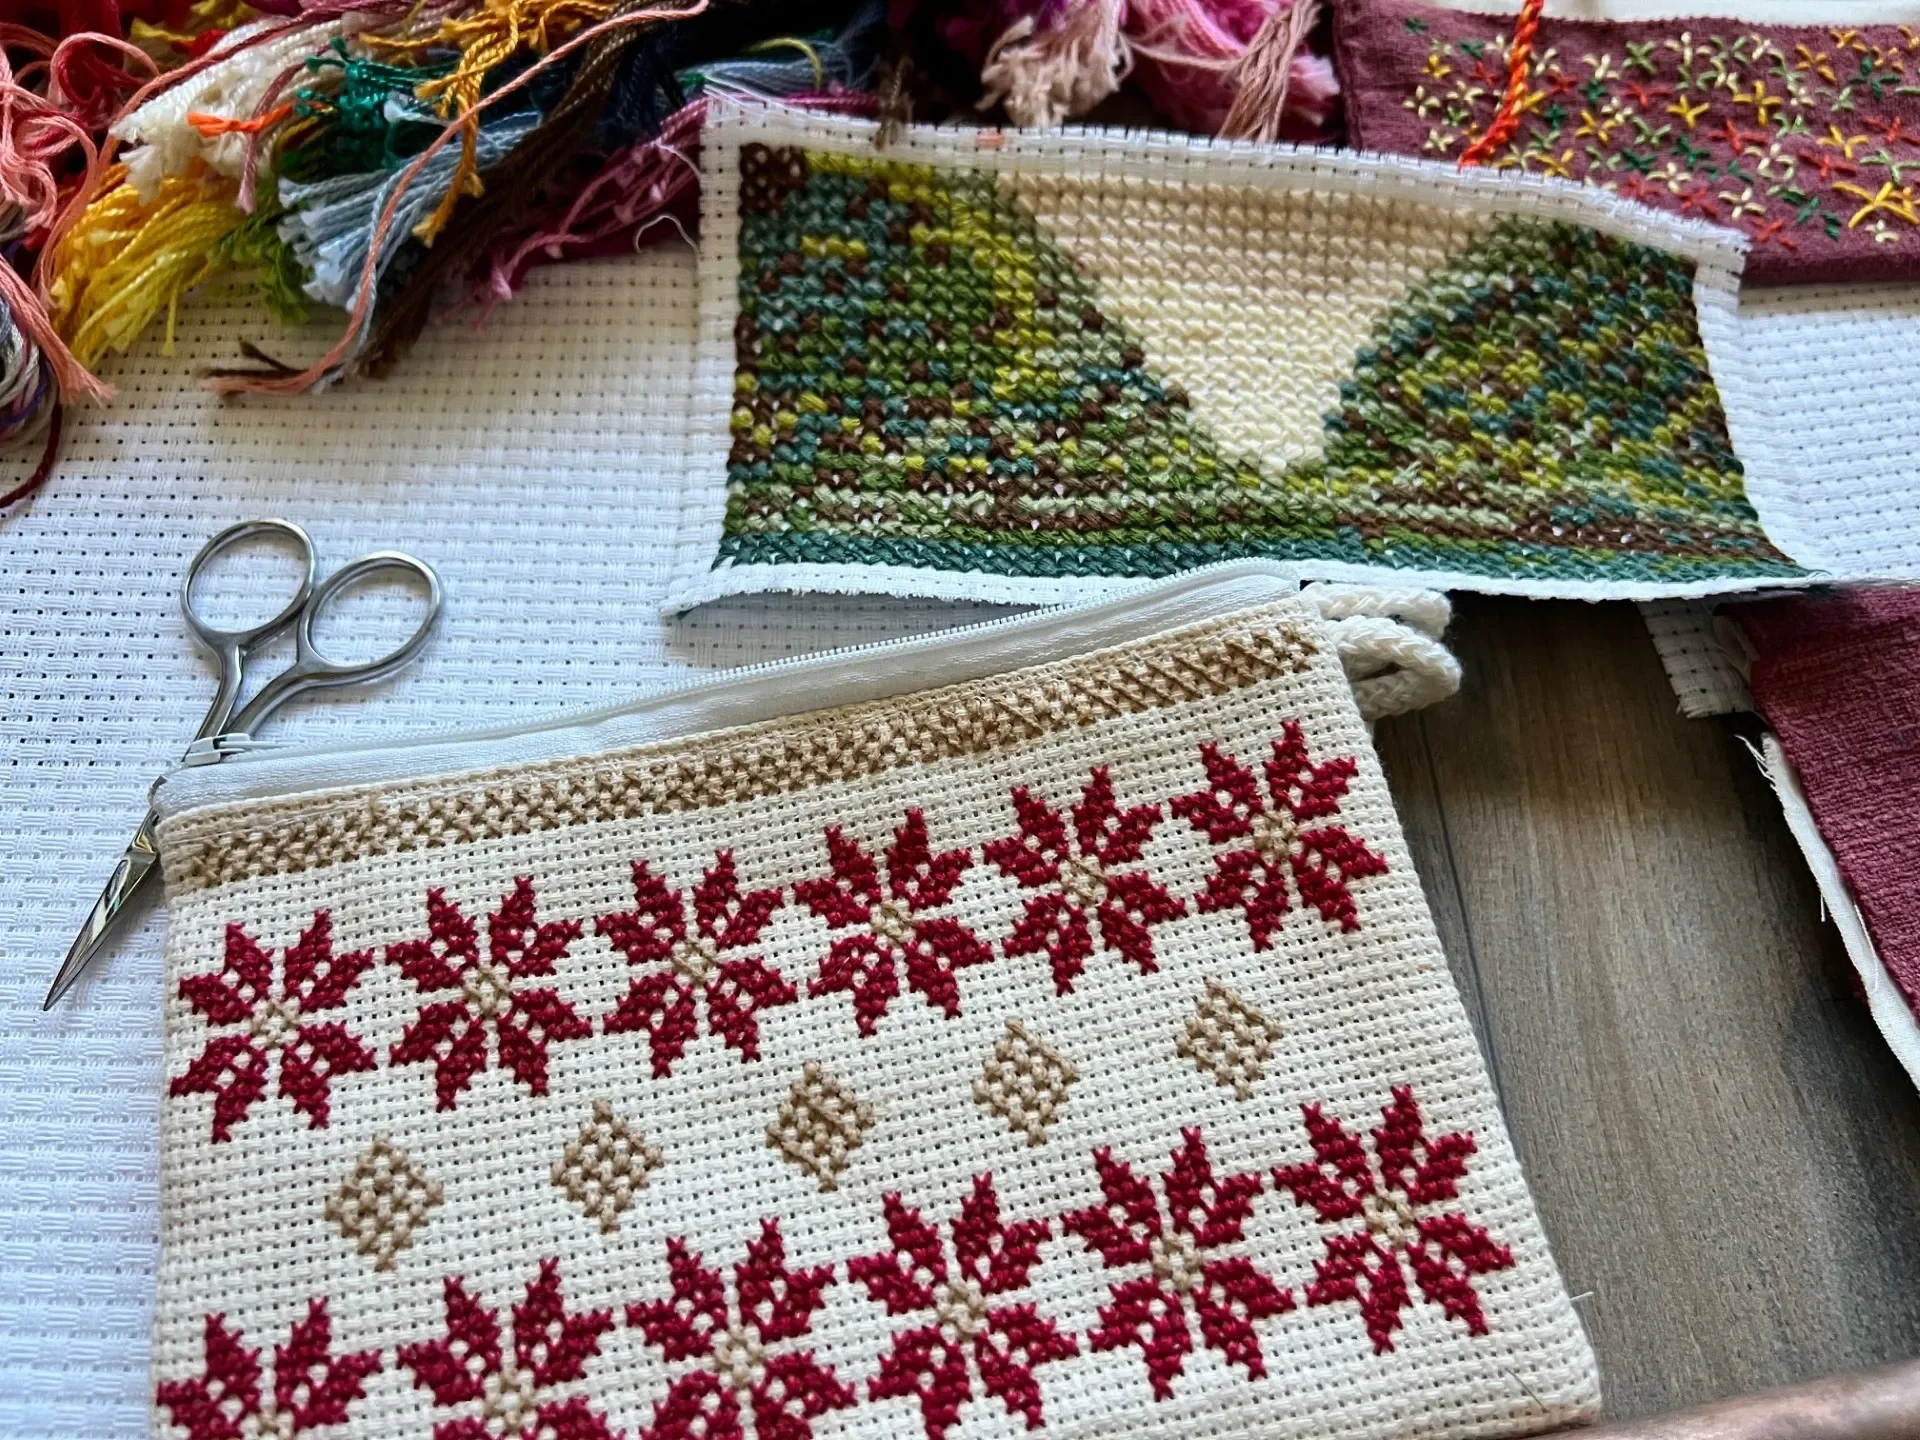
Cross Stitch
Cross-stitch introduces students to precise, rhythmic handwork that supports focus, patience, and spatial awareness. Working with geometric patterns on even-weave fabric, children gain confidence in stitching while exploring symmetry, color harmony, and traditional folk designs.
-
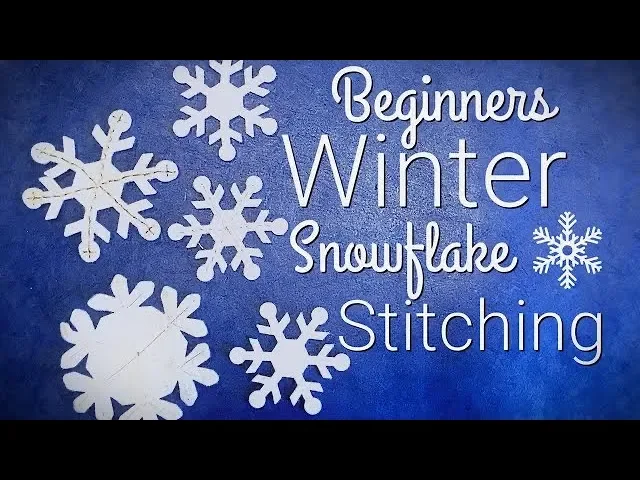
Stitched Snowflake
Stitching a simple running stitch on season shapes like leaves and snowflakes is a great opportunity to practice skills students will need in the upcoming years with short achievable projects. Adding stitching detail to snowflakes is a beautiful seasonal craft.
Handwork Resources
Waldorf Grade 4
Waldorf Handwork
Handwork in Waldorf schools takes as much care in choosing the work that will be done as choosing the lessons. In some cases the lessons and the handwork coordinate beautifully. Cross Stitch and embroidery are the main projects for this grade. Felting a ball is the first step to an embroidered ball. This project may take weeks to months to complete. Cross stitch is a beautiful skill to develop at this age.
Handwork Resources
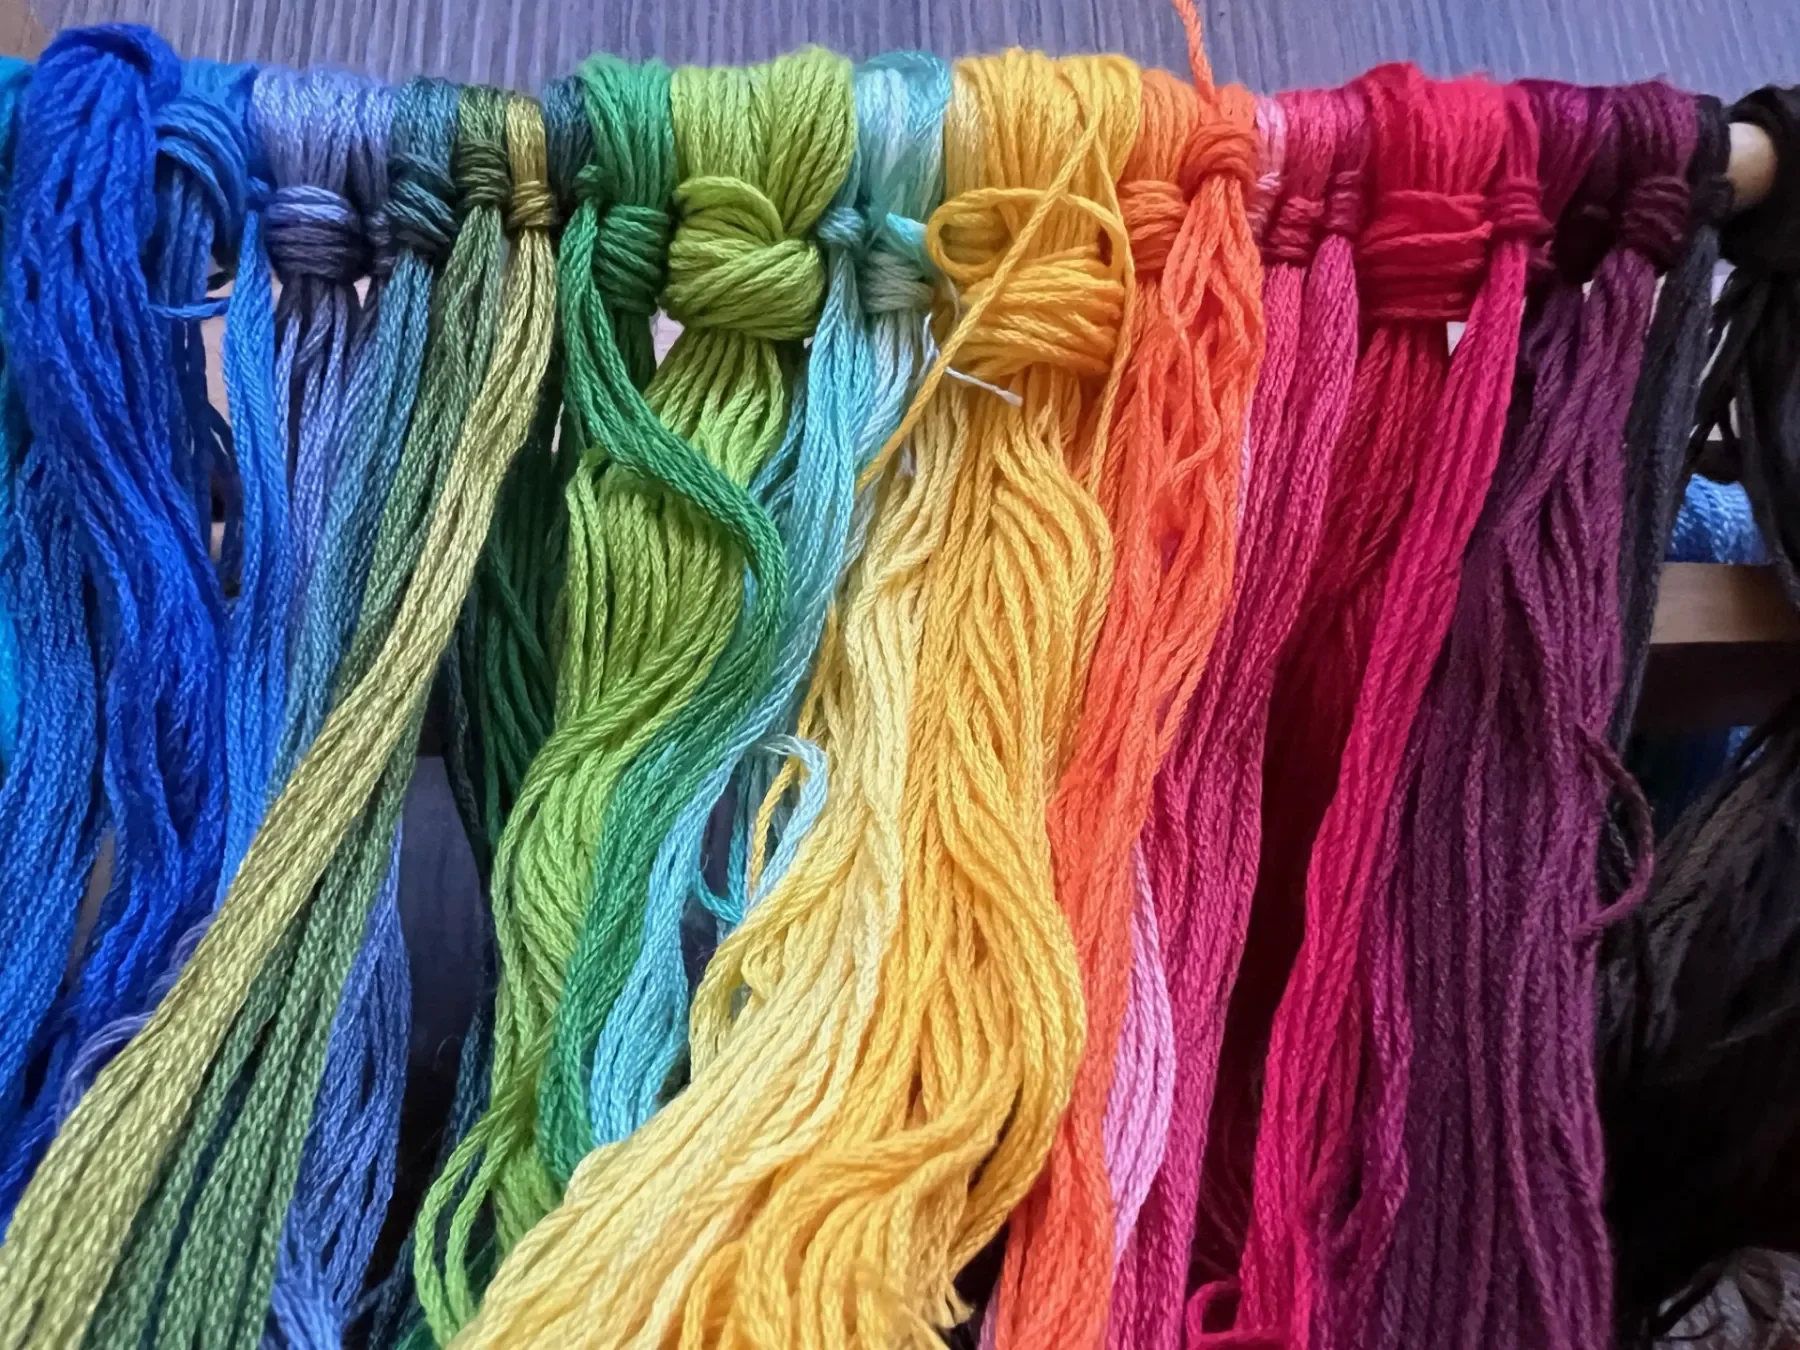
DMC 117F25HDC Embroidery Floss (for adults rather than students)
DMC 115 3-606 Pearl Cotton Thread, Bright Orange/Red (for students, thicker and pearl)
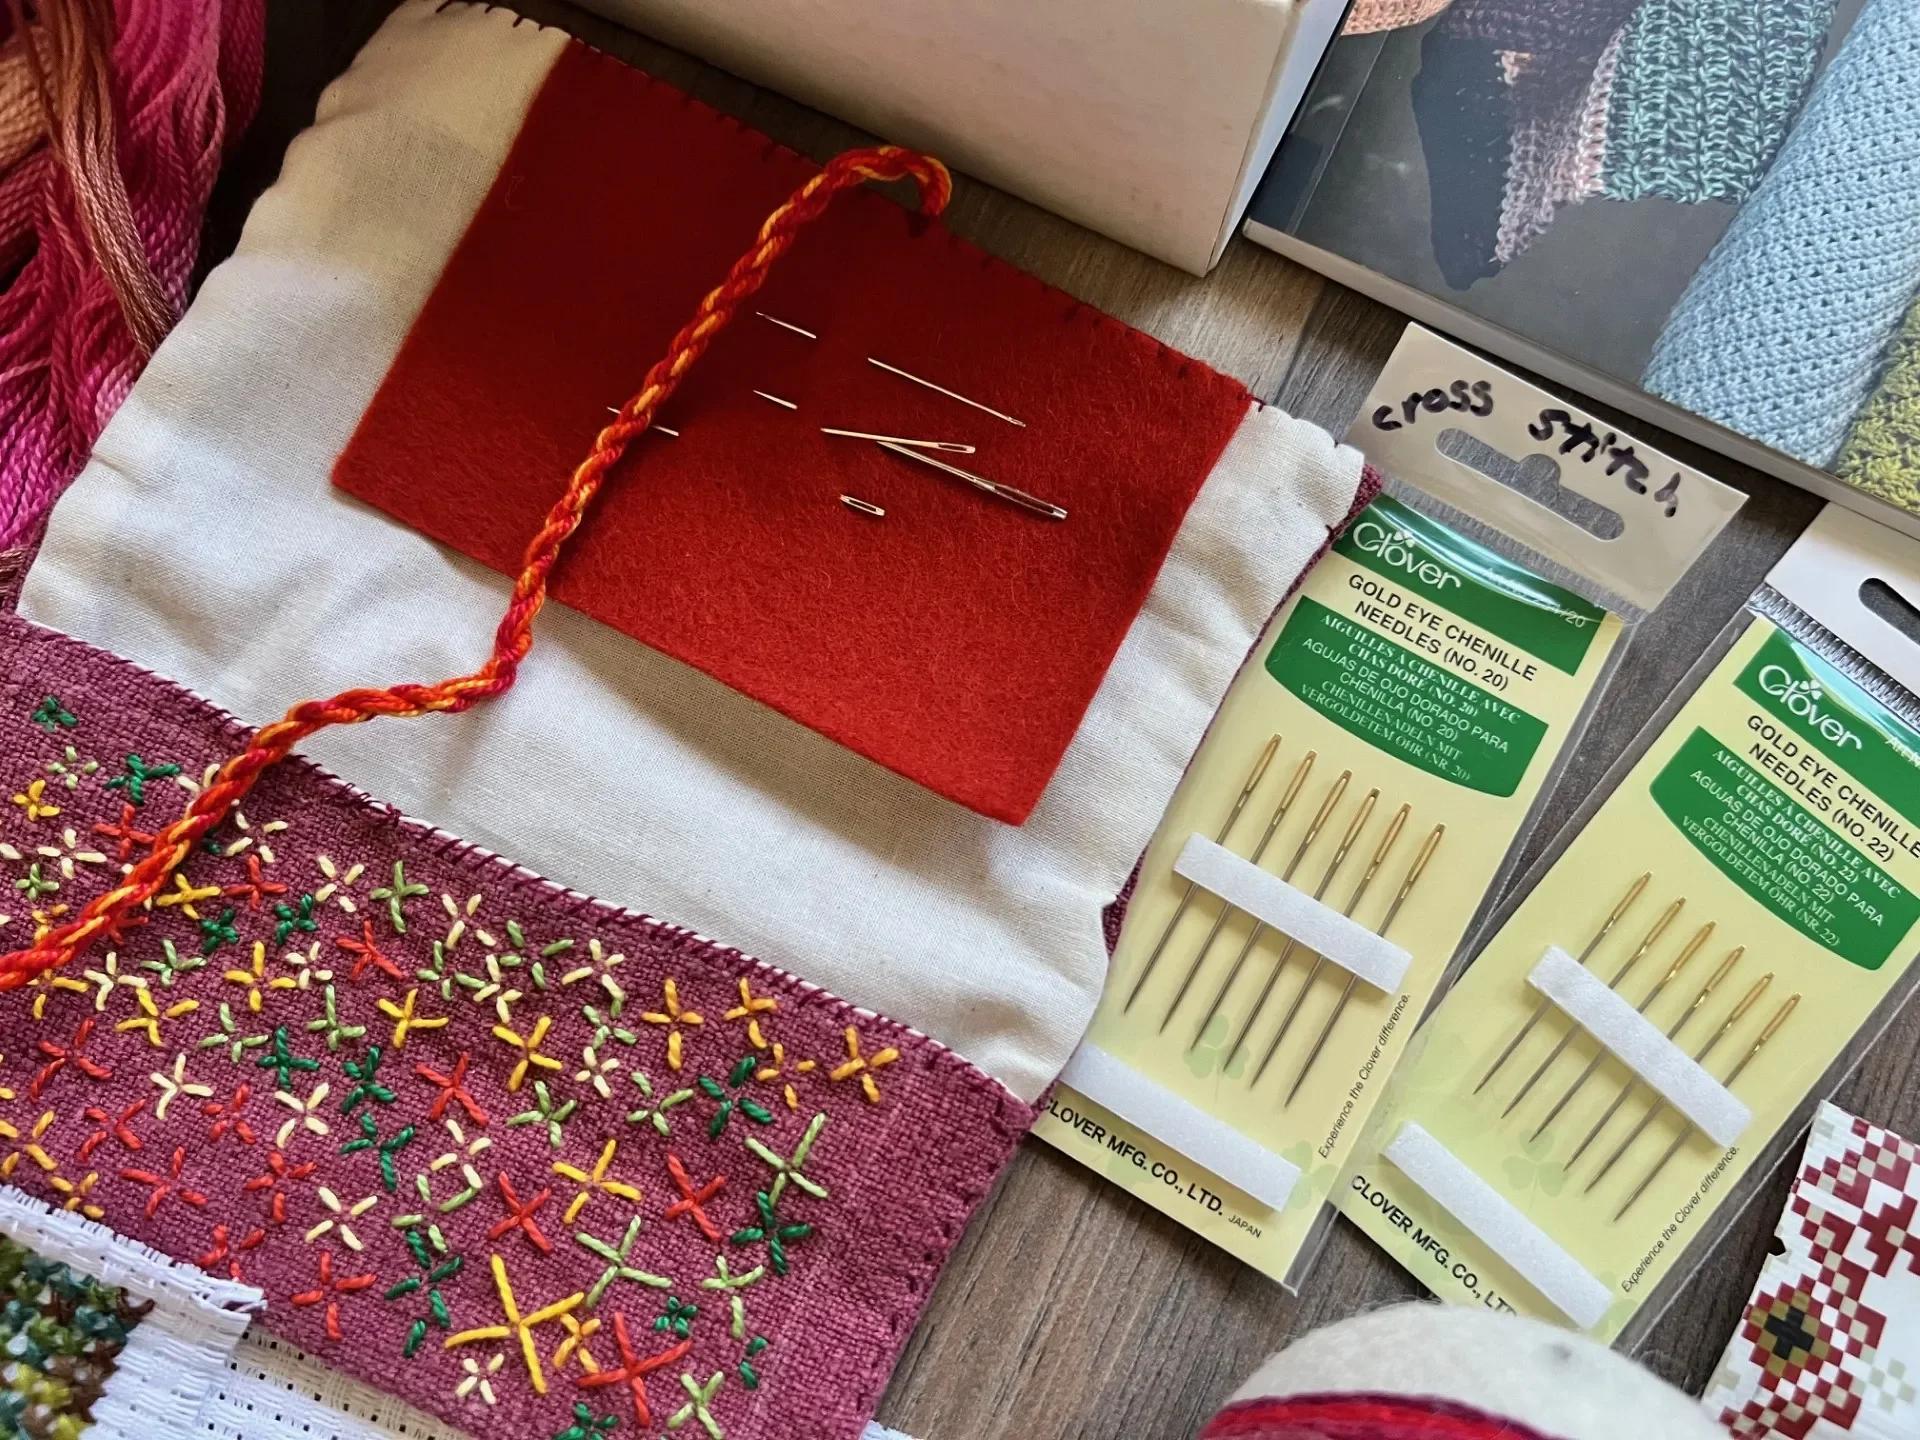
Clover Gold Eye Chenille Needles, 1 Count (Pack of 1), Size 20 6/Pkg
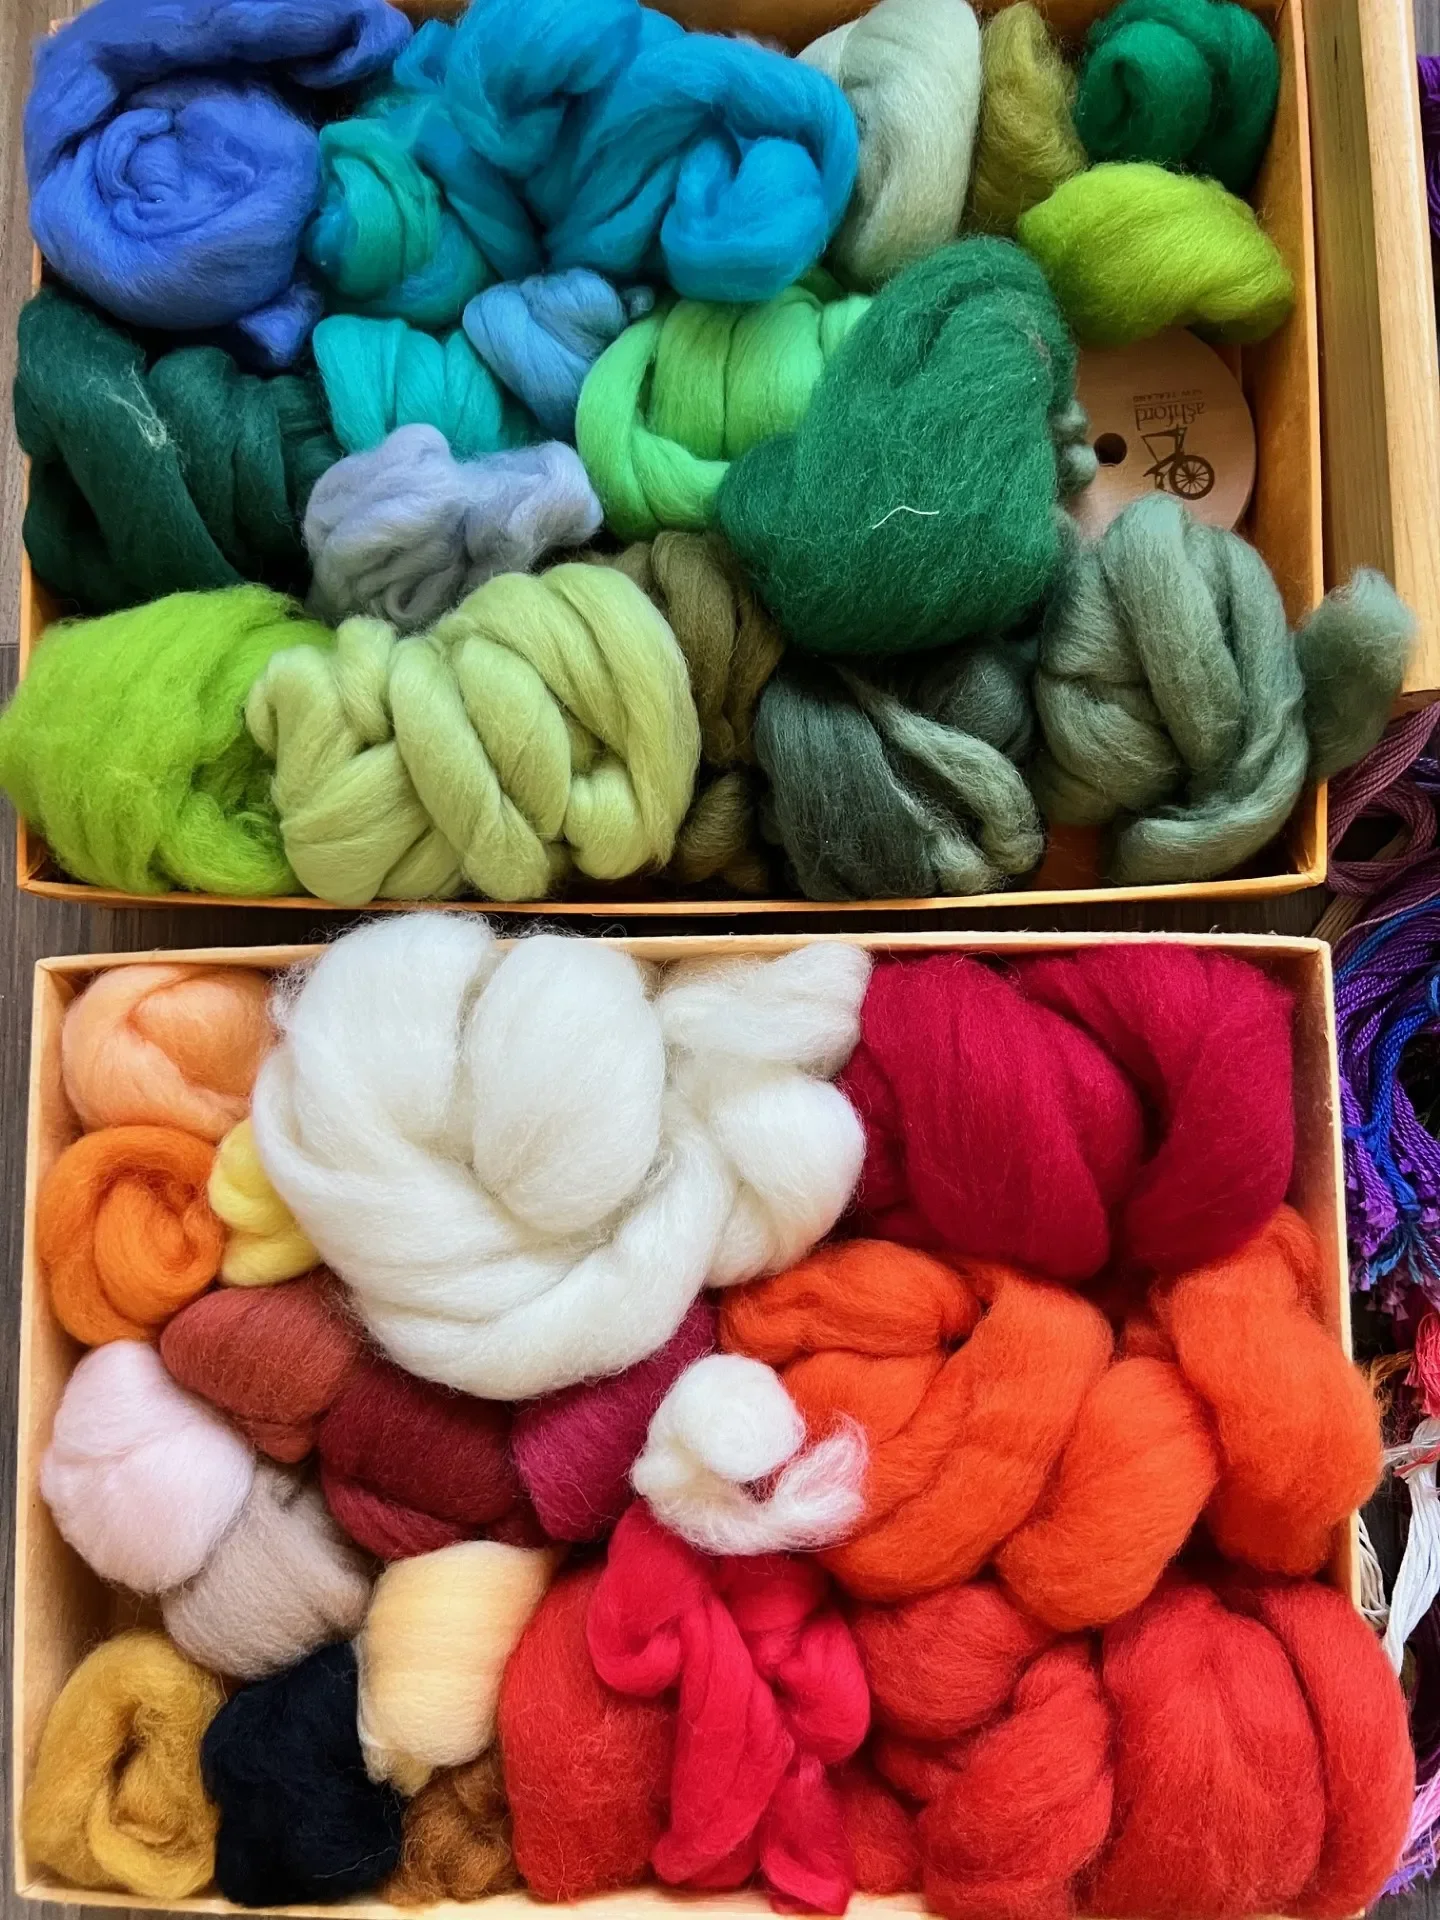
Needle Felting Wool Carded Batts Shade Pack 100 Grams 3.5 Oz -Green
Eurythmy Movements and Meditations: A Journey to the Heart of Language

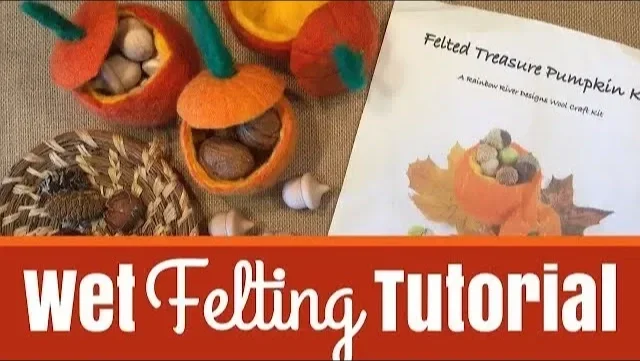
Wet Felting Pumpkin
I admit when I bought this kit, I thought it was a needle felting pumpkin kit. But you can't imagine my joy when, after a moment of confusion, I realized it was a wet felting kit! I haven't done wet felting in years, and I'm excited to get back into it. This kit, by Rainbow River Designs, comes with everything you need to get 2-3 pumpkins, except a ball and warm soapy water. Don't add too much soap, it foams up fast and gets very bubbly. You can find this kit at the Rainbow River Designs' Etsy shop as well as A Child's Dream.
Wet Felted Balls

Some handwork projects span several weeks or months and others can be done in a day. Making a felted ball falls somewhere in between depending on how you make it and for what purpose. In grade 4 Waldorf schools, you may find students making and embroidering felted balls. These gorgeous masterpieces take months to do, but the end result is breathtaking.
Today's project is just on making a felted ball which still takes some time to make, but the majority of the project is complete in just one afternoon. I'm working with my 8-year-old daughter and 13-year-old son and when the felted balls are done, you'll be able to see each of their skill sets and how much I helped them. We are not embroidering these balls right now. Either they will remain just as felted balls, or become heads for dolls, or eventually be embroidered. We initially did this project with the intention to use the balls for our mental and movement math activities, but found we prefer heavier objects like bean bags or racket balls. However, these balls are ideal for safe indoor movement math provided they are used appropriately.
For this project, I used scraps of yarn from other projects to make up the core of the ball. Next, I covered the core with undyed wool. For my daughter, she wanted a pink ball so I covered hers with additional pink wool batt. The wool is from A Child's Dream and we typically use it in our homeschool for various projects including felted animals for our nature main lesson blocks. You'll only need a few supplies for this project, but you may consider working outside or in the kitchen, as it's a project that gets messy fast. Aside from a small amount of wool, and something for the core, which can be more wool, but I liked having the opportunity to use up my scraps, you'll need two bowls of water: one hot (but not too hot you can't put your hands in) and one cold (cold water from the tap is fine). You'll also need some dish soap. Have a towel on hand too!
The starting of this project takes a little skill, so I did quite a bit for my 8-year-old daughter who wouldn't have this handwork project in a Waldorf setting at her age, but because we are homeschooling, a lot of our projects end up being done by multiple children in different grades. I formed the core for her and added the wool. I also dunked it in water and formed it until is was a sphere. Once I thought the shape would hold, I handed it over to her to finish. I made the core for my son and felt confident he could manage the rest, which he could. The felting part takes a long time. I've shown more the process than I normally would show for a tutorial because this is one project in which the children (and possible an adult), would think the project is done far sooner than when it's actually done. Plan on about 15-25 minutes of felting by dunking the ball into hot water with a bit of soap and forming it in the palm of your hands and dunking it in the cold water and repeating over and over again until the ball is firm.
My daughter's ball isn't as firm as my son's because she tired sooner than he did and she didn't felt firmly. In the end, while you can tell the difference, I think they are both just fine. The funnest part is bouncing the balls in a bathtub! You can pop them in the dryer to dry, and you can leave them there as dryer balls, or you can set them in a dry place and let them air dry. It took ours a full week to be completely dry all the way through, but they will be dry to the touch within a few days.
Stitching

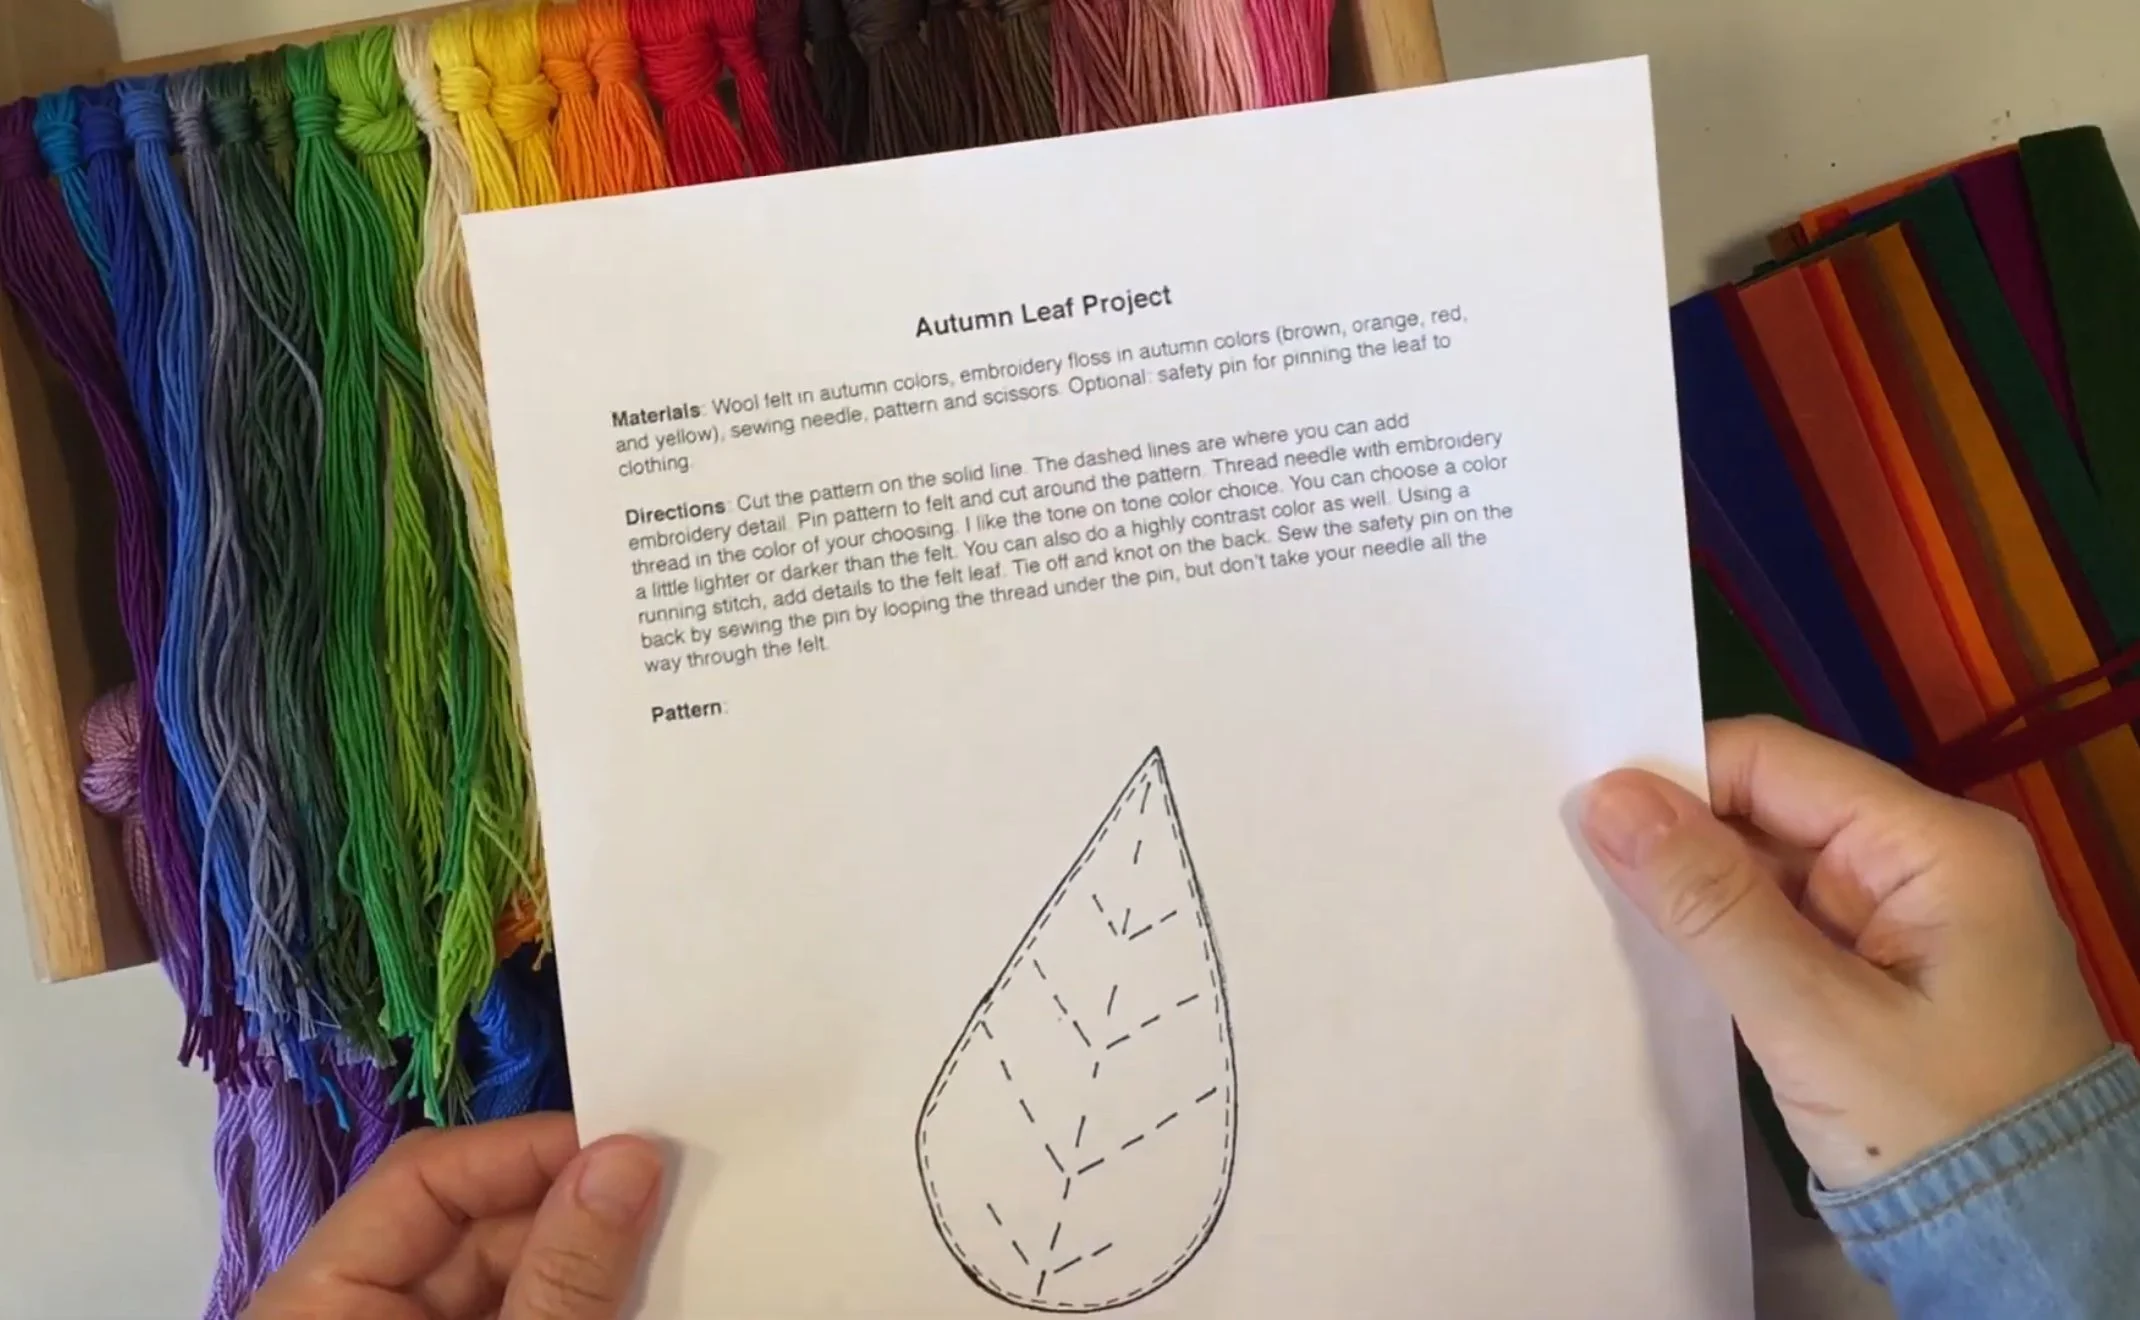
Welcome autumn with this simple, yet beautiful handwork project that's great for children about eight years and up. All you need is felt and embroidery thread. You also need a needle and a pair of scissors. I've made a pattern (with the help of the original sample made by Melanie Hatch, a master Waldorf handwork teacher) that you can download for free here. The felt and embroidery floss at A Child's Dream.
Embroidered Ball
The embroidered ball of fourth grade is a lengthy project that begins with making a wool felted ball. There are several different ways to make a felted ball, and you can even buy them premade. I have made embroidered balls on three different felted balls. One was made on a store-bought dryer felted ball. I do not recommend buying a pre-made ball for this project. They are too hard and too large to work with. I found that I really struggled to do my embroidery and finally gave up on that project because the ball was too big and it was too painful to work on such a hard ball. Another way is to what felt a wool ball with a core of wool scraps. This is the lengthiest way to make a wool ball. You work with two bowls of water and dish soap until you compact your wool ball enough for you to bounce it around in an empty bathtub. Once it’s compacted, leave it out to dry over several days. A shortcut is to put it in the dryer. The last way is to loosely make a wool ball until it’s compact enough to put in an old sock. Place it in the washing machine on hot. Let it go through a cycle and then pop it in the dryer. You’ll get a perfectly round ball. That’s just the right texture and it’s a shortcut when working with a large group of students. Once your ball is complete, you can begin on your chain stitch. It’s best to use pearl embroidery floss as it’s easier to work with. The one thing you can’t do in this project is cross paths with your chain stitch. If your chain stitch hits another line it will have to curve or stop.

Cross Stitch
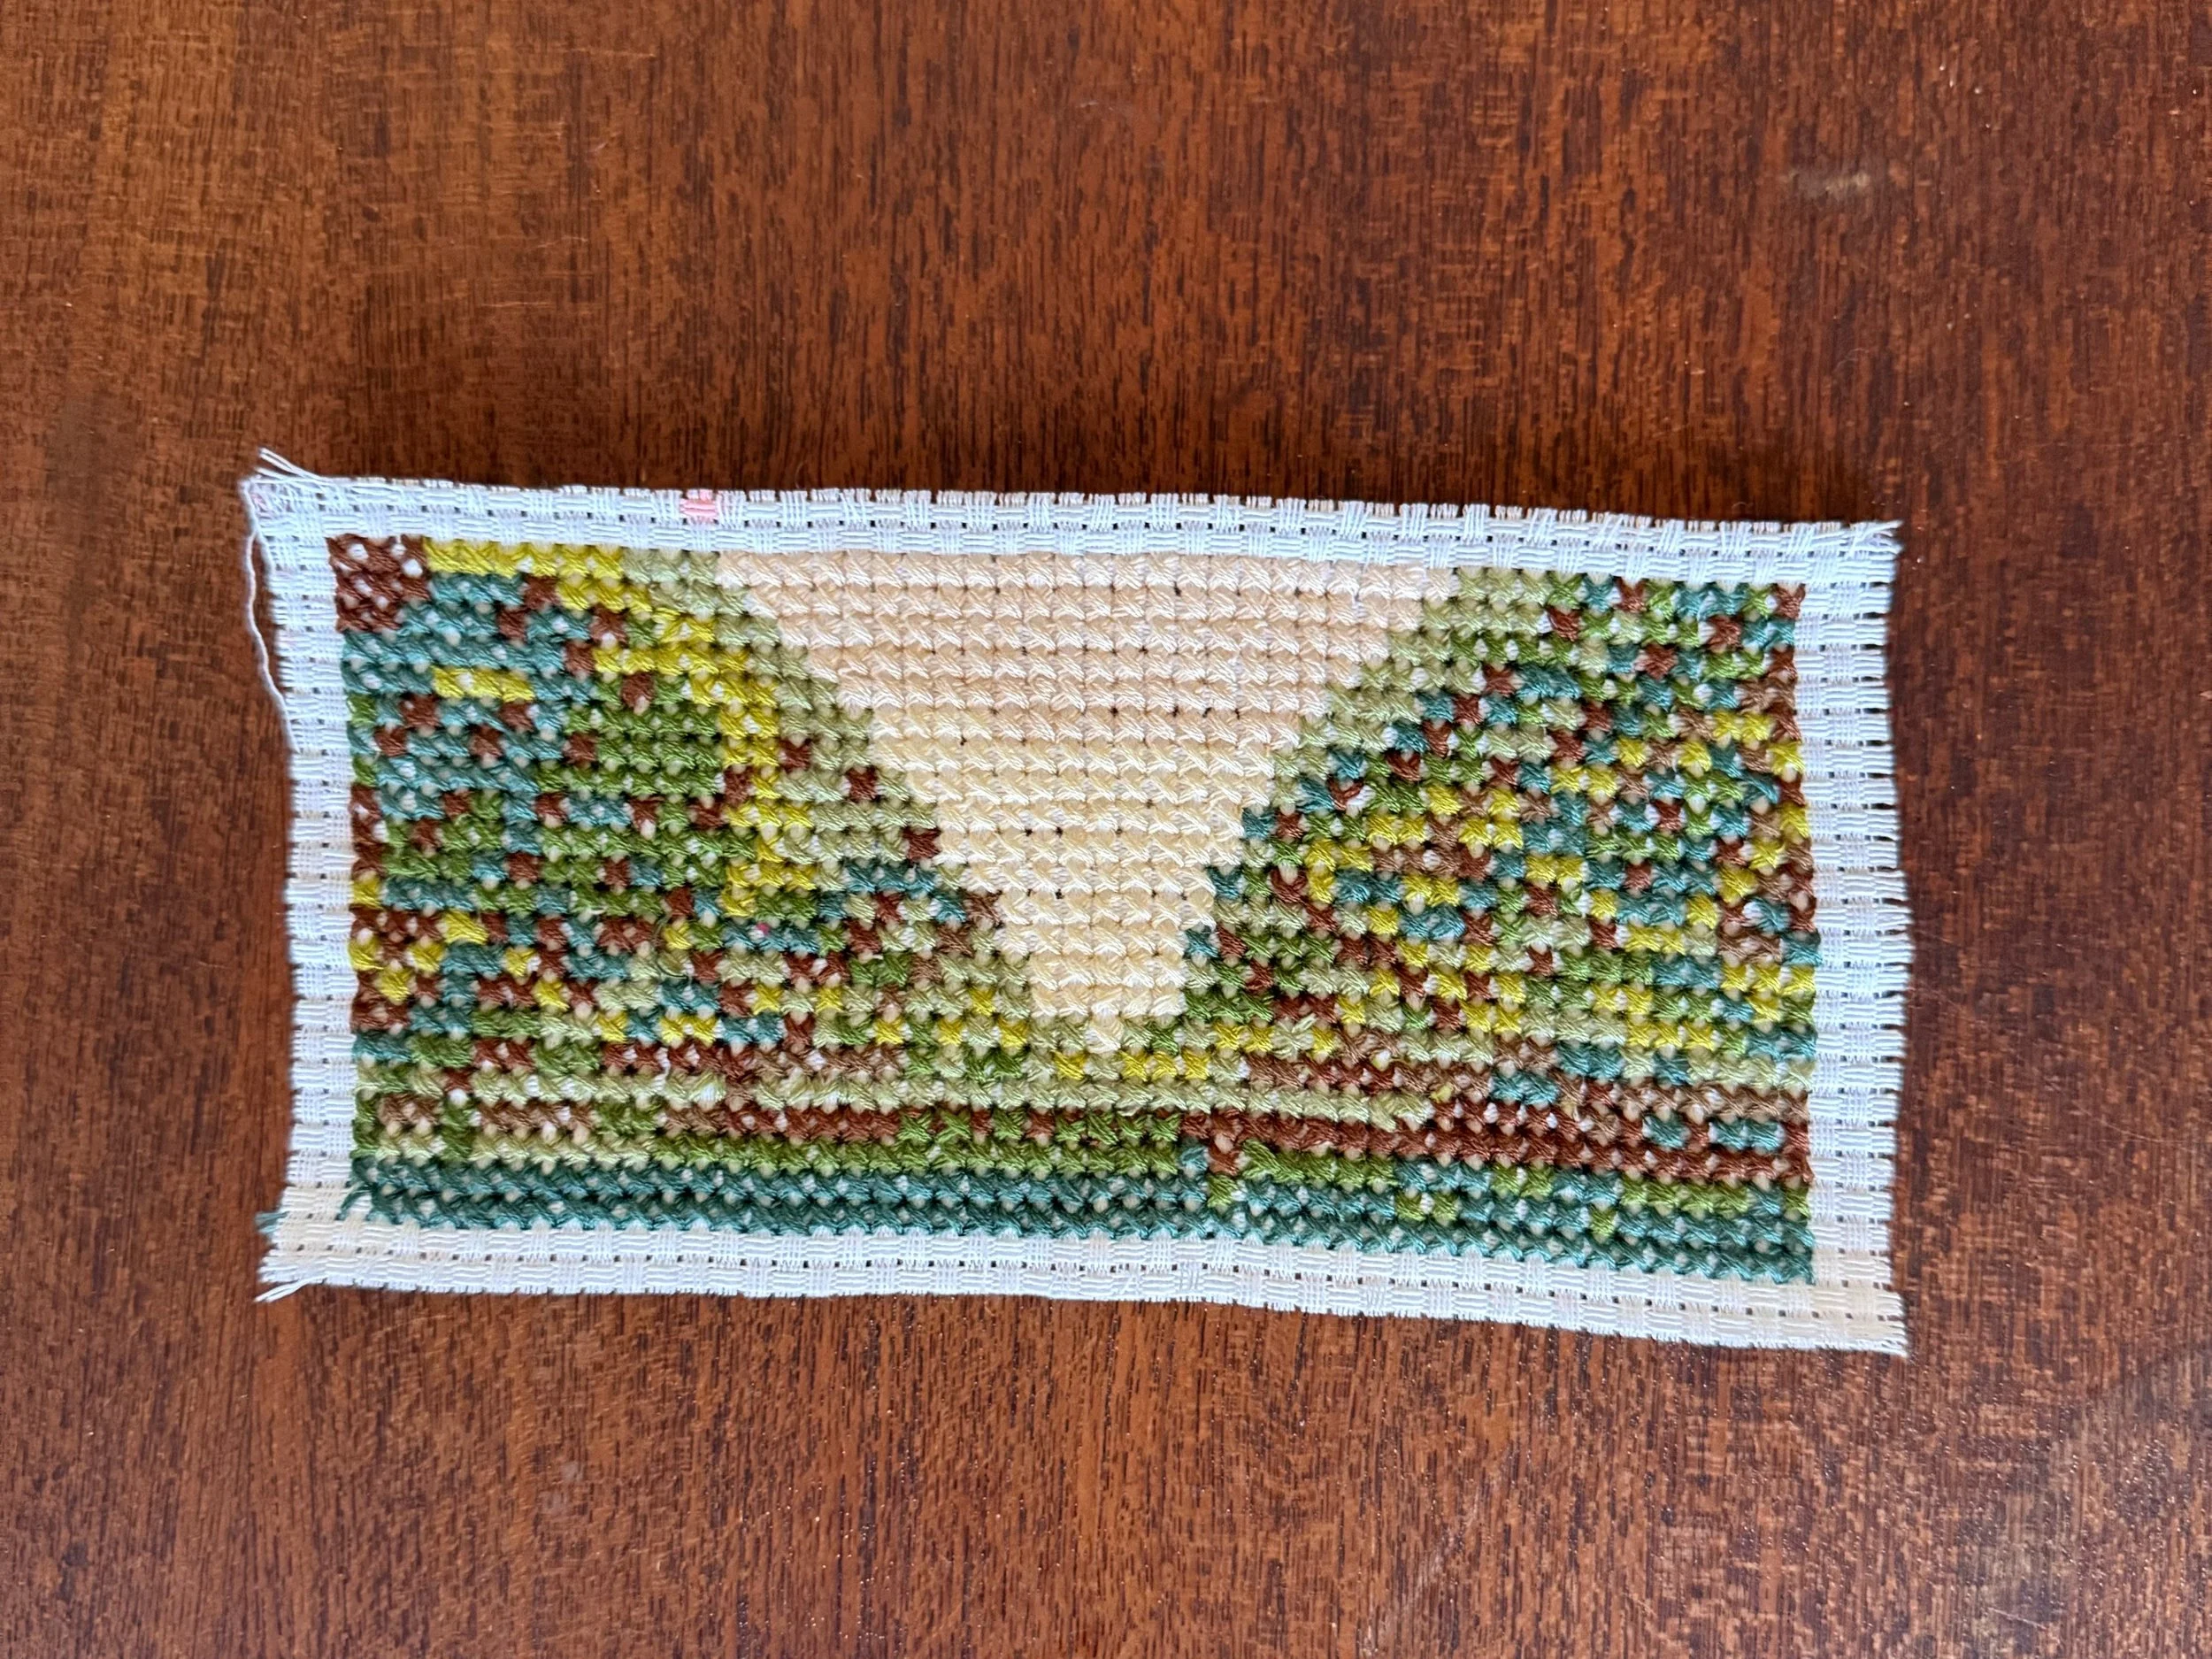
There isn’t a Waldorf Handwork project that isn’t slow and methodical. And Cross-stitch is one of those projects but not only takes a long time, but also requires visualizing the big picture as you walk through your project. Before we worked on our Cross-stitch project, we played with small squares of watercolor paper so that we could envision are designed. This would be a delight for students to do prior to starting the Cross-stitch design. They could watercolor each sheet of paper in a color that matches the embroidery floss. Then you can cut it up into 1 inch squares or smaller and all the students can use the paper to create the design. In grade 4 we’re doing a variegated color with a light source coming in from the top. that is a designed element that needs to be present for at least the first Cross-stitch project. Many of the Cross-stitch projects, then in fourth grade are ones that will end up being used as a pouch or bag of some kind. In that case the largest part of the “light” needs to be directed towards the opening of the pouch. Alternatively, you can sketch the design on grid paper or on blank paper. Once you start working on your Cross-stitch, it’s important that your stitches are all the same, and that they cross in the same pattern. This means that you start from the upper right corner coming down to the lower left corner Across the back to the lower right corner and back up to the upper left corner. In this way, if you flip your project over, you’ll see a nice straight line in the back. In this way, you can see a beautiful pattern in the front and a beautiful pattern in the back. However, once you start using different colors, your pattern will get distorted unless you thread your needle, each time!
Stitched Snowflake
This is one simple yet beautiful project you can complete in no time, especially if you do the stitching like my 11-year-old son and not like me! We used gold and metallic DMC thread to stitch designs on the wool blend die cut snowflakes using two simple stitches: the running stitch and the back stitch. You can use a single or a double strand of thread, but I found that the single strand looked far better. The gold stands out more on the white snowflakes, but the silver looks magical. I asked if Over The River Felt would be interested in sending me samples of their products so I could share them with you and they said yes! The snowflakes were sent to me free of charge. They come in two sizes and are of a high quality wool blend felt.
Project Details: Materials: snowflake diecuts, metallic thread or colored embroidery floss, needle, scissors. Cost: $7 for 12 projects, less if you use DMC embroidery thread instead of metallic thread Level: easy/beginner Age: 8 years and up Duration: 15 minutes
