Nature Study Projects & Activities
Nature Study | Projects & Activities
-

How to Grow a Pine Tree from Seed
I can't tell you how much we love the kits we got from Nature-Watch. The one I'm sharing to day is a classroom kit for 25 students called Forever Forests. In addition to providing content for a lesson, this kit comes with enough supplies to plant more than 25 pine trees from seed
-

Mason Jar Herb Garden
Here's a fun little project you can do so you can have fresh herbs at the ready when cooking. A big bonus is that these frosted blue mason jars look super cute on your kitchen counter. And once the herbs start growing, they add a splash of vibrant green that brightens your space and brings the outdoors in.
-
Nature Watch
Self directed learning never looked so good! We got these samples from a Nature-Watch kit called Forest in a Box. It came with 20 forest specimens enclosed in zipper bags with cards describing each sample.
-
How a Seed Grows | Root Observation
It's a quintessential rite of passage to grow plants from seeds, and now you can watch the growth of the roots with this Root Observation kit from Nature-Watch.
-

How to Make a Pine Needle Basket
For our Nature unit we studied conifers. As part of the lesson activities we decided to weave pine needle baskets. This is a great activity for a nature unit study or for an Indigenous People.
-
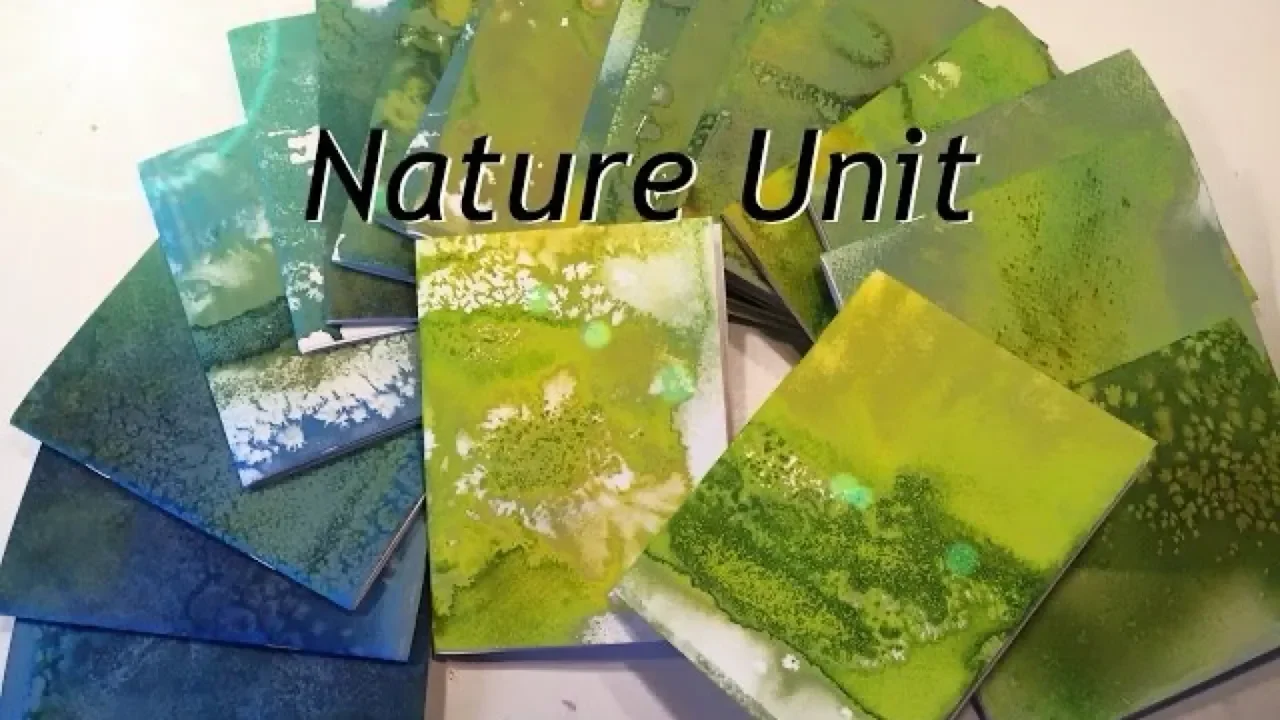
How to Make a Nature Journal
Want to make a quick and easy nature journal? You don't need many supplies. I made these using watercolor paper, drawing paper, a long reach stapler and a paper trimmer. It was a lot of fun watercoloring the paper.
-

How to Make Hiking Sticks
Join me as we learn how to make hiking sticks from found branches and sticks. We cut them down to size, removed protruding parts and sanded them down using a power sander, metal file or sandpaper.
-
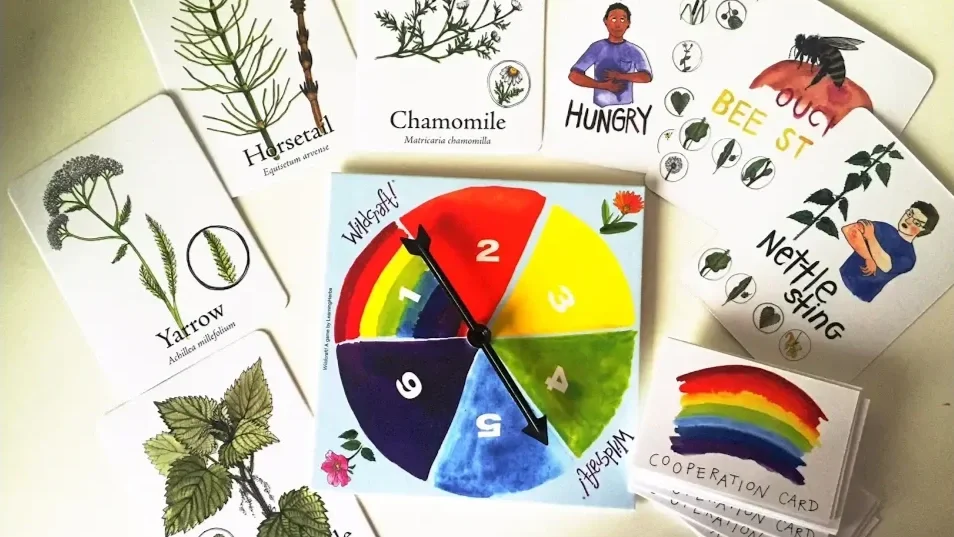
How to Play Wildcraft! | An Herbal Adventure Game
I think games are a great way to learn or review. Want to play a cooperative board game with your kids while learning about herbs and their medicinal qualities? Check out this video. It's especially enjoyable for kids under puberty as there is no competition nor strategy. It's pleasantly informative and fun to play and the cards and board game are a work of art.
-
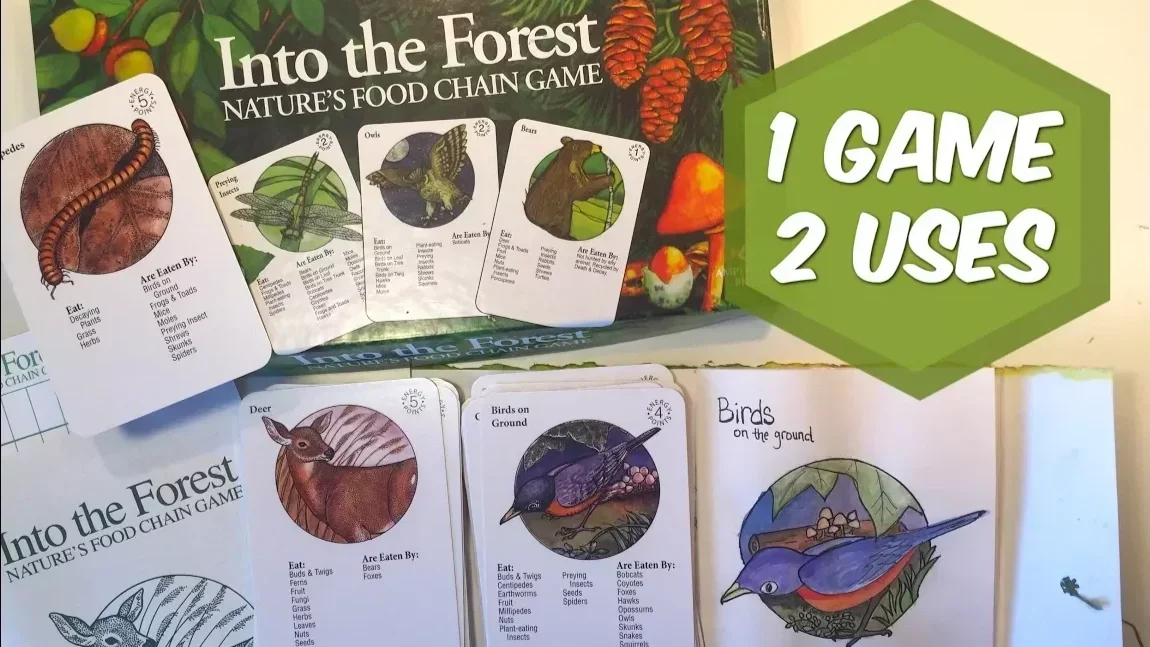
Into The Forest
Games and hands-on projects are a staple in our learning environment. Into The Forest is a nature game we used to play in our Opening Activities and as inspiration for art projects.
-
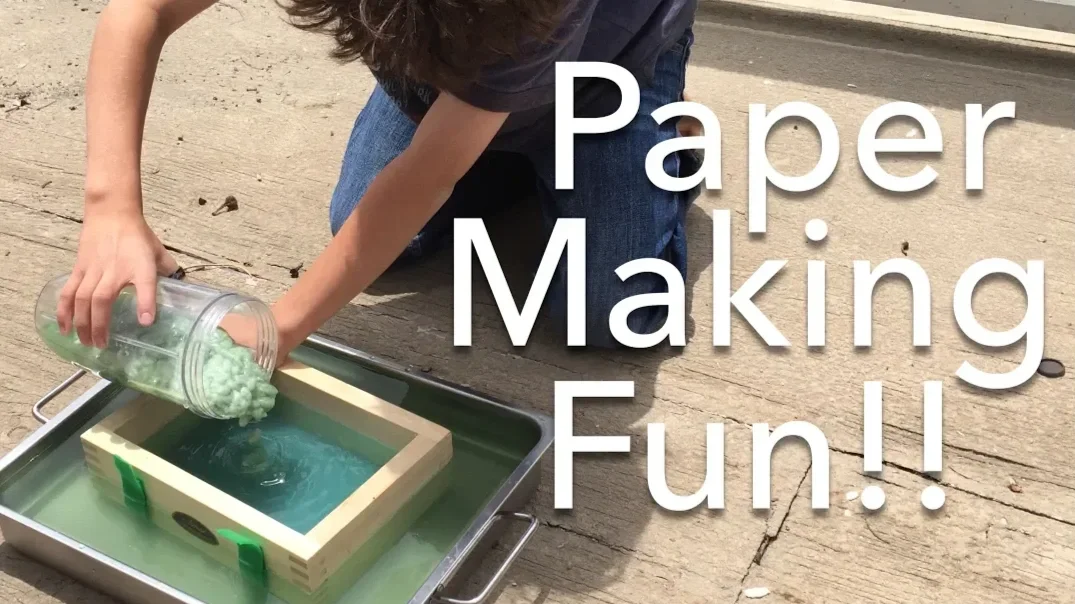
How to Make Paper | Nature Unit
We love making things! This paper making kit from Acorn Naturalists comes with everything you need to make homemade paper (except the paper scraps). The DVD and paper directions were easy to follow.
-
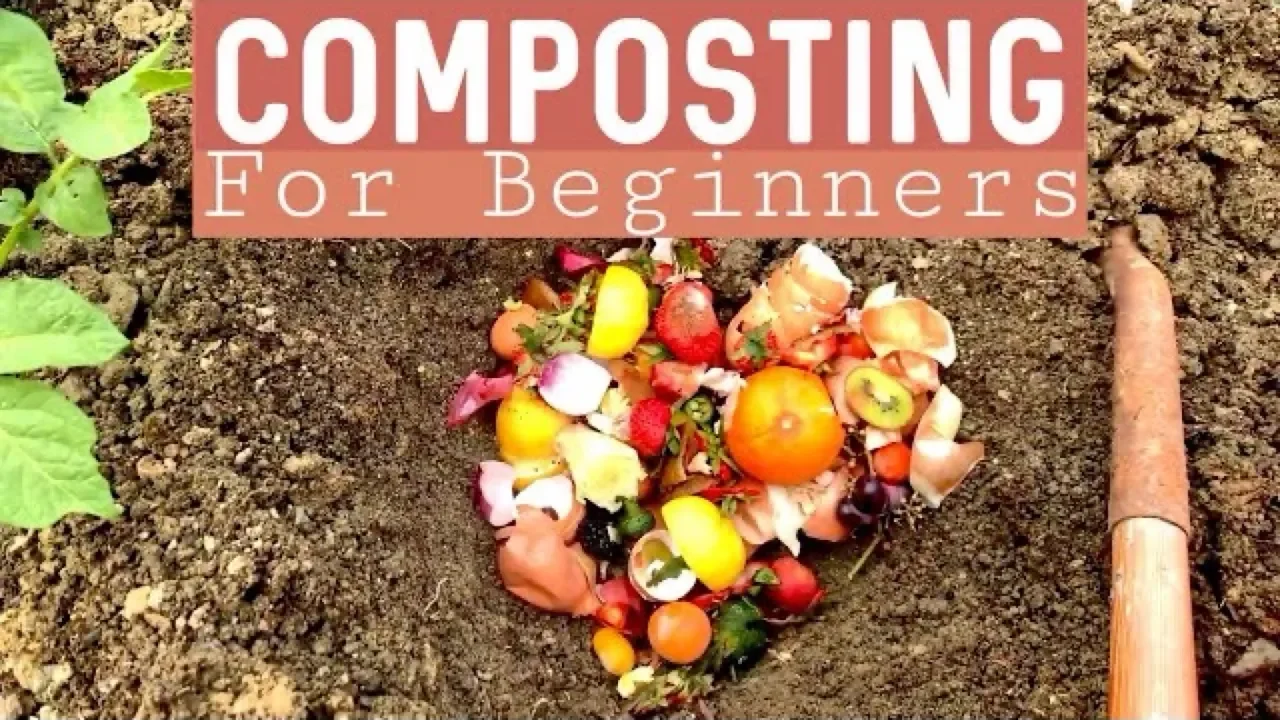
How to Compost
There are two ways to compost: The right way and my way ;) I don't compost with the intention of balancing nutrients; I compost primarily to keep our kitchen waste from ending up in the landfill.
-
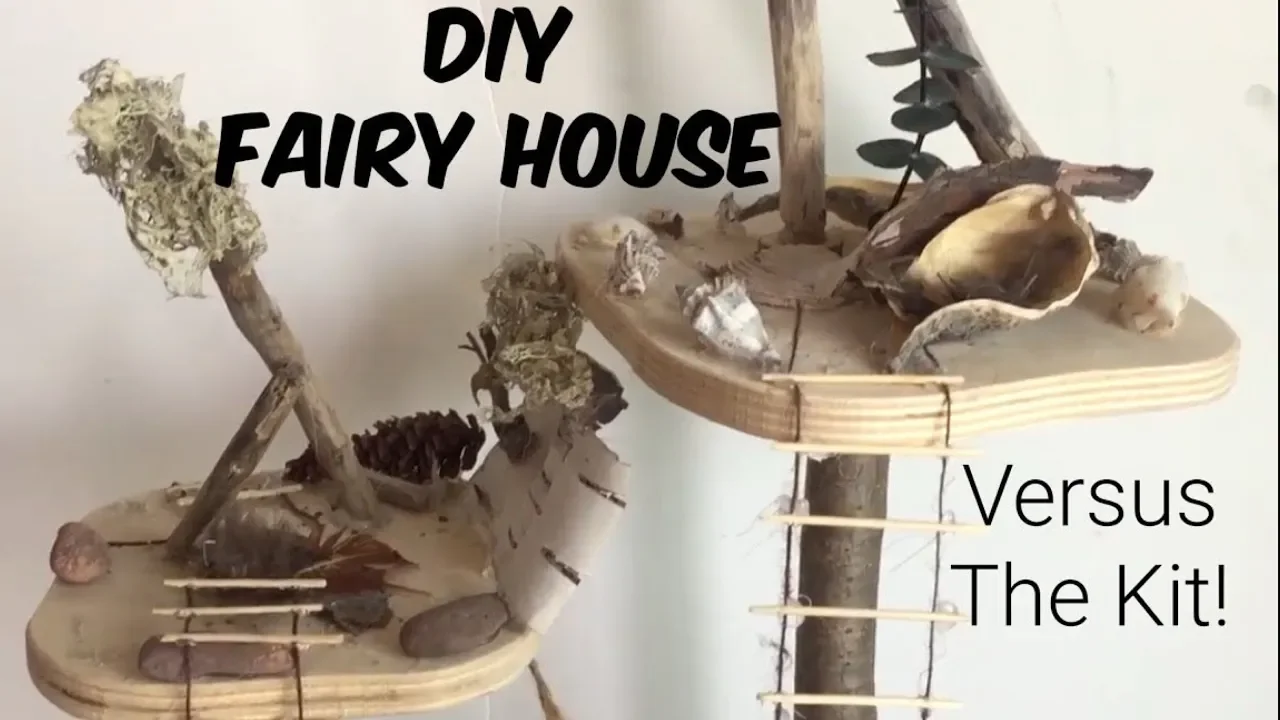
Fairy House | Doll House | PRETEND PLAY
Make a charming nature inspired doll house for fairies, finger puppets or gnomes. Find all the material you need for this project in nature or at your local craft store. You can also find assembled kits at A Child’s Dream.
-
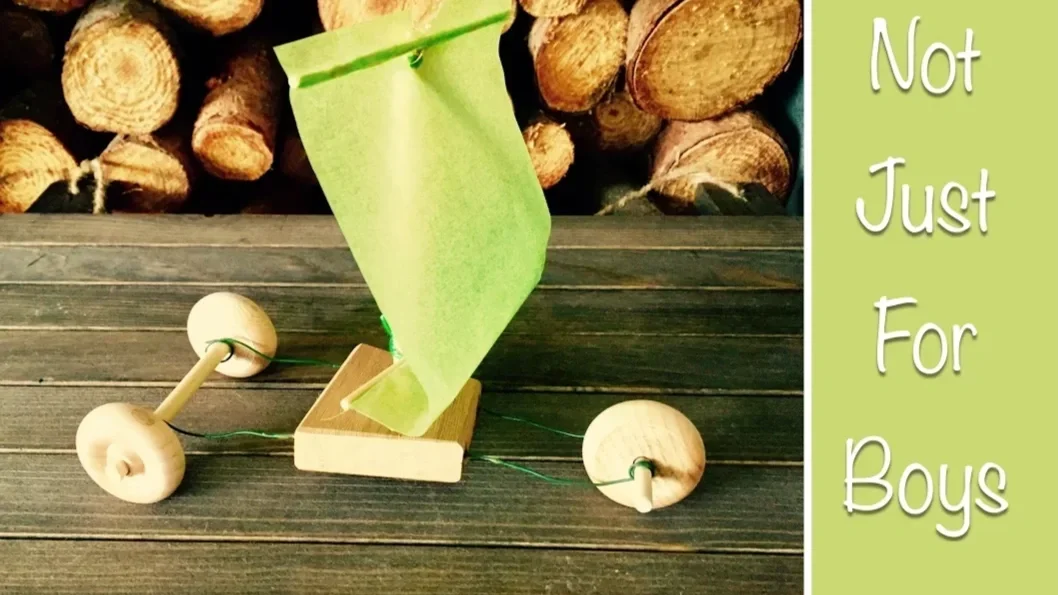
How to Make a Wind Car
This is another awesome kit from Pied Piper Crafts. This wind car kit is designed for kids eight years an d up and comes with everything you need to make one wind car. The only thing you'll need is a pair of pliers. The best part: It actually works!
-
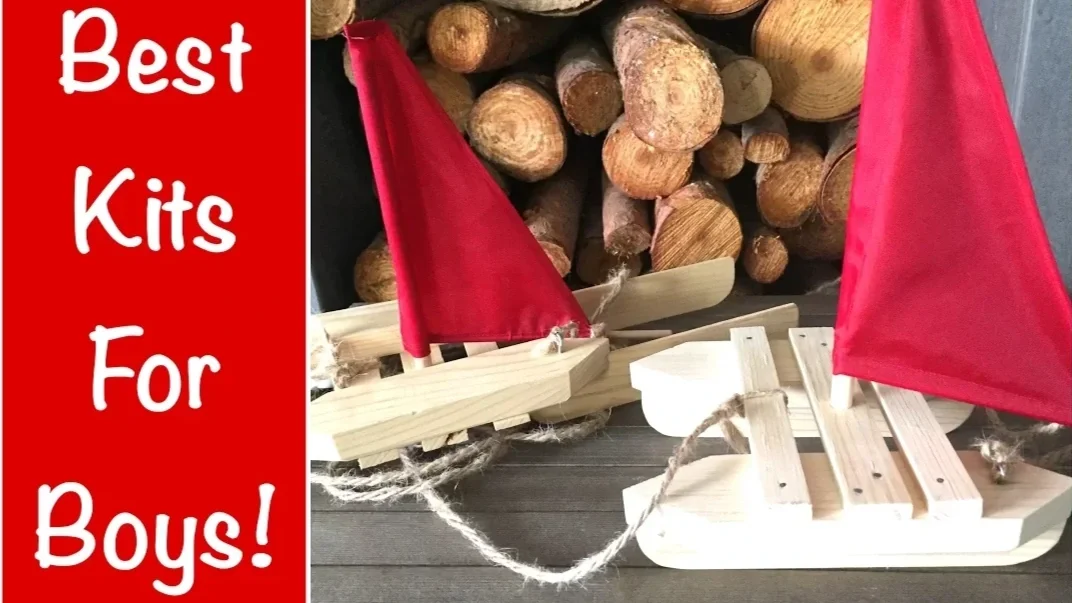
How to Make a Sailboat
I'm so pleased with the kits by Pied Piper. This sailboat kit comes with everything you need to make a real working sailboat. The only tool you need is a hammer. It's perfect for children ages six and up, though you may need to help young children.
-
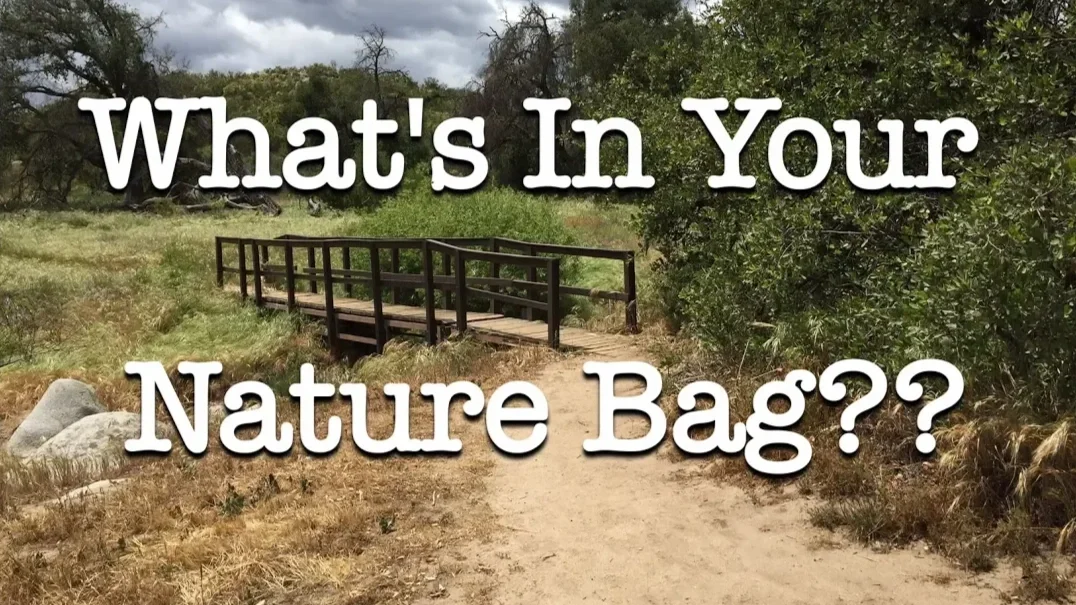
What's in a Nature Bag?
I shared what we keep in our nature bag when we go to the park for our nature study lessons. We use a simple backpack, and in the main compartment I usually pack water, snacks, and a few tools like a compass, shovel, binoculars, and a magnifying glass. I also bring Kleenex, lavender essential oil for cuts or stings, and a small activity booklet with nature questions to start conversations.
-
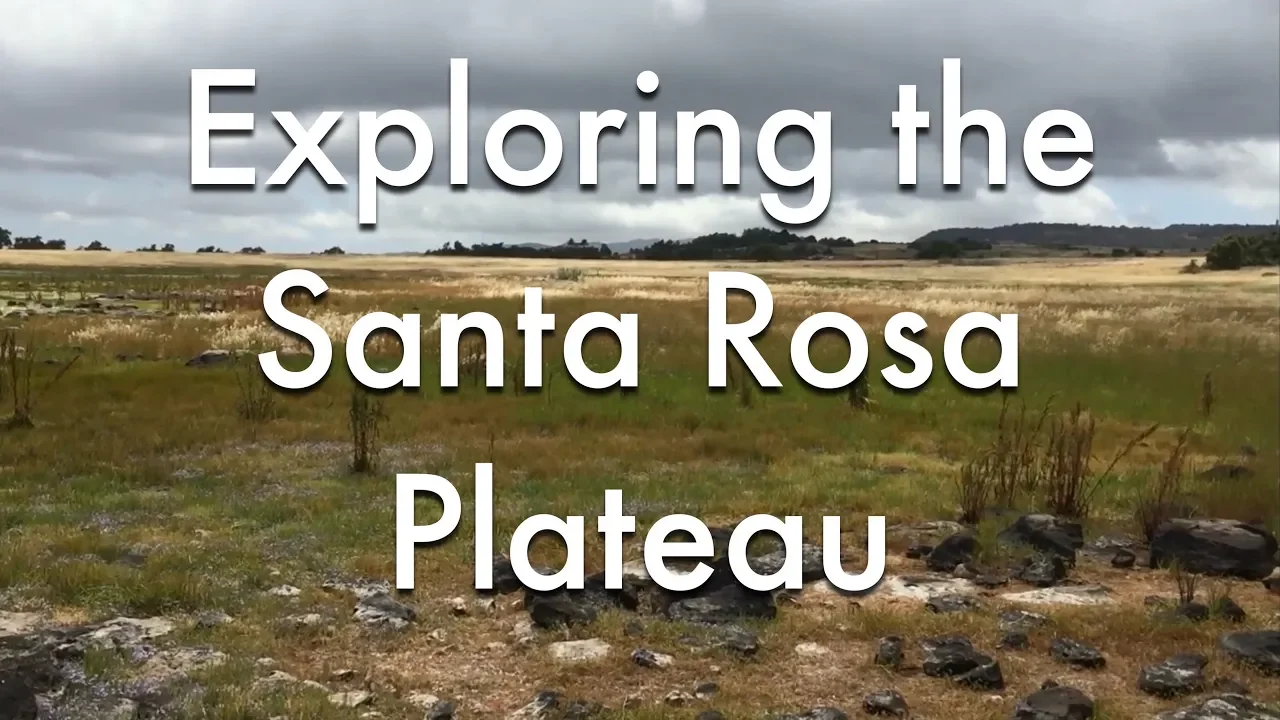
Exploring Nature With Kids
Join us as we explore the beautiful Santa Ana mountains in search of the seasonal vernal pools. Being in our fourth year of drought, the vernal pools haven't had water in them for years, but don't worry the shrimp (eggs) that are unique to this area can survive decades in this area without water.
-
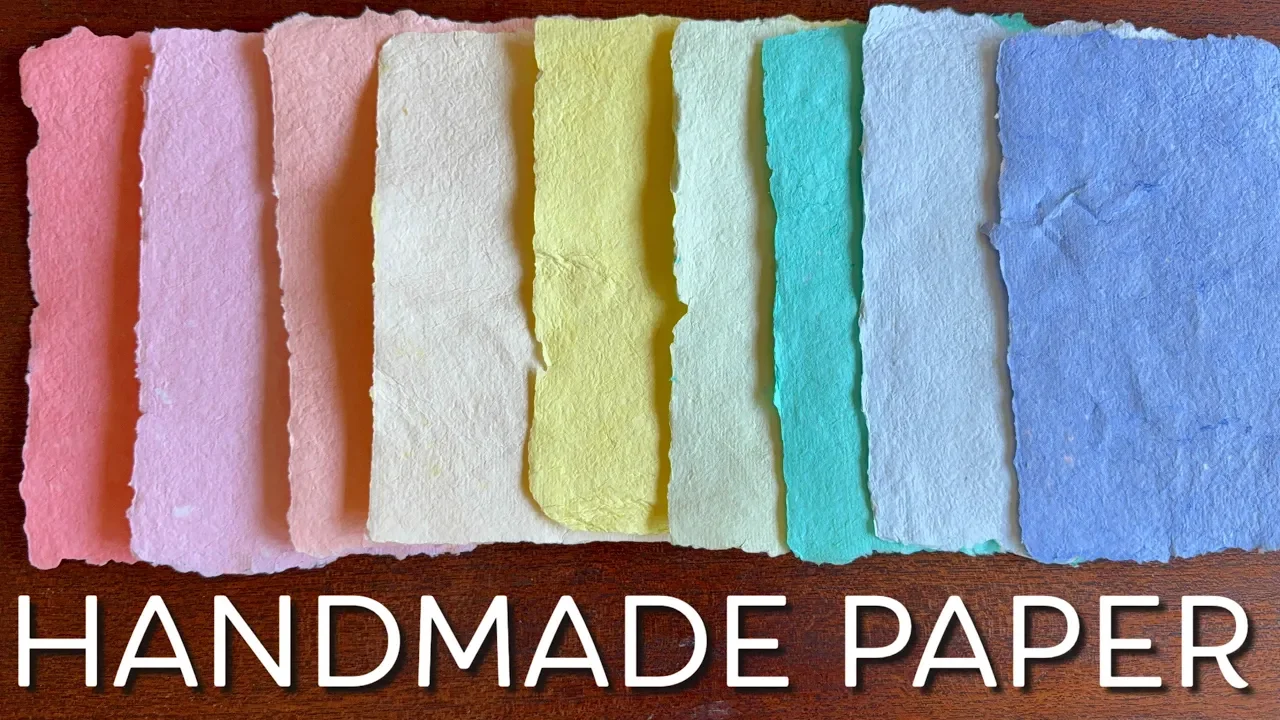
How to Make Paper | Natural Colors
I'm using my Arnold Grummer's Paper Mill kit which is one of the better kits I've used. While it comes with high quality materials, it does not include the large water tray which we had separately. However, I found that you could easily make paper without that tray, and simply use a baking tray instead. You will also need a towel to dry your paper and a blender to turn your scraps into paper pulp.
Projects & Activities
Games and Art | Into the Forest
After many of you saw these Into The Forest game pieces, you asked about the game, where to find it, and if we liked it. The thing is that at the time, we weren't playing the game, we were only uses the beautiful cards for drawing inspiration for our nature studies. We would draw one of the cards into our nature journal, then write about the plant or animal. We did this for a couple of weeks, choosing 1-2 cards a week. During that time, we also spent a lot of time in the garden planting seeds and tending our raised beds. Finally one day, we learned how to play the game.
June 2017
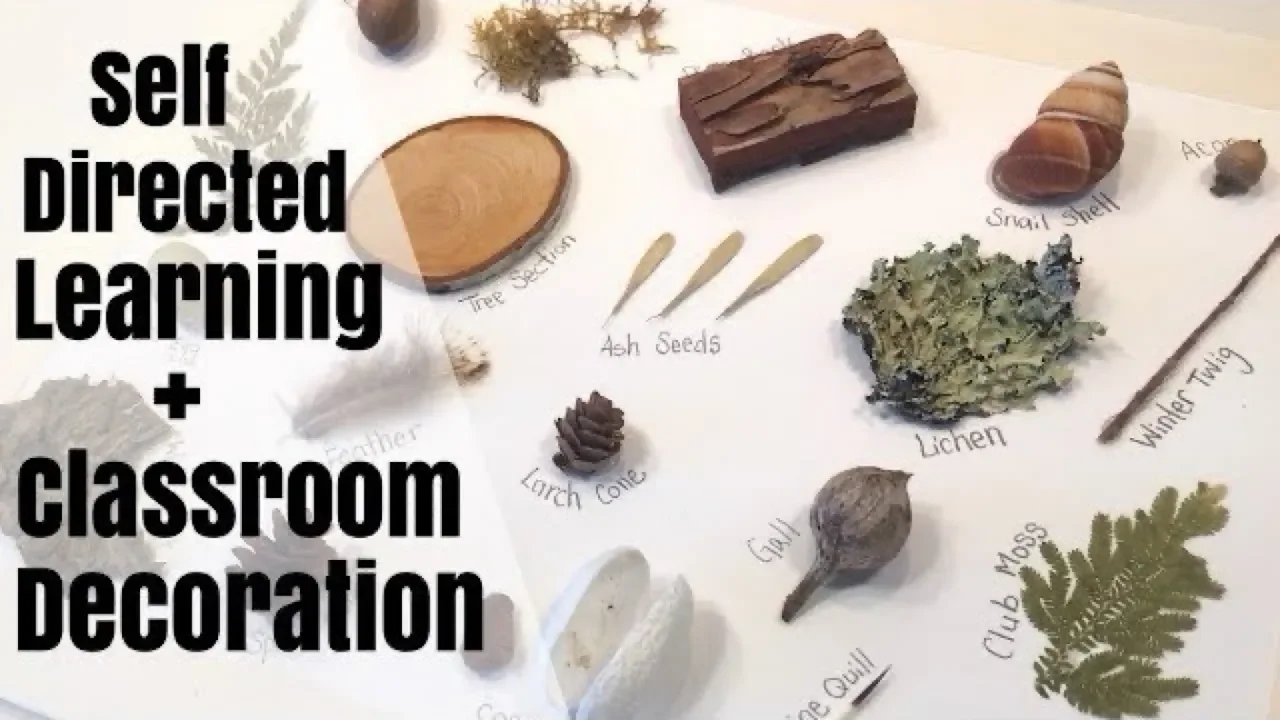
How to Display Scientific Specimens
Self directed learning never looked so good! We got these samples from a Nature-Watch kit called Forest in a Box. It came with 20 forest specimens enclosed in zipper bags with cards describing each sample. We removed the cards and placed them in an envelope on the back of the display board and mounted each specimen using hot glue. We used heavy duty chipboard. As thick and strong as a hardback book as our display. I used a glue stick to adhere the watercolor paper to the display board. The finished project is 14"x11" big and it is bordered on all sides with drywall tape to finished off the edges and give it a clean look. I penciled in the names of each specimen so the students can identify each sample on the cards and each the description about each.
This makes a beautiful classroom display. It has inspired the children to look at it and piqued their curiosity about the samples. Duration: 30 minutes Cost: minimal because I had these supplies Nature-Watch kit: $39.95 Supplies: Hot glue gun, glue sticks, forest samples, watercolor paper, drywall tape, twine, and heavy chipboard.
October 2017
How to Compost for Beginners
There are two ways to compost: The right way and my way ;) I don't compost with the intention of balancing nutrients; I compost primarily to keep our kitchen waste from ending up in the landfill. In so doing, I create rich nutrient dense soil for my garden, but alas, I've been a novice gardener since I started gardening many years ago. I haven't progressed in my skills or abilities, but I still love to prep the soil and plant seeds. Some grow, some don't, but I still do it.
With some exceptions, I've been composting for as long as I've been gardening, and it's worked every time. Let me walk you through the process and help you understand how awesomely quick and easy this can be...that is if you do it my way ;)
First, get yourself a compost pot. It can be fancy and pretty and sit on your counter. If can be a spare bowl you have. I use my nesting Tupperware plastic bowls I've had for years...like many many years. I put one on the counter when I'm cooking and toss kitchen scraps into the bowl. Then I put it in the freezer if I can't compost right away. If I think I'll compost in the next day or two (or three if it's winter and the compost isn't likely to get yucky on the counter and smell and decompose and attract flies), I'll leave the compost bowl on the counter and sometimes, I may put a lid on it. Usually, I pop it in the freezer because that way, I can compost less often.
When I'm ready to compost, I dig a hole big enough for the compost and large enough to have a lot of soil to cover the compost completely. I put all the kitchen scraps in the hole and cover it thoroughly. If you have a problem with rodents getting to your garden or compost, you can add extra soil and then top the soil with a large pot or tile.
You can also compost in a large pot, too, and this may keep the rodents from getting into the compost. When composting in a large pot, just know that it may rot before decomposing if you don't turn it once in a while. I've also composted it my EarthBoxes and in an IKEA trash bin with a lid. Nothing works as well as composting directly in the soil.
If you wish to turn the compost, you may do so. Just make sure that you cover it completely when you're done. You can also compost in the same hole often, even if the contents aren't completely decomposed. You also may need to wet the soil if it's especially dry. That keeps the worms happy. I haven't had a problem with the soil being too wet.
Once the soil is decomposed, you'll find that the soil tends to be richer and more moist than non composted soil.
July 2017
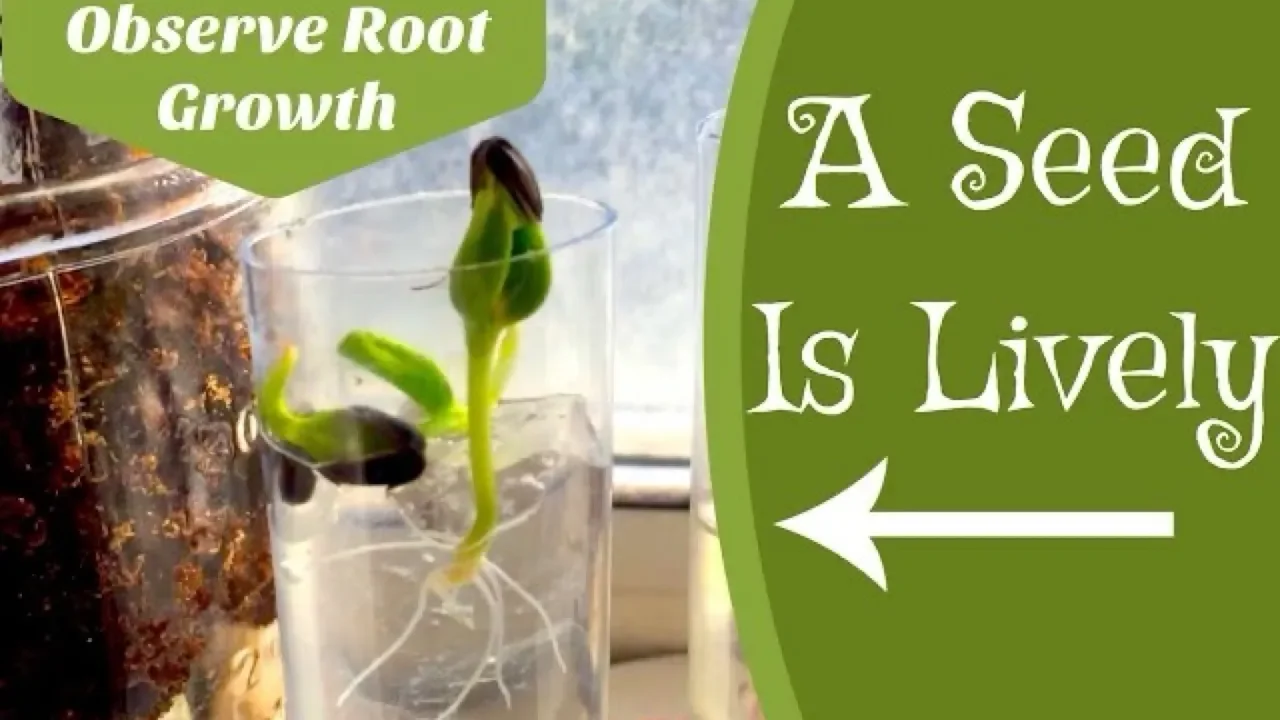
How a Seed Grows
Root Observation
It’s a quintessential rite of passage to grow plants from seeds, and now you can watch the growth of the roots with this Root Observation kit from Nature-Watch. This is the classroom kit, though they sell them individually as well. This kit comes with supplies for 25 students, but I’m going to show you how you can use this classroom kit even if you are homeschooling. This kit comes with 25 clear root observation tubes (with lids), over 50 dwarf sunflower seeds, a bag of acrylamide crystals, glue and 25 cardboard plaques for your tubes. You can find this kit at Nature-Watch.
April 2017
Mason Jar Herb Garden
Here's a fun little project you can do so you can have fresh herbs at the ready when cooking. A big bonus is that these frosted blue mason jars look super cute on your kitchen counter. And once the herbs start growing, they add a splash of vibrant green that brightens your space and brings the outdoors in.
While I've seen these at Uncommon Goods (a fun place to find unique home goods and kits), I found mine on the clearance racks at T.J.Maxx.
If you can't find this adorable and useful kit, you can make your own! You can make your own herb garden in a mason jar. I would suggest frosting from the outside of the jar so avoid any paint or chemical residue lingering around where your plants are growing. I would also offer this alternative to using the metal basket that comes with the kit: try using a sewn cotton bag with two strings hanging down that you can fold over the side of the mason jar. Then screw the lid on. Fill the mason jar with water before putting the bag in place. Fill with soil and seeds and watch your herbs grow!
One nice thing about having the blue frosted glass is that you don't see the roots or water. It's not as nice you think, plus the roots need a dark place to thrive.
Our best countertop herbs are basil. It grows easily and abundantly every time. Next is cilantro followed by parsley. I haven't much luck with other herbs like thyme or chives.
The seeds that came in the kit all did well. The cress and arugula grew well.
Do water by filling the mason jar rather than by watering the soil. If you water the soil, soil particles get in the water and cloud it and may cause algae growth or mold. Do trim the flower buds to keep producing herbs. If you put them outside, they will likely need to be watered more often. Algae may grown in the jar and around the basket. If this happens, empty the water and clean it with a sponge. Clean the jar, basket and cording.
Add fertilizer when you replace or refill the water. Some comes in the kit. Once it ran out, I didn't get more. But that's something to consider. We eventually used composted soil to fill our metal baskets as we did this project again.
We've had this for a year now and have grown many plants, but one thing that happens pretty quickly is the metal ring rusts. The basket doesn't, just the metal mason jar lid has rusted. Any suggestions on how to keep that from happening or how to clean the rust off now will be appreciated.
How to Play Wildcraft! | An Herbal Adventure Game
I think games are a great way to learn or review. Want to play a cooperative board game with your kids while learning about herbs and their medicinal qualities? Check out this video. It's especially enjoyable for kids under puberty as there is no competition nor strategy. It's pleasantly informative and fun to play and the cards and board game are a work of art.
To order you copy or to find out more, click Learning Herbs.
How to Grow a Pine Tree from Seed
I can't tell you how much we love the kits we got from Nature-Watch. The one I'm sharing to day is a classroom kit for 25 students called Forever Forests. In addition to providing content for a lesson, this kit comes with enough supplies to plant more than 25 pine trees from seed. It also comes with pine nuts for tasting and various pine cones for viewing. Watch the progress of our pine trees from seedling to sapling and beyond by following me on Instagram at Pepper and Pine.
This project is part of our Waldorf Botany Main Lesson. See the other videos in this playlist.
Find this kit Forests Forever Activity Kit and more at Nature-Watch.
April 2017
How to Make a Nature Journal
Easy Tutorial
Want to make a quick and easy nature journal? You don't need many supplies. I made these using watercolor paper, drawing paper, a long reach stapler and a paper trimmer. It was a lot of fun watercoloring the paper. You can see those techniques in this tutorial video.
I used Fabriano water color paper and Tim Hotlz Distress Inks are available at Blick Art Supplies.
Drawing paper and spray mists are from Michaels.
Heavy duty stapler is from Demco.
Stockmar paints are from A Child's Dream
Level: easy
Duration: 5 minutes or less
Cost: less than $1 each
Want to see other videos in our nature unit series? Check them out Here.
How to Make Paper
Nature Unit
We love making things! This paper making kit from Acorn Naturalists comes with everything you need to make homemade paper (except the paper scraps). The DVD and paper directions were easy to follow.
We used left over paper from a previous project on making nature journals.
The watercolor paper was blue and green so our final result is a little tinged with blue/green. Also, since we used watercolor paper, the cotton content resulted in nice thick sturdy paper.
We also embedded seeds in our paper so that the recipient can plant the paper, making this a very green project (pun intended ;)
Find the paper making kit here at Acorn Naturalist.
How to Make Hiking Sticks
Join me as we learn how to make hiking sticks from found branches and sticks. We cut them down to size, removed protruding parts and sanded them down using a power sander, metal file or sand paper. You can also use a pocket knife to remove bark and reveal layers of beautiful wood. Smooth down your stick starting with 80-100 grit sandpaper and move to finer and finer grit until your stick is nice and smooth. Remove dust with an oiled cloth before staining. Use a brush or foam applicator to apply 1-2 thin coats of stain. Allow to dry in a well ventilated place. We had ours outside and they dried pretty quickly. The last step is to apply a sealant. We use polyurethane to give the sticks a shinny protective layer. The polyurethane takes 24 hours to dry completely. Make sure all your surfaces are protected before staining or varnishing. You can also decorate your sticks with a wood burning tool or cut notches into the handle. The whole project took us less than 4 hours to complete.
How to Make a Pine Needle Basket
For our Botany Main Lesson block, we studied conifers. As part of the lesson activities we decided to weave pine needle baskets. This is a great activity for a nature unit study or for an Indigenous People. It’s fairly simple, but does take some practice or skill. What I did was get the project started out for my 10-year-old son who continued making it until the end, when I finished it off. We made a small flat basket with a small lip. If you work with a larger bundle of pine needles, it was be faster and easier, especially for kids.
I would recommend using a blunt wide eyed needle for this project. You can find raffia online or in craft stores. Pine needles are free! But I recommend using the long pine needles. If you can’t find them in nature, you can buy them as a basket weaving kit from Acorn Naturalist. This project is ideal for kids 12 years and up, but with a little help, you can assist a child as young at eight years old.
June 2017
Fairy House | Doll House | PRETEND PLAY
Make a charming nature inspired doll house for fairies, finger puppets or gnomes. Find all the material you need for this project in nature or at your local craft store. You can also find assembled kits at A Child’s Dream.
Want to make cute finger puppets to populate your doll house?
How to Make Paper | Natural Colors
I'm using my Arnold Grummer's Paper Mill kit which is one of the better kits I've used. While it comes with high quality materials, it does not include the large water tray which we had separately. However, I found that you could easily make paper without that tray, and simply use a baking tray instead. You will also need a towel to dry your paper and a blender to turn your scraps into paper pulp.
For a year, I saved paper scraps from high quality watercolor or drawing paper. I only used scraps that were unused to keep the paper white or colored solely by the watercolors. If you use paper that has writing, drawing or watercolors, the paper will turn out greyish or tinted with whatever color dominates your paper. In past we've ended up with light greyish blue or green paper and while that's nice if you want that color, I recommend just sticking to plain white scraps.
You may also decided to embed seeds into your paper which is something we've previously done. Then you can send that paper as cards and the recipient may plant the card and watch it grow.
For this project, we opted to use an old set of watercolors to tint the paper. We used about 8 grams of scraps per sheet of paper and did not submerge the frame into a tray of water so as to not dilute the watercolor. As I was using an old set of paints, I couldn't accurate measure how much watercolor I was using, so some papers turned out more intense than others.
Since we were drying these outside on a bright sunny day, I think the sun might have lightened them as well. They do dry a couple shades lighter as well.
How to Make a Wind Car
This is another awesome kit from Pied Piper Crafts. This wind car kit is designed for kids eight years an d up and comes with everything you need to make one wind car. The only thing you’ll need is a pair of pliers and some glue. The best part: It actually works!
I love simple toys and lend themselves to hours of creative play, and while the construction was the highlight for my 10 year old son, it’s my five year old daughter who gleans hours of creative play from these cars and the sailboats by using them with her finger puppets and pegdolls. You can find this kit and more at A Child’s Dream.
How to Make a Sailboat
I’m so pleased with the kits by Pied Piper. This sail boat kit comes with everything you need to make a real working sailboat. The only tool you need is a hammer. It’s perfect for children ages six and up, though you may need to help young children. My son is 10 years old, and he did this entire project on his own, though the first time, he assembled it up-side-down. We bought two kits. I intended my sons to both make one (ages 10 and 14), but my 14 year old is no longer interested in these kinds of activities, so my 10 year old did both. Now that they are made, he likes to take them to the pool or lake to play with them. When they are dried and at home, my five year old daughter likes to play with them as ‘homes’ for her peg dolls. You can find this kit at A Child’s Dream.
Hands-on kits are a great addition to any homeschool curriculum and are especially great if you don’t homeschool but are looking for ways to connect with your children through hands-on projects. Most projects and activities I see are geared towards girls. And while there may be some overlap, or modest interest in other crafts, I noticed that my boys were not interested in ‘artsy’ and ‘crafty’ projects that dominate the market. The crafts from Pied Piper have been big hits for my boys (and maybe my girl in the future) because they involve building, constructing, tools and purposeful projects.
This project took about an hour to complete and once finished, it actually worked! Even our mistake sail boat worked, too. What I love about kits like this is that the finished project is something that can be used or played with and I’ve found that my boys desire that out of a project, whereas my girl simply delights in the process of doing a craft or project more than anticipating the completion of the project. What I also like about this kit and others is that they are complete. You don’t have to worry about finding the supplies or coming up with the design. You might scoff at the price, but it’s well worth it because it would take you much time, energy and forethought, and as parents and homeschoolers, sometimes our most precious commodity is time. Now, I’m a crafty person and often come up with craft projects on my own, but I know first hand how time consuming they are and how much easier it is to buy kits complete and ready to go. But if you want to challenge yourself to make a sail boat, wind car or any other wood working project, please do let me know how it turns out. I do so love seeing your projects.
Find me on Instagram and don’t forget to tag your project with #pepperandpine and let me know about it!
What's in a Nature Bag?
For our Nature Unit, we spent a lot of time at a local regional park. In an attempt to make the best use of our time, I packed a backpack with some 'educational' material we could use to inspire us while in the field. Of course we had snacks and water, but we also carried our nature journals, field guides and other materials and tools to enhance our outdoor experience.
"I'm currently putting together my bag now. I have a lot of the same stuff. I also have gloves, a couple of baby food jars for water, some washi tape for attaching stuff in journals, old crayons for leaf rubbing, a full first aid kit because my family is prone to mishaps, ziplock to keep twigs and leaves for our nature table, basic art kit, a trash bag so we can gather trash too, then the usual hats, sunscreen, etc." -MT
"Excellent we usually geocache on our hikes and hunt fungi. It also depends on the time of year." -Mid-Century Micro Farm
I shared what we keep in our nature bag when we go to the park for our nature study lessons. We use a simple backpack, and in the main compartment I usually pack water, snacks, and a few tools like a compass, shovel, binoculars, and a magnifying glass. I also bring Kleenex, lavender essential oil for cuts or stings, and a small activity booklet with nature questions to start conversations. This time, we included our nature journals, which I made in another video, along with a few reference books on insects, birds, and trees. Even though we didn’t end up using them during this outing, they are great for identifying plants and animals in our local area.
I also packed a special how-to-draw book written by my friend, which teaches how to draw plants and animals of California. It’s a step-by-step guide that works perfectly with our nature journals. We brought a set of colored pencils in earthy tones, which are ideal for sketching what we observe. Before leaving, I wrote down a few activities I wanted to try with the kids, including a micro hike, where they focus closely on a small section of nature. It was fun to try, though it worked better for some of the kids than others.
Finally, I brought along a local field guide that covers plants and animals specific to our region. This book is one of my favorite resources for hikes because it helps identify everything we come across. I recommend finding a similar guide for your own area to make outdoor learning more meaningful. These are some of the items we use for our nature study outings, and I love hearing what other families include in theirs, so I invited viewers to share their ideas in the comments.
What do you pack when you leave the house for a day at the park, forest, or beach? Let me know below.
Exploring Nature With Kids
Santa Rosa Ecological Reserve
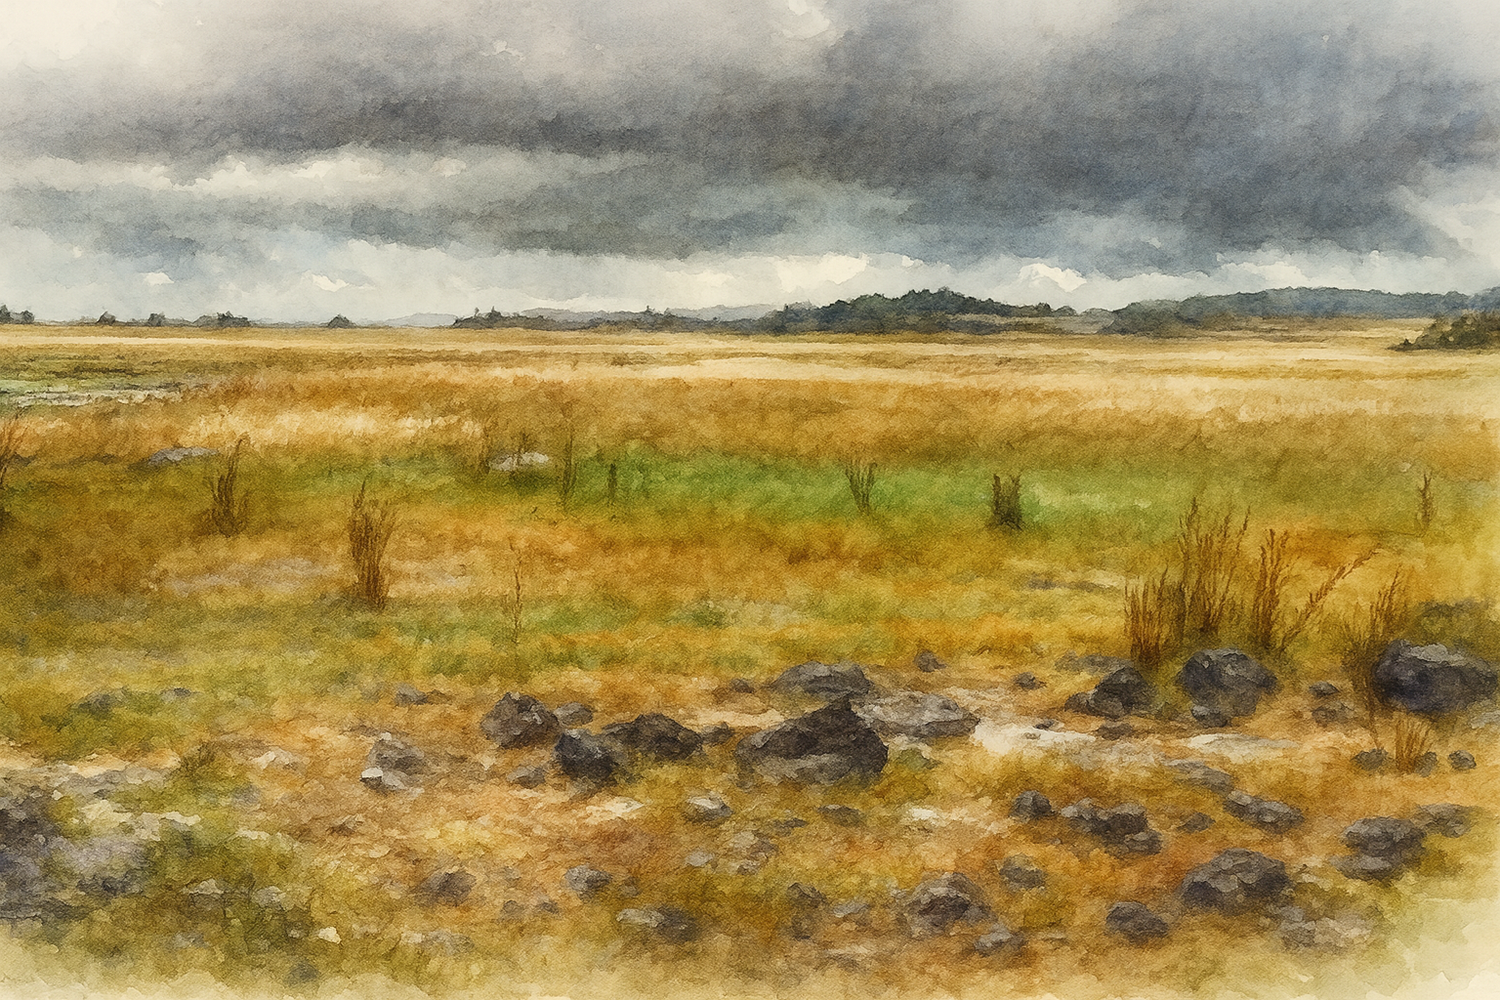
Join us as we explore the beautiful Santa Ana mountains in search of the seasonal vernal pools. Being in our fourth year of drought, the vernal pools haven't had water in them for years, but don't worry the shrimp (eggs) that are unique to this area can survive decades in this area without water. When water fills these shallow pools the shrimp eggs hatch. I hope to visit them one year and actually see them. In the meantime, the sights were breathtaking. We were blessed with big gorgeous clouds, breezing weather and sunshine now and then.
While hiking the Granite Loop trail, we passed through multiple plant communities. This was a fantastic way to bring our nature unit to life!