Botany Projects & Activities
Botany Projects & Activities
-

How a Seed Grows | Root Observation
It's a quintessential rite of passage to grow plants from seeds, and now you can watch the growth of the roots with this Root Observation kit from Nature-Watch.
-

DIY Mason Jar Herb Garden
Grow your own herb garden using supplies you probably already have around the house. This DIY indoor Mason Jar herb garden was easy to do and you can make one, too!
-

How to Grow Herbs Indoors
I can't say enough about the Nature-Watch kits we've used so far. They are well designed and take all the hard work out of doing hands-on projects and replaces with simple projects that are easy to do with great results.
-
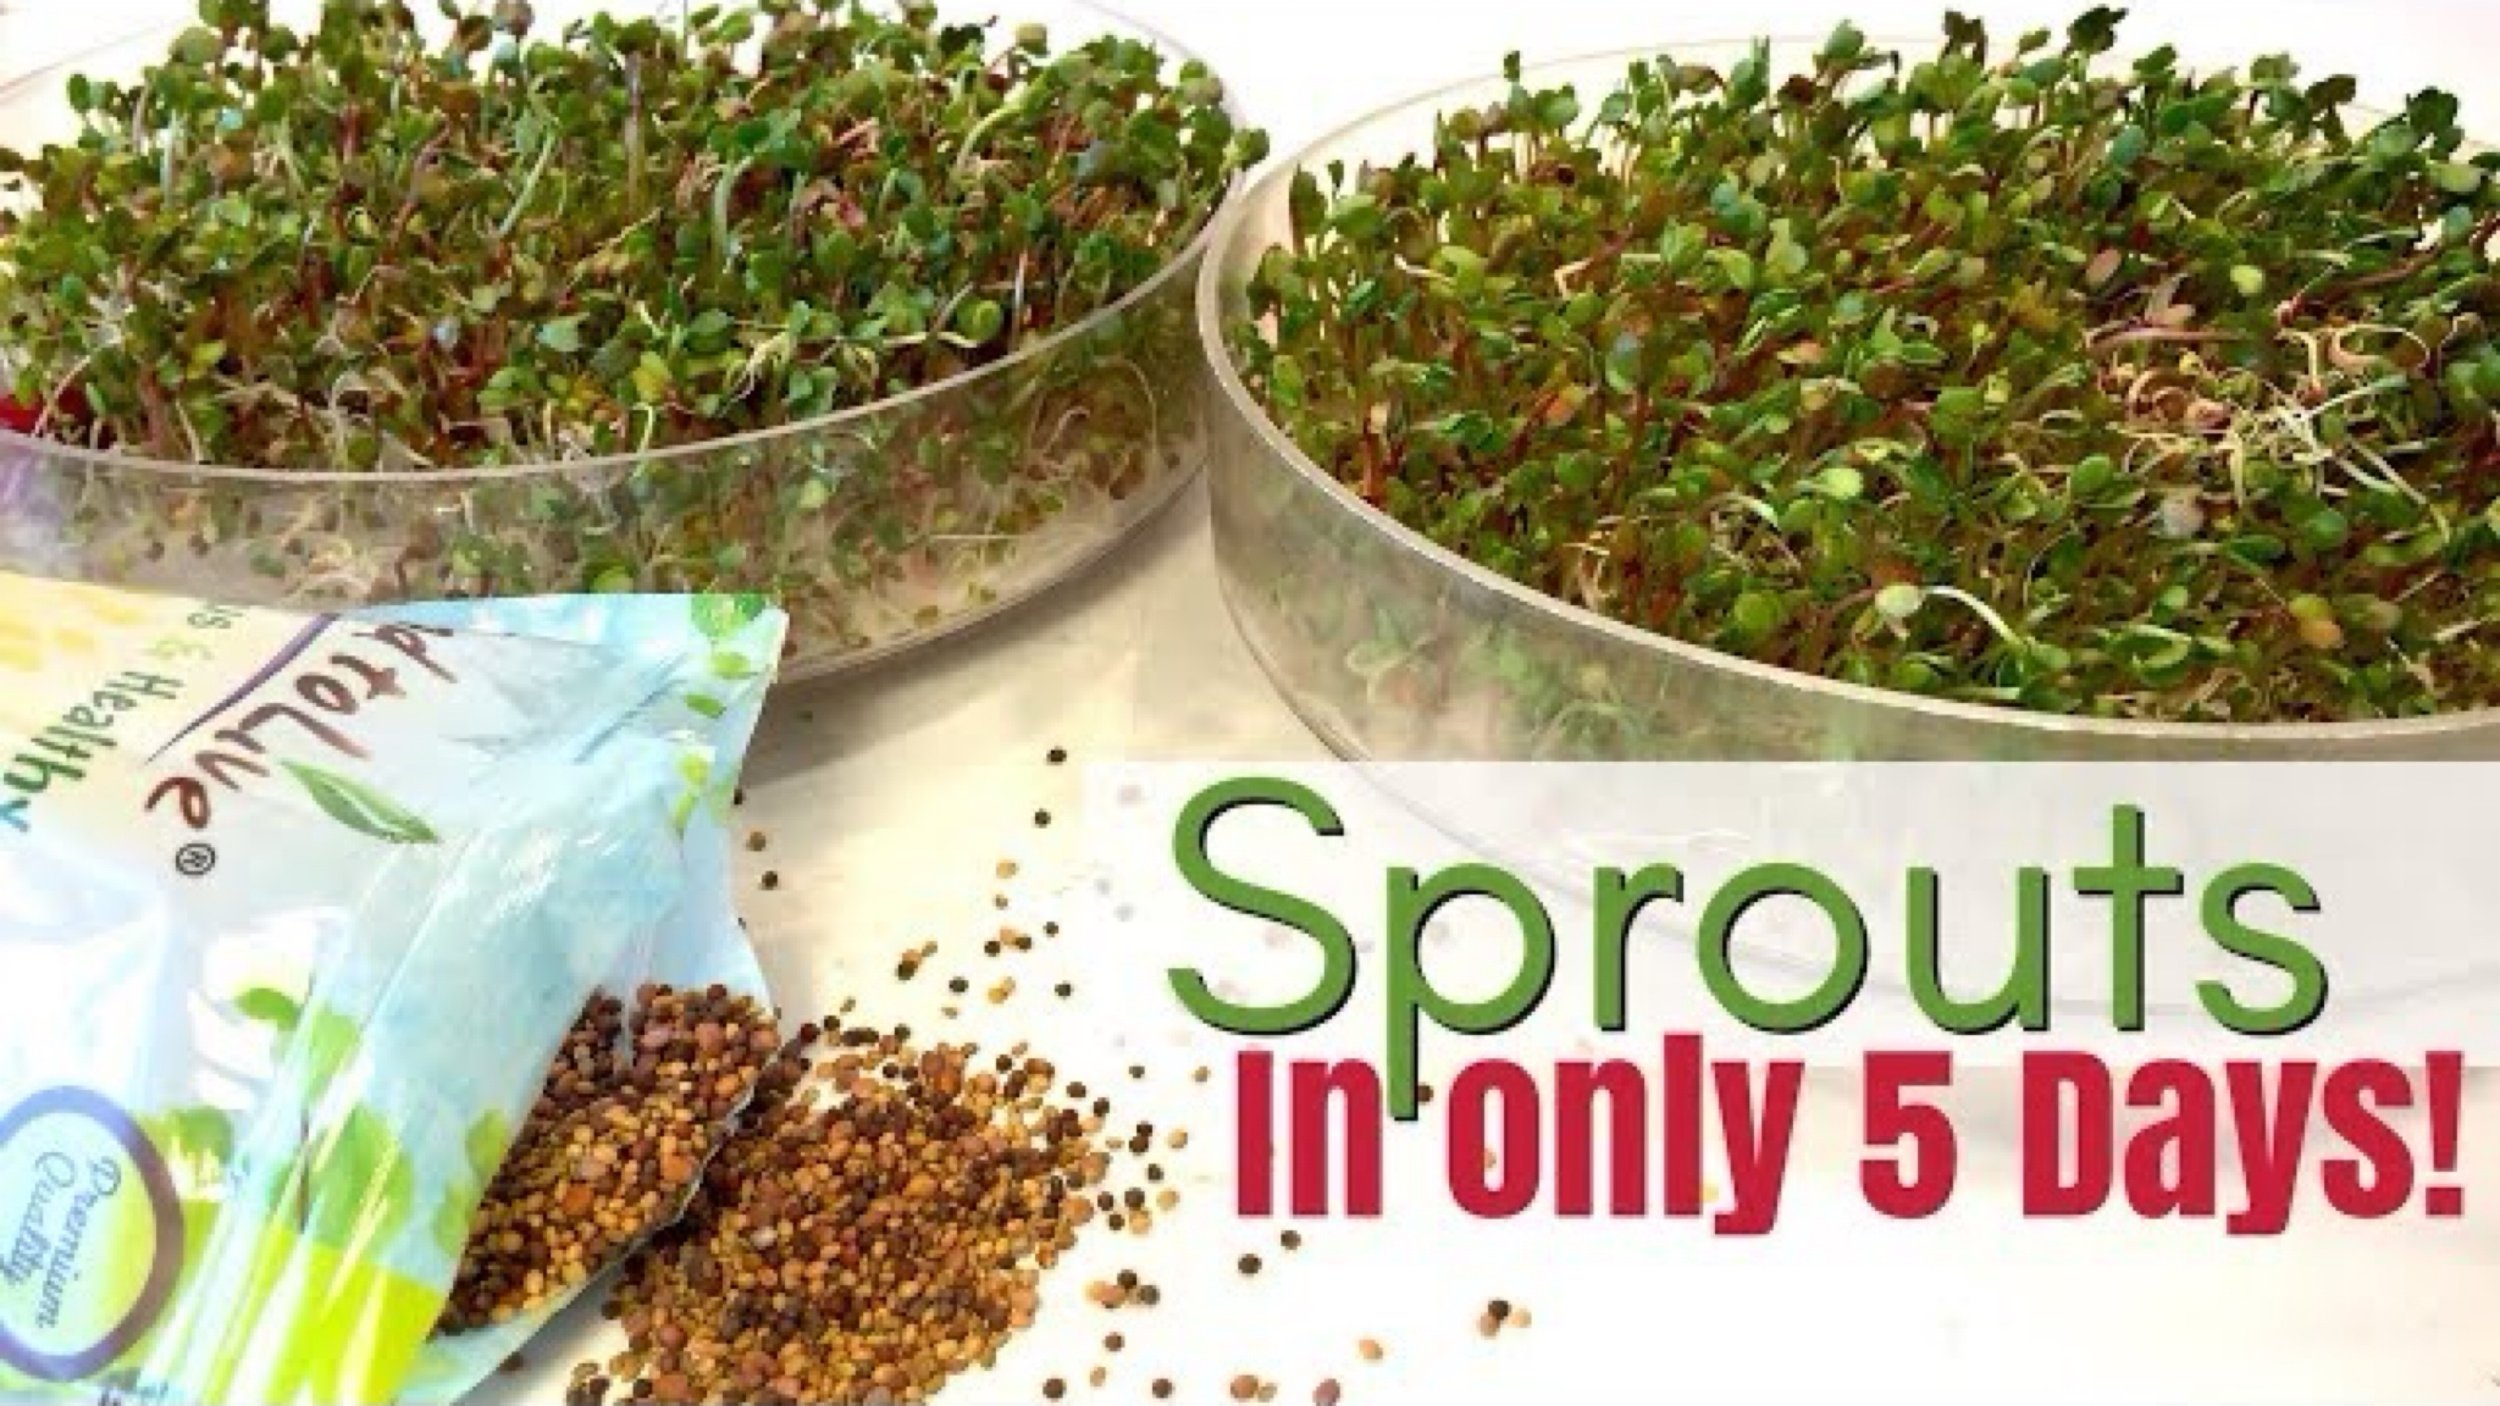
How to Grow Sprouts
One day when I was only five years old, my mom caught me sneaking the sprouts. It was as if I was sneaking chocolate! They were so good, and I kept eating them before they were ready. Fast forward nearly four decades, I'm at it again!
-

What Does Compost Look Like After 3 Weeks?
Curious to see what kitchen scraps look like after three weeks in the dirt? It's probably what you'd expect, but each time I turn over soil that's been composted, I'm always surprised and thrilled at the same time.
-
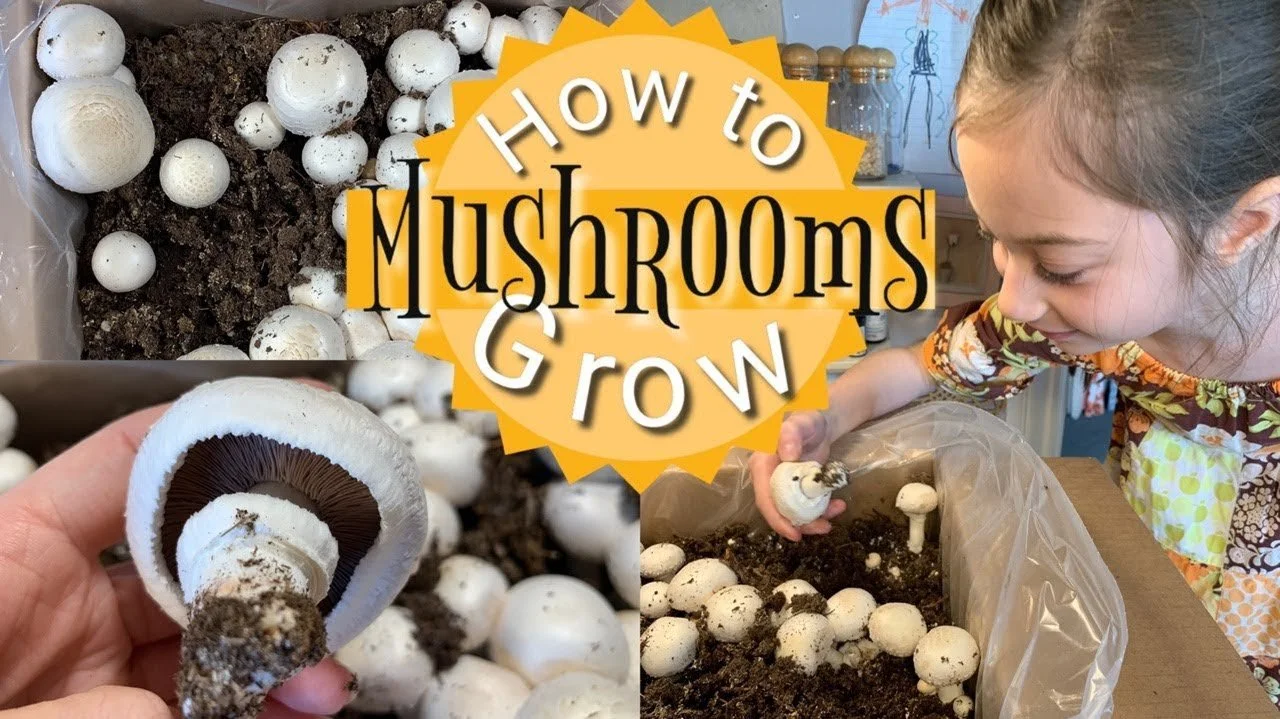
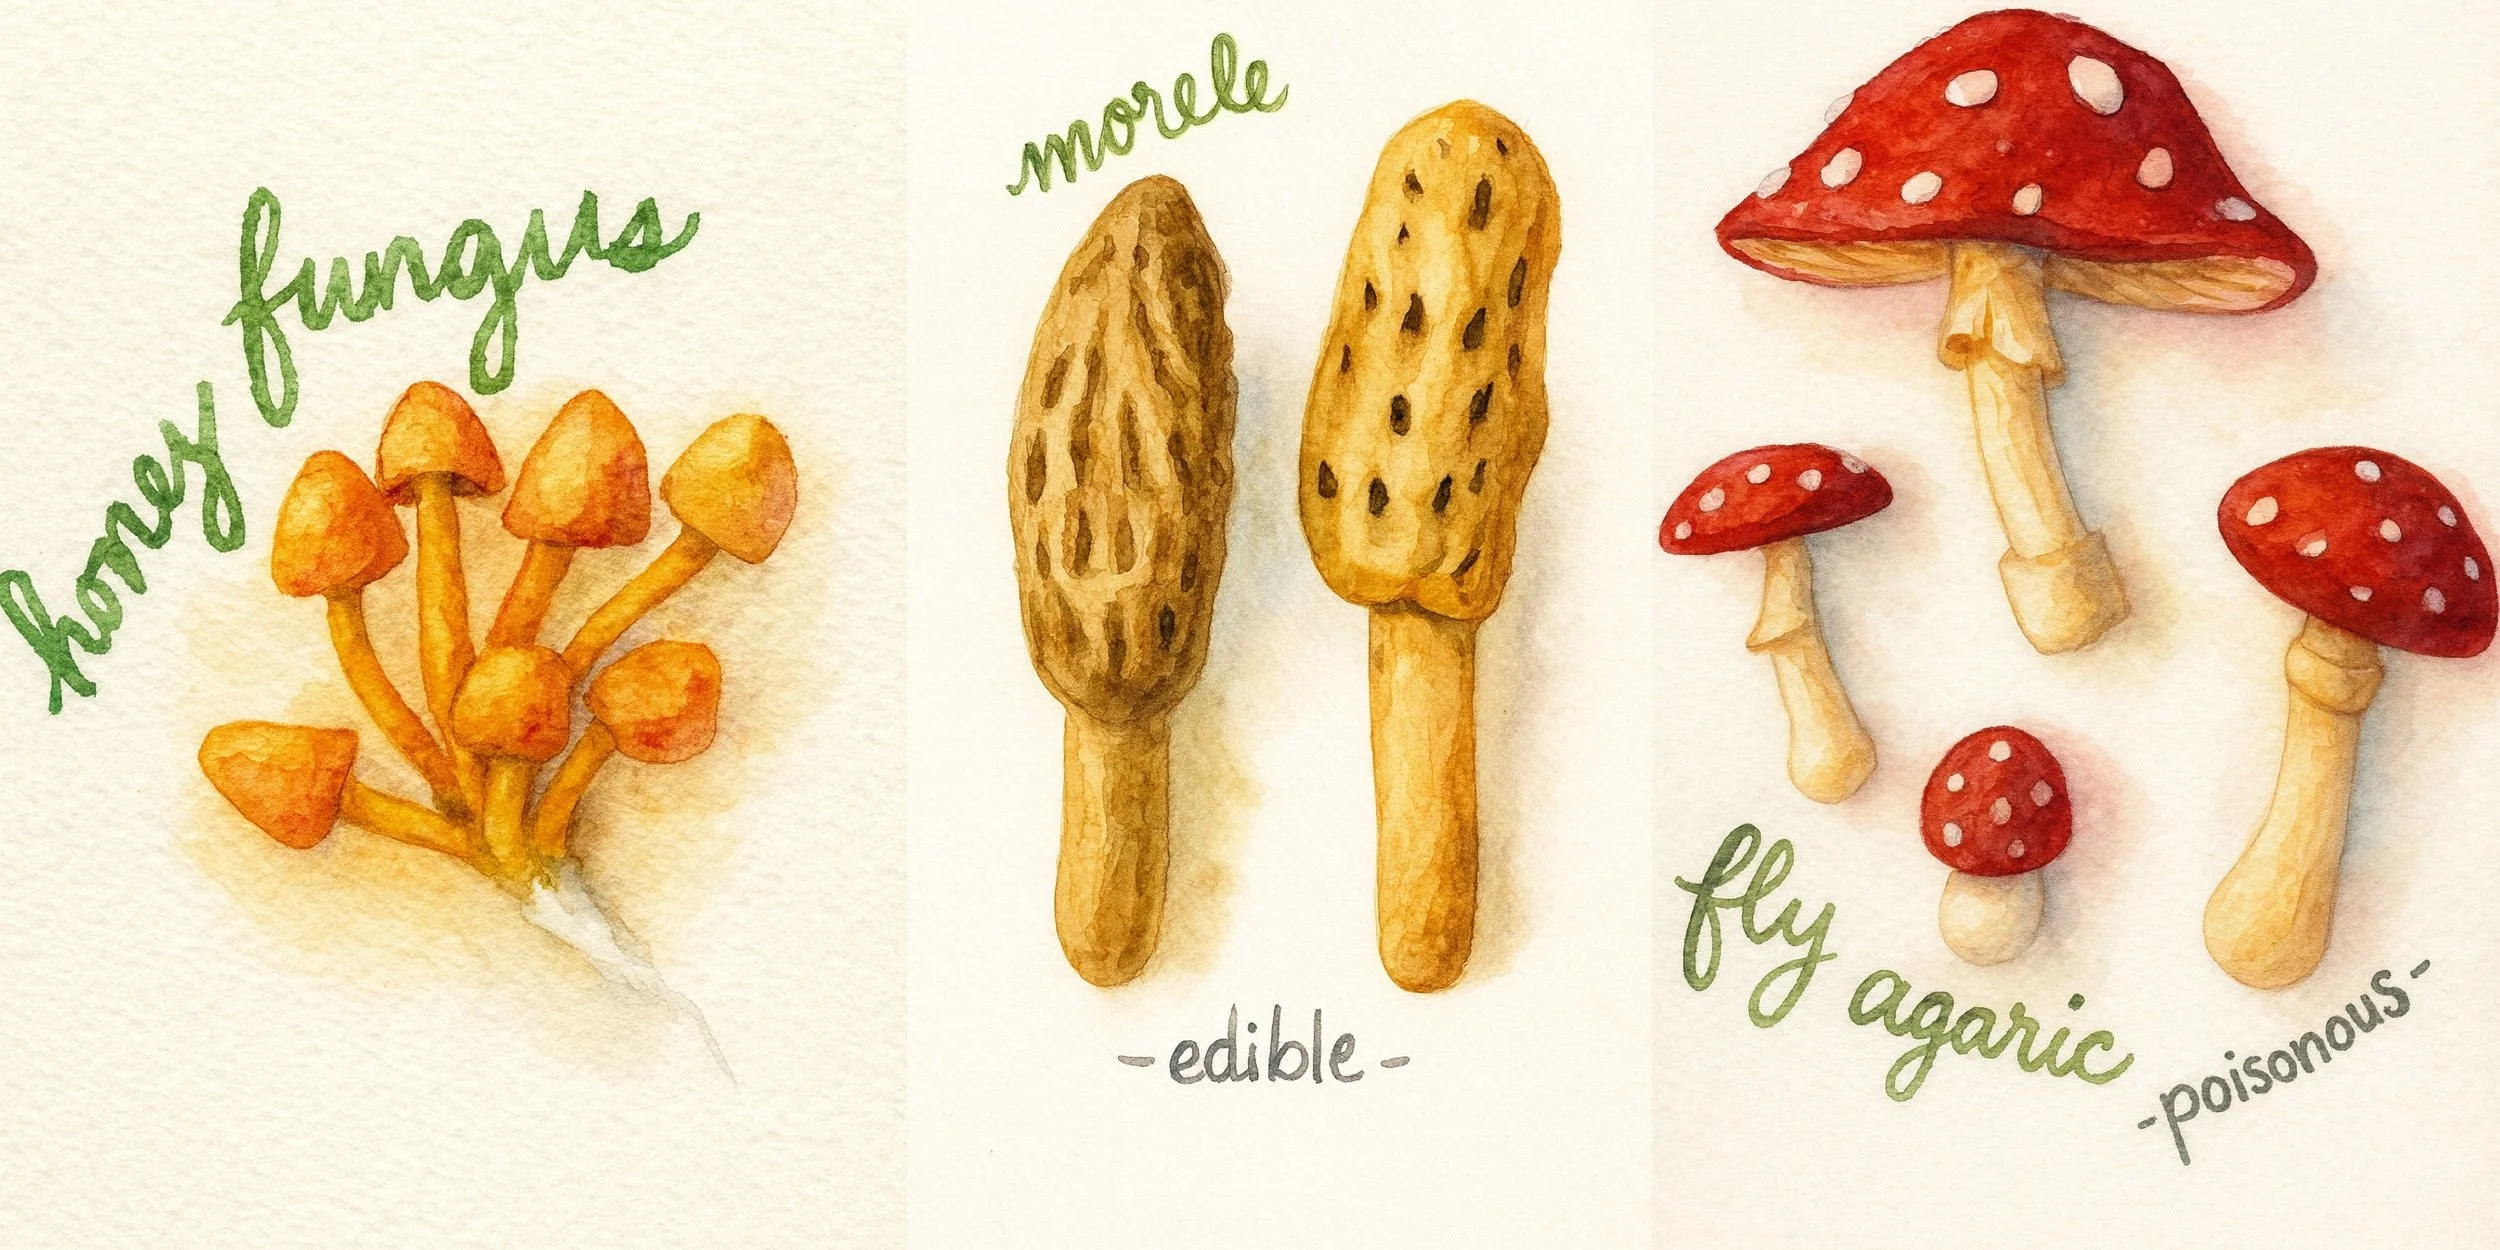
How to Grow Mushrooms
Growing mushrooms is watching nothing happen for weeks and then suddenly they emerge and grow overnight doubling in size in days. That's what happened with our Mushroom Adventure Grow Edible Mushrooms kit from Gardeners.
-

How to Compost for Beginners
There are two ways to compost: The right way and my way ;) I don't compost with the intention of balancing nutrients; I compost primarily to keep our kitchen waste from ending up in the landfill.
-

How to Make Spore Prints
Making spore prints turned out to be a really easy educational project that has creative potential. You want to harvest or use mature mushrooms. You may choose to remove the cap or keep it in place.
-

DIY Mini Mushrooms
This project was more time consuming than I expected but it turned out fabulously in the end. I’m using Sculpey Ultra Light Oven Bake clay, acrylic paints and an assortment tools and materials I had on hand to form these mushrooms.
-

Mushroom Kit
This is the oyster mushroom grow kit. Available by Back to the Roots. This is one of our most enjoyable passive hands-on projects in our botany unit.
-

How to Display Scientific Specimens | Nature Study and Appreciation | Forest Display
Self directed learning never looked so good! We got these samples from a Nature-Watch kit called Forest in a Box. It came with 20 forest specimens enclosed in zipper bags with cards describing each sample.
-

How to Grow a Pine Tree from Seed
I can't tell you how much we love the kits we got from Nature-Watch. The one I'm sharing to day is a classroom kit for 25 students called Forever Forests.
-

How to Make a Pine Needle Basket for Beginners
For our Botany Main Lesson block, we studied conifers. As part of the lesson activities we decided to weave pine needle baskets.
-

Sensory Activities for Preschool and Kindergarten | Rainforest Seeds
I'm once again impressed by the kits by Nature-Watch. They are creative, innovative and educational, not to mention environmentally responsible. These seeds are sourced from Costa Rica and are hand-drilled by local artisans.
Botany
Projects & Activities
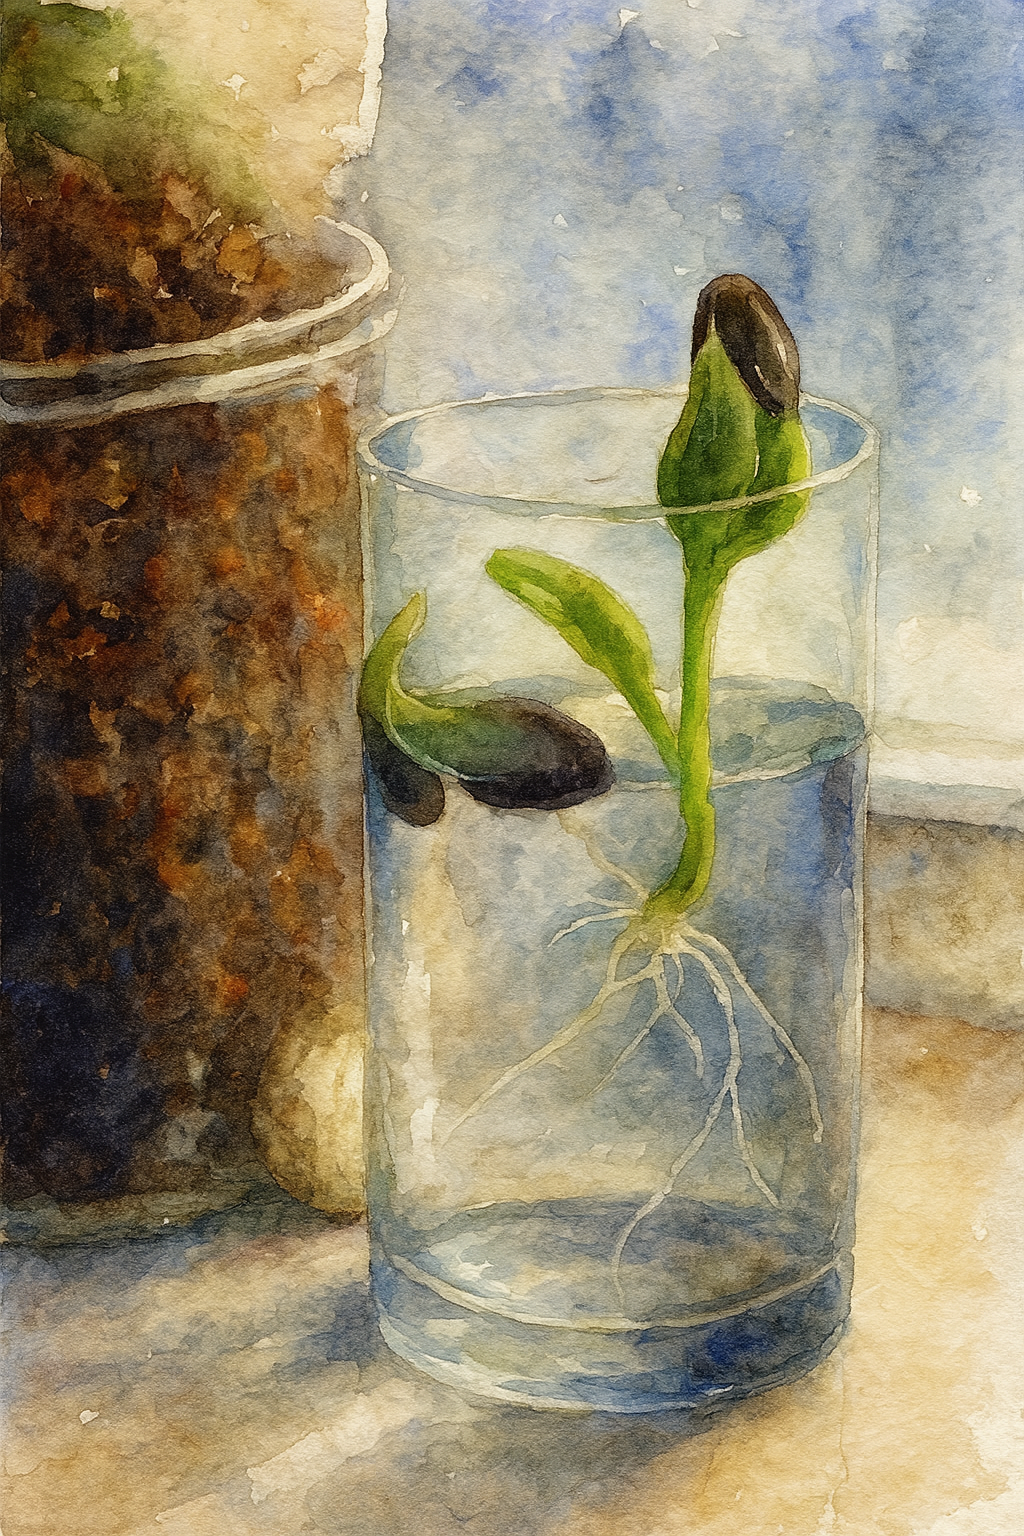
How a Seed Grows
Root Observation
It’s a quintessential rite of passage to grow plants from seeds, and now you can watch the growth of the roots with this Root Observation kit from Nature-Watch. This is the classroom kit, though they sell them individually as well. This kit comes with supplies for 25 students, but I’m going to show you how you can use this classroom kit even if you are homeschooling. This kit comes with 25 clear root observation tubes (with lids), over 50 dwarf sunflower seeds, a bag of acrylamide crystals, glue and 25 cardboard plaques for your tubes. You can find this kit at Nature-Watch.
April 2017
DIY Mason Jar Herb Garden
Grow your own herb garden using supplies you probably already have around the house. This DIY indoor Mason Jar herb garden was easy to do and you can make one, too! All you need is a mason jar or similar jar. Wide neck is easier than a narrow neck. You also need sand, rocks, soil and seeds. We used basil for our herb garden, but you could use a variety of herb
Directions: Fill the jar with about an inch of sand, followed by 1-2 inches of rocks, topping it off with about 2 inches of soil. Sprinkle a few seeds on top, cover with soil and water your seeds a couple times a week. It did several weeks before the basil grew large enough for us to use a few leaves. We also put our jars outside for a couple weeks because our original location in our school room was north facing. Once the basil was big enough for us to use, we moved it back in the house and put it in the kitchen. It looks beautiful and it’s functional!
Supplies: jar, sand, rocks, soil , and seeds. Cost: Less than $1 per jar. Duration: set up: 15 minutes, project: 10 minutes, clean up: 10 minutes, sprout: 1 week, leaves: 3 weeks, big enough to use:6 weeks
April 2017
How to Grow Herbs Indoors
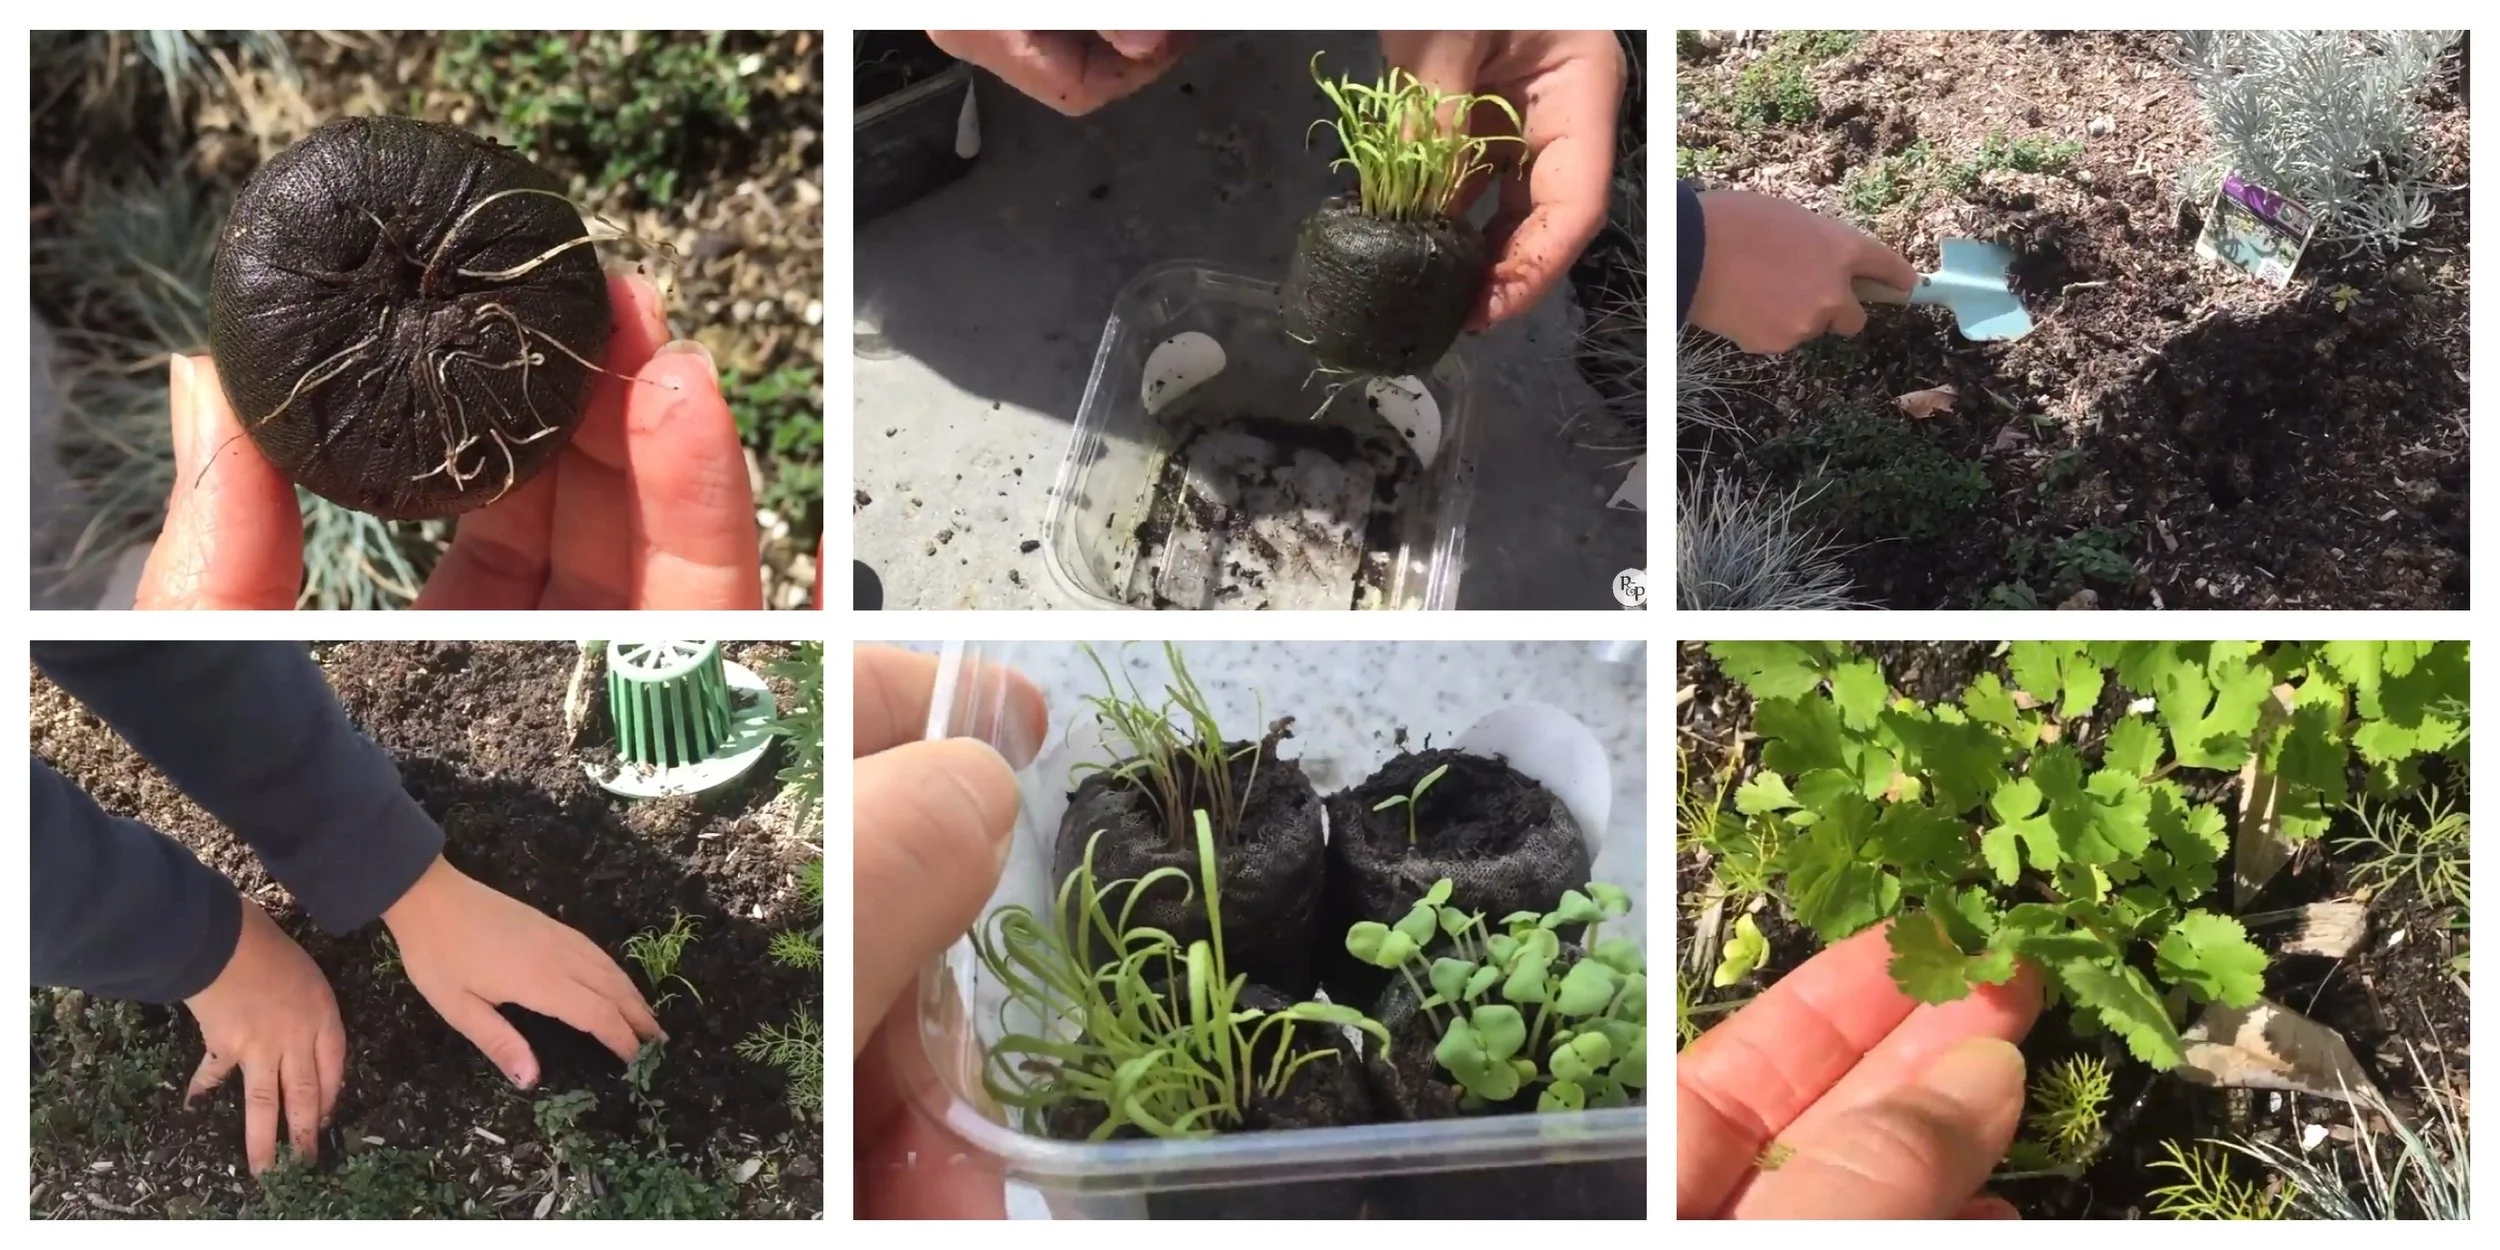
I can’t say enough about the Nature-Watch kits we’ve used so far. They are well designed and take all the hard work out of doing hands-on projects and replaces with simple projects that are easy to do with great results. The projects are meaningful, educational and long lasting. And because we’ve purchased the classroom kits for projects, we have left overs to use again and share. This project is for our Spring Nature Themed unit and you can see more projects for this unit.
This project is a Nature-Water DIY indoor greenhouse to grow herbs. It actually works! And what makes it especially easy for transplant are the soil pellets the kit comes with have mesh around them. These soil pellets come dry for easy shipping and storage. You just add several tablespoons per soil pellet to rehydrate them. Keep an extra half inch of water in the container once the soil pellets are rehydrated. Add 10 seeds to each soil pellet (the opening should be face up), cover the seeds and put the lid back on. In about 2-4 weeks, the herbs will be big enough to transplant. They are ready for harvest a few months later. Harvest stems and leaves and leave the plant to continue growing. To keep it from going to seed, pinch off the flowers.
April 2017

How to Grow Sprouts
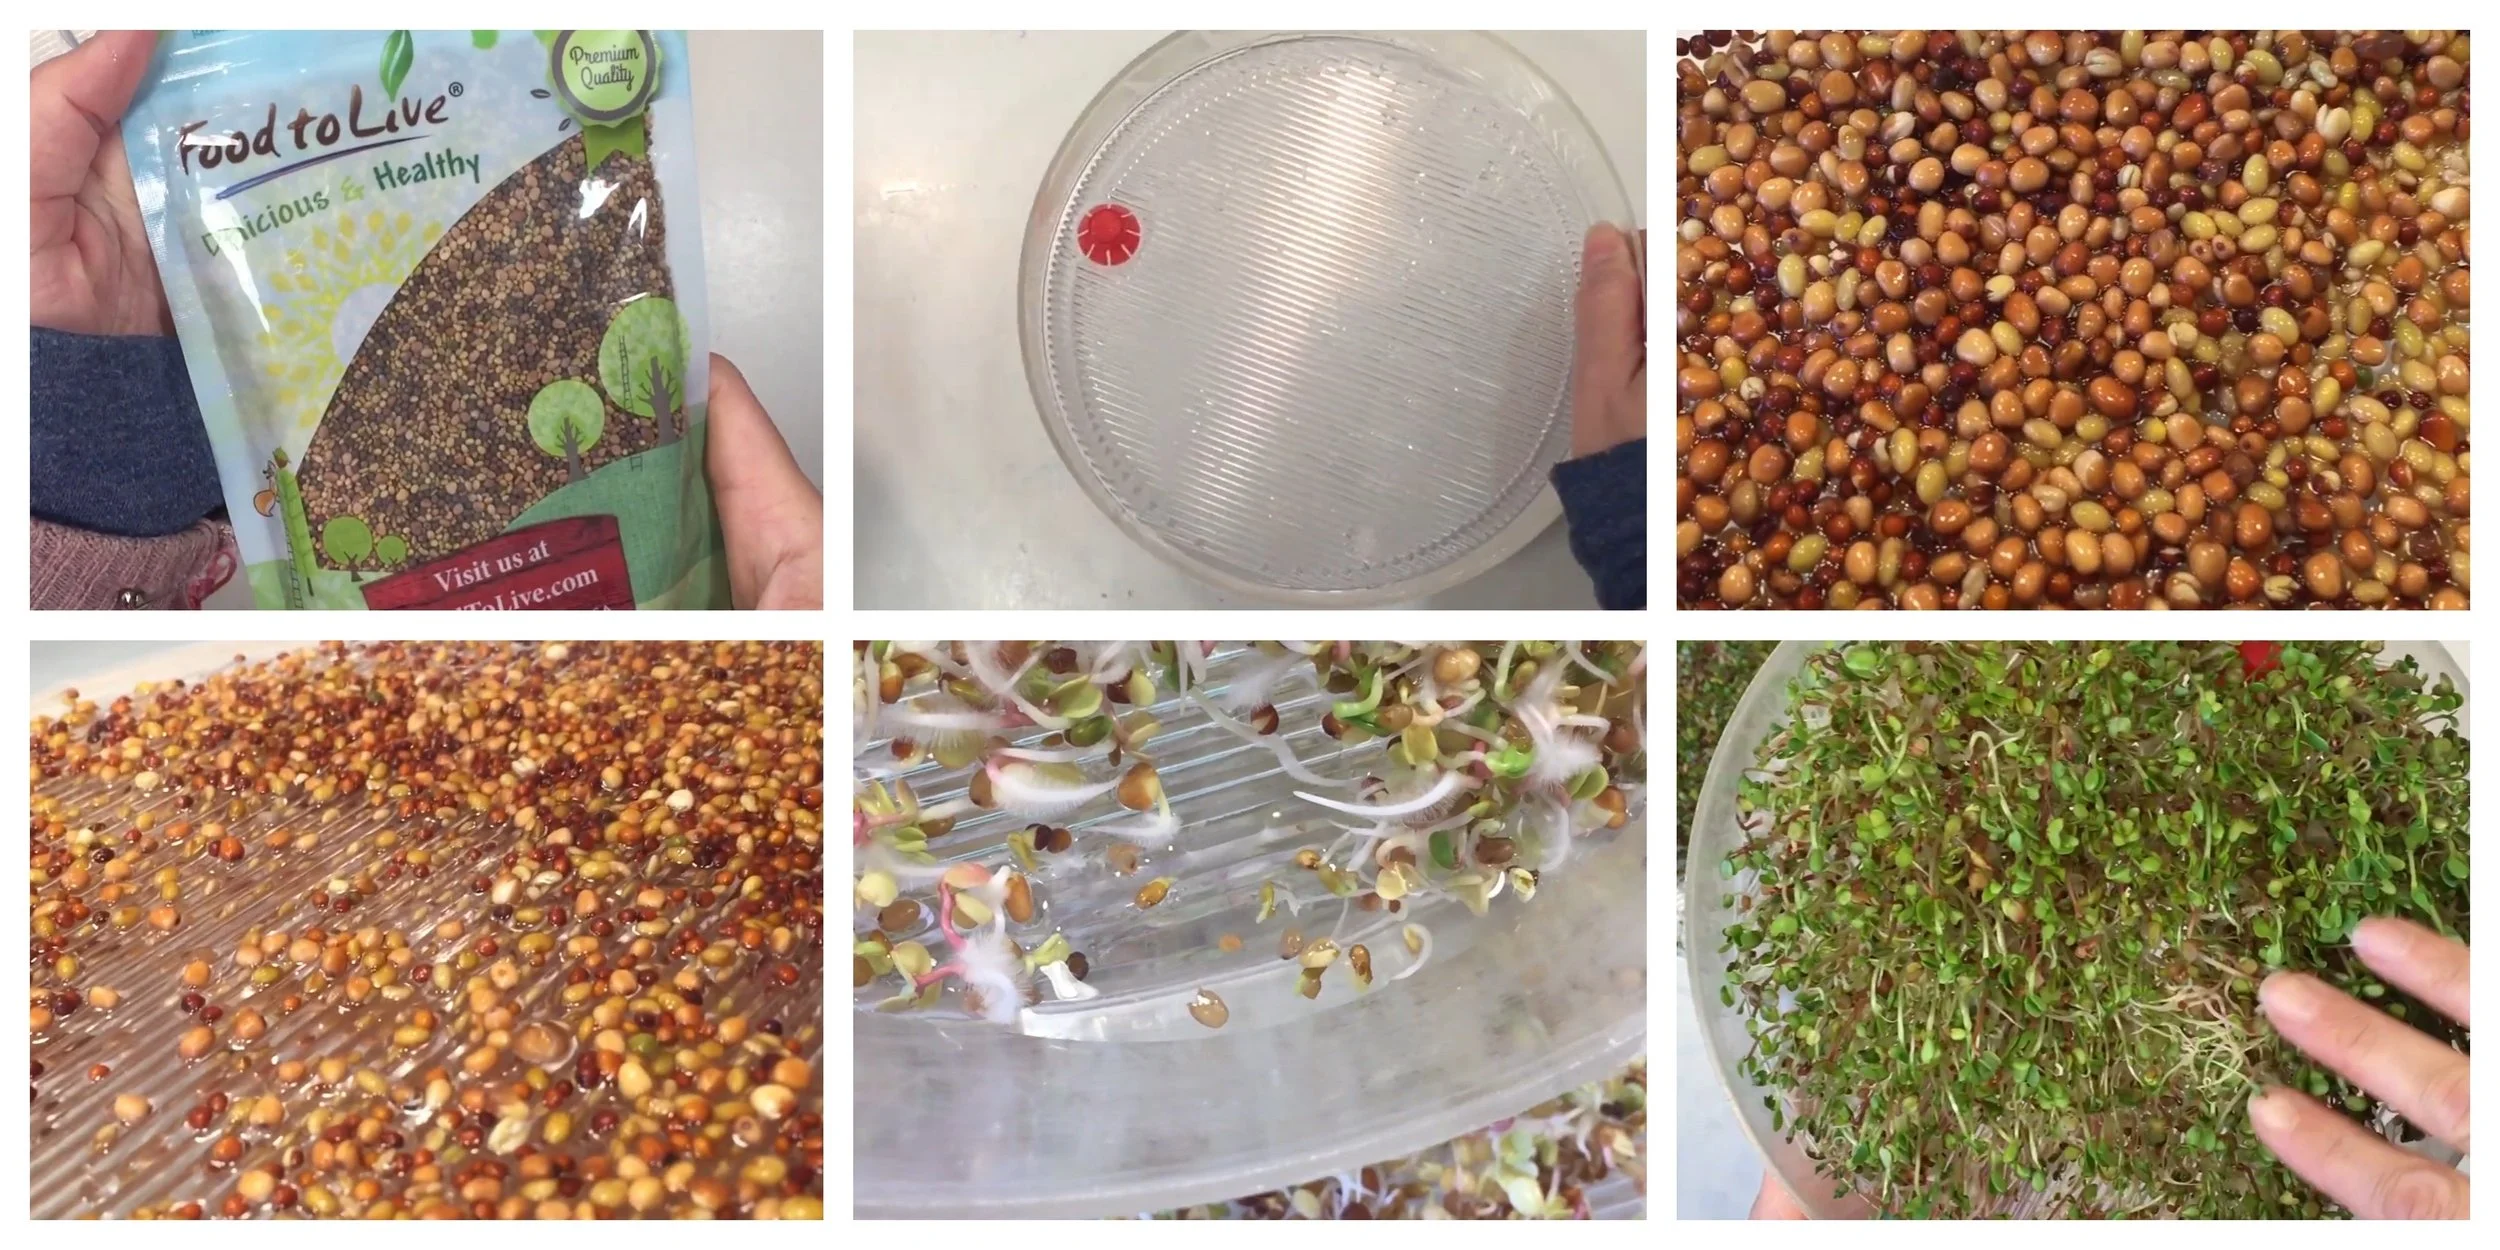
One day when I was only five years old, my mom caught me sneaking the sprouts. It was as if I was sneaking chocolate! They were so good, and I kept eating them before they were ready. Fast forward nearly four decades, I’m at it again! Same sprouter, new seeds. This time I’m using a blend of clover, radish, broccoli and alfalfa. I have to say the radish was pretty strong and overpowered the taste of the other sprouts. In the future, I’ll stick with just one kind.
The process of growing sprouts is straightforward and easy. After soaking the seeds over night, transfer them to a sprouter. The key to good sprouts is to be diligent with rinsing them thoroughly. You also want to make sure to drain them well. Our sprouter didn’t offer the best drainage and around day 2-3 it looked like there was some extra growth on the sprouts. Whether it was mold or not, I rinsed them thoroughly, drained them thoroughly and let them dry out by removing the lid and trays. Problem solved! By day 4-5, the sprouts were green and perfect.
Check out some of the other spring projects we’re doing this season.
What Does Compost Look Like After 3 Weeks?
Curious to see what kitchen scraps look like after three weeks in the dirt? It's probably what you'd expect, but each time I turn over soil that's been composted, I'm always surprised and thrilled at the same time. It's incredible how quickly the right materials will decompose and how unchanged materials that take eons to decompose look like after weeks, months or years. Another surprise is the temperature. You may already know that decomposition creates heat, but seeing it on the thermometer and feeling it as you run the compost through your fingers is another thing entirely.
Check out the other Nature-Watch kits we use and love.
If you want to try this using the kit we used, you can find it at Nature-Watch.
You could also make your own using large mason jars, a hammer and nails to puncture the lid and a few thermometers to measure the temperature change. Though we did this project in the fall, I think this would be a great activity to do in the spring along with a nature or science unit. You can check out the last two spring season projects and units here: Nature Unit Spring 2016 and Nature Unit 2017.
How to Grow Mushrooms
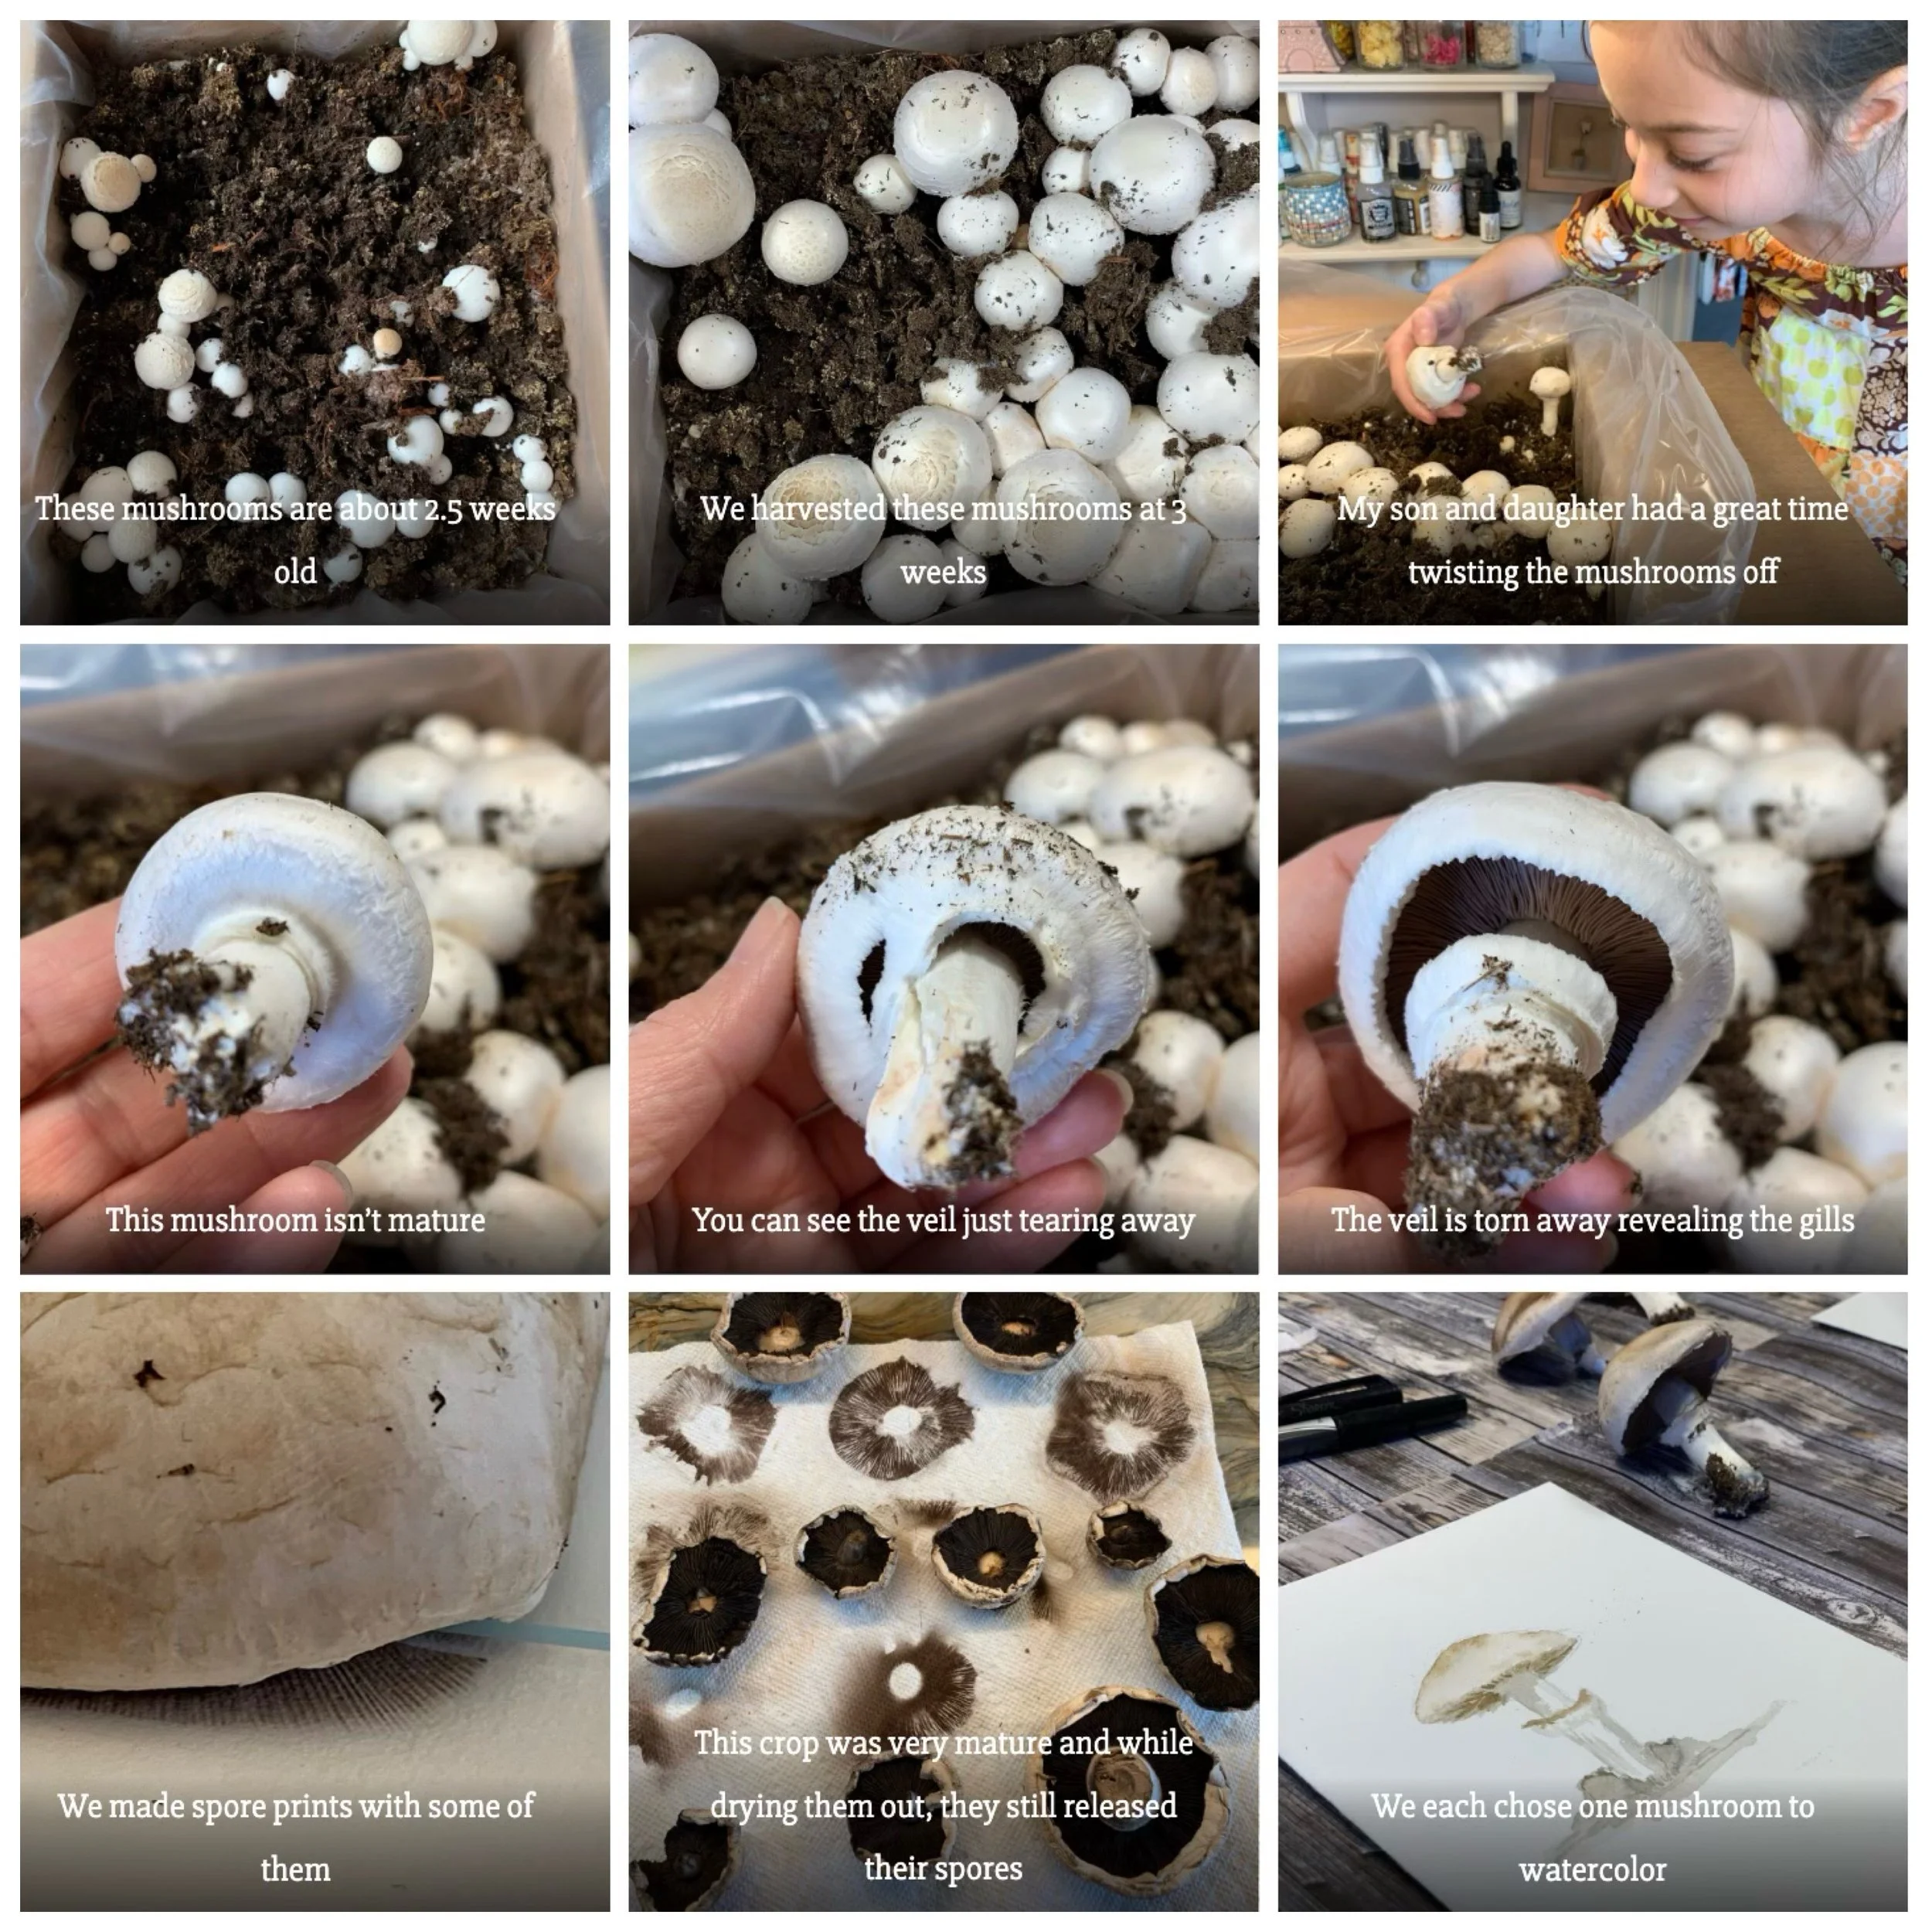
Growing mushrooms is watching nothing happen for weeks and then suddenly they emerge and grow overnight doubling in size in days. That’s what happened with our Mushroom Adventure Grow Edible Mushrooms kit from Gardeners. We bought this kit for our spring nature study, but really had intended to buy when we did our Botany Main Lesson Block to accompany the lesson on fungi.
It took about 4-6 weeks for both crops of mushrooms to grow and be harvested. We sauteed the first batch of mushrooms, made spore prints with a smaller mid crop and dried out the final crop of mushrooms to be used in future dishes.
How to Make Spore Prints
Check out how we made spore prints.
Making spore prints turned out to be a really easy educational project that has creative potential. You want to harvest or use mature mushrooms. You may choose to remove the cap or keep it in place. We did both with varying results. To keep the spore prints from being scattered by air drafts, you can cover them with a cup.
We left our spore prints for two days and that was too much time. We could have removed the mushroom caps after two hours and moved the caps to another part of the paper to collect more. I find the finer prints to be more beautiful and easier to observe under a microscope.
Check out the haul video where we purchased this mushroom growing kit and other supplies for our main lesson blocks and unit studies.
Check out the rest of our Botany Main Lesson block lessons, activities and projects for more ideas on how you can bring this subject area to life.
Check out some of my food tutorials to find recipes we’ve used in our home and homeschool:
This kit was $45 and we purchased it from Gardners.com
DIY Mini Mushrooms
This project was more time consuming than I expected but it turned out fabulously in the end. I’m using Sculpey Ultra Light Oven Bake clay, acrylic paints and an assortment tools and materials I had on hand to form these mushrooms. Books used: The ABCs of Nature Nature Anatomy, Humongous Fungus, The Practical Naturalist, Fungarium, The Curious Nature Guide, and Curious Kids Nature Guide
Mounted on heavy weight watercolor paper Watercolors for the edge of display Copic markers for labeling Hot glue gun for assembling.
October 2023
Mushroom Kit
This is the oyster mushroom grow kit. Available by Back to the Roots. This is one of our most enjoyable passive hands-on projects in our botany unit. Bonus because we get to cook and eat these mushrooms when they’re fully grown. Once they begin to grow, they grow rapidly! It’s thrilling to watch as it only takes a few days for them to be fully mature. It’s best to harvest them as soon as they are mature and cook them within a few days.
How to Display Scientific Specimens
Nature Study and Appreciation | Forest Display
Self directed learning never looked so good! We got these samples from a Nature-Watch kit called Forest in a Box. It came with 20 forest specimens enclosed in zipper bags with cards describing each sample. We removed the cards and placed them in an envelope on the back of the display board and mounted each specimen using hot glue. We used heavy duty chipboard. As thick and strong as a hardback book as our display. I used a glue stick to adhere the watercolor paper to the display board. The finished project is 14"x11" big and it is bordered on all sides with drywall tape to finished off the edges and give it a clean look. I penciled in the names of each specimen so the students can identify each sample on the cards and each the description about each. This makes a beautiful classroom display. It has inspired the children to look at it and piqued their curiosity about the samples.
Duration: 30 minutes
Cost: minimal because I had these supplies
Nature-Watch kit: $39.95 (current price in 2025 is $52)
Supplies: Hot glue gun, glue sticks, forest samples, watercolor paper, drywall tape, twine, and heavy chipboard.
Check out our Botany Main Lesson Block playlist on YouTube.
How to Grow a Pine Tree from Seed
I can't tell you how much we love the kits we got from Nature-Watch. The one I'm sharing to day is a classroom kit for 25 students called Forever Forests. In addition to providing content for a lesson, this kit comes with enough supplies to plant more than 25 pine trees from seed. It also comes with pine nuts for tasting and various pine cones for viewing. Watch the progress of our pine trees from seedling to sapling and beyond by following me on Instagram at Pepper and Pine.
This project is part of our Waldorf Botany Main Lesson. See the other videos in this playlist.
Find this kit Forests Forever Activity Kit and more at Nature-Watch.
April 2017
How to Make a Pine Needle Basket for Beginners
For our Botany Main Lesson block, we studied conifers. As part of the lesson activities we decided to weave pine needle baskets. This is a great activity for a nature unit study or for an Indigenous People. It’s fairly simple, but does take some practice or skill. What I did was get the project started out for my 10-year-old son who continued making it until the end, when I finished it off. We made a small flat basket with a small lip. If you work with a larger bundle of pine needles, it was be faster and easier, especially for kids.
I would recommend using a blunt wide eyed needle for this project. You can find raffia online or in craft stores. Pine needles are free! But I recommend using the long pine needles. If you can’t find them in nature, you can buy them as a basket weaving kit from Acorn Naturalist. This project is ideal for kids 12 years and up, but with a little help, you can assist a child as young at eight years old.
June 2017
Sensory Activities for Preschool & Kindergarten
Rainforest Seeds
I'm once again impressed by the kits by Nature-Watch. They are creative, innovative and educational, not to mention environmentally responsible. These seeds are sourced from Costa Rica and are hand-drilled by local artisans. The kit comes with high quality durable elastic bands to string the seeds together to make bracelets. I anticipate keeping these bracelets for a long time, but when it's time to say good-bye, I feel good knowing that this project produced little waste as the seeds can be returned back into nature and the elastic band disposed of.
If you'd like to see some of the other projects we've done from Nature-Watch kits, click here.
The Rainforest Seeds Kit is available from Nature Watch.
Here's the printer's tray I used.
I can't tell you how much I like it and plan to empty my other scrapbooking supplies out of my trays and bring them into the homeschool room. It's such an inviting way to display materials.
