Colonial Times Projects & Activities
Projects & Activities
Hands-on activities are part of nearly every unit study and main lesson block. We tend to do the most handsome projects with our history units as they lend well to activities that support the lesson.
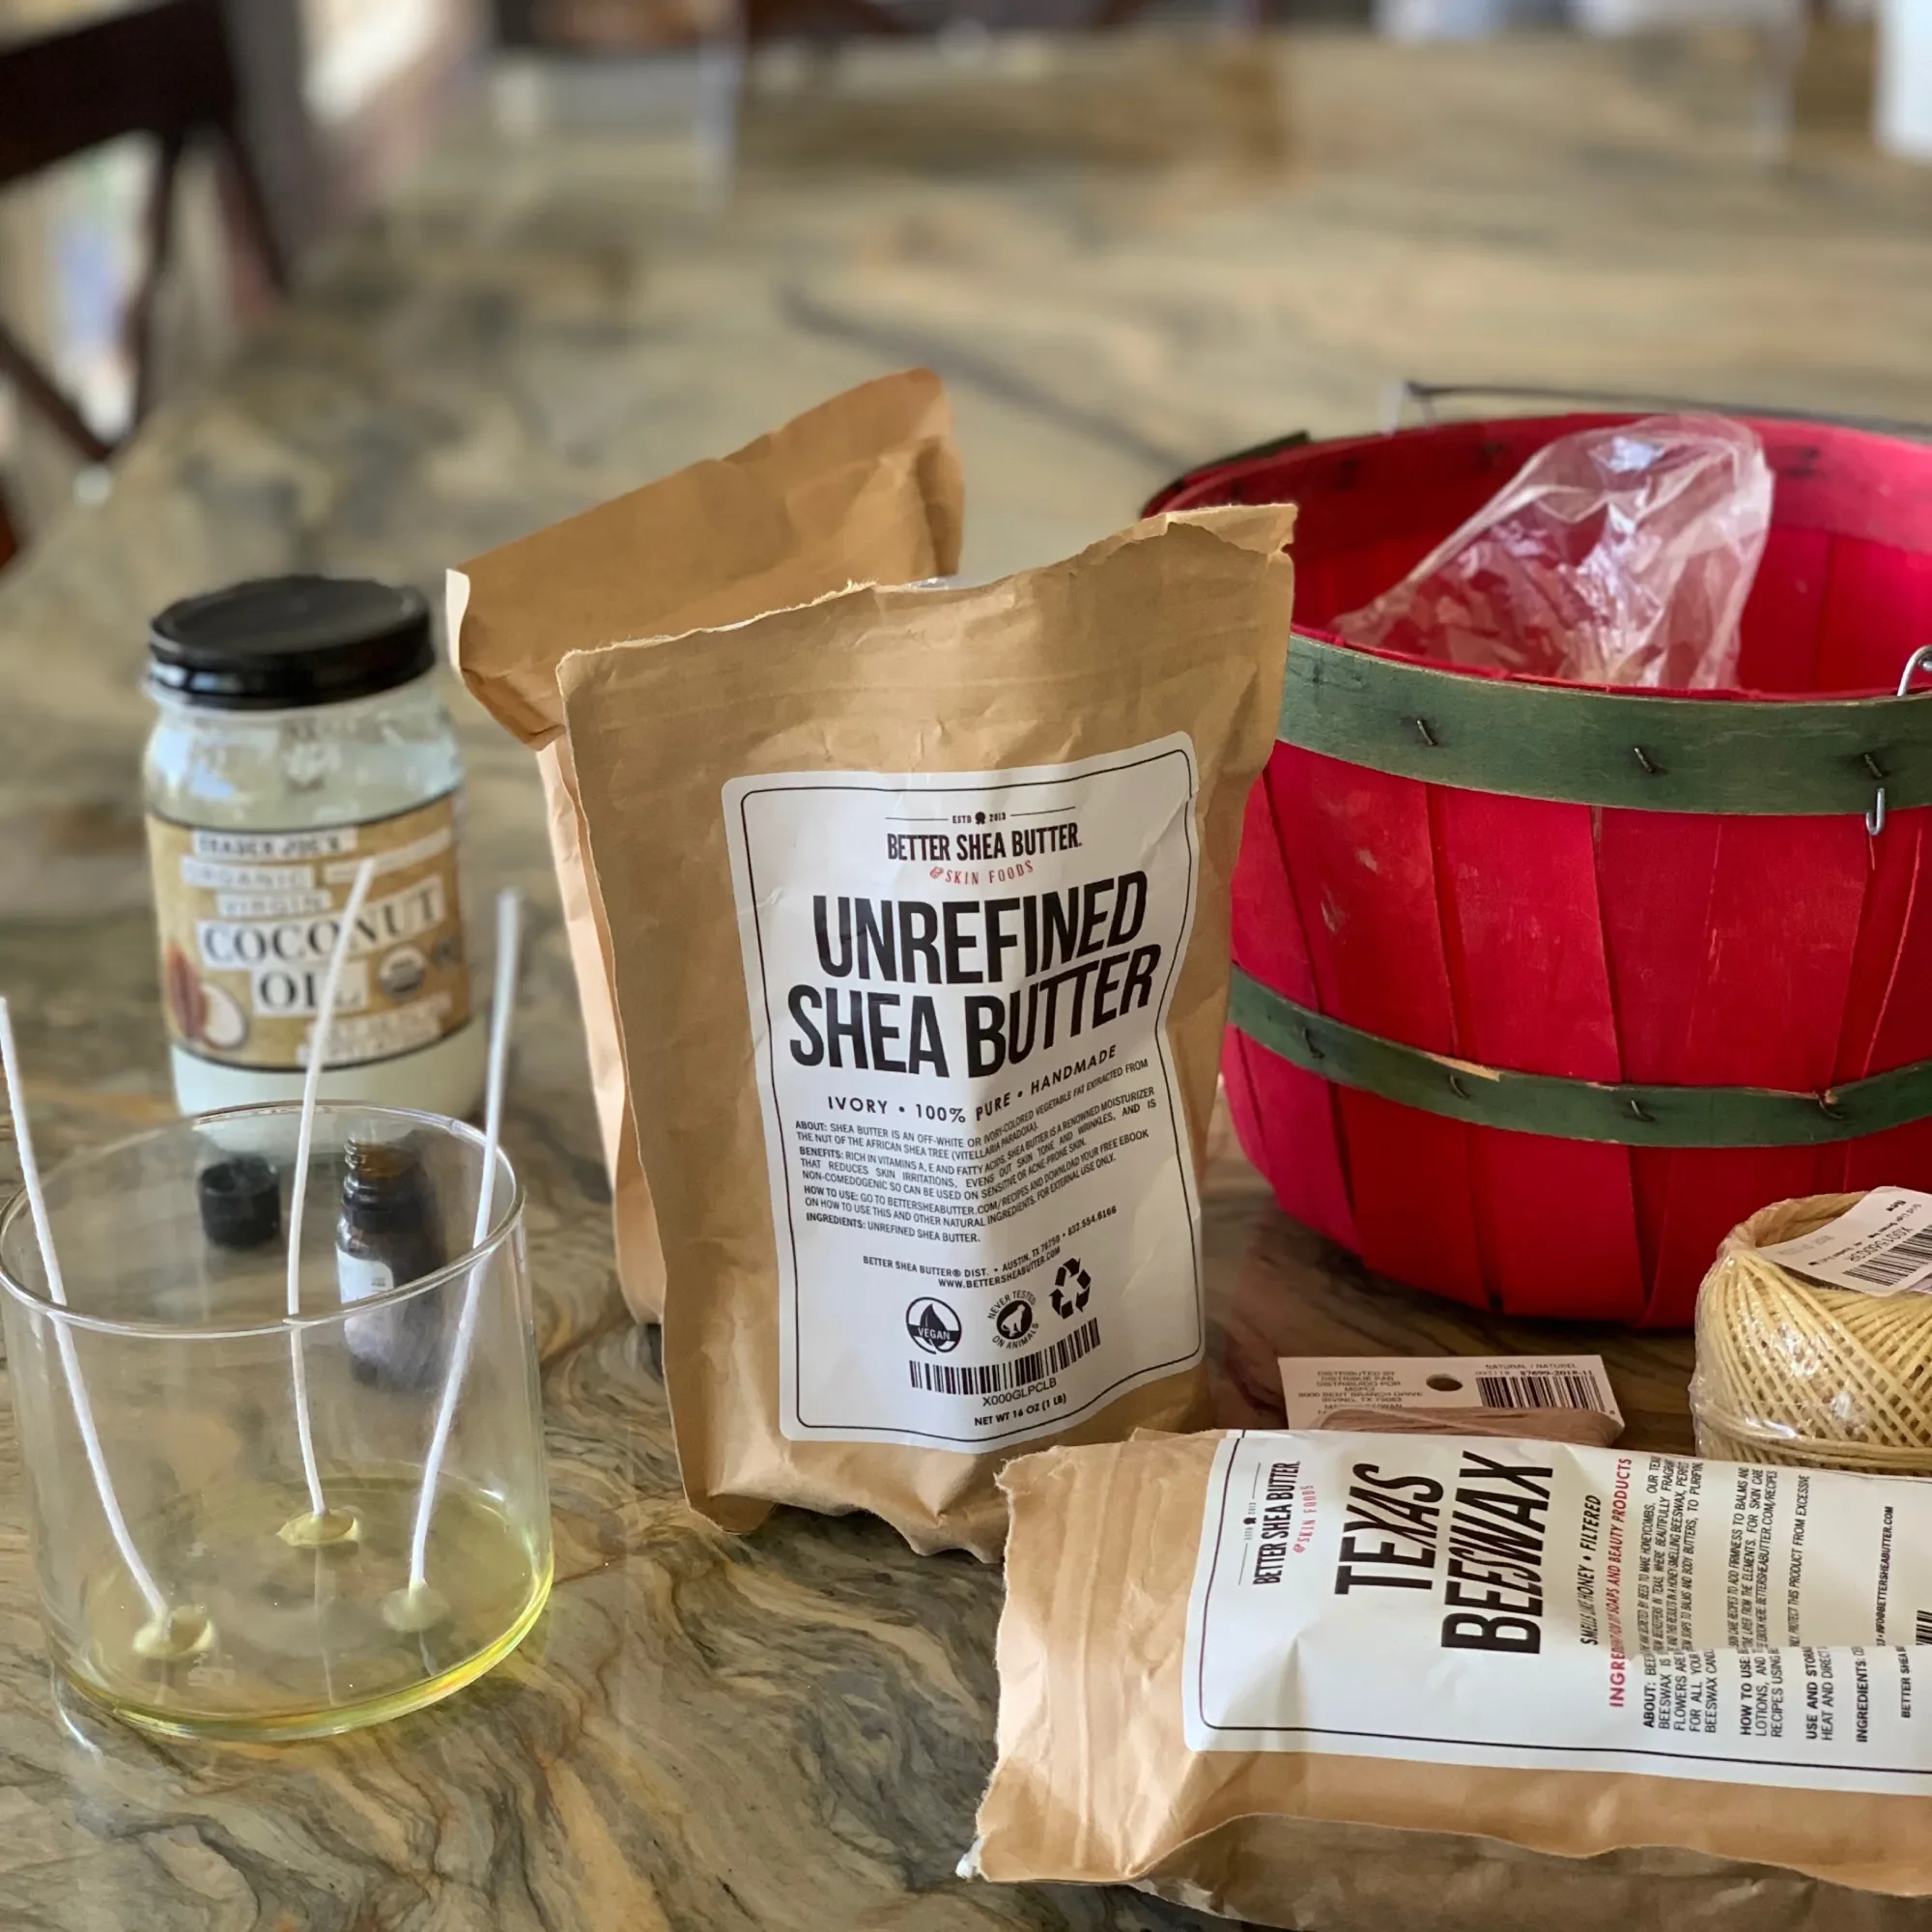
One of our colonial times unit studies coincided with autumn. It was a perfect opportunity to do fall projects and recipes that supported our colonial times history unit study. We explored Handwork and historic tutorials for this unit, using plants to dye wool, beeswax to make candles and embroidery and sewing to make dolls and beautify projects.
We also made a historic rope bed, historic mop, and historic Pine needle broom. Working with materials available in the environment, as well as a few from the craft store we were able to re-create utilitarian items found in a colonial home.
Making these basic tools and crafts would also support a Grade 3 student as it is incredibly satisfying to learn how to make things for your well-being and survival such as growing food, building shelters, and sewing clothes.
While we didn’t make our own log cabin, we did make a miniature version using popsicle sticks. Some projects become keepsakes while others got recycled.
Colonial Projects & Activities
-

Plant Dyed Wool
This has been on my crafting bucket list for ages: dying fabric & yarn with natural plant dyes. We finally did it! It was both easier & harder than I thought.
-
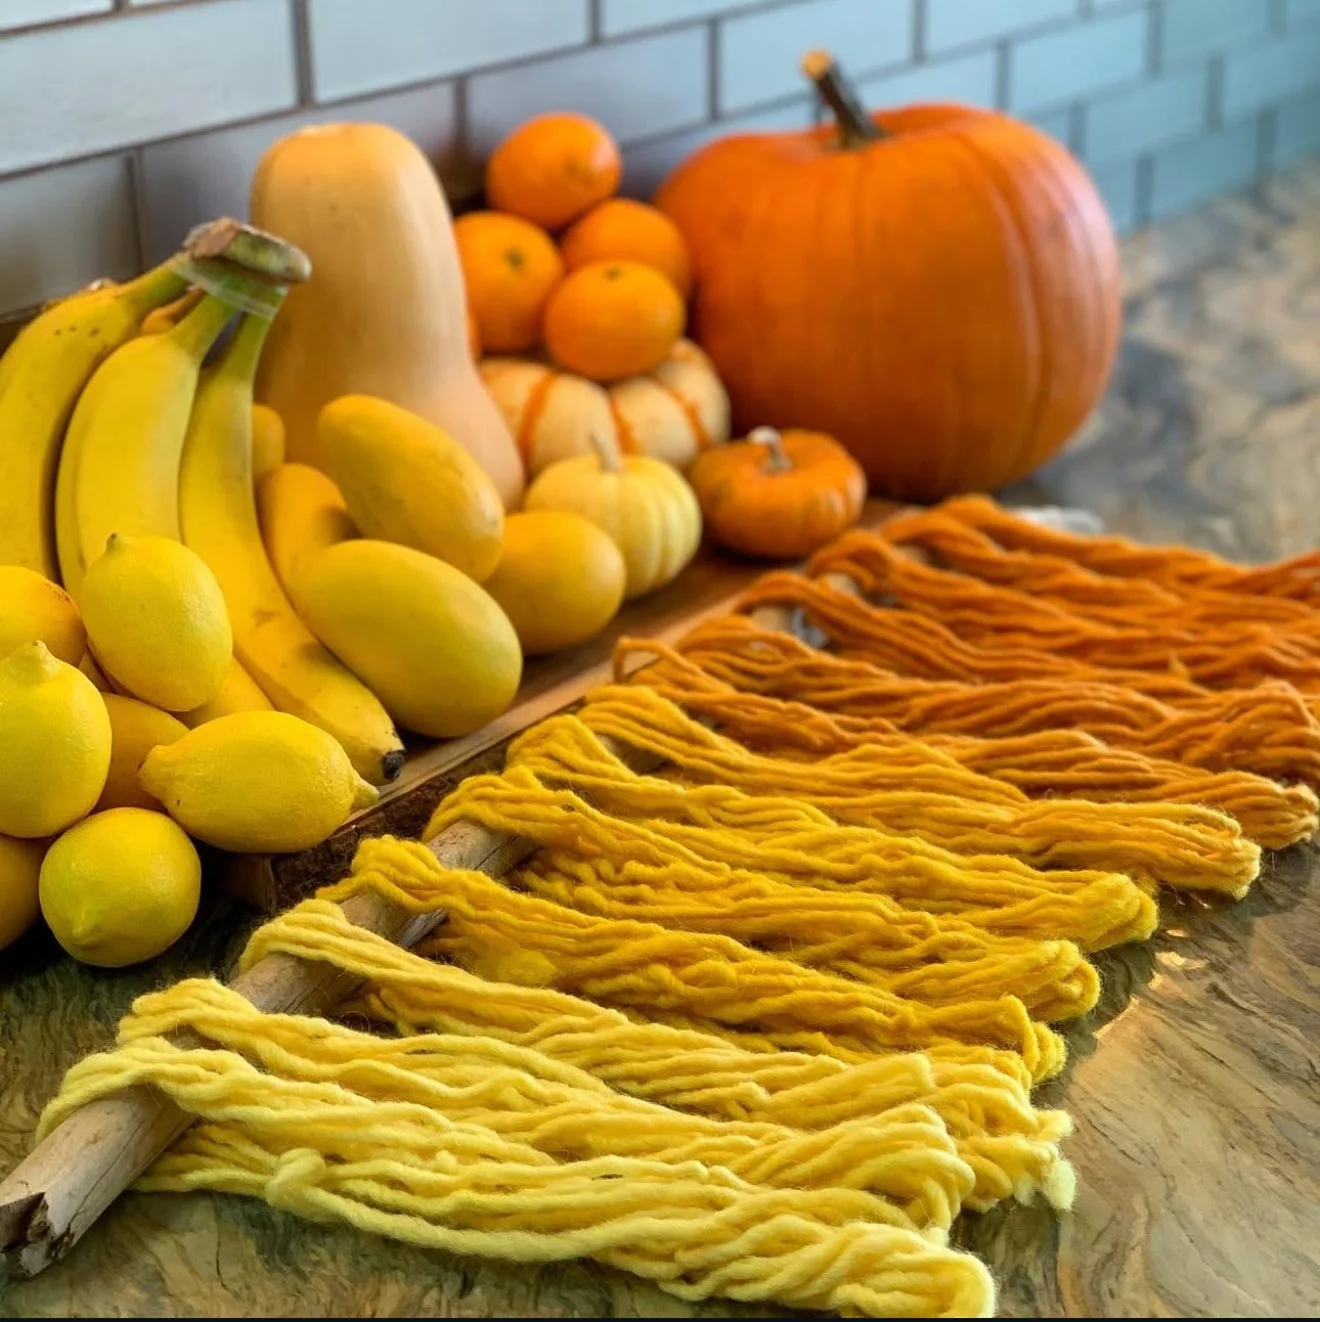
Hand Dyed Yarn
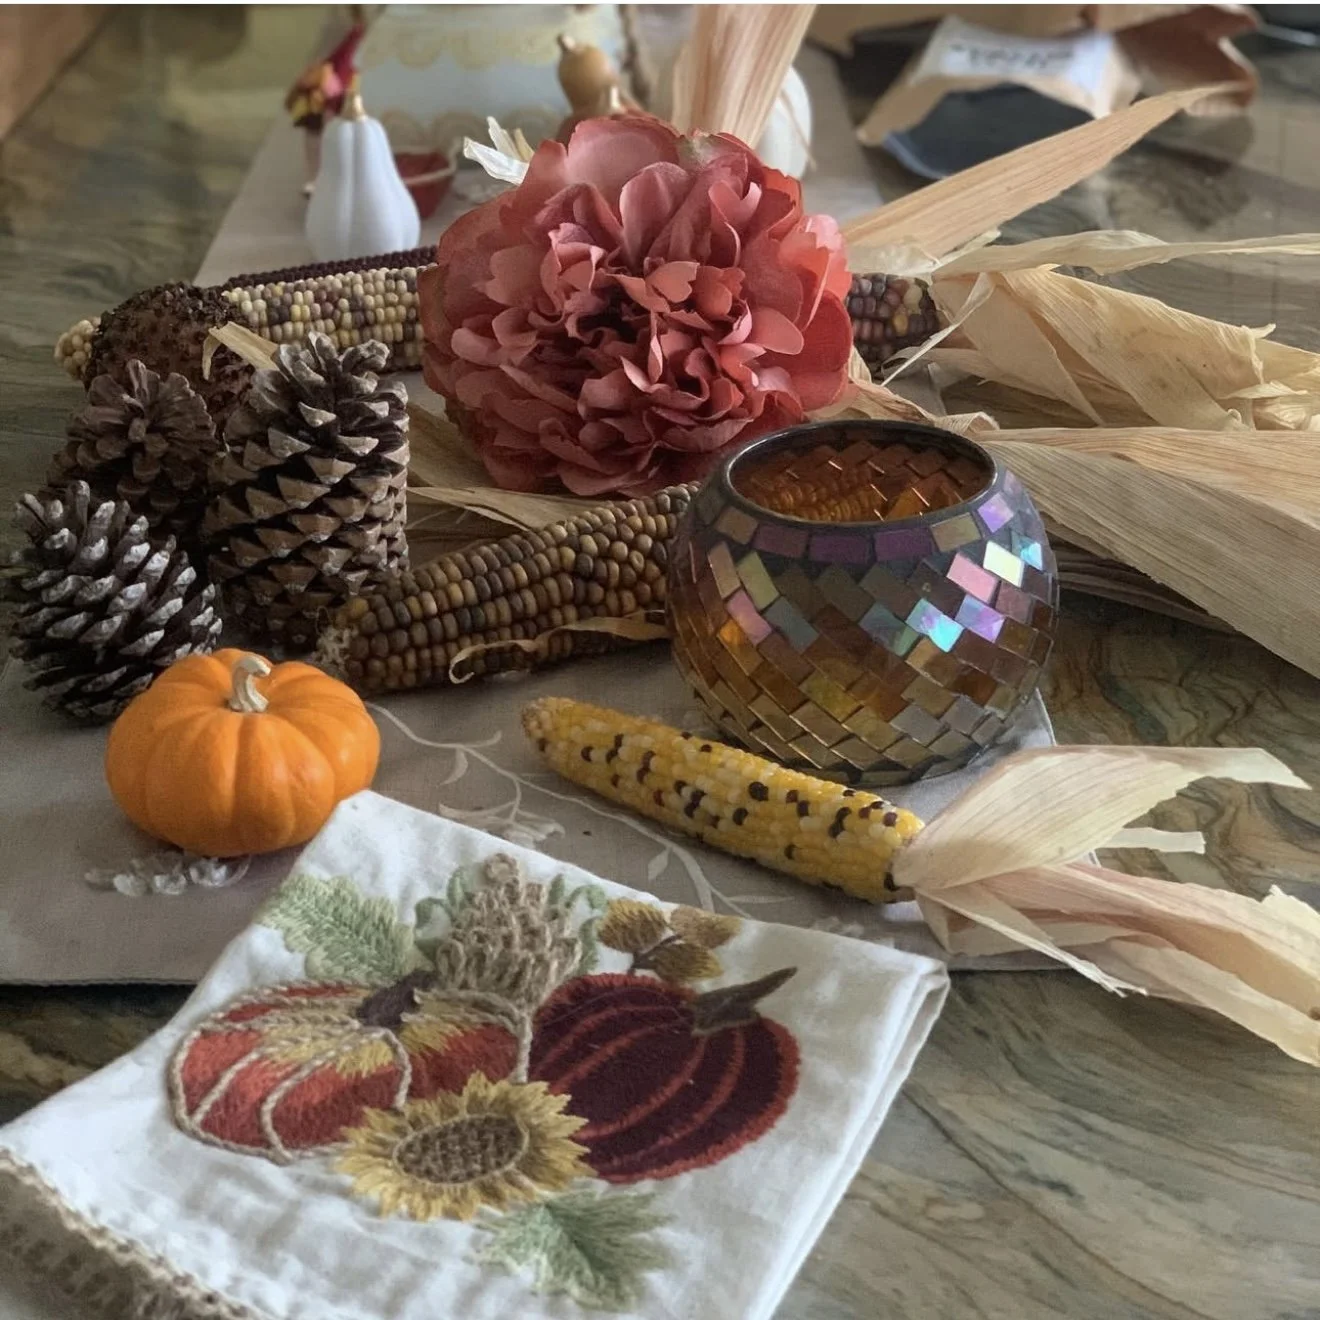
When your handwork project matches your fruits and vegetables, you swoon with joy. It’s not a failure, if you learn from your mistakes. It’s called an experience. And we’ve had a lot of experiences this past week.
-

How To Weave On A Loom
When doing a main lesson block, I look for a variety of books and projects for the children. For this unit, I set up our Harrisville Designs wooden loom for my 8-year-old daughter. Weaving is just right for a grade 3 student and it fit nicely with our American History unit that was primarily for my 12-year-old.
-

Colonial Times Projects
I need your help. I just released our Colonial Times Unit Study video on YouTube, and I’m questioning pretty much all our history resources for US History.
-

Spice Dyed Yarn
There’s something truly enchanting about seeing undyed yarn sink into a vat of natural dye and watching it change color. .
-

Plant Dyed Wool Yarn
The other day, a friend of mine asked how I learned to do all the things in my homeschool. I told her I didn’t know how to do them, I learned alongside my children. I wish I knew all these things because one thing I still struggle with is impatience and wasting time.
-

How to Make a Log Cabin
This super simple, frugal hands-on project can be accomplished by anyone, even if you are not crafty or do hands-on projects. It's easy, fast and you and your children will have a sense of accomplishment when finished. It's hard to mess up this project, so rest assured, you'll be pleased when it's complete.
-

Historic Mop Tutorial
While reading Great Colonial America Projects You Can Build Yourself by Kris Bordessa, we were inspired to do our own version of a Colonial Times mop. The supplies are readily available and affordable and this project took hardly any time at all and produced hardly any mess!
-

Historic Pine Needle Broom | Handmade
While working on our history units, we decided to make a child’s sized broom. We found inspiration for this project from Kris Bordessa’s book Great Colonial America Projects You Can Build Yourself. Though ours was more complicated than the book, it was actually really simple. You will need to assist your child if he wants to help, but this is a very quick project you can do in less than a half hour.
-

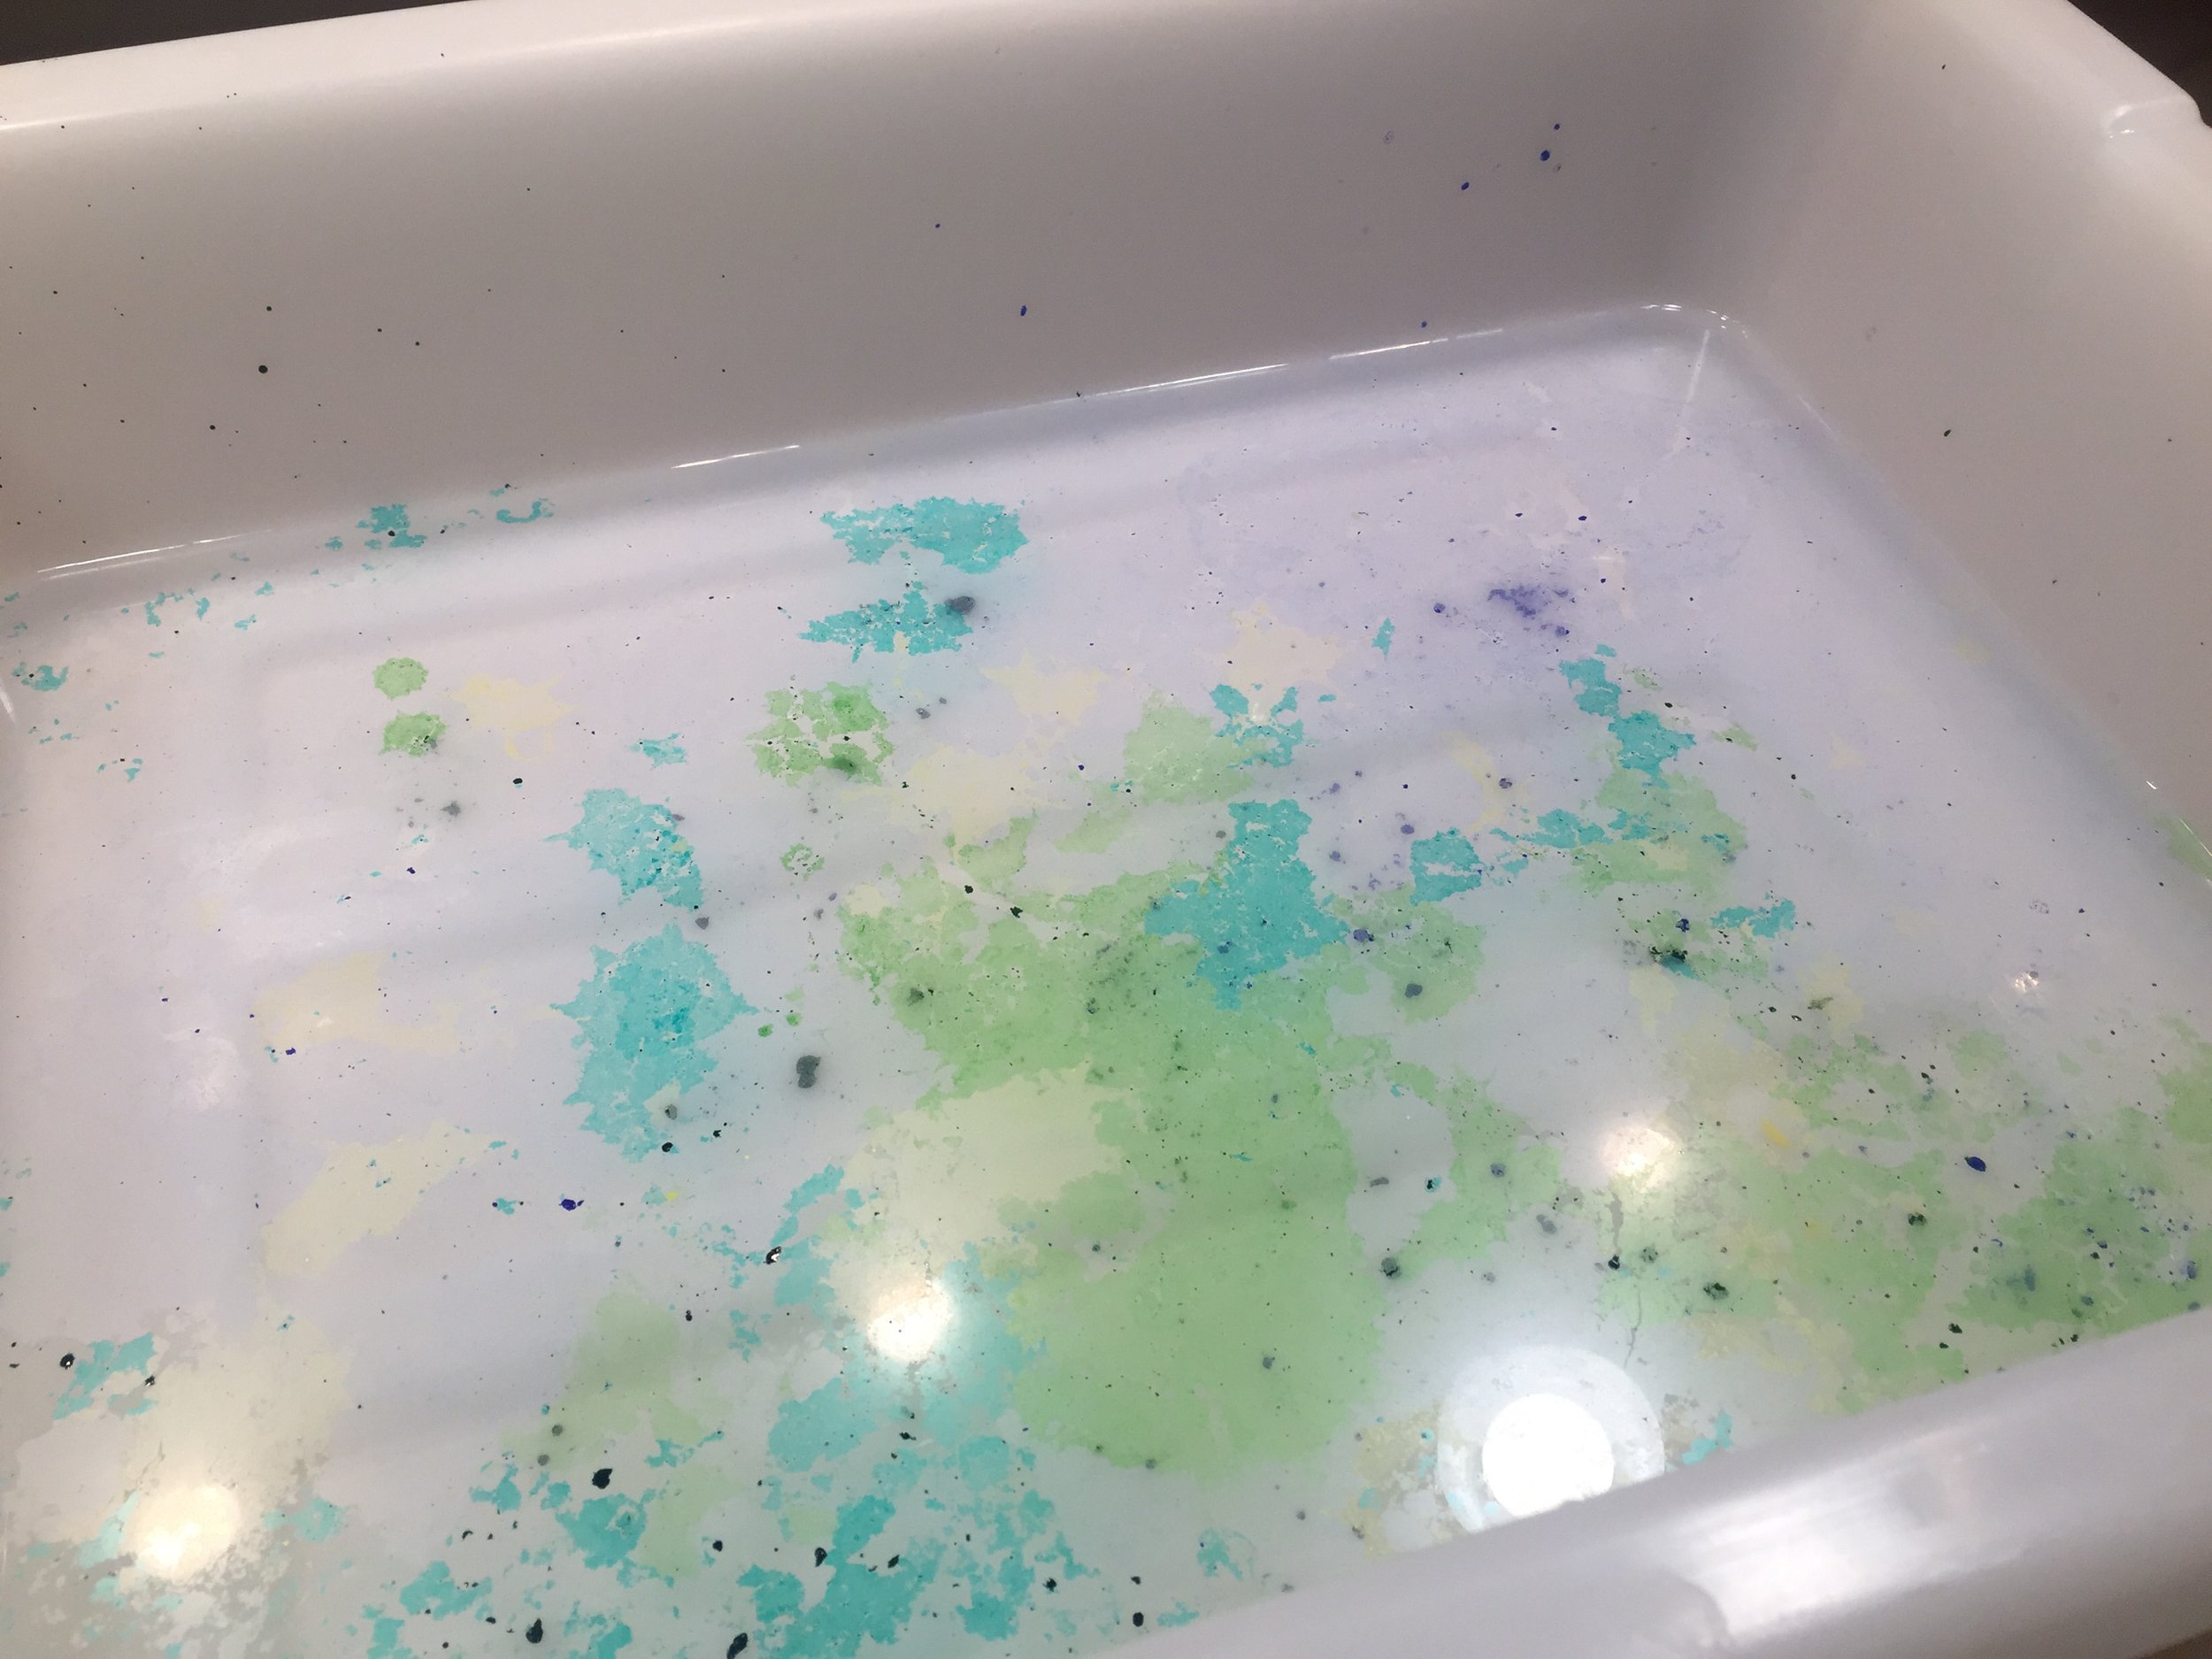
How to Make Marbled Paper
Here's another project we're doing for our American History Unit. We got the idea from the book American Kids in History Colonial Days by David King. The project was pretty exciting to do and would make for an lively science discussion on liquids that mix versus ones that don't.
-

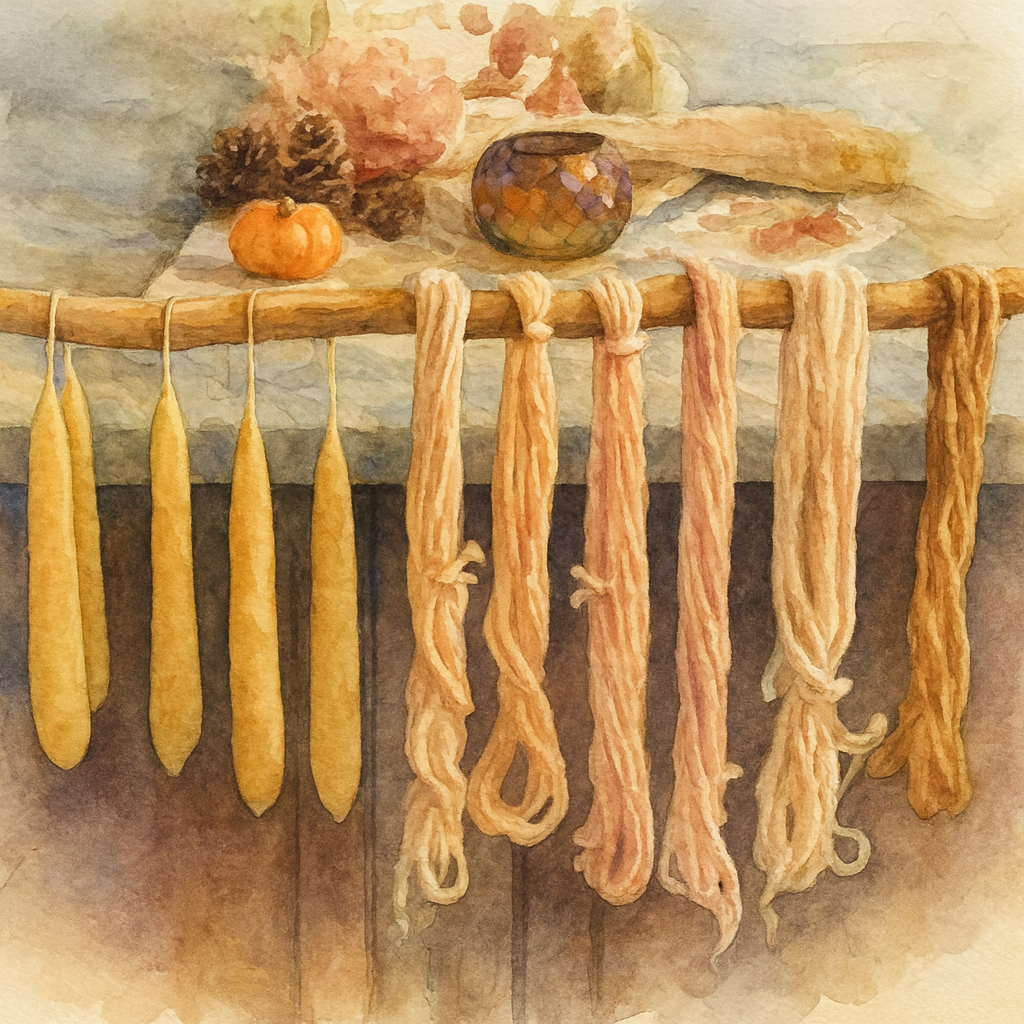
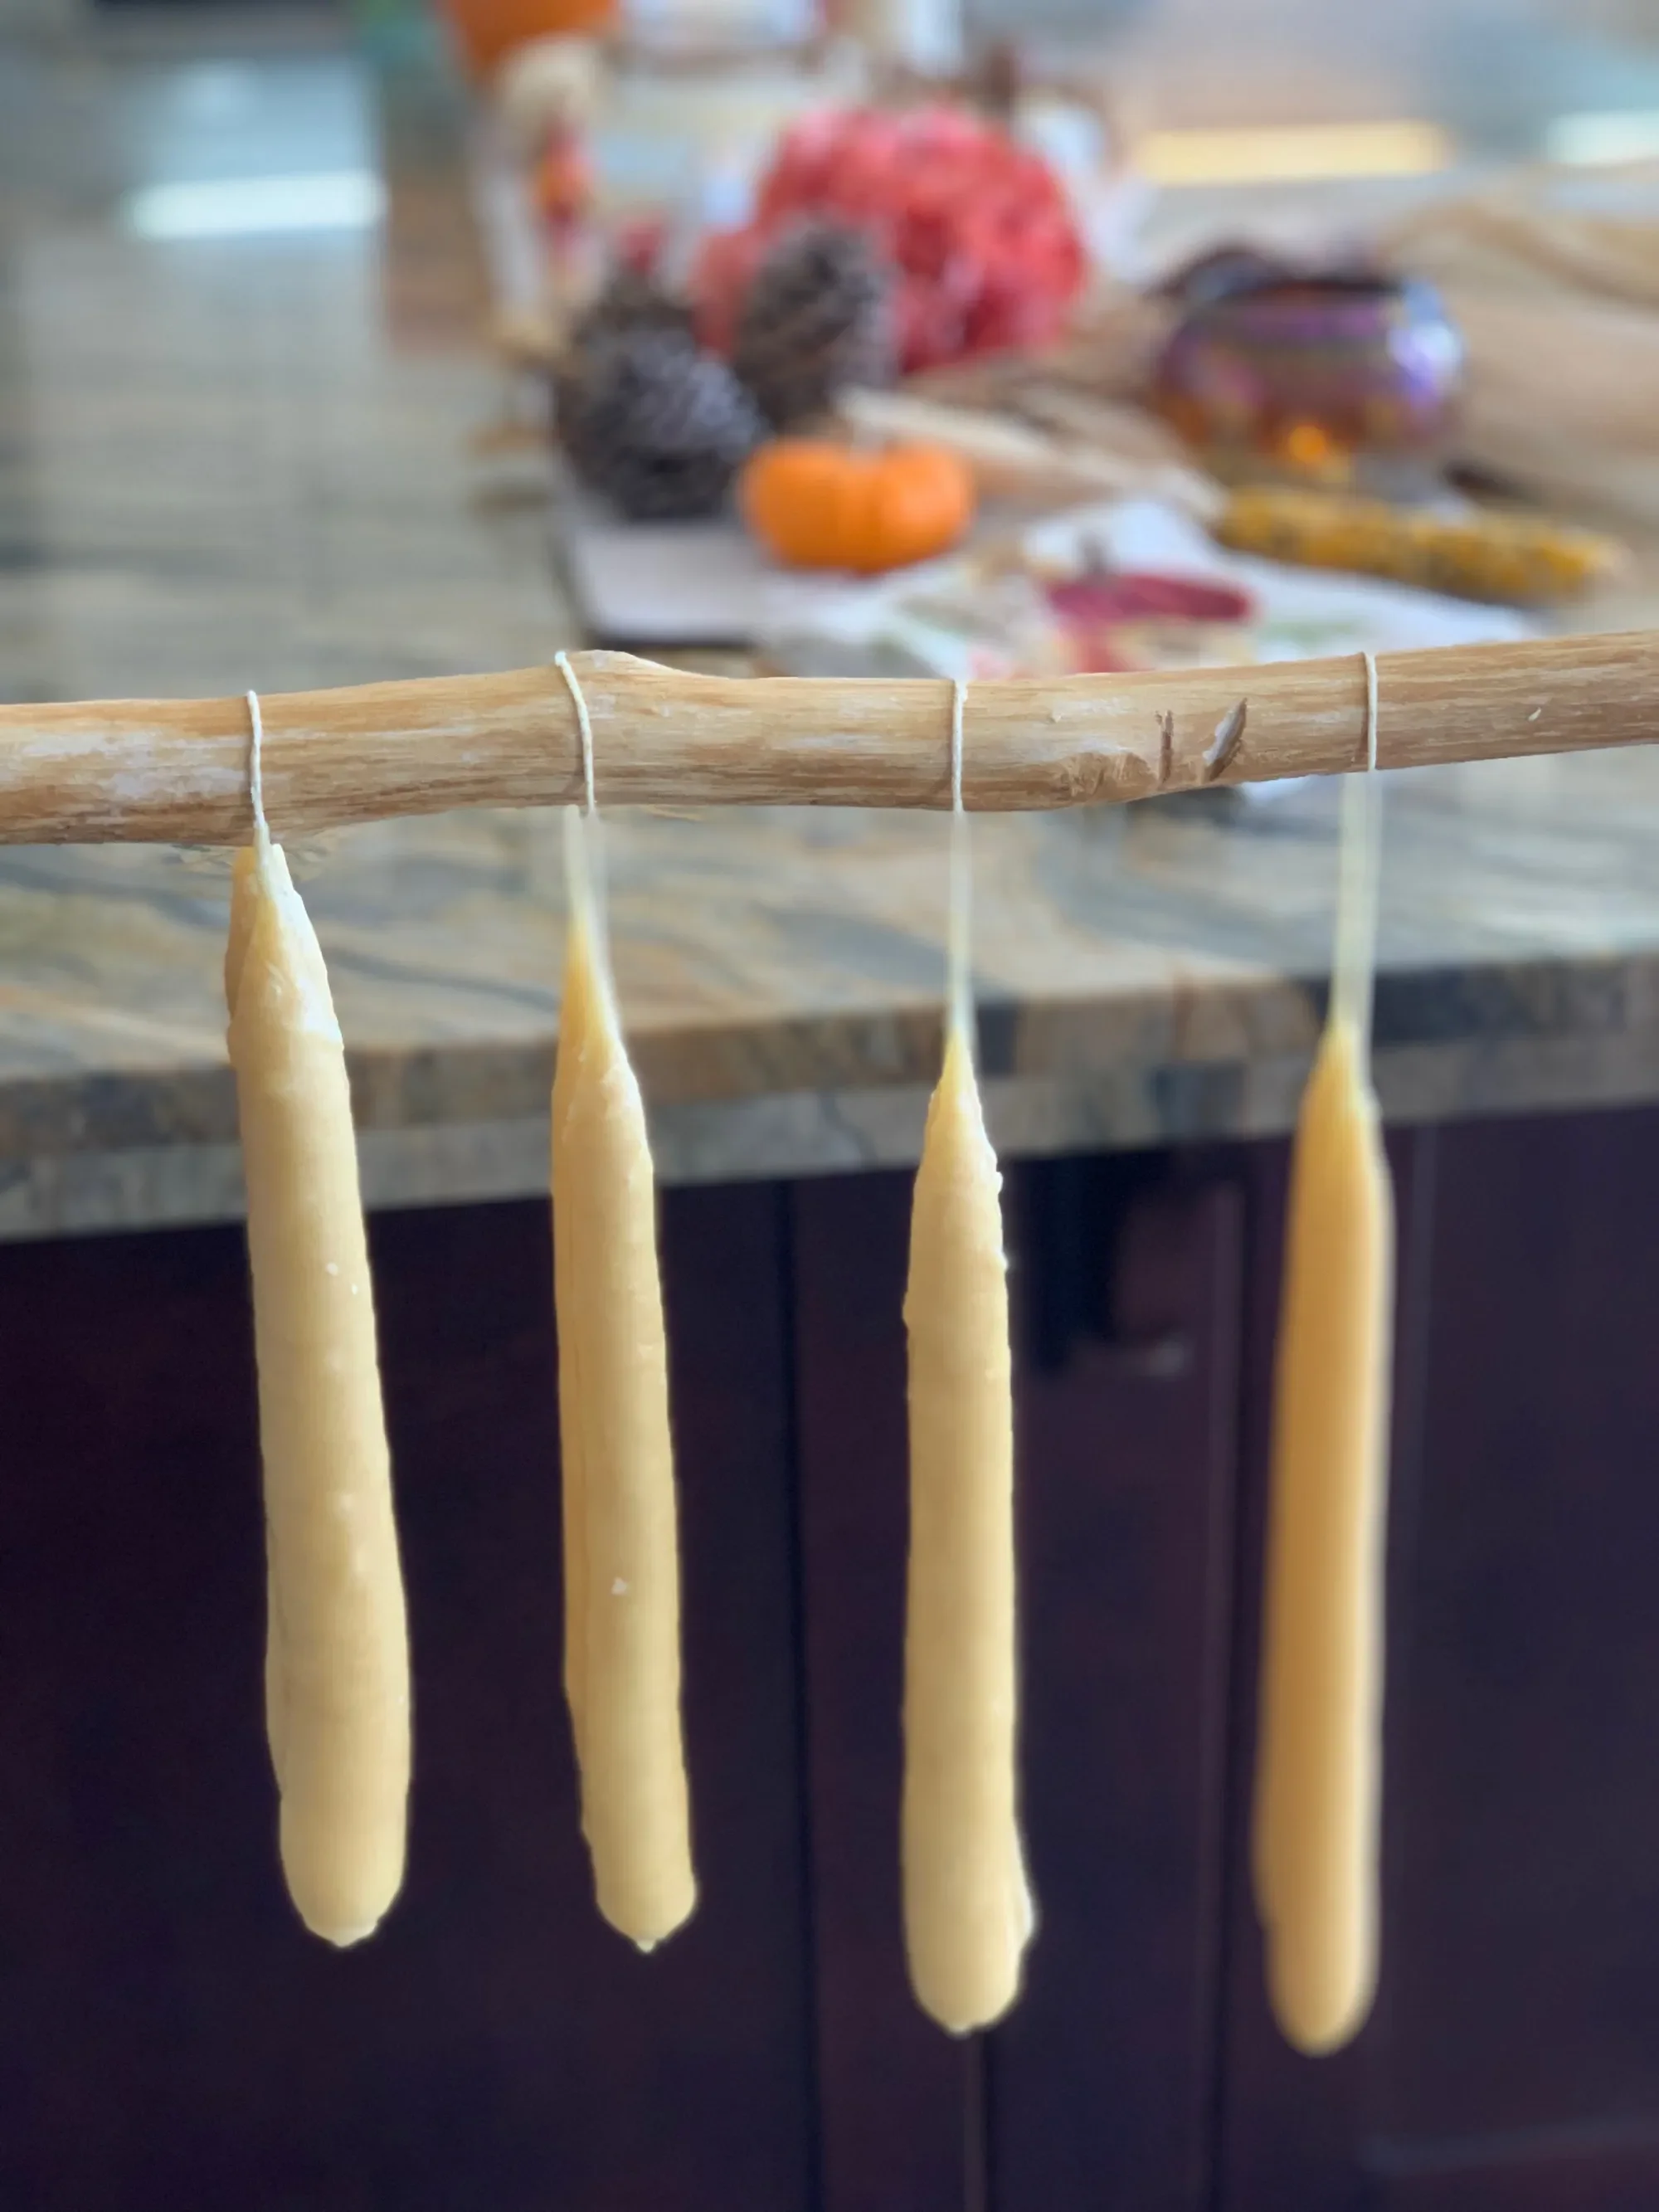
Hand Dipped Candles
Did you ever wanted to turn left over candles into hand dipped tapers? You can either buy wax or upcycle an old candle. All you need is a deep pot for the wax, baker's twine, a pair of scissors and a burner. We used an old three-wick candle by Colonial Candles of Cape Cod sold by PartyLite. It has a nice light peppermint scent and a bright red color, both of which were retained when we turned them into new tapers.
-
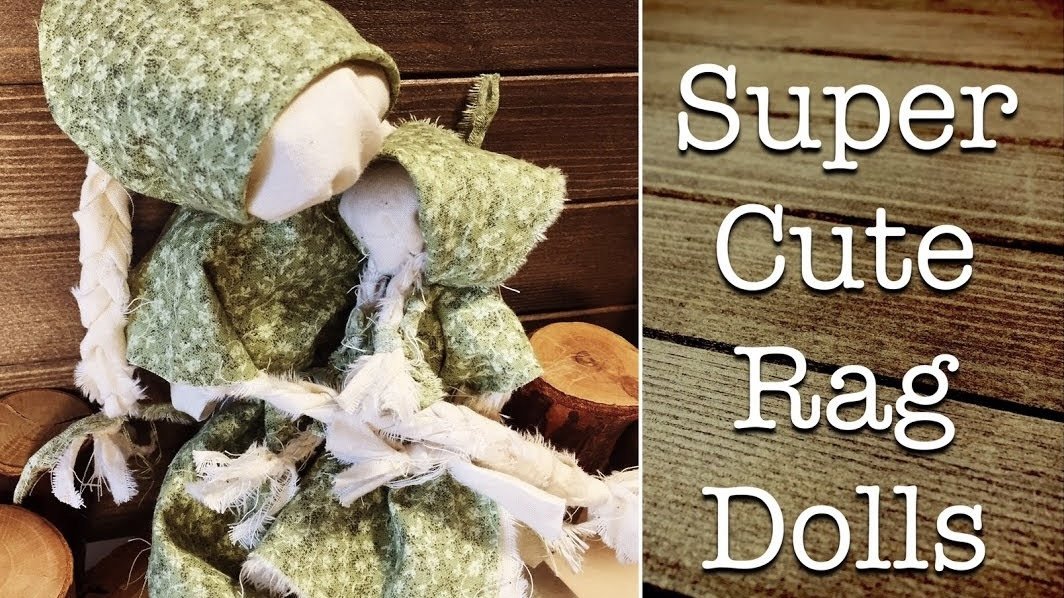
Easy Rag Doll Tutorial | Historic
Having had boys for 12 years of my motherhood journey, I never had the need to make these adorable rag dolls. My friend, Megan, taught our kindergarten co-op how to make them, and my five year old daughter loves them! In the tutorial you can see how simple, easy and fast they are to make. I'd like to make a few suggestions now that my daughter has been playing with them non-stop:
-

Boy Rag Doll Tutorial For Beginners
If you've never made playthings for your kids, this might be the perfect place to start. It's easy to make rag dolls, and what's great about it is that you don't need many supplies, and even old clothes would work perfectly for this project.
-
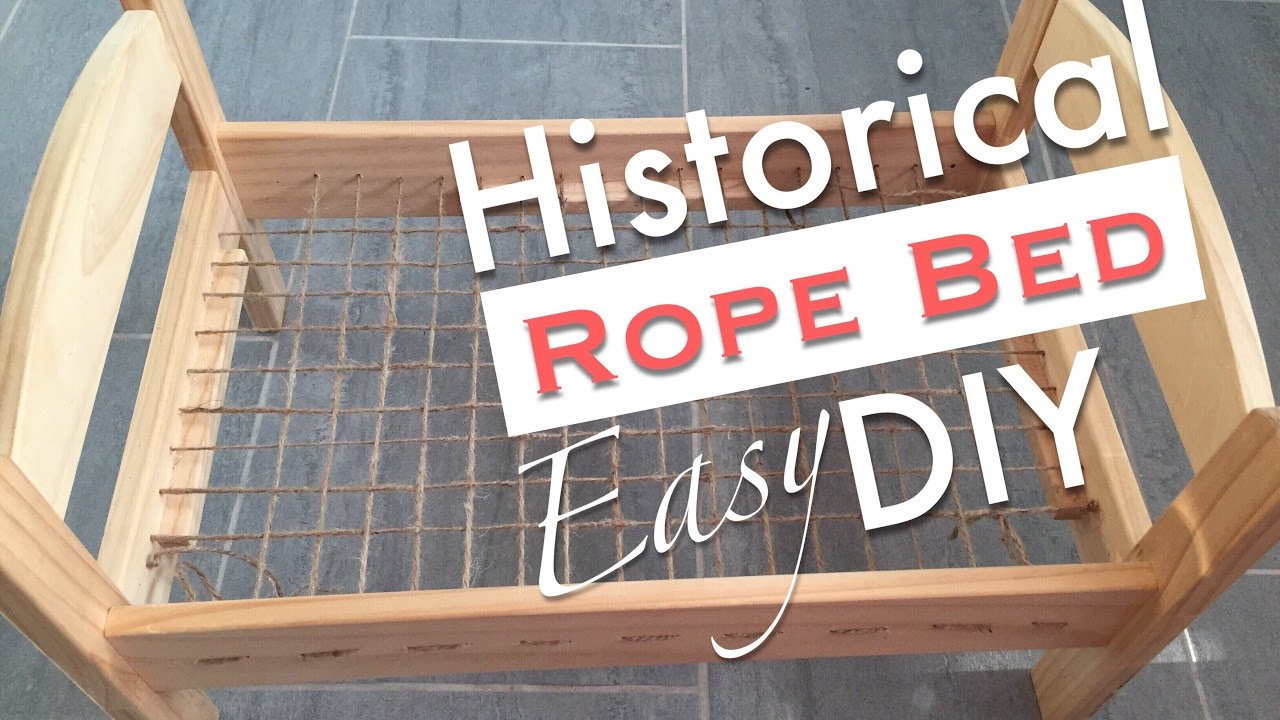
How to Make a Rope Bed | Historical
I love projects that are educational and functional. A few years ago, this doll’s bed from IKEA broke when my boys ‘accidentally’ stepped on the particle bed insert.
Colonial Times Projects & Activities
Plant Dyed Wool
his has been on my crafting bucket list for ages: dying fabric & yarn with natural plant dyes. We finally did it! It was both easier & harder than I thought.
Thanks to a quick conversation with Elizabeth @elizabethsewardhandwork in which she gave me some great tips, this project was a success. She warned against using a metal mordant which I thoroughly appreciated because I know so little about dying fabrics naturally. She also explained you need a lot of raw materials to get the color you want. Indeed you do!!
I also can’t do a project like this & not mention my first knitting teacher and mentor, Maria, who first introduced me to the idea of using onion skins and avocado pits to dye yarn. Yes, you really do get a most glorious shade of pink when you use avocado pits.
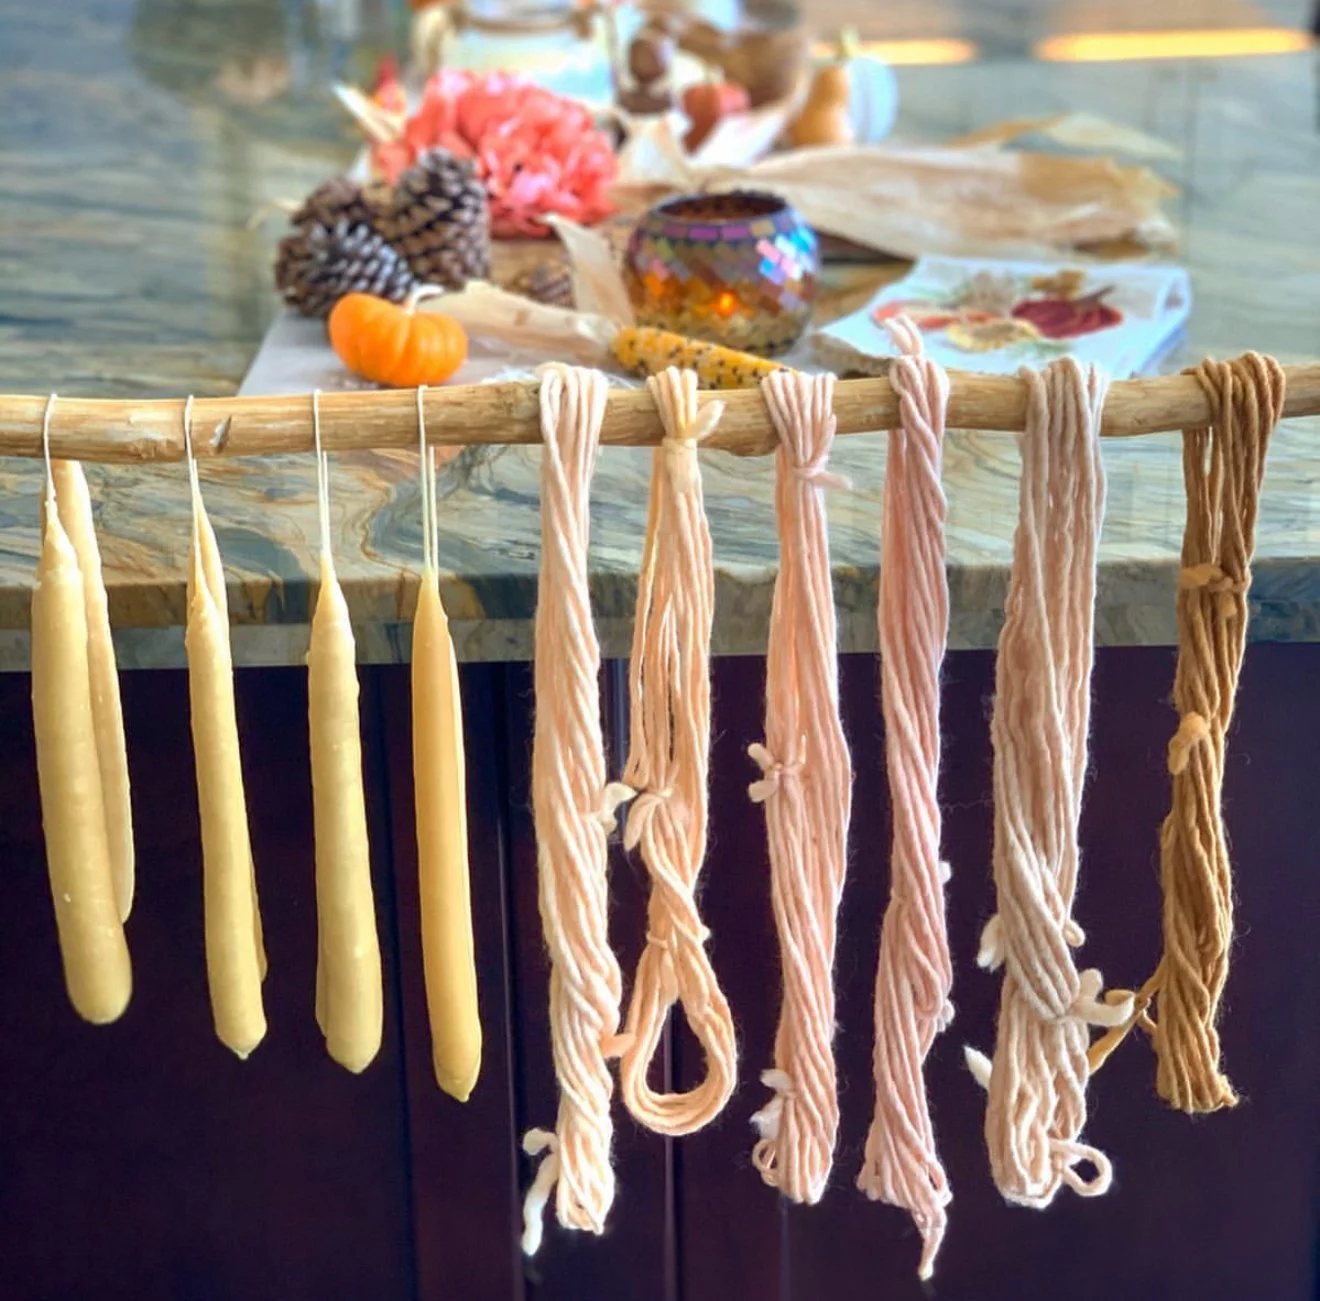
For the pale yellow, we used brown onion skins, for a different shade of pink, we used red onion skins, for brown, we used tea and for the bright yellow (shown in last picture), we used a spice I cook with often: turmeric!
We already started using our yarn for a few weaving projects and are super pleased with how it’s looking so far.
Here are my tips if you want to try this project: gather A LOT of avocado pits or onion skins. I put mine in the freezer until I’m ready for them.
Get yourself a nice sized pot. Our larger ones ensured that the yarn could move freely.
Use a natural yarn or fabric. We used wool.
I boiled the onion skins & avocado pits for over an hour.
Don’t shock the yarn! Set it in water & bring it up to temperature or cool down your dye bath to put your yarn in & then warm it up again.
Loop yarn into an O and tie it in three spots loosely. This ensures it will dye evenly & won’t get tangled.
Let it dry completely before using!


Hand Dyed Yarn

When your handwork project matches your fruits and vegetables, you be like 😍😍😍😍😍
It’s not a failure, if you learn from your mistakes. It’s called an experience. And we’ve had a lot of experiences this past week.
For the past week we have been experimenting with natural dyes. So far we’ve done brown onion skins, red onion skins, tea, turmeric and avocado pits.
Each time, the experience was enriching. The first time we did avocado pits, we were all surprised at the pink hue our fabric became.
When we did brown onion skins, the soft yellow brown color that emerged was enchanting.
Then I learned that you could alter the dyes with acids and bases. So we were back to the kitchen, this time experimenting with baking soda, Borax, and vinegar.
Though I didn’t call it a chemistry experiment exactly, it was the best kind of chemistry lesson you could have. Like magic, our yellow dye turned deep red and then brown when baking soda and borax were added to the mixture.
Then came a new phenomenon. As we dyed our wool yarn and cotton fabric, we noticed that each took to the dye differently.
Then something even more fascinating happened. As our fabric and yarn were exposed to air, they started to change colors once again.
It changed from a pale yellow orange to a deep red! You would think since my degree is in chemistry, I would know all the science behind this, but in truth I am a student just like my children.
I will probably always be a student. And am content being a Jackie of all trades and a master of none.
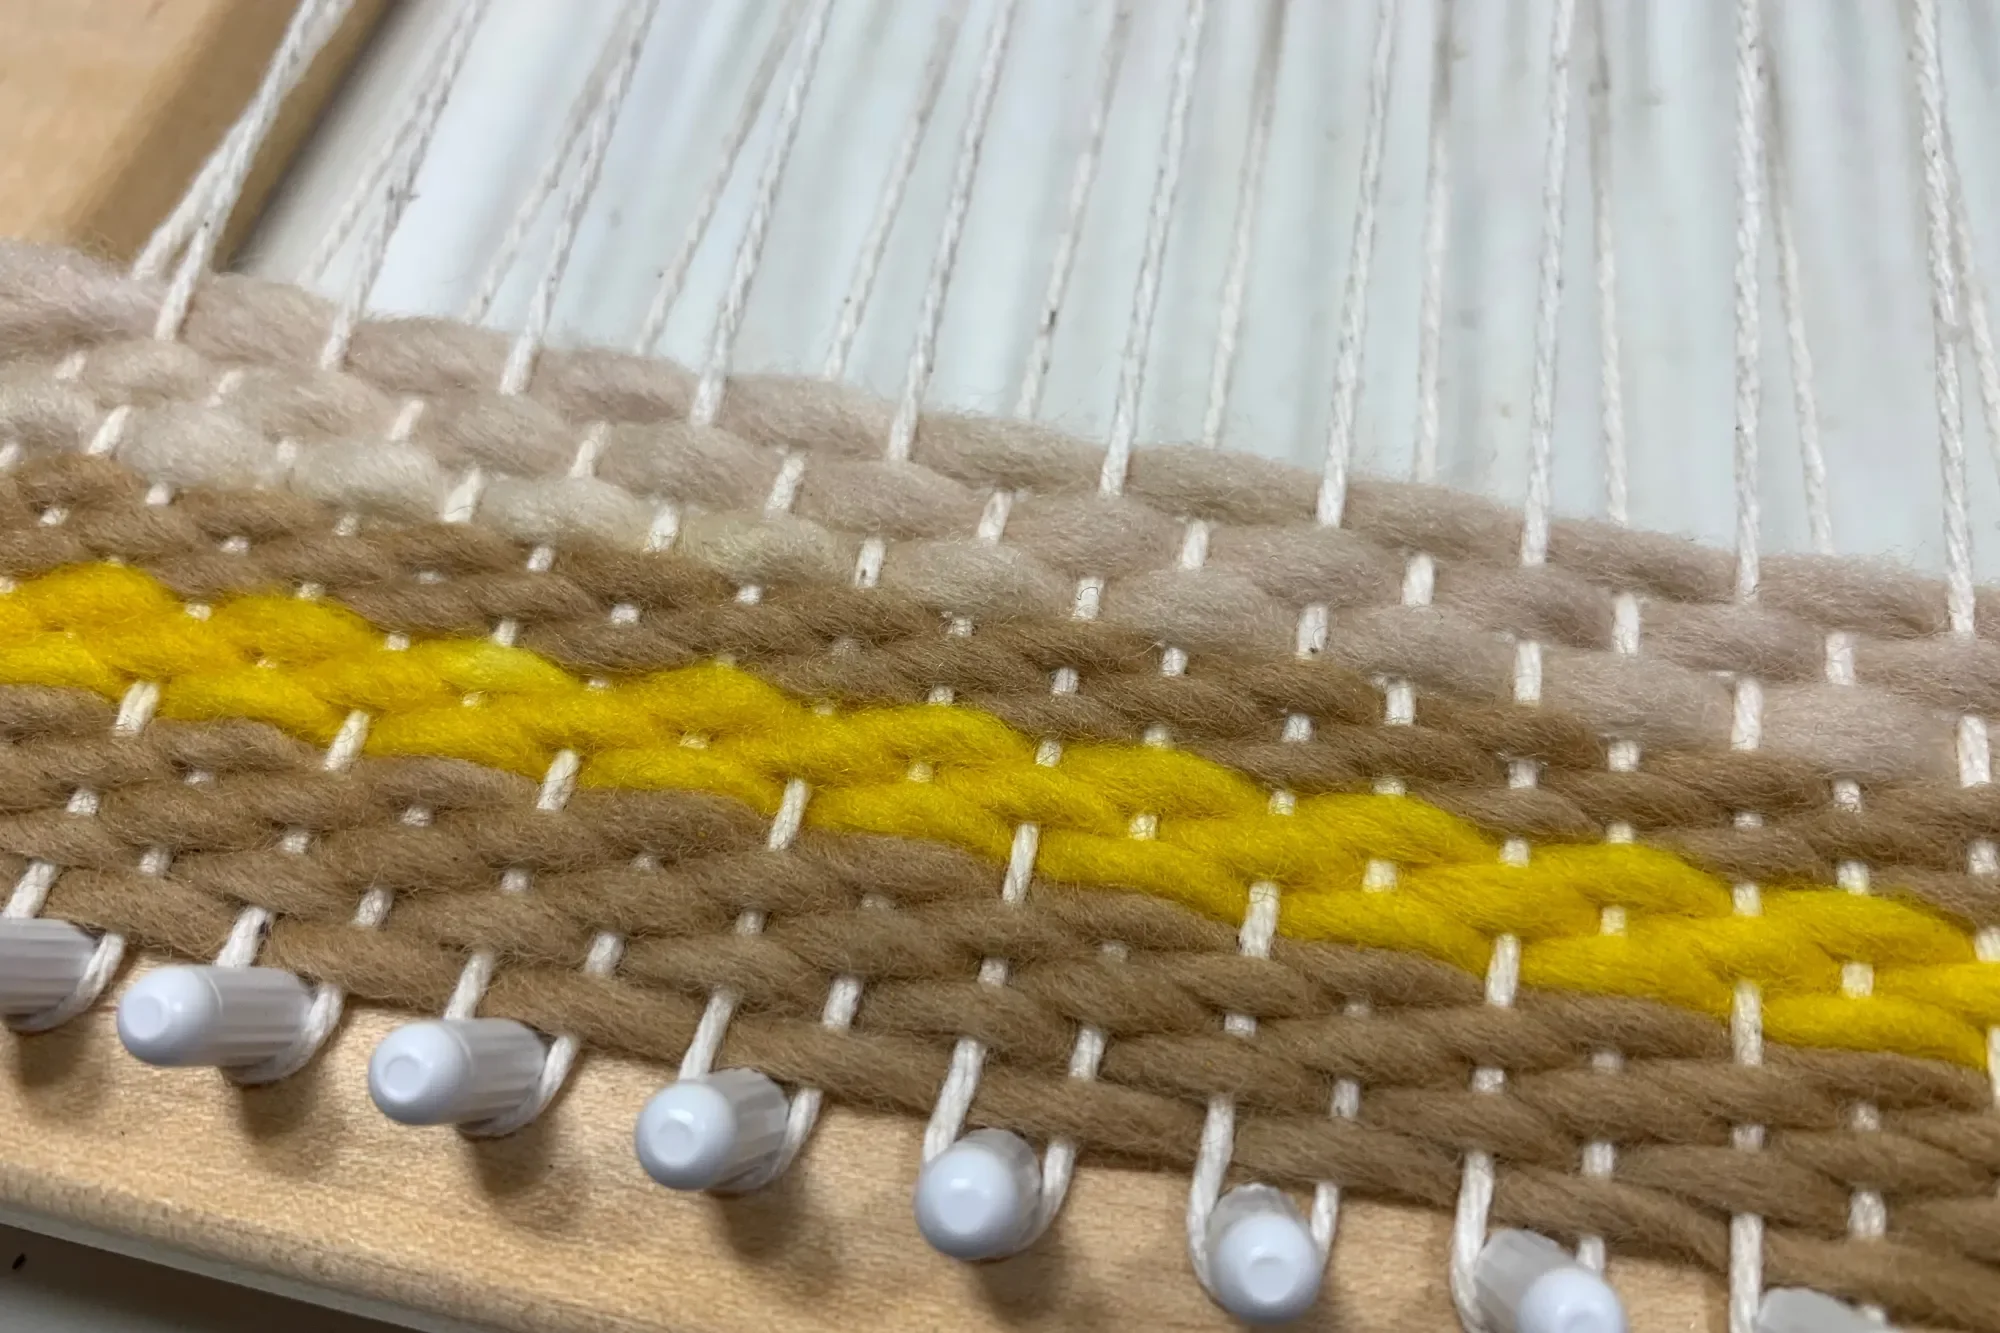
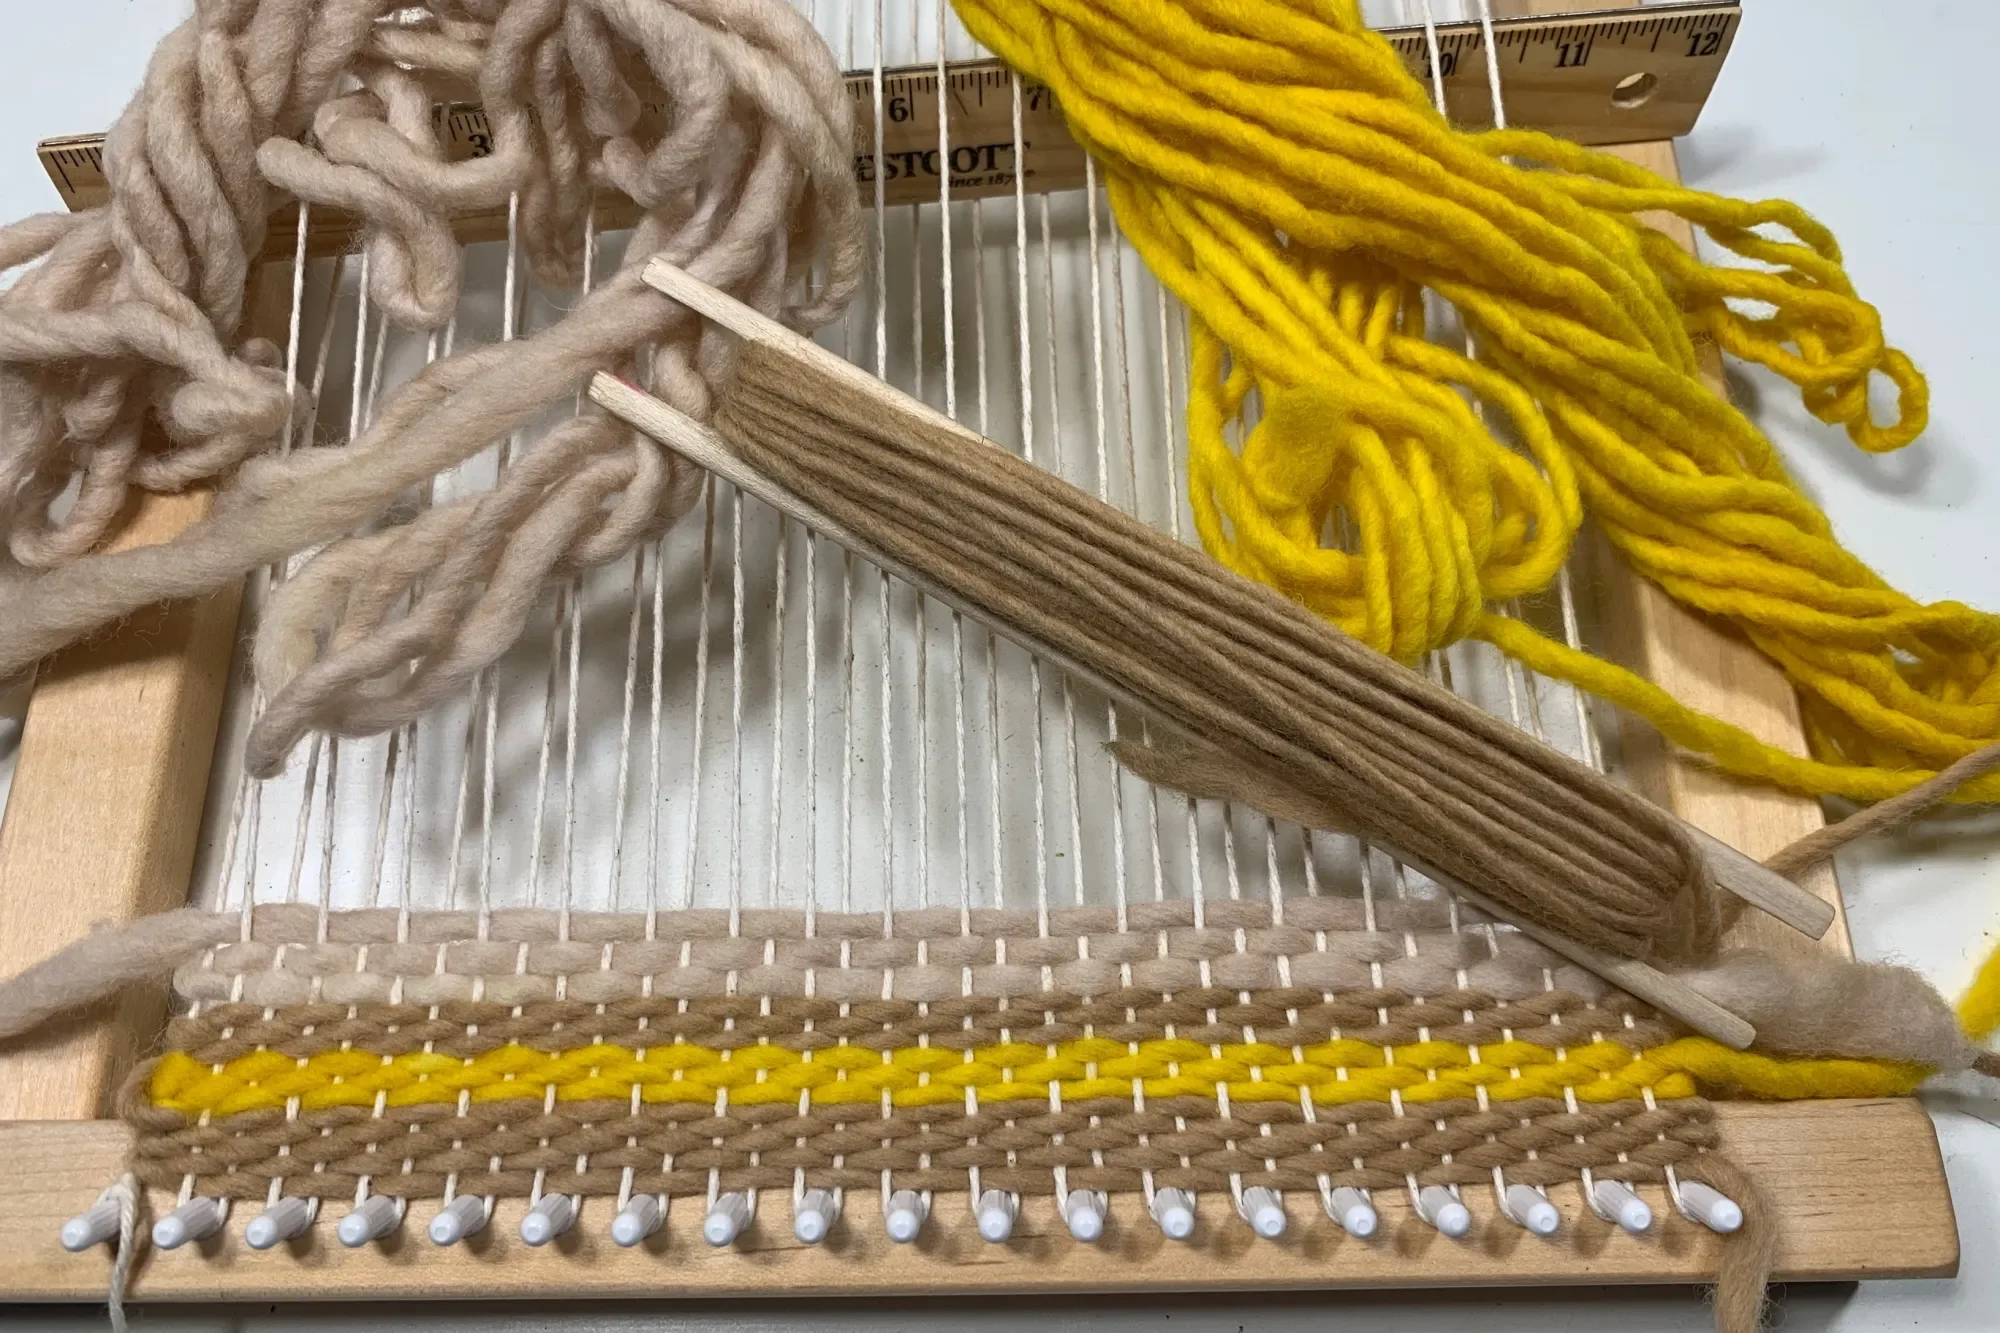
How To Weave On A Loom
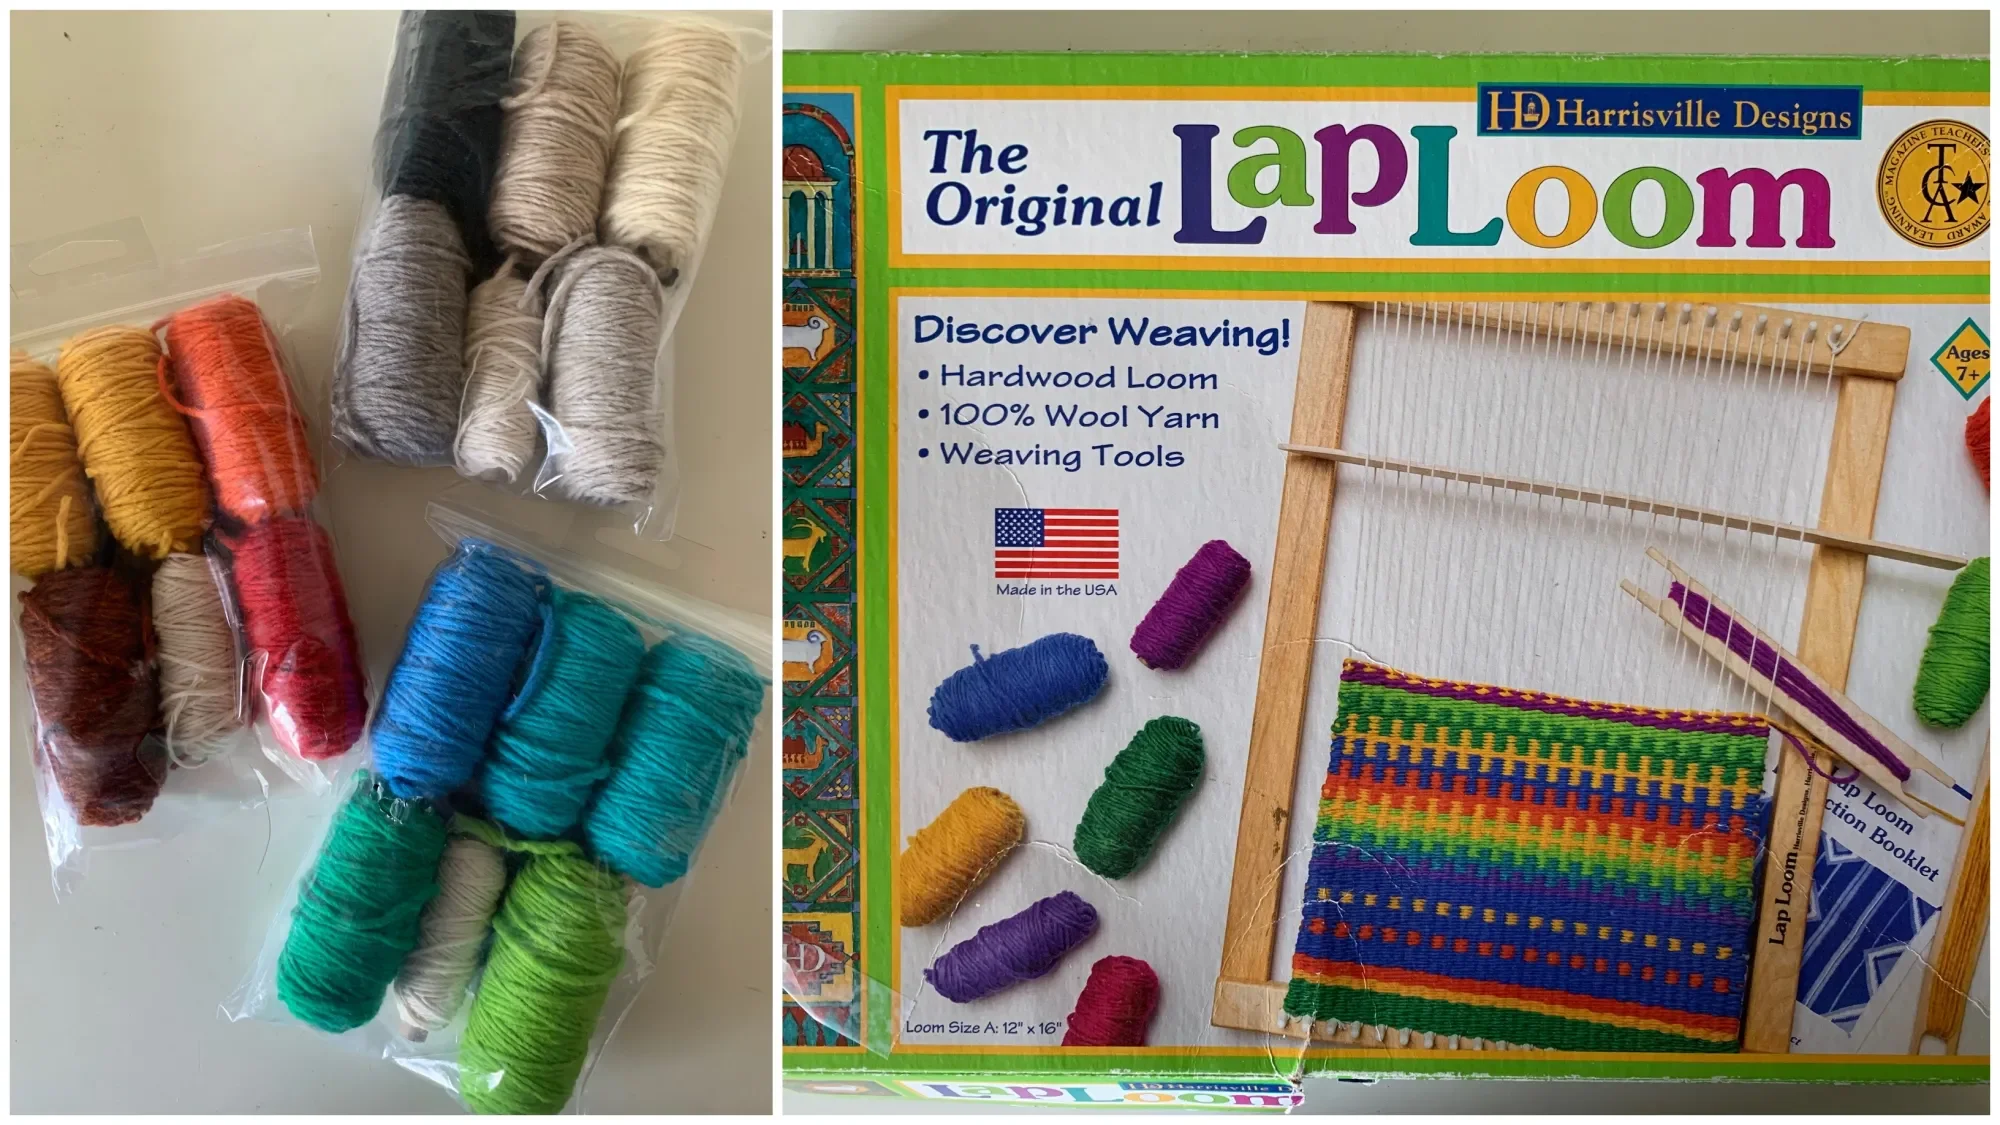
When doing a main lesson block, I look for a variety of books and projects for the children. For this unit, I set up our Harrisville Designs wooden loom for my 8-year-old daughter. Weaving is just right for a grade 3 student and it fit nicely with our American History unit that was primarily for my 12-year-old.
For this project, we just a sturdy child-sized loom. While this kit comes with all the supplies needed to weave a project, this happened to be a hand-me-down, so I collect our own supplies for this project. I used cotton string from Harrisville Designs to prepare the loom. Next I wove several rows for my daughter until the complicated pattern was set. We used bulky Lamb’s Pride yarn that we dyed using natural materials like tea, avocado pits and onion skins.
After the pattern was established, I showed my daughter how to go under and over with the wooden pick stick, then send the shutter through the open space created when the pick stick is turned on its side. The process was repeated until the project was complete.
Colonial Times Projects

I need your help. I just released our Colonial Times Unit Study video on YouTube, and I’m questioning pretty much all our history resources for US History.
I know there are better more accurate resources available, and I’d like to add them to my home library and share them in new updates videos.
I know many resources we own have inaccuracies that I explain to my children when we read them aloud. Author bias shines through in nearly every book we’ve read, and it’s become a quest to find and point them out.
I have purchased books with naivety in the past, and I’d like to change that moving forward. I’m aiming to be more intentional about the content and not always pick a book because it has pretty pictures.
What I’m hoping you can do for me is leave comments on any video we’ve seen in which I’ve shared a book that is in some way problematic.
I know I’m asking a lot of you, and I’m relying on those of you who are both knowledgeable and passionate about this to help me out. If you know what is outdated or inaccurate about a resource, please leave that info in the comment so others can benefit.
I feel very strongly about being able to do this as a community. I can’t do it alone, and I will be so grateful for your help.
Btw, this video is from the fall of 2019 🤦♀️ in case you hear me referencing the season. Check out this post of Instagram.


Spice Dyed Yarn
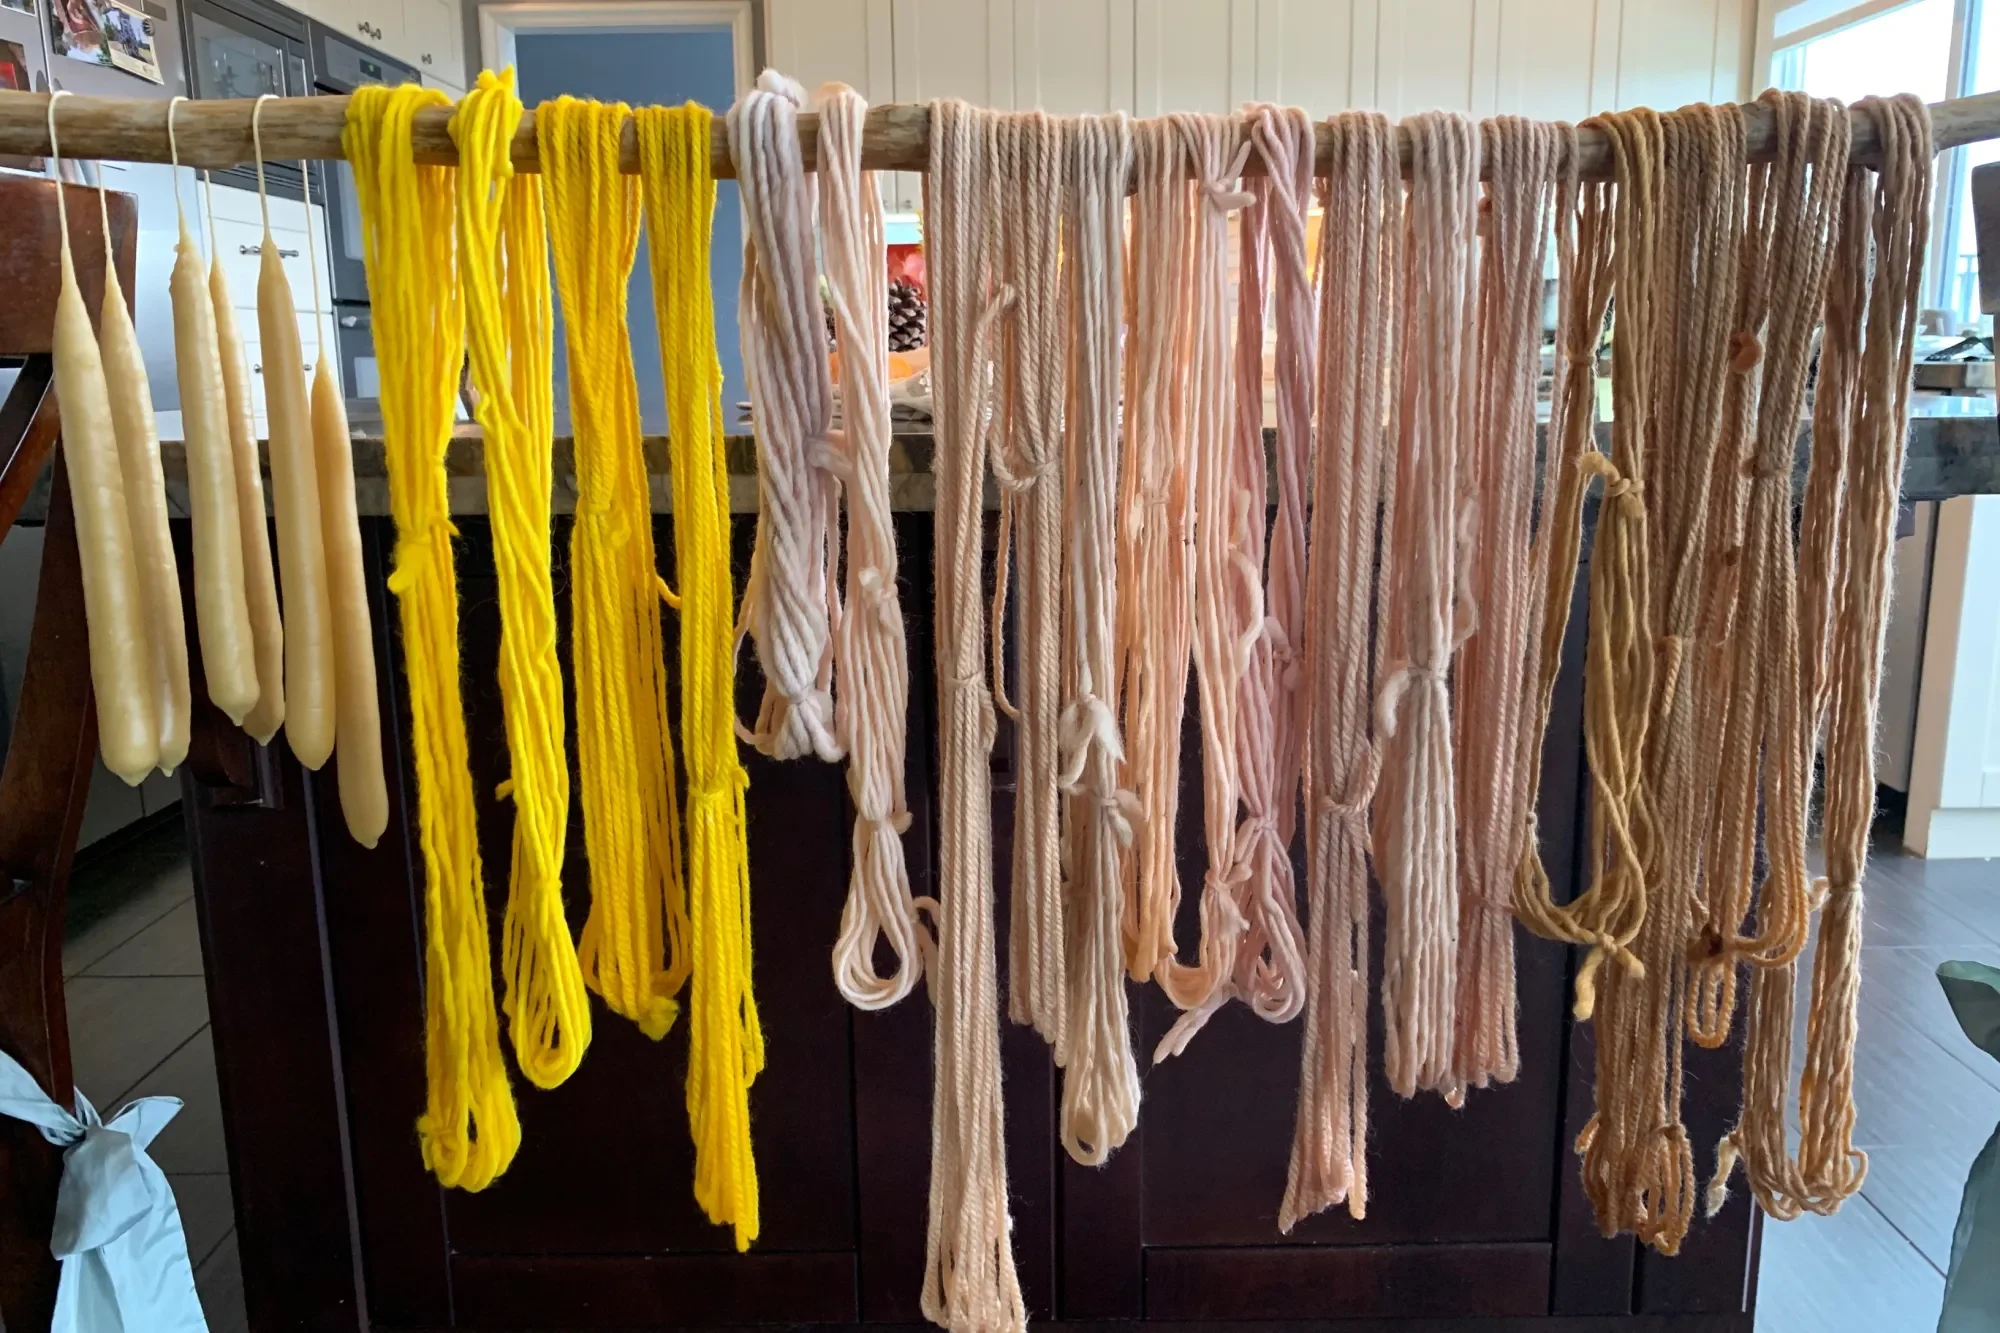
There’s something truly enchanting about seeing undyed yarn sink into a vat of natural dye and watching it change color.
It’s oddly satisfying watching the color emerge, deepen and then lighten as it dries. I found this project both incredibly easy and unexpectedly challengingly. We used turmeric for the yellows and oranges and brown onion skins for the paler yellow. It was hard to control the color and that in and of itself was a humbling lesson. No two sets of yarn were exactly the same showing us the beauty of diversity.
We had to be gentle and patient.
I was hoping we could knit a variegated hat using the paler yellows at the bottom and moving to the deeper tones at the top. Or the other way around. I think both would work.
But first my son needs to finish knitting his sock, so we can use the knitting needles 🙈 Or we need to make another set of knitting needles.
I recently learned how to make knitting needles from @elizabethsewardhandwork @wonderandwisdomofhandwork @melaniehatch6
And it’s surprisingly easy. The only difficulty I had was sourcing the right kind of dowels. I think I have, so expect a tutorial coming up this year on my YouTube channel. In the meantime, check out Melanie and Elizabeth’s accounts for more handwork inspiration.
Un-Dyed bulky and worsted weight wool yarn from @achildsdreamcrafts .
Plant Dyed Wool Yarn
The other day, a friend of mine asked how I learned to do all the things in my homeschool. I told her I didn’t know how to do them, I learned alongside my children.
I wish I knew all these things because one thing I still struggle with is impatience and wasting time. Learning things on your own takes more time. Undoubtedly, you’ll make mistakes & very likely there will be a lot of trial and error.
That was the case this morning. I was trying something new and I didn’t know how to do it. I had seen how you can take baking soda and turn turmeric from a yellow dye to a deep red.
I was utterly intrigued. I prepped everything we’d need for this project, and then excitedly waiting for my 13-year-old to join in the “chemistry” of the project.
He added the baking soda to the dye bath, and nothing happened.
He added more.
Still nothing.
He added the whole thing.
Nothing.
We stirred.
Nothing.
We doubted ourselves.
Still nothing.
We tried baking powder.
It fizzed. But still no red.
Finally, I pulled up the video that showed this magic.
Oh! Maybe because we are using wool and not cotton. That must be it.
I grabbed some recently dyed cotton. It was a pale yellow brown. I dunked it into the baking soda-rich dye bath.
Nothing.
Discouraged, but not defeated, we moved on to spinach. That’s when the magic happened. I picked up the dish towel that was next to the turmeric dye bath and noticed it was stained red! “Look!” I told my son! Maybe it needs to be cotton? Maybe it needs to be oxidized?
That’s how our homeschool goes: two parts curiosity and one part trial and error. Check stories today to see the behind-the-scenes of this homeschooling adventure.
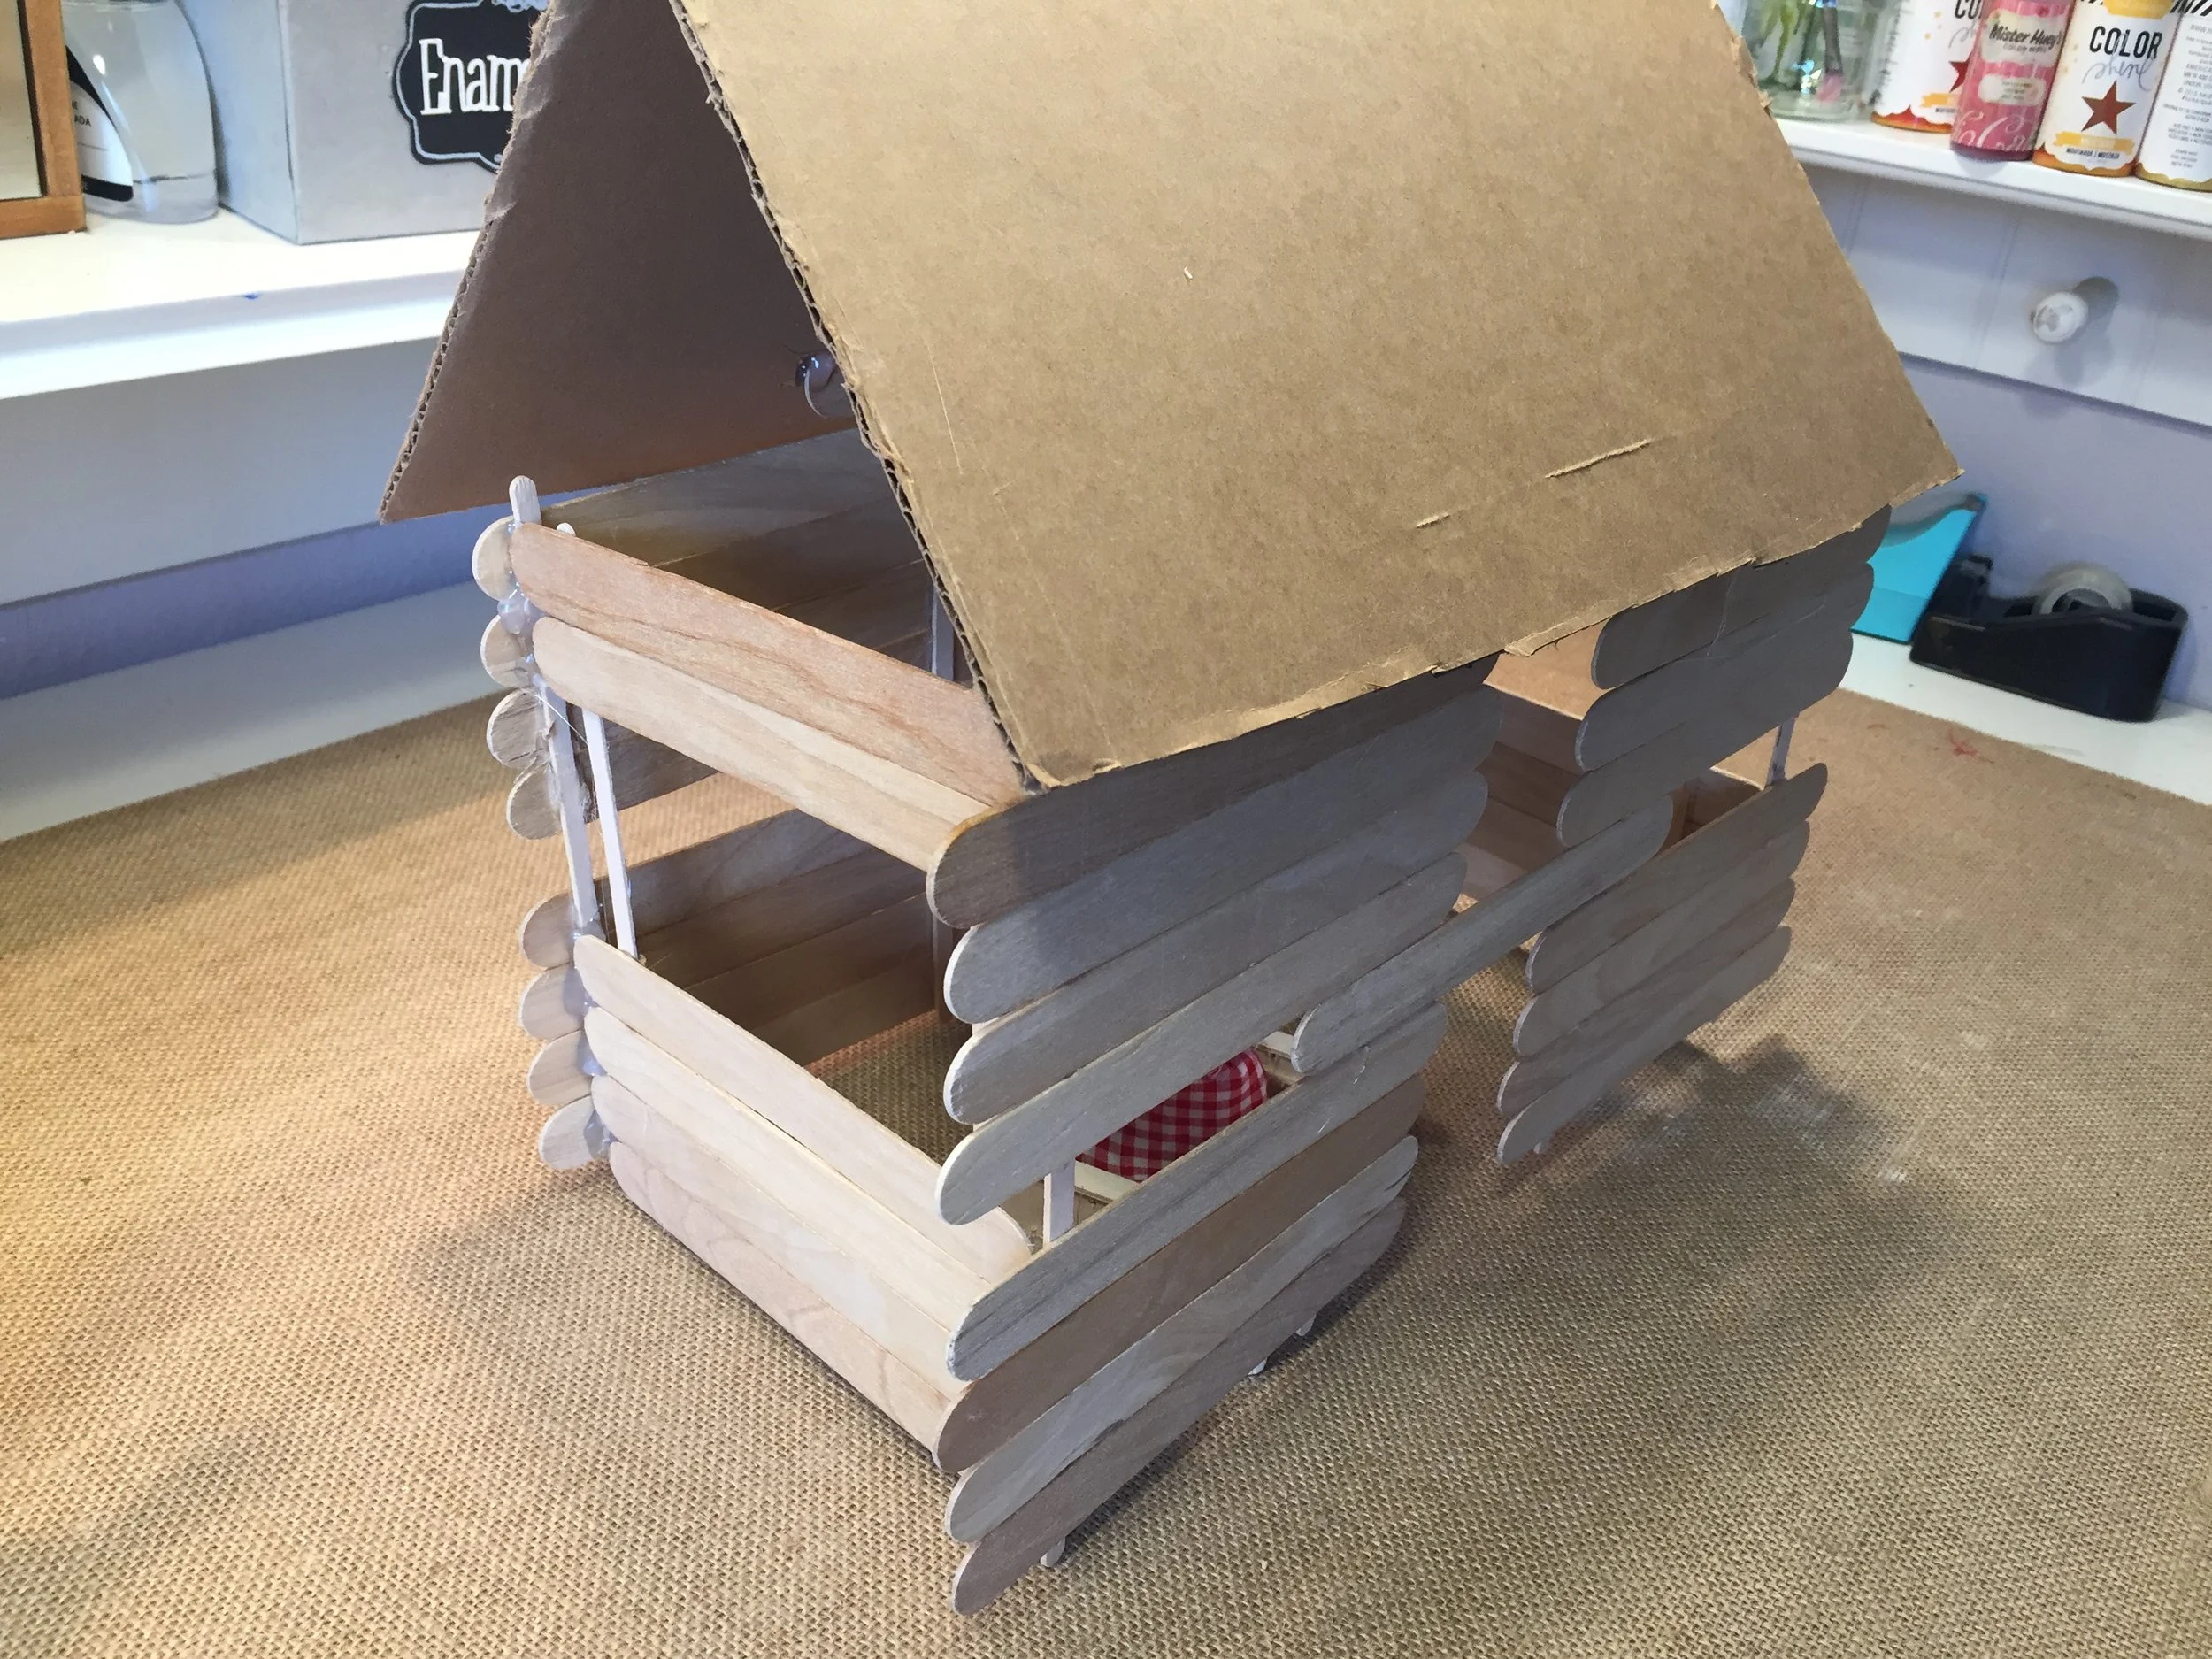
How to Make a Log Cabin
This super simple, frugal hands-on project can be accomplished by anyone, even if you are not crafty or do hands-on projects. It’s easy, fast and you and your children will have a sense of accomplishment when finished. It’s hard to mess up this project, so rest assured, you’ll be pleased when it’s complete.
Inspiration for this project came from the book Great Colonial America Projects You Can Build Yourself by Kris Bordessa. We used this books which has content plus projects along with others for our Colonial Times Unit Study.
Materials:
craft sticks (we used the wide ones from the Dollar Tree)
hot glue gun or tacky glue
cardboard for roof
Cost: less than $2
Duration: 30 minutes or less
Prep and clean up: minimal
Grade level: KG and up


Historic Mop Tutorial | Colonial Times
While reading Great Colonial America Projects You Can Build Yourself by Kris Bordessa, we were inspired to do our own version of a Colonial Times mop. The supplies are readily available and affordable and this project took hardly any time at all and produced hardly any mess! This project accompanies our American History unit.
DIY Mop:
supplies: a dowel measuring at least 18-24 inches, several yards of rope (thicker than baker’s twine). I used 2 yards, but it wasn’t enough. I’d say at least 4 yards would suffice. 1-2 zip ties (clear if possible, though I used black and then covered it with baker’s twine), a pair of scissors.
Directions: loop rope to diresed length (8 inches is pretty good). Keep it looped, don’t cut it. Nestle dowel between looped rope and secure with a zip tie. Repeat for thicker mop. That’s it!
This mop actually works; try it out! Tag me on Instagram when you do! And use the hashtag #pepperandpine


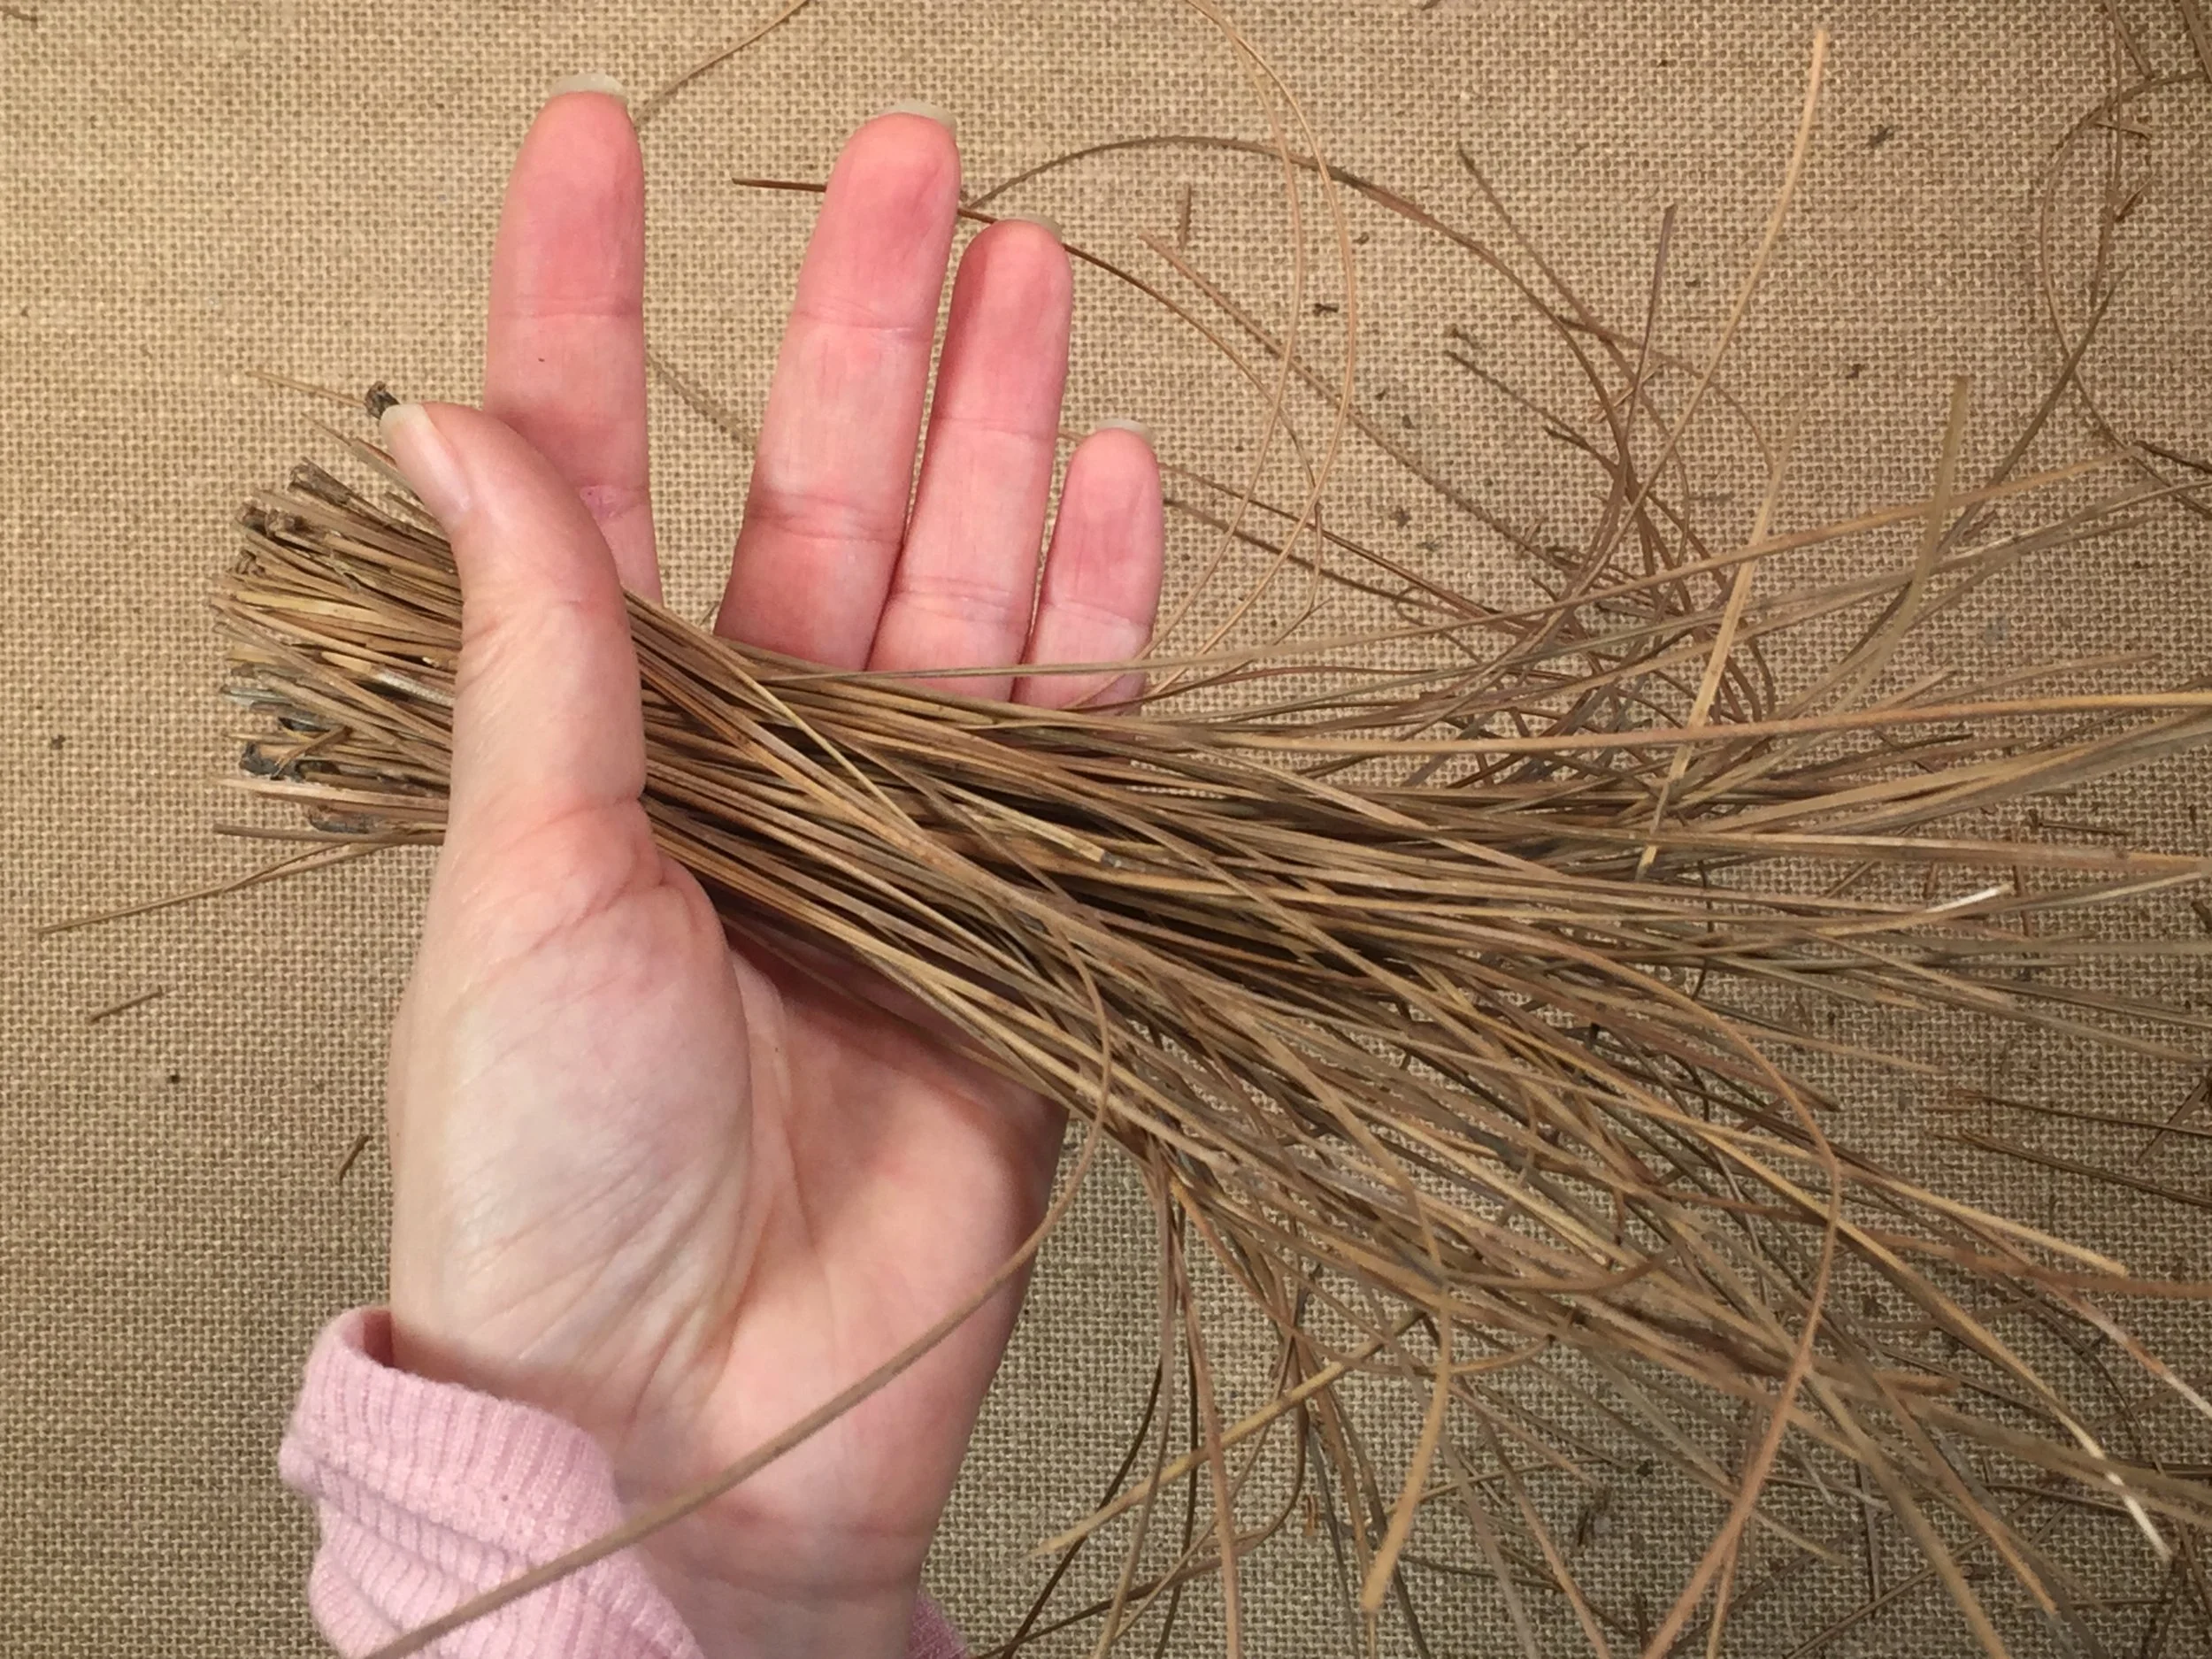

Historic Pine Needle Broom | Handmade
While working on our history units, we decided to make a child’s sized broom. We found inspiration for this project from Kris Bordessa’s book Great Colonial America Projects You Can Build Yourself. Though ours was more complicated than the book, it was actually really simple. You will need to assist your child if he wants to help, but this is a very quick project you can do in less than a half hour. We actually had intended to just make a mop inspired by a child’s mop my 5 year old has, but then our handmade “Harry Potter-esque” broom caught our eye and we thought we could do both! The kids and I are very pleased with the way both turned out and they actually work!
Here are a few tips that can help you if you wish to do these projects. First, look for long pine needles for the broom. You can also use straw, stiff grasses or thin twigs as well. We don’t have long pine needles where we live; they are all quite short, but I did have some left over from a basket weaving kit. We used those, but if you were do this, I’d suggest using more than what we had. We used a tight handful bundle.
Materials:
5/8 or 1/2 inch dowel (18-36 inches long)
Two bundles of straw/hay or pine needles (more the better)
2-4 clear colored zip ties
2-3 yards of baker’s twine or hemp twine
Twine needle
Directions:
Cut a 5/8 or 1/2 inch dowel to desired height. We chose 18 inches because our dowel was 36 inches, and we only bought one thinking we were just going to make the mop. About 24 inches would be a good height for a child.
Holding a bundle of straw or pine needles, nestle the dowel in your hand while gentle wrapping the pine needles around. Secure it with a zip tie. Repeat to make the broom thicker. Add the zip tie above or below where the other zip tie already is. Tighten as best you can.
Thread your twine. Sew your pine needles 1/4 and 1/2 to keep them together. Cover your zip ties with twine. Trim the pine needles for a straight cut.
You can check out other projects we are doing for our American History unit, and see how we incorporate activity books into our curriculum.
If you try this or any other project inspired by one of my tutorials, don’t forget to share it with me on Instagram and use the hashtag #pepperandpine! I love to see what you come up. I’m always so impressed!!
How to Make Marbled Paper
Here’s another project we’re doing for our American History Unit. We got the idea from the book American Kids in History Colonial Days by David King. The project was pretty exciting to do and would make for an lively science discussion on liquids that mix versus ones that don’t. Overall, it was not our favorite project. It was messy and time consuming to clean up. Since we don’t use oil paints, I had to buy them as well as turpentine (for clean up, though it would have made the project itself easier) making the cost of this project very high as compared to other projects in these activity books.
If you already had the materials, I would encourage you to try it. If you didn’t have the materials, I would suggest an alternative.
We purchased our oil paints and turpentine from Michaels craft store. The ‘bus boy tray‘ (large shallow container) was purchased from Amazon.
Directions:
Fill container with water. Thin oil paints with paint thinner. Using a paint brush, gentle tap some oil paint onto the surface of the water. You won’t be able to see it well, but it’s there, resting on the top of the water. Next take watercolor paper or thick drawing paper and carefully lay it on the surface of the water. Lift up to reveal your marbled paper.


Hand Dipped Candles
Ever wanted to turn left over candles into hand dipped tapers? You can either buy wax or upcycle an old candle. All you need is a deep pot for the wax, baker’s twine, a pair of scissors and a burner.
We used an old three-wick candle by Colonial Candles of Cape Cod sold by PartyLite. It has a nice light peppermint scent and a bright red color, both of which were retained when we turned them into new tapers.
Tips for this dipping candles were learned from this video.
Here’s how we dipped our candles: First we broke up our old candles and put them in a large candle pot. You can use any tall pot, but what’s nice about using one specially designed for candles is that you can leave the candle wax in there until you need it again.
We found that our smallest burner on the lowest setting melted the wax in about 30 minutes, but brought the temperature up to 200 degrees F which is about 30-40 degrees higher than the melting temperature of wax. This meant that it was really hard to coat our candles. We turned off the heat and let the wax cool down before dipping them, and that worked much better.
An alternative is to add your dipped candles to a cold water bath to cool down between dippings in the wax.
We found this to work really well, but we noticed that our candle became rippled when doing so. Maybe we didn’t let the water drip throughly, but it is a solution for hasty candle dippers!
Last alternative is to add weights to your candles to keep them dipping deep in the wax and to keep them from floating up in the water.
We didn’t like this option because wax began to build up on the weight and below it ultimately reducing the size of our candle. You just need to trim off the weight and reform the bottom of the candle before giving it a few more dips. Let the weight plop into the wax and melt off before retrieving your weight.
If you try this out, share a pic with me via Instagram and don’t forget to tag me!!


Easy Rag Doll Tutorial
Having had boys for 12 years of my motherhood journey, I never had the need to make these adorable rag dolls. My friend, Megan, taught our kindergarten co-op how to make them, and my five year old daughter loves them! In the tutorial you can see how simple, easy and fast they are to make. I’d like to make a few suggestions now that my daughter has been playing with them non-stop:
Double knot everything
Sew the bonnet to the head (two stitches is sufficient)
Sew the braids to the head (two stitches is sufficient)
Sew a stitch into the ribbon that ties the braids off
My daughter likes to pretend play a lot. At the root of her pretend play is family. She likes to group her toys into families, she even likes to group her washi tape into families! Yep, I actually buy her washi tape, even though I’m the scrapbooker! So when I had finished making her a rag doll, she was happy, when I finished making her a little girl, another mom and a baby, she was over the moon excited. She’s already put in requests for more! Like another baby for the first mom, a basket and another little girl, oh…and two dads to complete her little family unit. Hmmm…boy rag dolls…I’ll have to experiment.
Supplies:
1/4 yard of muslin (you can choose from a variety of colors for different skin tones)
1/4 yard of calico fabric or any print fabric
wool or cotton balls
scissors
optional: needle and thread
Directions:
Cut or rip a strip of muslin to 4″ by 24″
Cut or rip 4 strips of muslin 1/2″ by about 20″
Fold long strip of muslin (4″x24″) in half and stuff a little wool in the top for the head
Tie off head with one strip of fabric (1/4″x20″) keep excess for the belt
Braid arms and tie off each end with remnant strips of fabric
Optional: make another set of braids for hair and tie off with printed fabric
Tie arms to base of neck with the fabric used to tie off the head
Cut or rip piece of calico or printed fabric about 4″ by 20″ for the dress
Fold in half then in half again and cut a very small slip where the corners come together (the video will help with this)
Wiggle head through the opening
Fill the body with wool (optional)
Belt the body with remnant piece of fabric and make a bow in the back
Cut square of fabric about 3″ square and fold into a triangle
Tie or sew the bonnet on the head (if you are adding braids, sew them in place before putting on the bonnet
Hand to a little child and watch his or her face light up!
Did you enjoy this tutorial? If so, let me know below!


Boy Rag Doll Tutorial For Beginners
If you’ve never made playthings for your kids, this might be the perfect place to start. It’s easy to make rag dolls, and what’s great about it is that you don’t need many supplies, and even old clothes would work perfectly for this project. We used muslin for the body of the doll, wool batting for the head and body and remnant fabric from a curtain that had been floating around in our pretend play dress-up basic for years.
The result was a boy rag doll to complete the rag doll family. My five-year old daughter really likes to pretend play with families: mom, dad, baby and sometimes other members. Having made her several girl rag dolls (mom, baby and young child), she was thrilled to add a ‘dad’ to the mix.
I can’t say I actually like the way he turned out, as I prefer the girl rag dolls much more, but she love it and what you already know (if you make playthings for your kids), is that children are so loving, innocent and accepting, that even your worst effort is applauded and loved by your child. So try this project whether you are a seasoned crafter or not; your children will love you all the more for it. And if you do try it, don’t forget to show me your project! Share with me on Instagram and don’t forget to tag your project with #pepperandpine.
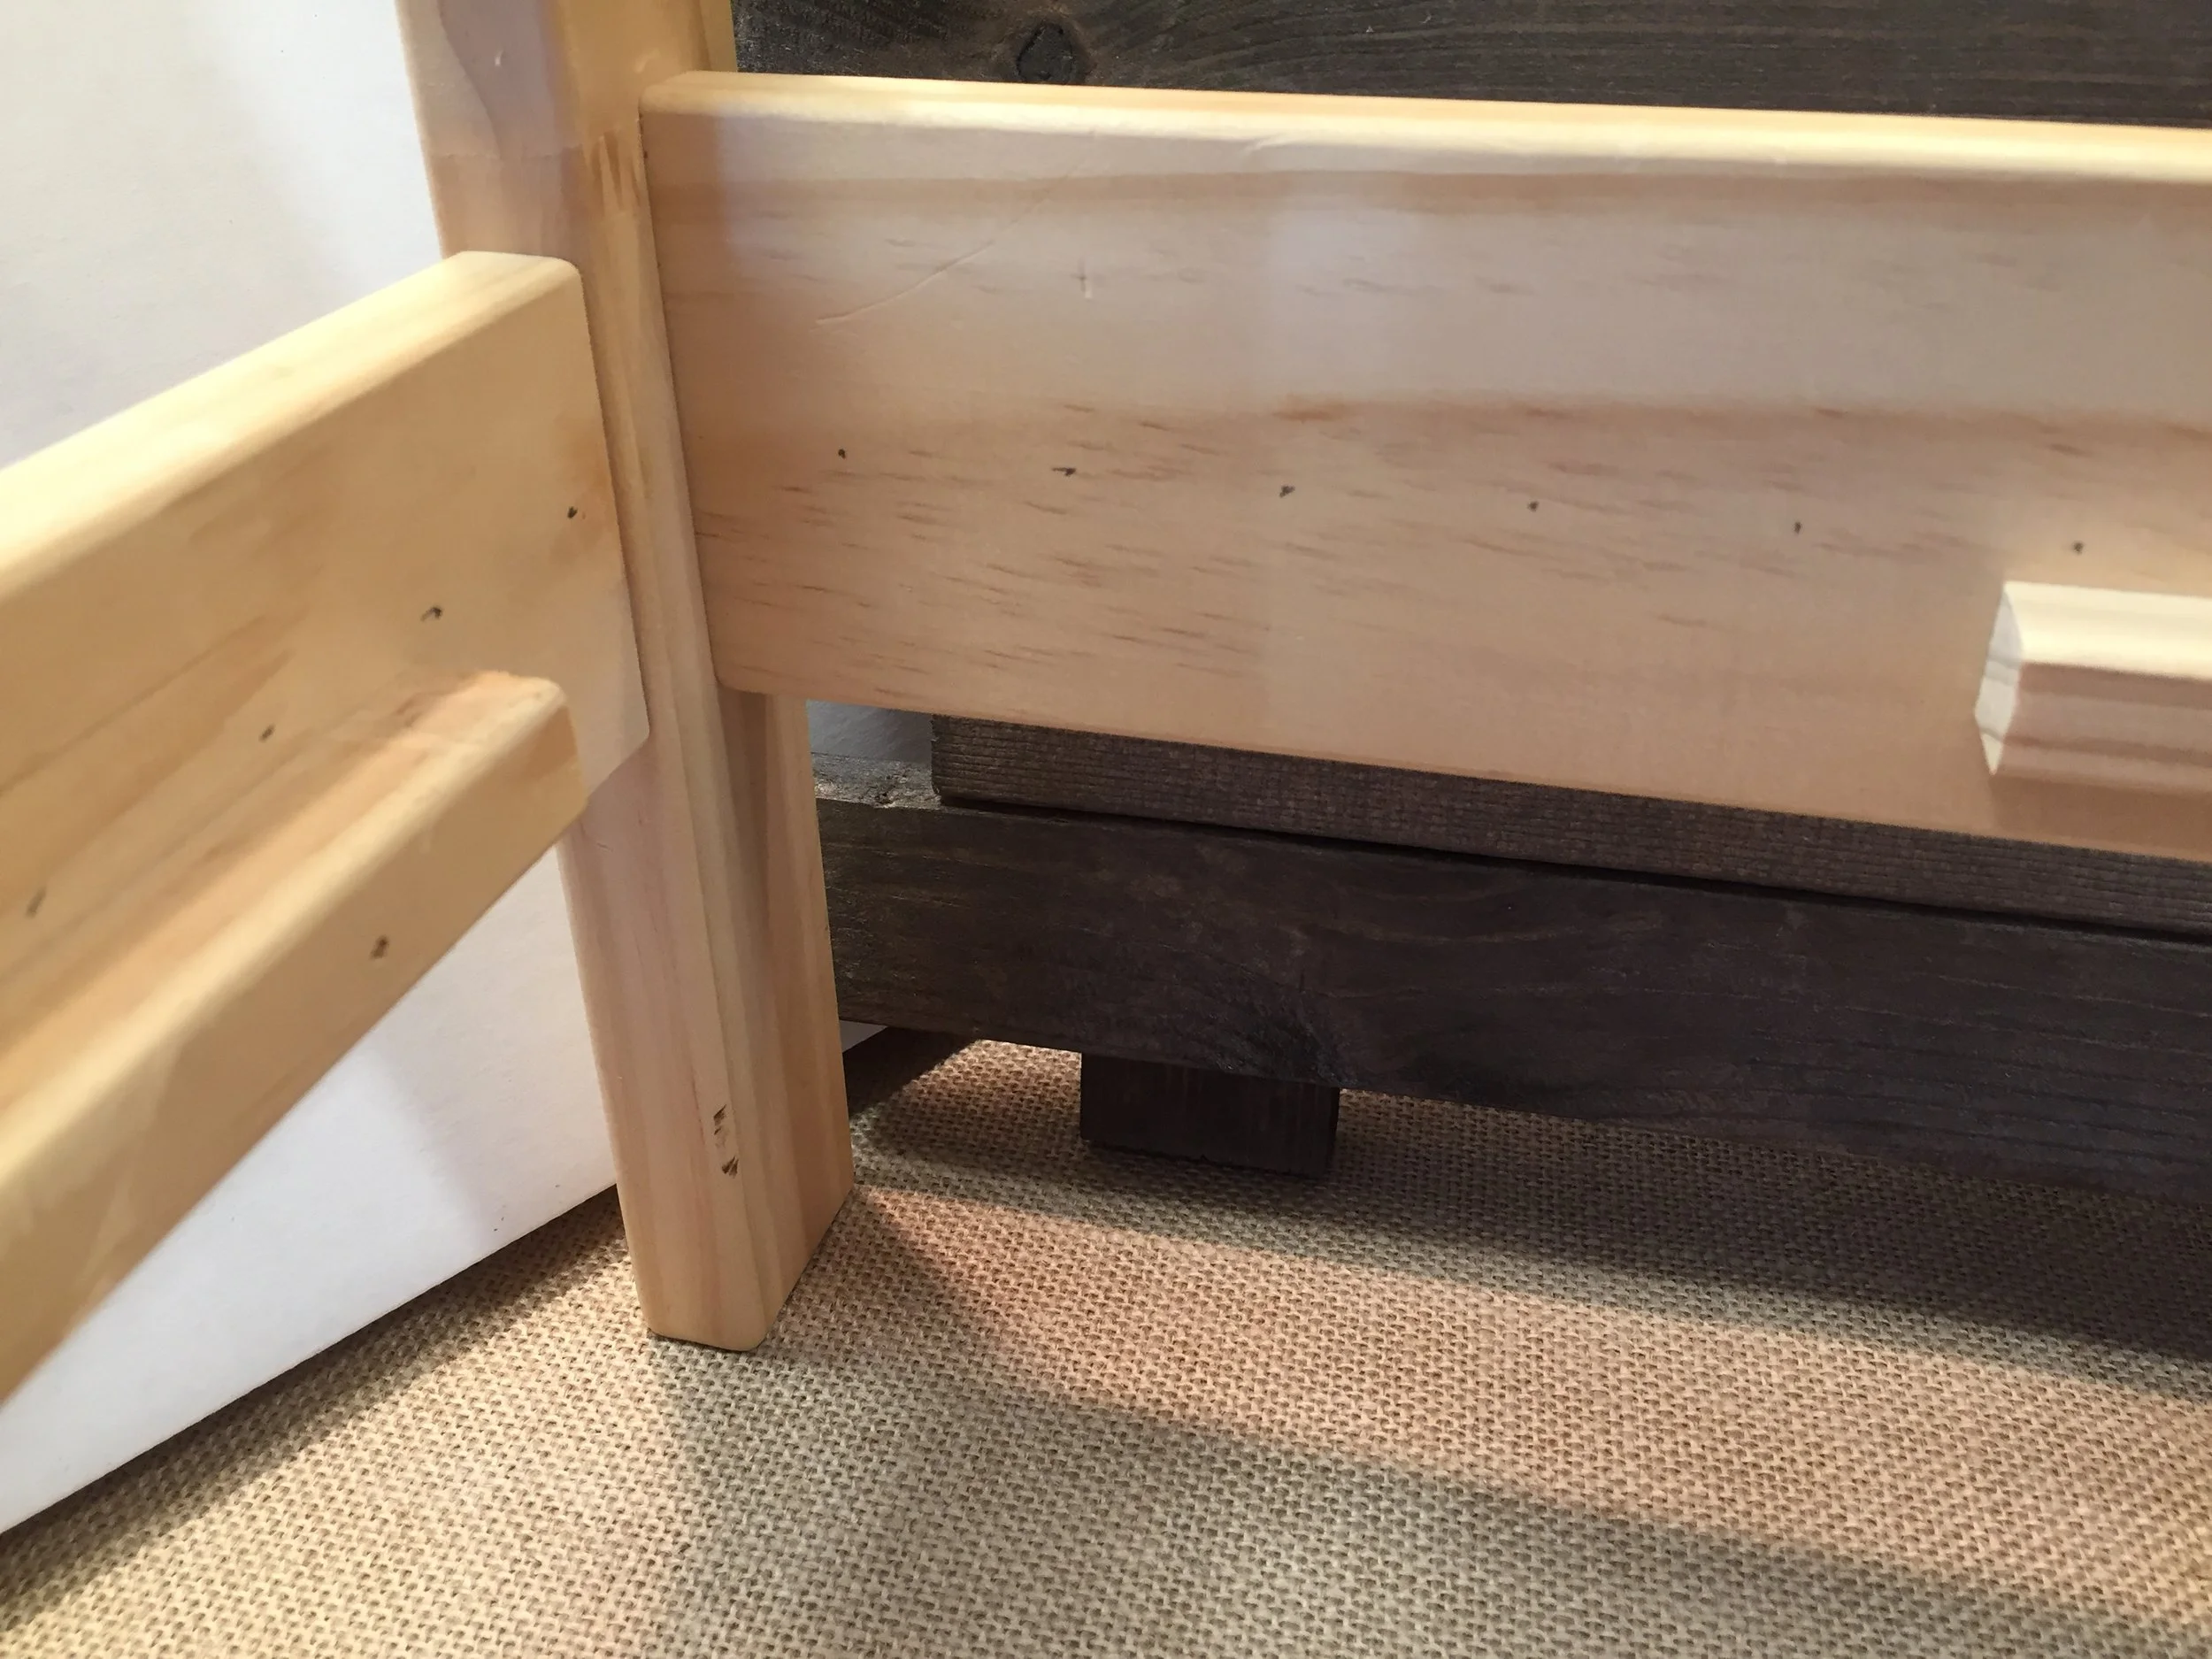
How to Make a Rope Bed | Historical
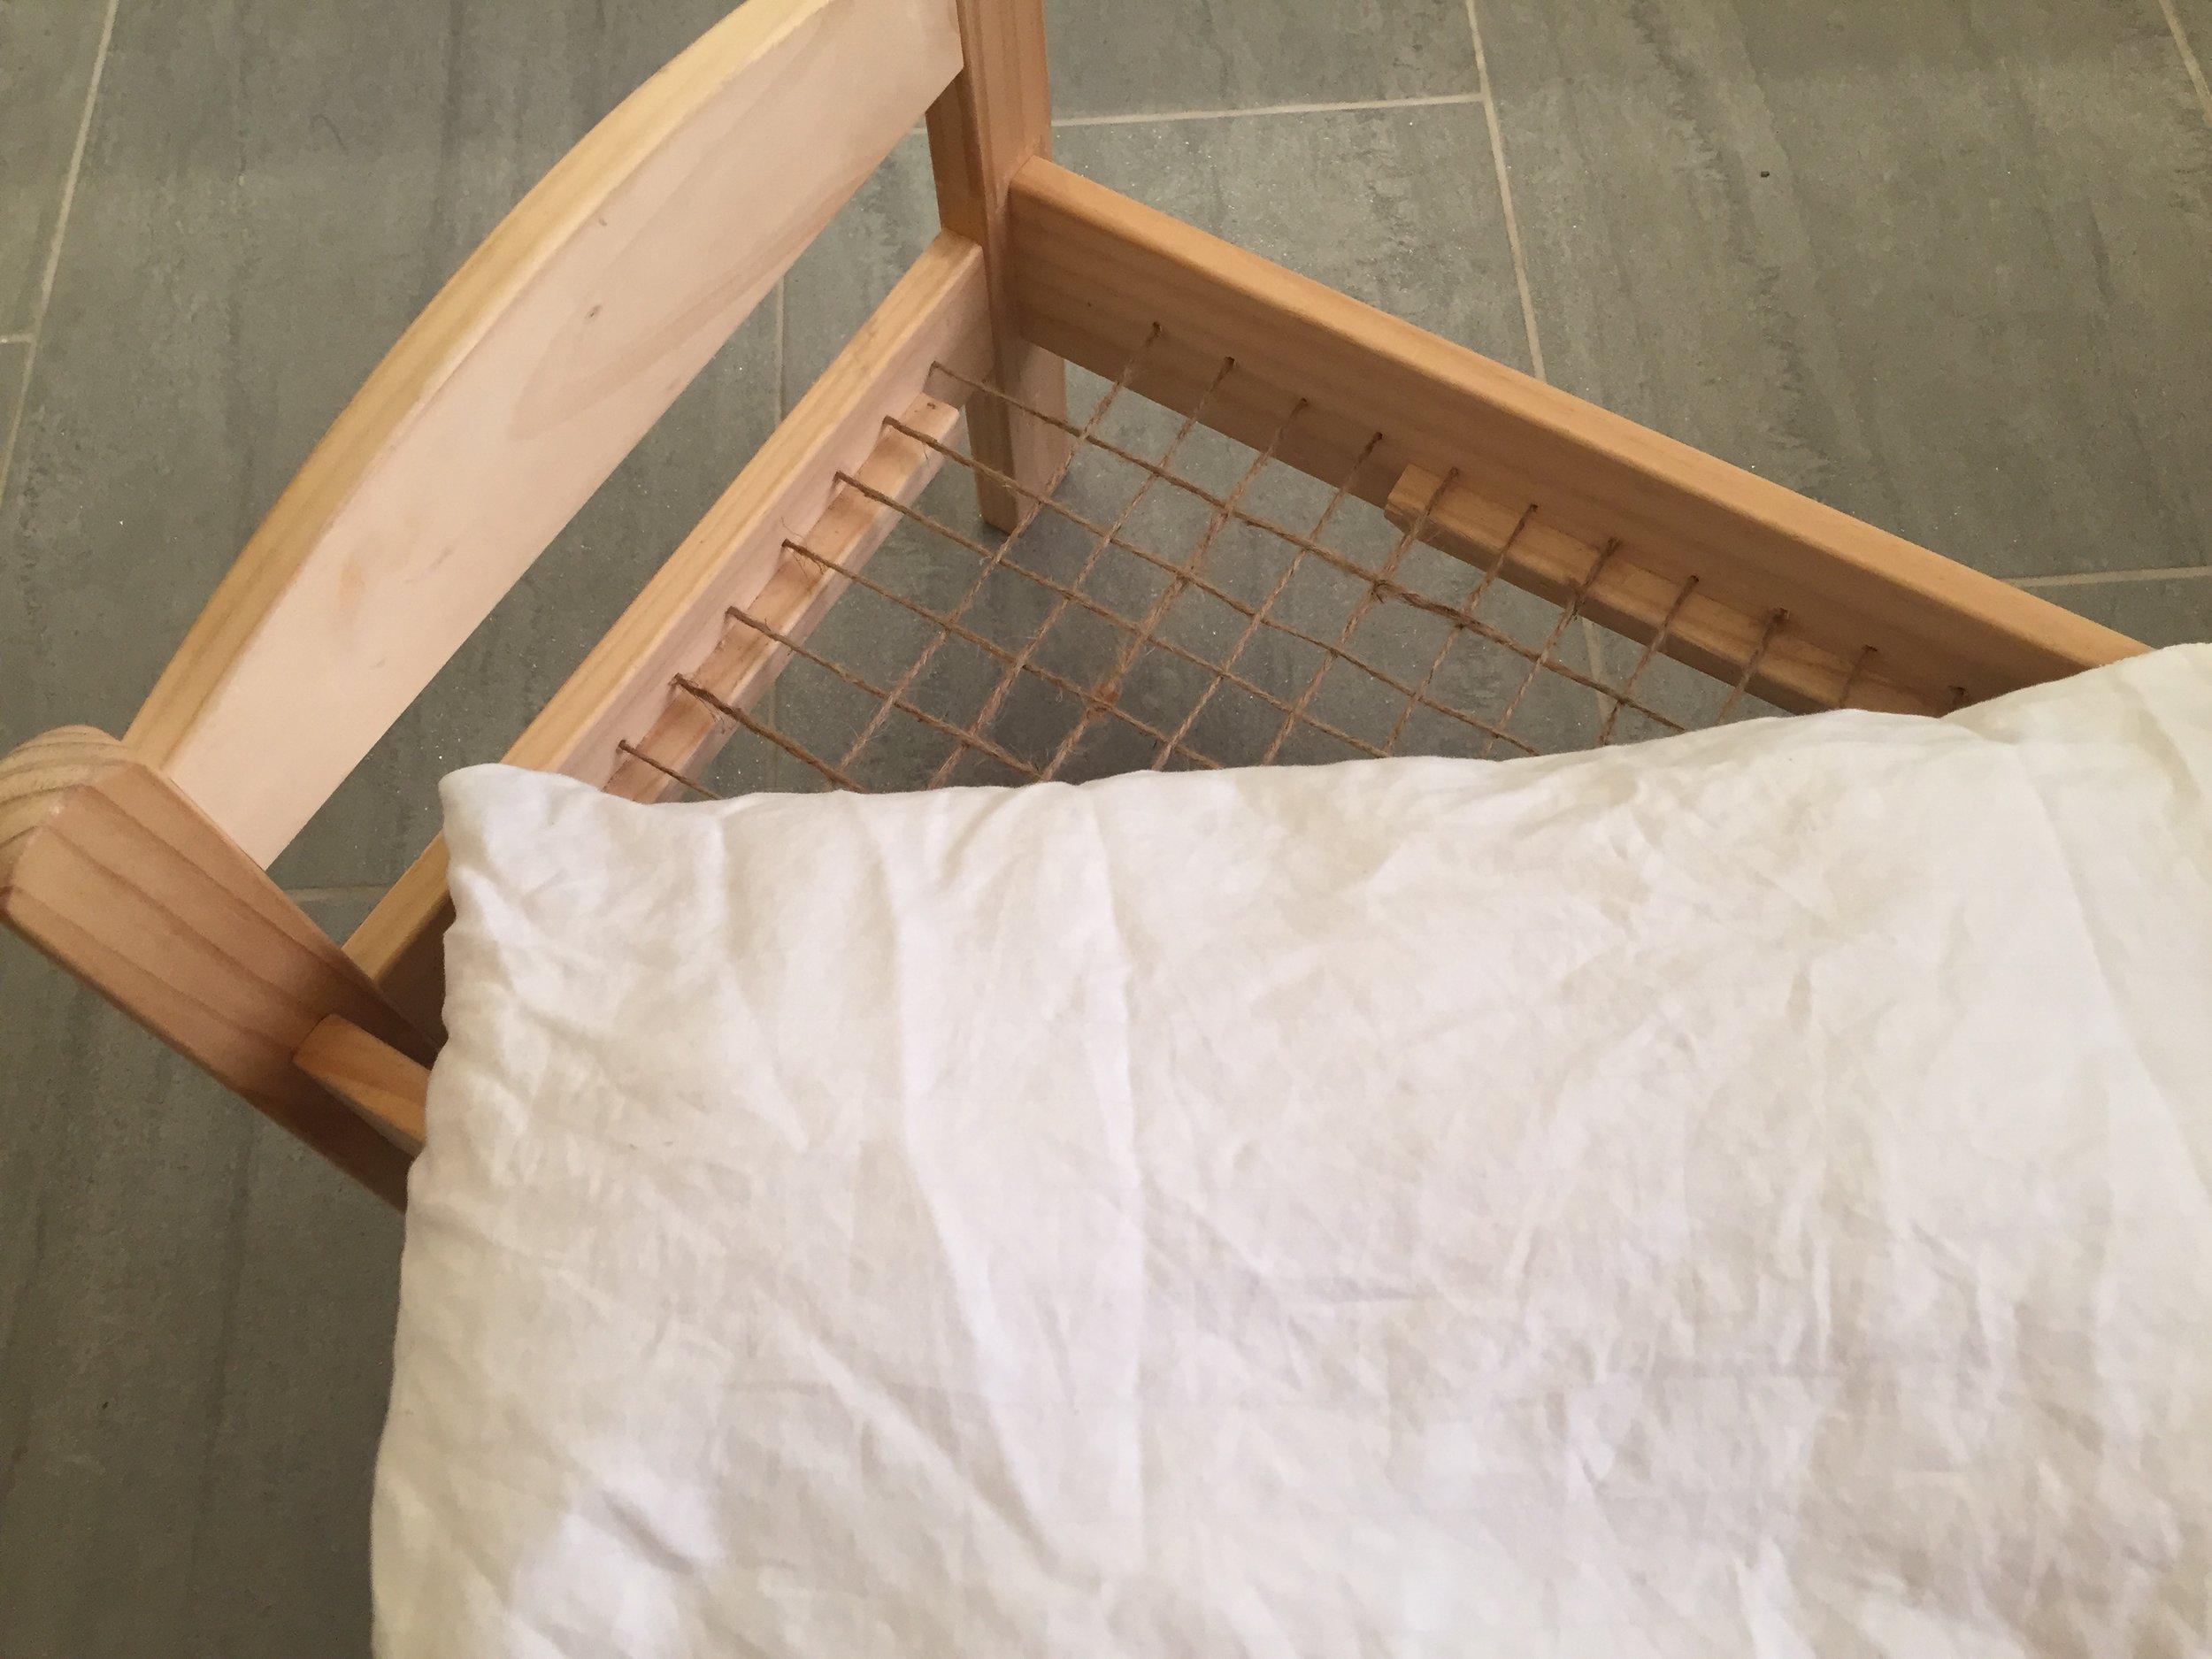
I love projects that are educational and functional. A few years ago, this doll’s bed from IKEA broke when my boys ‘accidentally’ stepped on the particle bed insert. Eventually it broke all together. I had intended to buy a piece of wood to replace it, but didn’t get around to it and finally I stored the broken bed in the attic for another day. Well that day is today! I came across while in the attic and thought it would make a perfect project for our history units. We’ll fix it up by using the frame to make a rope bed. And using an old sheet, we’ll make a straw tick. “Goodnight, sleep tight, don’t let the bedbugs bite” here we come!
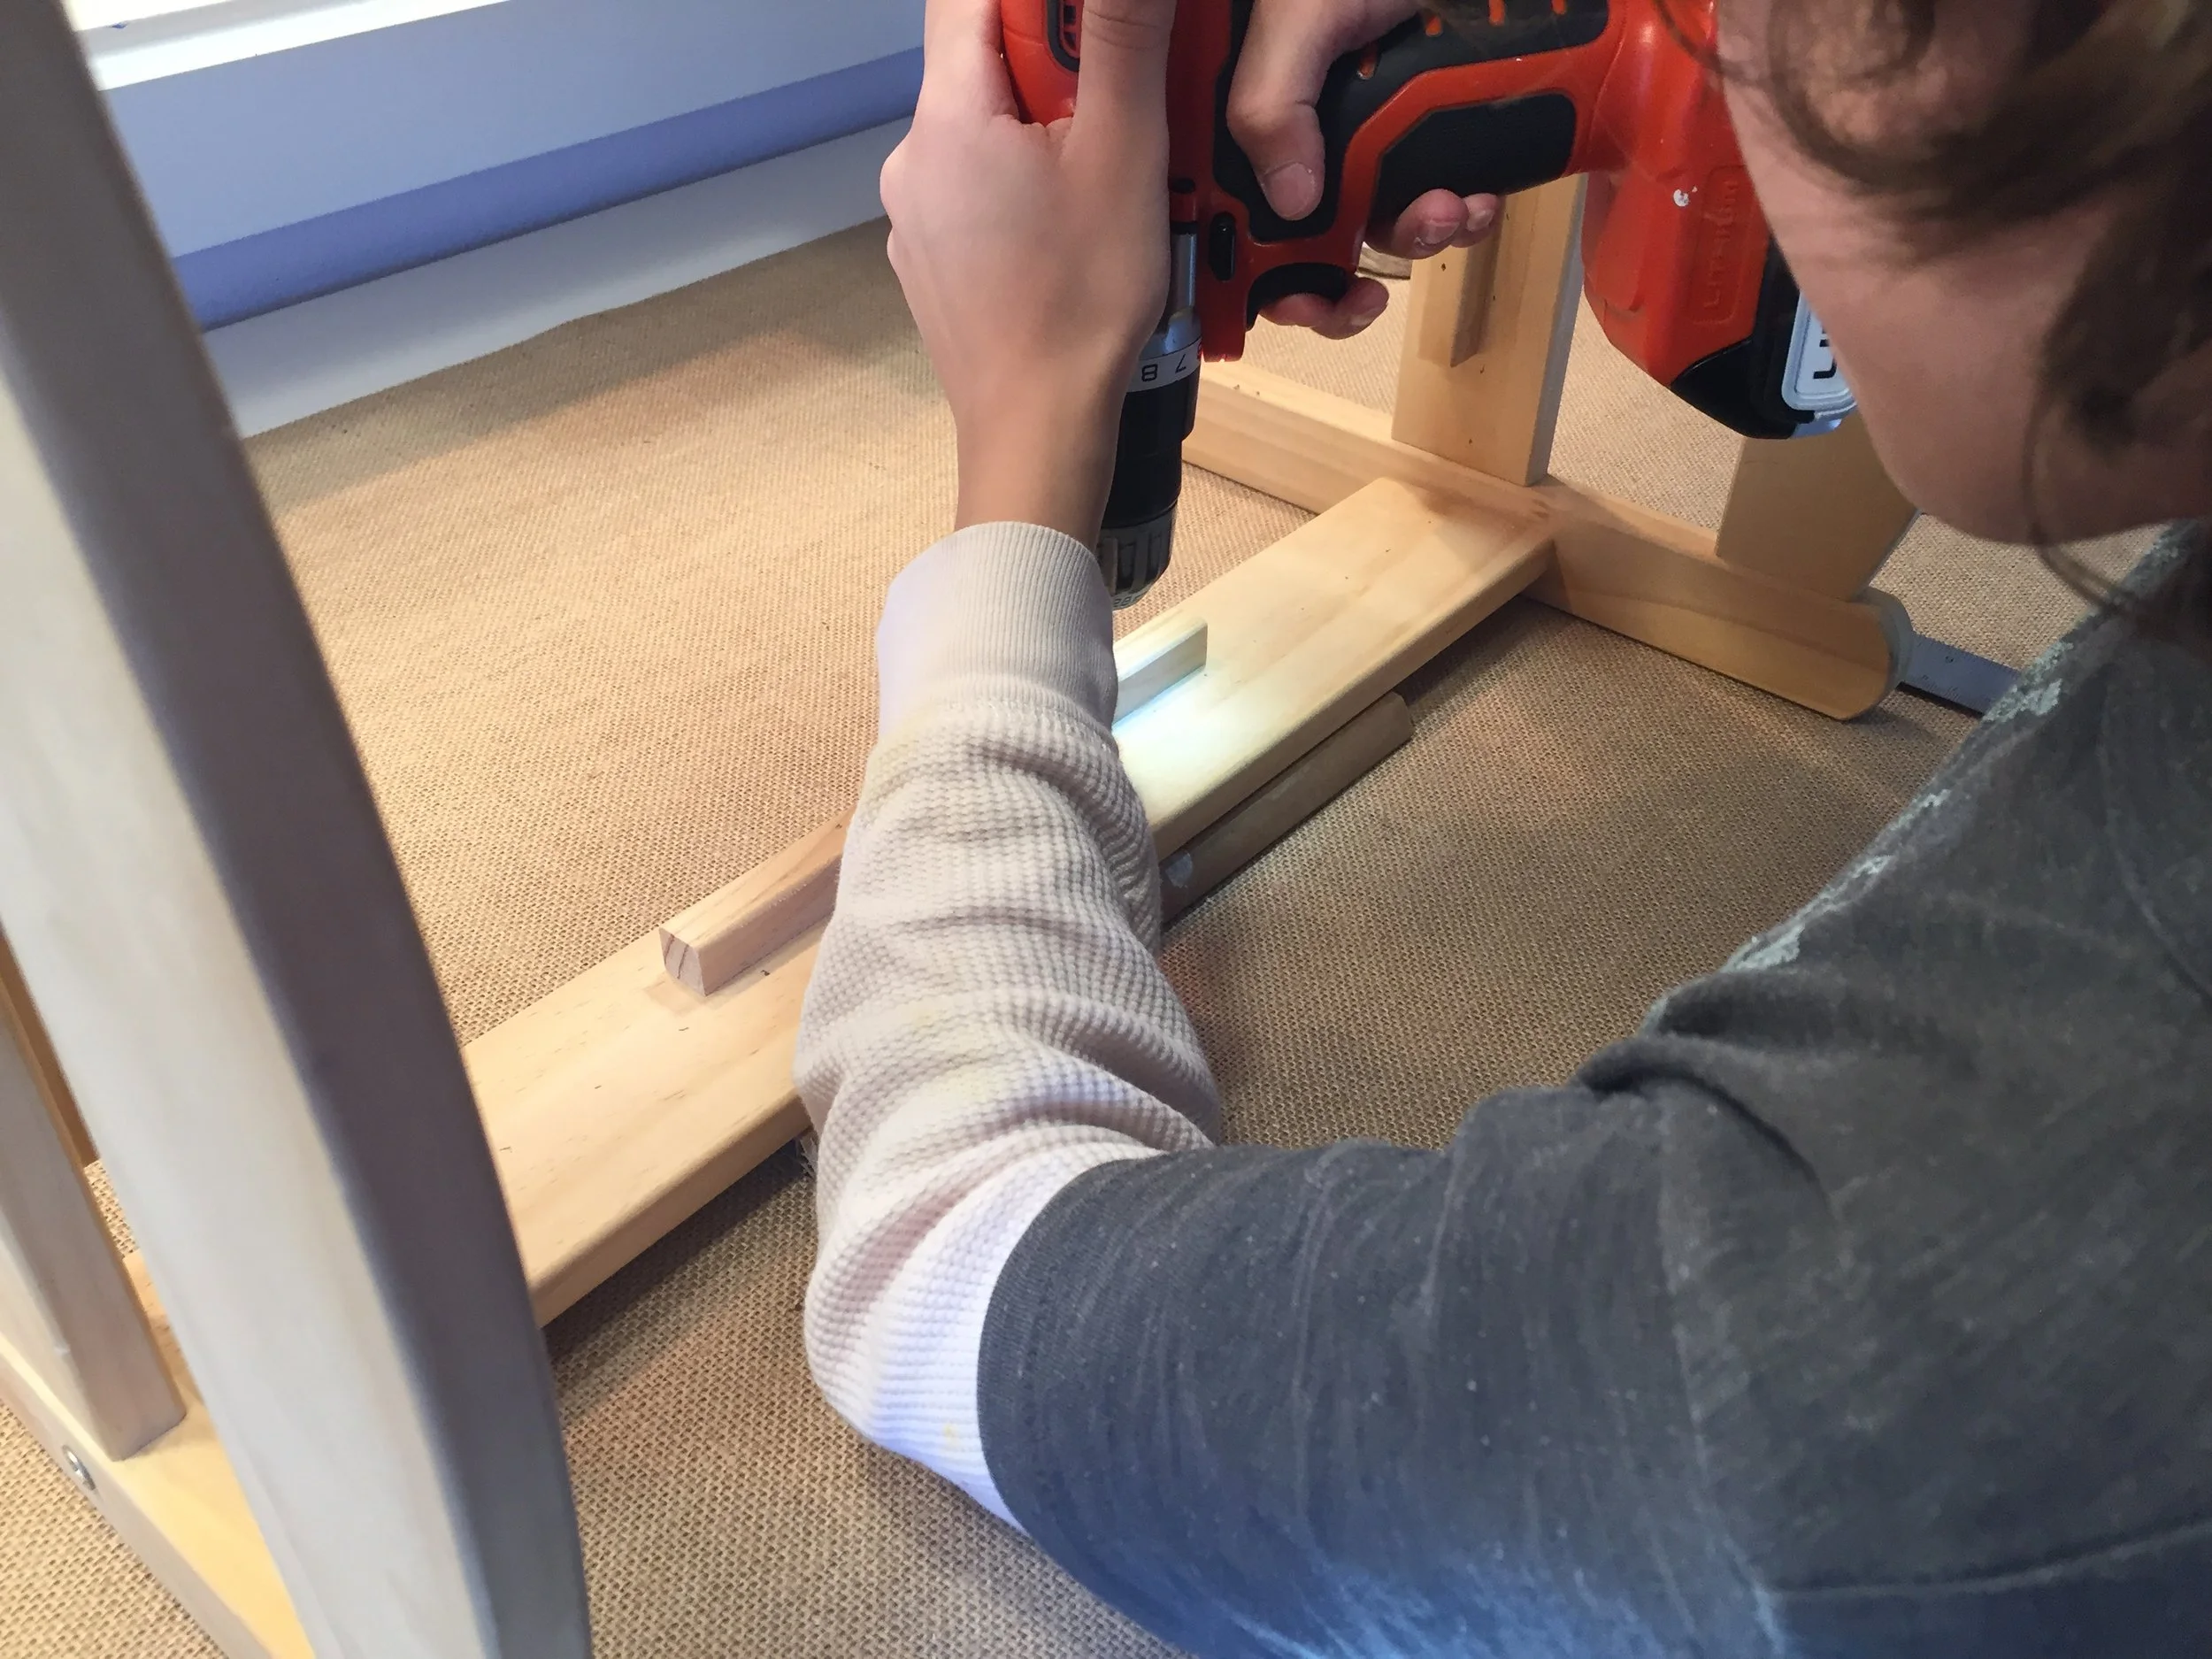
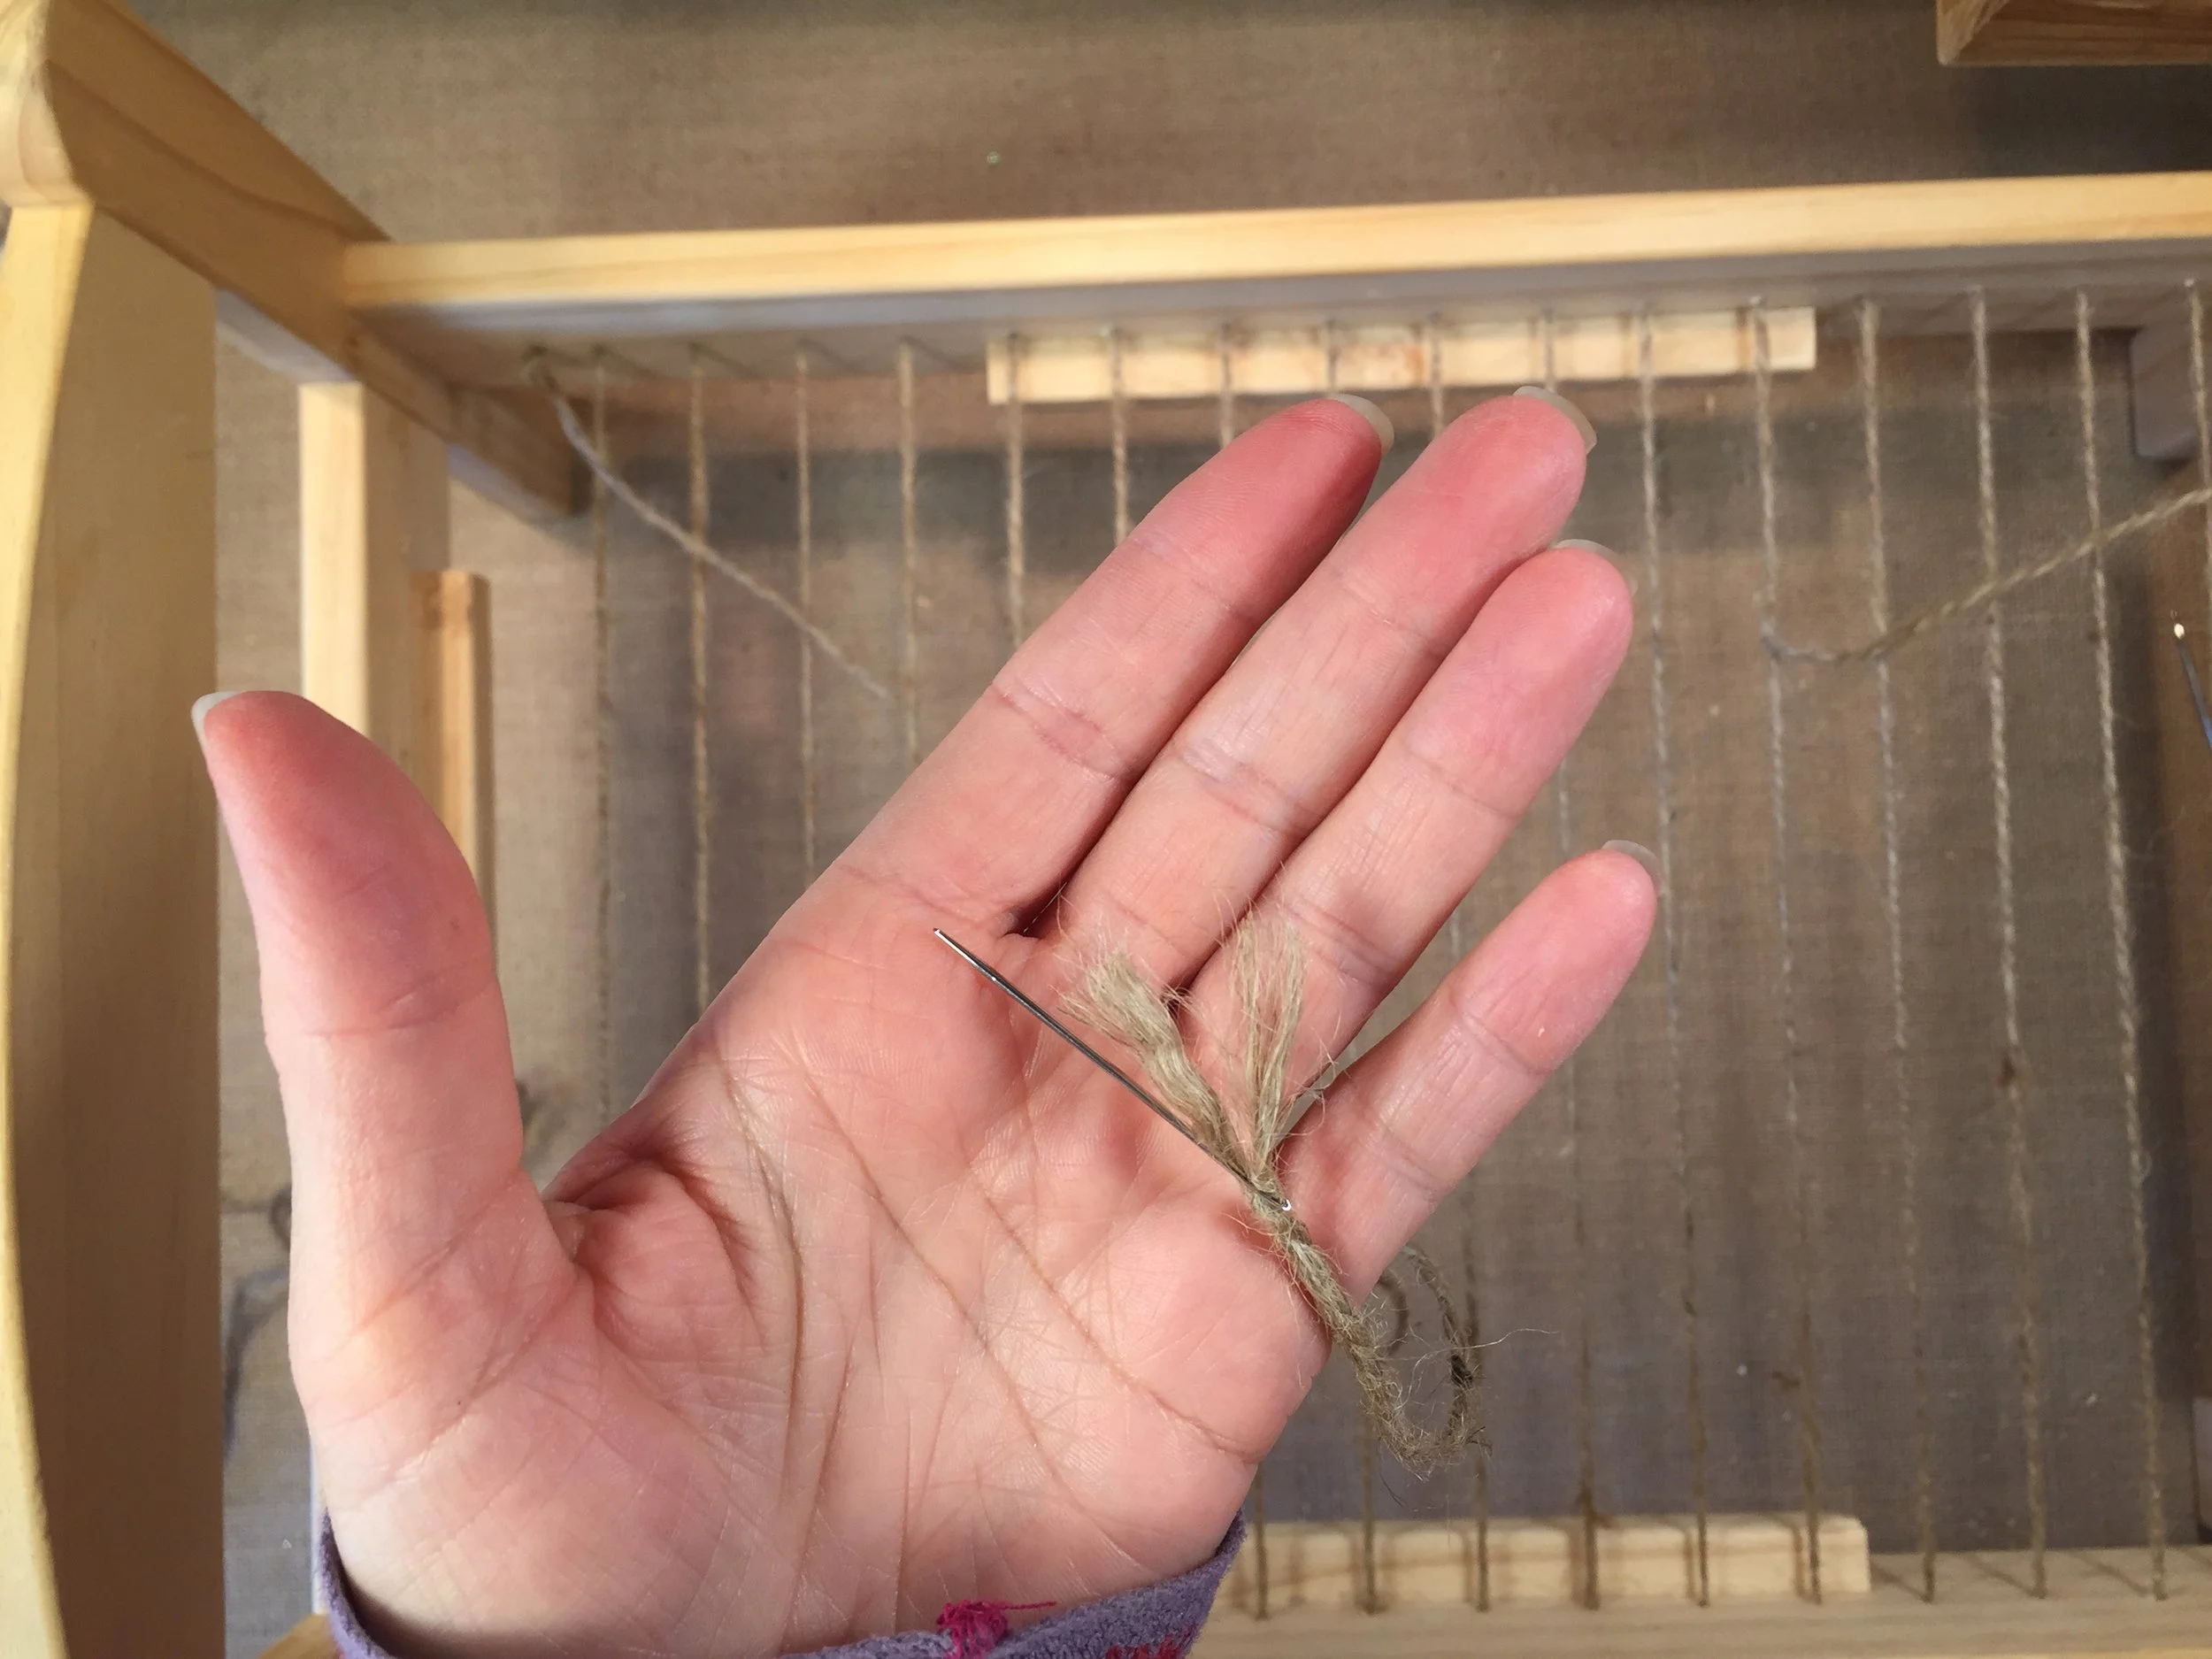
Now I know we only had to string it up and sew a mattress with modern day tools. No growing or chopping down trees to make the bedstead, no raising and shearing sheep for wool or gathering straw and leaves. No weaving and sewing a mattress. But seriously, this was more work and took much longer than I expected. I can’t tell you how appreciative we all were when this project was complete that we have easy access to clean mattress and bed frames!!
This project took over an hour to complete. We used and upcycled materials we already owned (except the Dollar Tree bed), so this project was very affordable for us. If you didn’t want to buy materials for this project, I suggest getting a Dollar Tree bed to do the project.
We used the book Great Colonial America Projects by Chris Bordessa for inspiration for this project. Though the book calls for making your own straw tick, we decided to take it a step further.
You can see all other projects we did for our American History units by checking out the playlist.