
Waldorf Practical Arts Projects
Grades 9-12
Grades 9-12 Hard Crafts
High school students in Waldorf setting experience a new form of handwork in the hard crafts of the practical arts. While they may have experienced wood carving in middle school, new projects and skills are developed using materials from the plant kingdom, but for the first time from the mineral kingdom with copper smithing and brass smithing.
The evolution of handwork and hard crafts to meet the developmental needs of the adolescent changes to support the inner development of the individuality of the student. In Grade 6, when the student designed a pattern of an animal and turned that pattern right side out, it mirrored their own awakening. Now with the Grade 9 to 12 student they learn to discover who they are through the practical arts as well as other creative and artistic endeavors.
Grade 9 student students are experiencing new emotional intensity and the beginnings of independent thinking and thought. Handwork and the practical arts meets these shifts by introducing more structured and skill-oriented projects. In middle school students were introduced to the sewing machine. It mirrored the lessons in history when students learned about the industrial revolution. If a garment wasn’t designed and executed in Grade 8, students have an opportunity to do that in Grade 9.
Simultaneously in the hard crafts, students will continue to develop their skills in woodworking and metalworking. In middle school students may have made a three legged stool. And if they did not do that project in Grade 8, they may experience that in high school along with other working projects. Block printing, wood relief, carving animals, and working with copper are projects that the Grade 9 student may engage in.
Working with metals in high school also mirrors the study of ancient civilizations when these skills were crucial to the industrialization of these civilizations. Working with metalsmithing connect students to some of the first significant industrial milestones. Students may work on coppersmithing a bowl, which mirrors the shaping of their own selves and identity.
The introduction of these new skills will be developed throughout high school as more complex projects are introduced and more refined skills are built upon the foundation established in Grade 9. As students discover and develop their individual identity, their practical arts crafts will reflect their individual worldview as well as their nuances in their personality. There is still an emphasis on process over product and an emphasis on acquiring skills with precision and accuracy. However, there is more liberty for self expression once the assigned project is completed as directed.
Waldorf Practical Arts Projects | Grades 9-12
-
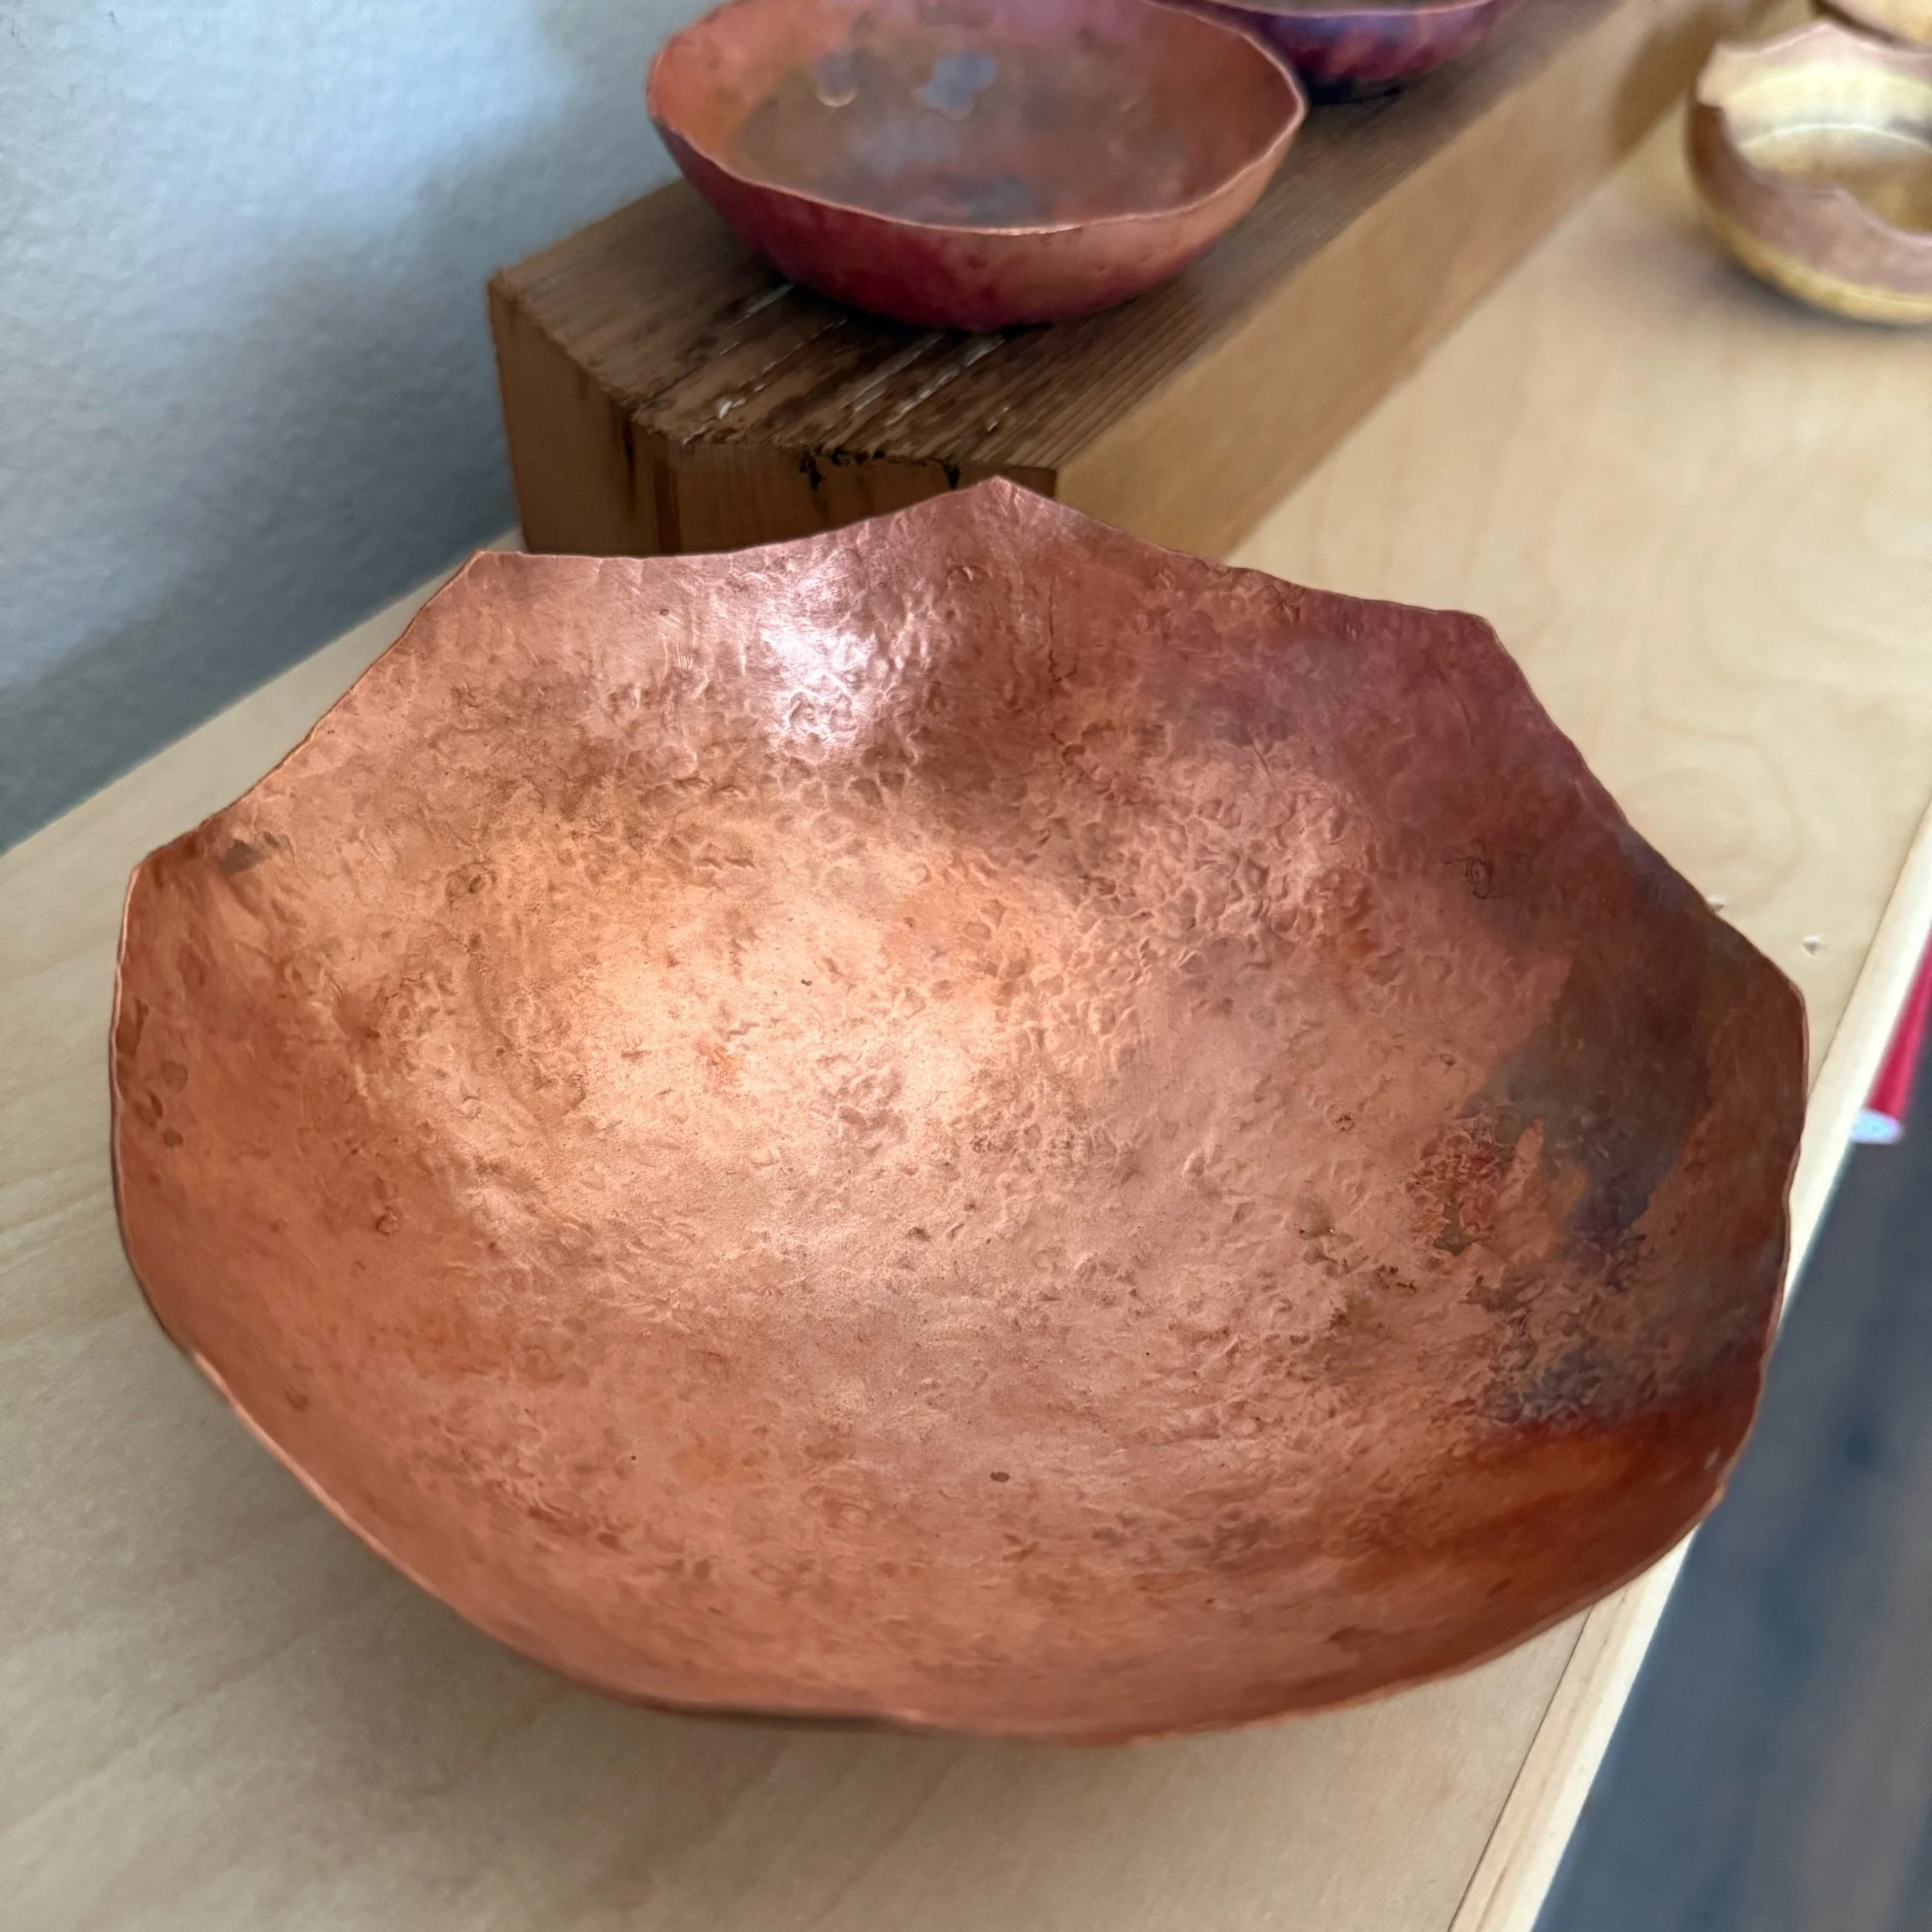
Copper Bowl
Students transform a flat sheet of copper into a rounded bowl through rhythmic hammering and careful annealing. This meditative, hands-on process nurtures focus, patience, and an appreciation for the transformation of raw materials into beautiful, functional objects.
-
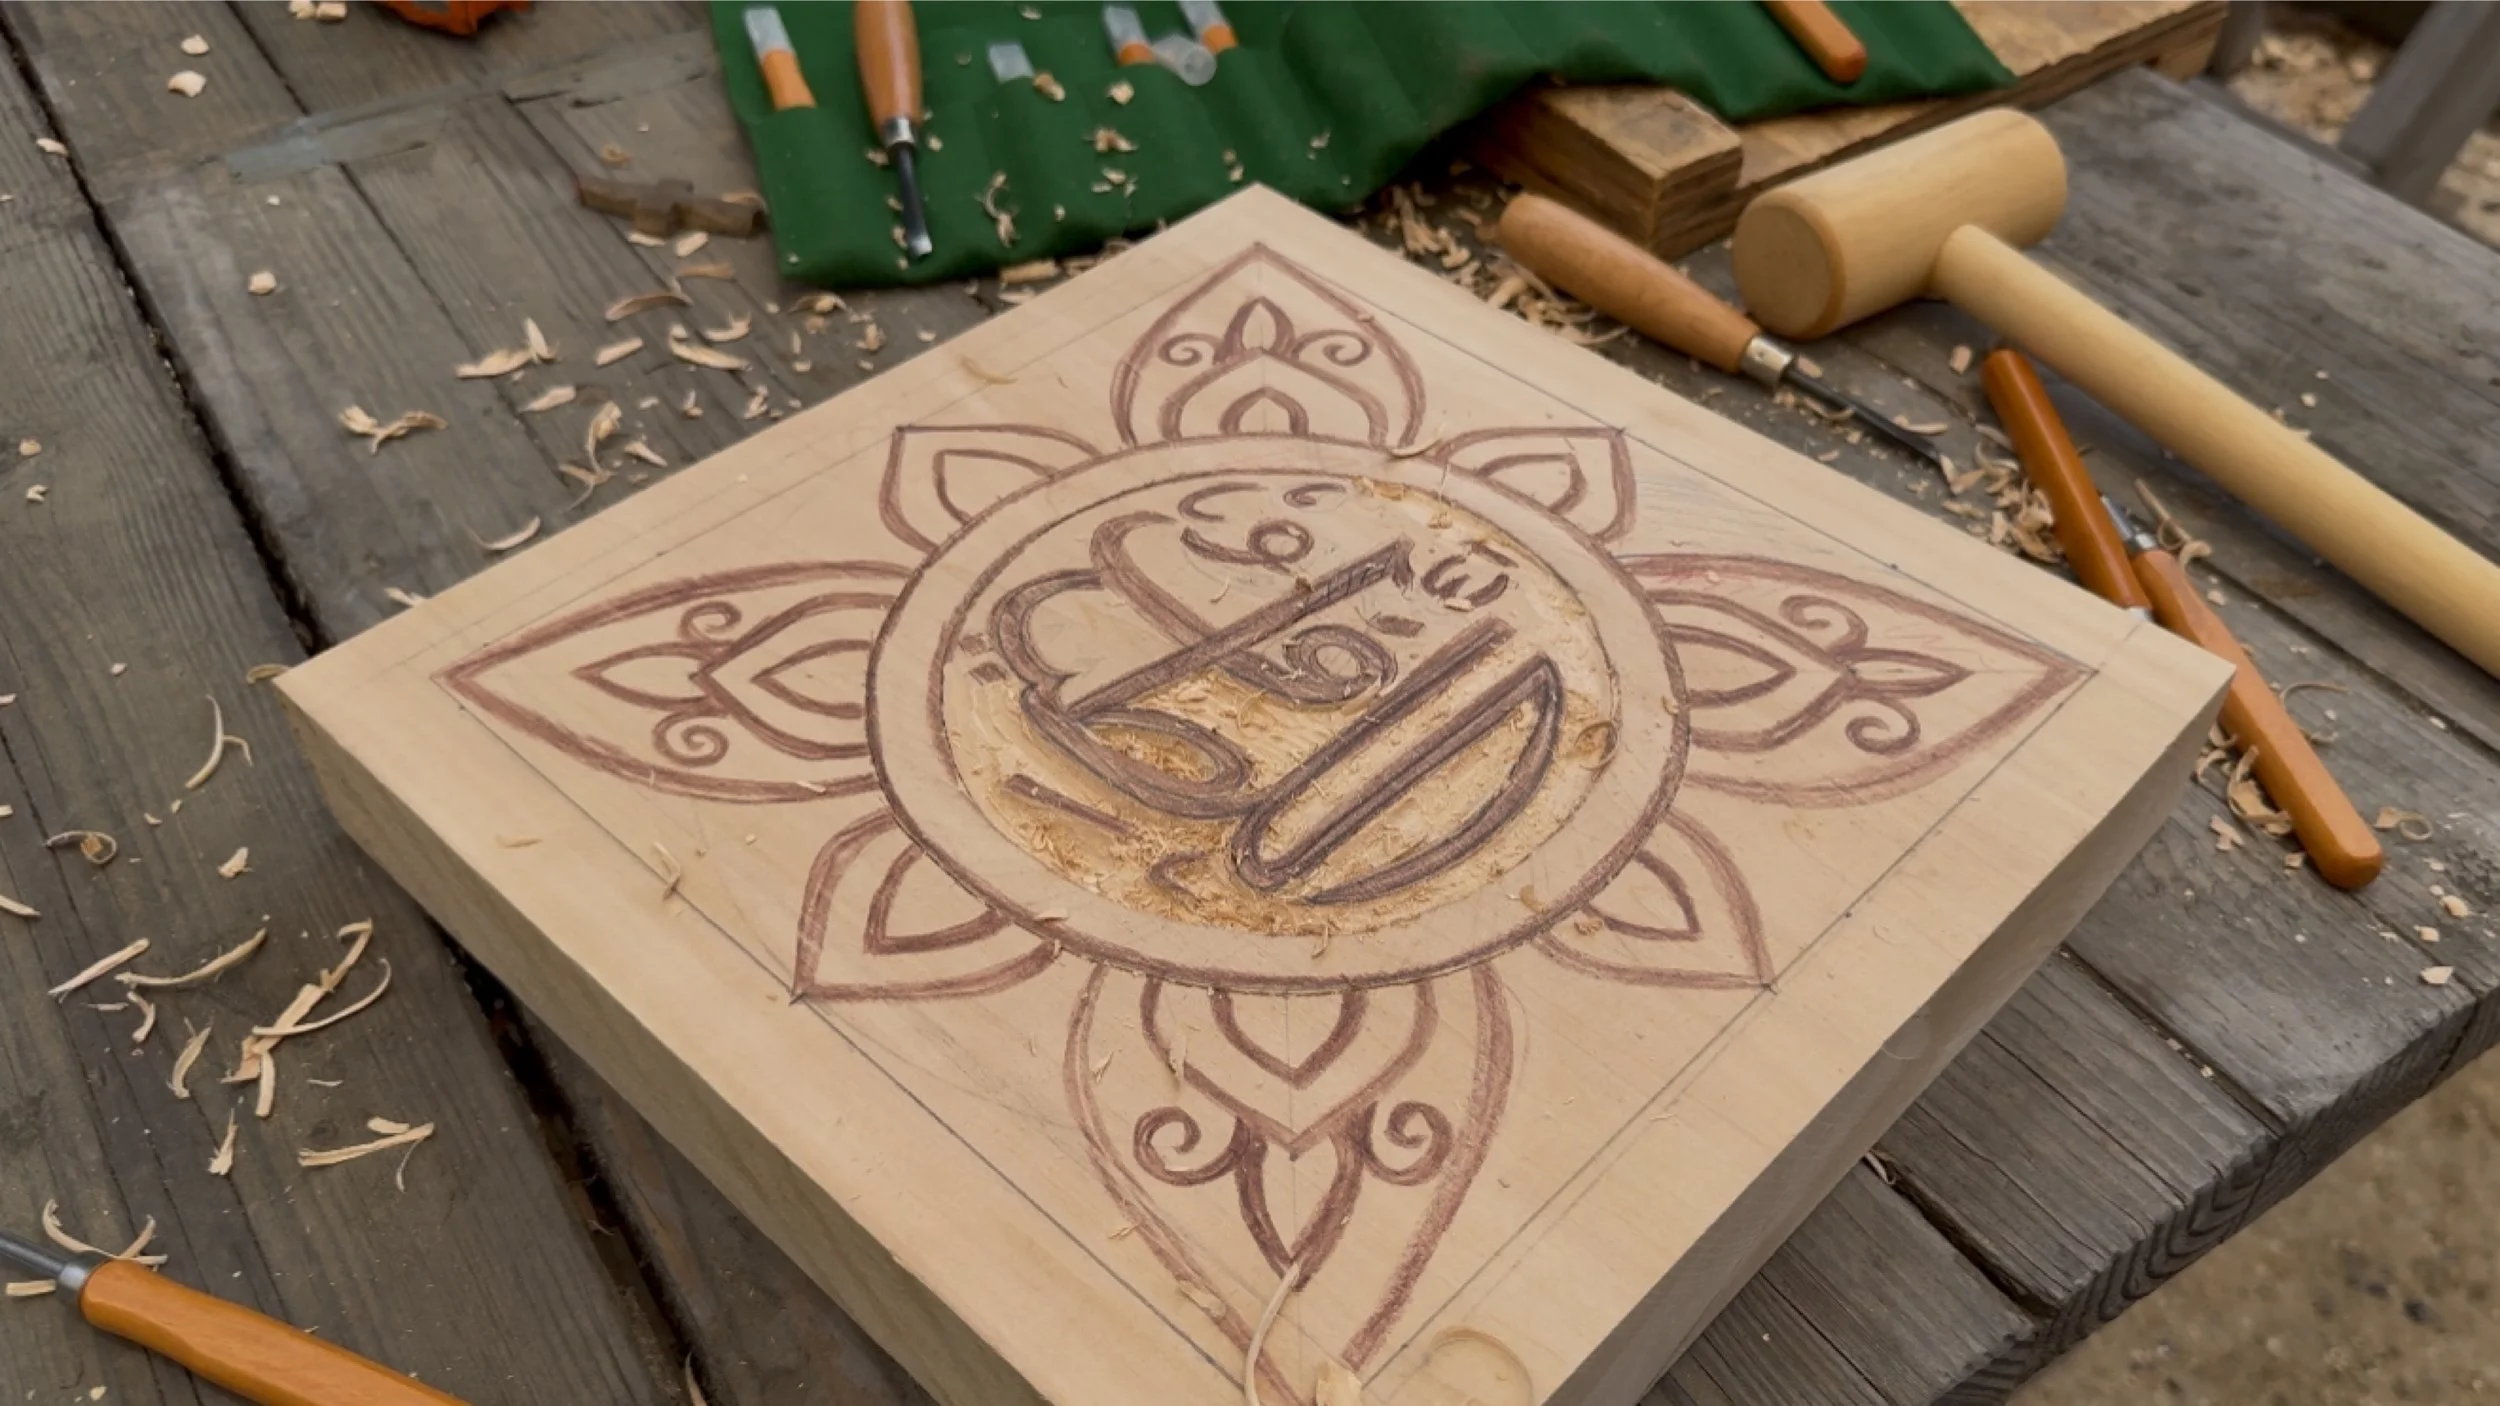
Wood Carving
Wood carving teaches students to shape living material into purposeful or symbolic forms using strength, sensitivity, and precision. The practice fosters willpower, spatial awareness, and reverence for nature.
-

Copper Ladle
Crafting a copper ladle challenges students to create a durable, functional tool through metal shaping, forming, and joining techniques. It integrates beauty and utility while developing craftsmanship and perseverance.
-
Book Binding
Students handcraft a book by folding, sewing, gluing, and binding pages with care and precision. This quiet, focused work supports attention to detail and gives students a lasting, personalized creation.
-

Block Printing
Block printing involves carving images into linoleum or wood and transferring them onto paper or fabric using ink. It enhances spatial thinking, design skills, and appreciation for traditional printing techniques.
-
Brass Bowl
Shaping a brass bowl requires strength and refined skill due to the hardness of the metal. This project develops discipline, rhythm, and an eye for symmetry and proportion.
-

Leather Journal
In making a leather journal, students cut, stitch, and assemble natural materials into a functional and beautiful writing tool. This process supports fine motor skills, creativity, and meaningful self-expression.
-
Notebook
Students design and construct a custom notebook, choosing materials and layout to suit a personal or academic purpose. This project merges artistic expression with utility, inviting pride in one’s work.
-
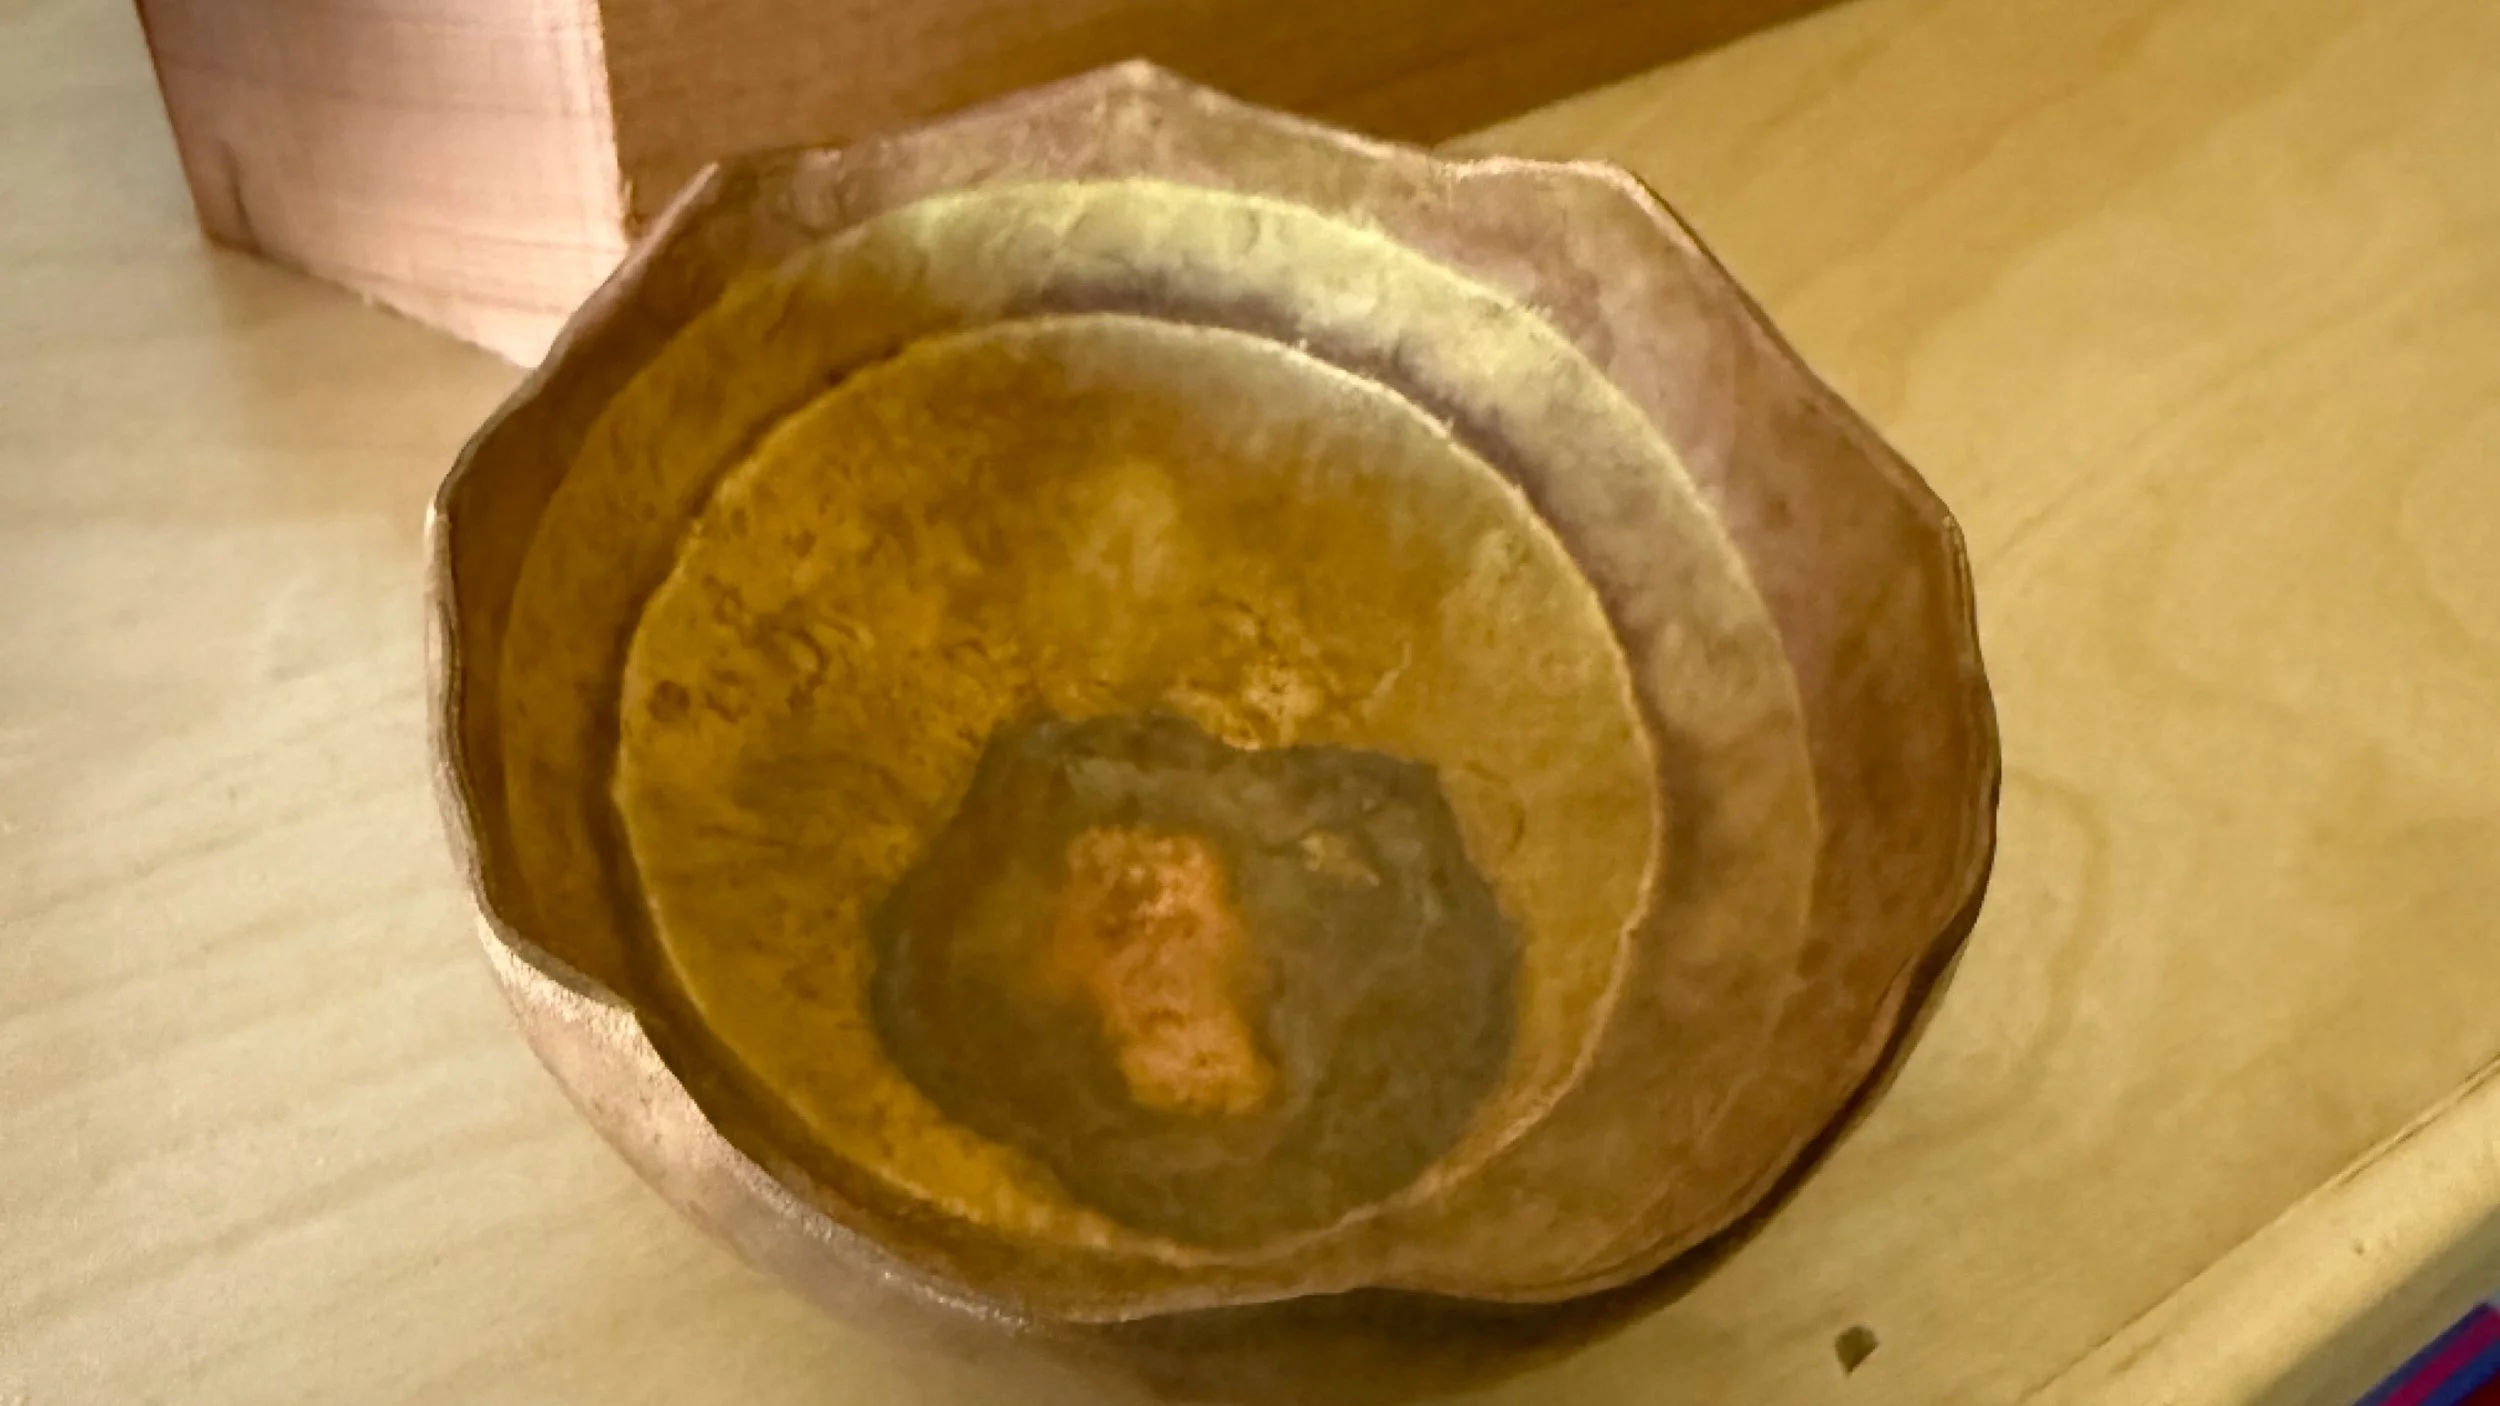
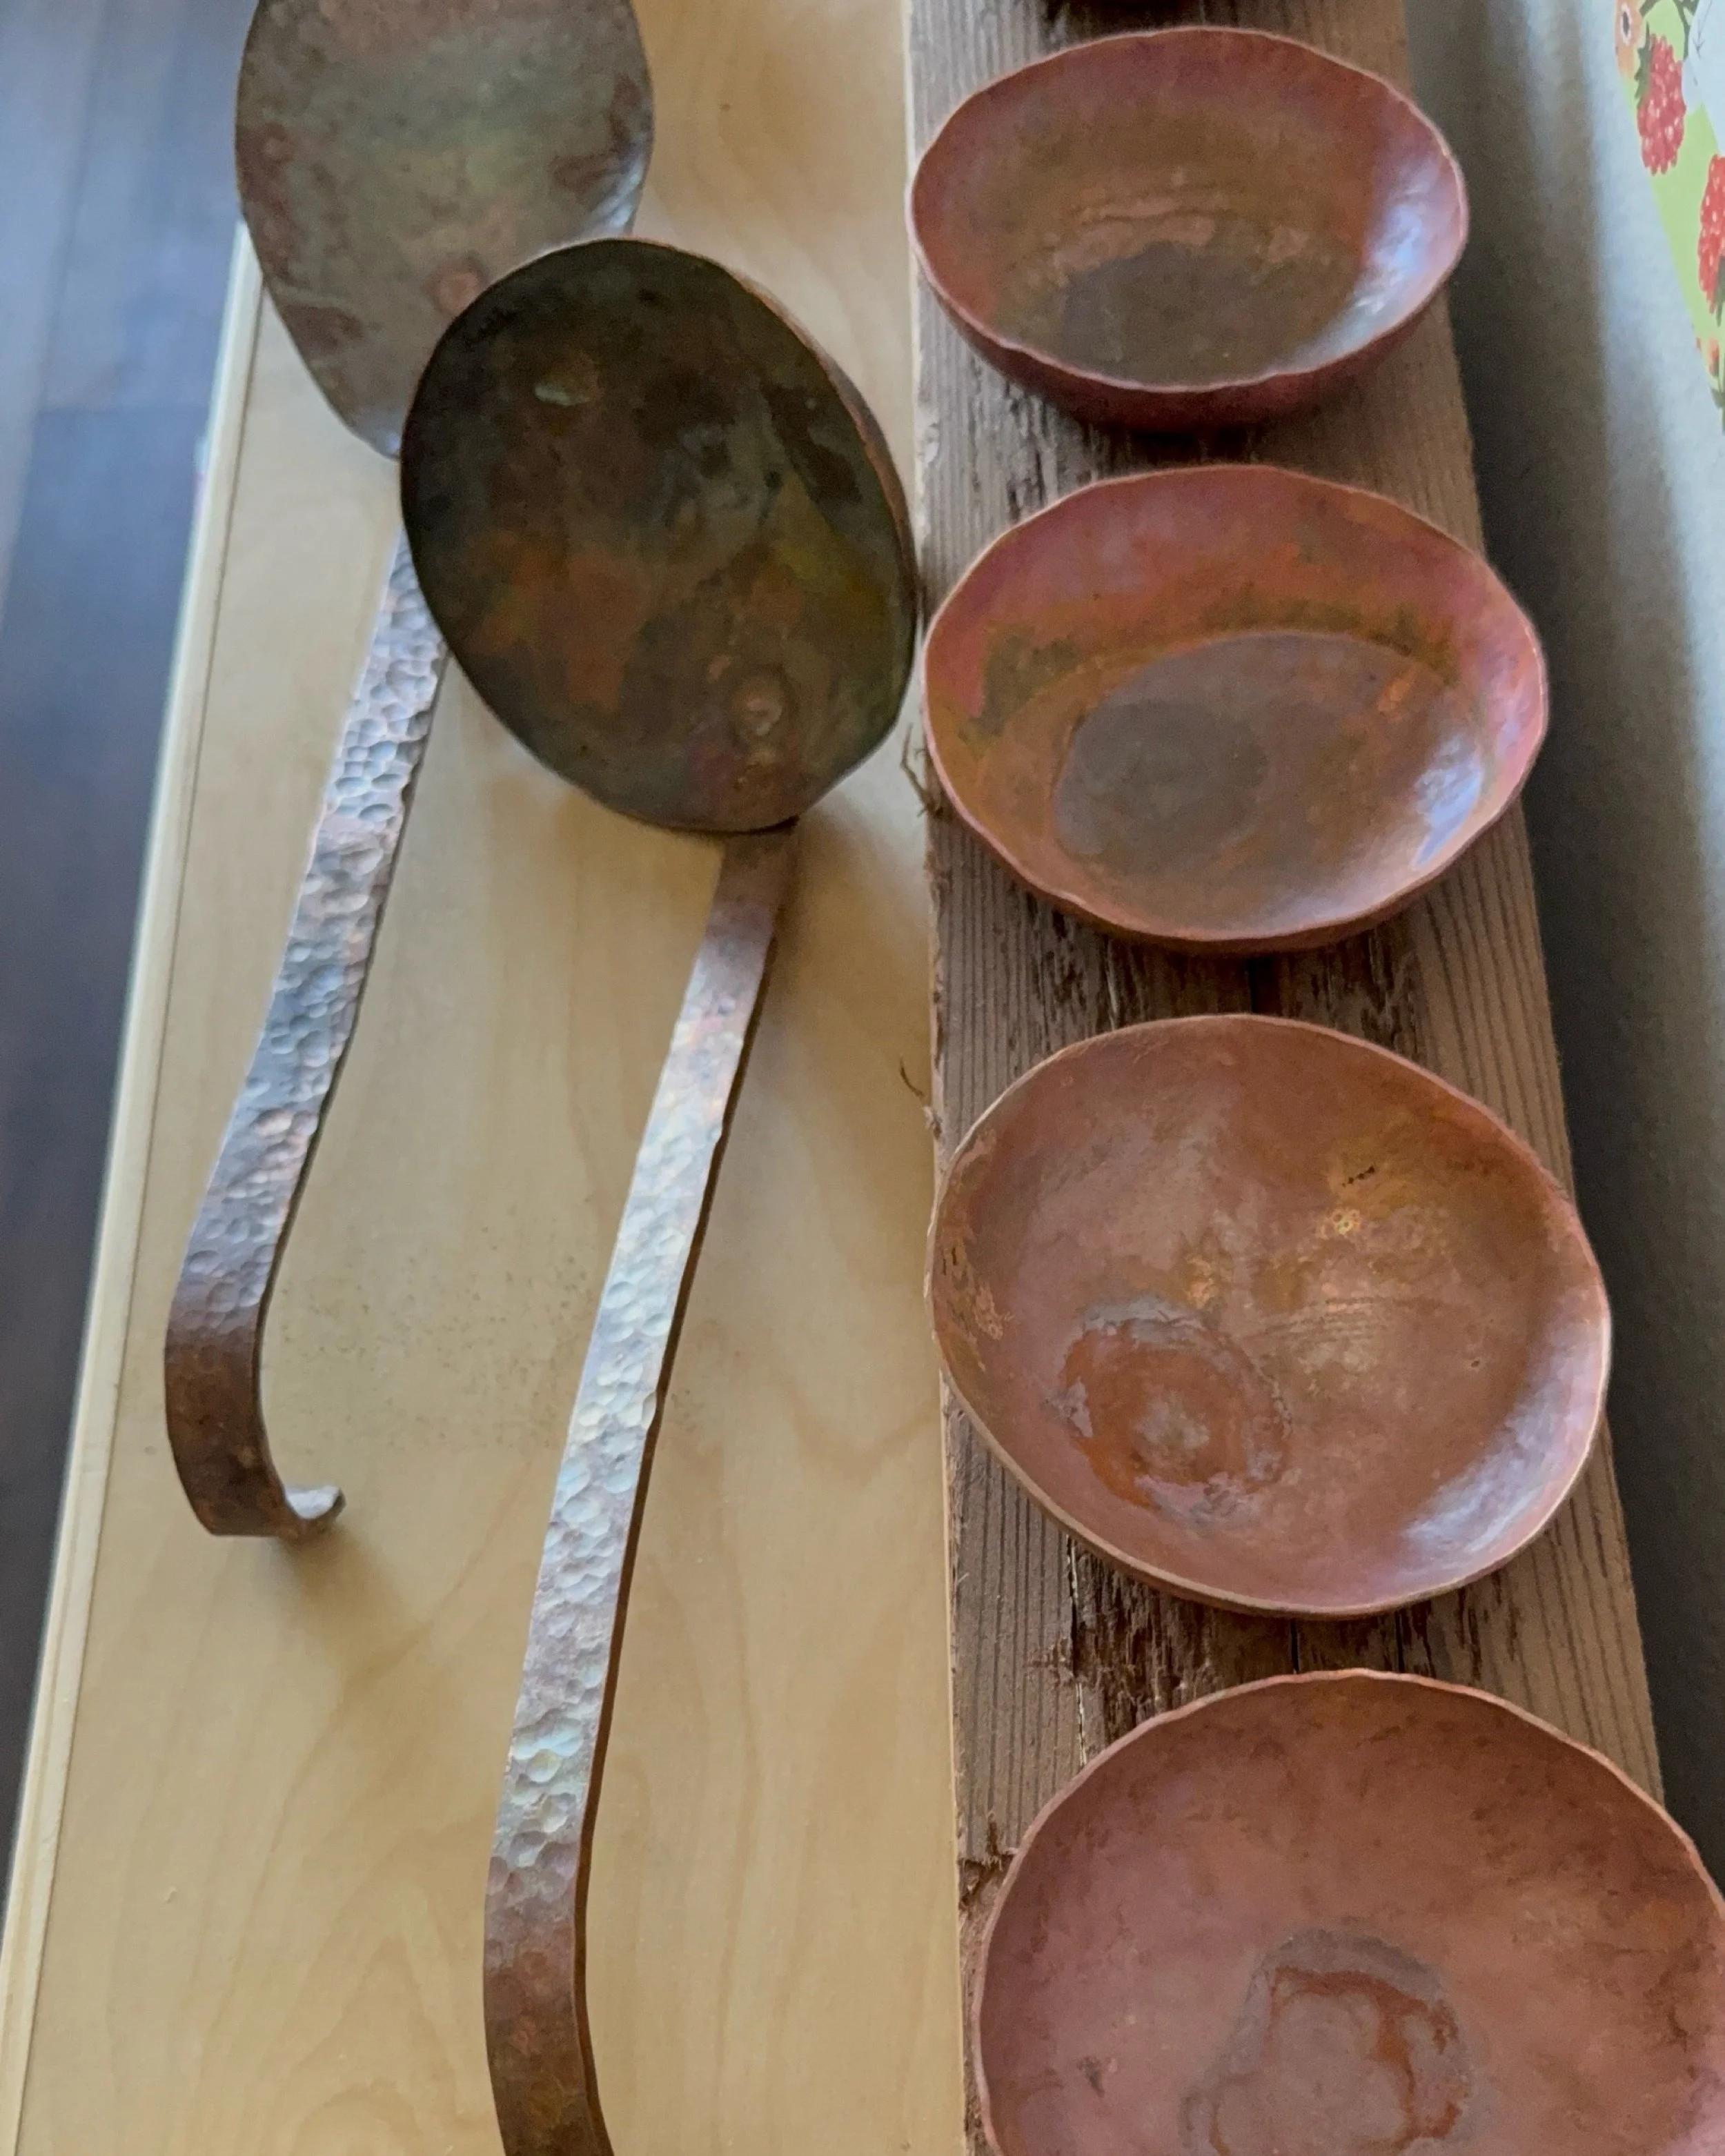
Mini Copper Bowls
Once you master the assigned project of making a copper bowl to the specification of the teacher, you are free to try your own projects.
Copper Bowl
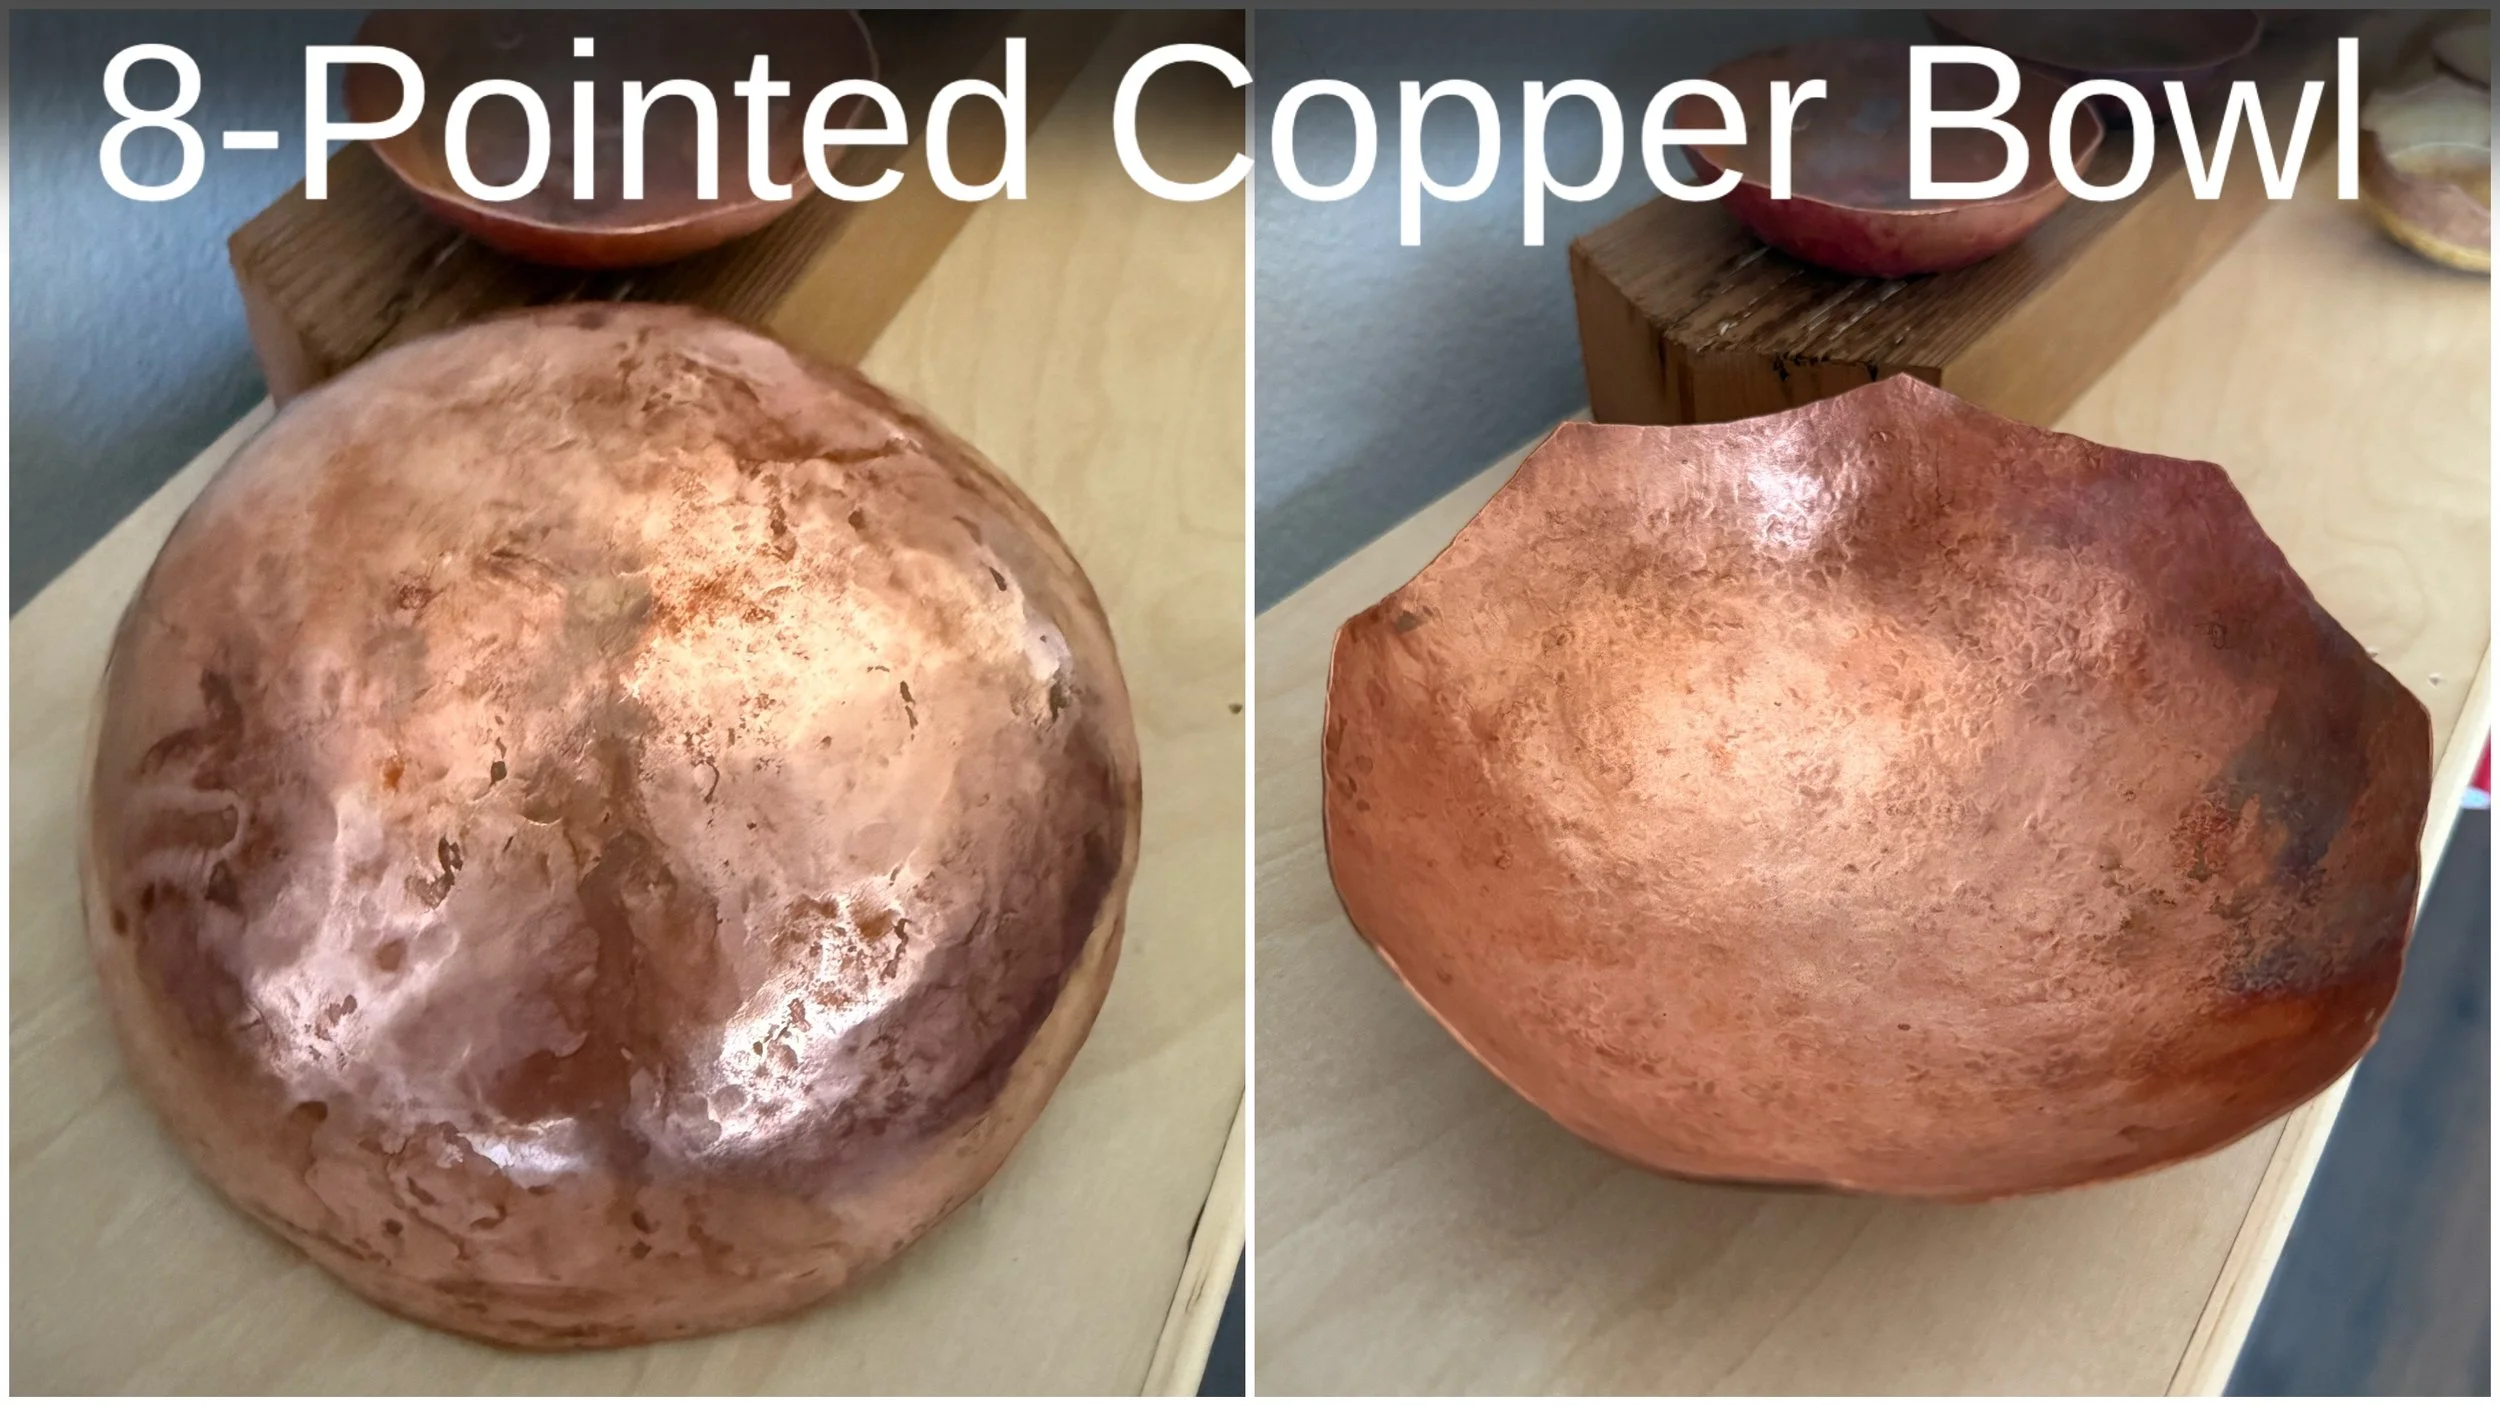
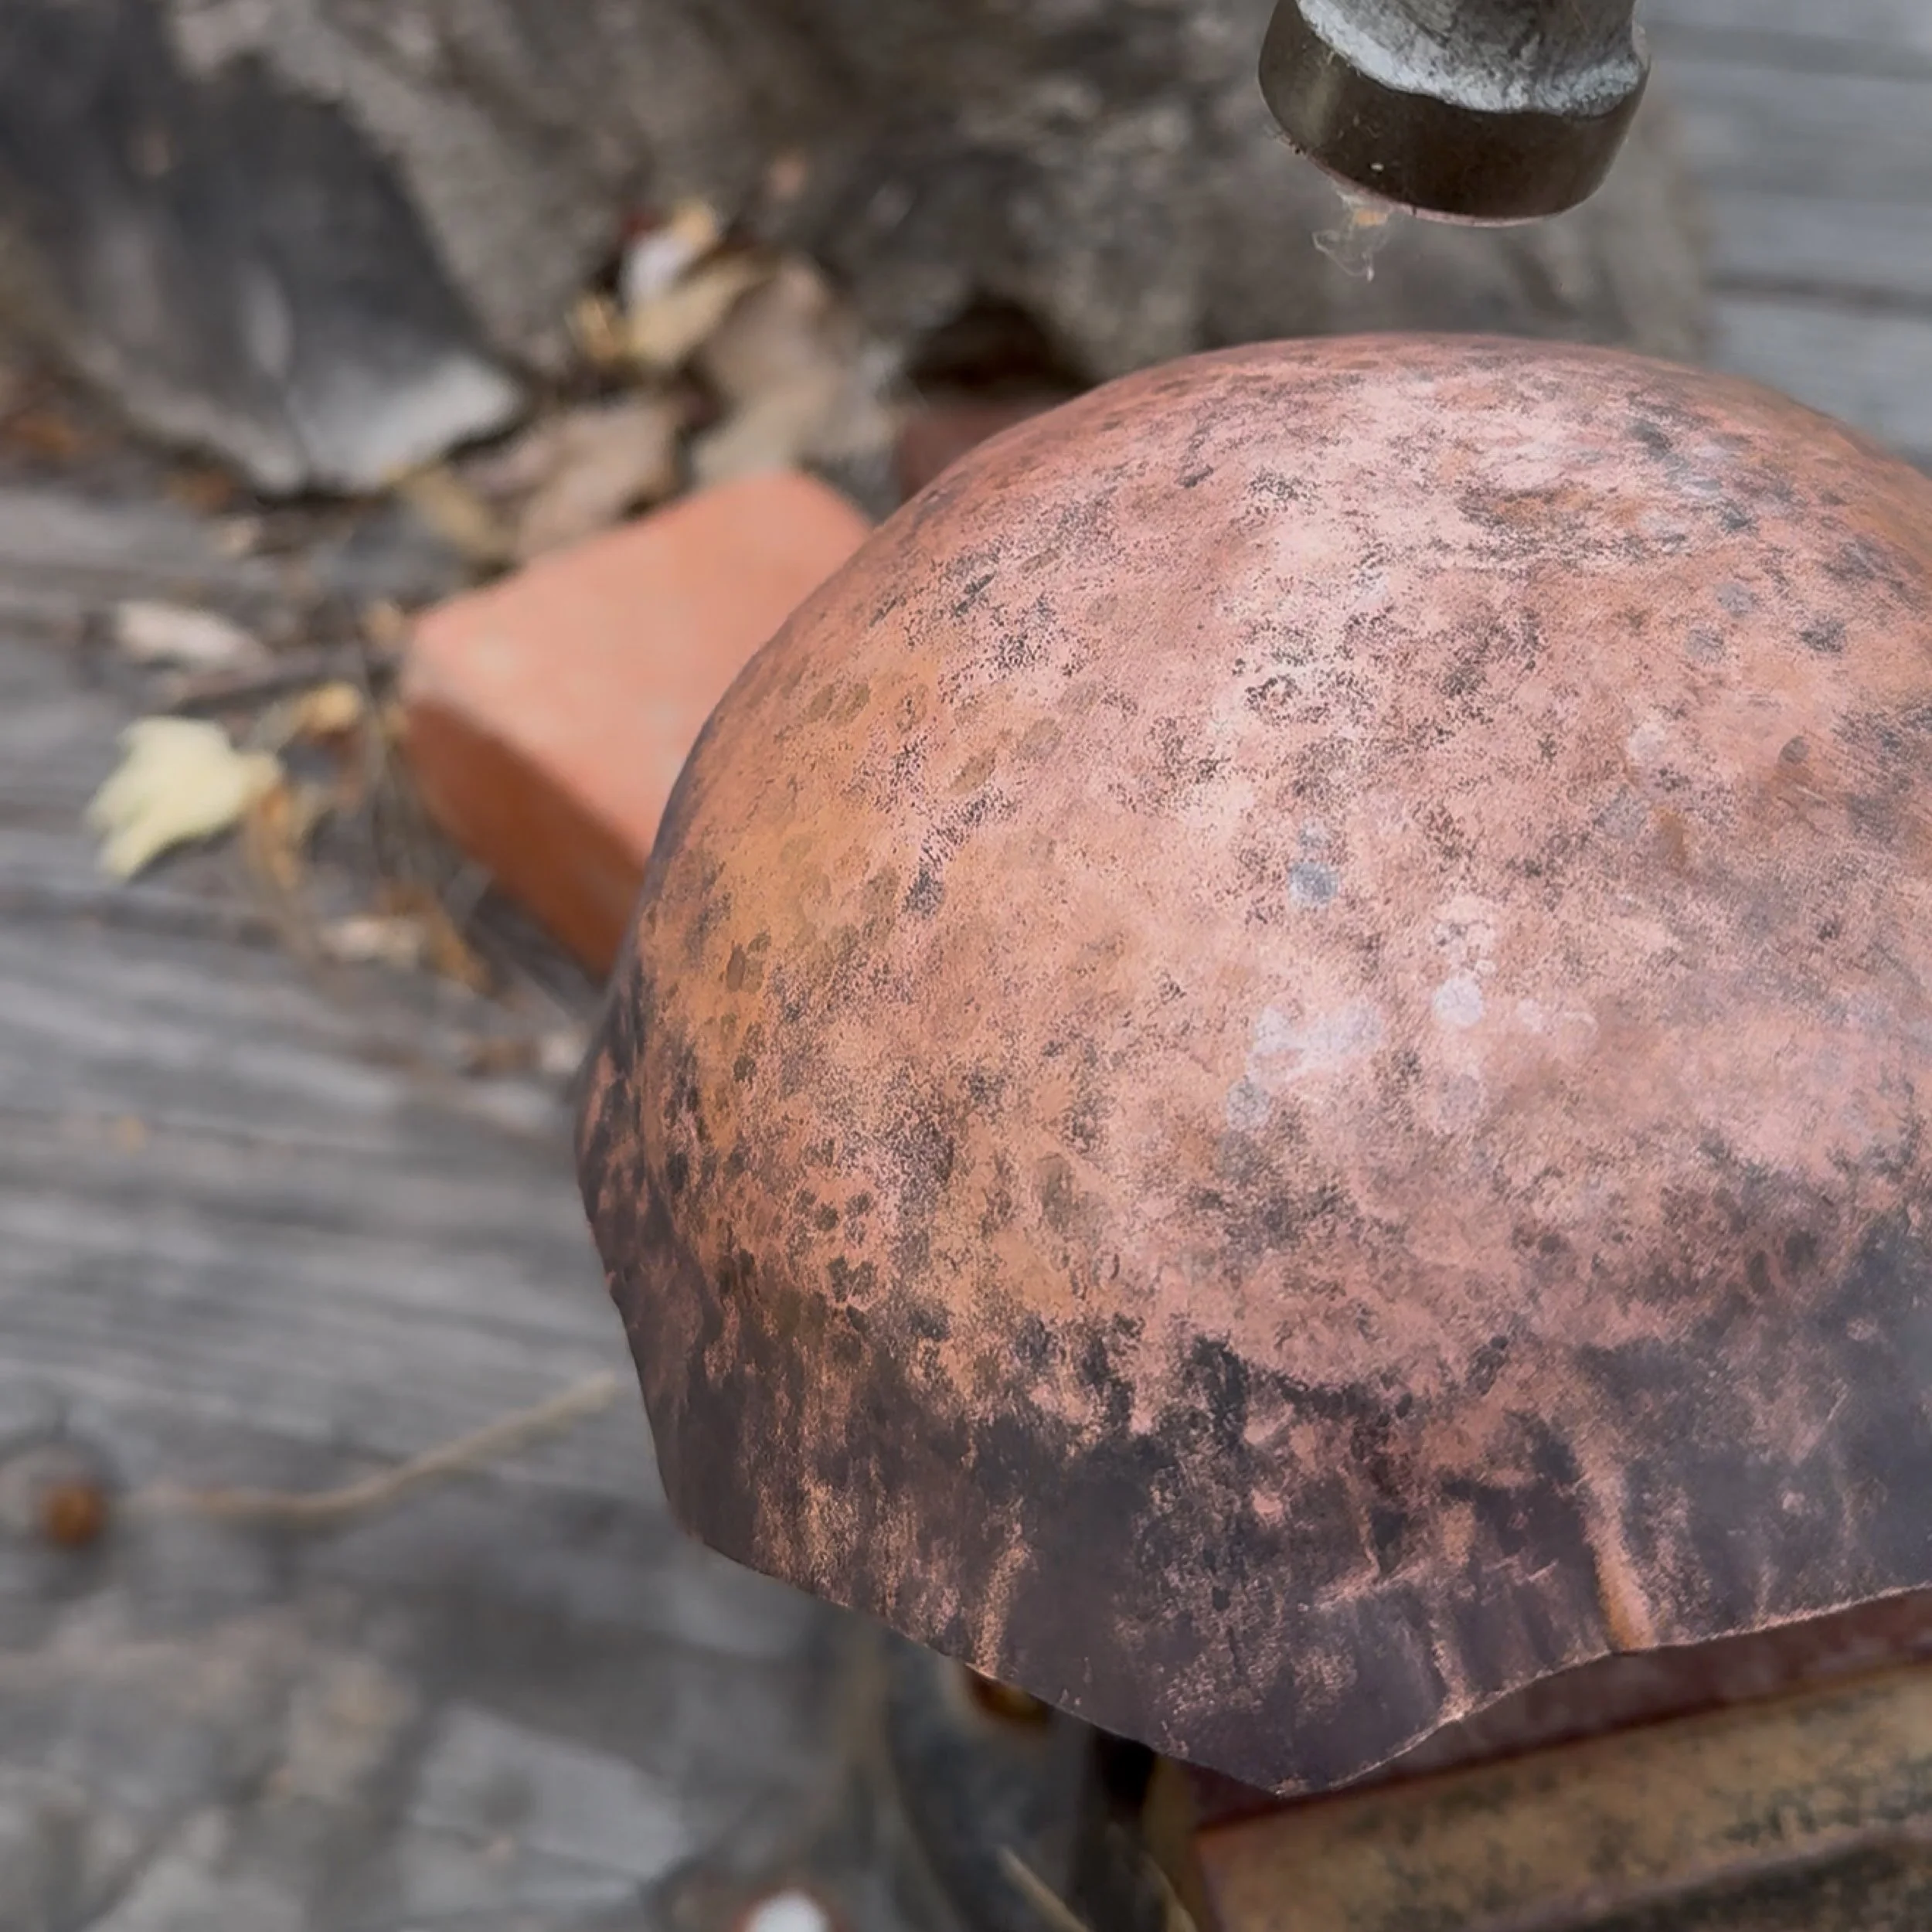
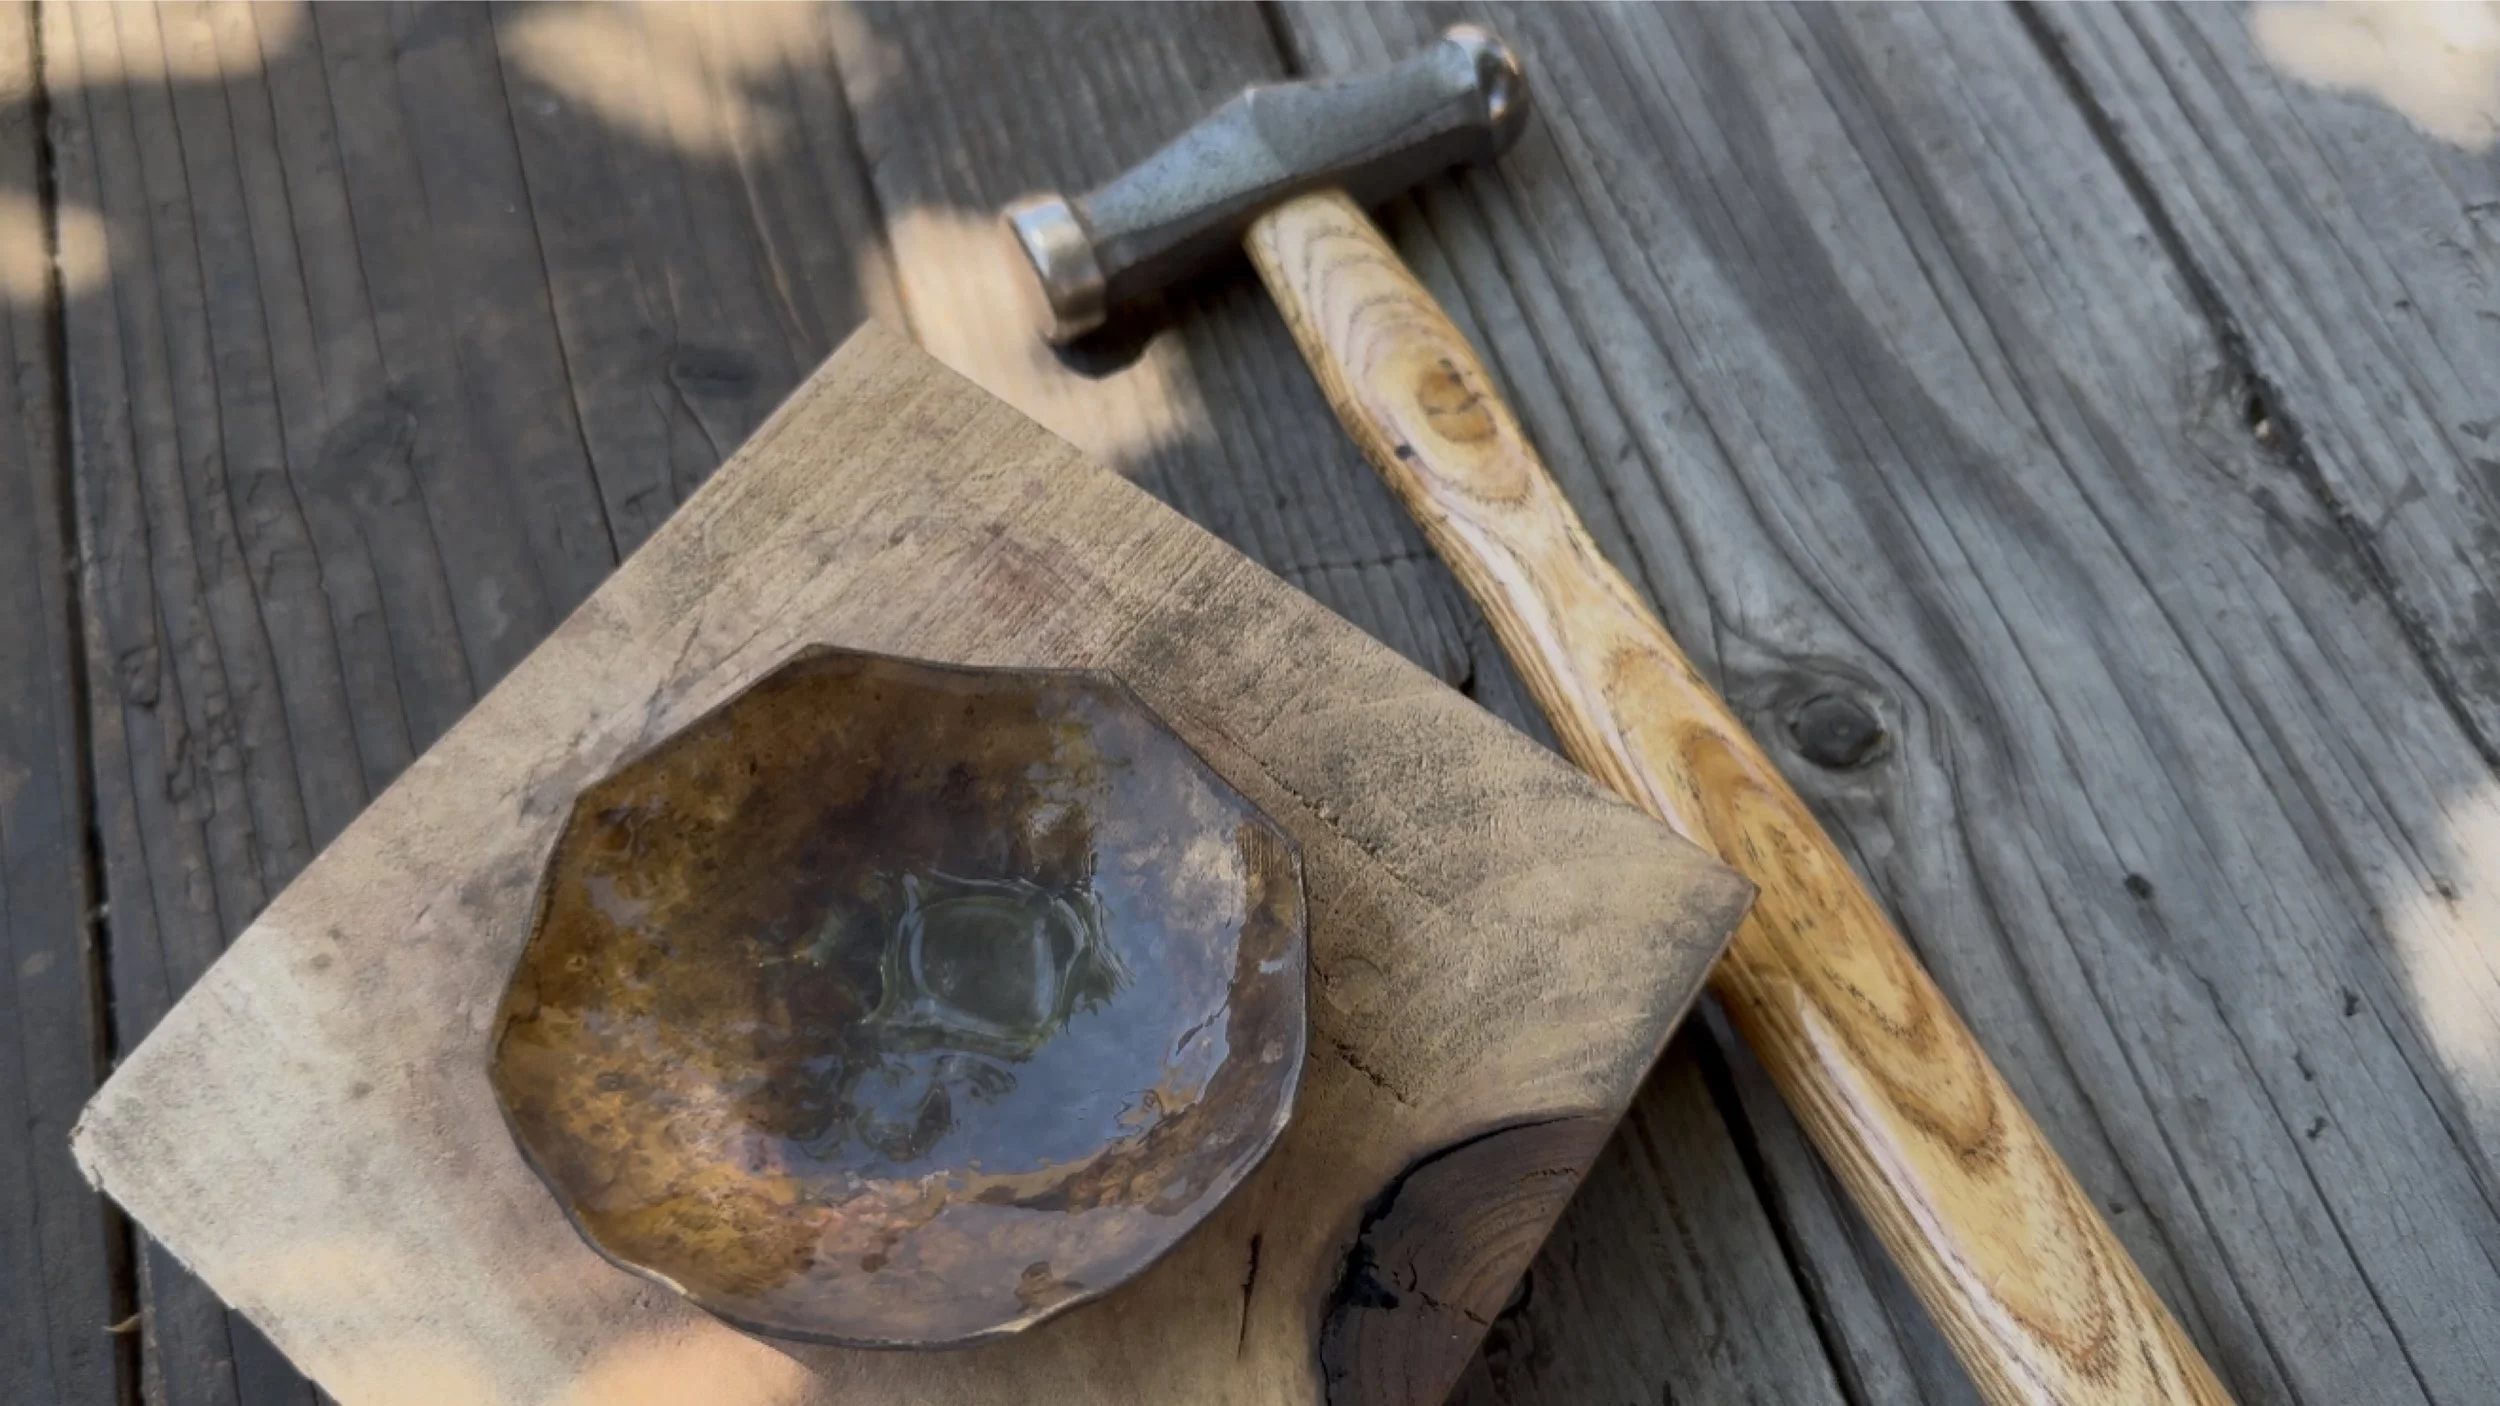
In Waldorf high school handwork, making a copper bowl is a transformative project that engages the student’s will, patience, and sense of beauty through a tactile and artistic process. Pounding flat copper into shape supports the adolescent’s need for meaningful, purposeful work by guiding them through the ancient art of metalworking. Students begin with a flat sheet of copper and, using a hammer, hollowed wood block and anvil, slowly shape the metal through rhythmic, meditative strikes, annealing it periodically to soften the material and allow it to be worked further. This process not only develops fine motor skills and hand–eye coordination but also cultivates inner focus, perseverance, and reverence for the craft. The finished bowl becomes a tangible expression of transformation—raw material shaped into a harmonious, functional form—mirroring the student’s own inner development during the high school years.
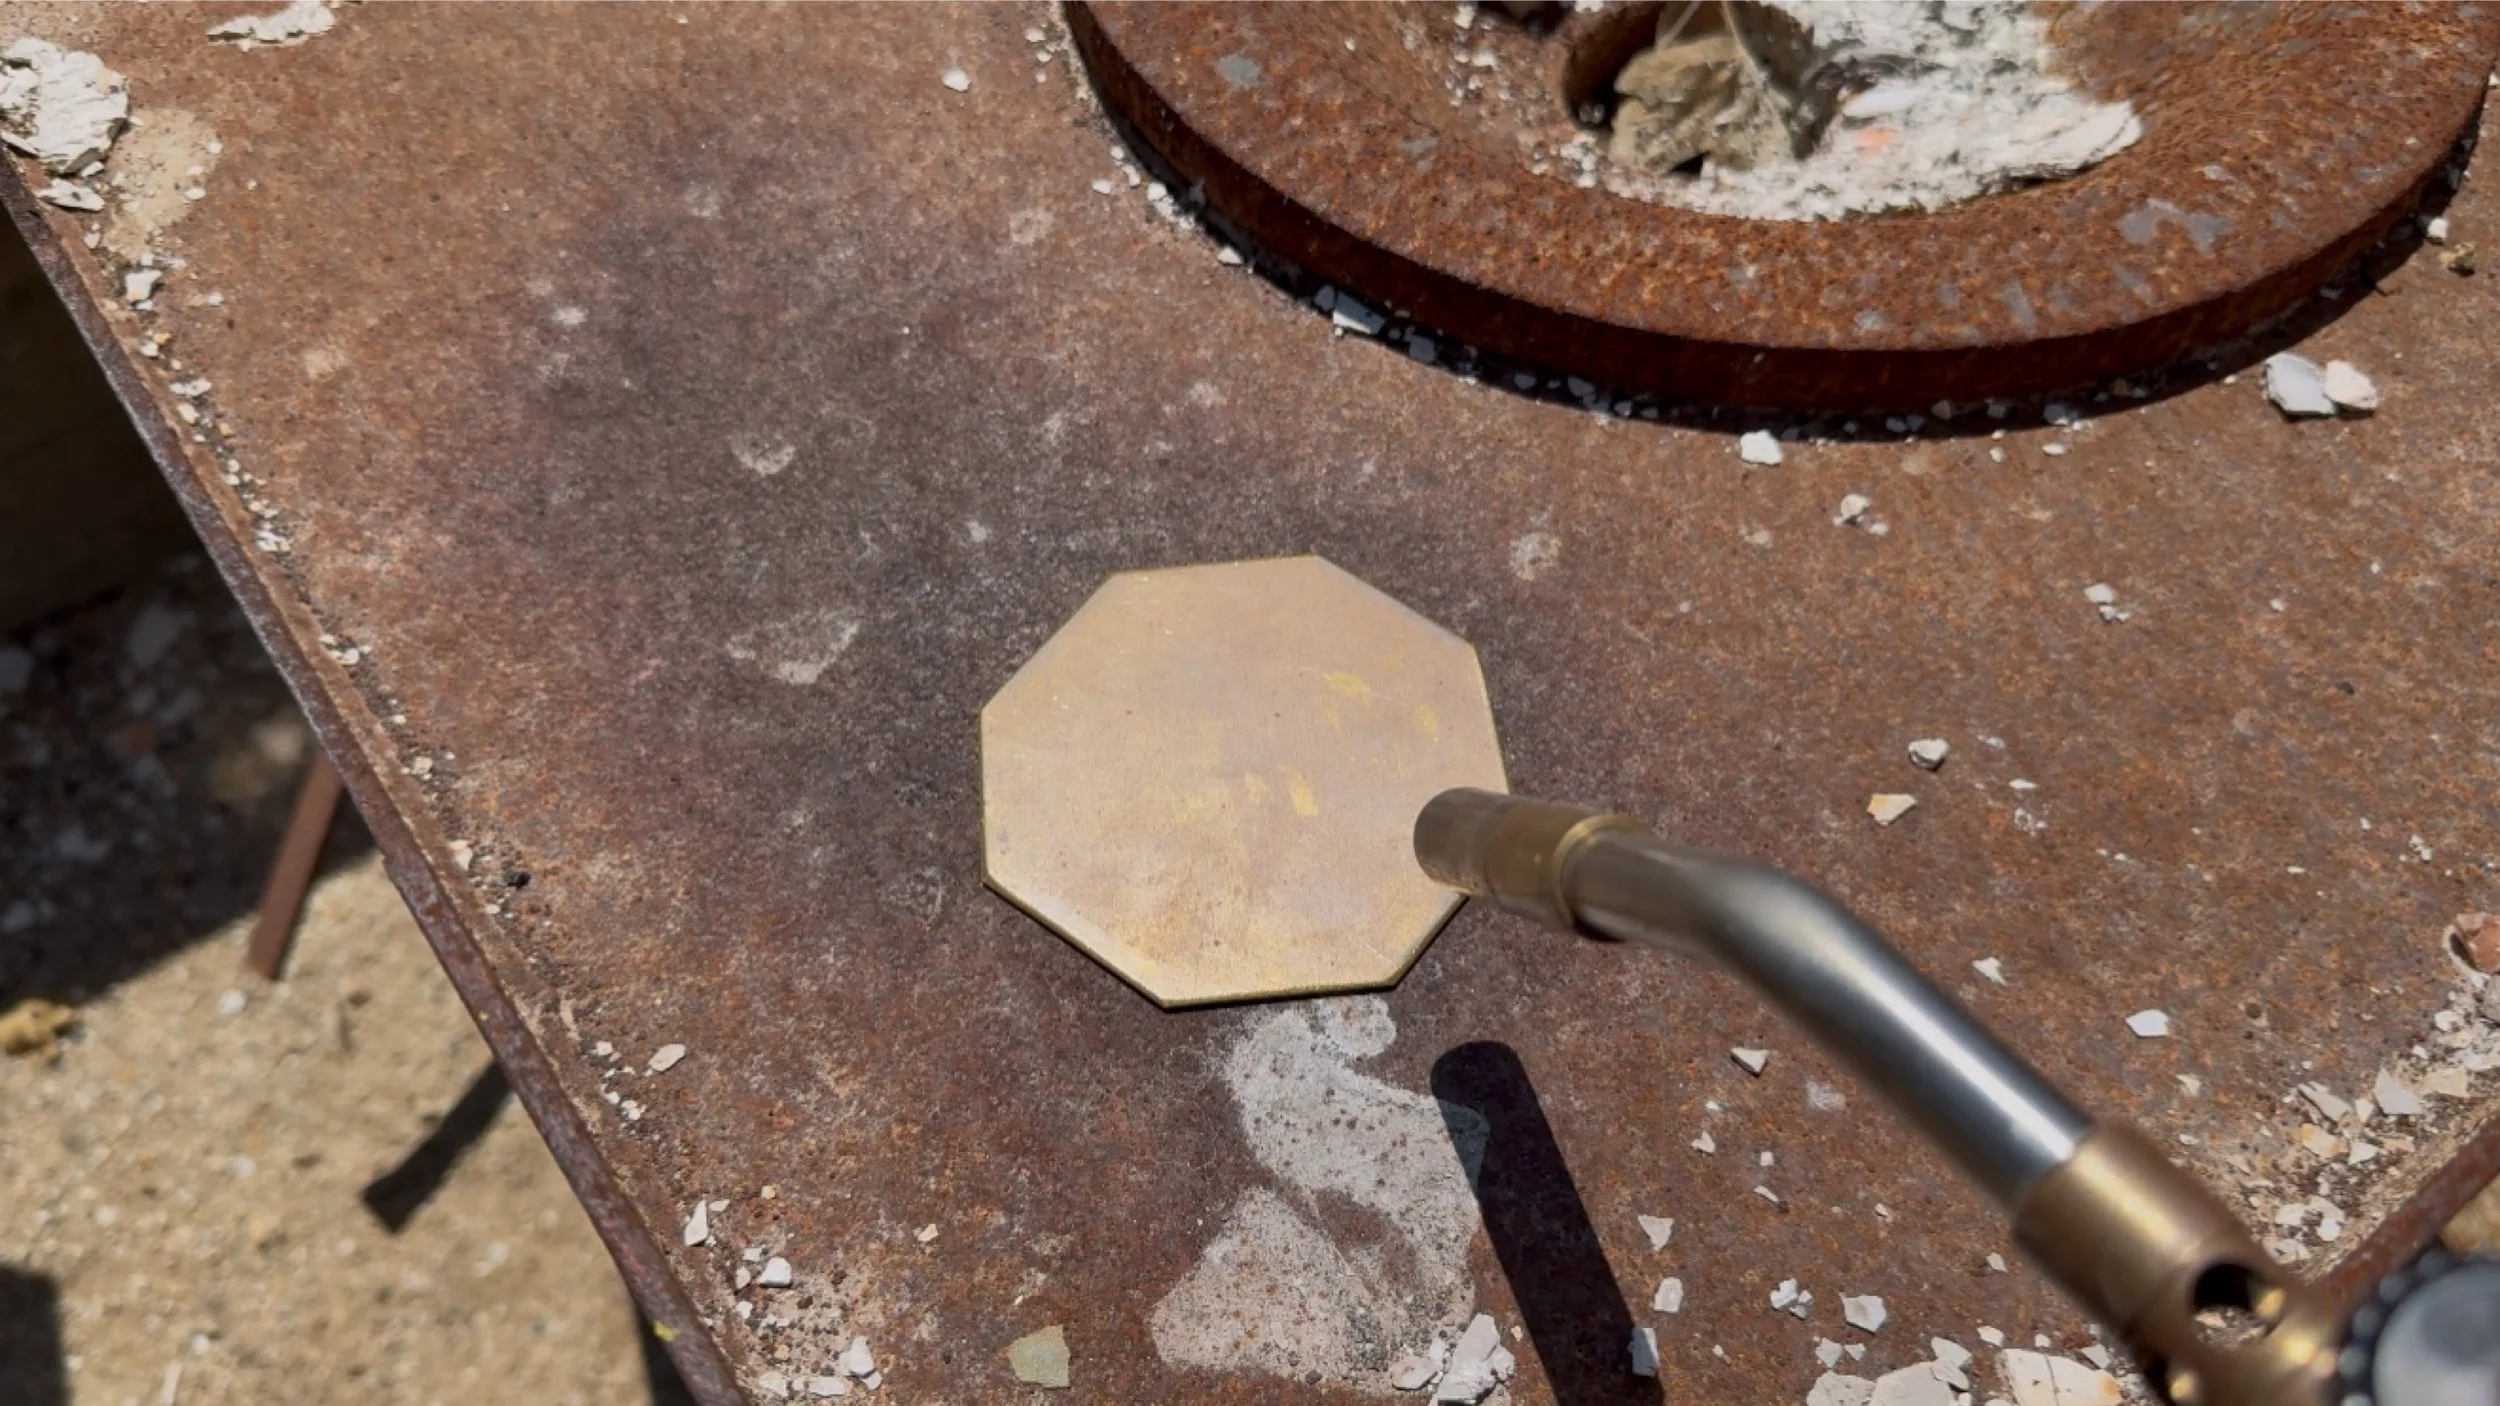
During my Waldorf practical arts training, we worked on making a copper bowl. This activity is one. The high school students would be doing in a Waldorf school. Hard crafts are reserved for the later years, starting with wood and then moving into the metals. We started with a flat piece of copper And using a bit of geometry, inscribed an octagon into our copper. We then used tools to cut and file the copper. Then it was time to shape the copper. Heating the copper to make it easier to work with is called annealing. Unlike iron, annealing brass and copper are easier because we do not need to work with it while it is hot, we can cool it down in a bucket of water. Once the copper is ready to shape, we used a special rounded hammer to begin to shape the copper from the edges inward. Some students began by hollowing out wood blocks to form a small semi circle. We are not pressing the copper into the semi circle of the wood, we are using it to help shape the flat copper into a round bowl. Working with an octagon piece of metal was challenging because the edges wanted to fold in and we needed the copper to be flat while we created the bowl. periodically, we would heat up the copper using a board torch when we noticed the copper was not yielding to our hammers as easily. Once we got the general shape of our bowl and you were happy with the way that it looked, we could begin smoothing out our bowl by placing it upside down on a solid iron wall. Once everything was nice and smooth, we put it in an acid bath. I found that the acid bath didn’t work as well as placing it overnight in a vinegar bath. But in the end, I didn’t like the shiny copper look, I preferred a patina. I tried to re-create the patina with my smaller bowls, but I’m not sure it will stay like that once they get used.
Wood Carving
In the Waldorf high school, wood carving is introduced as a way to bring form out of natural material through intentional, skillful effort. Students begin with simple shapes and gradually move toward more refined and symbolic forms, such as animals, utensils, or abstract designs. The process nurtures patience and reverence for the living material, teaching students to observe grain, texture, and resistance. Carving demands both strength and sensitivity, helping adolescents develop willpower, spatial awareness, and the ability to bring inner images into tangible reality through their hands.
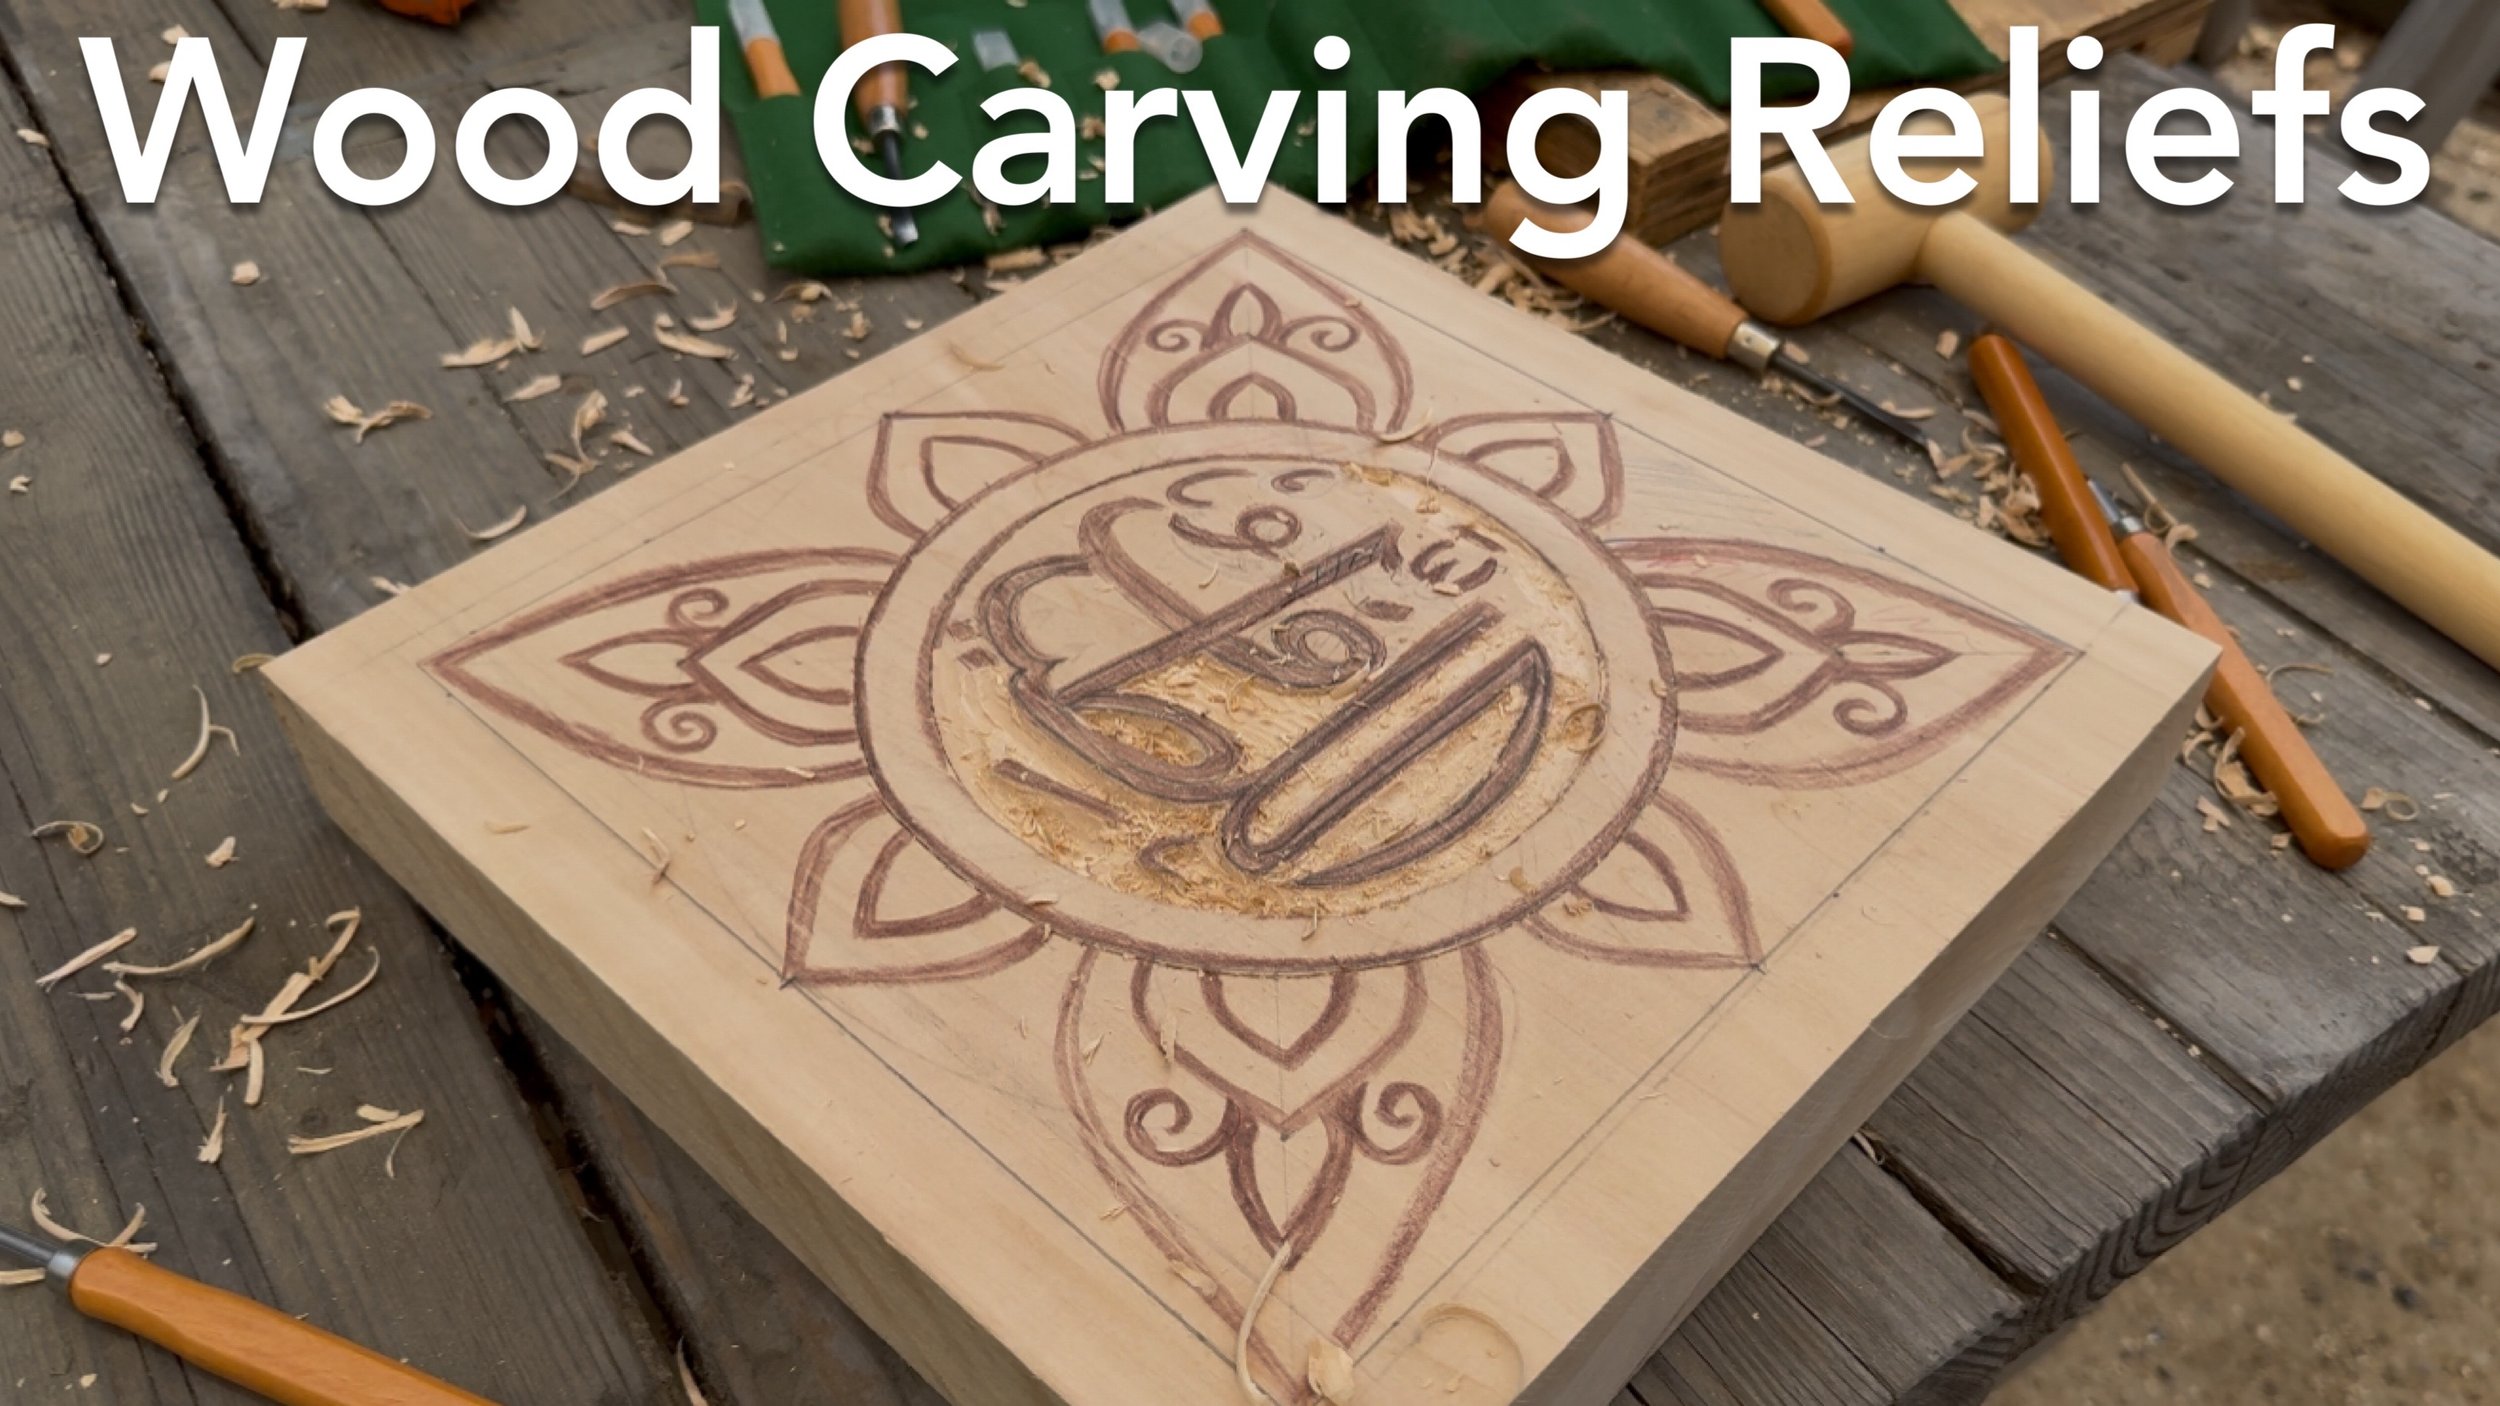
During our recent Waldorf practical art training, module seven, we did wood carving and block printing. When doing block printing, you have to remember to make your design inverted if they’re going to be letters and writing. If you are carving animals or geometric patterns, then you can do a block print at the beginning and then continue to carve your design. Because this design had lettering, they could only end up being a wood carving. I wanted to avoid carving animals, so I opted for something that was geometric and religiously significant. However, because of the delicate work of adding the lettering, some of the marks broke off as I was carving around the letters. I was writing in one of the 99 names of Allah. This is al Latif. At this point, I won’t be able to finish the project the way that it was intended because the markings of the letters have been broken off. So I began to work on the backside of this wood block with a geometric design. This word is Basswood and it is suitable for carving. I used to block approximately 12 in.².
Copper Ladle
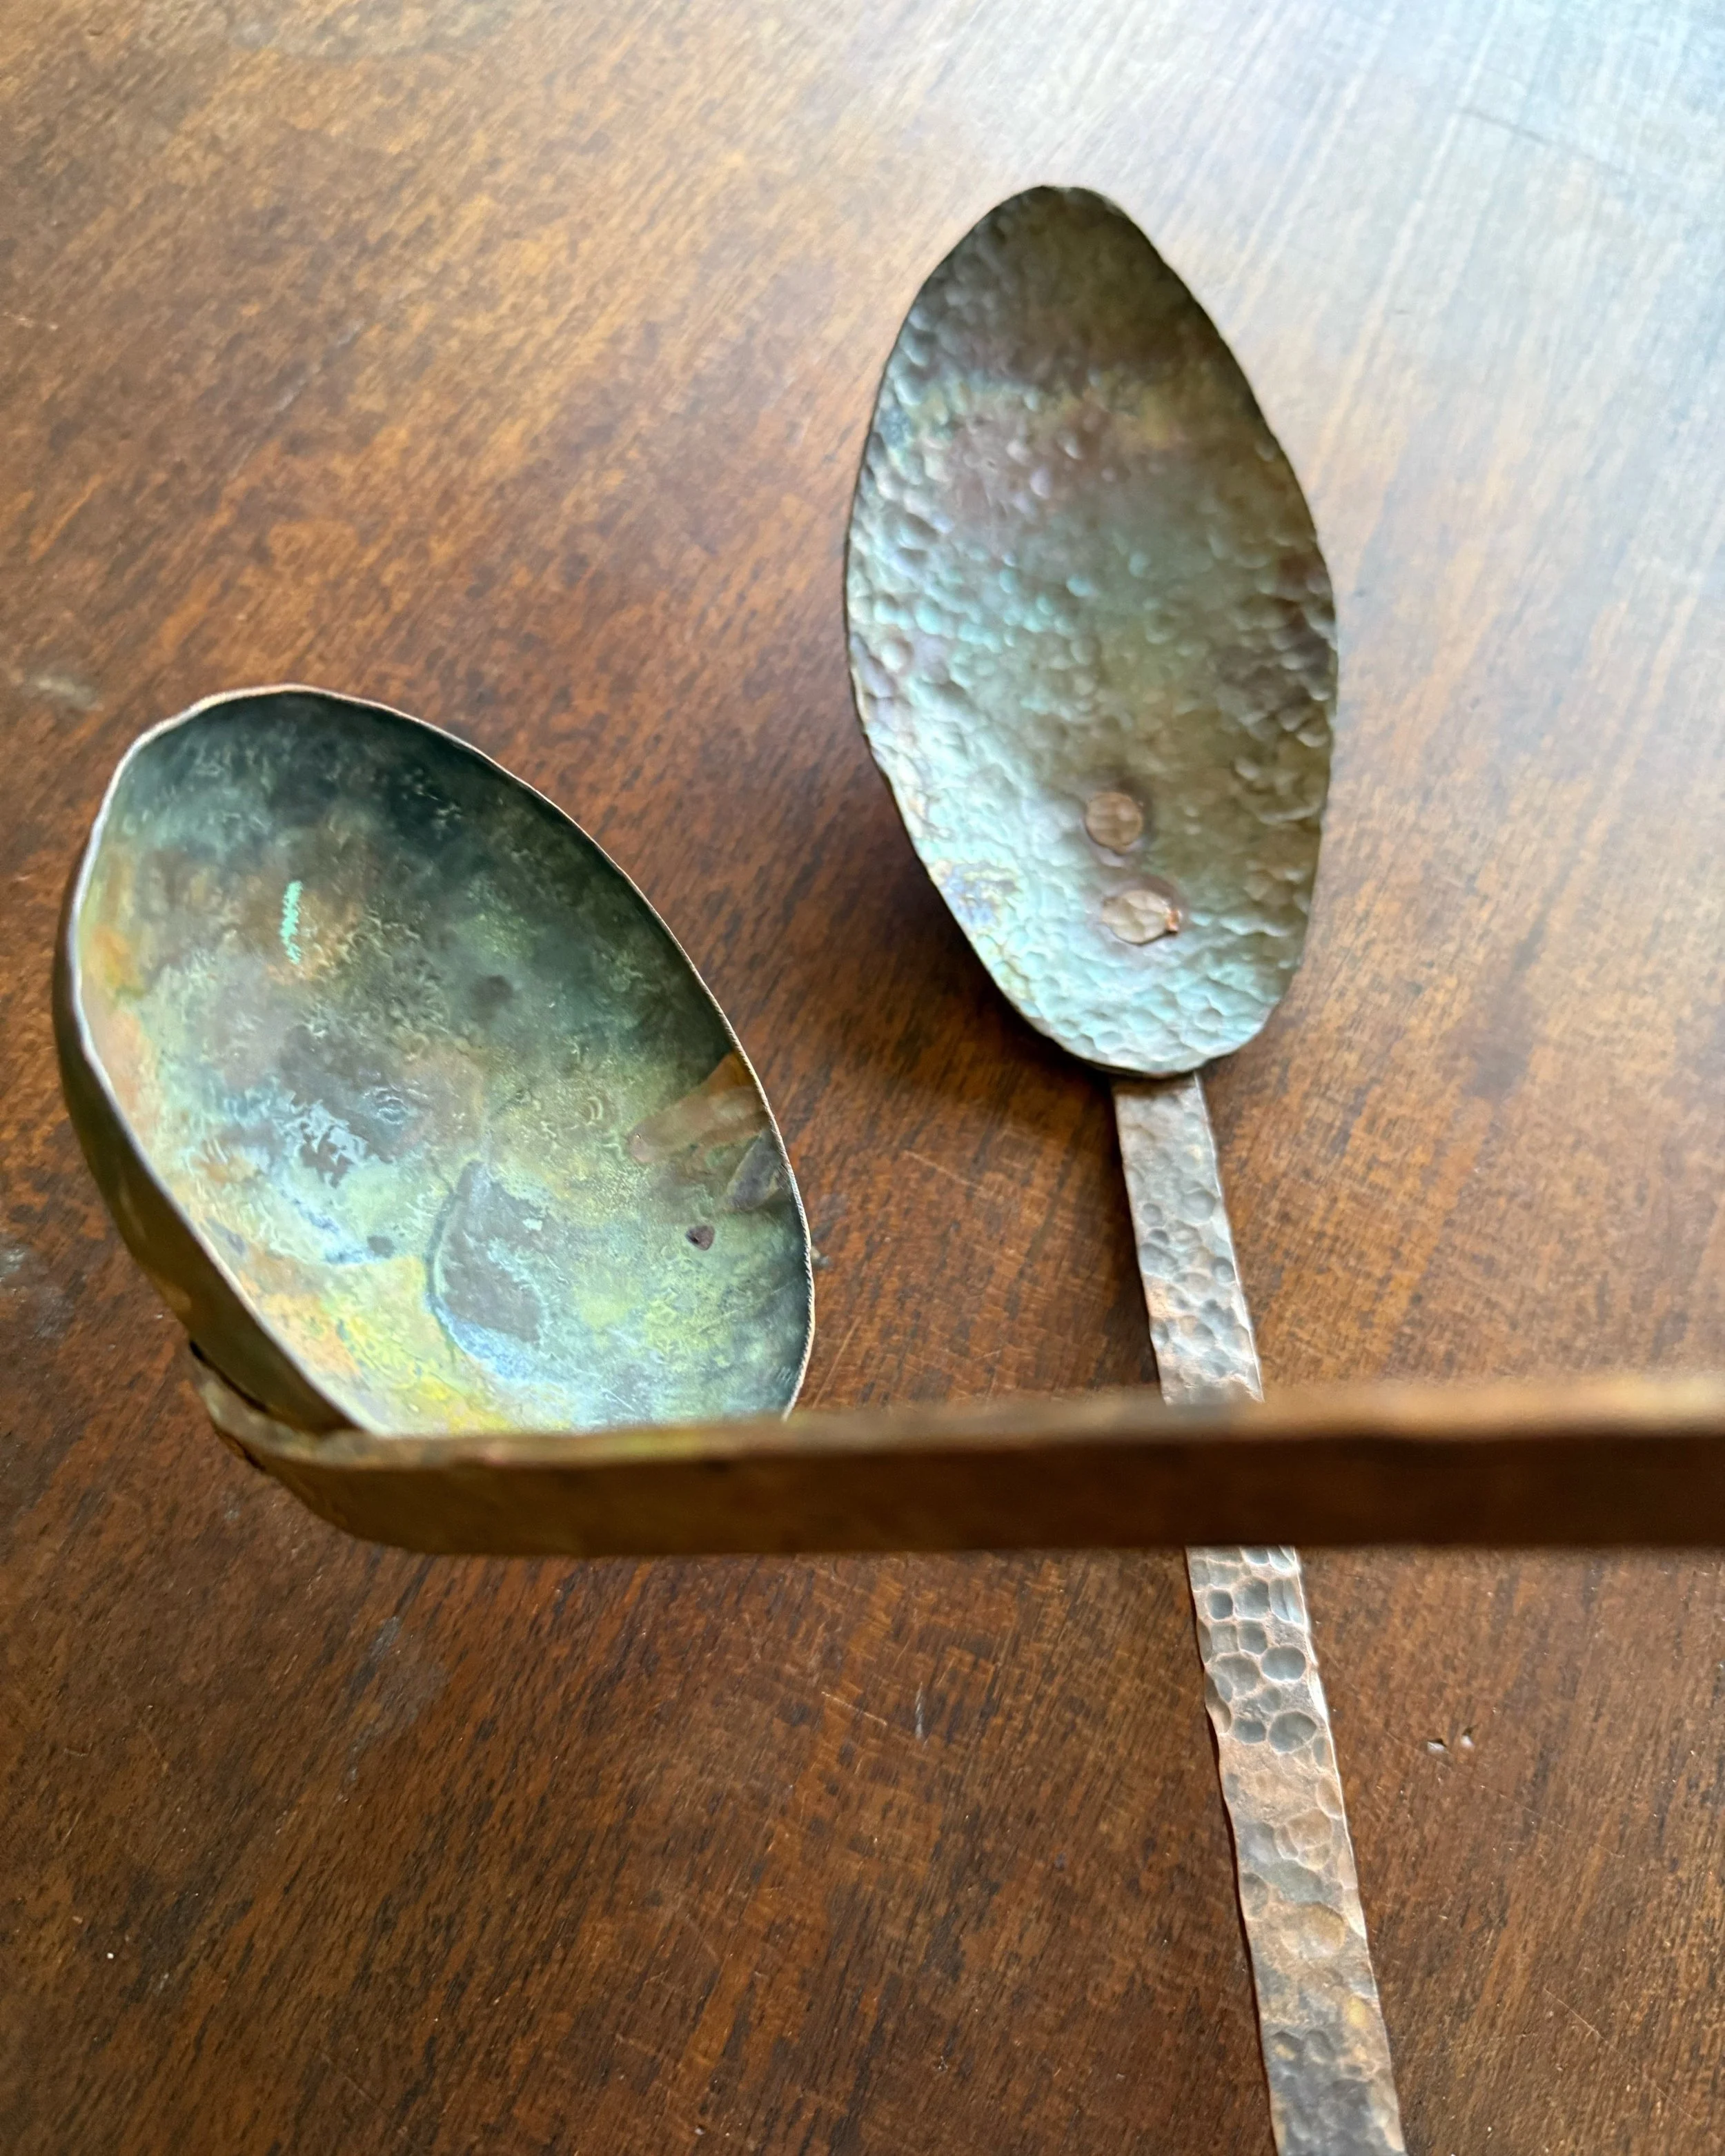
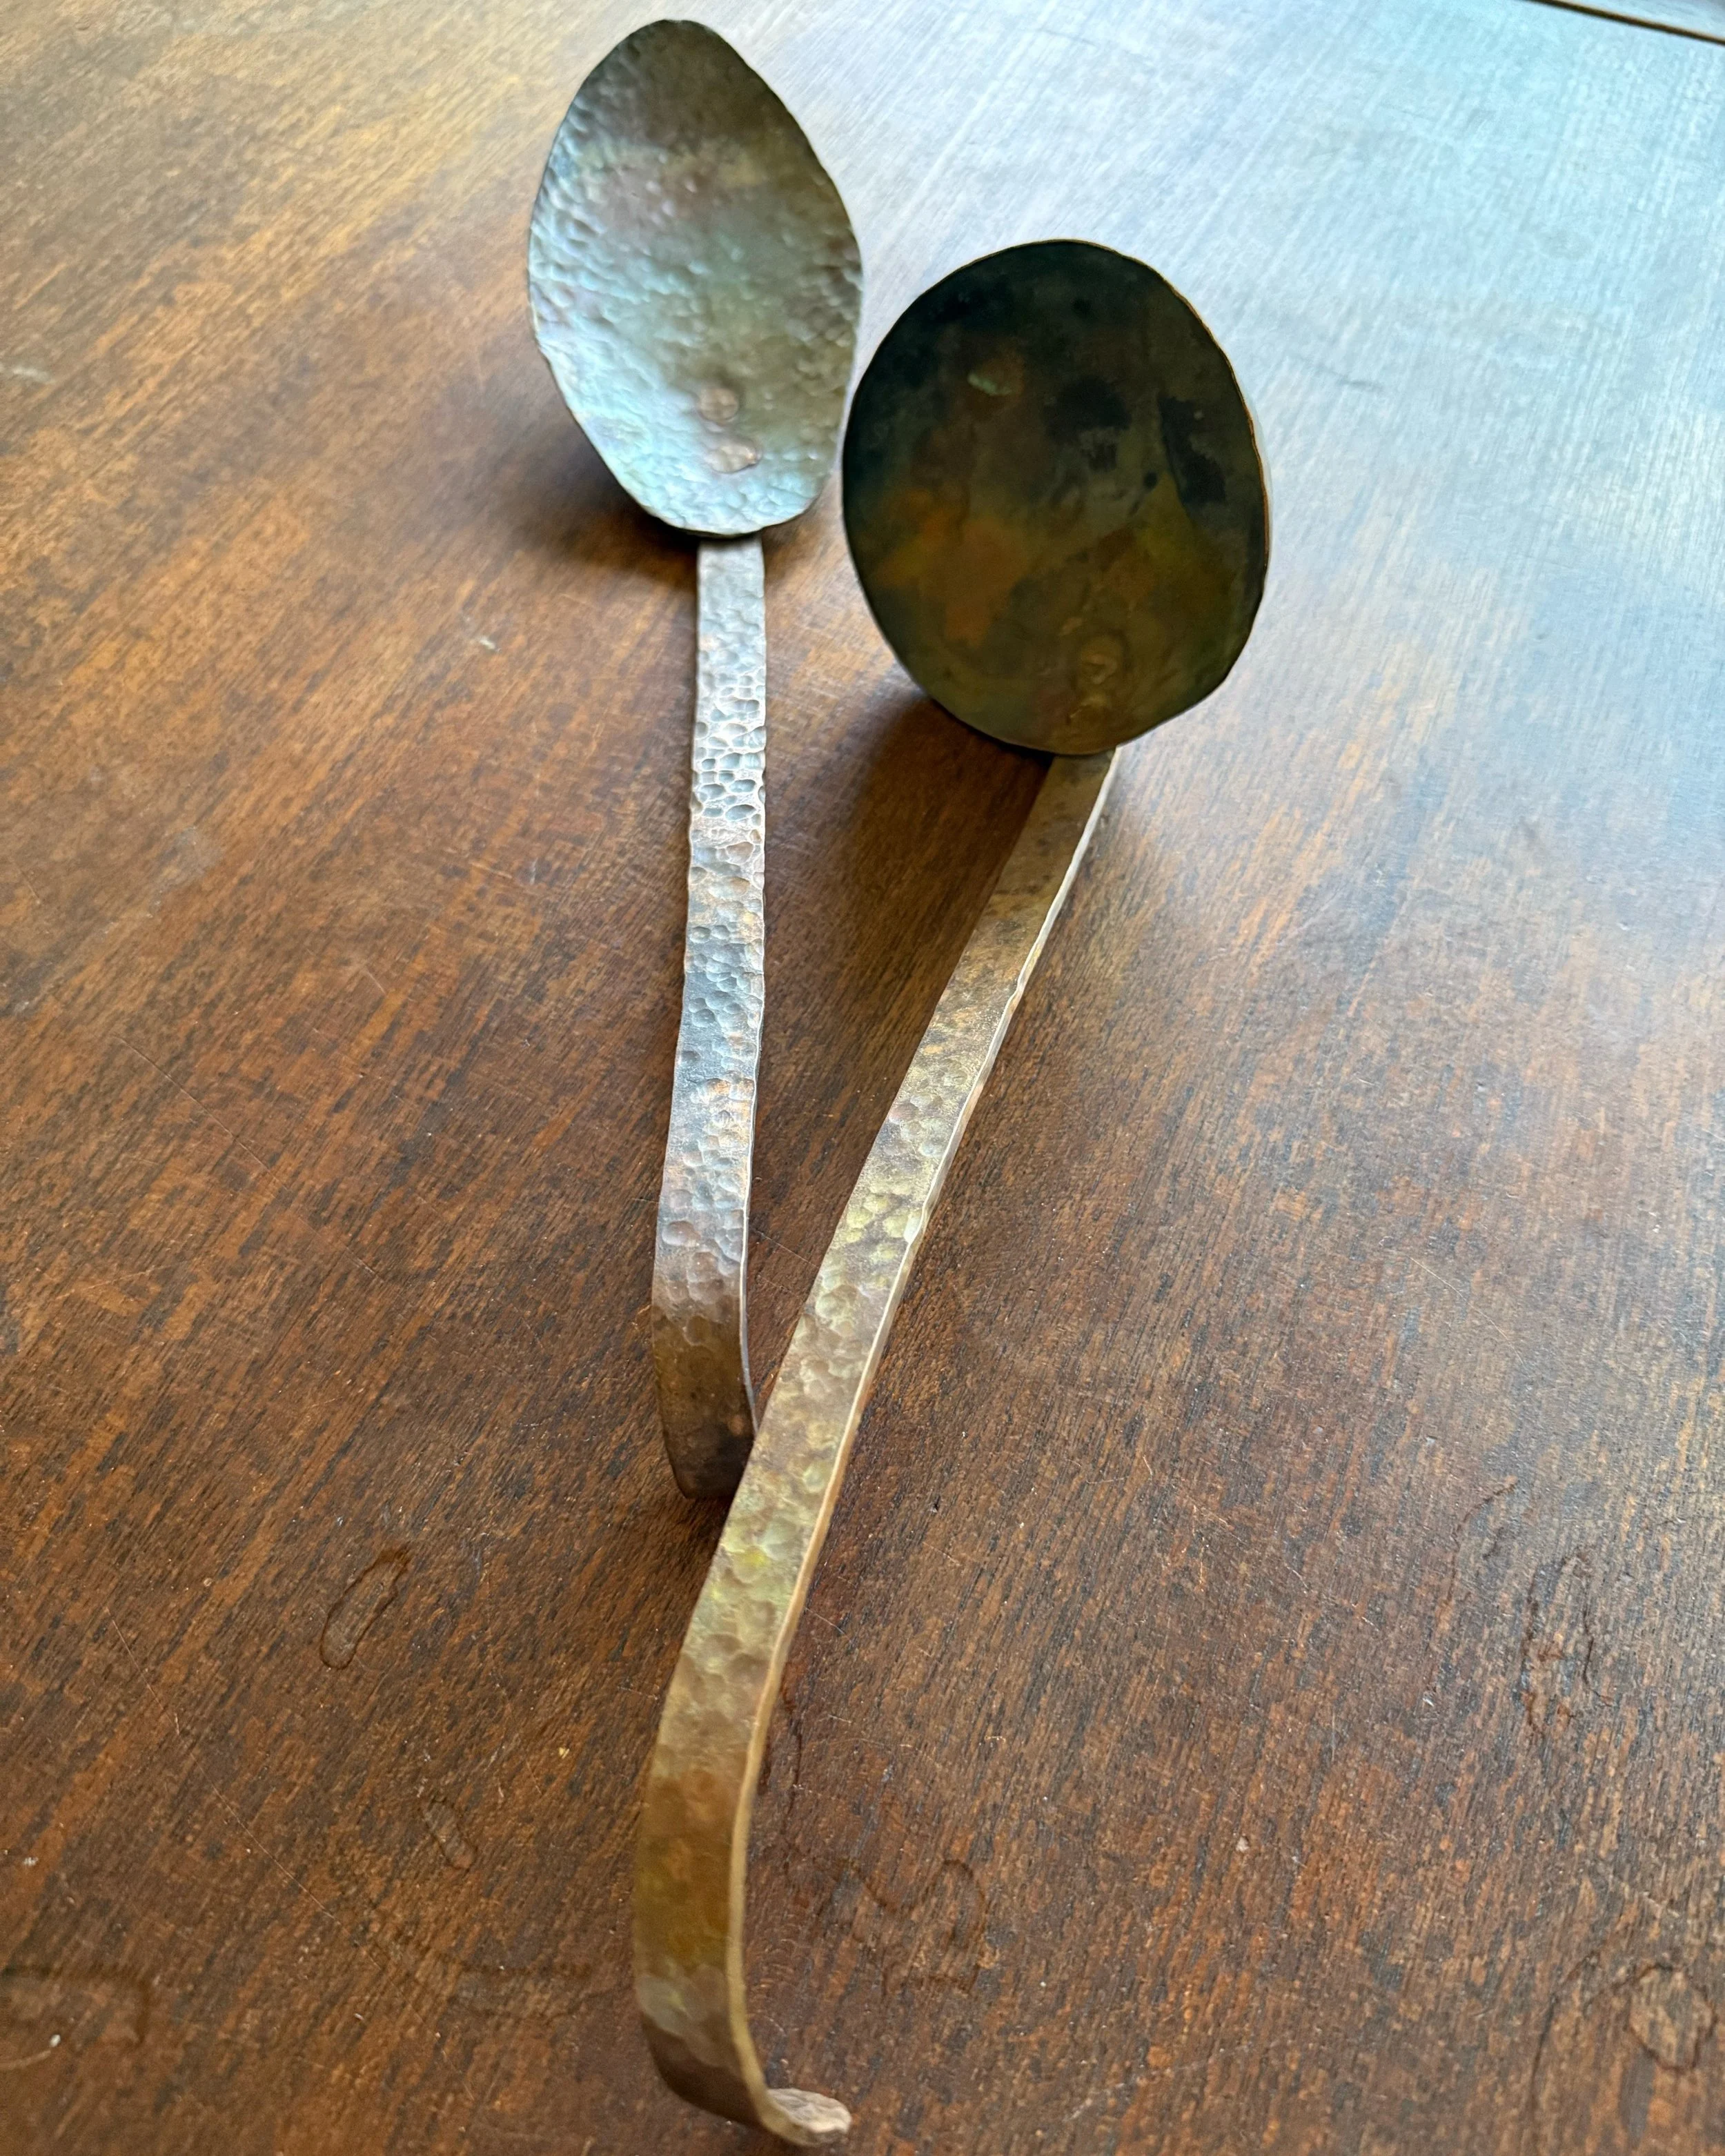
Creating a copper ladle is a specialized project that builds upon previous metalwork experience and integrates function with form. Students begin by drawing and cutting the shape, then hammering and forming both the bowl and the handle, often using riveting or soldering to join them. Each stage demands attention to proportion, strength, and ergonomics. The ladle becomes a symbol of usefulness and beauty, allowing students to experience the satisfaction of creating a durable, handcrafted tool from raw material.
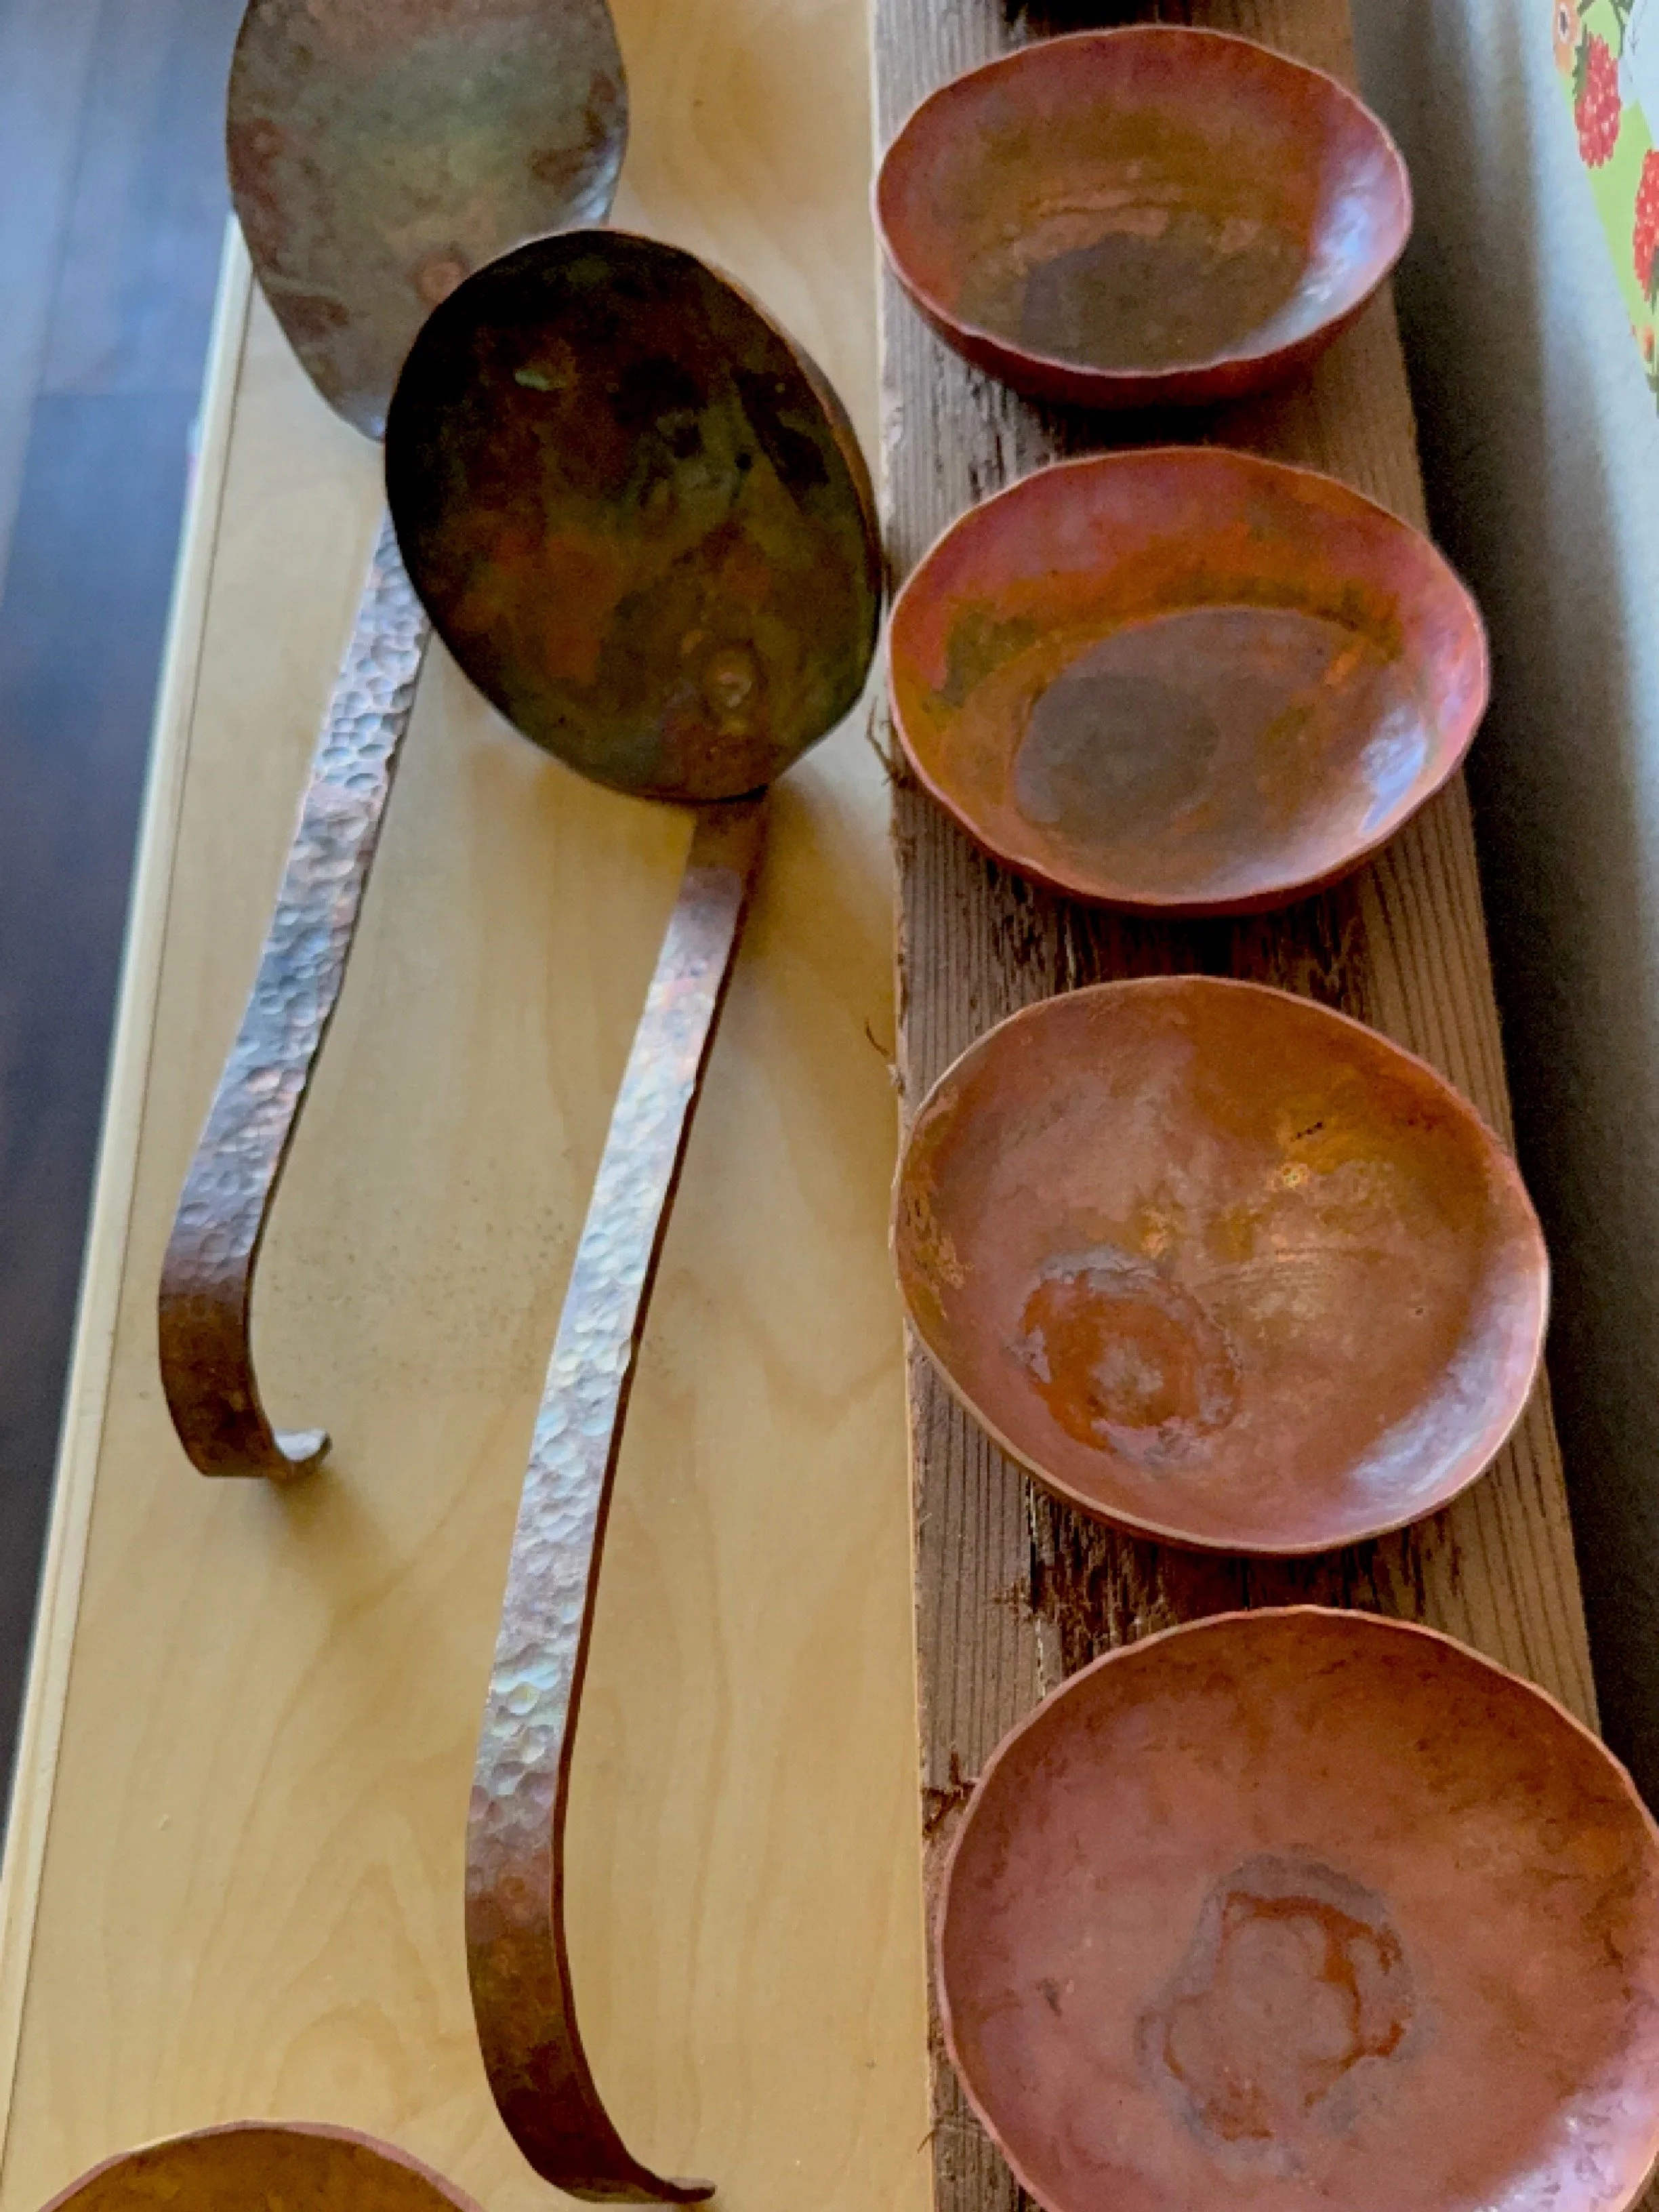
During the Waldorf practical art training, module six, we worked on making a copper bowl. Once we had completed the bowl, we had the option to make a spoon or a ladle. The ladle is similar to the bowl only smaller, and the ladle is more of an oval and not quite as deep as the bowl. I opted to try my hand at both. While I love the way, they turned out, the craftsmanship is lacking. They are wonky and lopsided, however, I love them! I think they have character and I love the patina on them. We used rivets to attach the bowl or spoon to the handle. We did a decorative Hammered look on the handle, which added a nice touch since the ladle and spoon have a hammered finish as well. I was able to achieve a beautiful patina on both the spoon and ladle, however, I’m not sure how that happened, and I don’t want lose it so I probably won’t actually use these in the kitchen.
Book Binding
Bookbinding in the Waldorf high school curriculum introduces students to the quiet, methodical art of making a book from start to finish. Beginning with folded signatures, students sew, glue, and press the pages, then construct the covers from sturdy materials like book board and cloth or decorative paper. This process invites mindfulness, precision, and care, as the finished book becomes a vessel for future thoughts, artwork, or studies. The rhythmic and structured nature of bookbinding offers a balance to the more expressive or chaotic elements of adolescence, grounding students in form and function.
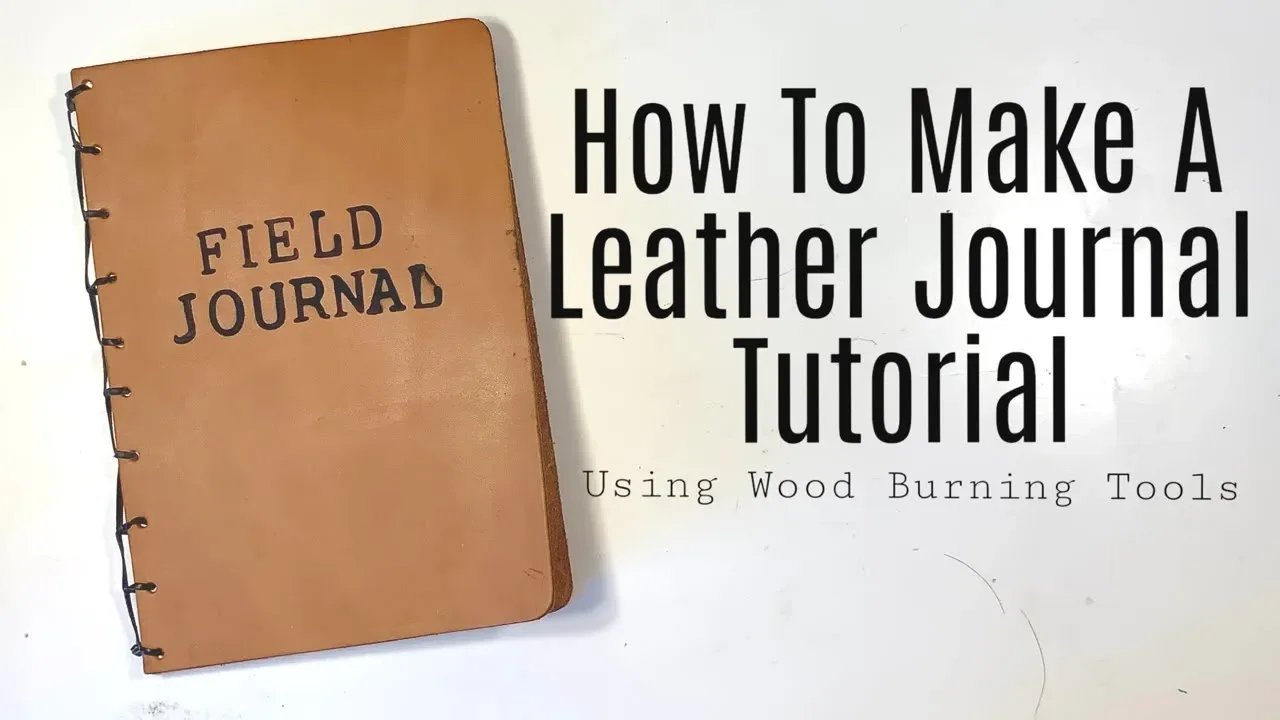
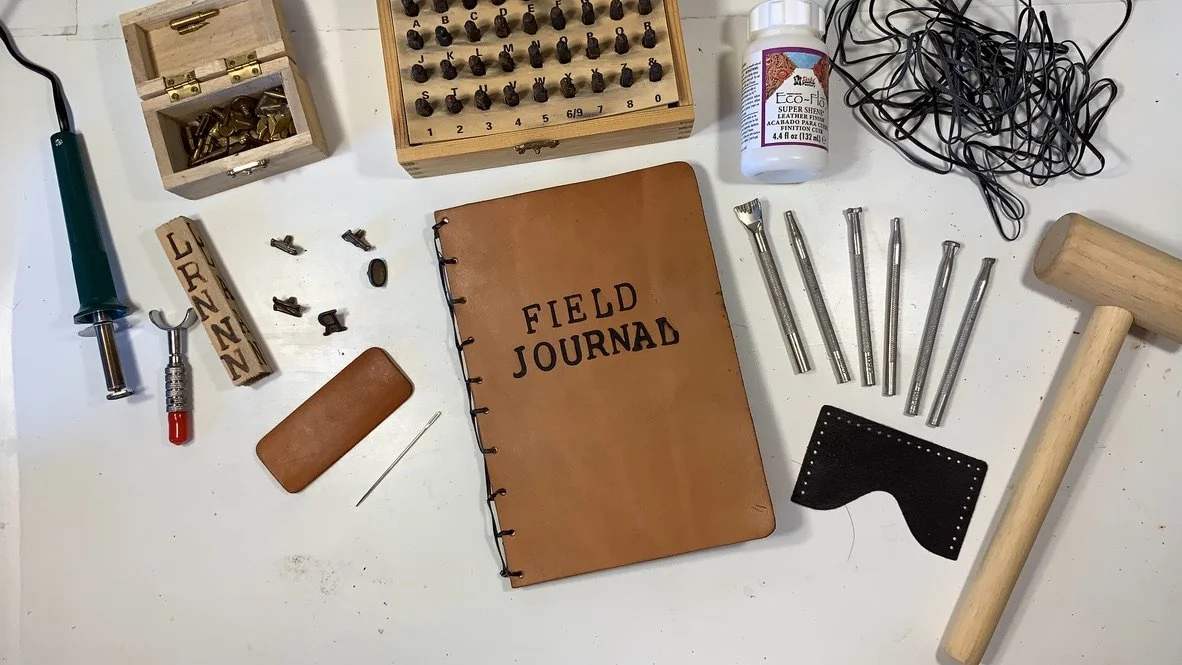
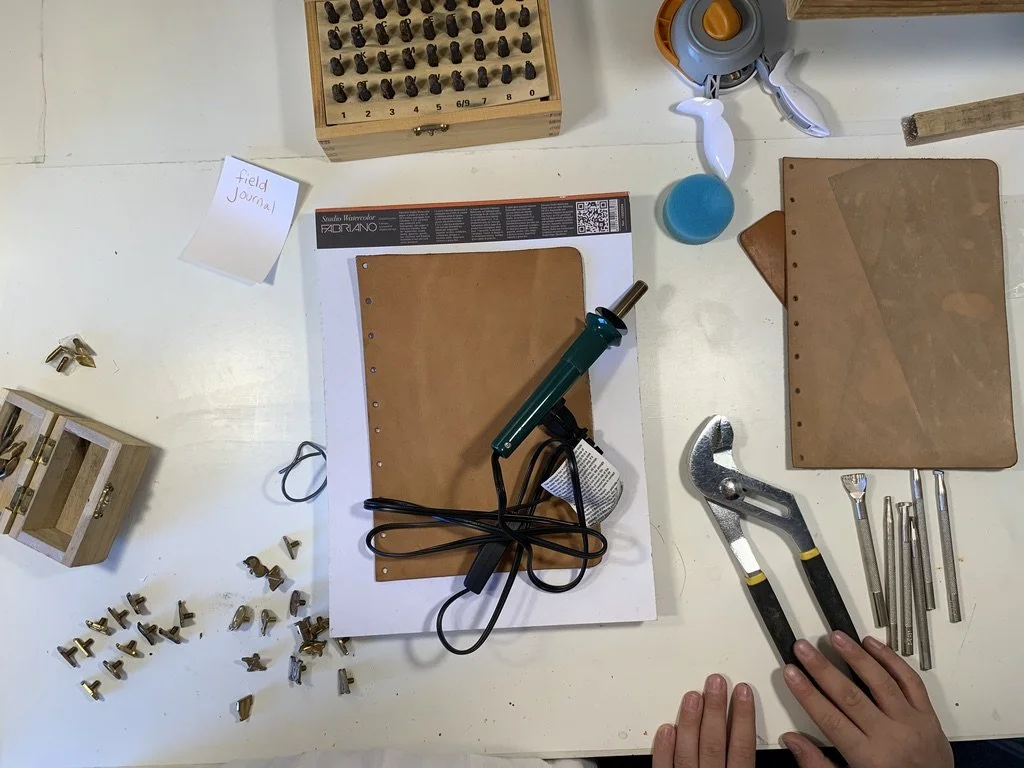
Making a journal can be easy and simple or spectacular and somewhat difficult. This is the easy version. It's the version where you don't need to fold or stitch. What this means is you can find more affordable options to make a journal. We happened to get the leather from a leather kit which included other projects, but I've since sourced leather for new journals which is softer and easier to use for binding and folding and stitching.
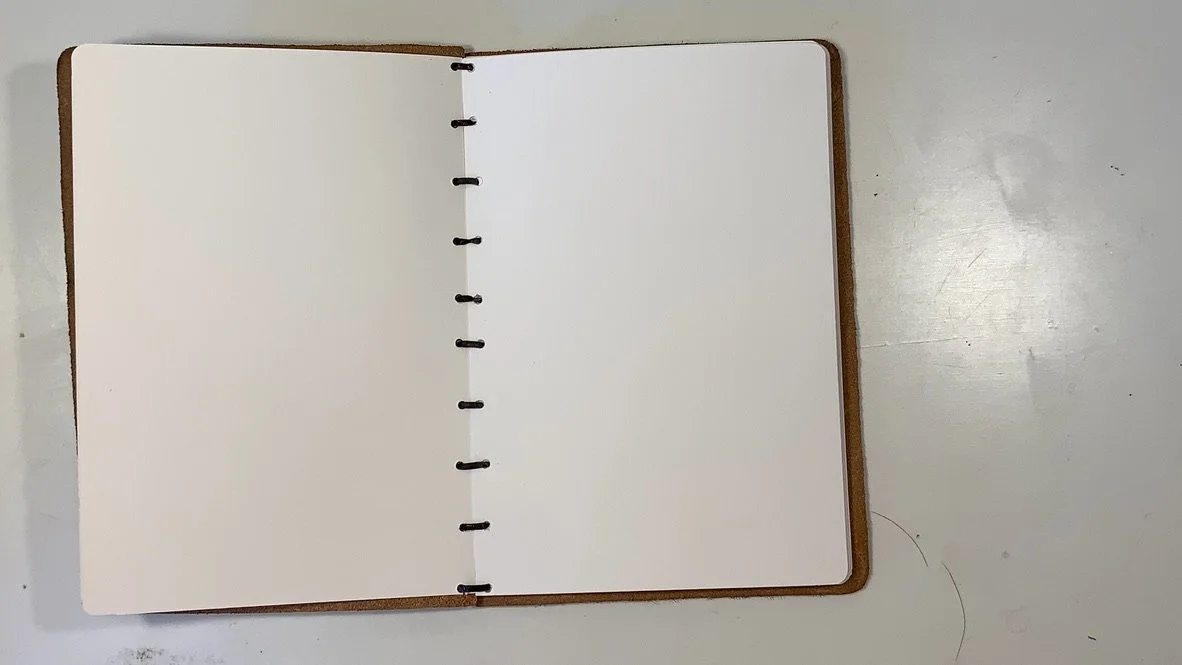
This one was bound on one side with leather string that came in our kit. We had tools from the kit as well as our own materials. We used some scrapbooking tools to punch holes in our paper to match the holes in the leather. It's an eyelet tool and I highly recommend an eyelet tool maker because we can get different attachment heads for holes of various sizes. Otherwise you are stuck using a standard hole punch size which is larger than these holes.
We considered using our homemade paper, but opted for drawing paper and I'm so glad we made that decision. In the end, the paper was smooth and thin enough for my son to use for his drawings and narrations.
One thing I'm super proud of is our experimenting with our wood burning tool. I love the way it turned out! This is one thing I did for my son because I'm more practiced and there were no do-overs. I had no other leather at the time of this project and I knew my son would be disappointed if he messed up. I practiced on a piece of wood because leather does not need the same pressure or time, and since I didn't have spare leather, I practiced with wood. Once I mastered the pressure, I burned the words "Field Journal" but messed up on the final letter!
This is our favorite project for this unit! I'm so pleased with the way it turned out and what's even better, my 13-year-old son used it as his main lesson book for this unit.


Block Printing

Block printing allows students to carve their own designs into linoleum or wood, ink the surface, and press it onto paper or fabric. This reversal process—carving out the negative to reveal the positive—develops spatial thinking and introduces students to image composition, symbolism, and repeatable design. Often paired with bookbinding or textile work, block printing can be used to create book covers, cards, or decorative cloths. The tactile, hands-on nature of this work fosters patience, craftsmanship, and an appreciation for traditional methods of image-making.
During the Waldorf of practical arts training for module seven we did wood carving. We had the option to do a block print after about a day or two of wood carving. This was before we took out too much of our image and there wasn’t much left to block print. However, it’s not going to work if you plan to have writing as part of your wood carving since the rain needs to be mirror image for the block print to work. If you choose to do block printing with writing, you just have to make a mirror image of it. When the Waldorf practical art training was complete, I went home and tried my hand at block printing. I do have the intention to continue this design into a wood carving but at the moment I’m really enjoying it as a block print. I did write the letters backwards so that it printed correctly. It takes a little bit of practice to get the print just right and each one is unique. I’m working on a piece of basswood, measuring 6 in.². I’m using tools. I purchased on Amazon several years ago.

Brass Bowl
Forming a brass bowl is an advanced metalworking project, as brass is harder than copper and requires greater effort and precision to shape. Students learn to hammer with measured strength, anneal the metal to prevent cracking, and develop a symmetrical, elegant form. The brightness and resonance of brass evoke a higher aesthetic, making this project as much about beauty as function. This work encourages resilience and steady effort, helping students refine their skills and inner discipline.
Once we had mastered our copper bowl in the Waldorf practical arch training, module six, we had the option to work with brass. Making a brass bowl required more will force as the brass was a thicker stronger material. However, the payoff was tremendous. The sound of a glass bowl is beautiful. It has a clear shining sound that is different than the sound of our copper bowl which has a dull sound. While we are not using our bowls as bells, it is nice to have that quality. If we ever did tap the side of our brass bowl, it would sound beautiful. And depending on the depth and size of your bowl, you will get a different sound. I was able to complete one brass bowl at the end of module six, but it didn’t end up being very deep. During module seven I began to work on a second brass bowl. This one was pre-cut into an octagon shape, so that is the piece that I worked on since I did not have enough time to cut and file a piece of brass. I love the way that it turned out. And I love the small bowls, even better than the large bowls.
Leather Journal
Making a leather journal brings together hand-stitching, measuring, cutting, and design in a meaningful and practical project. Students learn to work with leather—a responsive, natural material—while binding pages and attaching closures or embellishments. The result is a durable, personalized object that supports ongoing writing, sketching, or studying. The tactile nature of leatherwork supports the development of the will and invites reflection, as the journal becomes a private space for inner life and creative thought.
There are two travelers/explorers who we studied during our history units which focus on the Silk Road and the time period of about 1200-1400, and we imagine both of them carried a journal of sorts to record their travels, what they saw and how they felt. We decided to make an authentic leather journal filled with real parchment or vellum. Did you know genuine parchment is goat skin and genuine vellum is sheep skin? And did you know that it's probably about as expensive to buy it today as it was 700 years ago?! One small 5"x7" sheet of parchment cost me about $5. Maybe there are better deals out there, but I have to admit that looking for actual goatskin parchment wasn't easy! So we opted to buy a few sheets for the children to feel and use, but made our journals out of handmade paper (9"x12") I found on Amazon. I also found a piece of genuine leather (12"x24") for the cover and used my own scrapbooking tools and embellishments for the details.
We used this notebook for our written and illustrated lesson work for our Ibn Battuta and North Africa main lesson block. My 14-year-old son loved the journal so much! And one perk from the way I made it, allows you to add or remove paper. It does flip up and over rather than from side to side and we also didn't stitch the paper into the spine the way that journals were likely made at the time. I do have a tutorial on how to make notebooks with a stitched spine if you choose to make your journals that way.
We also altered store bought traveler's journals which ended up being super affordable and easy. I bought our journals from a local craft store and embellished them with a sandala from The Rustik Home. A simple, yet beautiful addition to a store bought journal was a quick and easy way to do this project. The only downside to the store bought journal was the size. It isn't really big enough for us to use as a main lesson book for our daily lesson work. It is just right to use as a mock itinerary or timeline.
Notebook
Creating a notebook offers students the chance to combine practical artistry with personal expression. From selecting paper to binding and designing the cover, students make decisions about form, size, and purpose. Whether hand-stitched or glued, illustrated or plain, the notebook becomes an extension of the student’s individuality. This project reflects the Waldorf principle of integrating beauty and utility, encouraging students to take ownership of their work and create meaningful tools for learning and self-expression.
All you need is paper, construction paper (optional) and stapler to make a simple sturdy notebook. I use a long-reach heavy-duty stapler from Demco. Paper and construction paper (for notebook cover) are by Canson and are available from local crafts stores or online. Other materials/tools: paper trimmer, embroidery thread, needle (for one version of the notebooks). Difficulty level: EASY
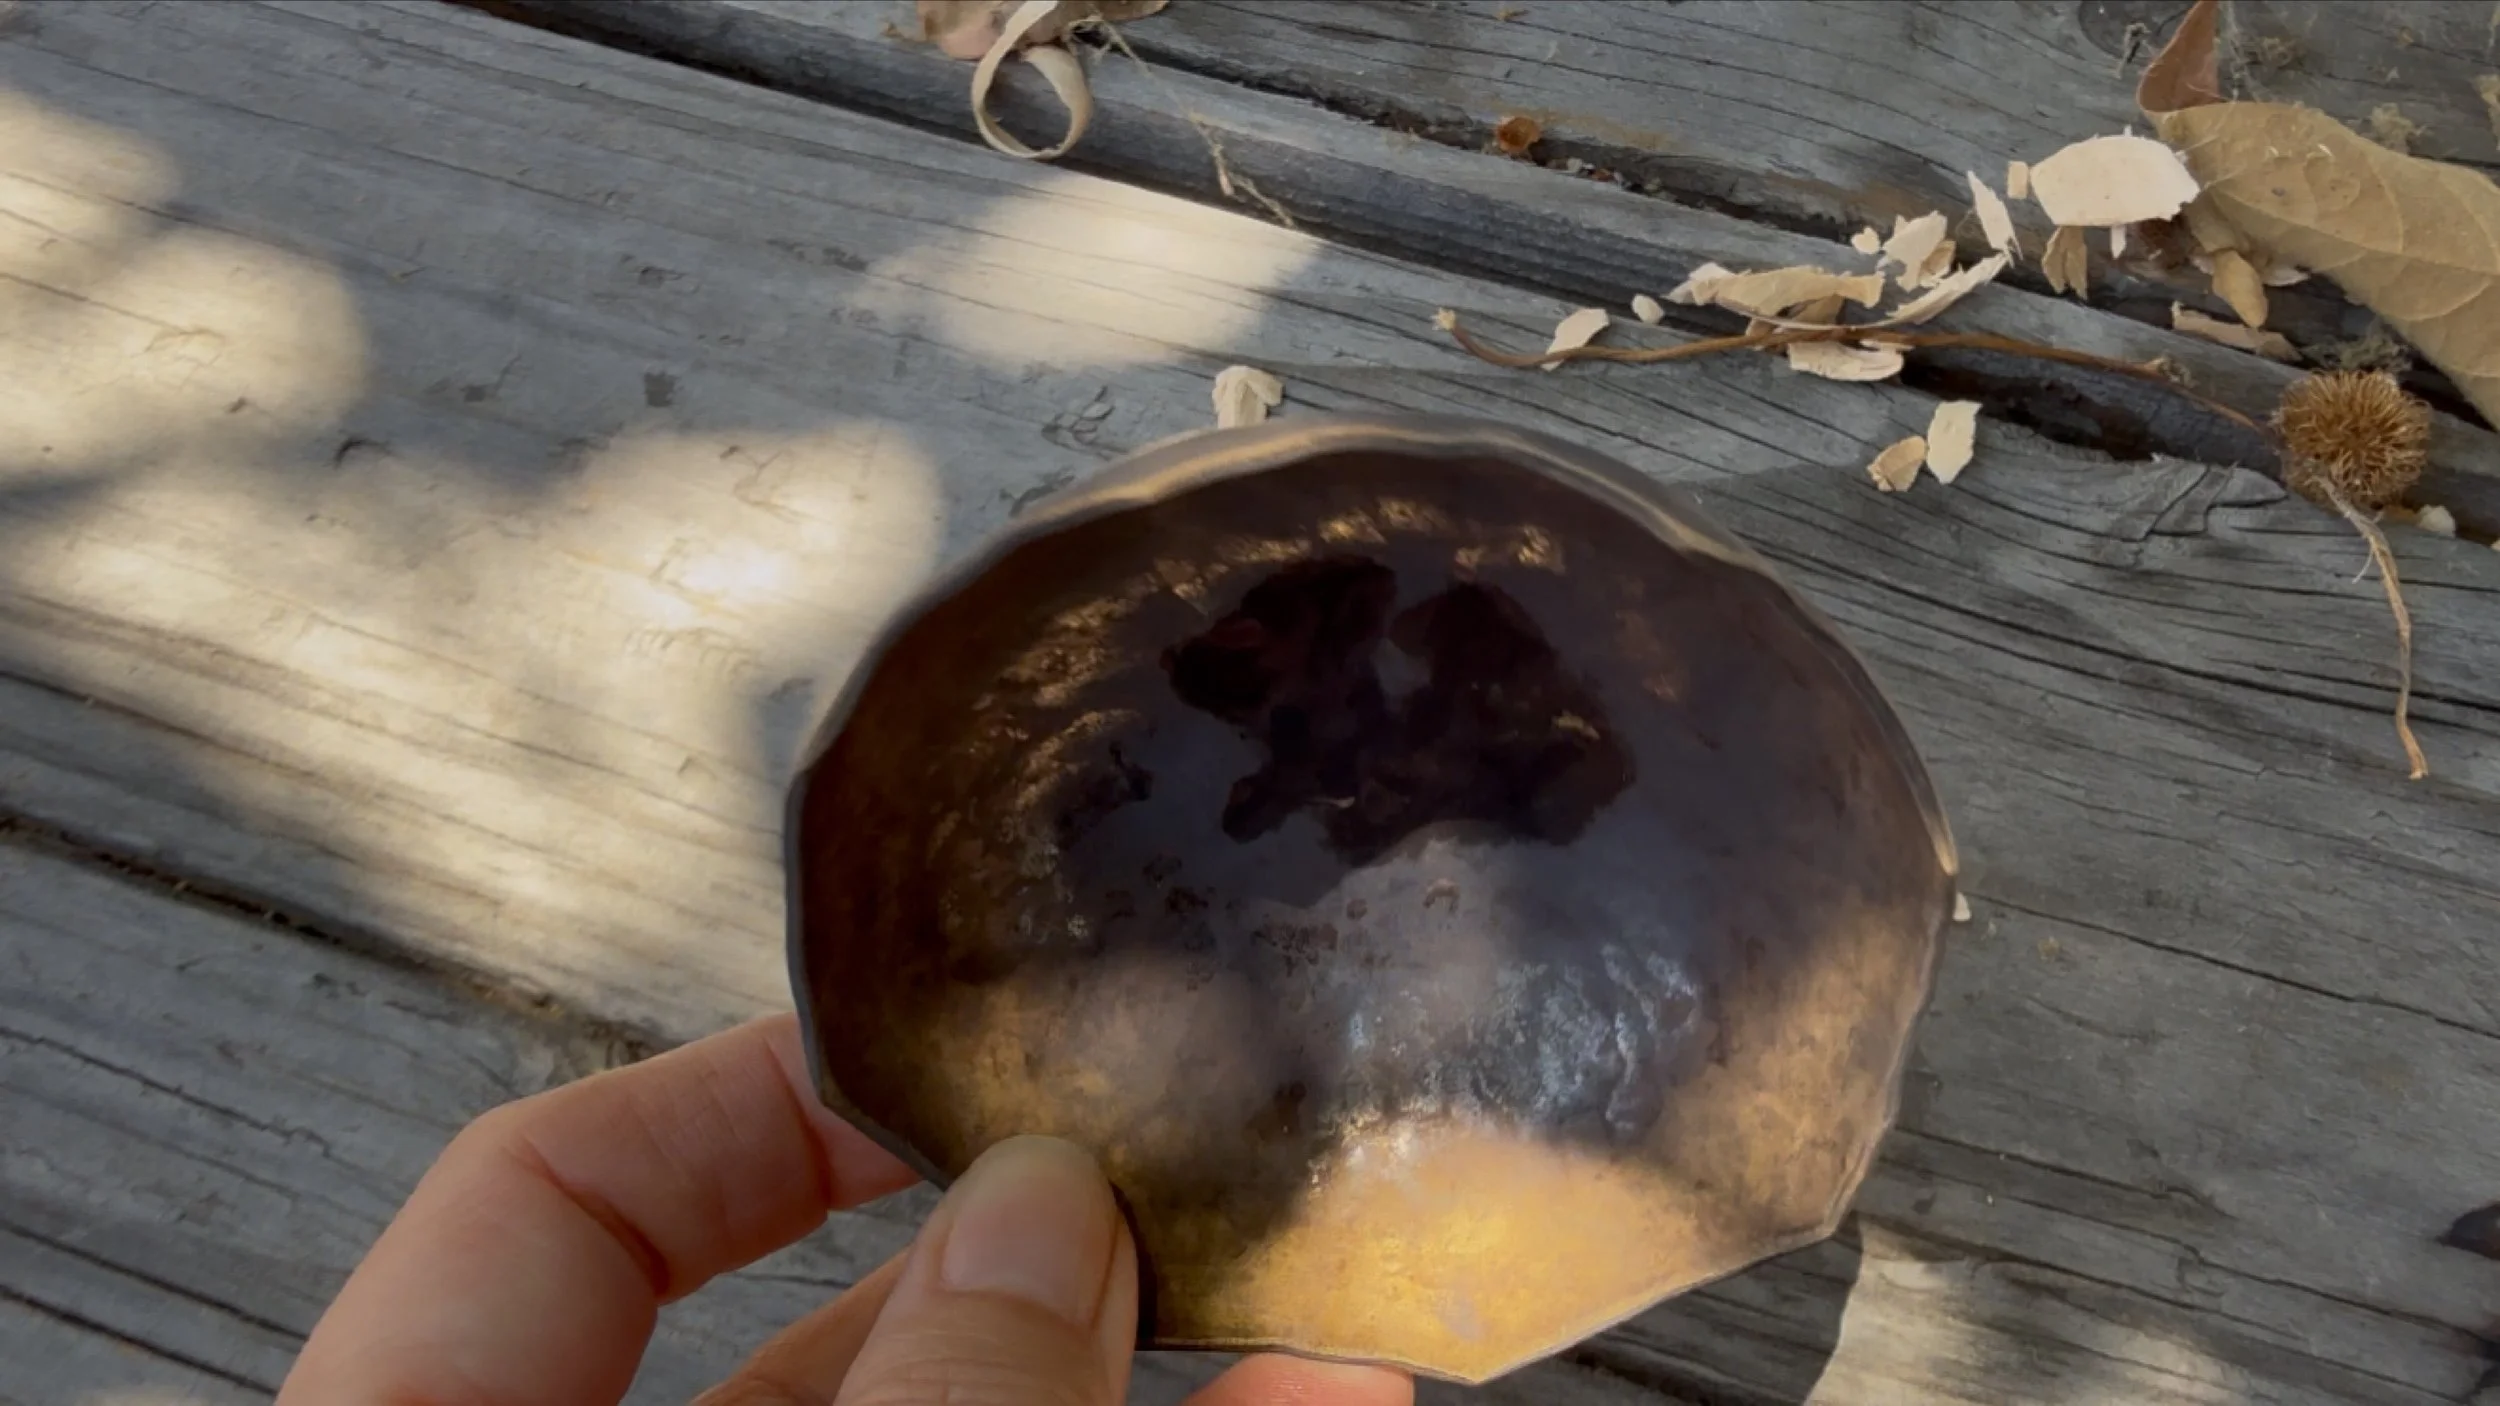
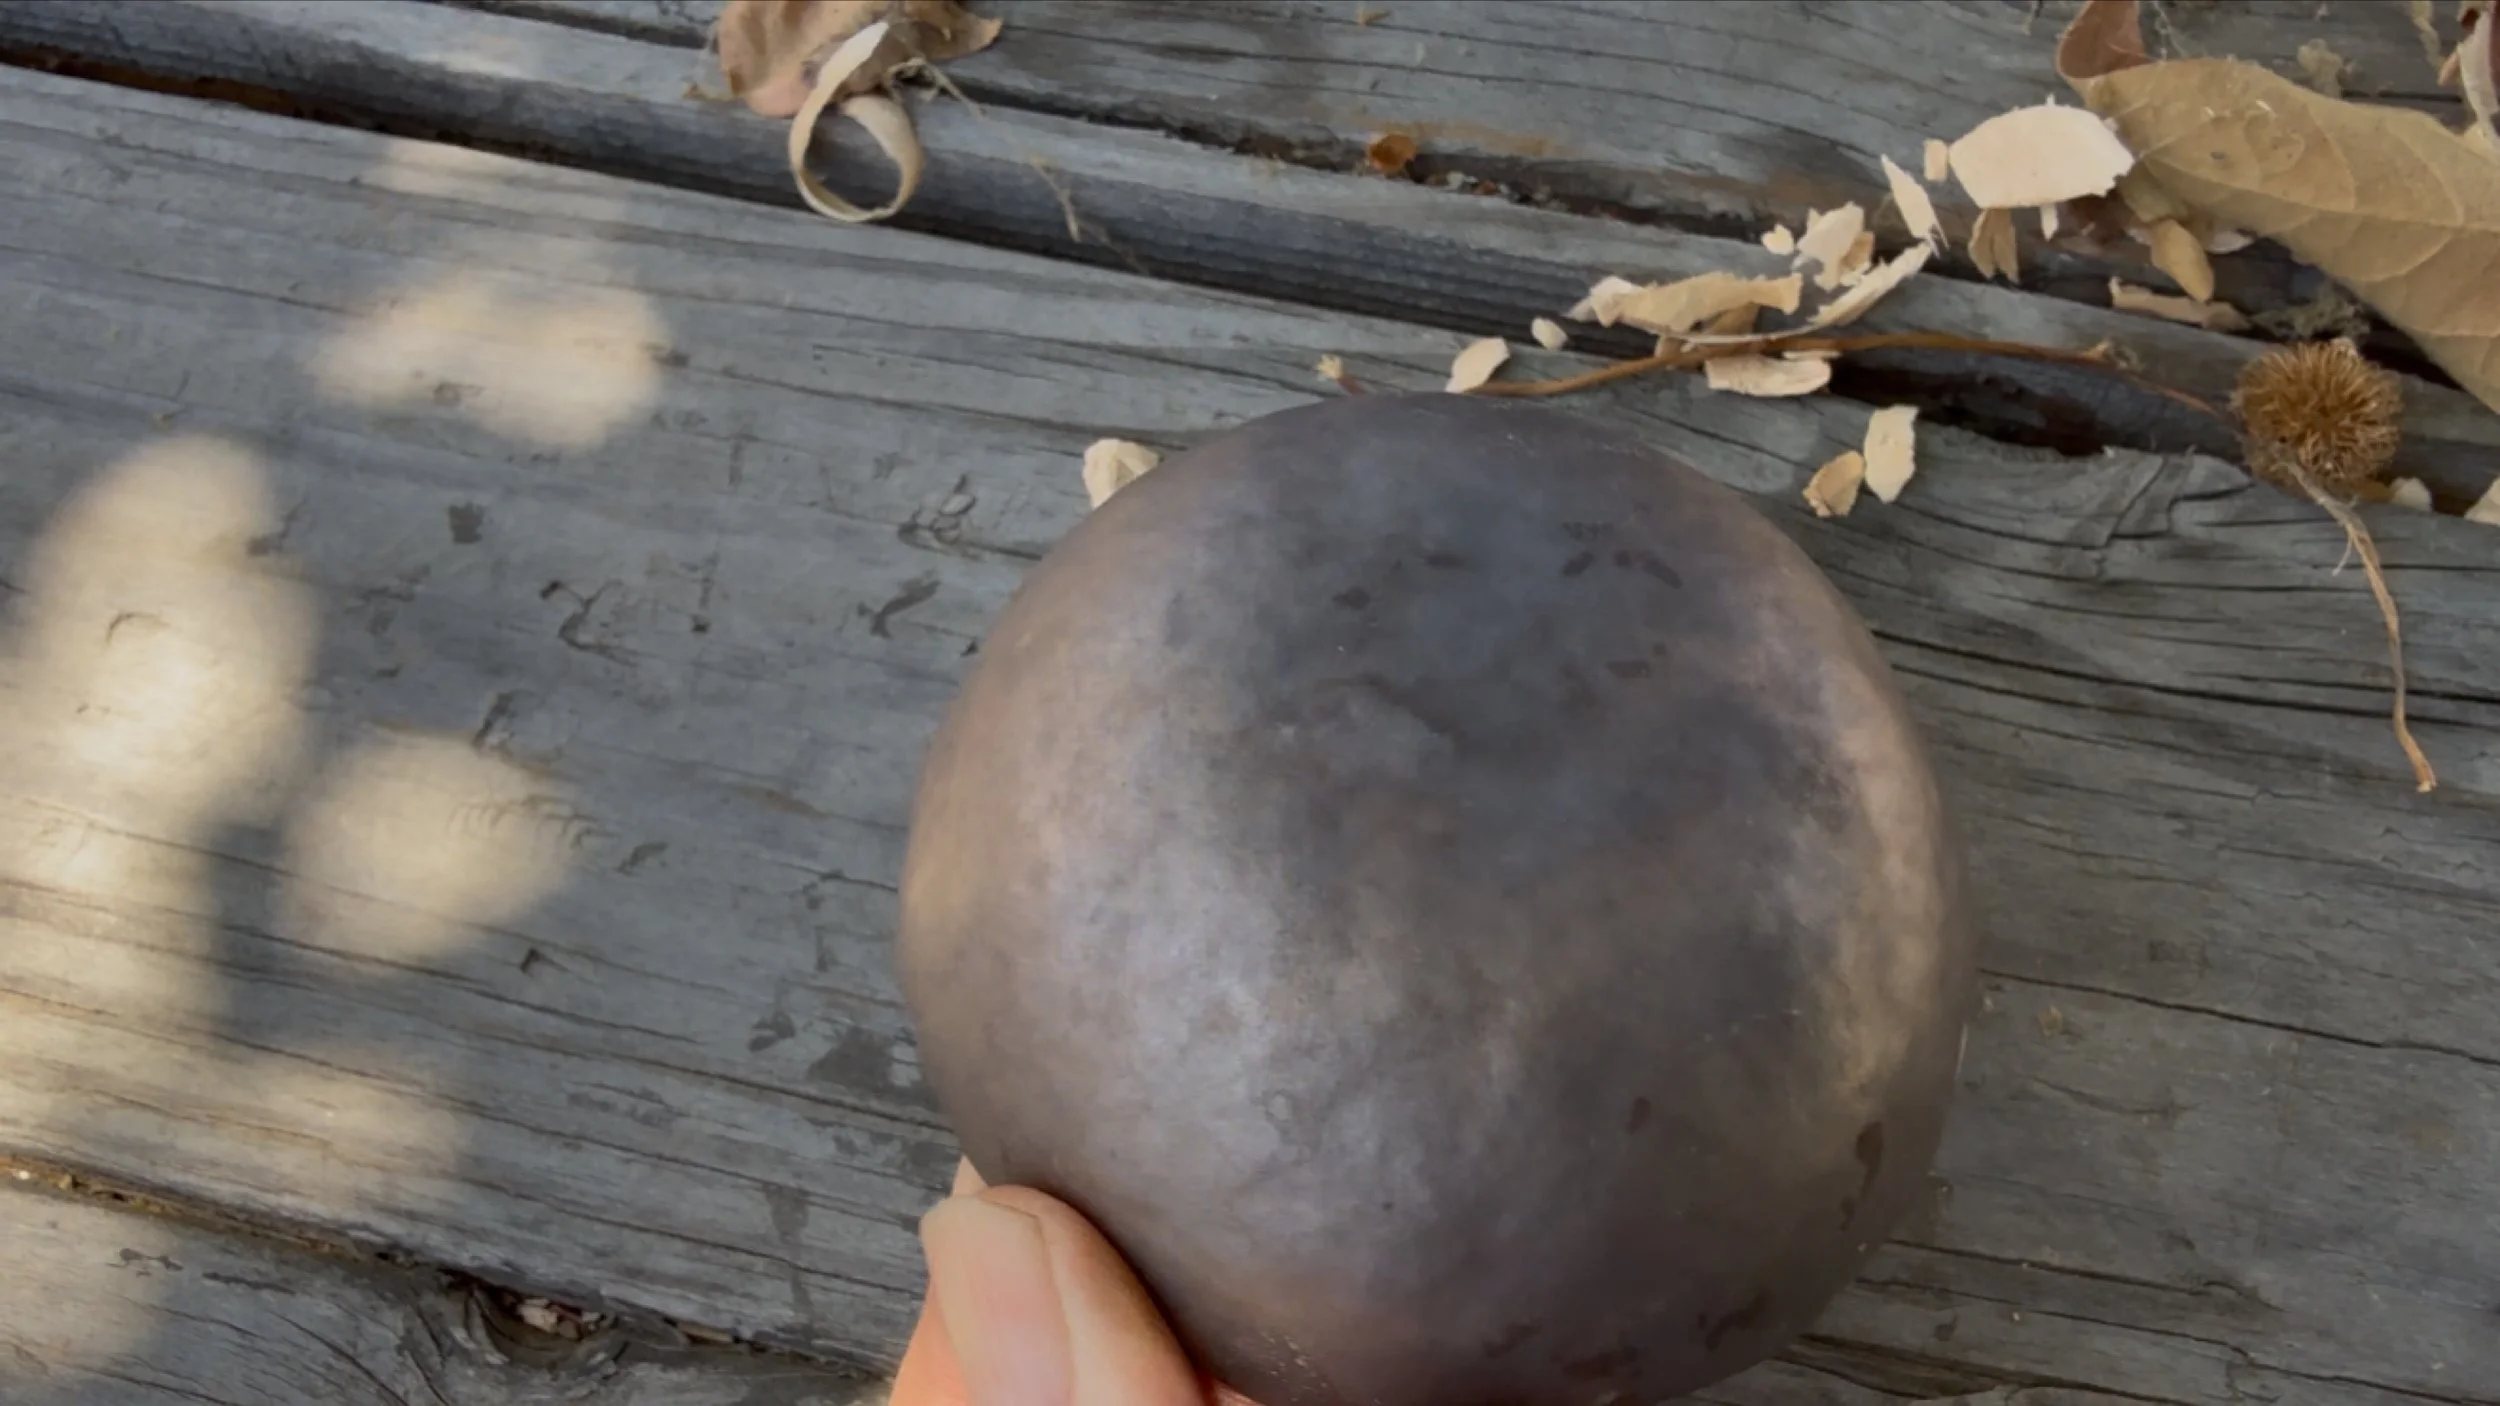
Mini Copper Bowls
Once you complete your octagonal copper bowl, you can work on whatever project you want! I continue to work with the copper to make bowls rather than move onto other projects like jewelry making. In this case, I wanted the copper balls to have a gentle hammered look, different than my first large copper bowl. To achieve this, I worked the copper less and kept a more organic flow to the bowl. While I like the aesthetic of these bowls, I think the craftsmanship is Not as good as one that has been worked through thoroughly.
