Mineralogy, Geology & Earth Science Lessons
Mineralogy Lessons
When doing our geology and mineralogy main lesson blocks and unit studies, we focused on two things primarily: lessons and projects. I love, including hands-on projects and activities in our Homeschool as I think those are excellent ways of learning and retaining information and skills. As my students got older, we relied less and less on projects and activities and more on lesson content and demonstrations or experiments. For our mineralogy block, for Grade 6, we relied on our Waldorf curriculum by Live Education extensively. In the past, I would use the curriculum as a suggestion, and then create our lessons and activities based on kits I would buy or activity books or through the Living books, I would source to put together our units.
When we approached our mineralogy main lesson block in 2024 with my last homeschooler, I decided to stick closely to the Live Education mineralogy curriculum. I’m so glad I did! In all the years of teaching earth science, this was the first time I truly understood the purpose and direction of the Waldorf curriculum for teaching mineralogy to Grade 6 student. There is a difference between geology and mineralogy, and in Grade 9 in a Waldorf high school, geology is taught. The main difference in the study of mineralogy versus geology is in our sense perception of the content. In the study of mineralogy, the student is exposed to things that are experienced through the senses. Nothing is explored that can’t be seen or experienced. For instance, the layers of the Earth are not taught in the mineralogy block and are rather discussed in the geology block in high school. So when talking about granite, for instance, we are looking at granite that is seen on the Earth’s surface and exposed through weathering rather than talking about things that are still below the Earth and are ultimately an abstract concept for the middle schooler. Some teachers may still choose to teach concepts that are not part of the sense perception for the middle schooler.
However, you will see many of the projects that we did cover are concepts that are best served for a post puberty student. The approach to mineralogy for the Grade 6 student, according to the Waldorf pedagogy, is to start with the whole and then examine the parts. The first lessons in mineralogy are the juxtaposition between water and fire. We look at granite being a manifestation of fire, the archetypal fire rock. And we look at limestone as a manifestation of water, the archetypal water rock. We examine the water cycle and the production of limestone. And we examine volcanoes and the rock cycle and the production of granite.
We also examine the various minerals within granite, retaining the whole as granite before examining the parts within.
Mineralogy Lessons
-
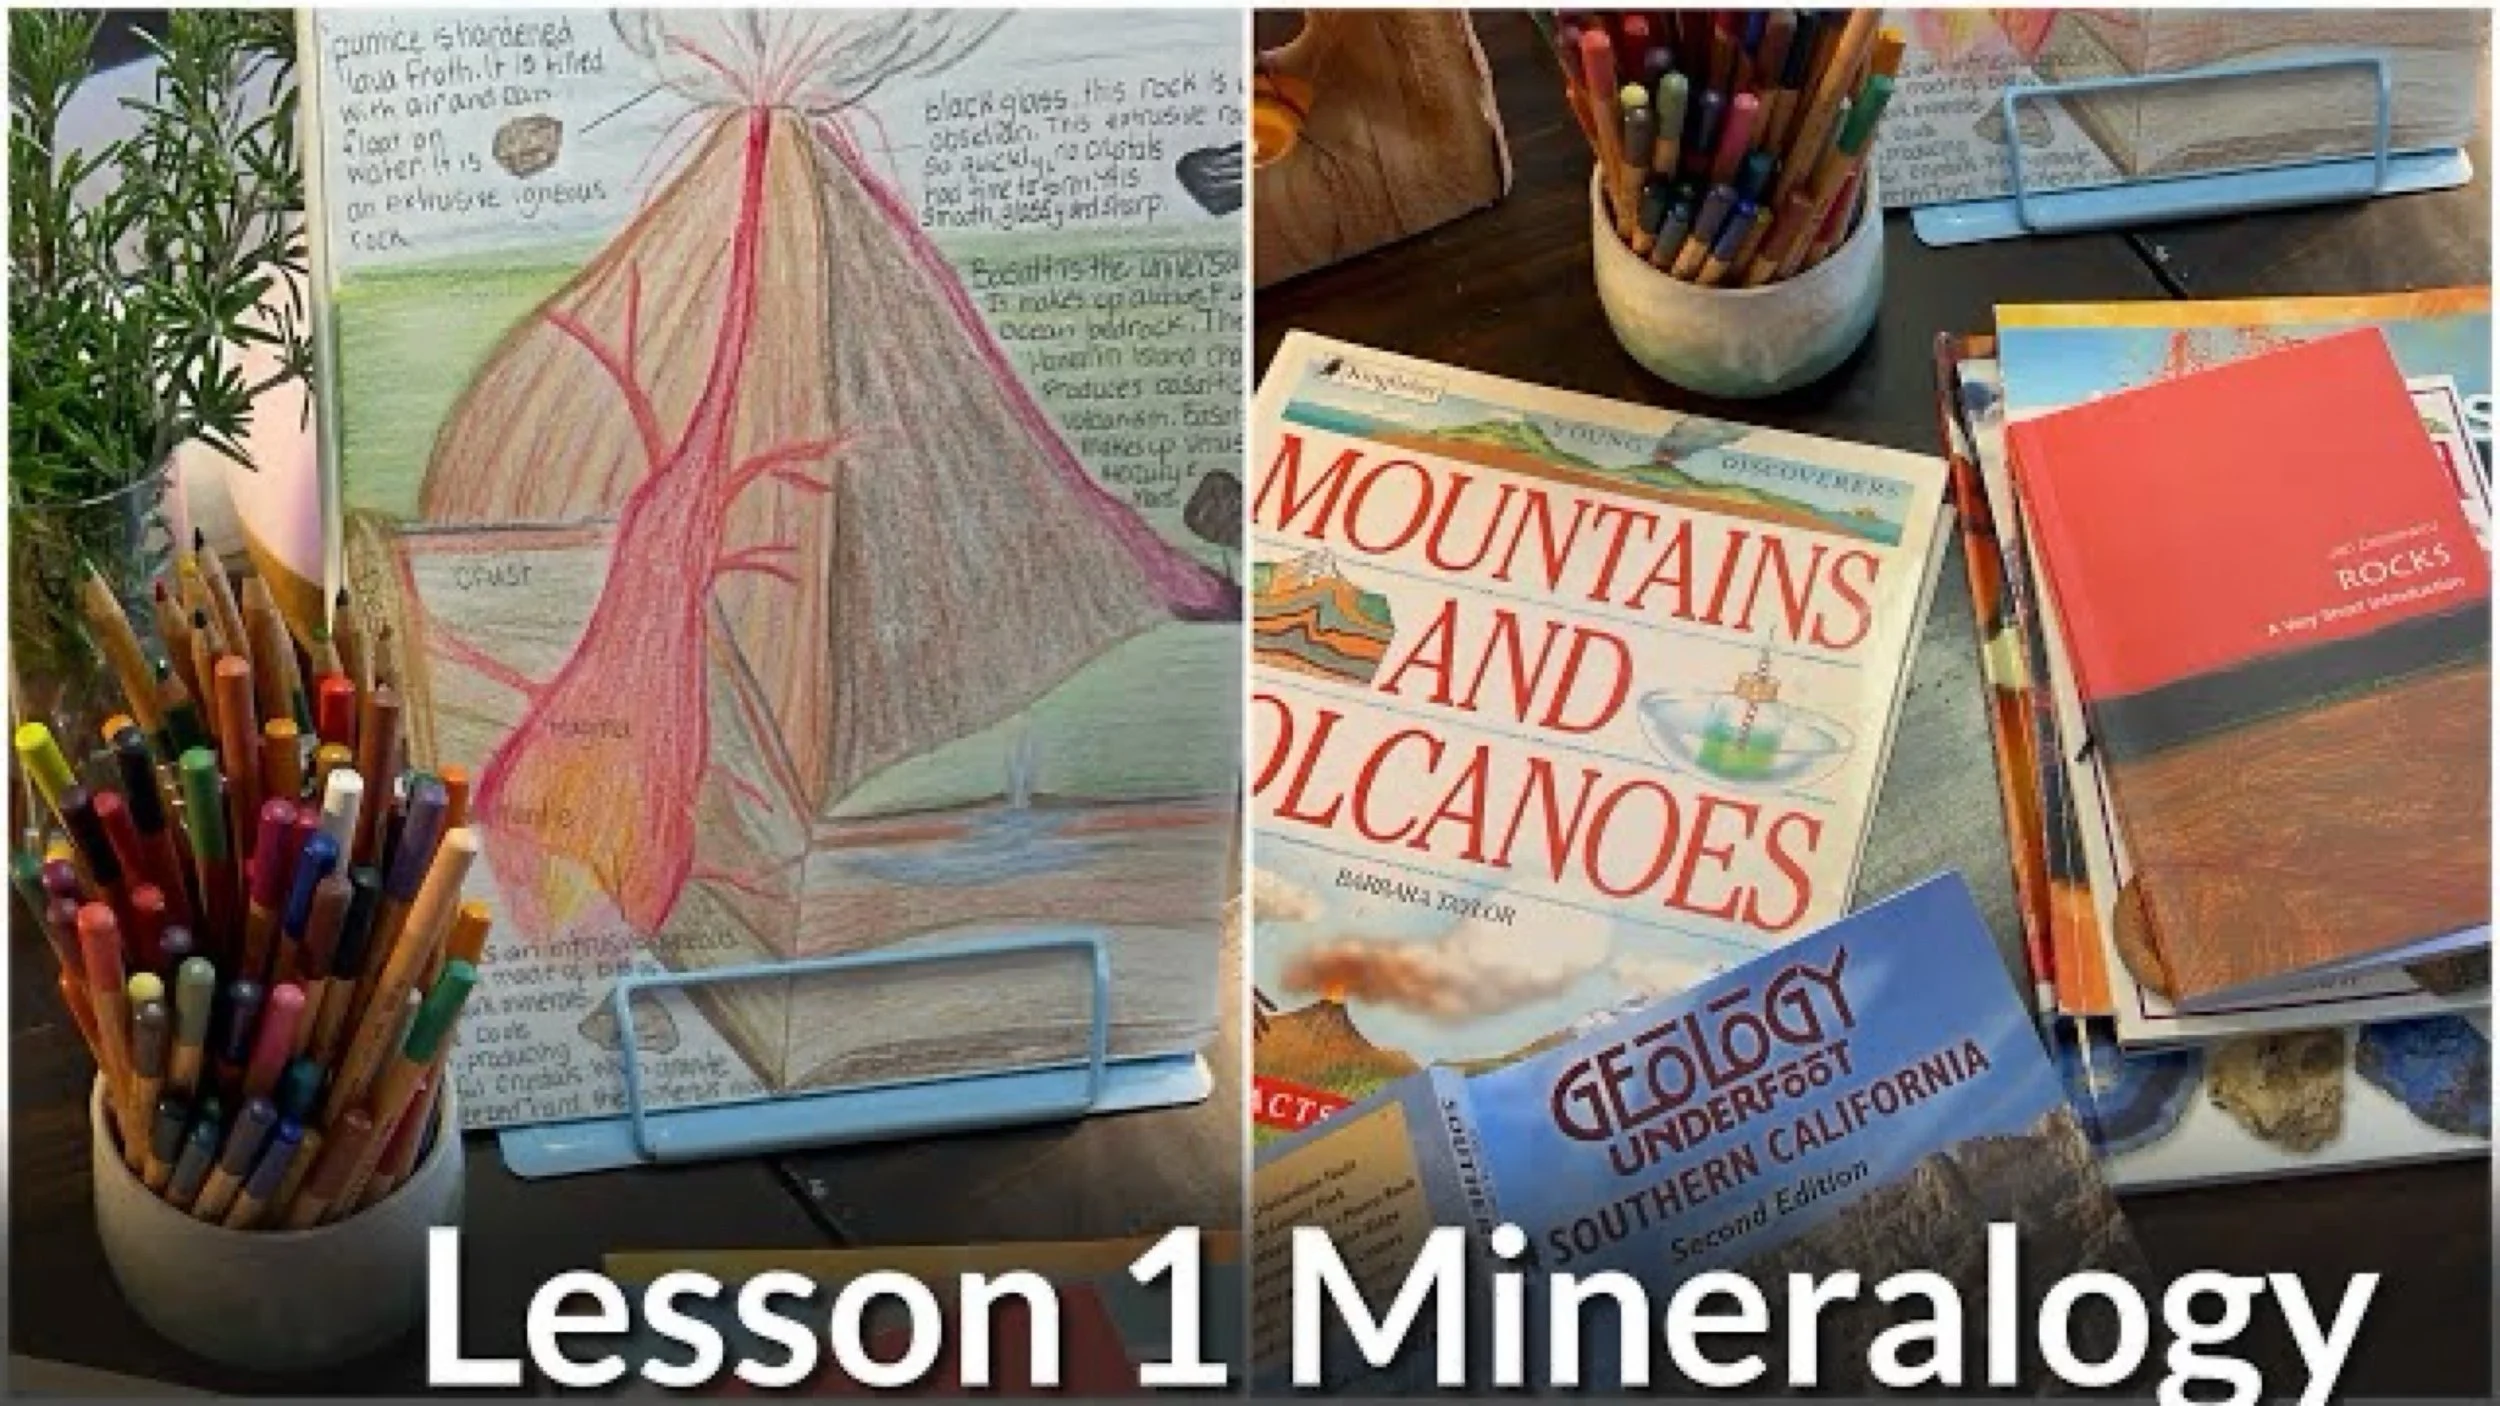
Waldorf Mineralogy Lesson
The Mineralogy main lesson block begins its study first with local geological landscape and formations then quickly moves into the 'whole' granite, before going to the 'parts' the minerals that make up granite. It progresses in this way rather than beginning with the rock cycle and a description of each type of rock and how its made.
-
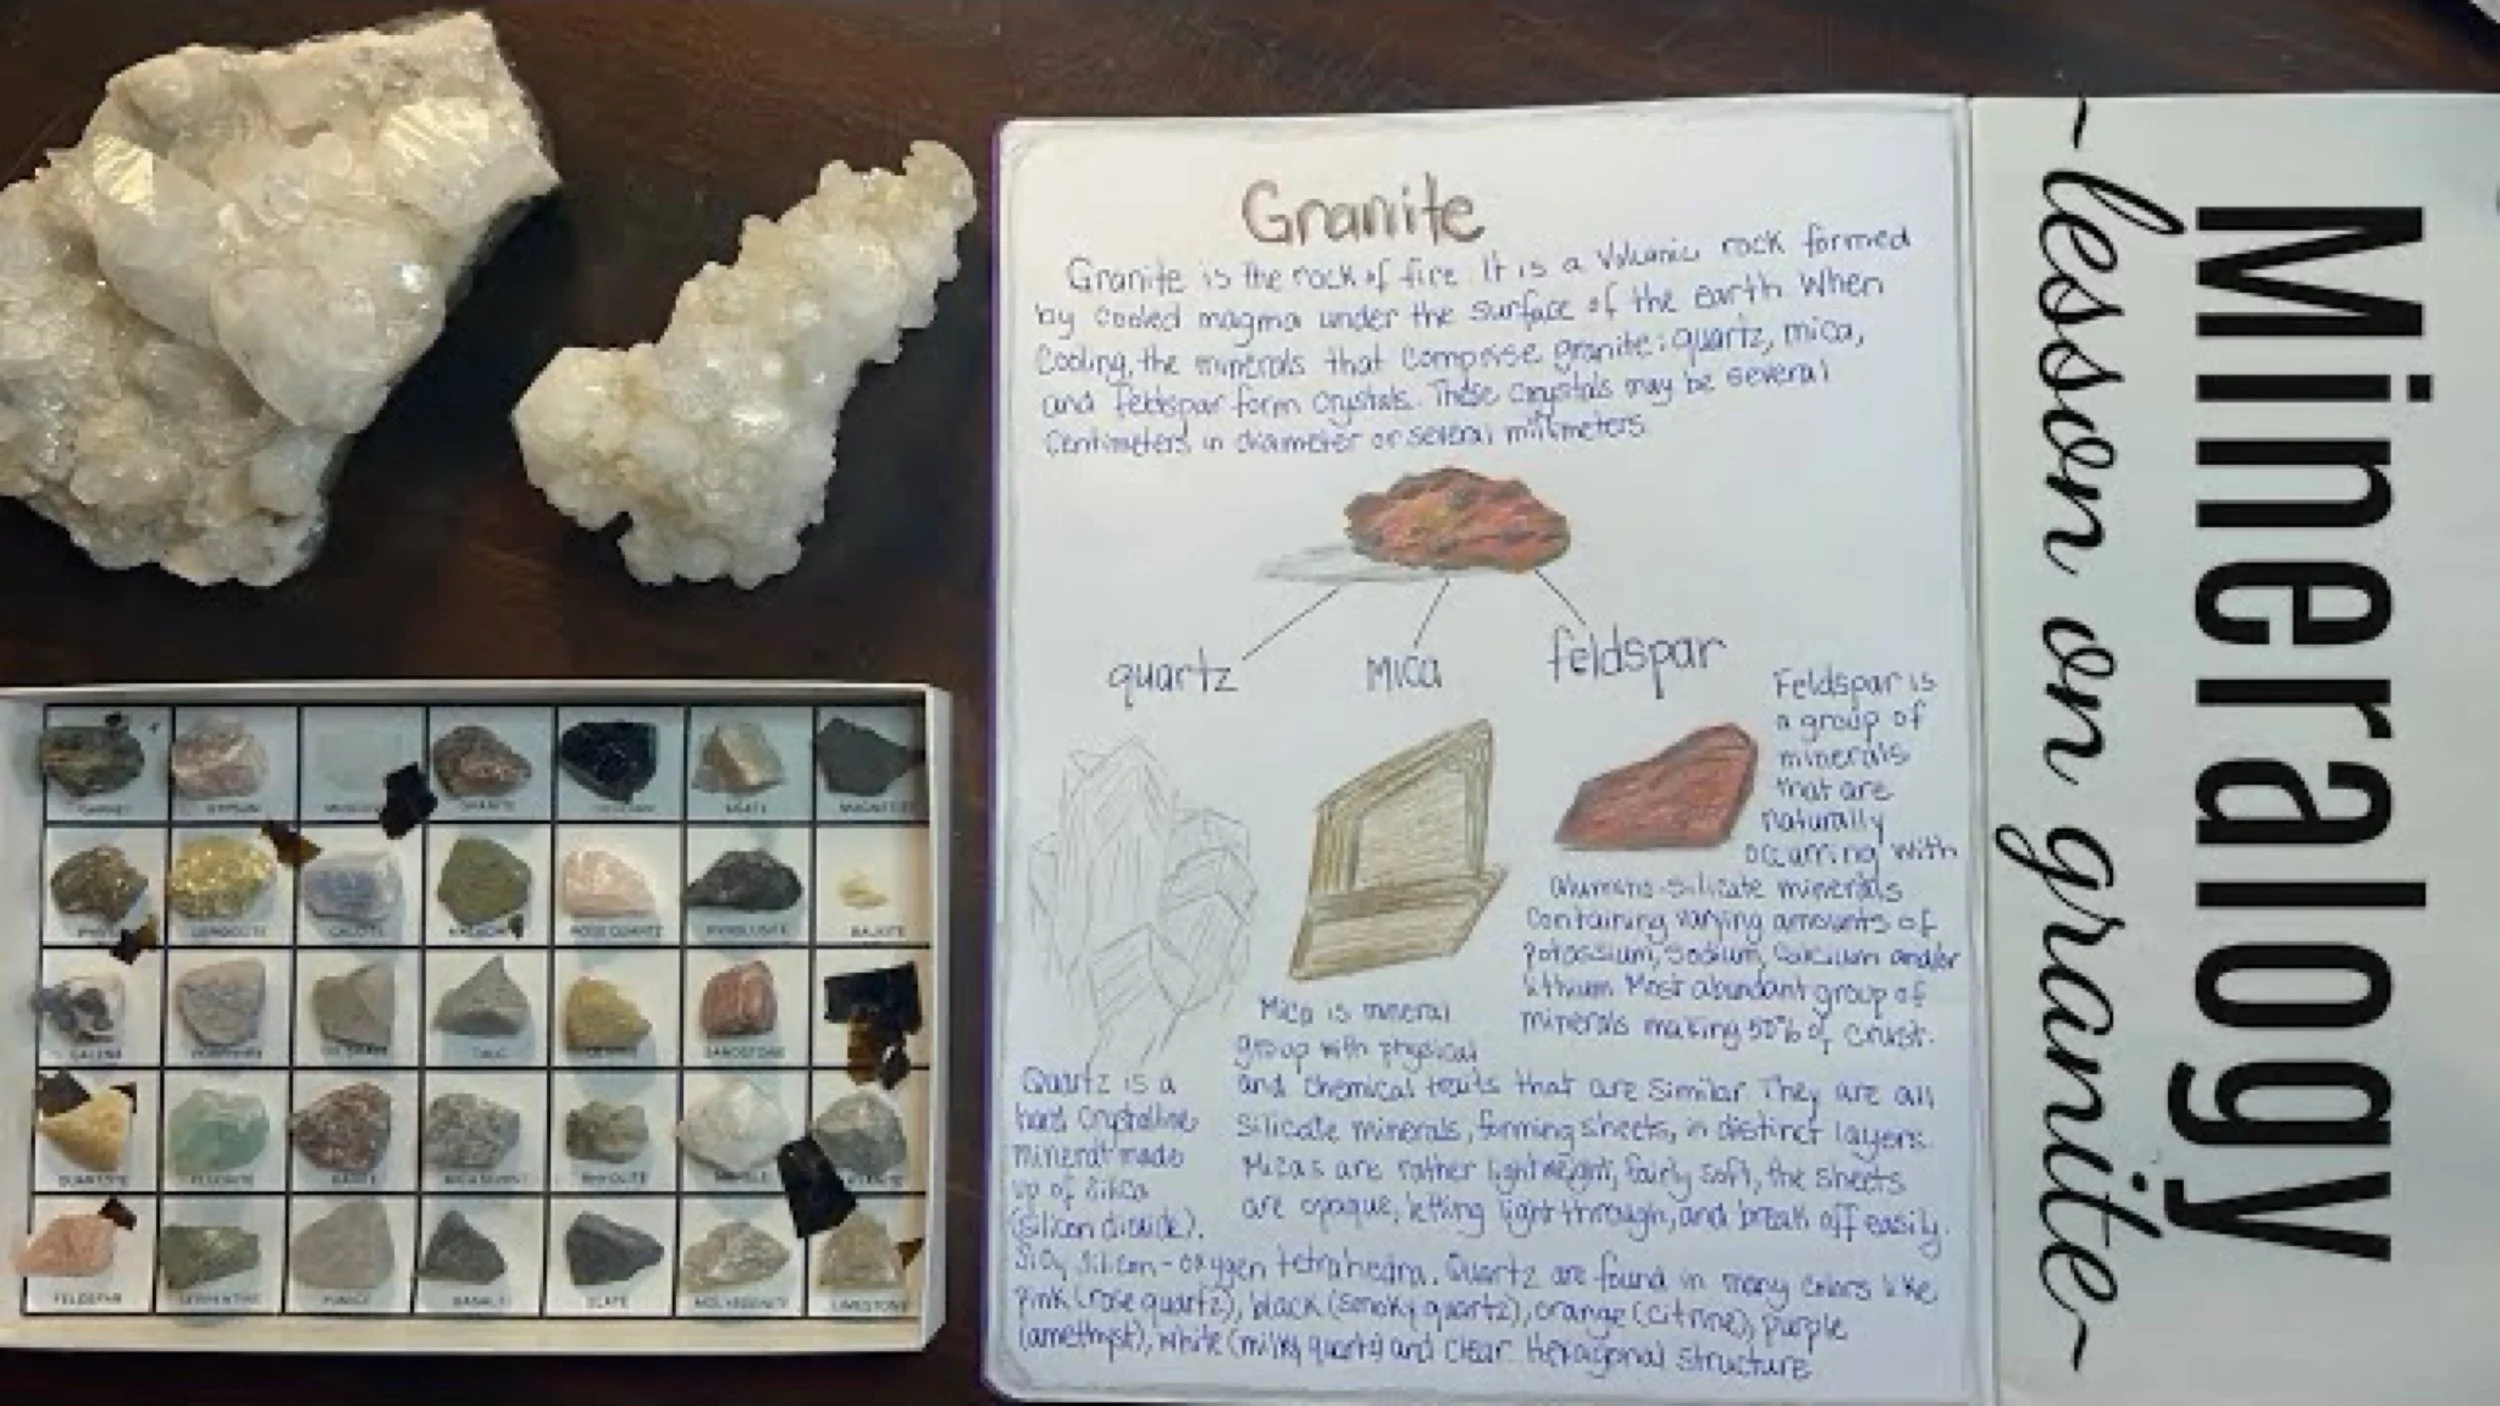
Mineralogy Main Lesson | Granite
This is lesson 2 of our latest Mineralogy Main Lesson Block, and while most of it is in line with the Waldorf methodology, I'm realizing some of the things I want to include, like the structure of minerals and the elements and the formation of elements and minerals, are not relevant to the lesson and are not developmental appropriate for the grade 6 student.
-
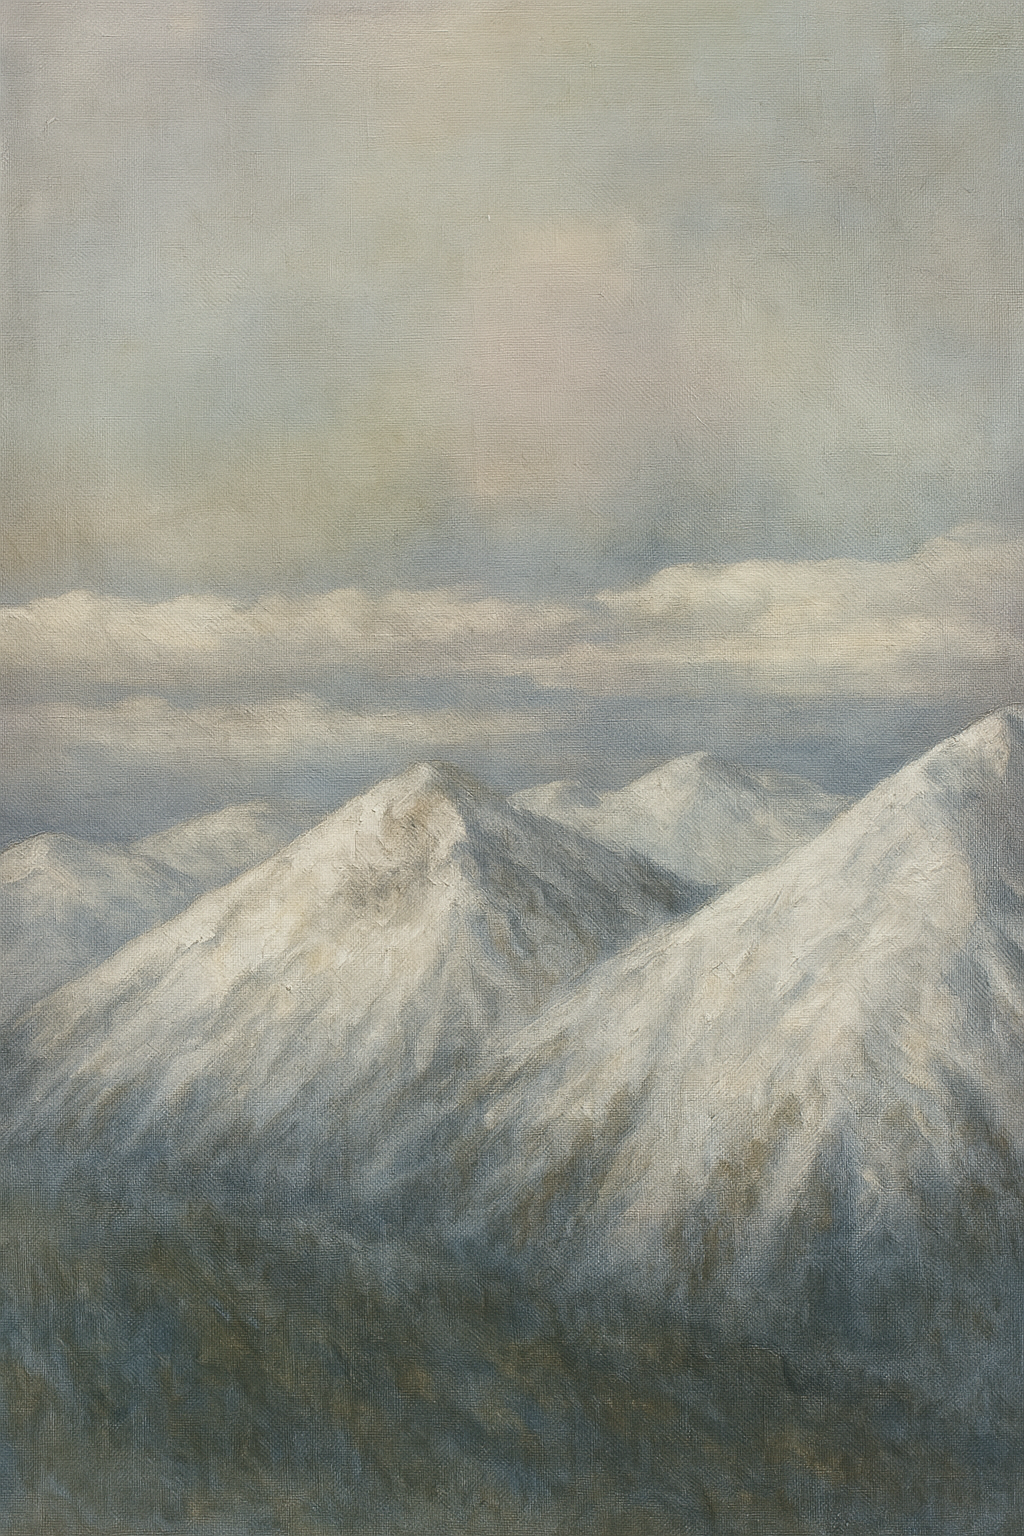
Geology Lesson | The Roots of the Mountain
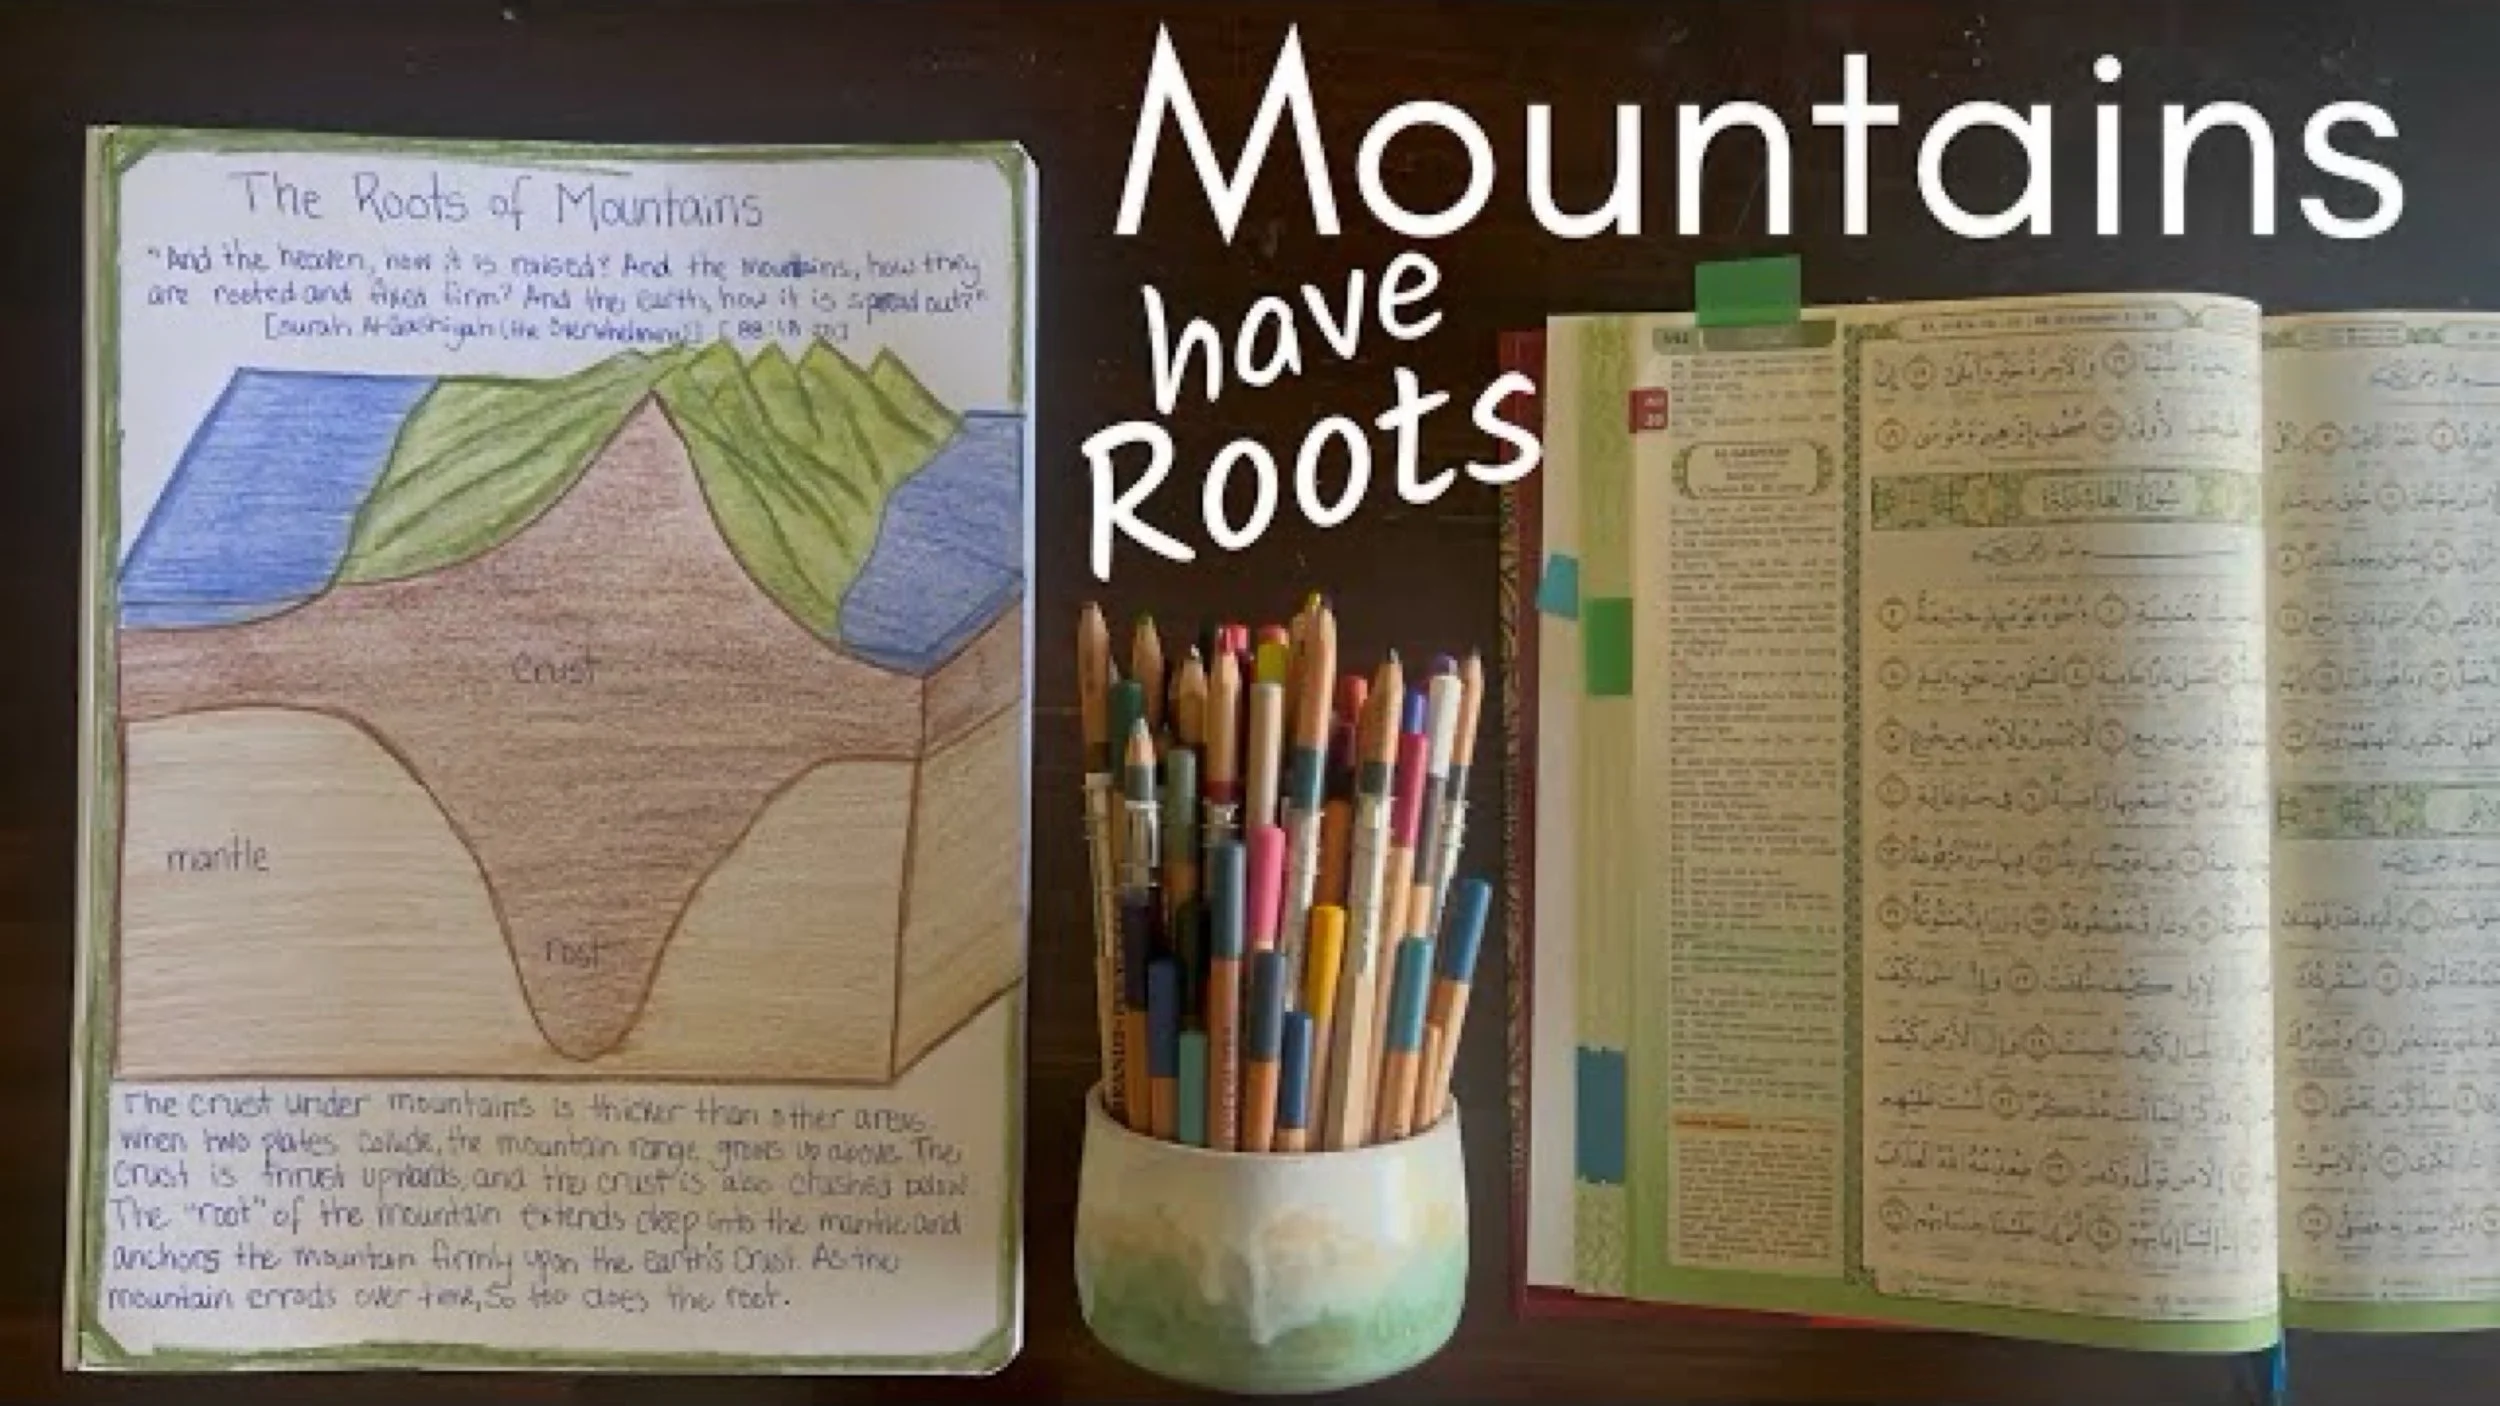
Did you know that mountains have roots? Much like an iceberg where you only see the tip above the water, and the majority of the iceberg is below water, so to are mountains, where just the tip is visible on the the surface of the planet, while the remainder of the mountain goes deep below the surface.
-
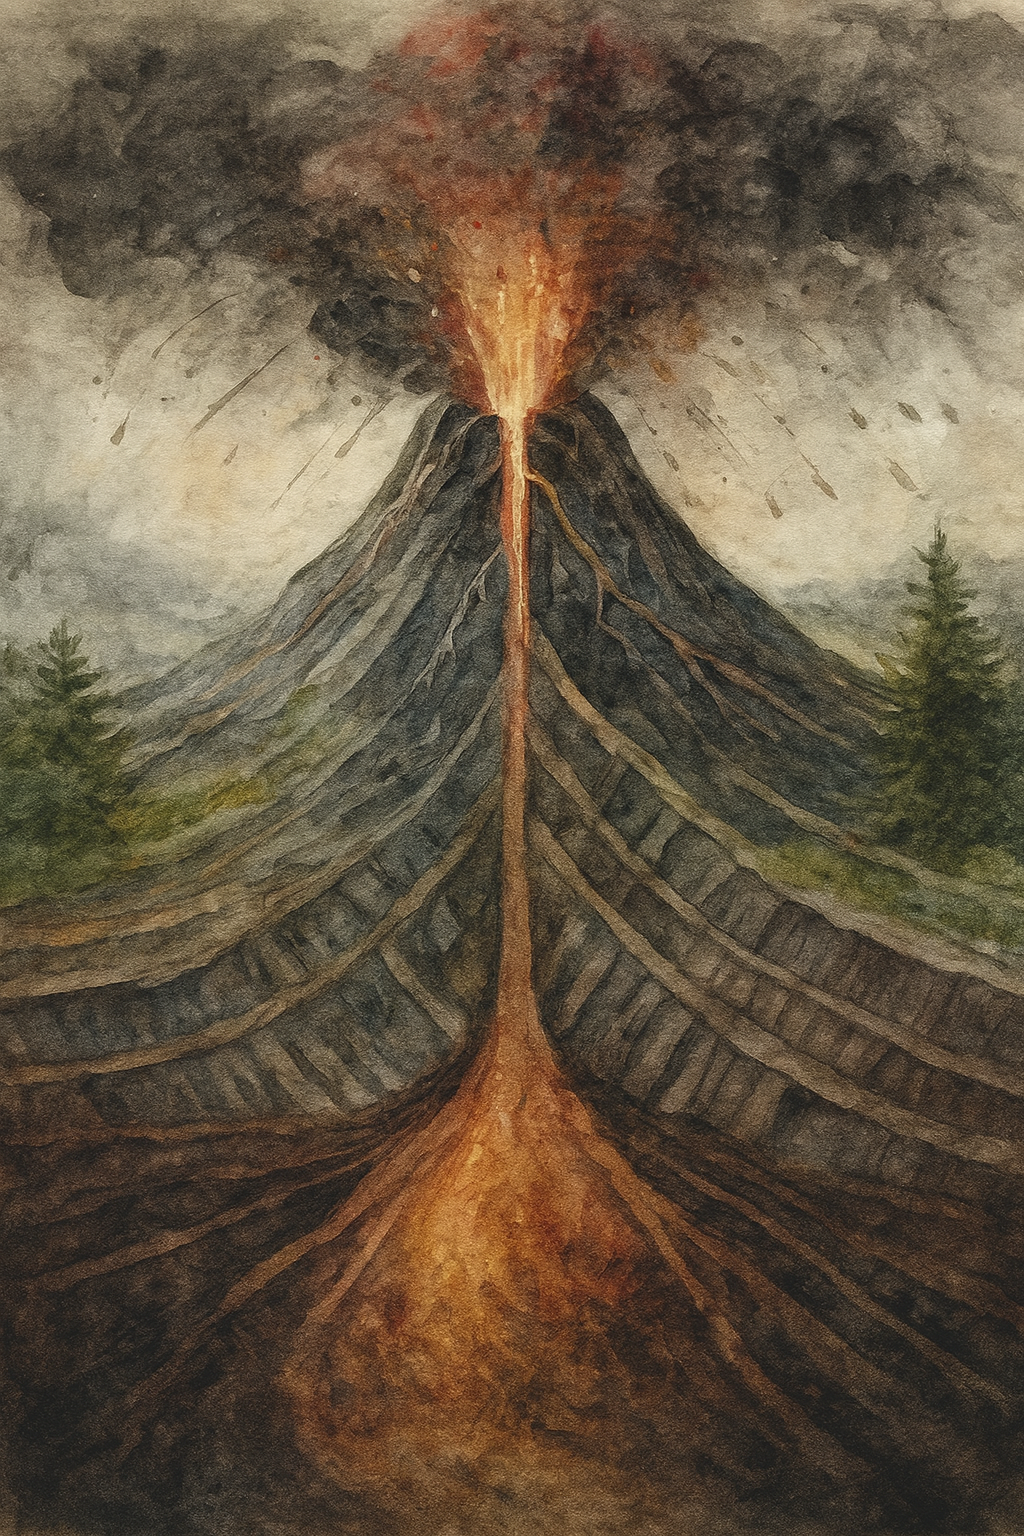
Mineralogy Lesson cross-section of the Volcano 
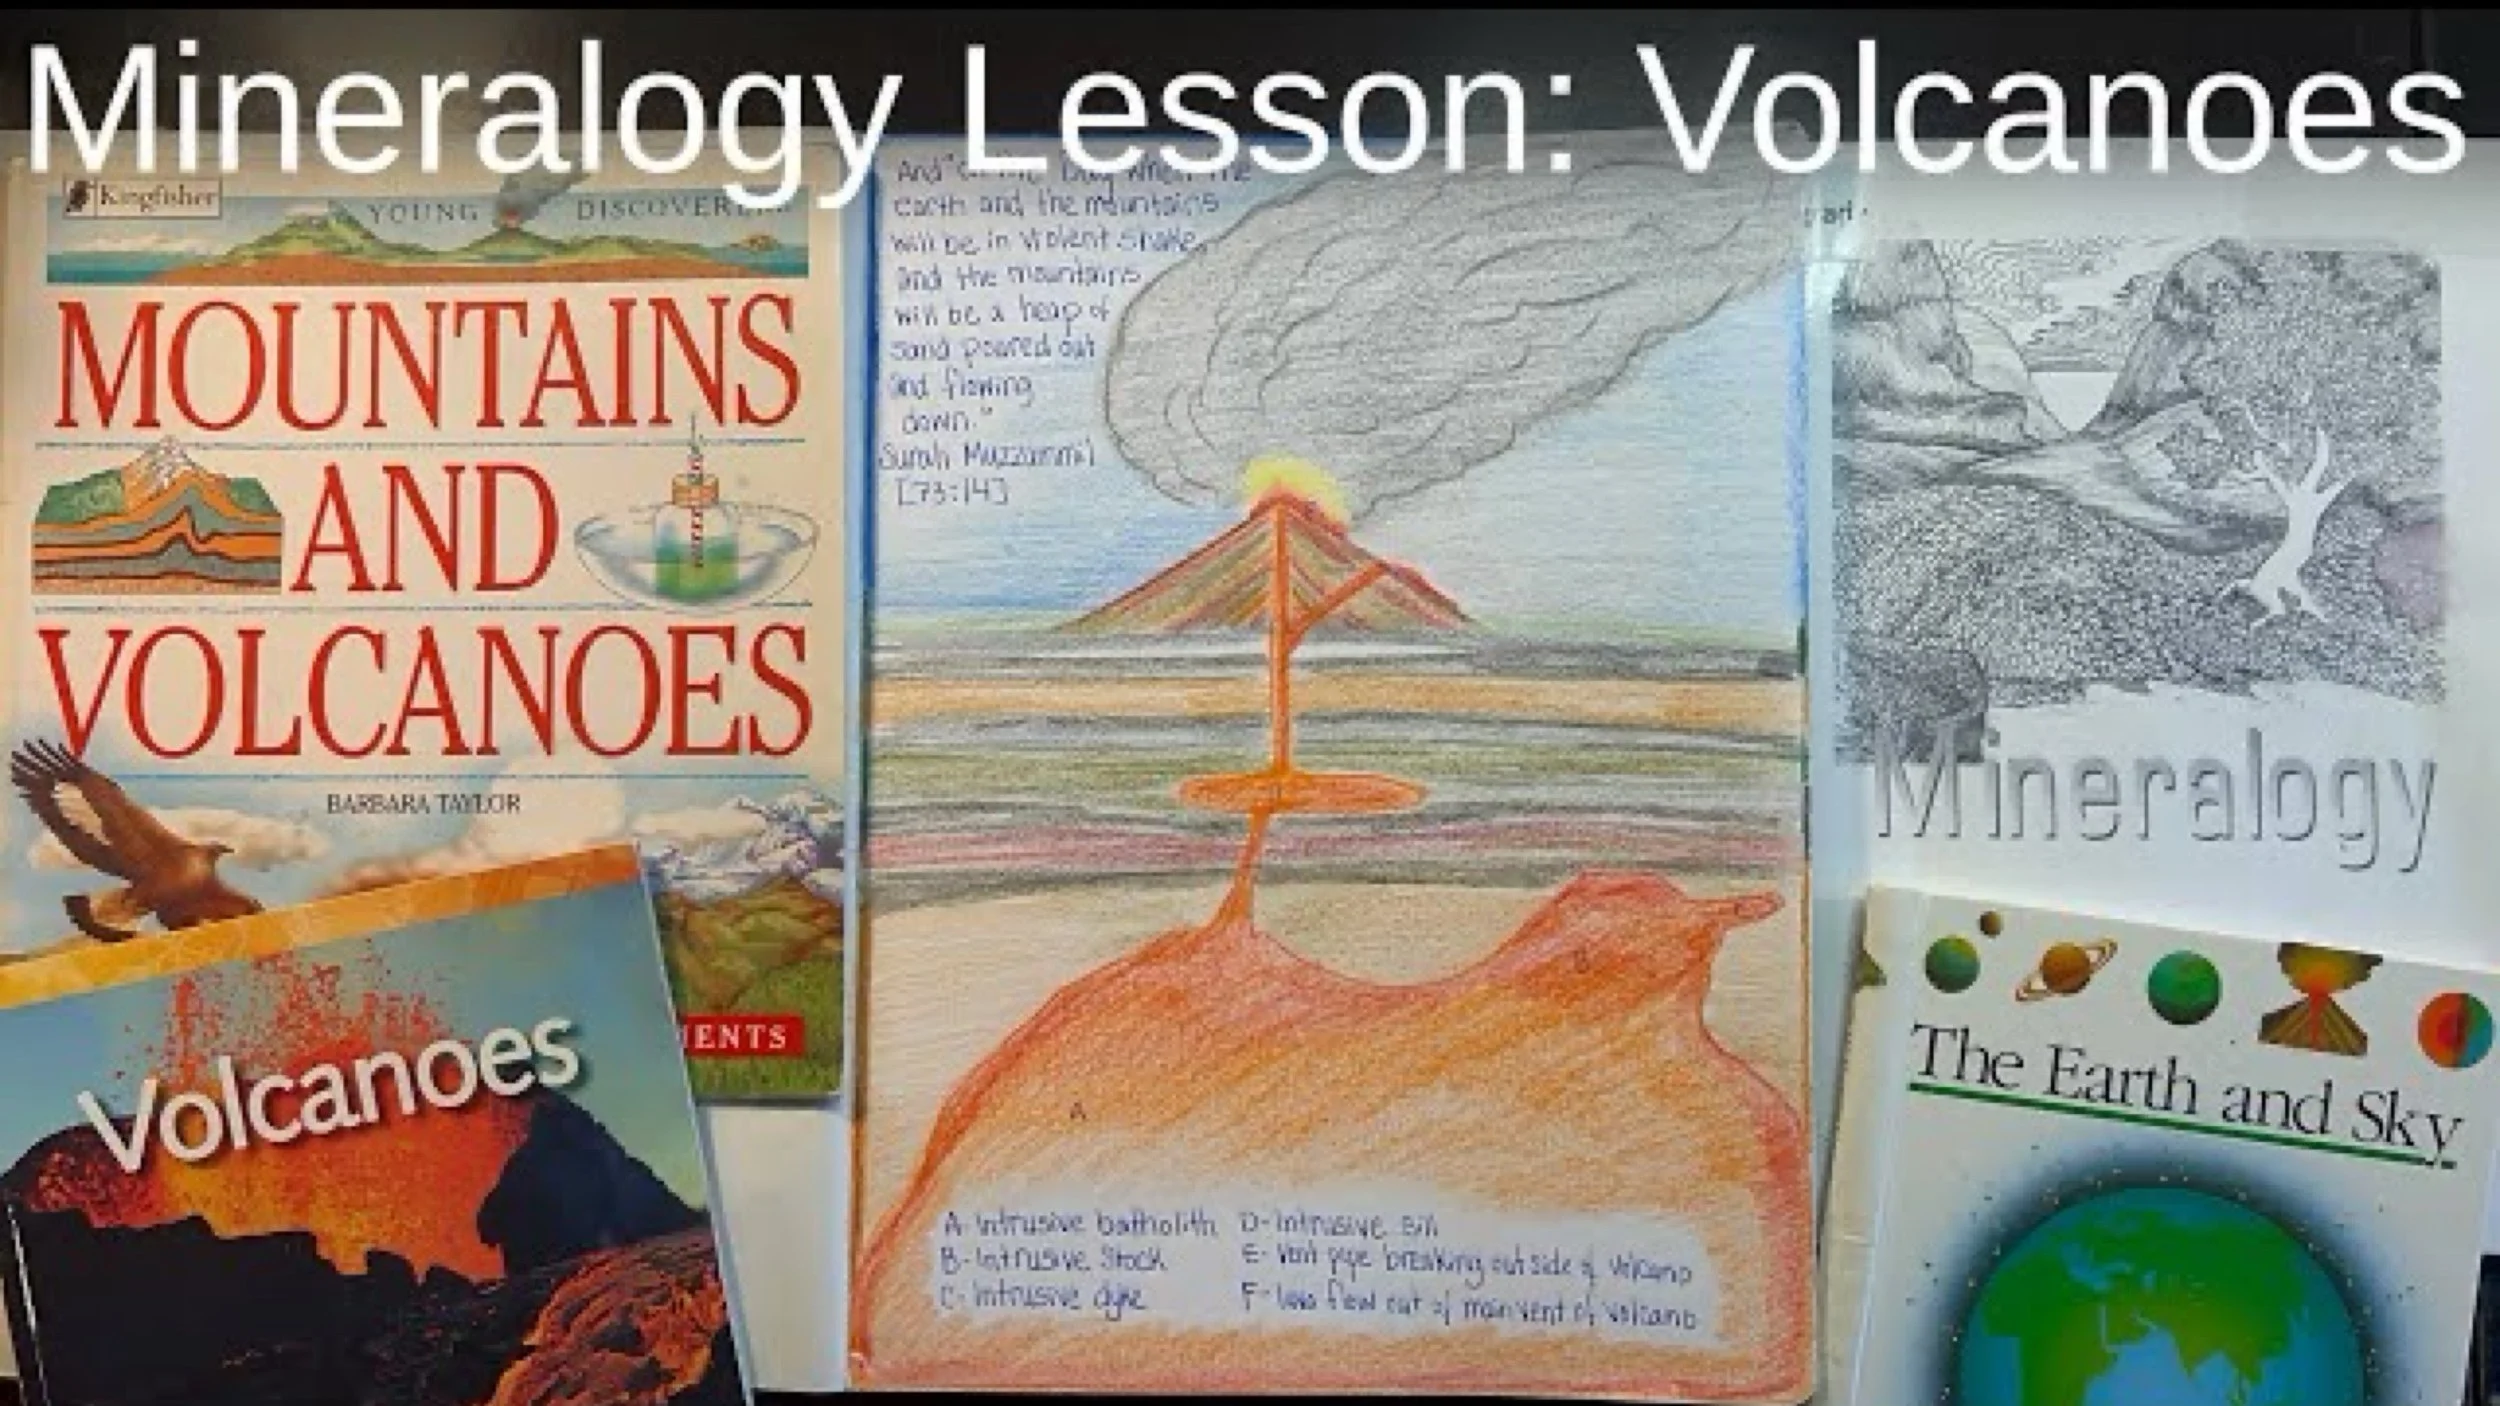
In this Mineralogy Lesson we learn about volcanoes and the tremendous amount of magma below the surface of a volcanic mountain. I am using our Lyra color pencils for this lesson. We completed the lesson over 2-3 days, reading completed on the first day, the drawing next, later we read specifics about the types of rocks and magma related to this illustration and finally we wrote narrations in our main lesson books.
-
Ring of Fire
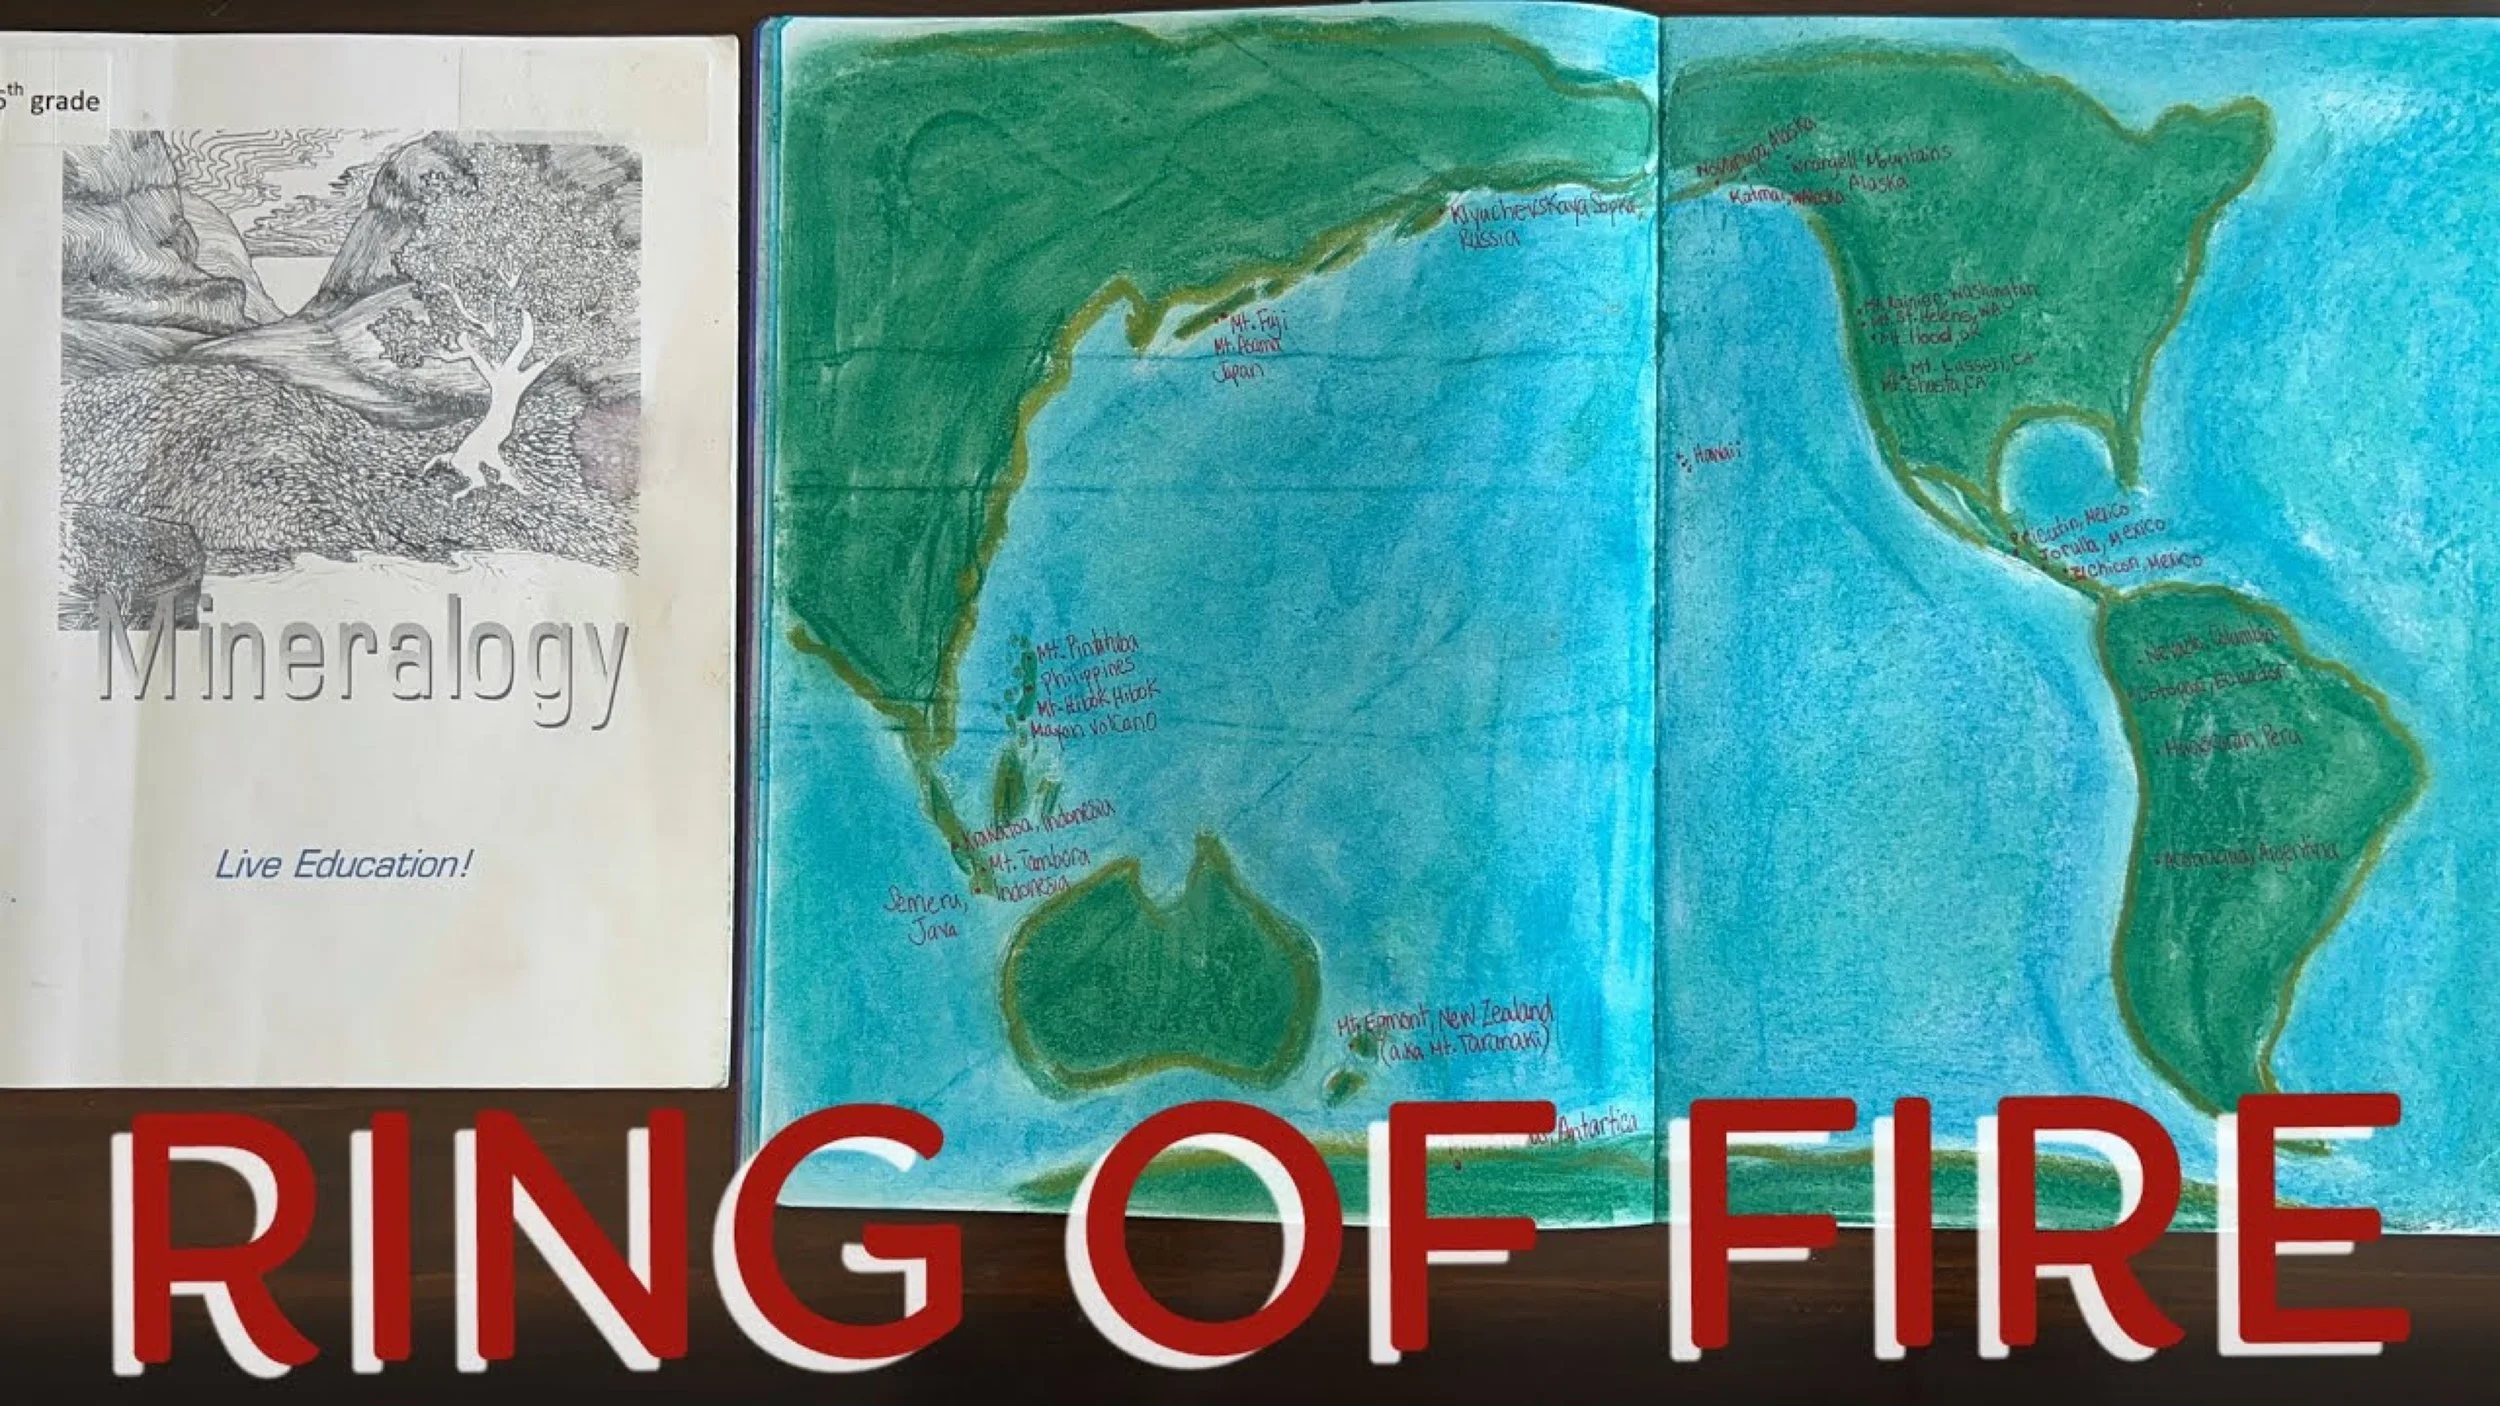
For our Waldorf mineralogy main lesson block, we continue with our lessons on land formation, plate tectonics and volcanic activity. Today's lesson is about the Ring of Fire. We used chalk to cover our double page layout in blue.
-
Mid-Atlantic Ridge & Pangea
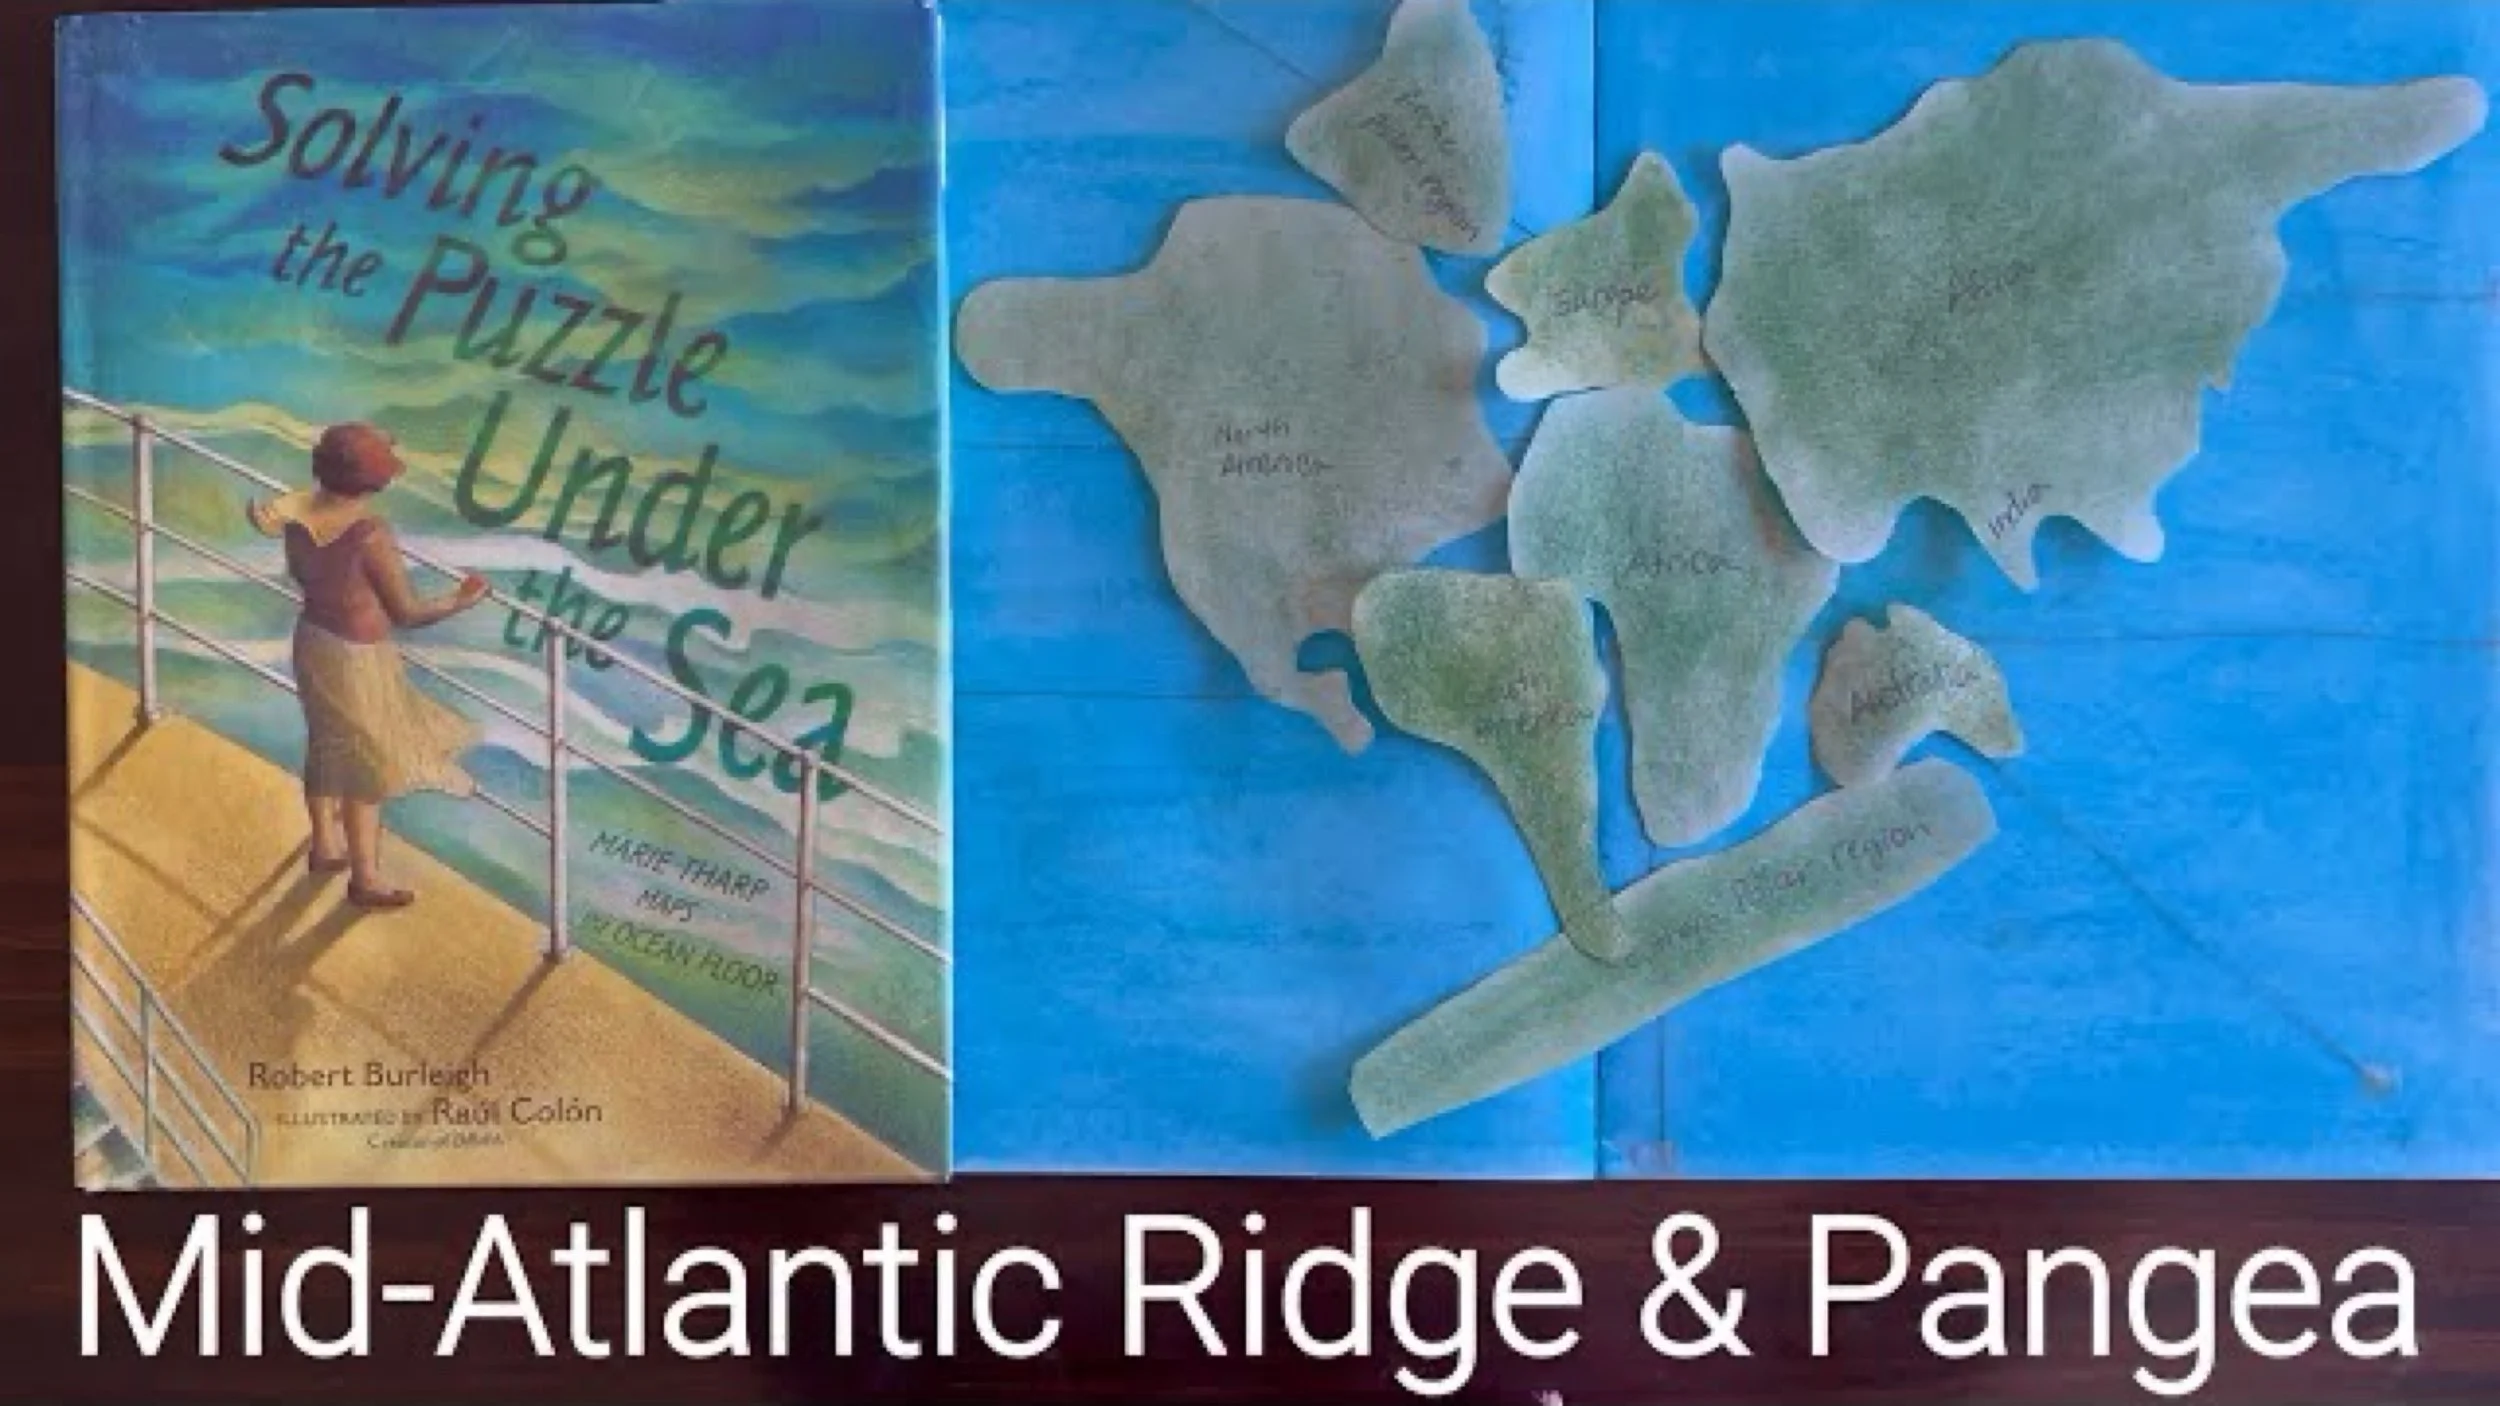
For our Waldorf mineralogy main lesson block, we continue with our lessons on land formation, plate tectonics and volcanic activity. While we have done the landforms for Pangea in the past, we are approaching this lesson a bit differently. We began by tracing the continents from an atlas. You could print off the continents on printer paper and cut them out alternatively.
-
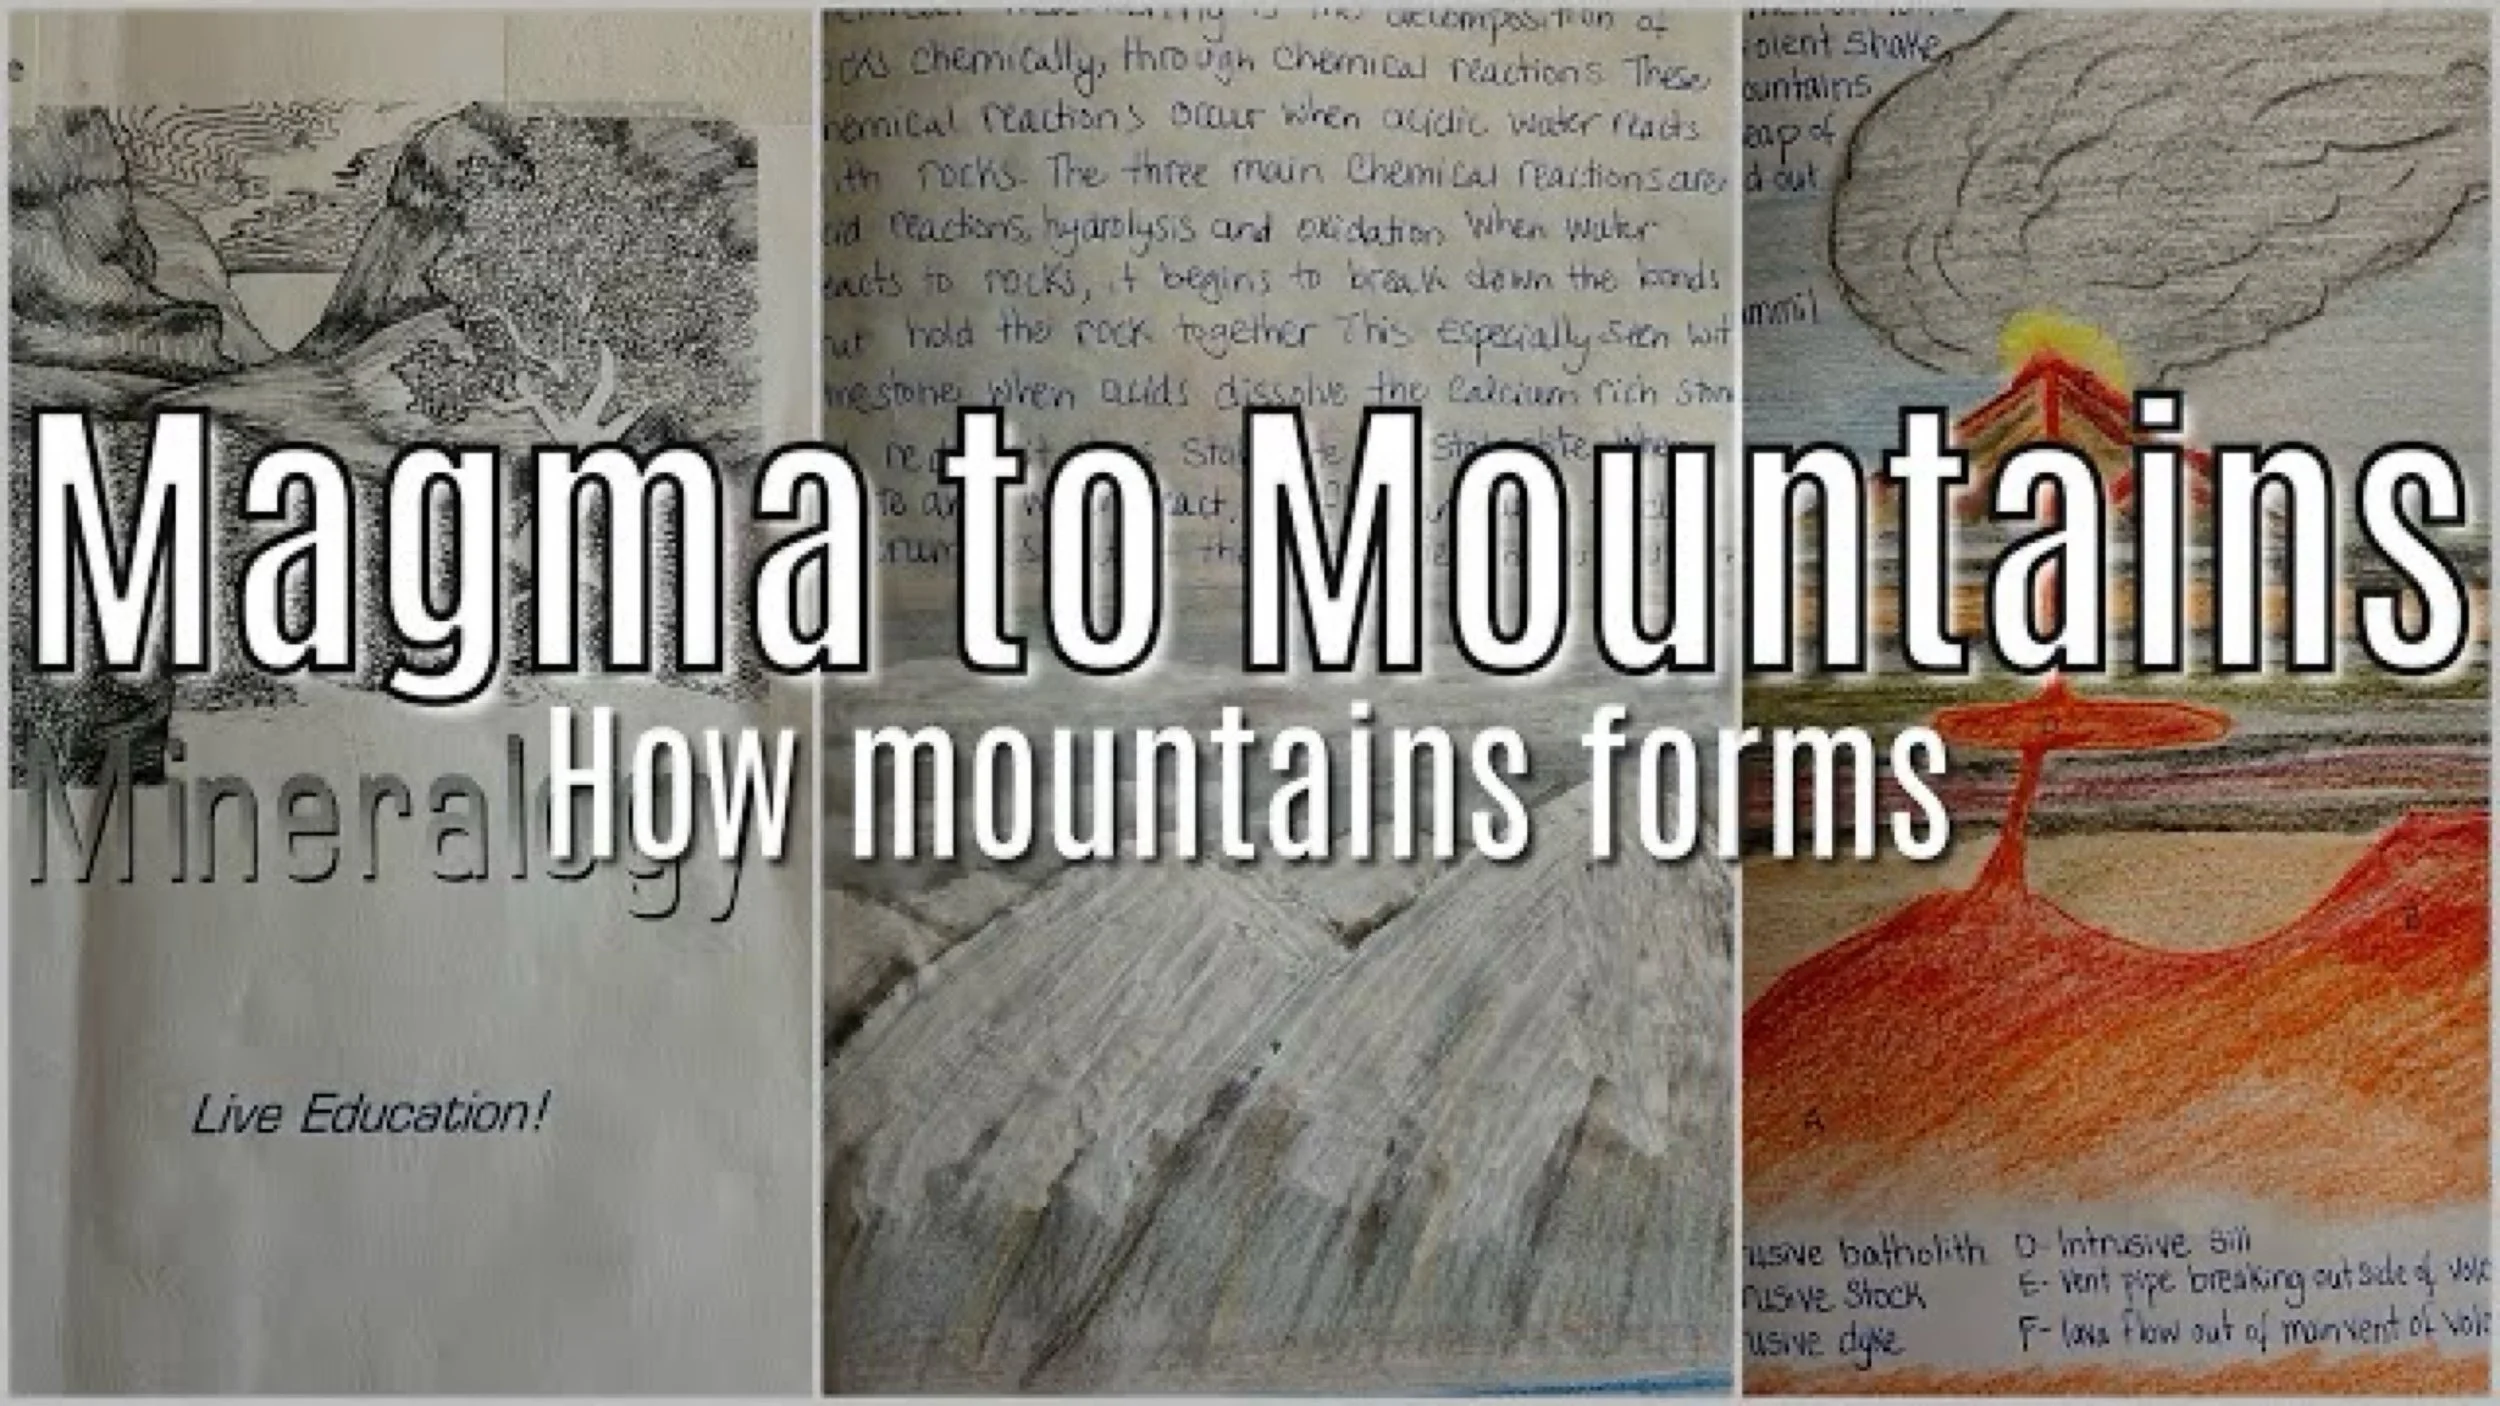
How Mountains are Formed from Magma
In this mineralogy lesson, we studied volcanoes. When magma cools below the surface of the earth, it forms gigantic granite ranges. Tectonic activity, and across geological time, these granite ranges rise the surface of the Earth and through erosion and weathering the layers that covered these granite ranges you rode overtime, exposing these gigantic granite mountains.
-
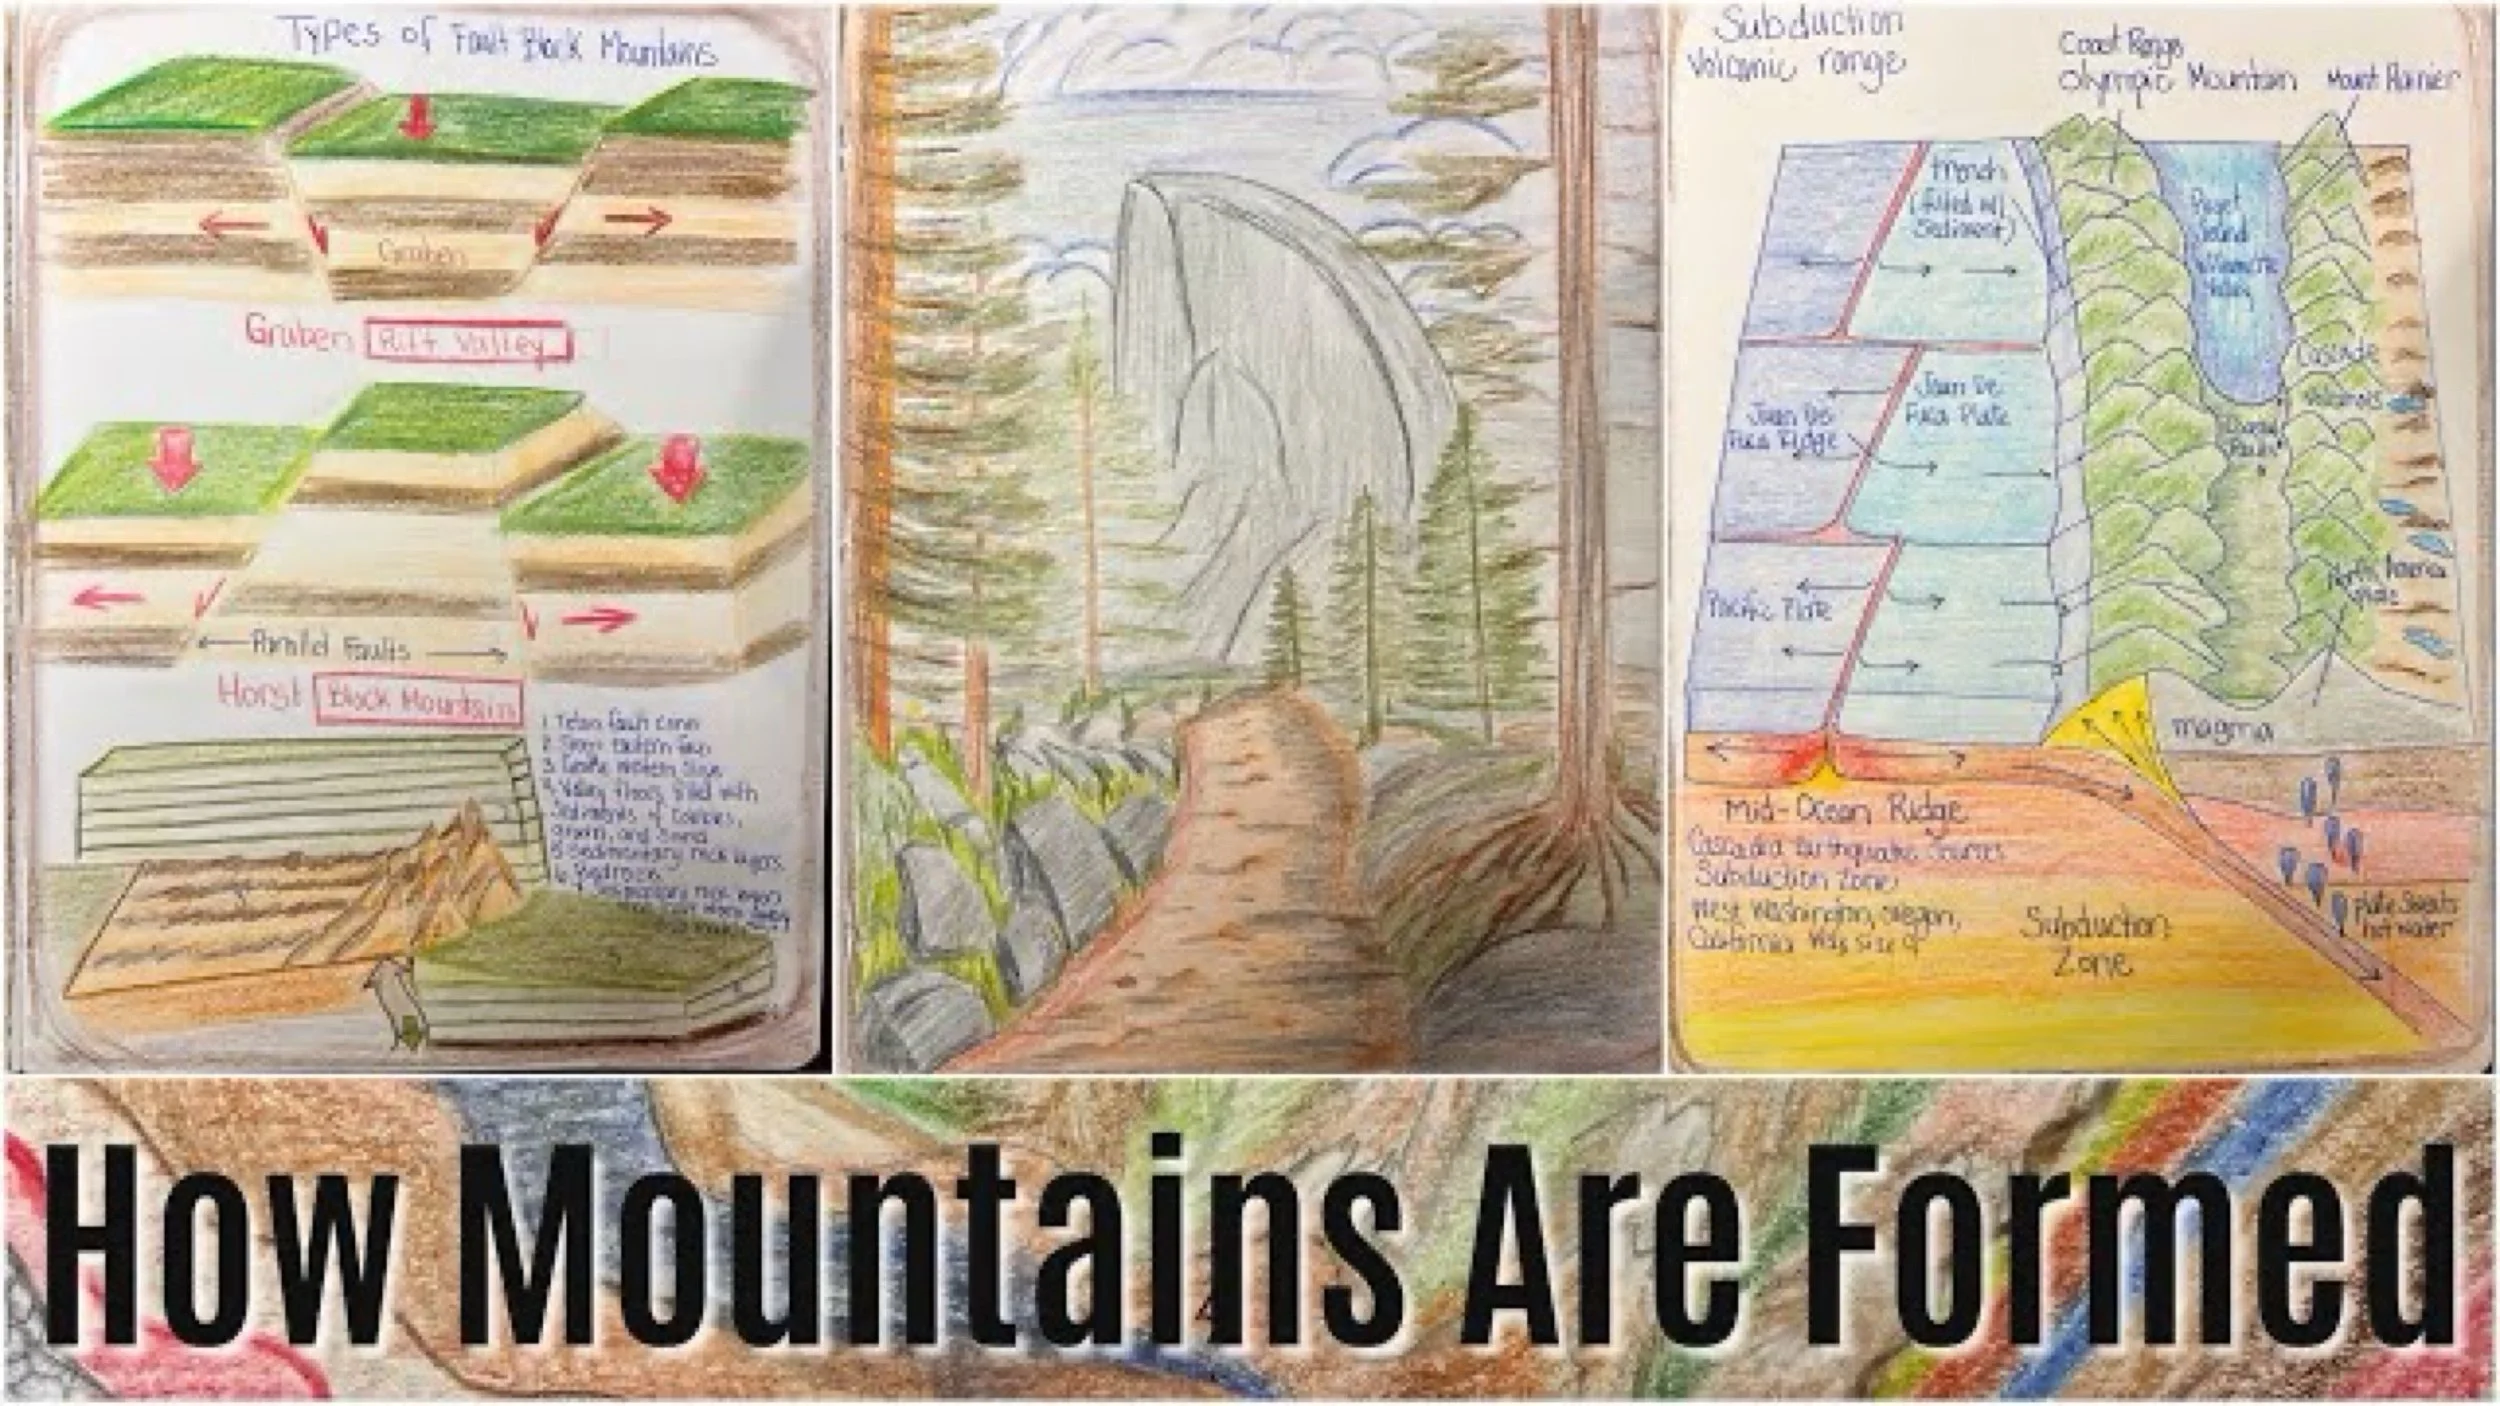
How Mountains Are Formed
This lesson on 'How Mountains are Formed' is a four part lesson in which we learned about Fold Mountains, Dome Mountains, Volcanoes and Fault Block Mountains.
-
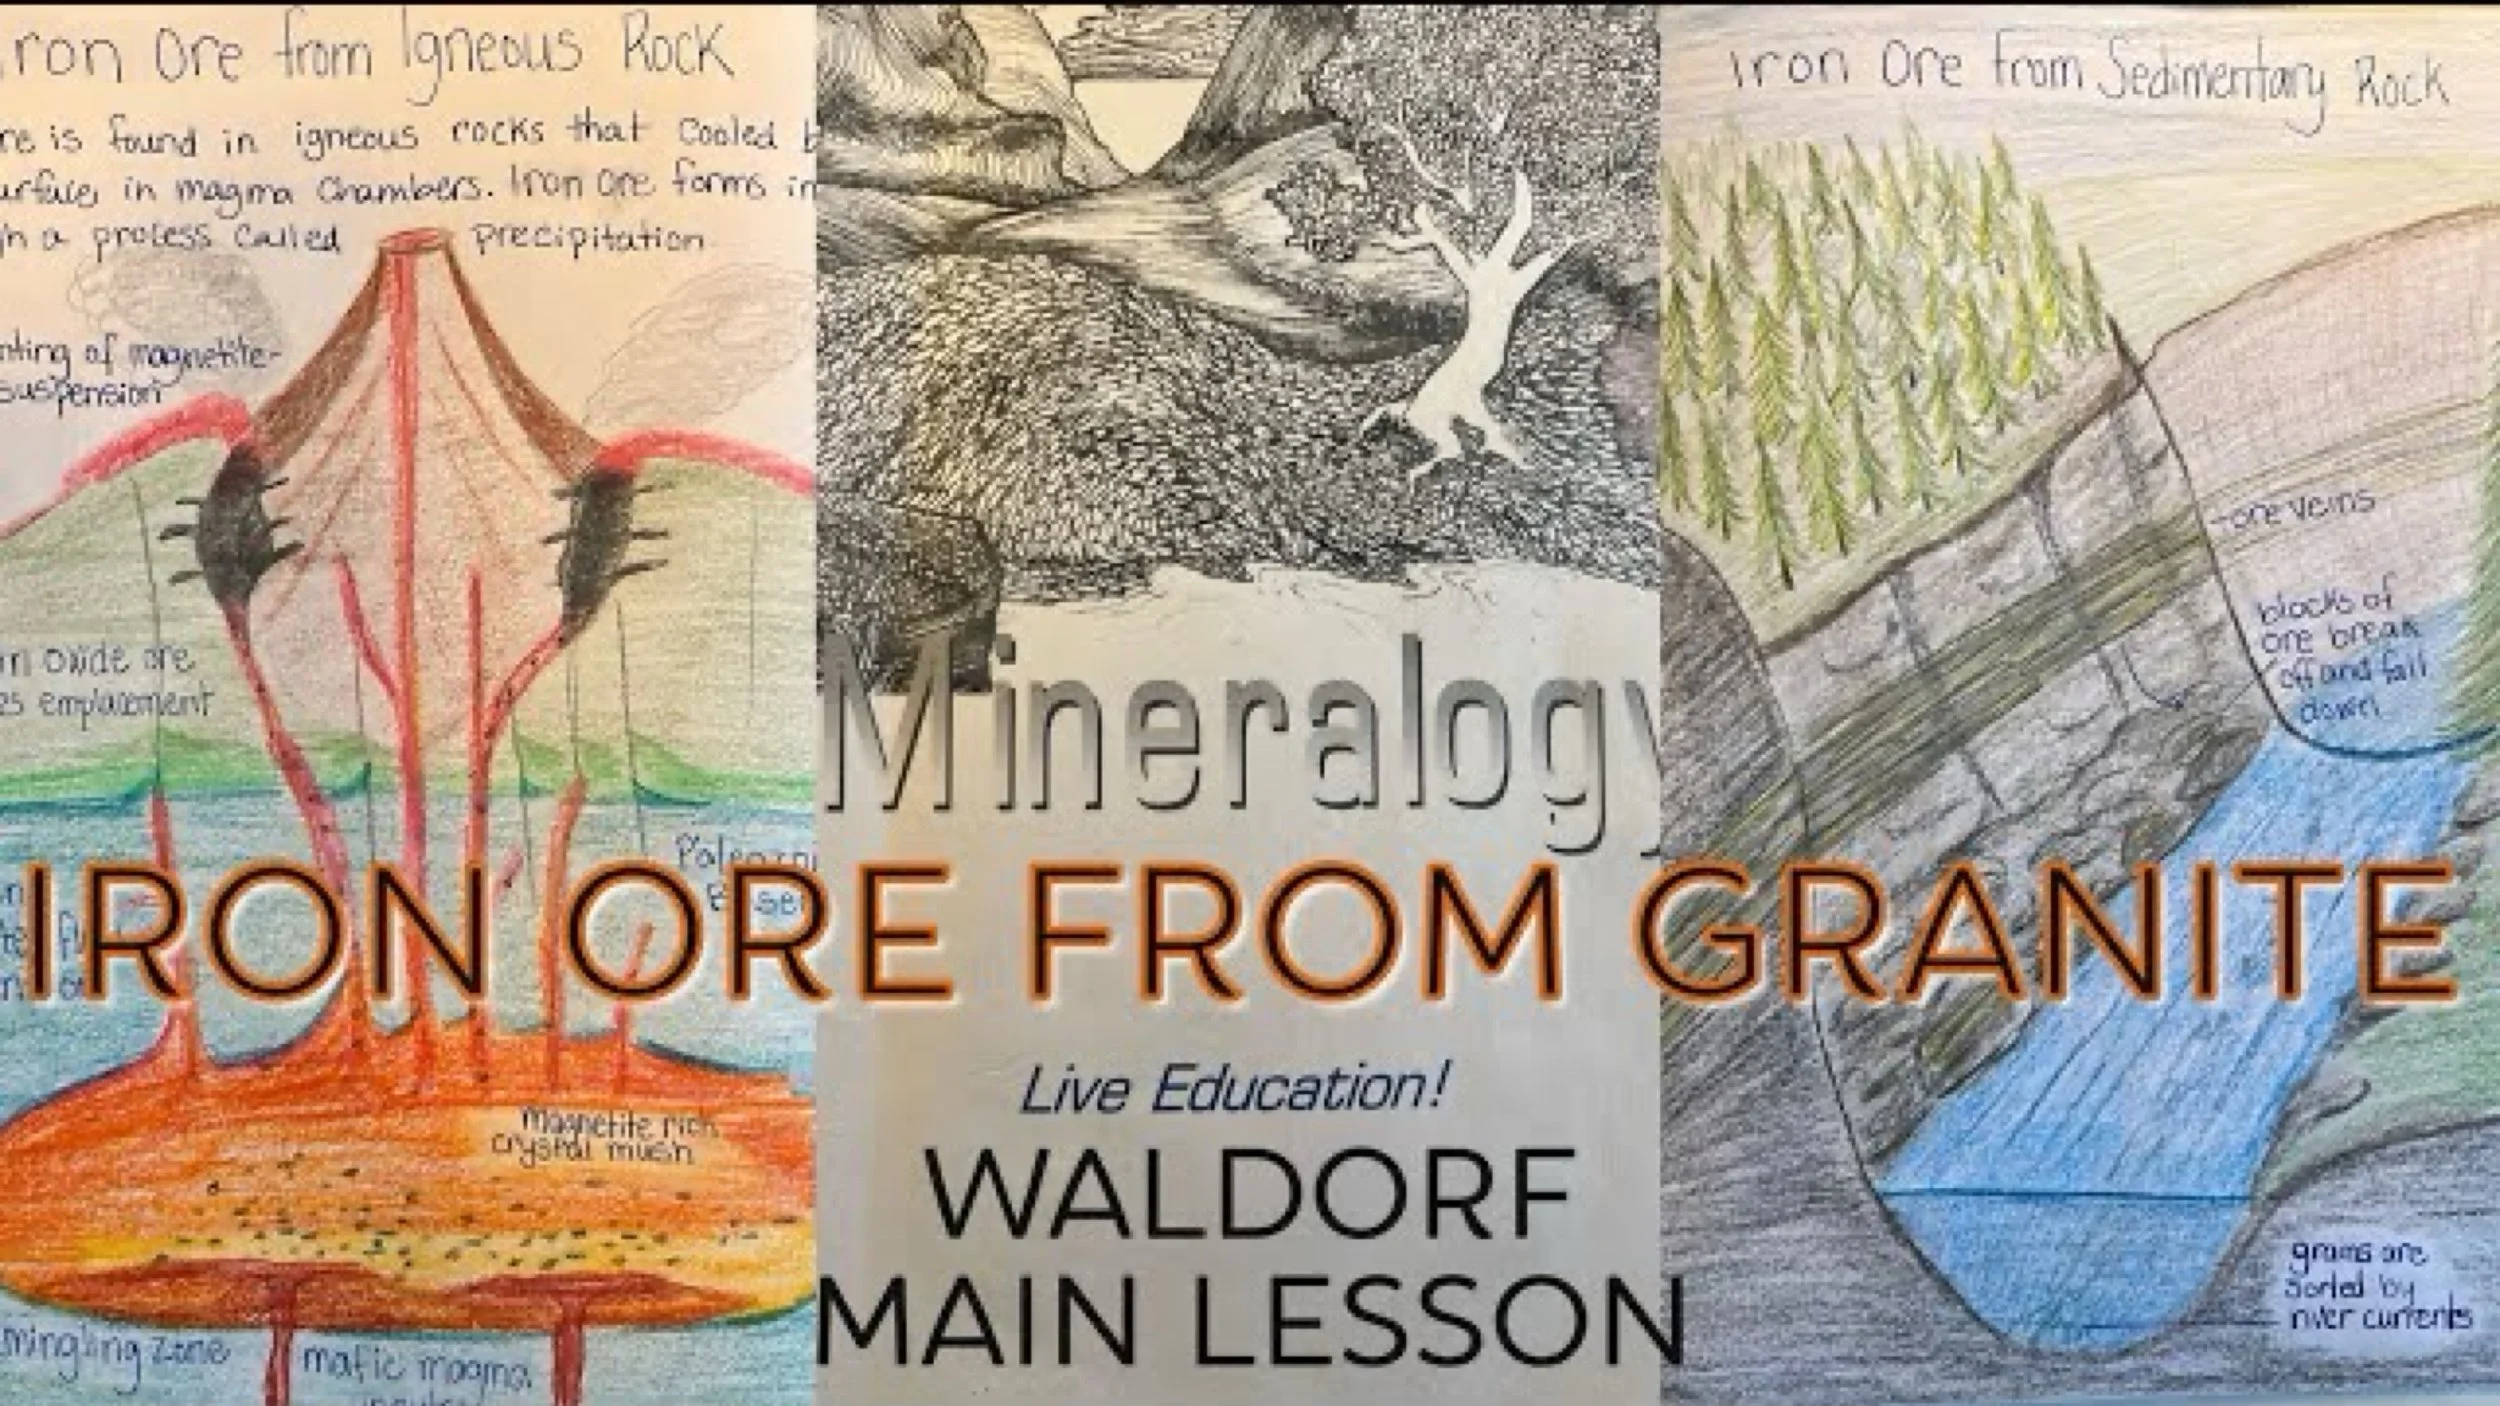
Iron Ore Veins from Sedimentary & Igneous Rocks
We continue with our main lesson block in Mineralogy with a two part lesson on the formation of iron ore veins in banded iron formations and iron oxide deposits in both sedimentary and igneous rocks.
-
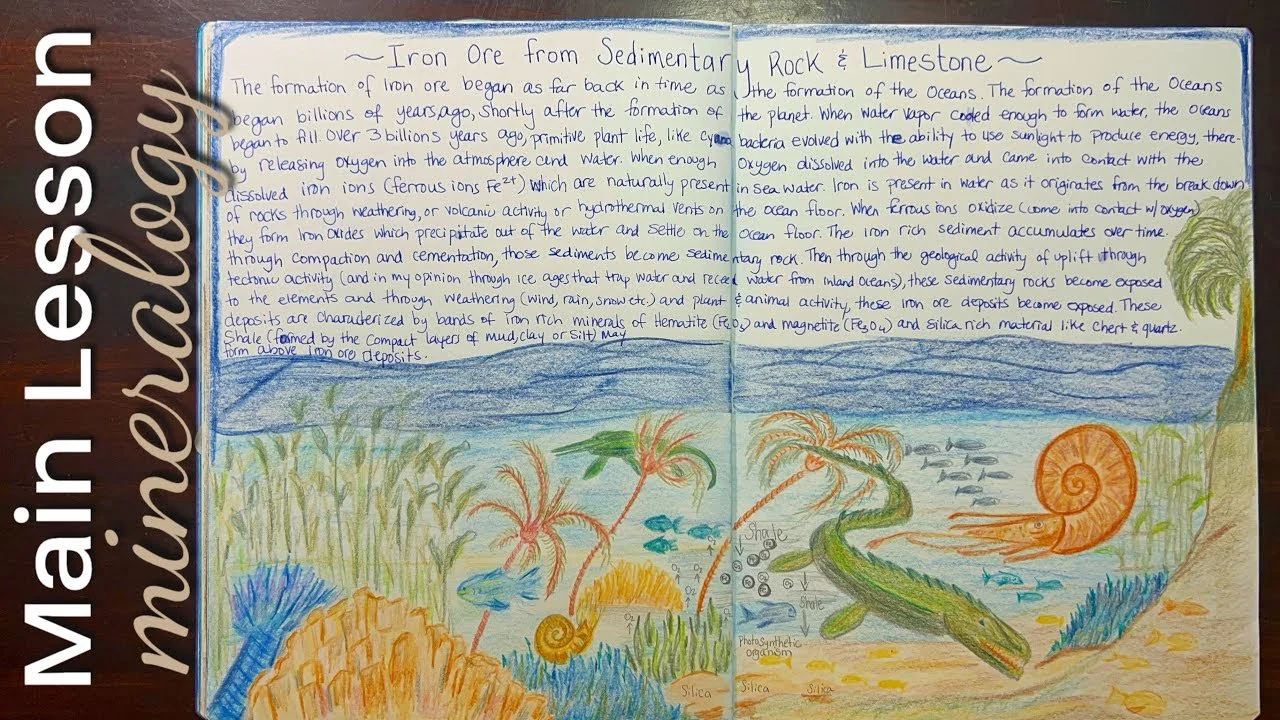
Banded Iron Formations from Sedimentary Rock
In this Mineralogy lesson, we depart from the main lesson book by Live Education to focus on two lessons where we dive into how iron ore deposits formed in precambrian oceans.
-
Water Cycle | Earth Science
While this lesson was not in the curriculum, I chose to add it here because of its relevance with the previous lesson on the limestone cycle. Originally I intended for this lesson to be part of the limestone cycle, but it ended up being its own lesson, though I didn't have any additional written content for it.
-
Limestone Cycle | Mineralogy
The limestone cycle starts in the ocean hundreds of millions of years ago when tiny creatures with calcium rich shells or bodies died and littered the ocean floor with increasing sediment. From the immense weight of the water above, the pressure compacted these layers and cemented them over time.
-
Grand Canyon Geology
This lesson on sedimentary rocks explores the Grand Canyon in Arizona. This geological formation is rich in beauty and geological history giving us an insight on how this land looked hundreds of millions of years ago.
-
Types of Fault Lines | Geology
Fault lines are lines of weakness in a plate and that instability results in plates shifting which can create brilliant mountain ranges. Fault lines can cause earthquakes which cause destruction to land and structures.
-
The Formation of Coal & the Carboniferous Period
The formation of coal occurred during a 60 million window during a period known as the Carboniferous period. During the Mississippian and Pennsylvanian periods of the Paleozoic Era, 299 to 359 million years ago, the planet was was warm, moist and had oxygen levels of 35%. Compared to the 21% of today, the Paleozoic Era boast oversized arthropods with dragonflies the size of birds and other insects measuring 10 feet long and weighing as much as 100 pounds.
-
Waldorf Mineralogy Main Lesson Book
This is the first time we followed our Live Education Waldorf curriculum for mineralogy to completion. We haven’t done this in the past, in part because I found the curriculum too challenging to wrap my head around or felt there wasn’t relatable content to present.
-
Real Time Homeschool Lesson | Mineralogy Main Lesson Block
Here's the only real time homeschool lesson for our Mineralogy unit. We're using the Rock-O-Rama classroom kit from Nature-Watch. This kit was packed with materials! We worked on these projects on three occasions over several weeks.

Mineralogy Lessons
Waldorf Mineralogy Lesson
The Mineralogy main lesson block begins its study first with local geological landscape and formations then quickly moves into the 'whole' granite, before going to the 'parts' the minerals that make up granite. It progresses in this way rather than beginning with the rock cycle and a description of each type of rock and how its made. Instead the two archetype of rocks: granite from fire and limestone from water, are discussed or at least mentioned or gently referred (at least this is how I did it). While I share 'lesson 1' for our mineralogy block, it's actually more like lesson 3 or even 4. Nonetheless, I hope you enjoy this look at the drawing I made (my 13 year old daughter copied my example into her main lesson book), and listen to my thoughts on this approach.
Mineralogy Main Lesson
Granite
This is lesson 2 of our latest Mineralogy Main Lesson Block, and while most of it is in line with the Waldorf methodology, I'm realizing some of the things I want to include, like the structure of minerals and the elements and the formation of elements and minerals, are not relevant to the lesson and are not developmental appropriate for the grade 6 student. You may differ on this point, however, if you are aiming to do this block and adhere to the Waldorf philosophy, I would offer that you save those lessons for the high school student and instead focus on what the student of 11-13 can see and sense.
Geology Lesson
The Roots of the Mountain
Did you know that mountains have roots? Much like an iceberg where you only see the tip above the water, and the majority of the iceberg is below water, so to are mountains, where just the tip is visible on the the surface of the planet, while the remainder of the mountain goes deep below the surface. Did you also know that the crust of the earth is thicker under mountain ranges? And did you know that the roots of mountains penetrate deep into the mantle? They are still considered part of the crust, but they anchor themselves deep into the mantle.  In today’s lesson, we referred to several verses of the Quran, which speak about how the mountains are fixed firmly, or are like pegs. Mountains are mentioned over 30 times in the Quran. I chose five eyes that speak about how the mountains are laid, and firmly fixed. I intended to include all of these, but only had room for one. In retrospect, I should have done this entry as a two page layout with all of the written portion on one page and the illustration on the opposing page. We will likely do another entry that includes more Ayats from the Quran. For reference, we intended to use the following versus: 88:18-20, 21:31, 78:6-7, 15:19, 13:3. For this entry, we sourced online information and an online diagram which I copied into the main lesson book. My daughter copied this entry into her main lesson book, copying my example, including the paragraph which she did as copy work. 
Mineralogy Lesson
Cross-Section of the Volcano
In this Mineralogy Lesson we learn about volcanoes and the tremendous amount of magma below the surface of a volcanic mountain. I am using our Lyra color pencils for this lesson. We completed the lesson over 2-3 days, reading completed on the first day, the drawing next, later we read specifics about the types of rocks and magma related to this illustration and finally we wrote narrations in our main lesson books. I am working with my 13-year-old daughter and rather than do an illustration on the chalkboard or have her copy the image from another resource, I am drawing and writing with her. I don't typically do this because it's time consuming, but as she's my last homeschooler, I'm happy to do so. This lesson included an ayat from the Quran that connected to this lesson loosely. We chose to write [73:14] at the top of the page while reserving the bottom of the page for a table indicating various parts of the illustration. The narration is on the opposing page.
Ring of Fire
For our Waldorf mineralogy main lesson block, we continue with our lessons on land formation, plate tectonics and volcanic activity. Today's lesson is about the Ring of Fire. We used chalk to cover our double page layout in blue. We drew our continents in green. While we were copying the map from two sources: Flip Charts, Geology and the Live-Education Waldorf curriculum for grade 6, we found that map making was quite challenging and it would have been better to print off a map and trace it into our main lesson book or print off a map and adhere it our main lesson book because in this situation, accuracy was of greater value than artistic expression. We used a matte fixative to spray and set everything. Once dried, we added labeled the various volcanoes in the Ring Of Fire. We used our Sargent Art Chalk Pastels, Main Lesson Book, and matte Fixative.
Mid-Atlantic Ridge & Pangea
For our Waldorf mineralogy main lesson block, we continue with our lessons on land formation, plate tectonics and volcanic activity. While we have done the landforms for Pangea in the past, we are approaching this lesson a bit differently. We began by tracing the continents from an atlas. You could print off the continents on printer paper and cut them out alternatively. Next we labeled, colored with chalk, then relabeled the land masses. We used chalk to cover our double page layout in blue. We used a matte fixative to spray and set everything. Once dried, we added heavy duty thread with fabric double stick tape (but clear tape works fine as that what my daughter used instead), and fixed the continents to the string using tape, sticky side together. We could slide the land masses from Pangea to the present day location. We included the mid-Atlantic ridge as well. We used our Live-Education Waldorf curriculum for grade 6, the book Puzzle Under the Sea, the story of Marie Tharp and an Atlas. We used our Sargent Art Chalk Pastels, Main Lesson Book, and matte Fixative. Other tools: scissors, tracing paper, tape and thread.
How Mountains are Formed from Magma
In this mineralogy lesson, we studied volcanoes. When magma cools below the surface of the earth, it forms gigantic granite ranges. Tectonic activity, and across geological time, these granite ranges rise the surface of the Earth and through erosion and weathering the layers that covered these granite ranges you rode overtime, exposing these gigantic granite mountains. We can imagine that this is the formation of the Himalayan mountain range. overtime these mountains continue to grow until they reach a maximum peak of 30,000 feet. Because solid granite rock you wrote more slowly, these mountain ranges remain for long periods of time.
How Mountains Are Formed
This lesson on 'How Mountains are Formed' is a four part lesson in which we learned about Fold Mountains, Dome Mountains, Volcanoes and Fault Block Mountains.
Iron Ore Veins from Sedimentary & Igneous Rocks
We continue with our main lesson block in Mineralogy with a two part lesson on the formation of iron ore veins in banded iron formations and iron oxide deposits in both sedimentary and igneous rocks. This lesson was suppose to complement the lesson we did on limestone and the production of cement, mortar and concrete from the chemical processing of limestone. However, once I started the illustration for this lesson, I realized that I might have drawn banded iron formations in sedimentary rock rather than igneous rock. Instead of turning this lesson into iron ore from sedimentary rock (because I wanted to devote another lesson on the formation of iron oxide in precambrian oceans), I opted to add another illustration to show how iron is formed through volcanic activity through the precipitation of minerals based on surrounding rock and the presence of water.
Banded Iron Formations from Sedimentary Rock
In this Mineralogy lesson, we depart from the main lesson book by Live Education to focus on two lessons where we dive into how iron ore deposits formed in precambrian oceans. We previously did a lesson showing how iron ore is found in granite outcrops, but I wanted to add this lesson because as I researched Iron ore deposits and veins, I found that they are found frequently in sedimentary rocks as well as metamorphic rock and through hydrothermal activity. For this lesson, I illustrated a precambrian ocean which is not accurate by any means. I searched for illustrations online but did not qualify a time period. I chose elements from several illustrations to show plant and animal life in the ocean. In order for iron oxide to form, oxygen needed to be present in the ocean to bind to the dissolved iron. The ferrous ions were oxidized and precipitated out, settling on the ocean floor where they became cemented together over millions of years. Then through tectonic activity and changes in climate, the sedimentary rock lifted and became exposed to the elements. Through rain and wind as well as plant and animal activity, the rock eroded away to expose the iron ore veins.
Earth Science
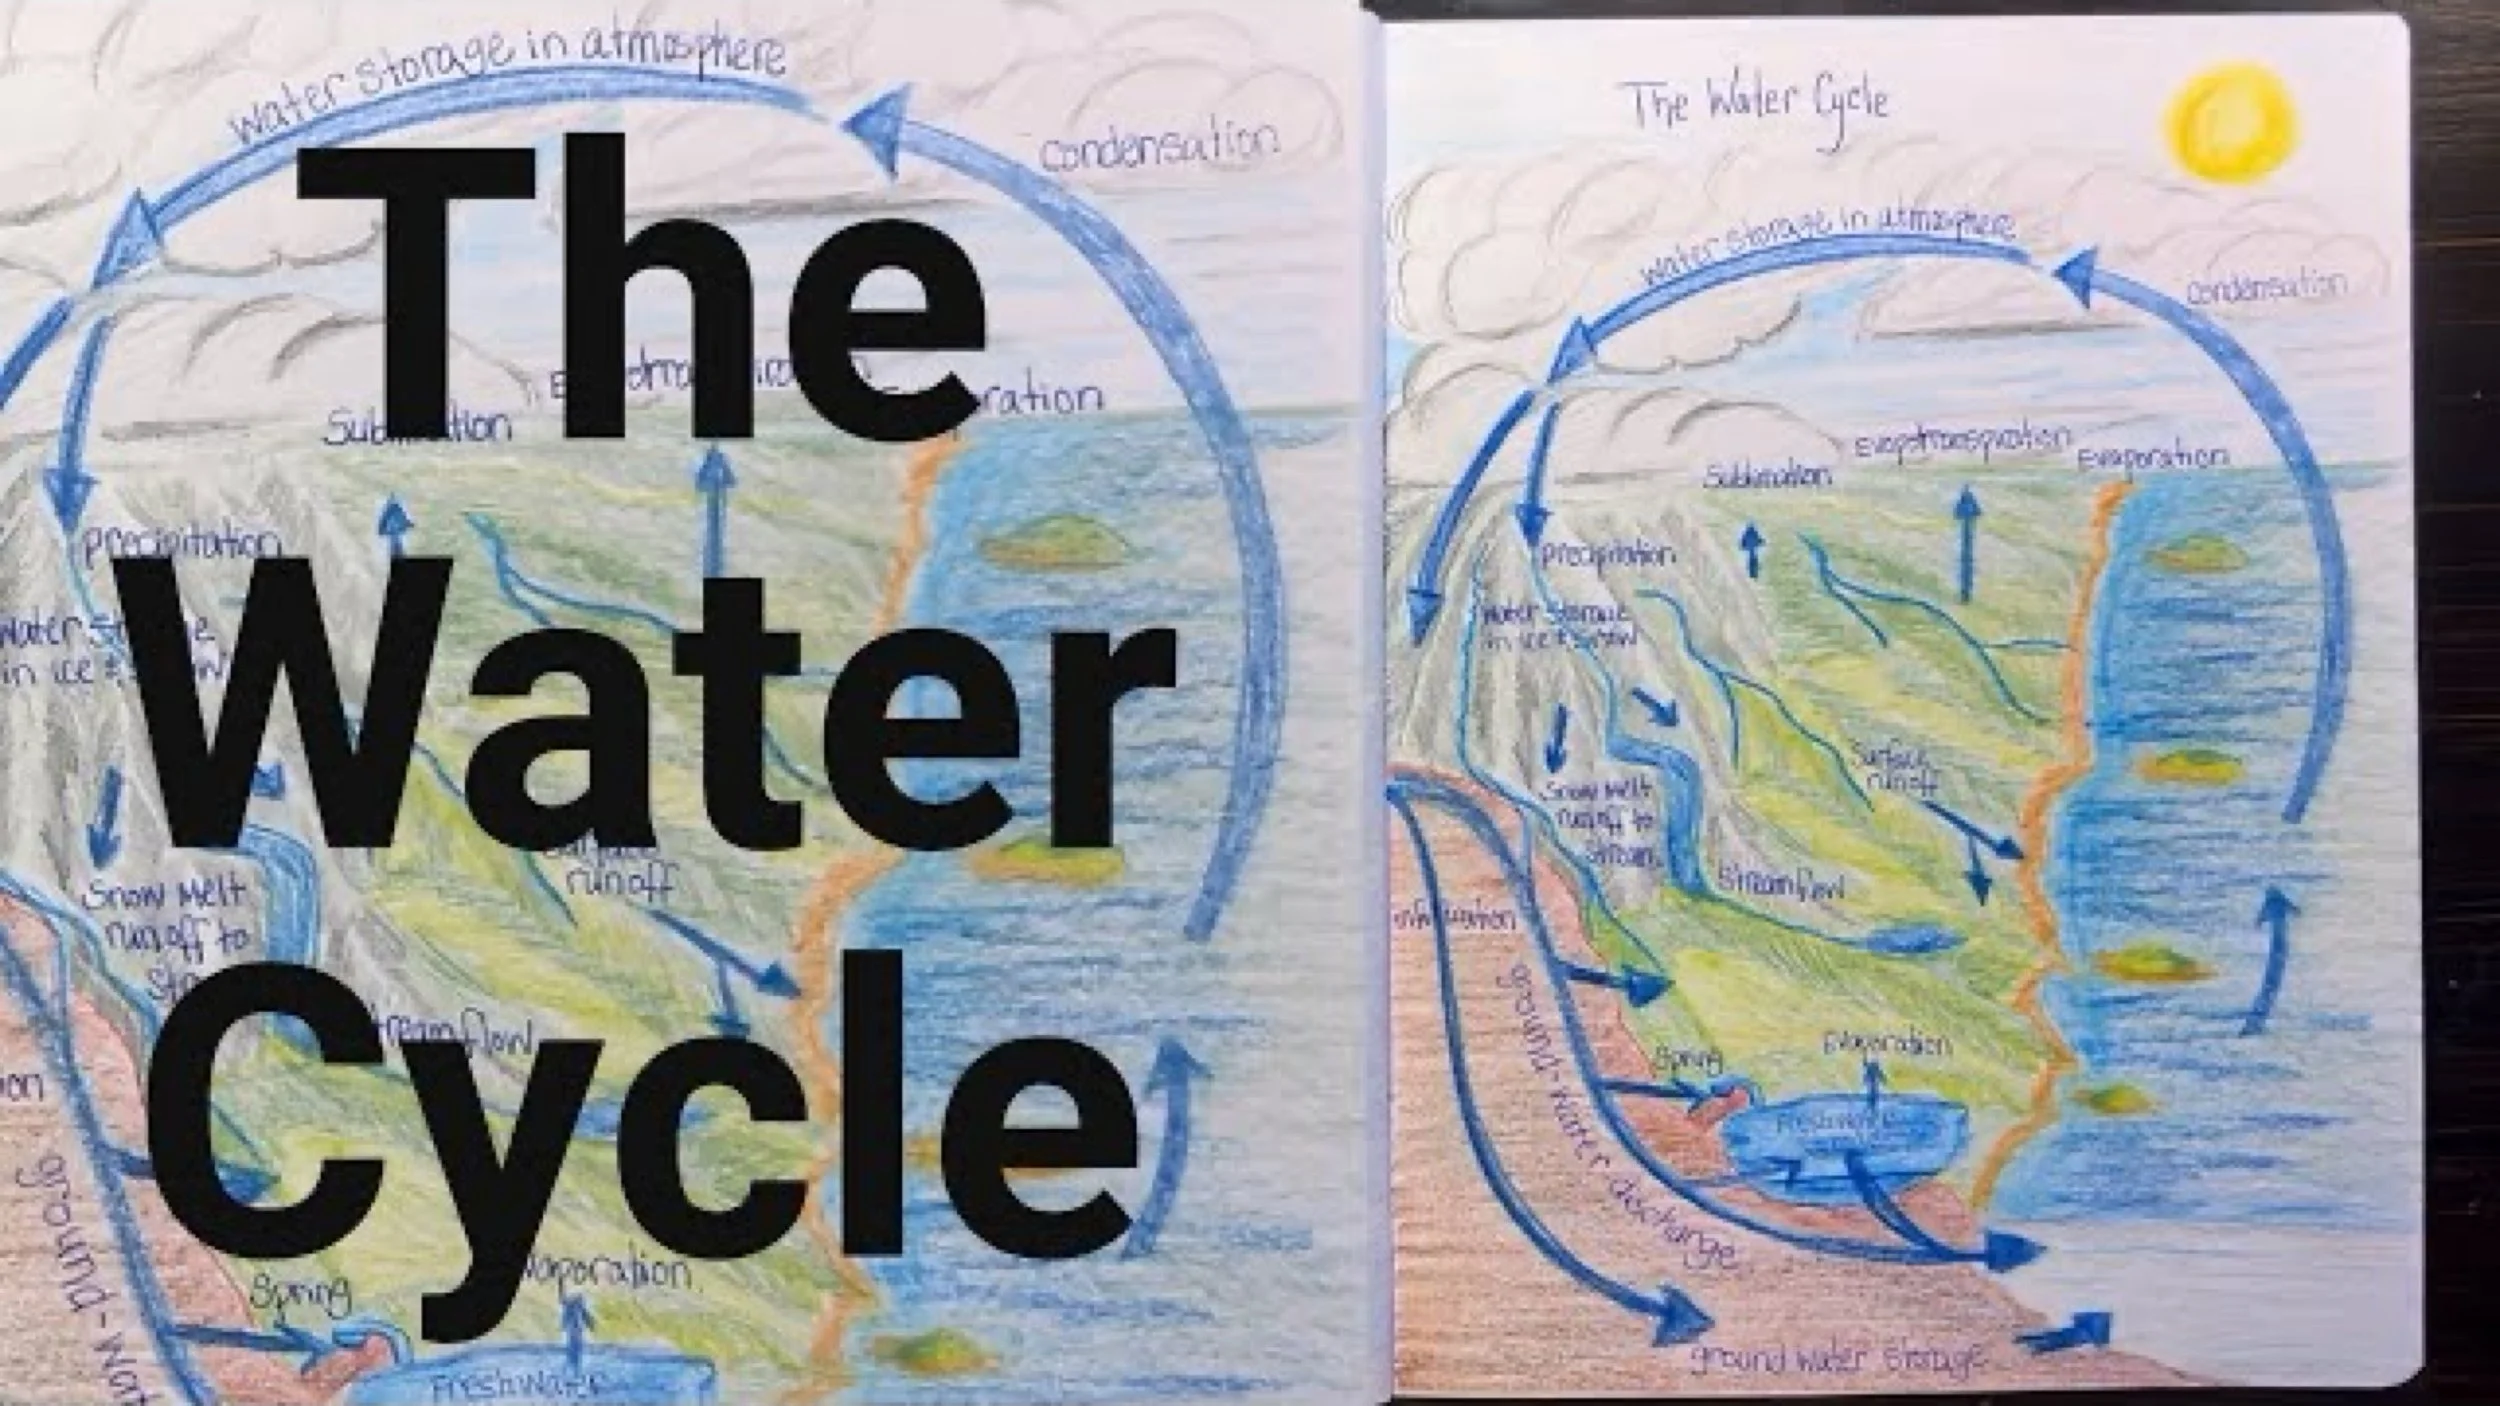
Water Cycle
While this lesson was not in the curriculum, I chose to add it here because of its relevance with the previous lesson on the limestone cycle. Originally I intended for this lesson to be part of the limestone cycle, but it ended up being its own lesson, though I didn't have any additional written content for it. This illustration was copied from artwork I found online from the USGS website. I found it to be detailed in a way other water cycles are not and I especially liked the indications of water storage in the ocean, atmosphere and in ice pack on mountains and glaciers. While the water cycle is a relatively simple concept, I think it paired well with our lessons in this block as we have now covered three cycles of 'recycling': the rock cycle, the limestone cycle and the water cycle.
Mineralogy
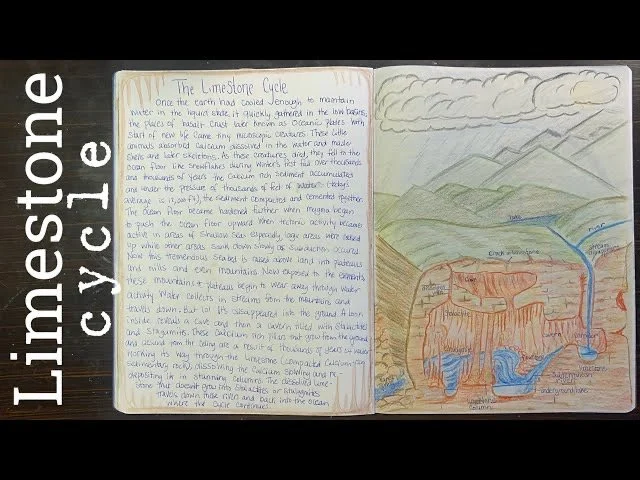
Limestone Cycle
The limestone cycle starts in the ocean hundreds of millions of years ago when tiny creatures with calcium rich shells or bodies died and littered the ocean floor with increasing sediment. From the immense weight of the water above, the pressure compacted these layers and cemented them over time. Then through geological activities like magma pressing up against the ocean floor, tectonic activity and changes in ocean depth and location, these great limestone formations were uplifted above sea level and some towered above the landscape as mountains or plateaus. Now water takes on a new roll and that is one of dissolving the minerals within limestone thereby creating stunning underground caves and caverns. Once again, water takes on a new task, that of carrying those dissolved minerals to be redeposited in the form of stalagmites and stalactites or carrying those dissolved solids back to the ocean where they may be used once again by plants and animals as the cycle continues.
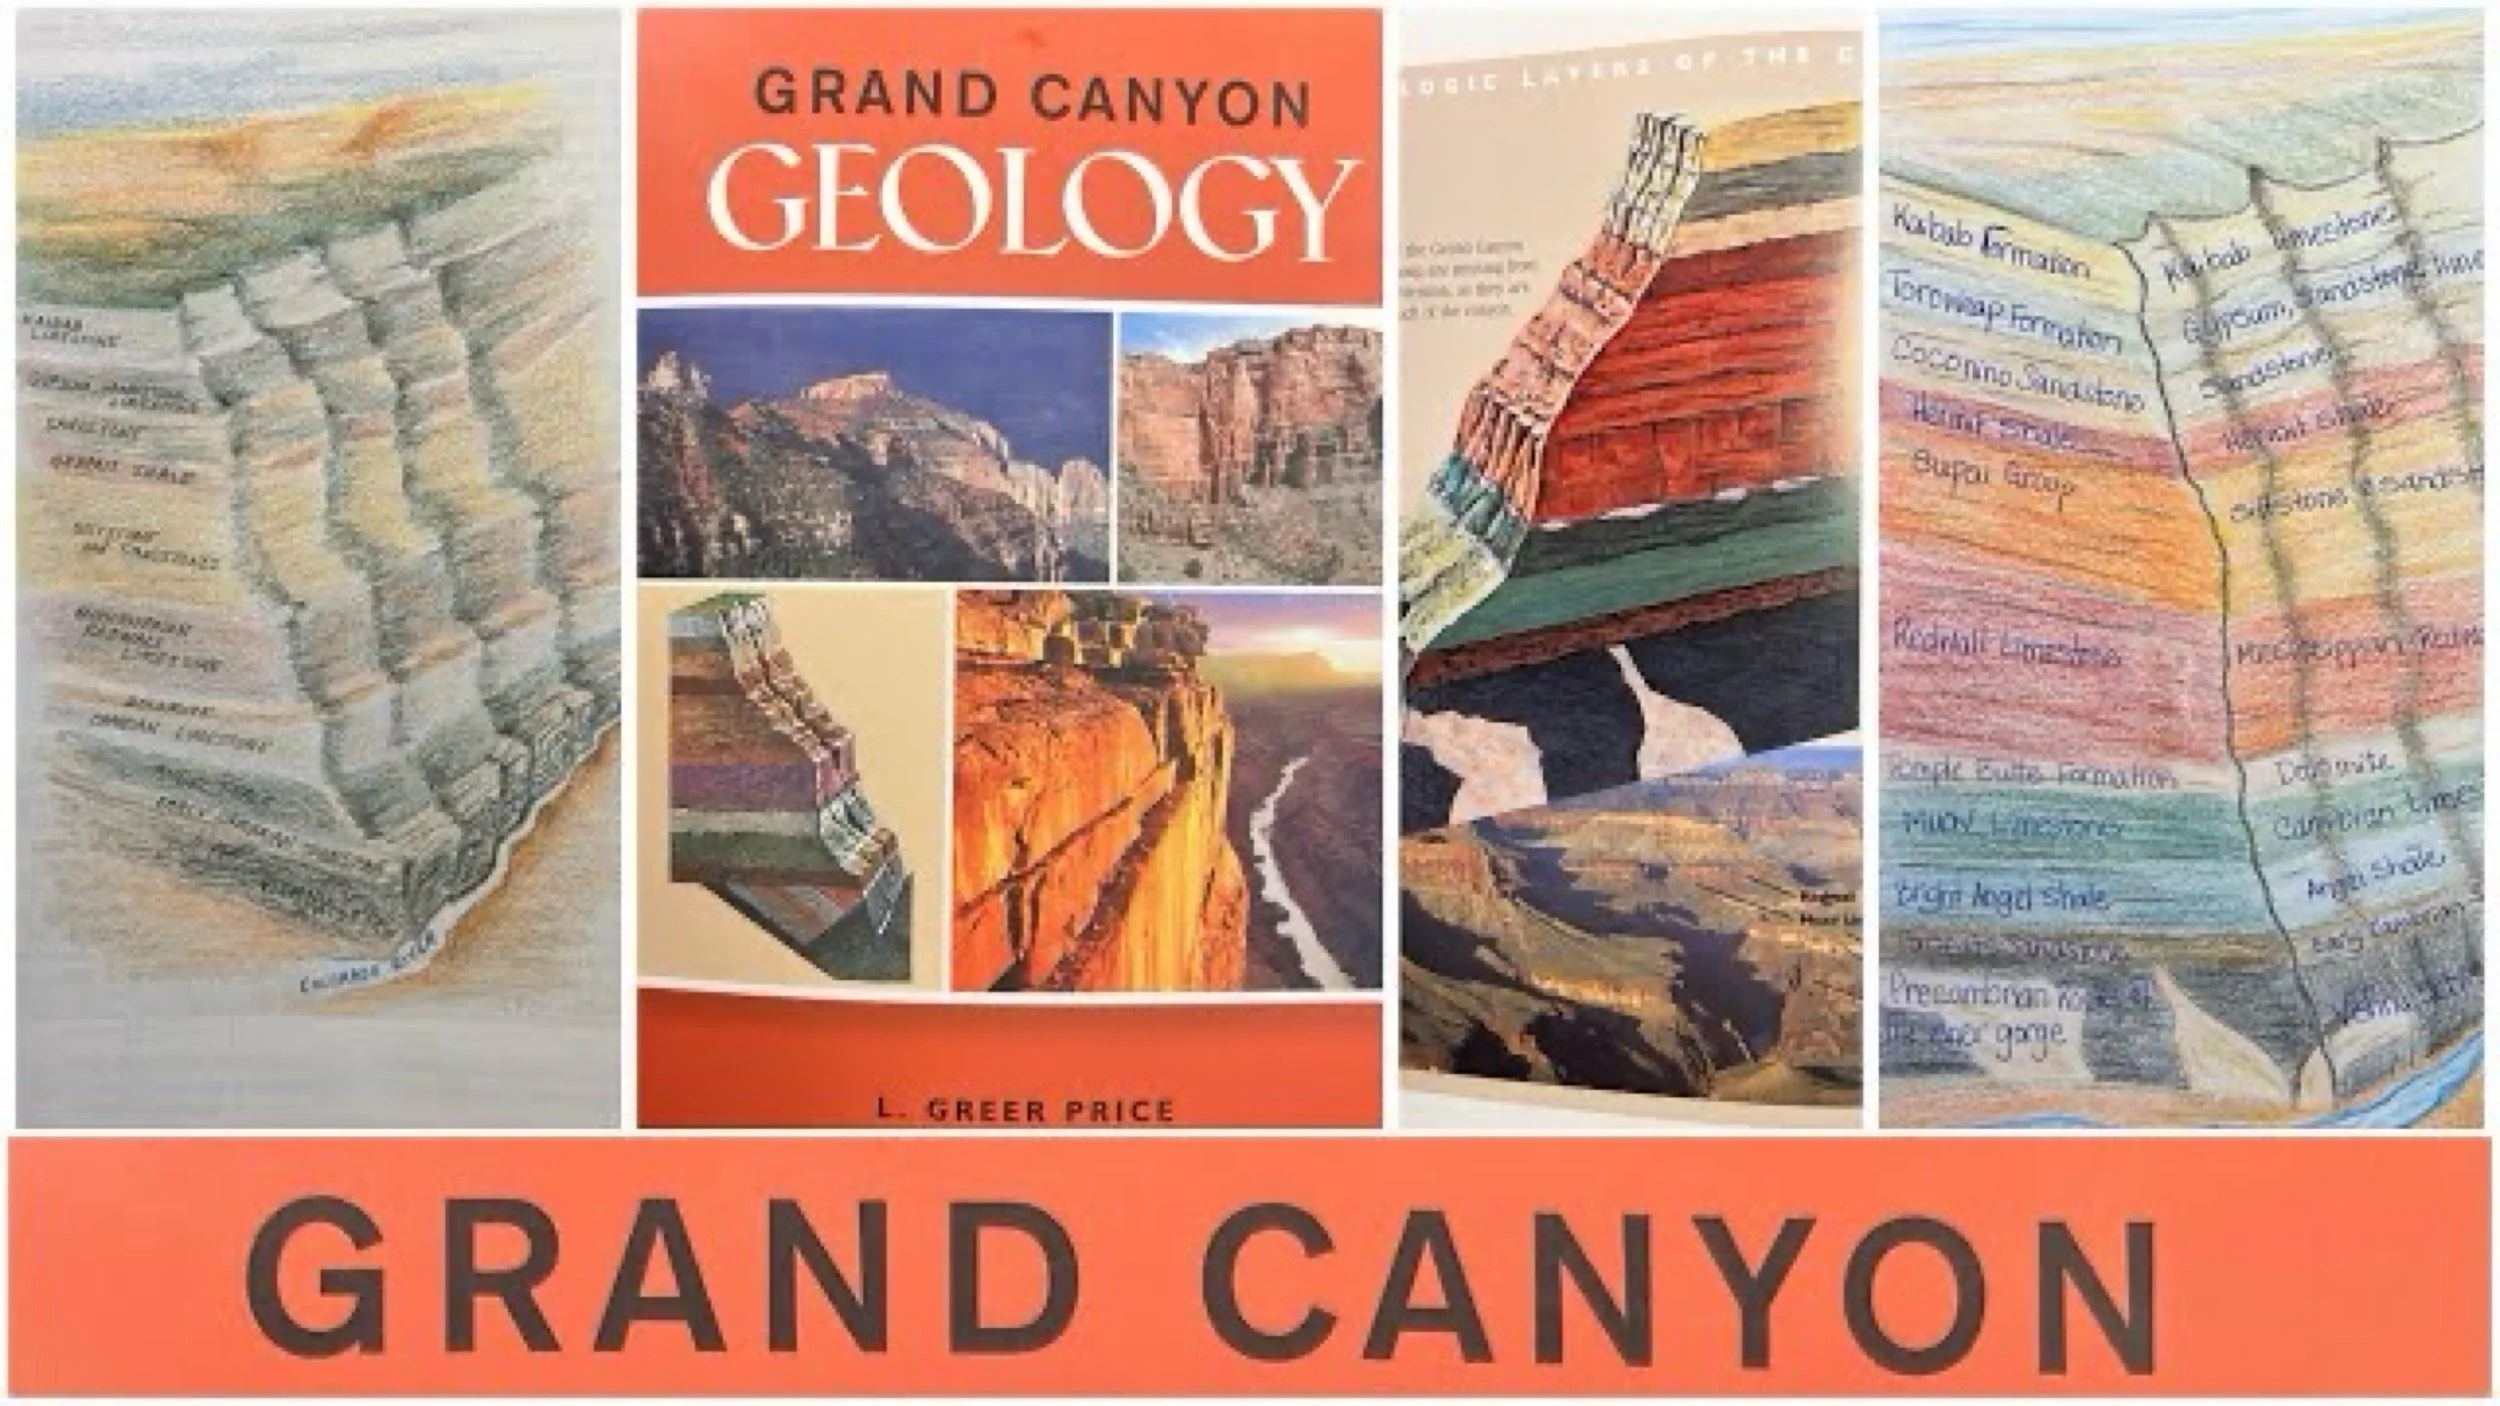
Grand Canyon Geology
This lesson on sedimentary rocks explores the Grand Canyon in Arizona. This geological formation is rich in beauty and geological history giving us an insight on how this land looked hundreds of millions of years ago. For this lesson I used the book Grand Canyon Geology by L. Greer Price, the Waldorf curriculum for grade 6 by Live Education and a documentary that can be found on YouTube. I researched the origins of the Grand Canyon back when the continent of North America was not yet even part of pangaea when the planet was covered with mostly ocean and there was hardly any oxygen in the atmosphere. The lowest layers of the Grand Canyon are the metamorphic and granite layers which date back to precambrian times. Each subsequent layer tells a story of what the Colorado Plateau looked like over the course of the Paleozoic and Mesozoic eras. During times of ocean transgression, water covered this area in varying degrees of coastal turbulence or wetlands and estuaries. This was during a time when the west coast of the North American continent was a passive margin, wet and warm and situated near the equator in the middle of present day Atlantic Ocean. Over geological time, the passive margin turned into an active margin with subduction and a volcanic island arc. During this time, the mid-Atlantic ridge was tearing and filling with magma creating one of the longest largest mountains ranges as the continents moved into their present day locations. Once the sediment of those shallow seas build up and became compacted, tectonic activity raised the whole plateau to a mountain range as tall as the Himalayas. This tremendous mountain range then eroded away before water carved the stone cliffs to expose the stunning Grand Canyon.
Geology
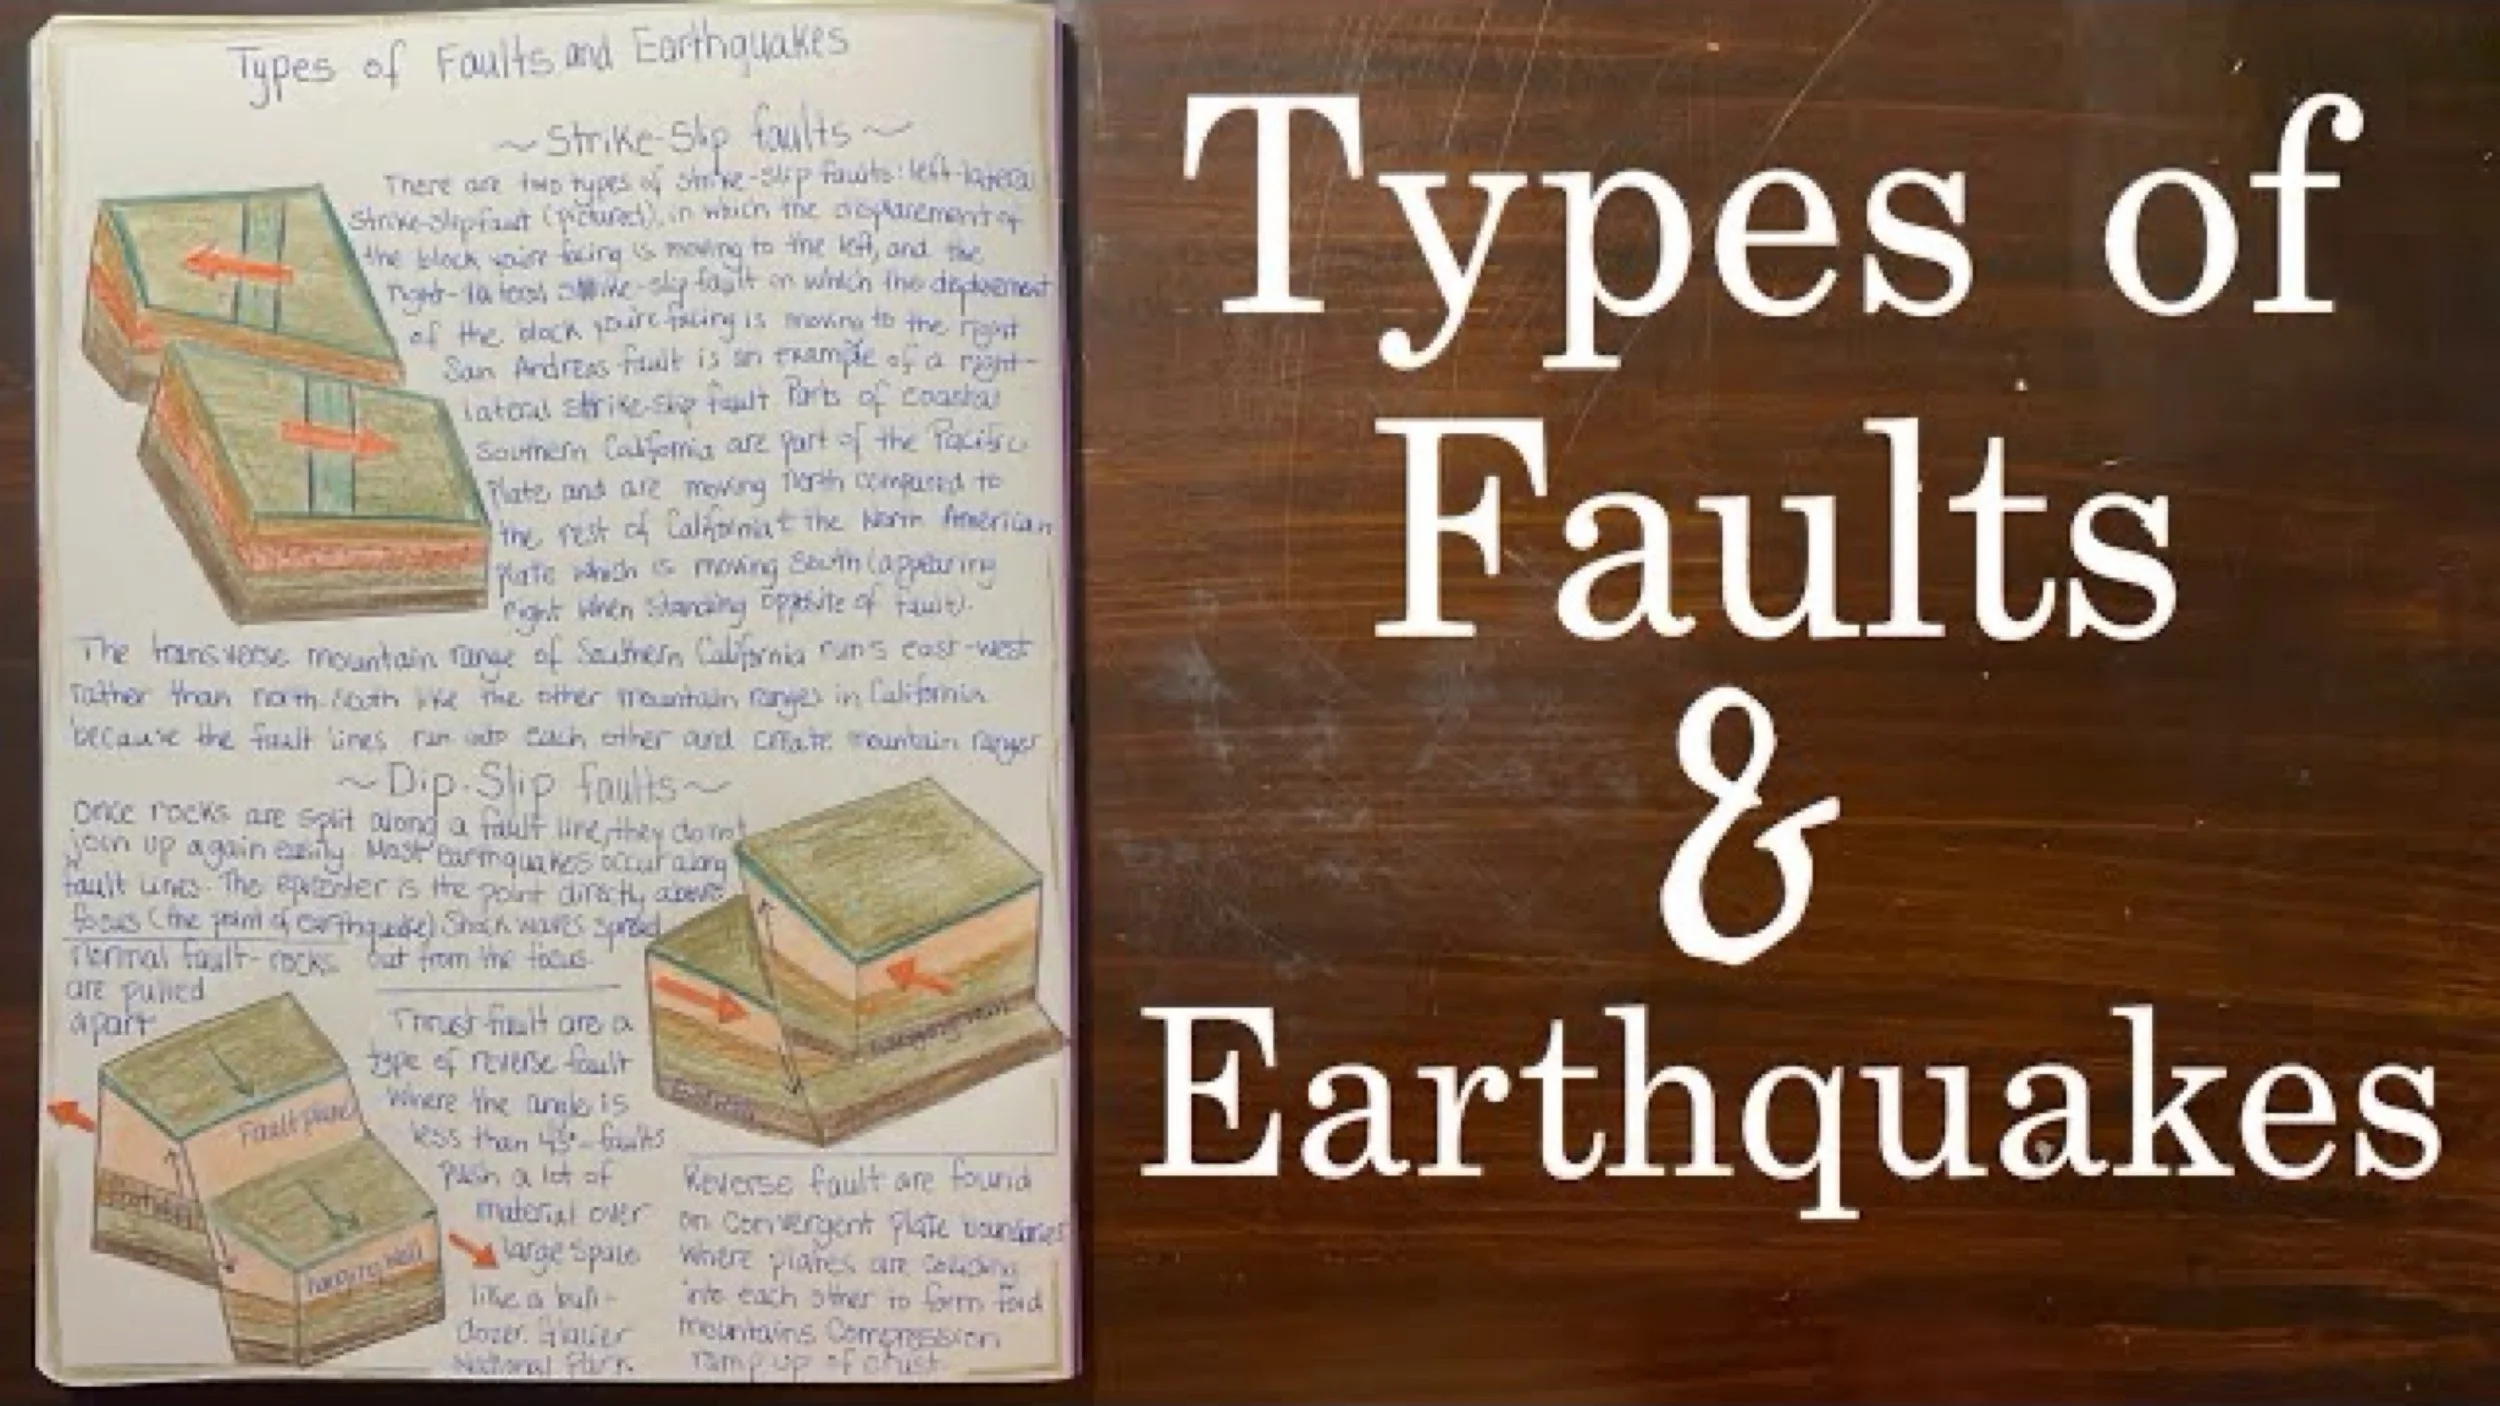
Types of Fault Lines
Fault lines are lines of weakness in a plate and that instability results in plates shifting which can create brilliant mountain ranges. Fault lines can cause earthquakes which cause destruction to land and structures. For this lesson in our Mineralogy main lesson block, I prepared a lesson that wasn't specifically in the curriculum, though the study of mountain formation was previously addressed. When learning about mountain formation, we examined fault block mountains and fold mountains (and volcanic and dome mountains), which are formed when the plates either pull apart (divergent boundary) or when they come together (convergent boundary). When studying fault lines we find these described as Dip-Slip faults with normal faults at divergent plates and reverse and thrust faults at convergent plates. We included Strike-Slip faults both right-lateral and left-lateral, and while these faults are not responsible for mountain building, the are responsible for the transverse mountain range of southern California when a series of fault lines intersect.
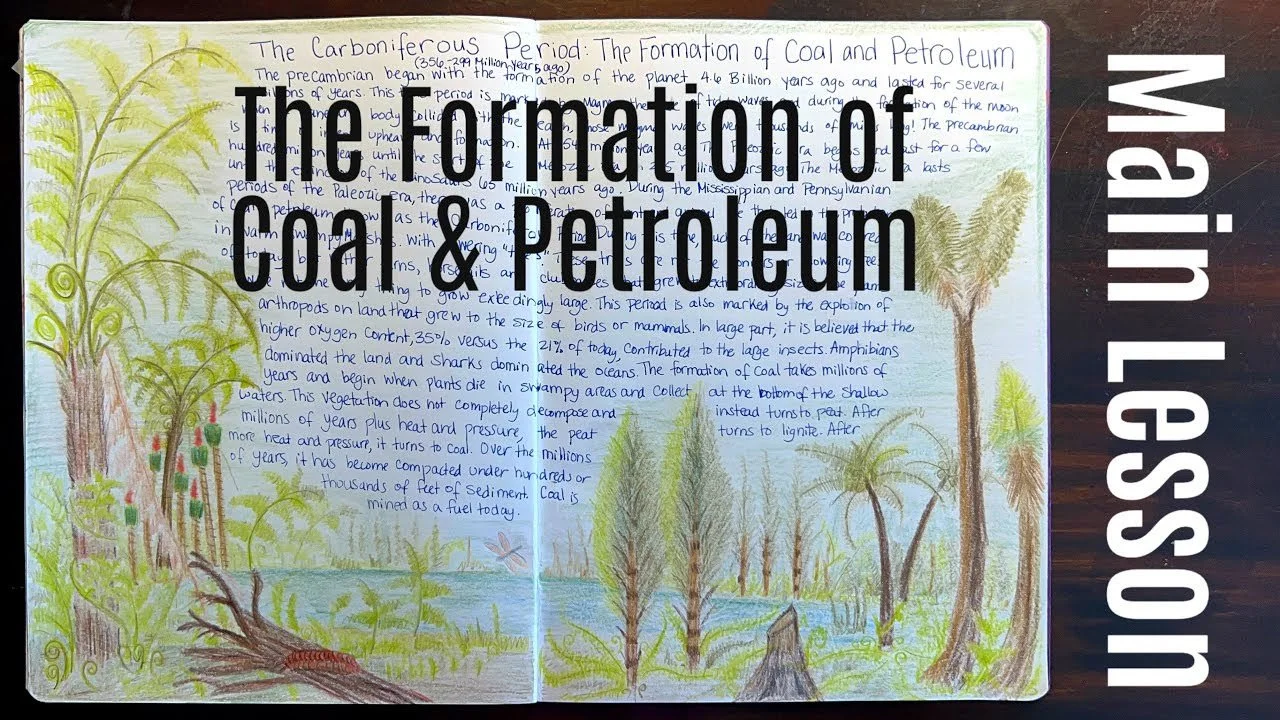
The Formation of Coal & the Carboniferous Period
The formation of coal occurred during a 60 million window during a period known as the Carboniferous period. During the Mississippian and Pennsylvanian periods of the Paleozoic Era, 299 to 359 million years ago, the planet was was warm, moist and had oxygen levels of 35%. Compared to the 21% of today, the Paleozoic Era boast oversized arthropods with dragonflies the size of birds and other insects measuring 10 feet long and weighing as much as 100 pounds. It must of been an extraordinary time, but totally inhospitable for humans and mammals. During the carboniferous period, the land was dominated by club moses, horsetails and ferns. These plants grew to tremendous sizes, towering as big as trees today. The land was swampy and oceans continually covered continents in shallow seas, over regressing from time to time. The continents at the time did not resemble the continents of today. Huddled together near the equator and towards the south pole, these continents experienced warm weather nearly year round. Nearly 300 million years ago, a catastrophic event took place. A massive volcano erupted on the continent that would later hold the country of Russia. This volcanic eruption lasted thousands of years and left behind rocky basalt evidence in Siberia known as the Siberian Traps. This event abruptly stopped the production of coal. The volcanic ash and toxic gasses were spewed into the air for so many years that the carbon dioxide covered the entire planet. The waters were warmed to the temperature of a warm bath and the circulation of water nearly halted. The plant life that had dominated the land and filled the shallow seas with plant matter, ceased to grow and eventually the plant matter became compact over layers of sediment for millions of years. Combined with the pressure from the weight of the sediment and heat from below, the plant matter that did not fully decompose became hardened into lignite. Then after more time, pressure and heat, it hardened further to coal.
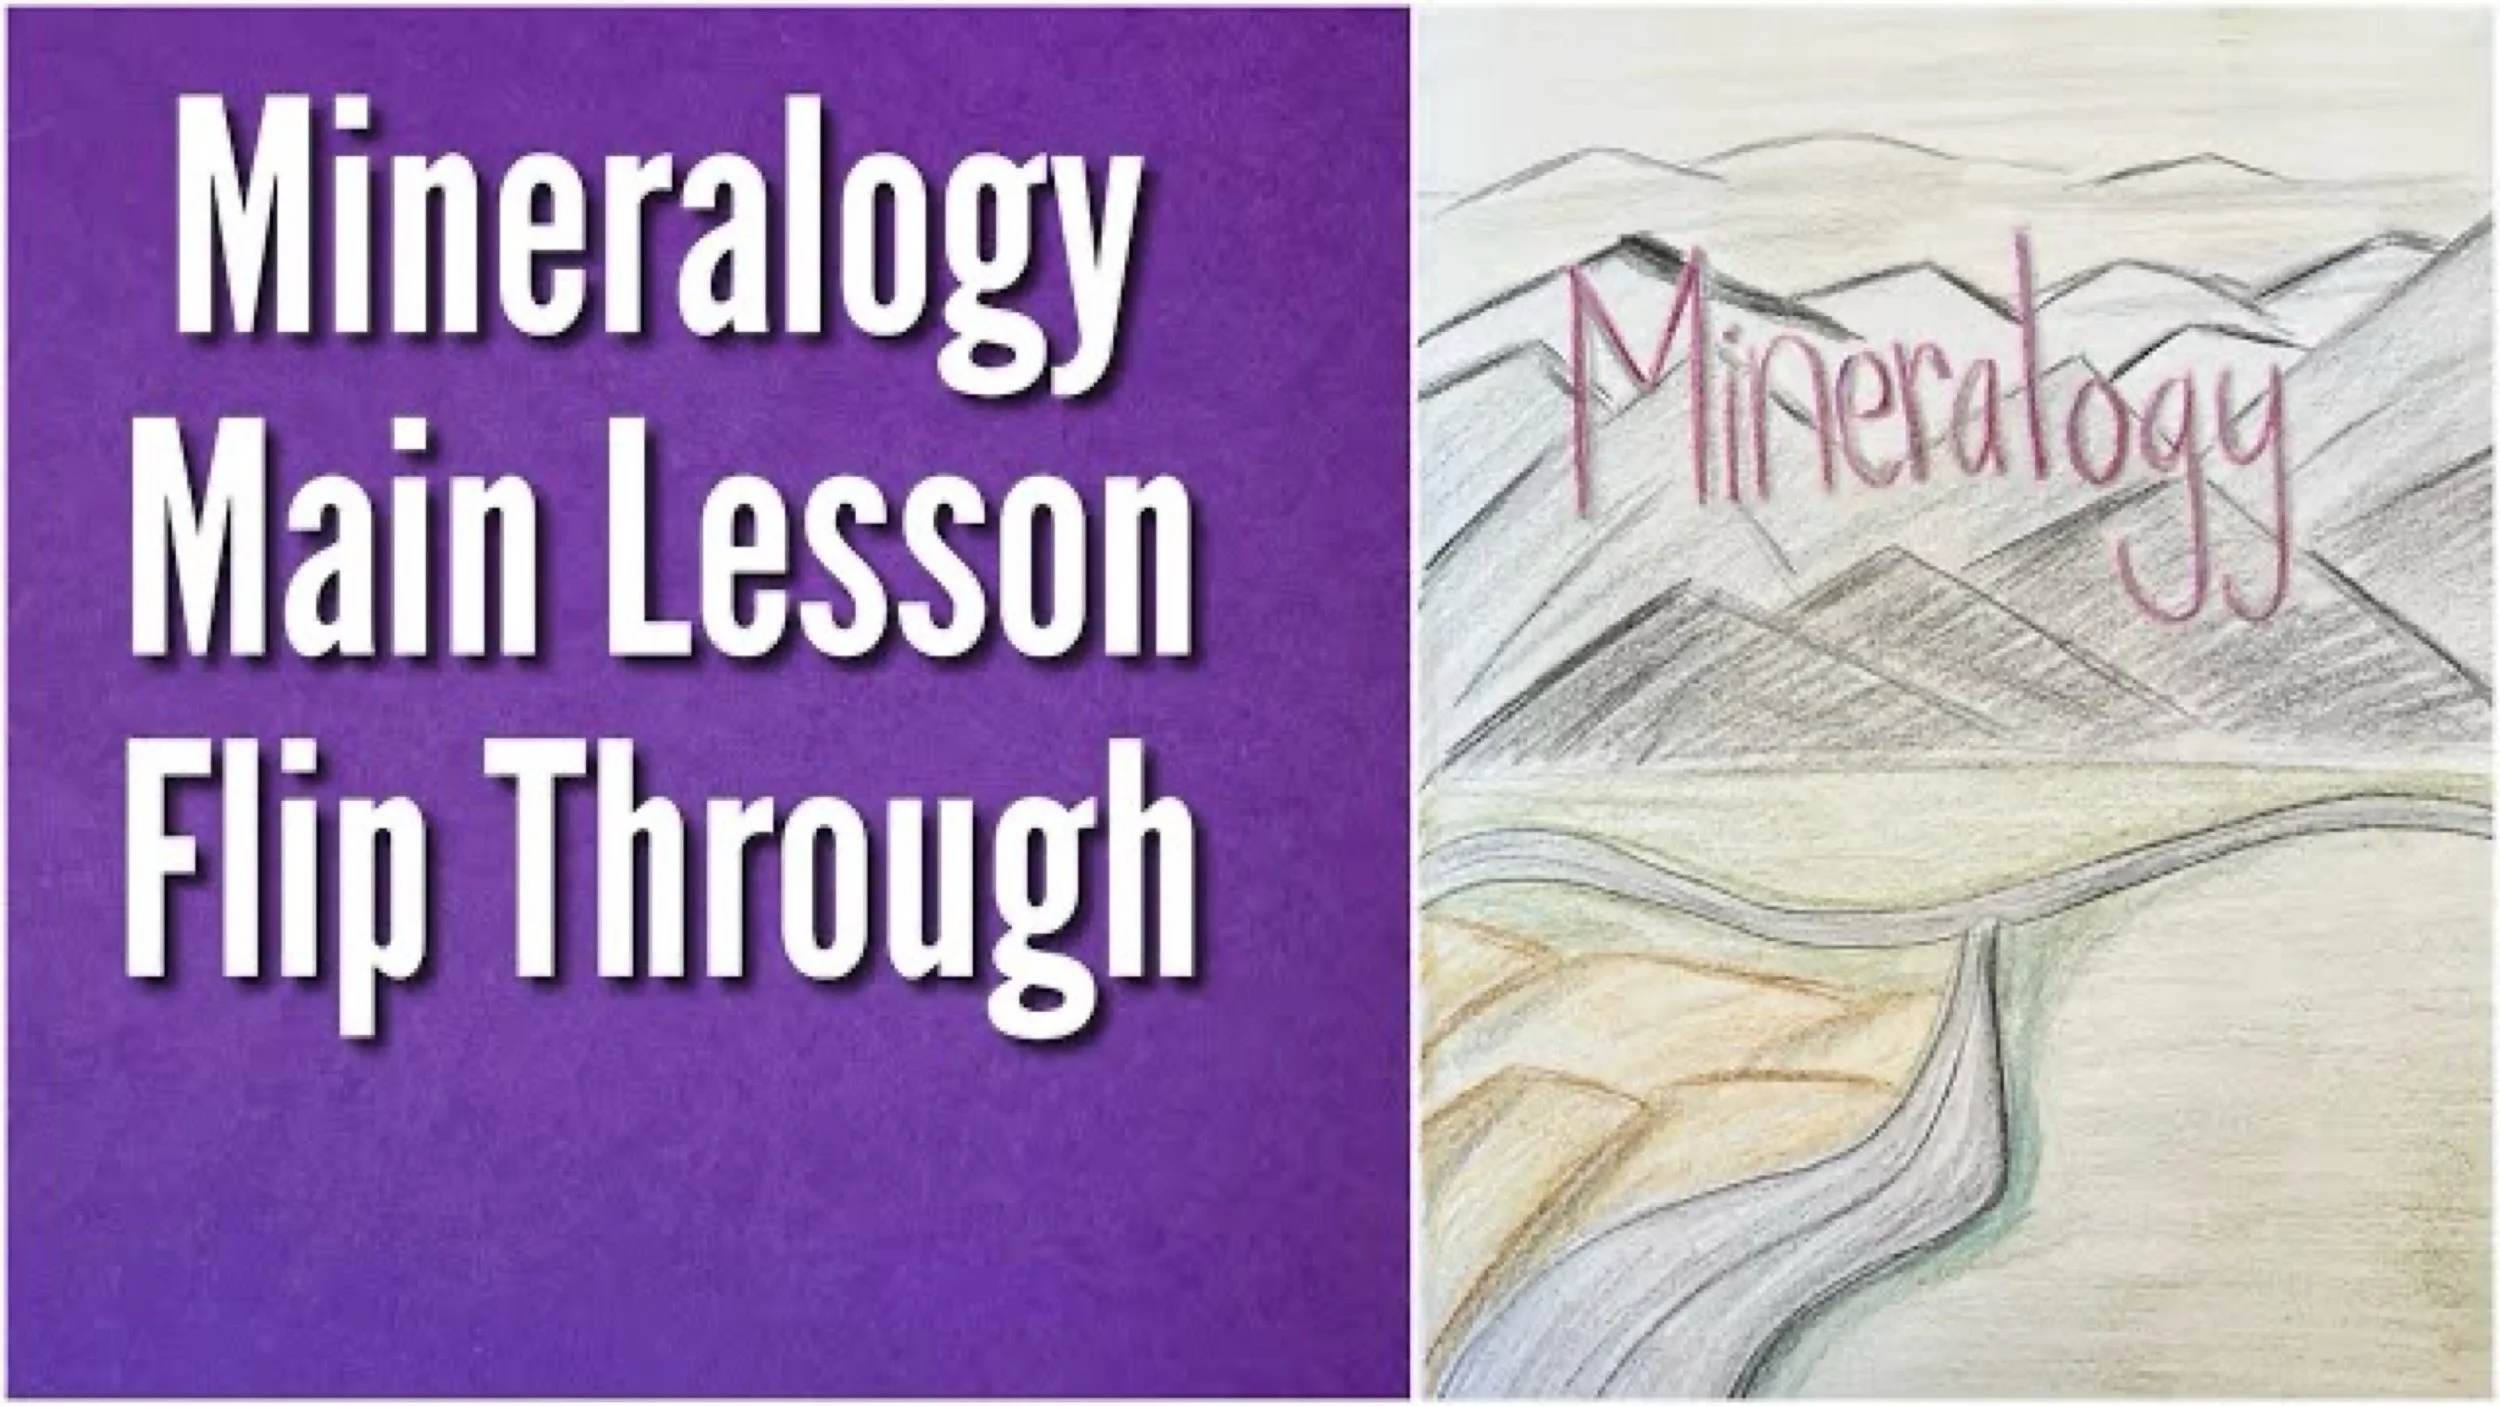
Waldorf Mineralogy Main Lesson Book Flip Through
This is the first time we followed our Live Education Waldorf curriculum for mineralogy to completion. We haven’t done this in the past, in part because I found the curriculum too challenging to wrap my head around or felt there wasn’t relatable content to present. Some of the lessons come complete with enough information to present the lesson, while others came with excepts from essays or poems. I found it challenging to progress with the curriculum in the past and often dispensed with it within the first lesson opting to use our books and resources as read alouds instead. The Live Education curriculum provides information for you, as the teacher, to Understand the content, to provide topics for research and provides lesson activities or copywork. In the past, I haven’t had enough time to research lessons prior to presenting them as I was homeschooling multiple children or didn’t feel inclined, but this time around, with my last child, I decided to give this curriculum another chance. I am so glad I did! It did take far longer to do the research and prepare for these lessons, but our lessons ended up being far more dynamic and engaging, and I loved it so much more. Prior to presenting the lessons, I would do research on the topic that was suggested in the curriculum. I wrote down my notes and research as a narration and included a drawing. Sometimes the drawings were copied from the curriculum when provided and other times, I searched online for inspiration for the illustrations. Occasionally I would include additional lessons or topics. Upon presenting the lesson, my daughter would copy the illustrations into her main lesson book and write original narrations. We did far fewer hands-on activities & field trips for this main lesson block than in the past. However, our individual lessons were more interactive and orally dynamic. We had more discussions, and I felt far more prepared to deliver lessons.
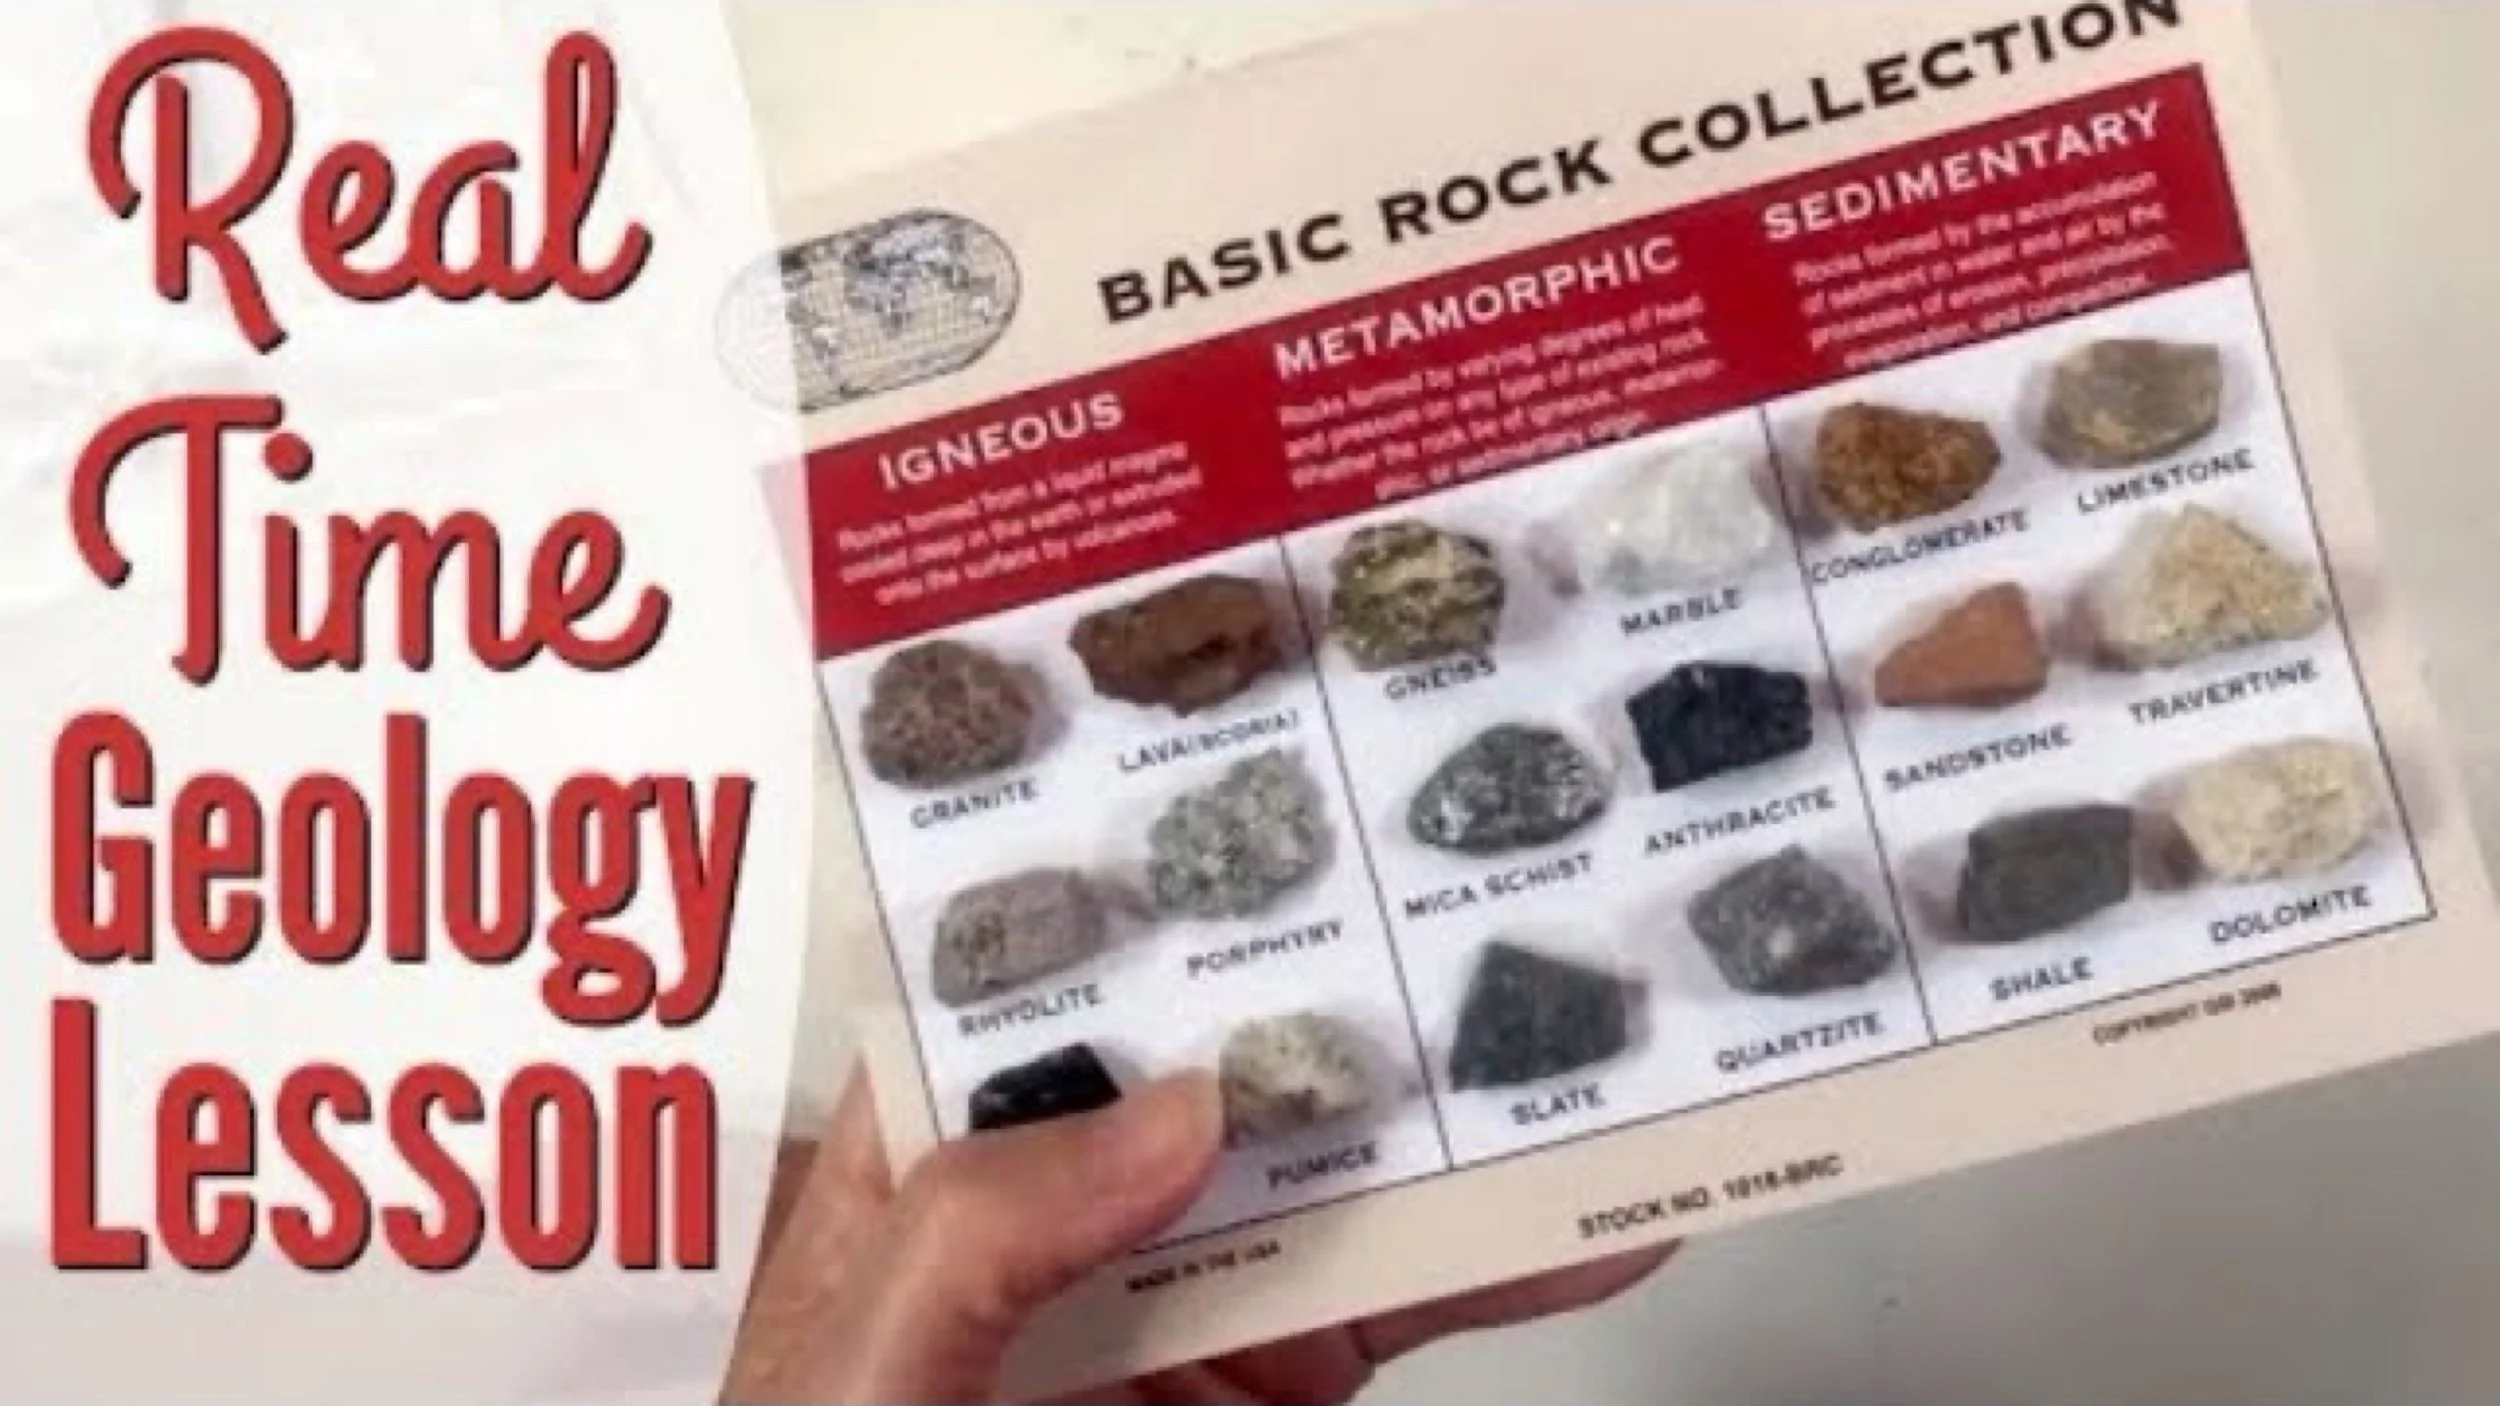
Real Time Homeschool Lesson | Mineralogy Main Lesson Block
Here's the only real time homeschool lesson for our Mineralogy unit. We're using the Rock-O-Rama classroom kit from Nature-Watch. This kit was packed with materials! We worked on these projects on three occasions over several weeks. My 11-year-old 6th grader and 6-year-old 1st grader worked on this project together at first, but later, my 1st grader opted out of finishing the project with us.