Ocean Main Lesson Block
Projects & Activities
Projects & Activities
-
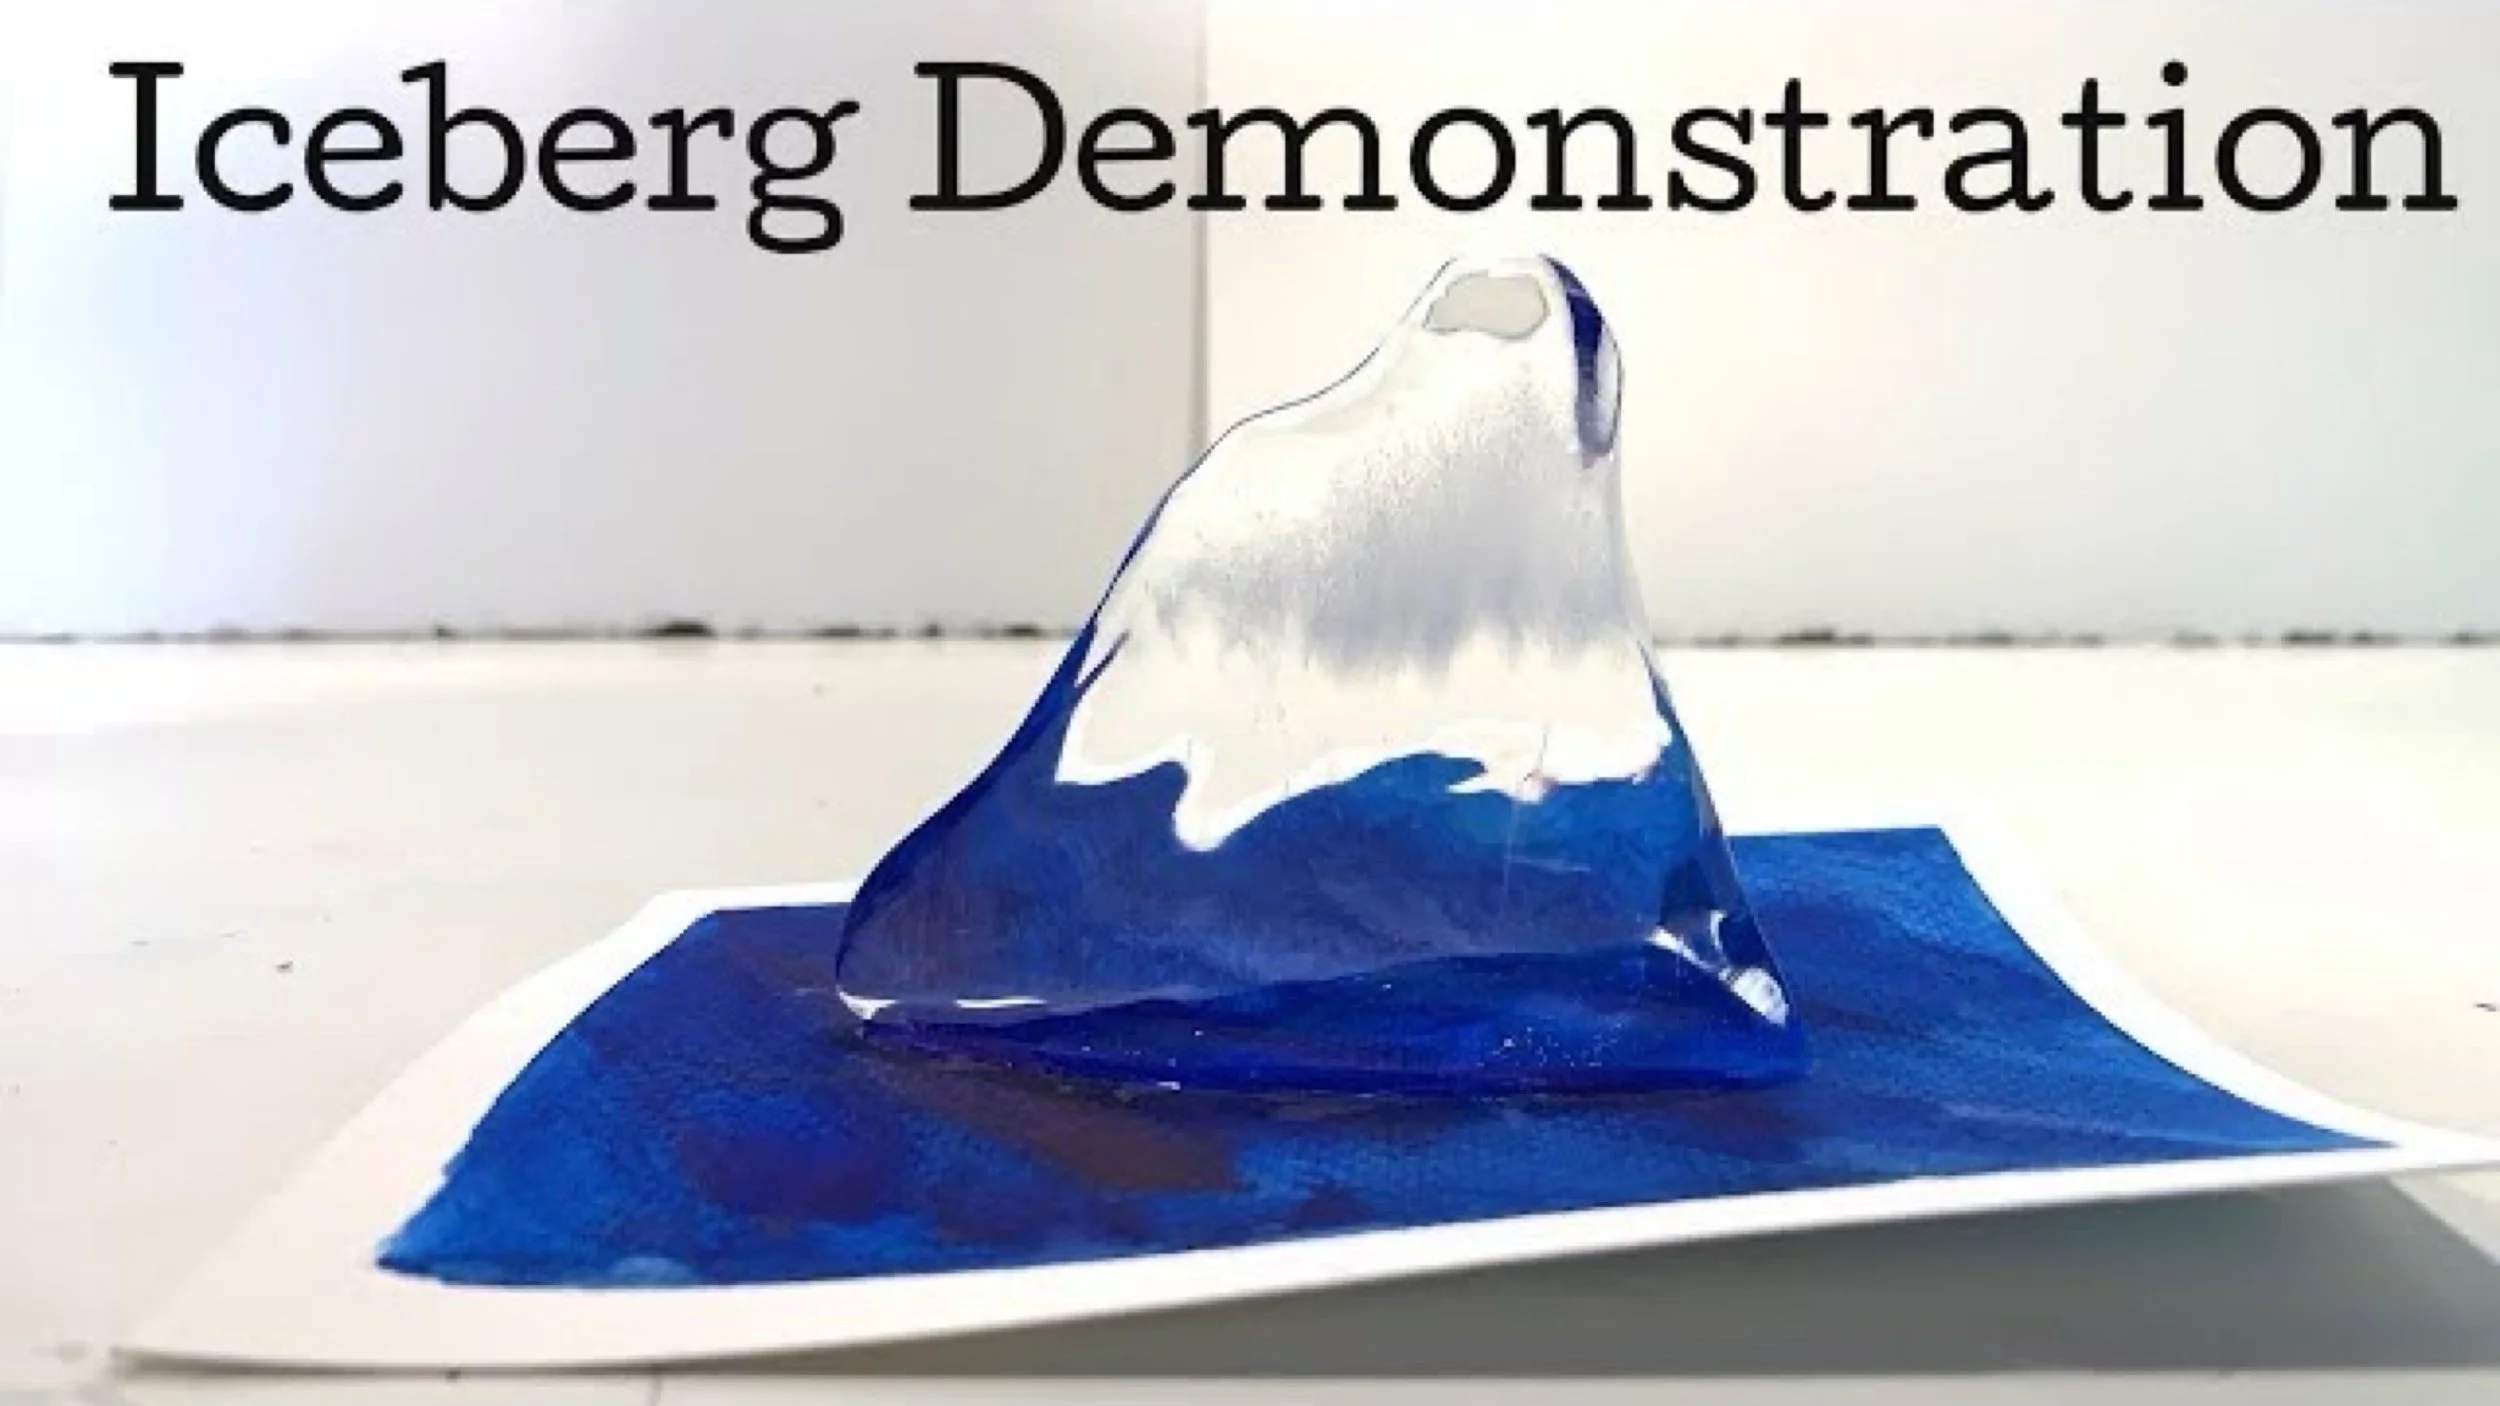
What An Iceberg Looks Like Under Water | Demonstration
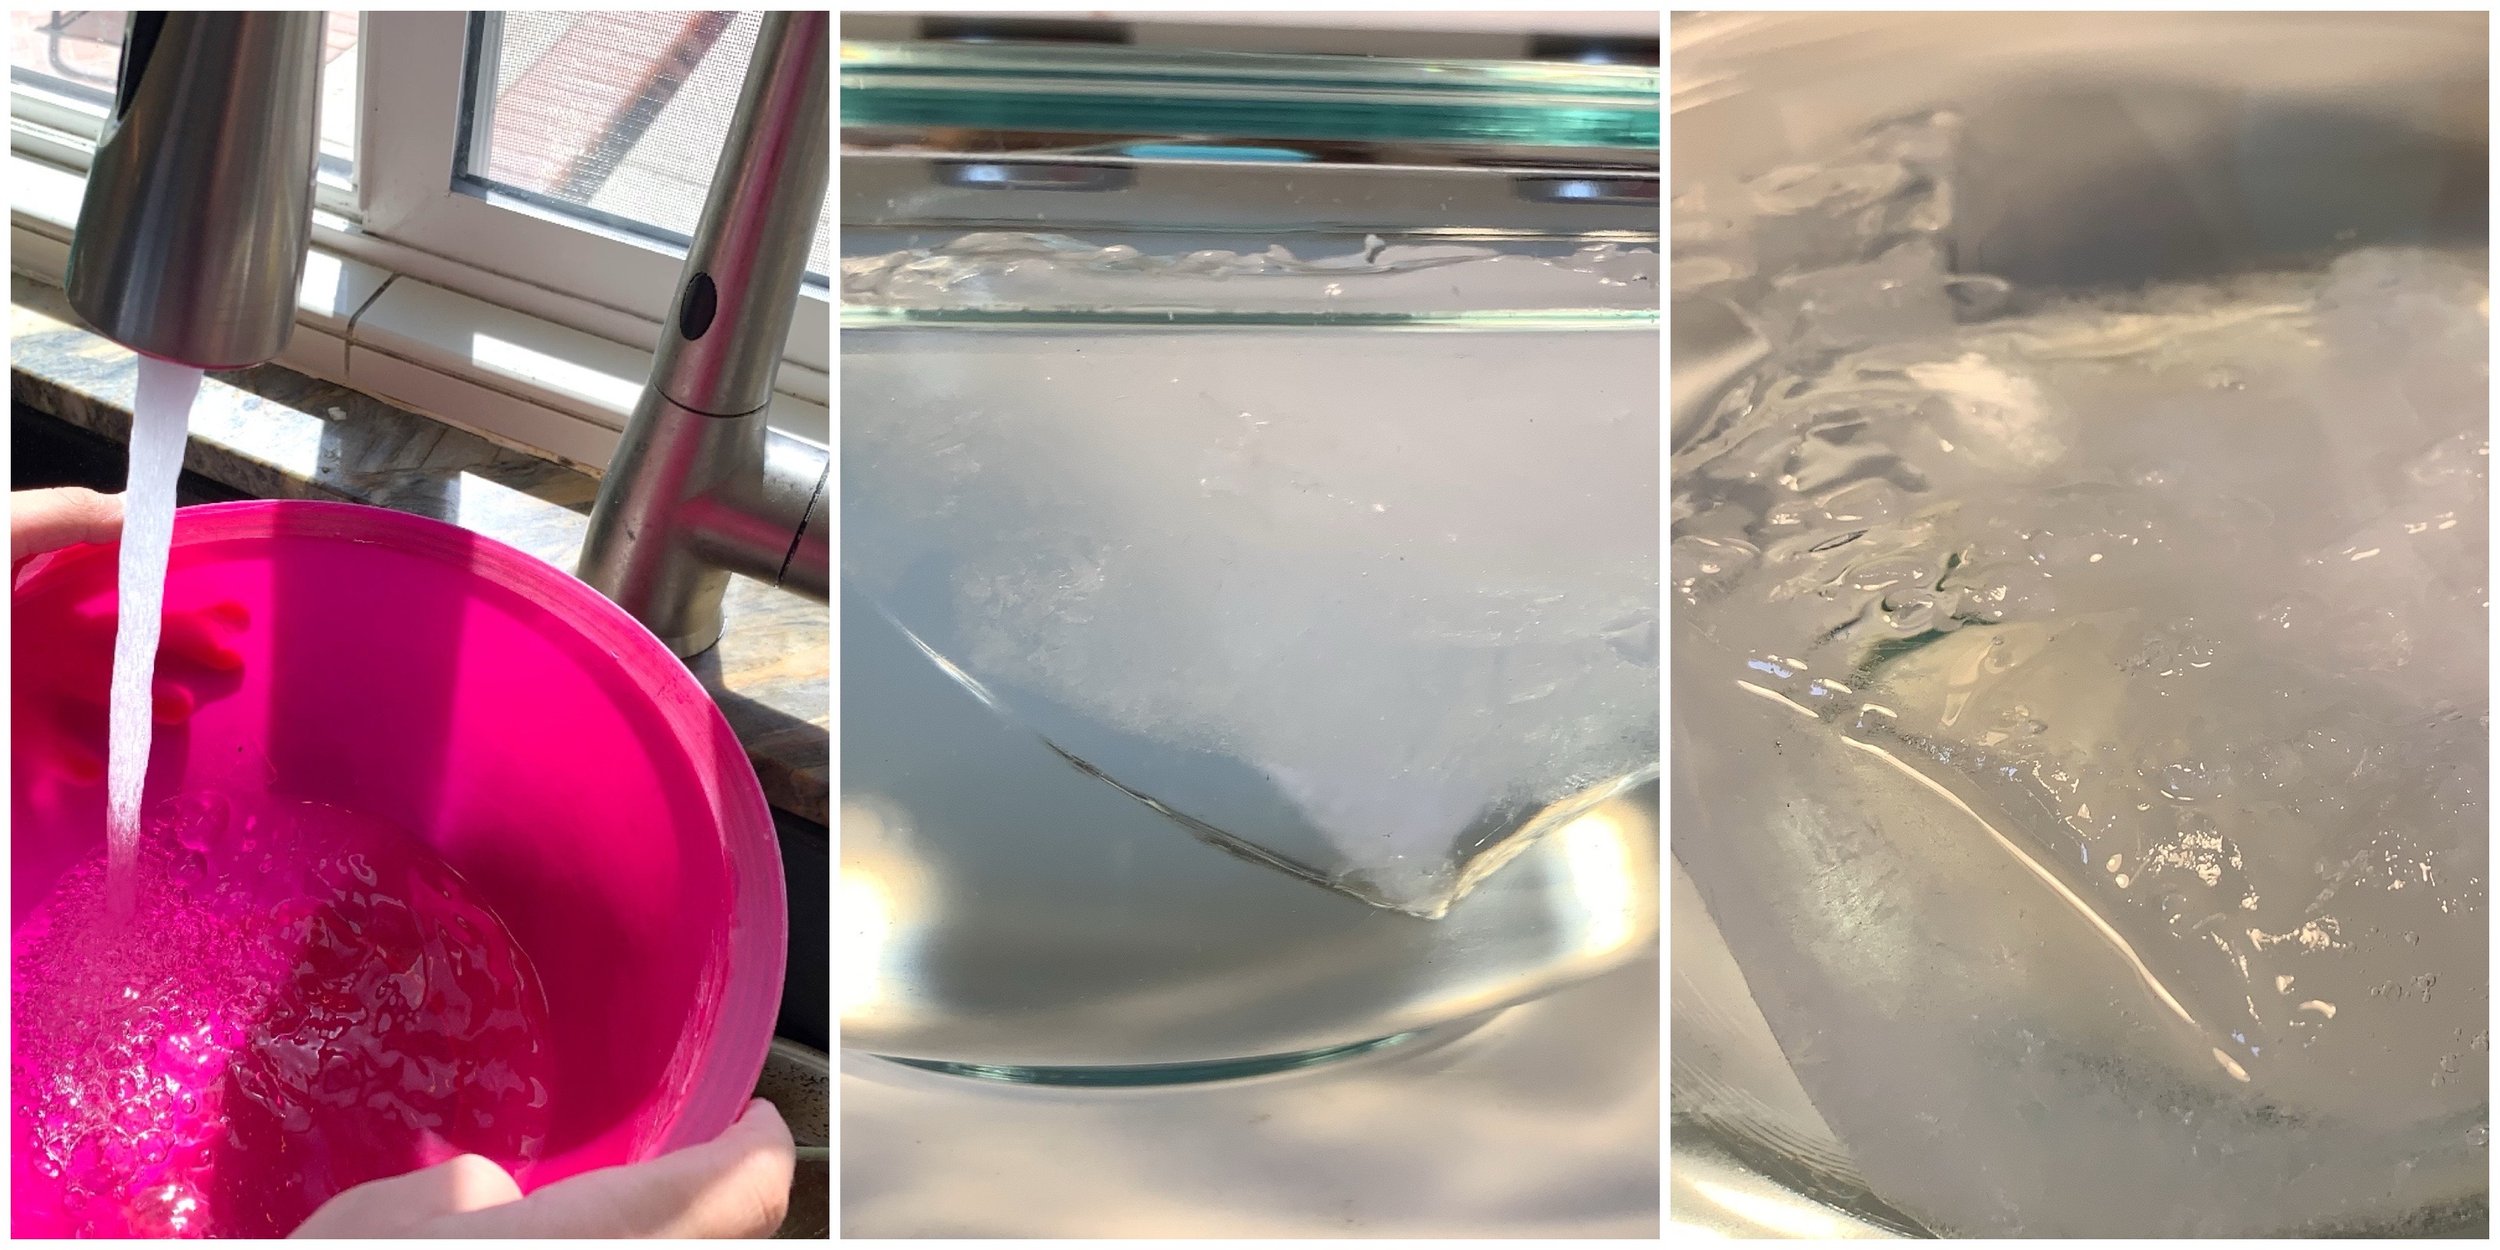
For this unit, we chose the super easy iceberg demonstration. Not only was it very easy to do, it was also extremely educational. You can very clearly see how 90% of an iceberg is underwater, especially when you use a big chunk of ice and a clear glass container for observation. We tried this project twice, once with 'saltwater' dyed blue and once with clear water.
-
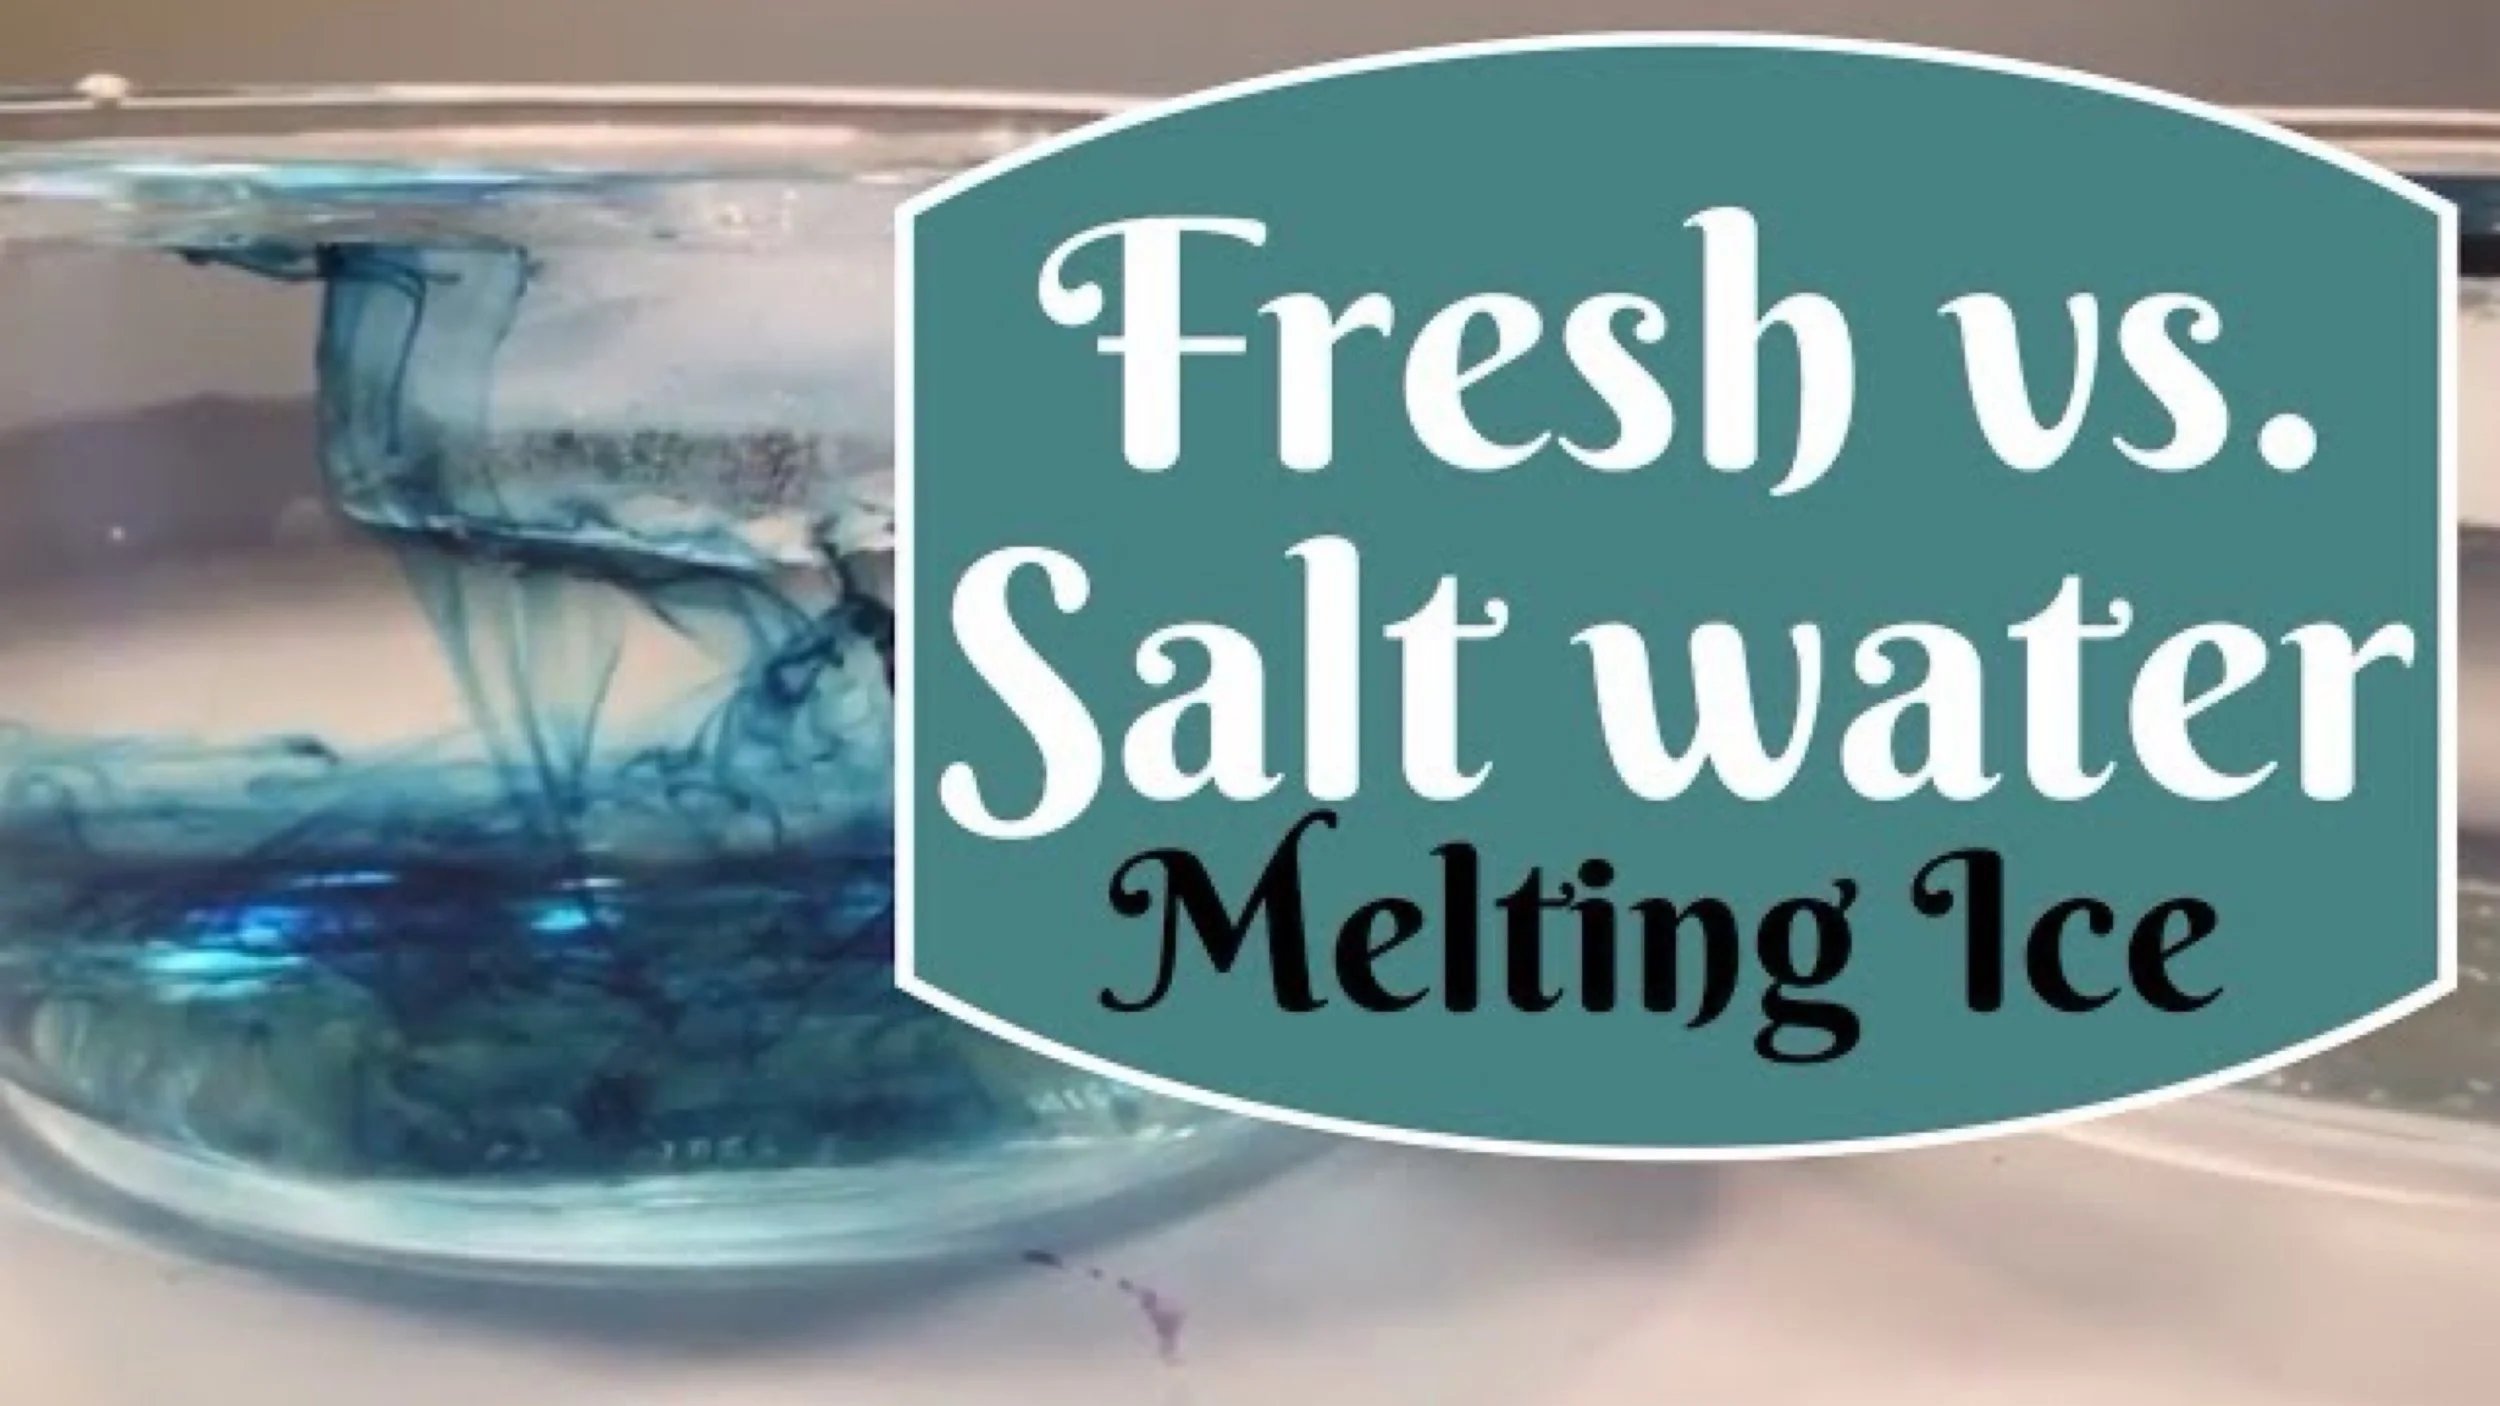
Freshwater VS. Saltwater | What Melts Faster?
What's your guess? Will ice melt faster in freshwater or saltwater? With a few drops of food coloring, you can really see the process and it's awesome! I like demonstrations like this because they are educational, profound, lasting and best of all, super affordable. With things you already have around the house, you can do this demonstration for any science unit.
-
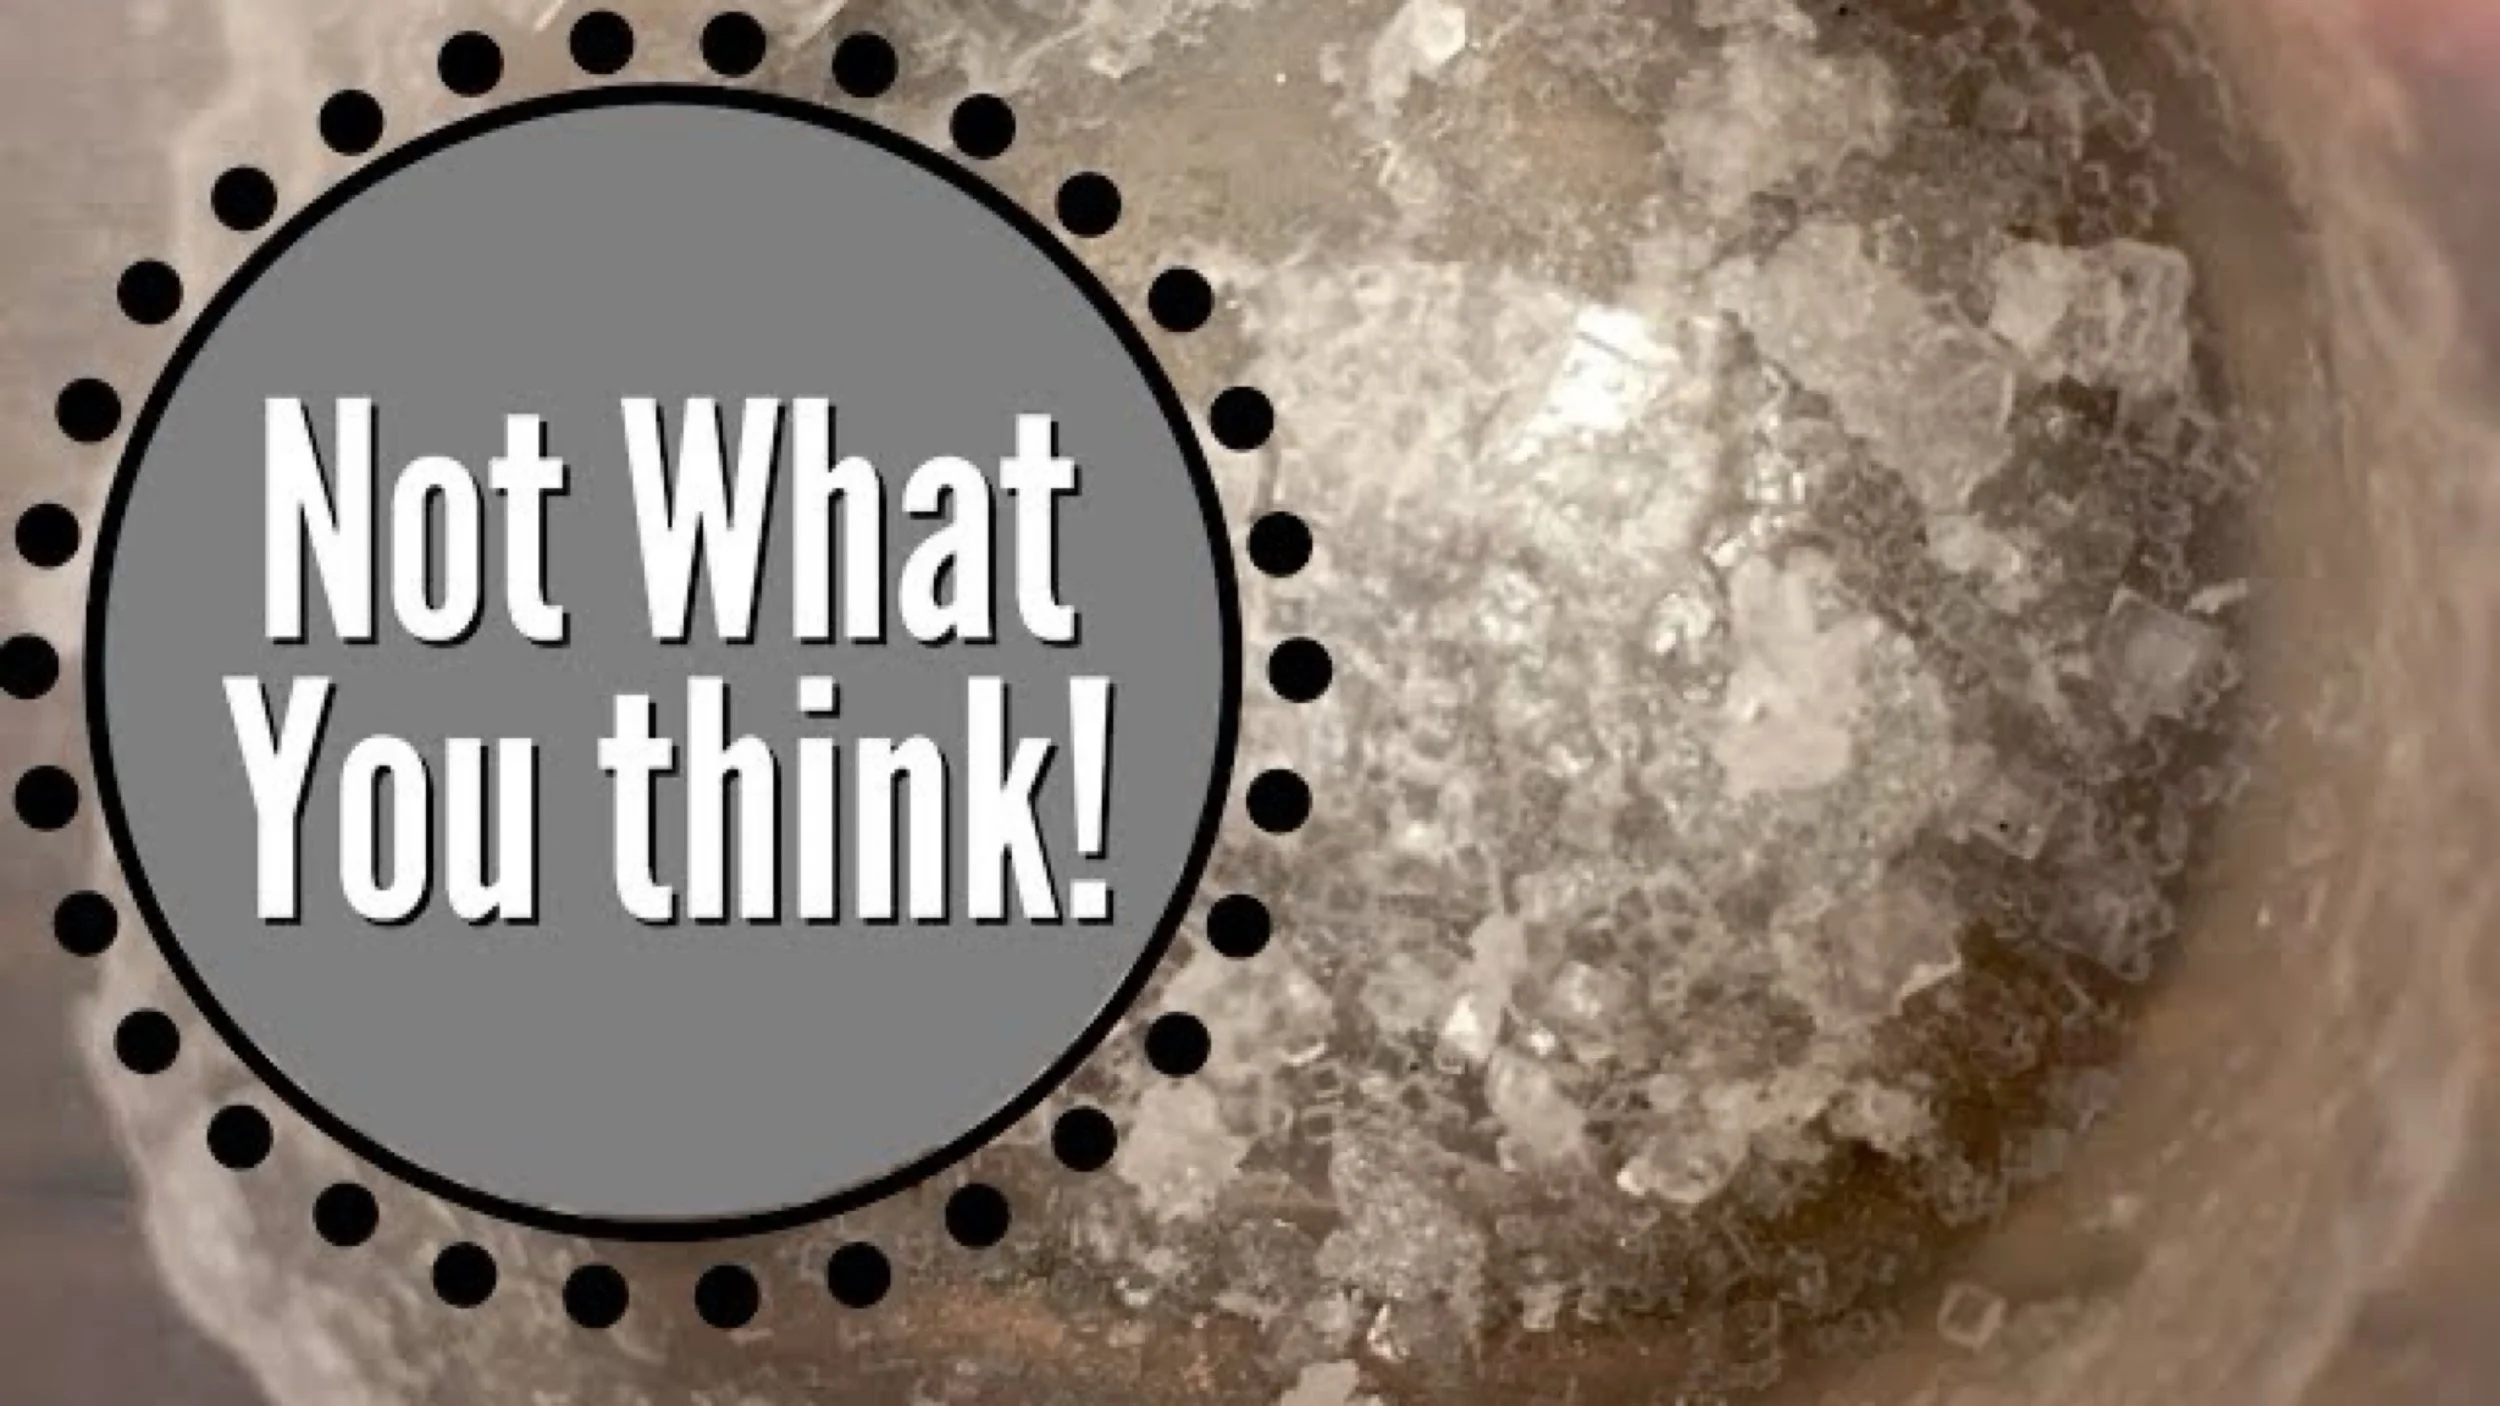
What Does Evaporated Seawater Look Like?
It isn't what you'd expect. Yes, evaporated seawater still forms cube-like structures, but it's what else we found in our seawater that surprised us.
-
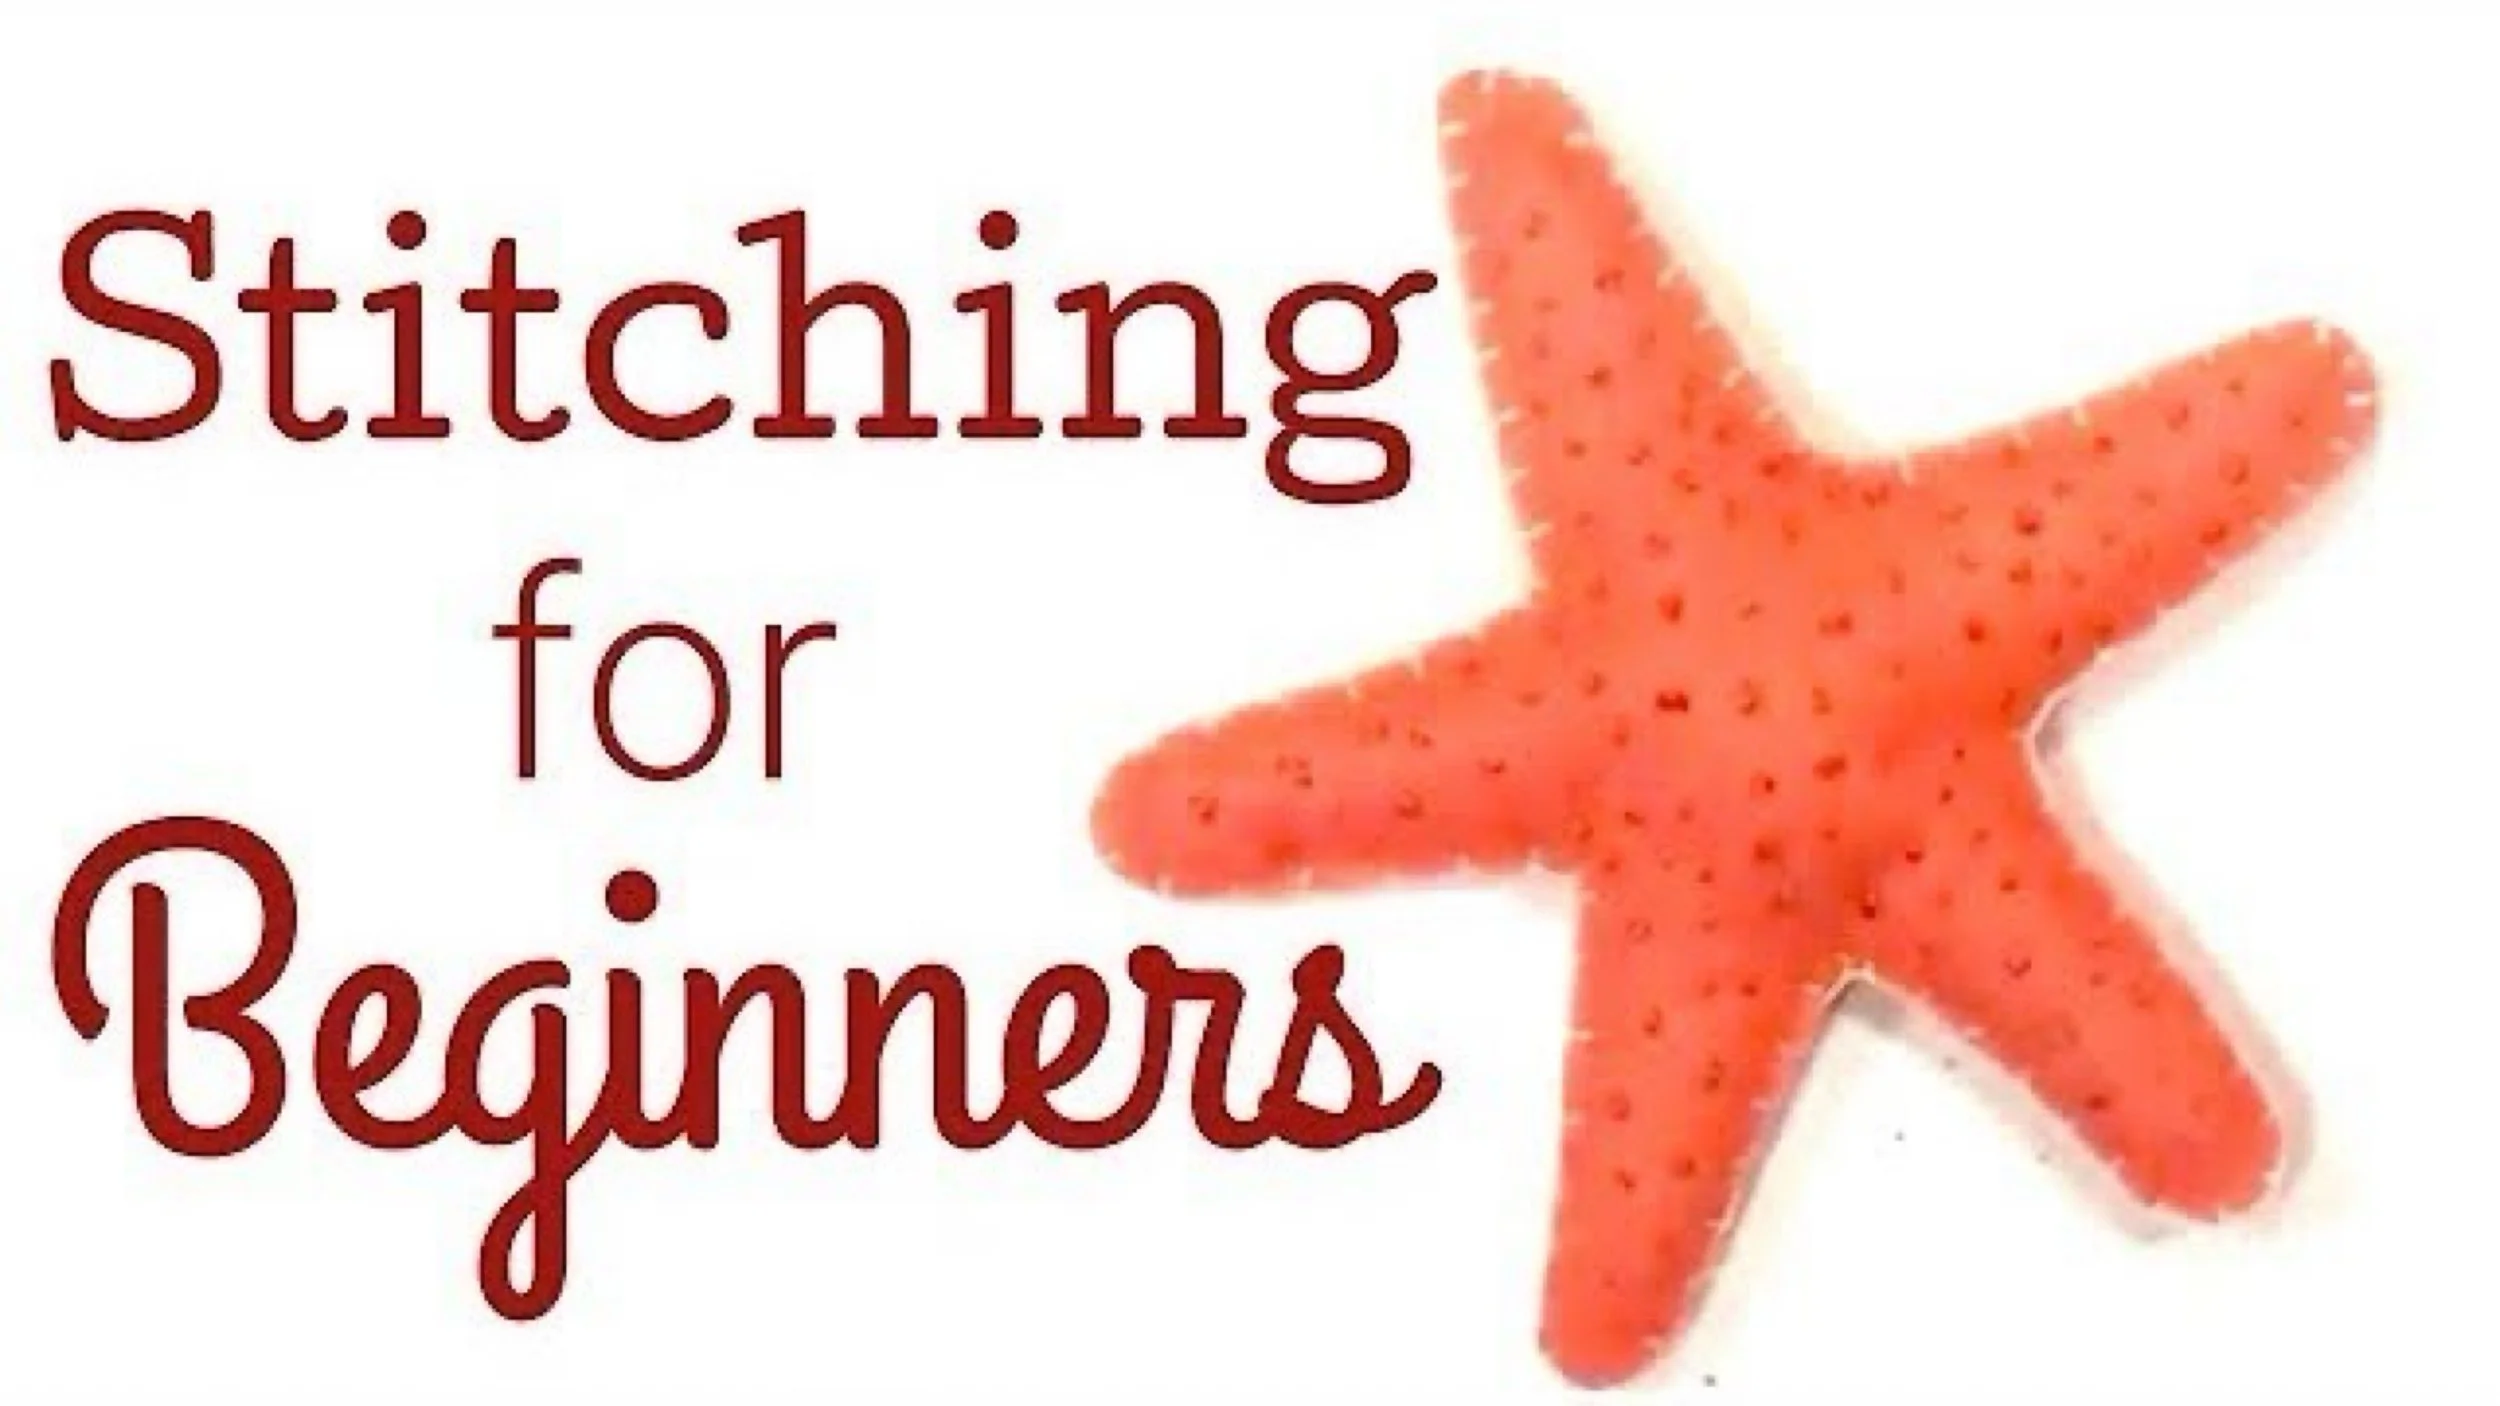
Stitching for Beginners | Sea Star Pattern
This is a very easy beginner's stitching project. You can free hand a sea star or download a pattern for this project. I used Holland felt in 100% wool in the color Tea Rose. Cut two sea star shapes. Line them up so they are the same.
-
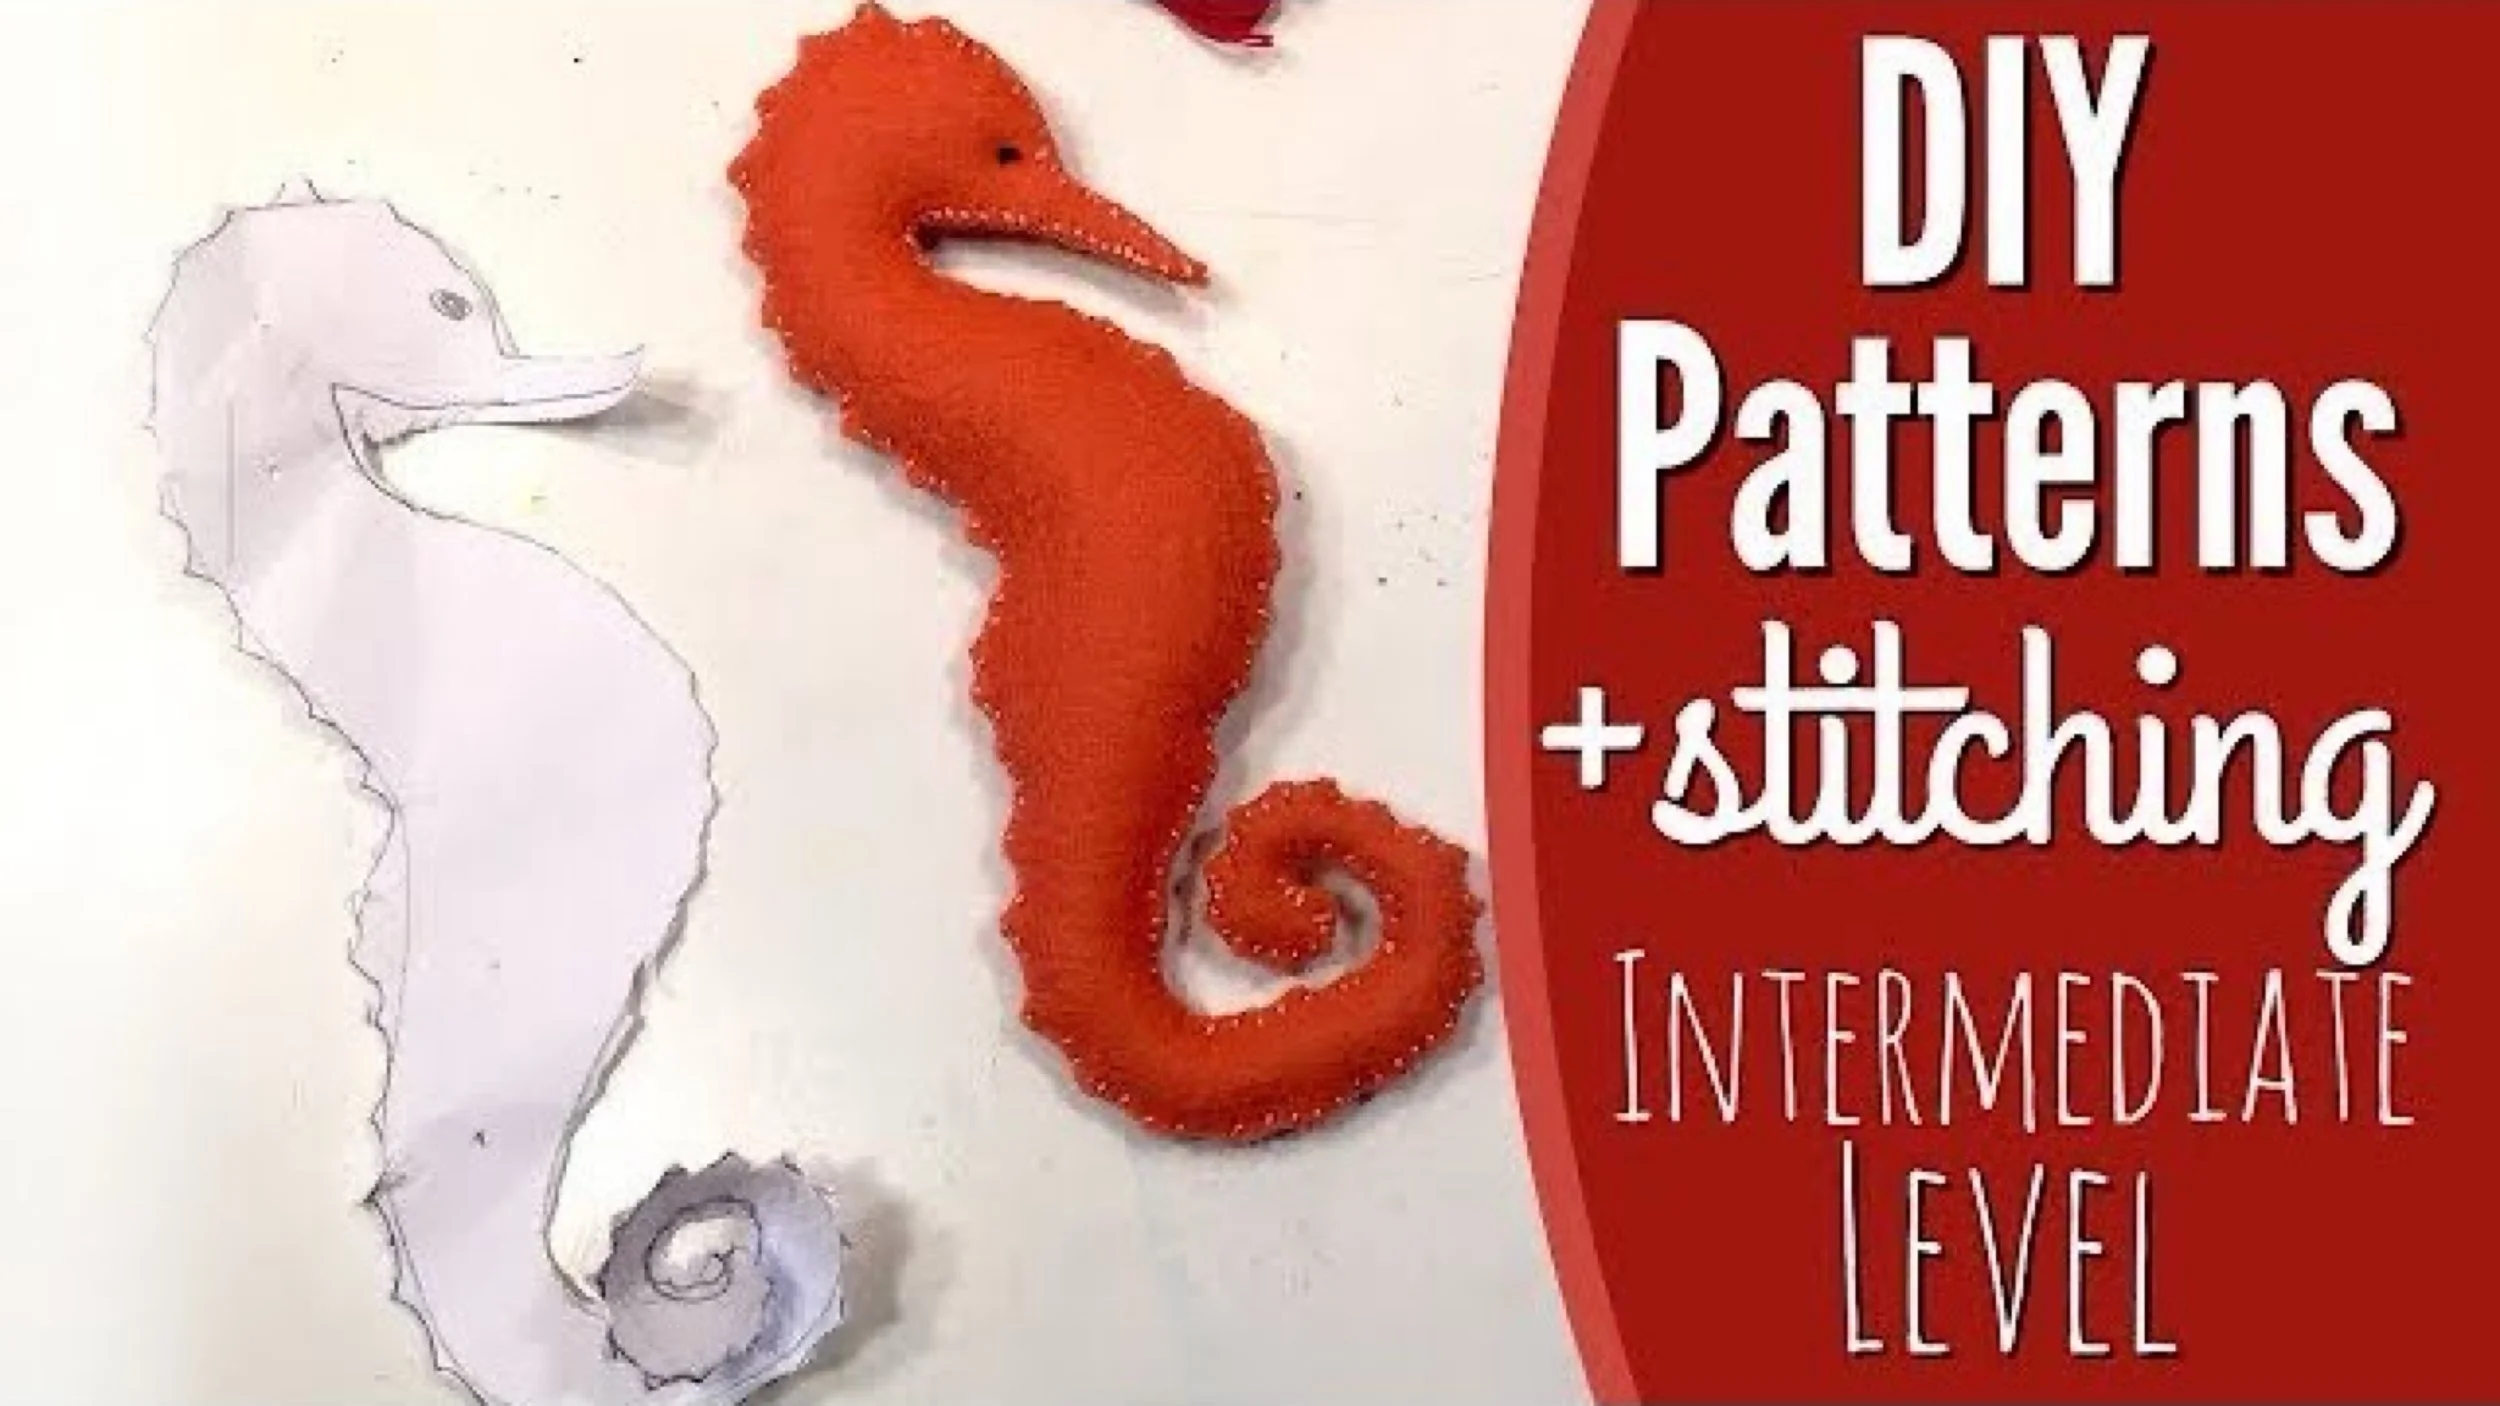
How to Make a Stitched Seahorse | How to Make Your Own Pattern
Try your hand at pattern making! For simple silhouettes, this project is great for beginners and as an intro to making your own projects. Watch as I work my way through this project while giving you tips.
-
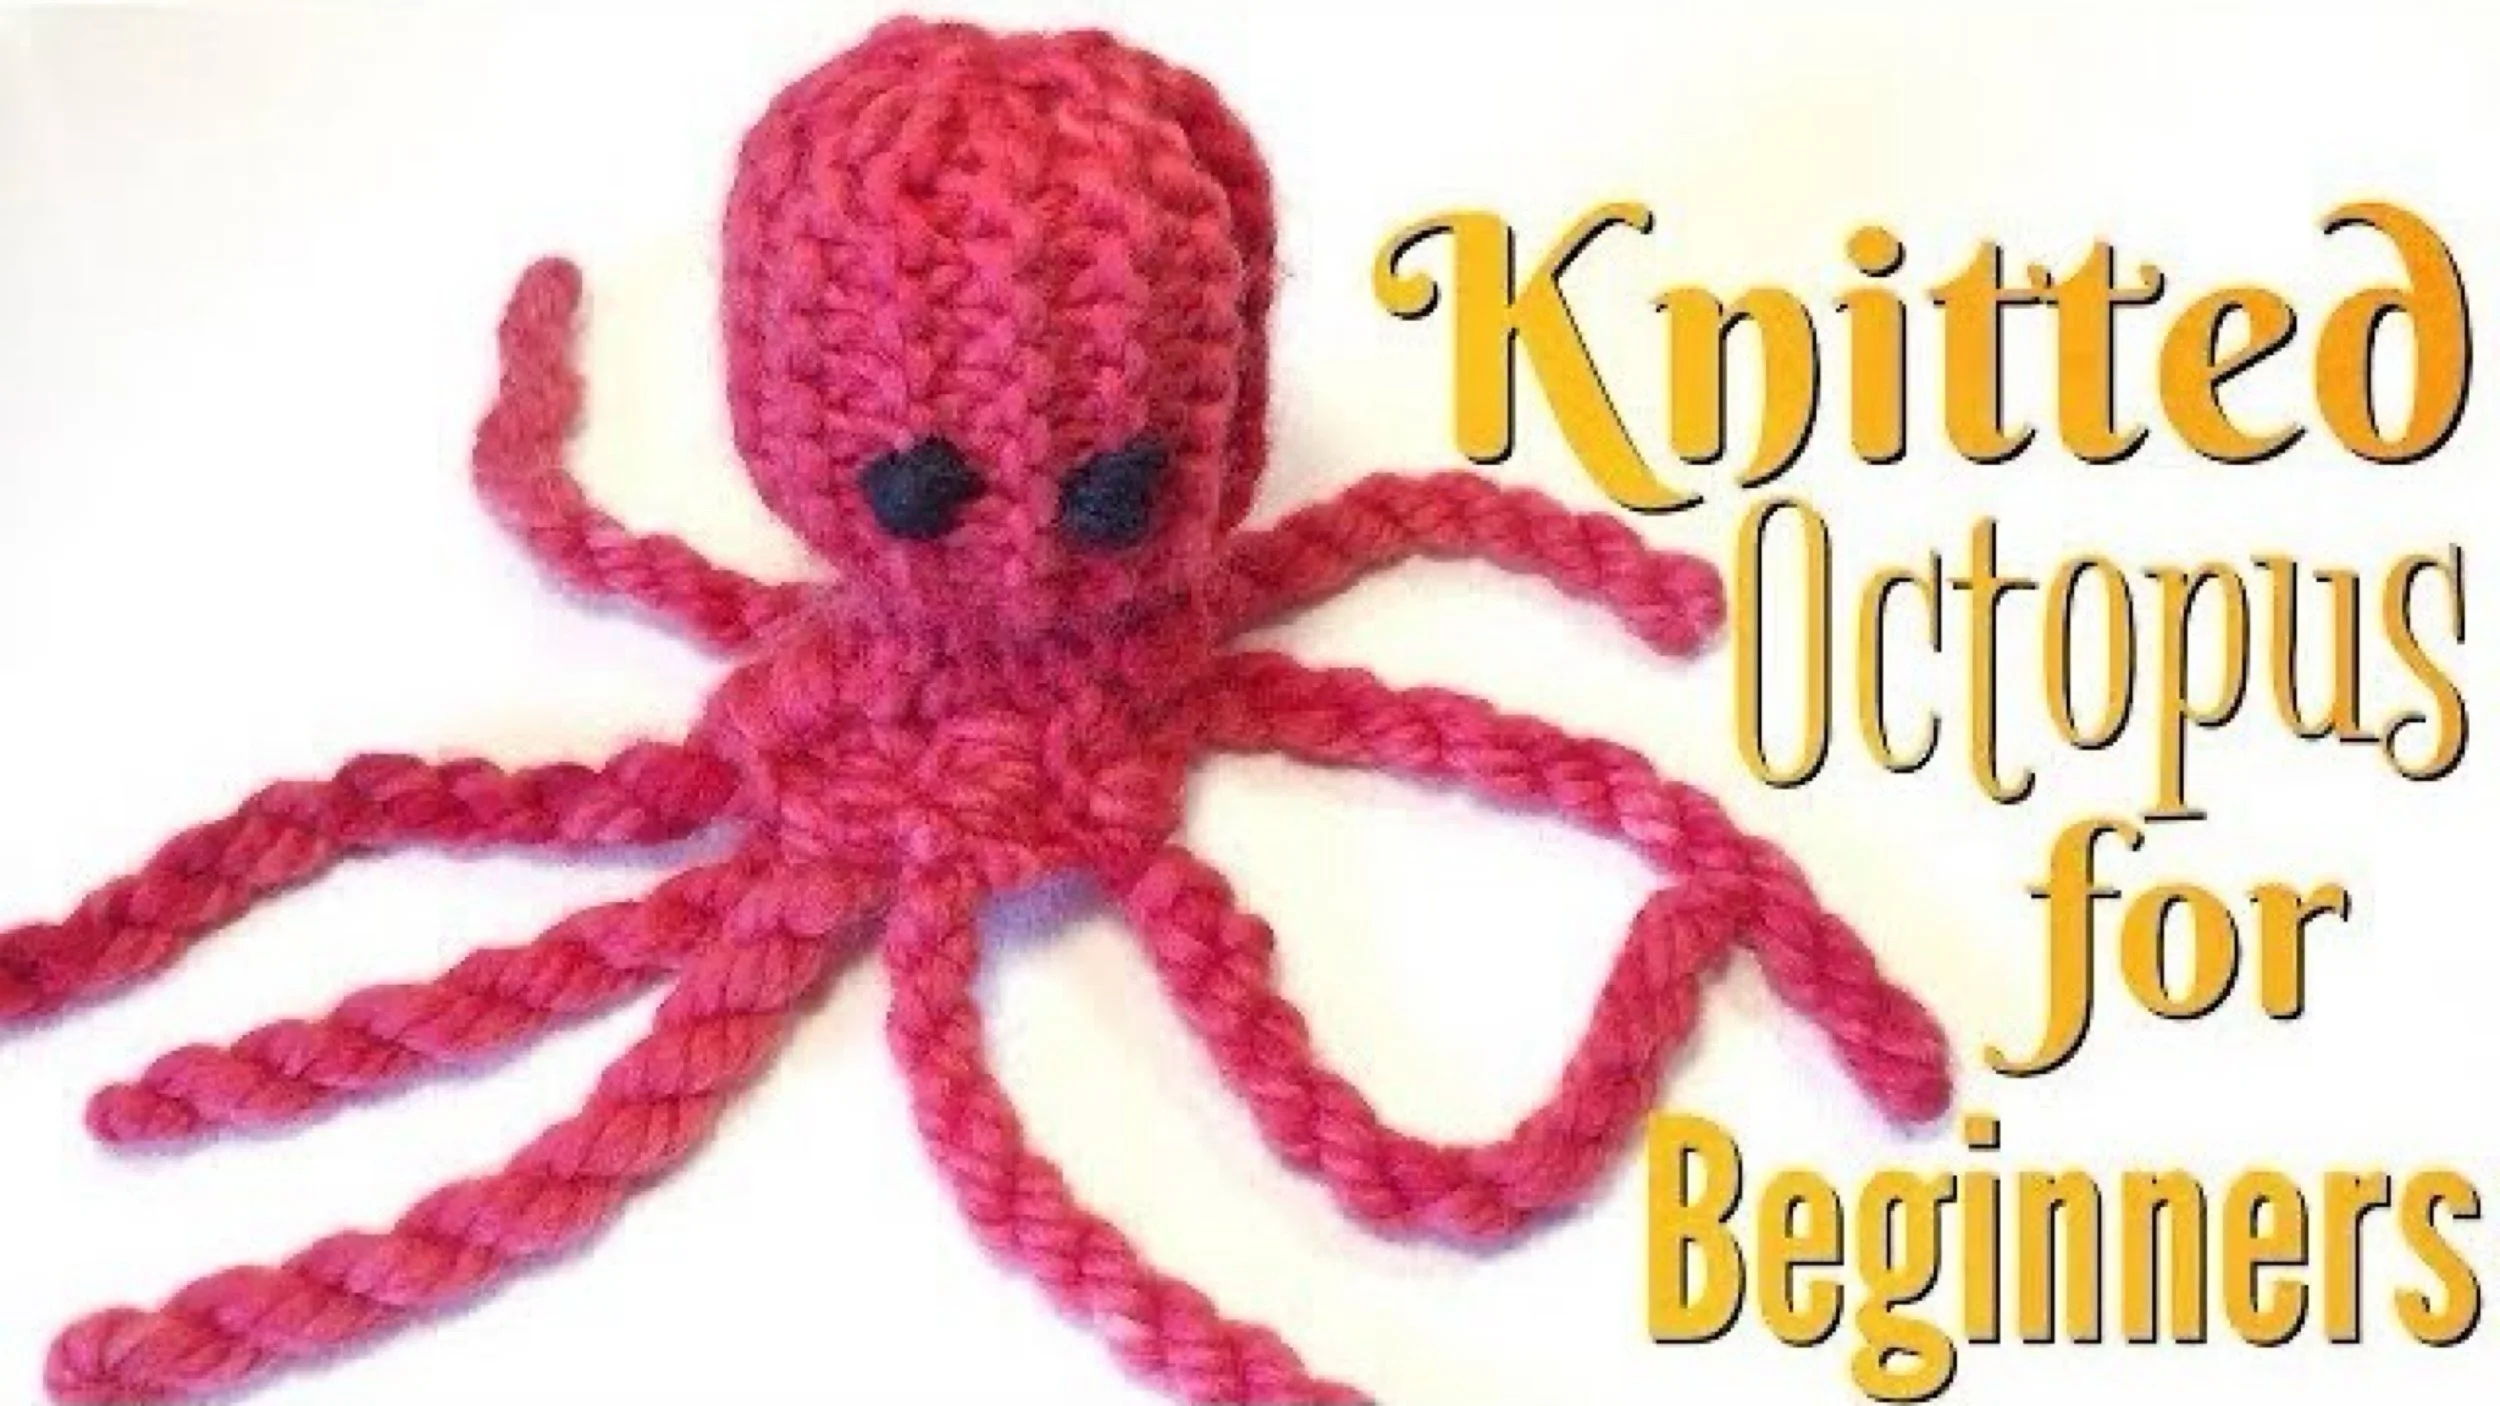
How to Make a Knitted Octopus | Knitting for Beginners
How adorable is this little octopus?! What's great about it, it that it's super easy, easy enough for a brand new knitter. In fact, if you don't know how knit, I walk you through the basics, from one novice knitter to another ;)
-
DIY Archaeology Kit | How to Make an Excavation Block
DIY excavation kits are super easy! All you need is some Plaster of Paris, a mold and some treasures to hide. We've been using these store bought kits in our homeschool for several years now, and I'm thrilled to be finally making them ourselves.
-
Homeschool Kits for Self Directed Learning
Wait till you see what I do with this Seashell Bracelet kit from Nature-Watch! I even surprised myself. After I arranged this kit in a printer's tray I use for scrapbooking, I emptied out two more trays to use for other kits and materials.
-
Discovering Seashells
I am totally surprised that so many seashells were packed into that tiny little tin! More too, I'm so impressed with the excavating material.
-

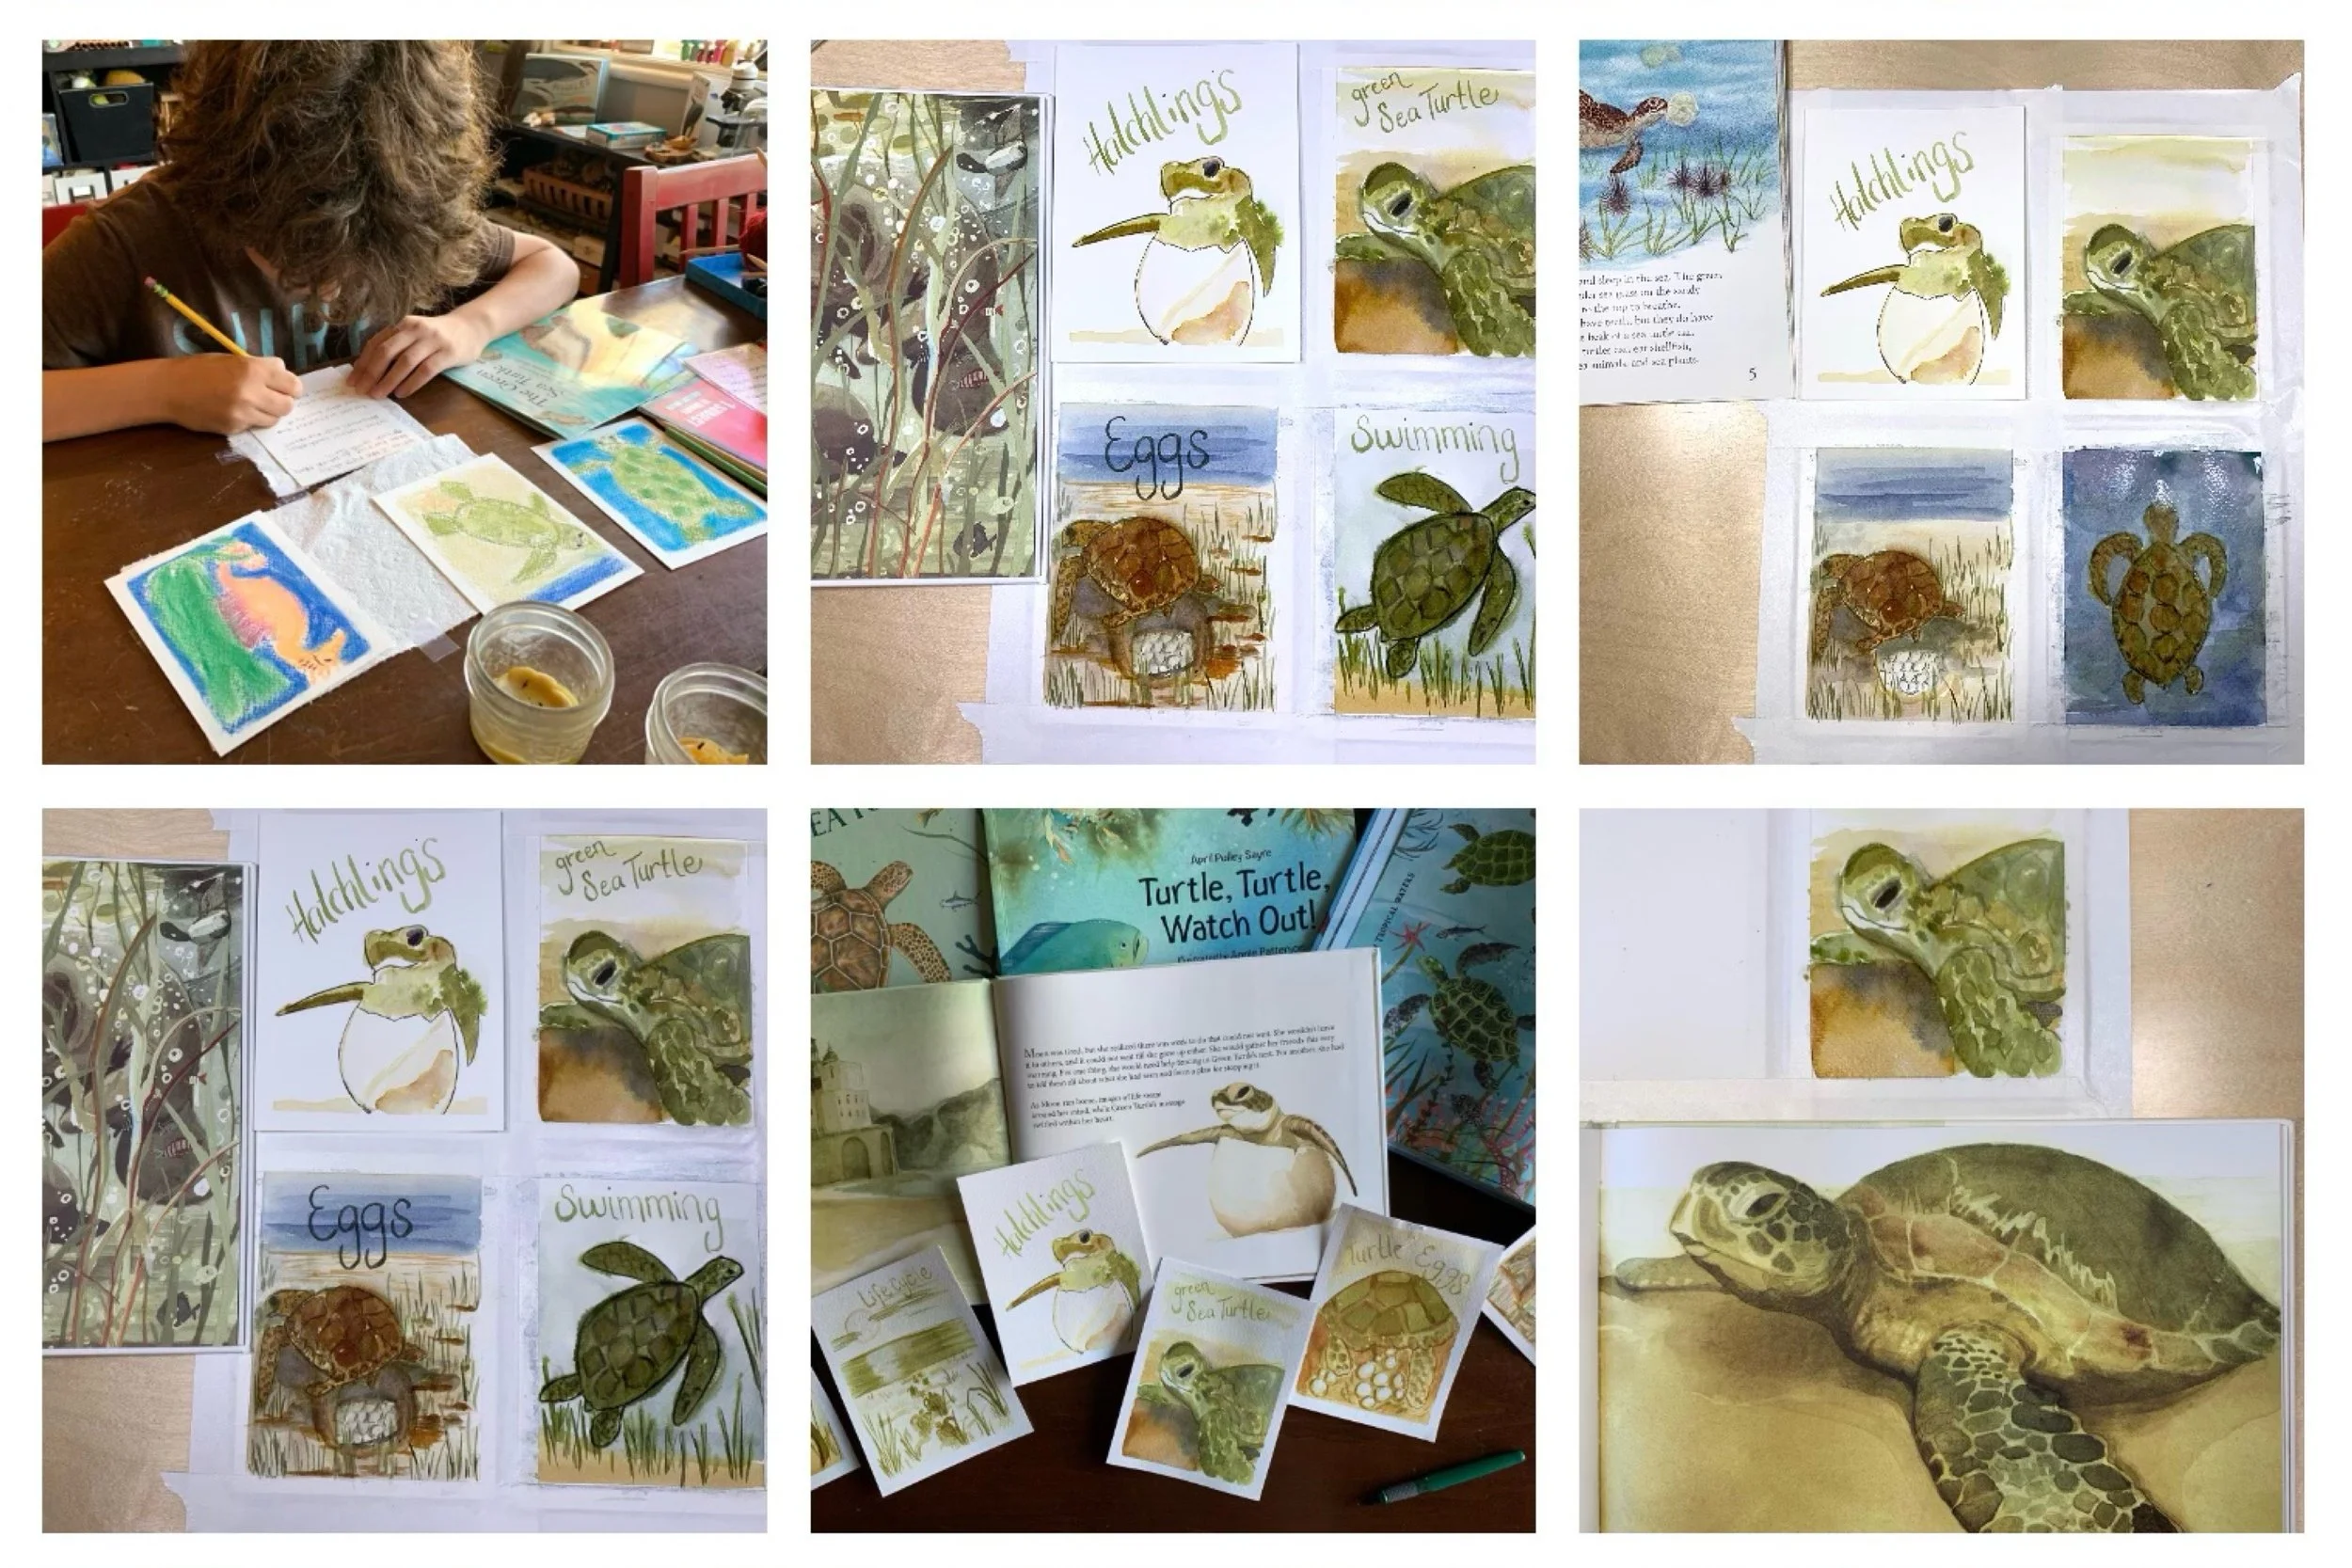
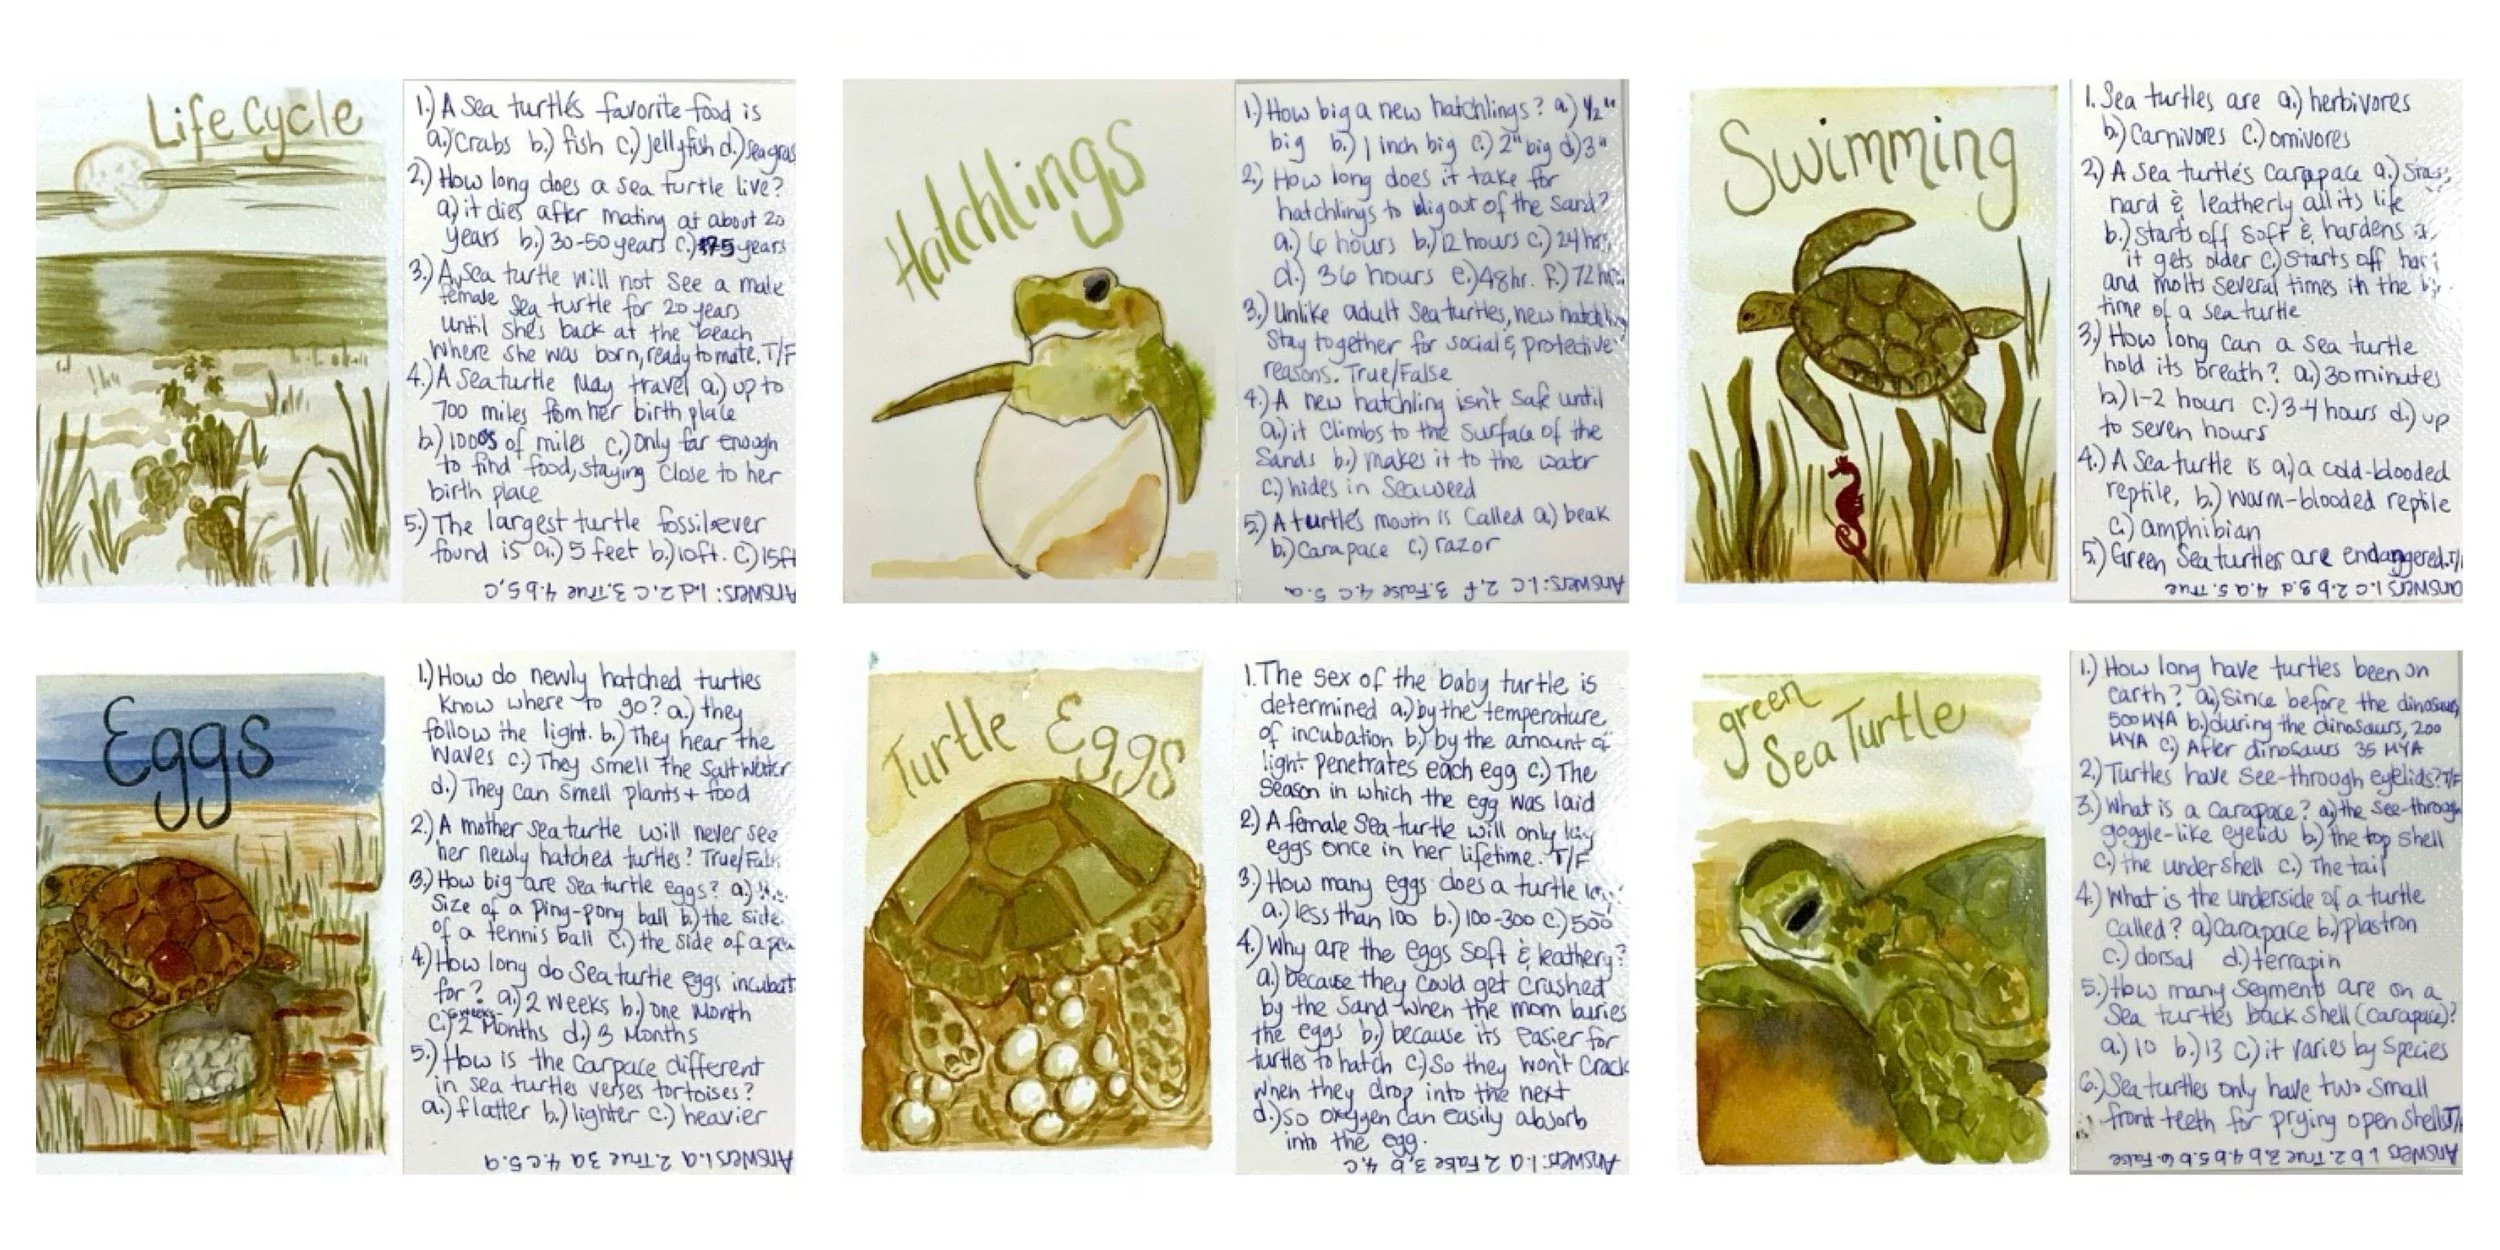
Sea Turtle Nature Cards
Learn how to make nature journaling or nature study cards for any unit! As we continue our nature unit study on Sea Turtles, we decided that the quickest and most beautiful way to show learning for this unit is in the form of these nature trivia cards. Each card has been photographed and is on the blog post for this video.
-
The Water Cycle | How To Make A Closed System
For the past four billion years, the water on this planet has remained the same. It's been recycled: evaporating from the seas and oceans, forming clouds and finally precipitating out as rain or snow. We recreated a simple closed system to show the water cycle.
-
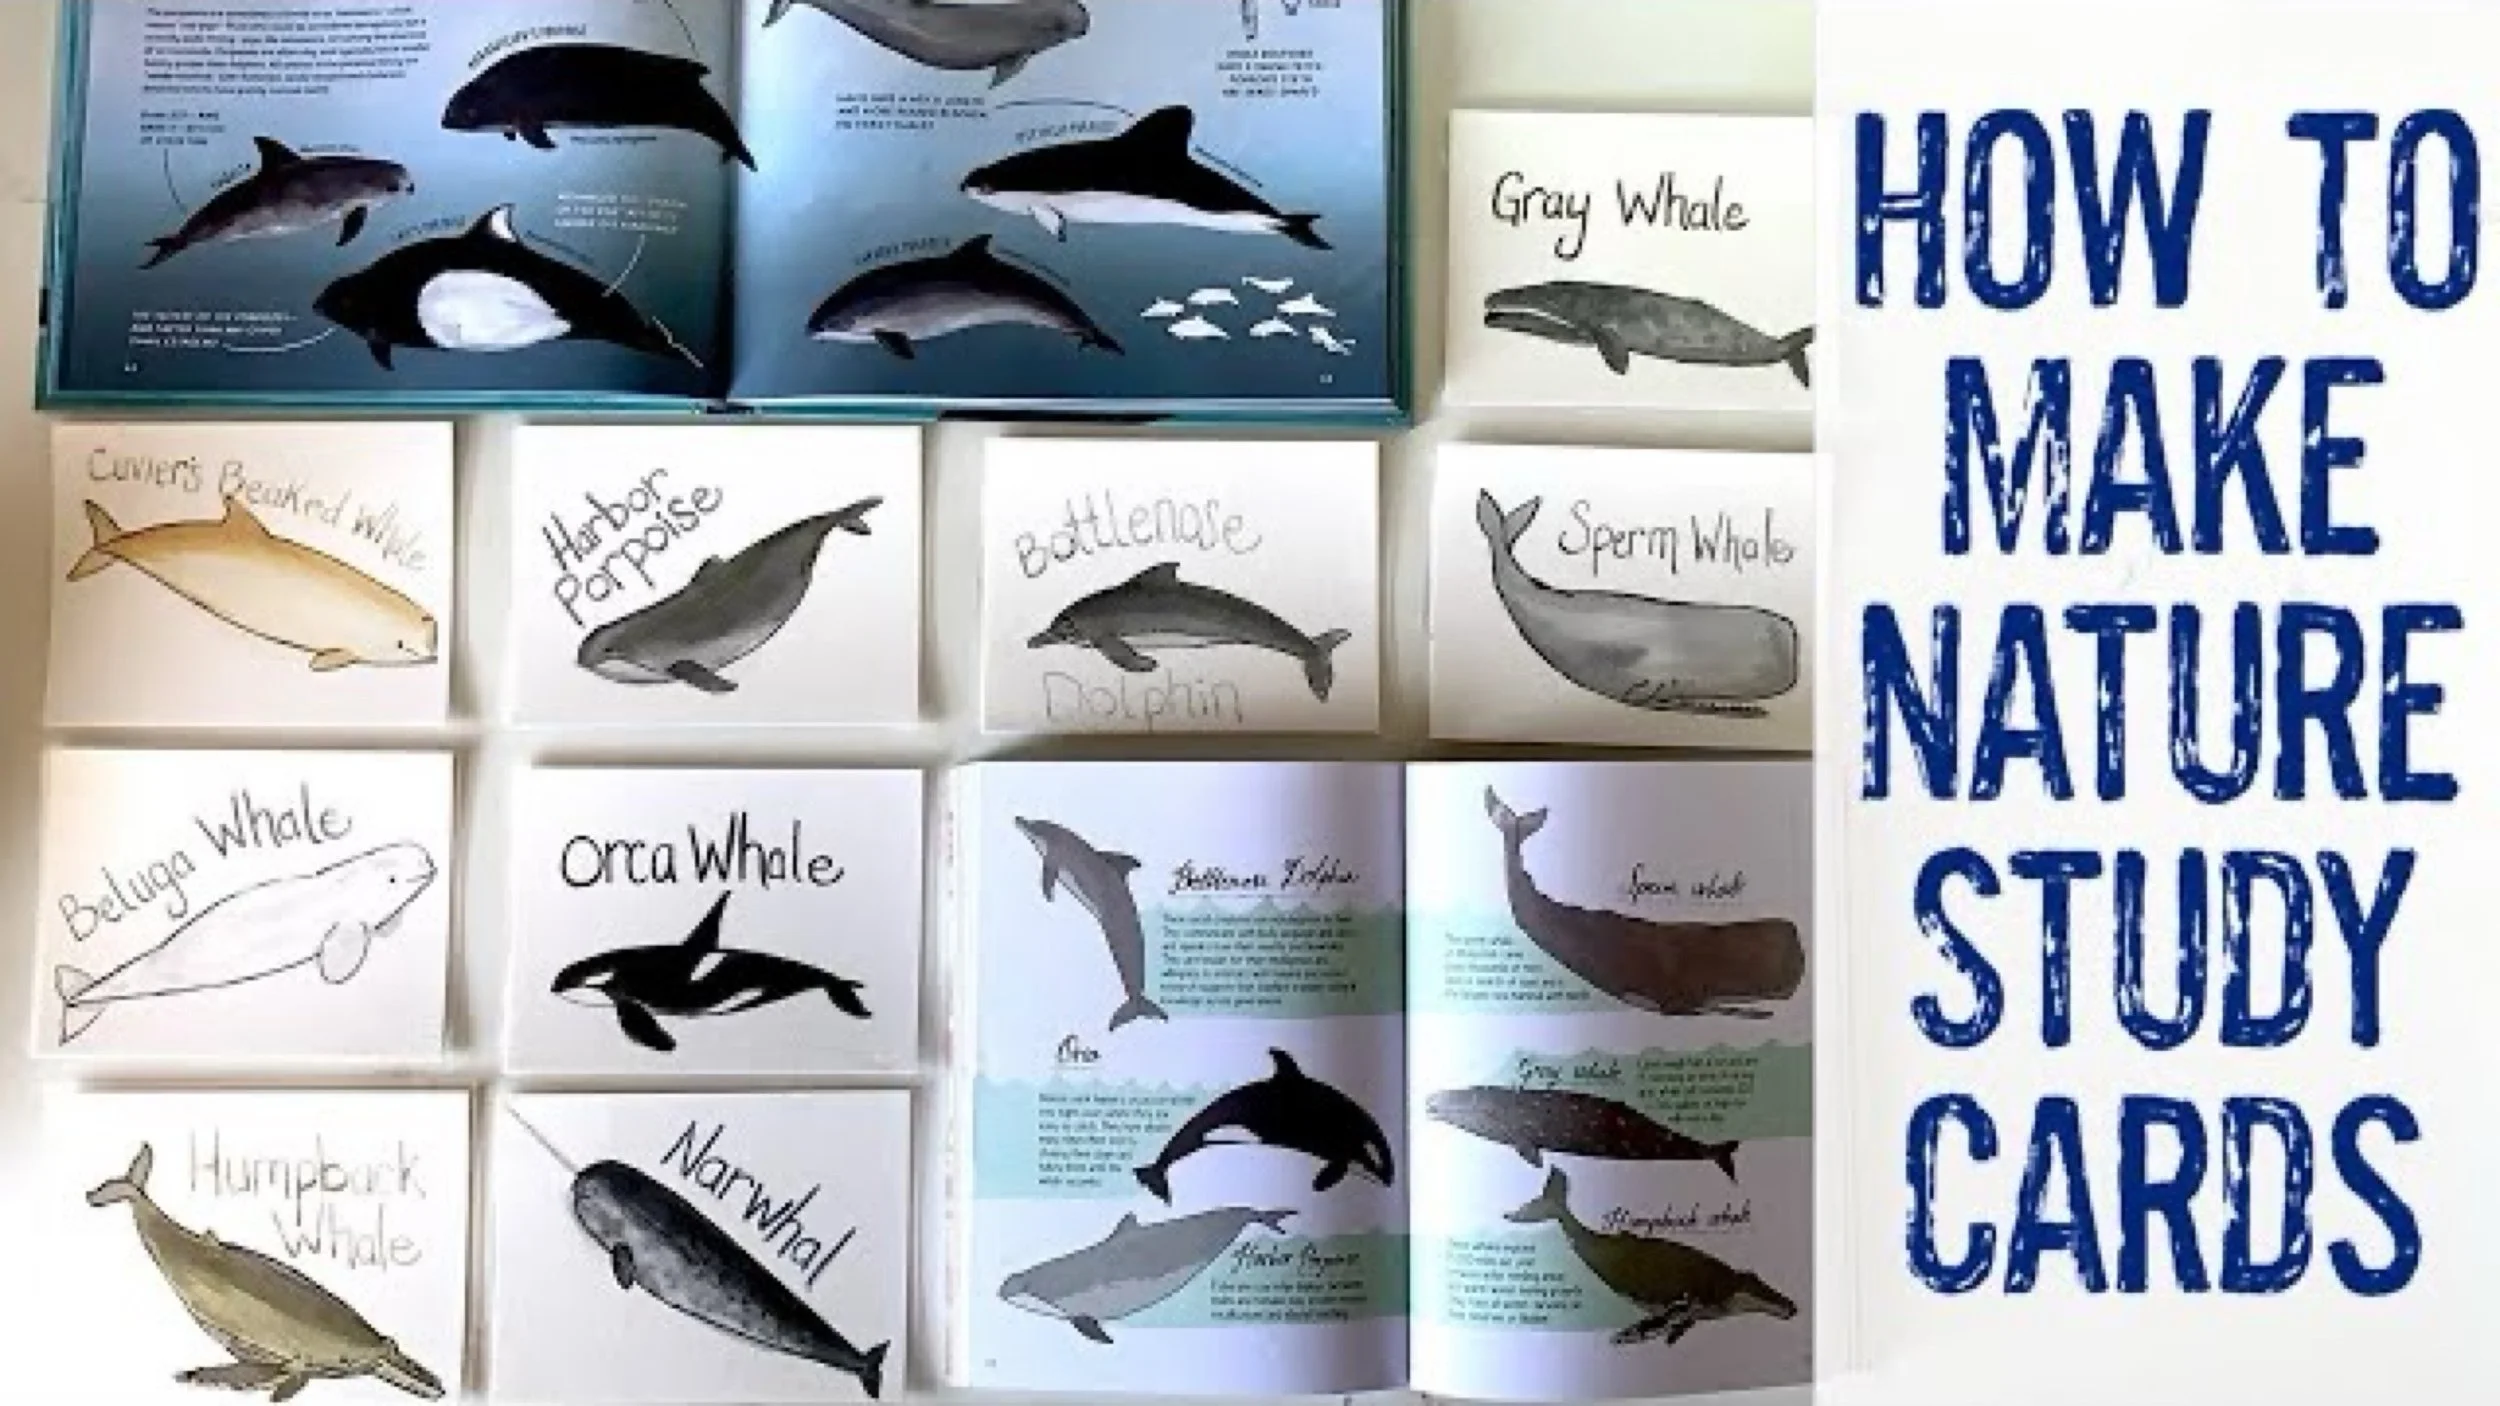
Whale Nature Study Trivia Cards
In case you missed the previous Nature Journaling Card tutorials, here’s one more that’s sure to inspire you. These were the easiest so far. In part, I think because whales are easier to draw than some of the other nature images we’ve done before.
-

How to Bind a Book
Here's one way to bind a main lesson book after you've completed your work. If you wish to use multiple art mediums for a main lesson block or if you are working with watercolors, binding your loose sheets of papers along with your narrations after the block is over is one way to do it.

Projects & Activities
What An Iceberg Looks Like Under Water
For our Whale and Sea Turtle Units, we turned to the book Rivers and Oceans by Barbara Taylor for inspiration for projects and activities. Two projects worked well for our units, even though they didn't exactly relate to the specific topics. For this unit, we chose the super easy iceberg demonstration. Not only was it very easy to do, it was also extremely educational. You can very clearly see how 90% of an iceberg is under water, especially when you use a big chunk of ice and a clear glass container for observation. We tried this project twice, once with 'saltwater' dyed blue and once with clear water. The clear water was easier for observation and also allowed us to repurpose the water for watering plants (don't water your plants with salt water!). This demonstration was easy and fast and best of all, free! You can use a water-filled balloon for this project or fill a large bowl. We did both and found a bowl was better and produced less waste. We hammered away at our large chunk of ice until we had 'iceberg' sized pieces.
Check out our complete Ocean Main Lesson Block with videos on how we put this unit together, the resources we used and the projects we did. You can also check out our smaller Whale Unit Study and Sea Turtle Unit Study which includes more projects and resources. We used our Distress Inks for many projects in this unit. You can see all the projects we’ve used Distress Inks for in a complete playlist. Enjoy!
Freshwater VS. Saltwater
What Melts Faster?
What’s your guess? Will ice melt faster in freshwater or saltwater? With a few drops of food coloring, you can really see the process and it’s awesome! I like demonstrations like this because they are educational, profound, lasting and best of all, super affordable. With things you already have around the house, you can do this demonstration for any science unit.
Inspiration for this project came from the book Ocean Currents Teacher’s Guide by Catherine Halversen.
Check out our complete Ocean Main Lesson Block with videos on how we put this unit together, the resources we used and the projects we did. You can also check out our smaller Whale Unit Study and Sea Turtle Unit Study which includes more projects and resources. We used our Distress Inks for many projects in this unit. You can see all the projects we’ve used Distress Inks for in a complete playlist. Enjoy!
What Does Evaporated Seawater Look Like?
It isn't what you'd expect. Yes, evaporated seawater still forms cube-like structures, but it's what else we found in our seawater that surprised us. We evaporated several beakers of water with varying levels of water to see which one would evaporate the faster. Even though the surface area was the largest for the greatest volume of water, it was the last to evaporate. But it didn't look completely evaporated. There was a watery residue on the salt crystals. So, we gave it more days to dry out completely, but it never did. Finally after several weeks, we examined the salt crystals and found them oily! There was an oily residue on the salt crystals. Upon some research, I found that the oil content in the water off the coast of California is quite high, and while I'm pretty sure that's why there's an oily residue on our salt crystals, I can't be 100% sure. If you know more, please let me know! If you live near a body of water and wish to evaporate the water, please let me know your findings!
Hand Stitched Sea Star
This is a very easy beginner's stitching project. You can free hand a sea star or download a pattern for this project. I used Holland felt in 100% wool in the color Tea Rose. Cut two sea star shapes. Line them up so they are the same. Use embroidery thread in a the color of your choice to stitch the edges using a blanket stitch. You can separate the embroidery thread for it to be thinner. After stitching one arm you can beginning filling it with filler. I used wool, but you could use anything from fill from an old pillow to cotton balls. Alternatively, you could add some details to one side of the sea star before stitching it together. I found this to be quite time consuming and had my kids skip this step. My 11-year-old son opted to do it anyway, but only did some bumpy stitching around the center.
Stitched Seahorse
Try your hand at pattern making! For simple silhouettes, this project is great for beginners and as an intro to making your own projects. Watch as I work my way through this project while giving you tips. See how I fix little mistakes and make alterations on the spot. The results are darling in the end, so I know you can achieve success, too!
For this project, I hand sketched a silhouette of a seahorse. I referred to images online for help and made some changes to make it easier. I gave my pattern a rough cut and then pinned it to my felt and cut both pieces of felt and the pattern at the same time. It actually worked really well! And it ensured that the patterns were exactly the same. Next, I stitched using embroidery floss (I separated three of the six strands out) all around the perimeter using a loop stitch. I filled with wool batt as I stitched. I finished off with two black eyes and the project was complete!
Check out how I store my floss for ideas on how you can store your fibers. The materials I used for this project are the following: Embroidery needle, Embroidery floss in color 352, Holland wool felt in Salmon, and Wool batt stuffing. Wool/rayon felt blend vendors: Over The River Felt and ThreadFollower for felt and intermediate kits.
Knitted Octopus
How adorable is this little octopus?! What's great about it, it that it's super easy, easy enough for a brand new knitter. In fact, if you don't know how knit, I walk you through the basics, from one novice knitter to another ;)
For this project, I'm using bulky weight Lamb's Pride yarn in Cranberry Swirl. It's gorgeous and you can find it at A Child's Dream. I'm using size 10 needles. I'm using a large blunt needle for sewing the octopus together, wool batt for stuffing and black yarn for the eye.
Direction: Cast on 15 stitches knit 30 rows bind off Sew the top and side together to form a tube Fill the top 2/3 with wool batt or top Sew around the tube so you have a spherical head with a 'collar' Twizzle four pieces of yarn about 12-18 inches long (ply them together) Sew the twizzles to the collar Stitch eye and you're done!
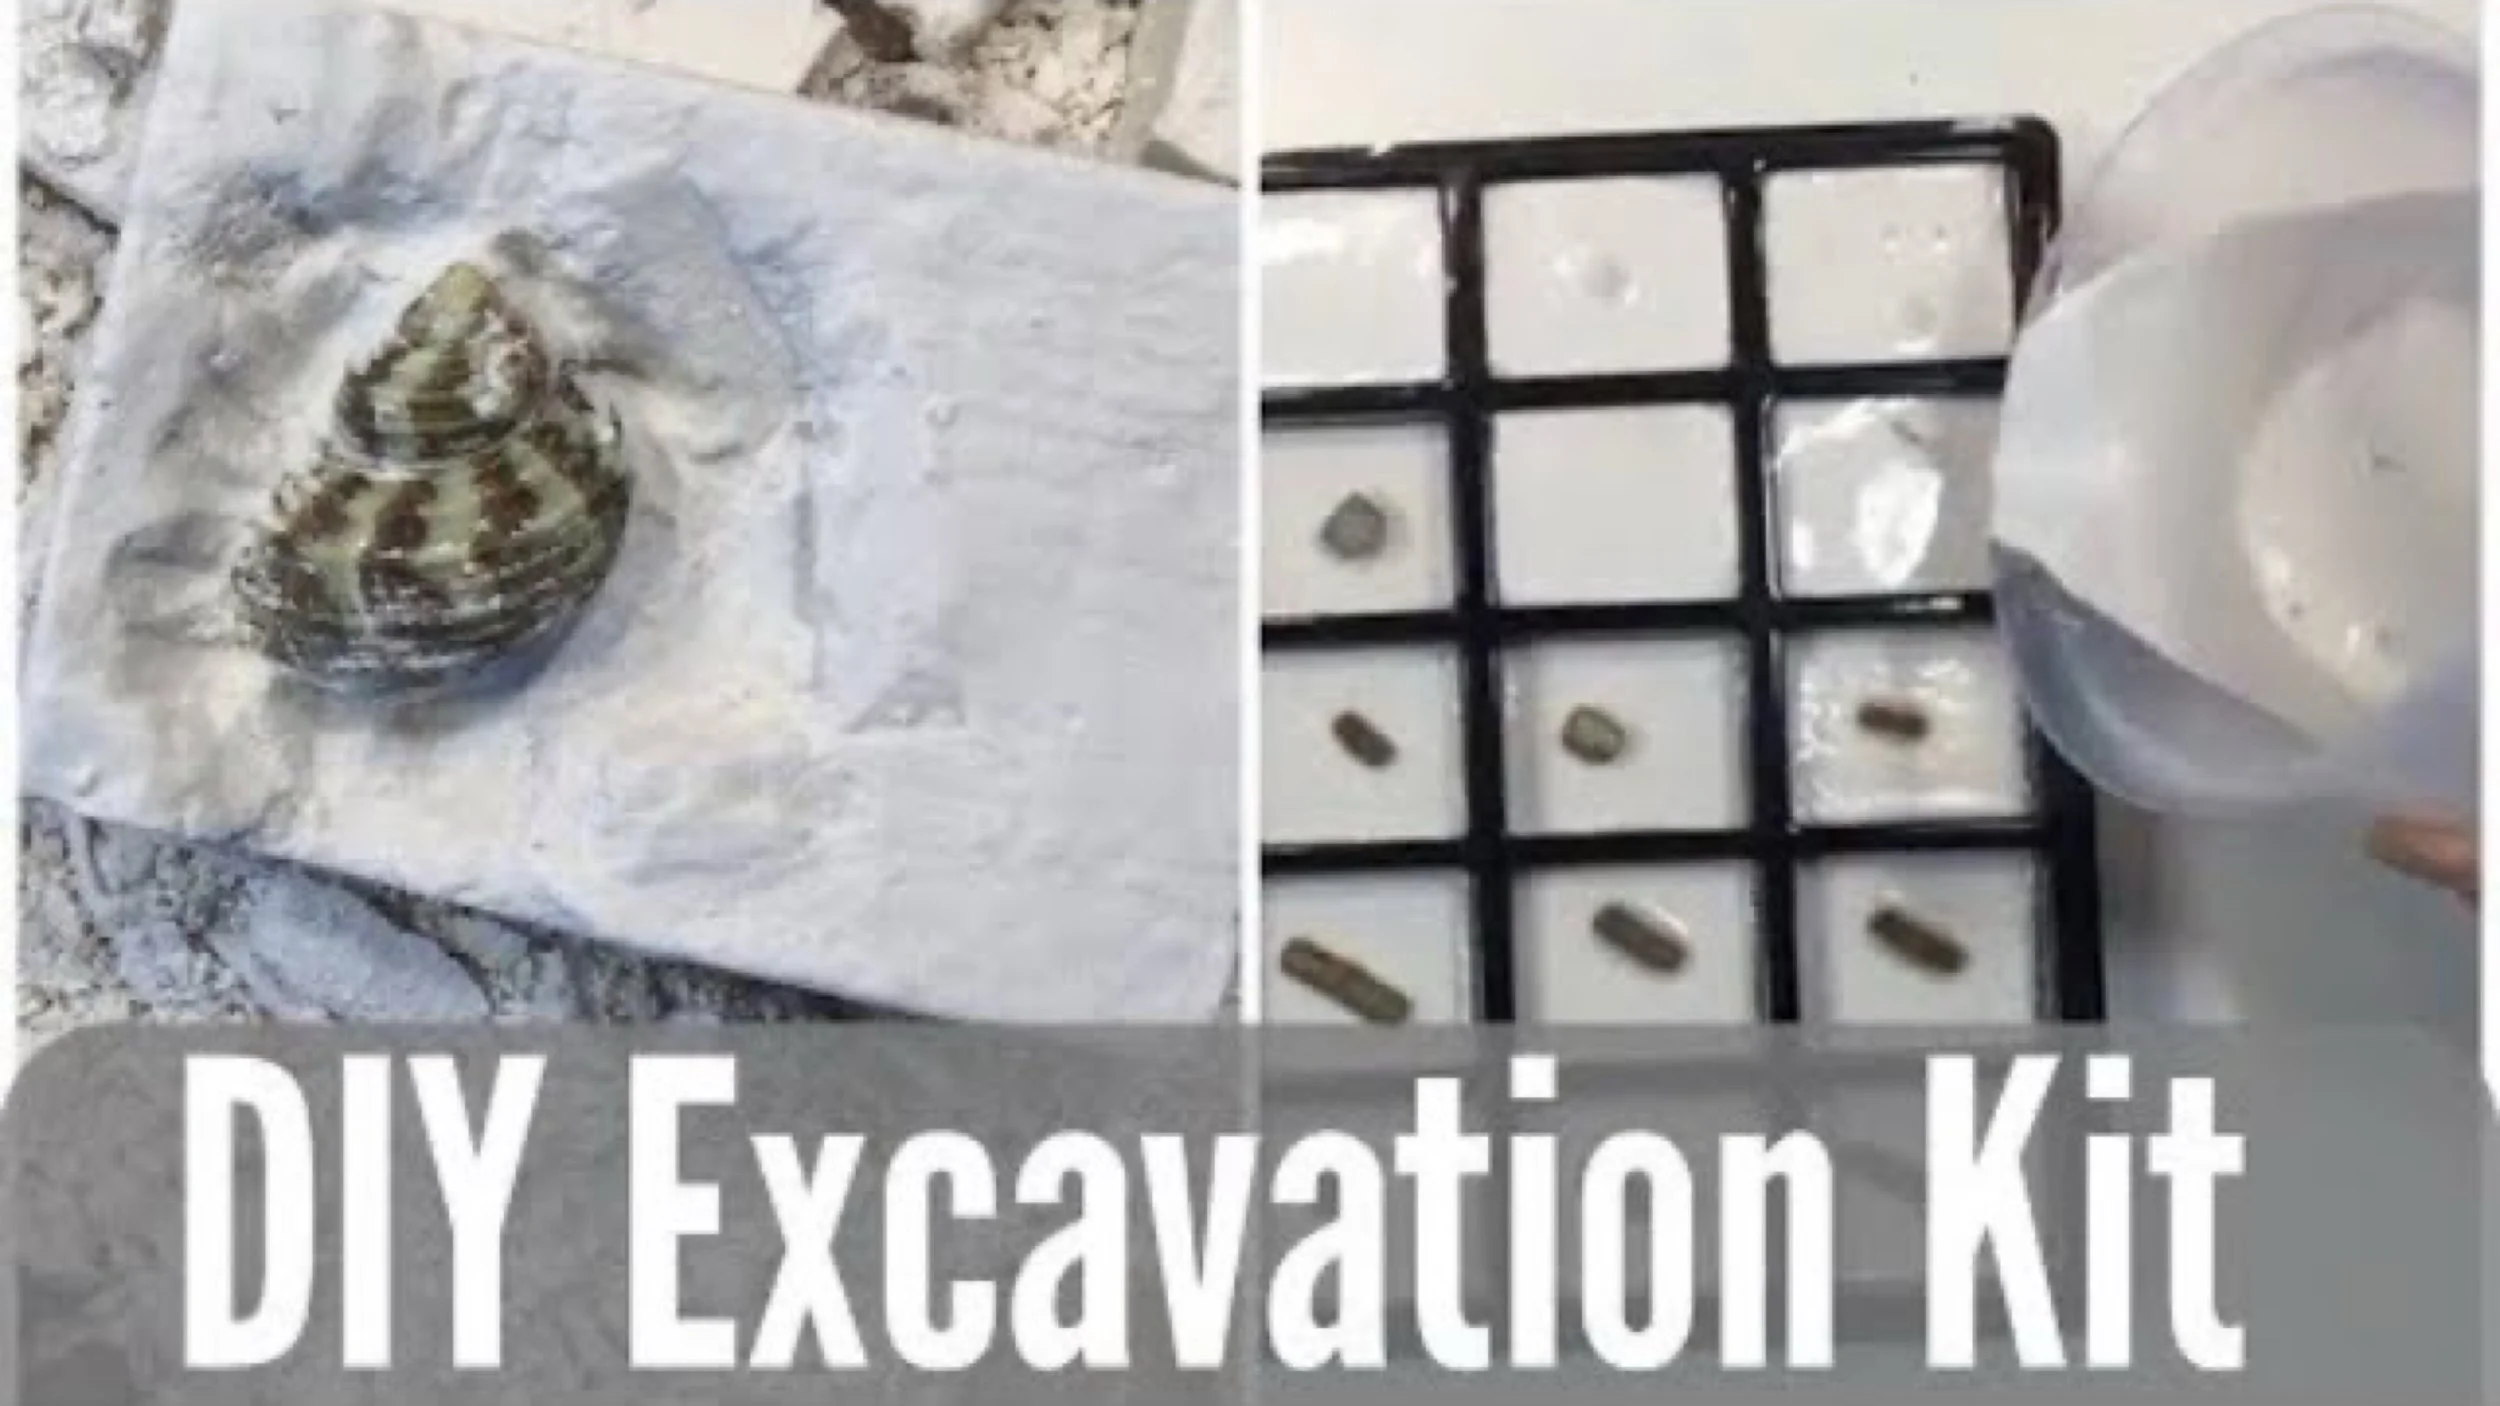
DIY Archaeology Kit | How to Make an Excavation Block
DIY excavation kits are super easy! All you need is some Plaster of Paris, a mold and some treasures to hide. We’ve been using these store bought kits in our homeschool for several years now, and I’m thrilled to be finally making them ourselves.
You’ll need quite a bit of Plaster of Paris for this project. One box should be sufficient for a homeschool family, but I would recommend having 2-3 boxes just in case. You’ll also need a silicone mold or sturdy cardboard boxes you can cut away. I used a soap Mold. It worked really well, and I could make six at a time. While it worked perfectly for us, I think slightly larger would have been better. We also used Mixing Beakers from Acorn Naturalists. While I like the reusable nature of using these beakers, I did have to clean them thoroughly. You DON’T want to clean these in the sink. You may clog the sink with hardened plaster, so wipe it down with a paper towel, or better yet, wait until it completely hardens and gently squeeze your container and the plaster will crack and fall off. If you use paper cups, use a clean one each time you mix plaster. And finally, you need treasure! We used the shells (from a bracelet kit and from shells ‘by the pound’), rocks (rocks from excavation kit, rocks from rock kit or rocks from a mixed kit) and arrowheads from these three Nature-Watch kits.
You can definitely have fun making your own excavation kits, but you can also buy them. We love these types of kits and have used the Mummy kit and the Sarcophagus kit for our Ancient Egypt Unit, and the Crystal kit, Rock Excavation kit and Volcano kit for our Mineralogy Unit.
The mini excavation kits were so much fun to excavate!
Check out our complete Ocean Main Lesson Block with videos on how we put this unit together, the resources we used and the projects we did. You can also check out our smaller Whale Unit Study and Sea Turtle Unit Study which includes more projects and resources. We used our Distress Inks for many projects in this unit. You can see all the projects we’ve used Distress Inks for in a complete playlist. Enjoy!
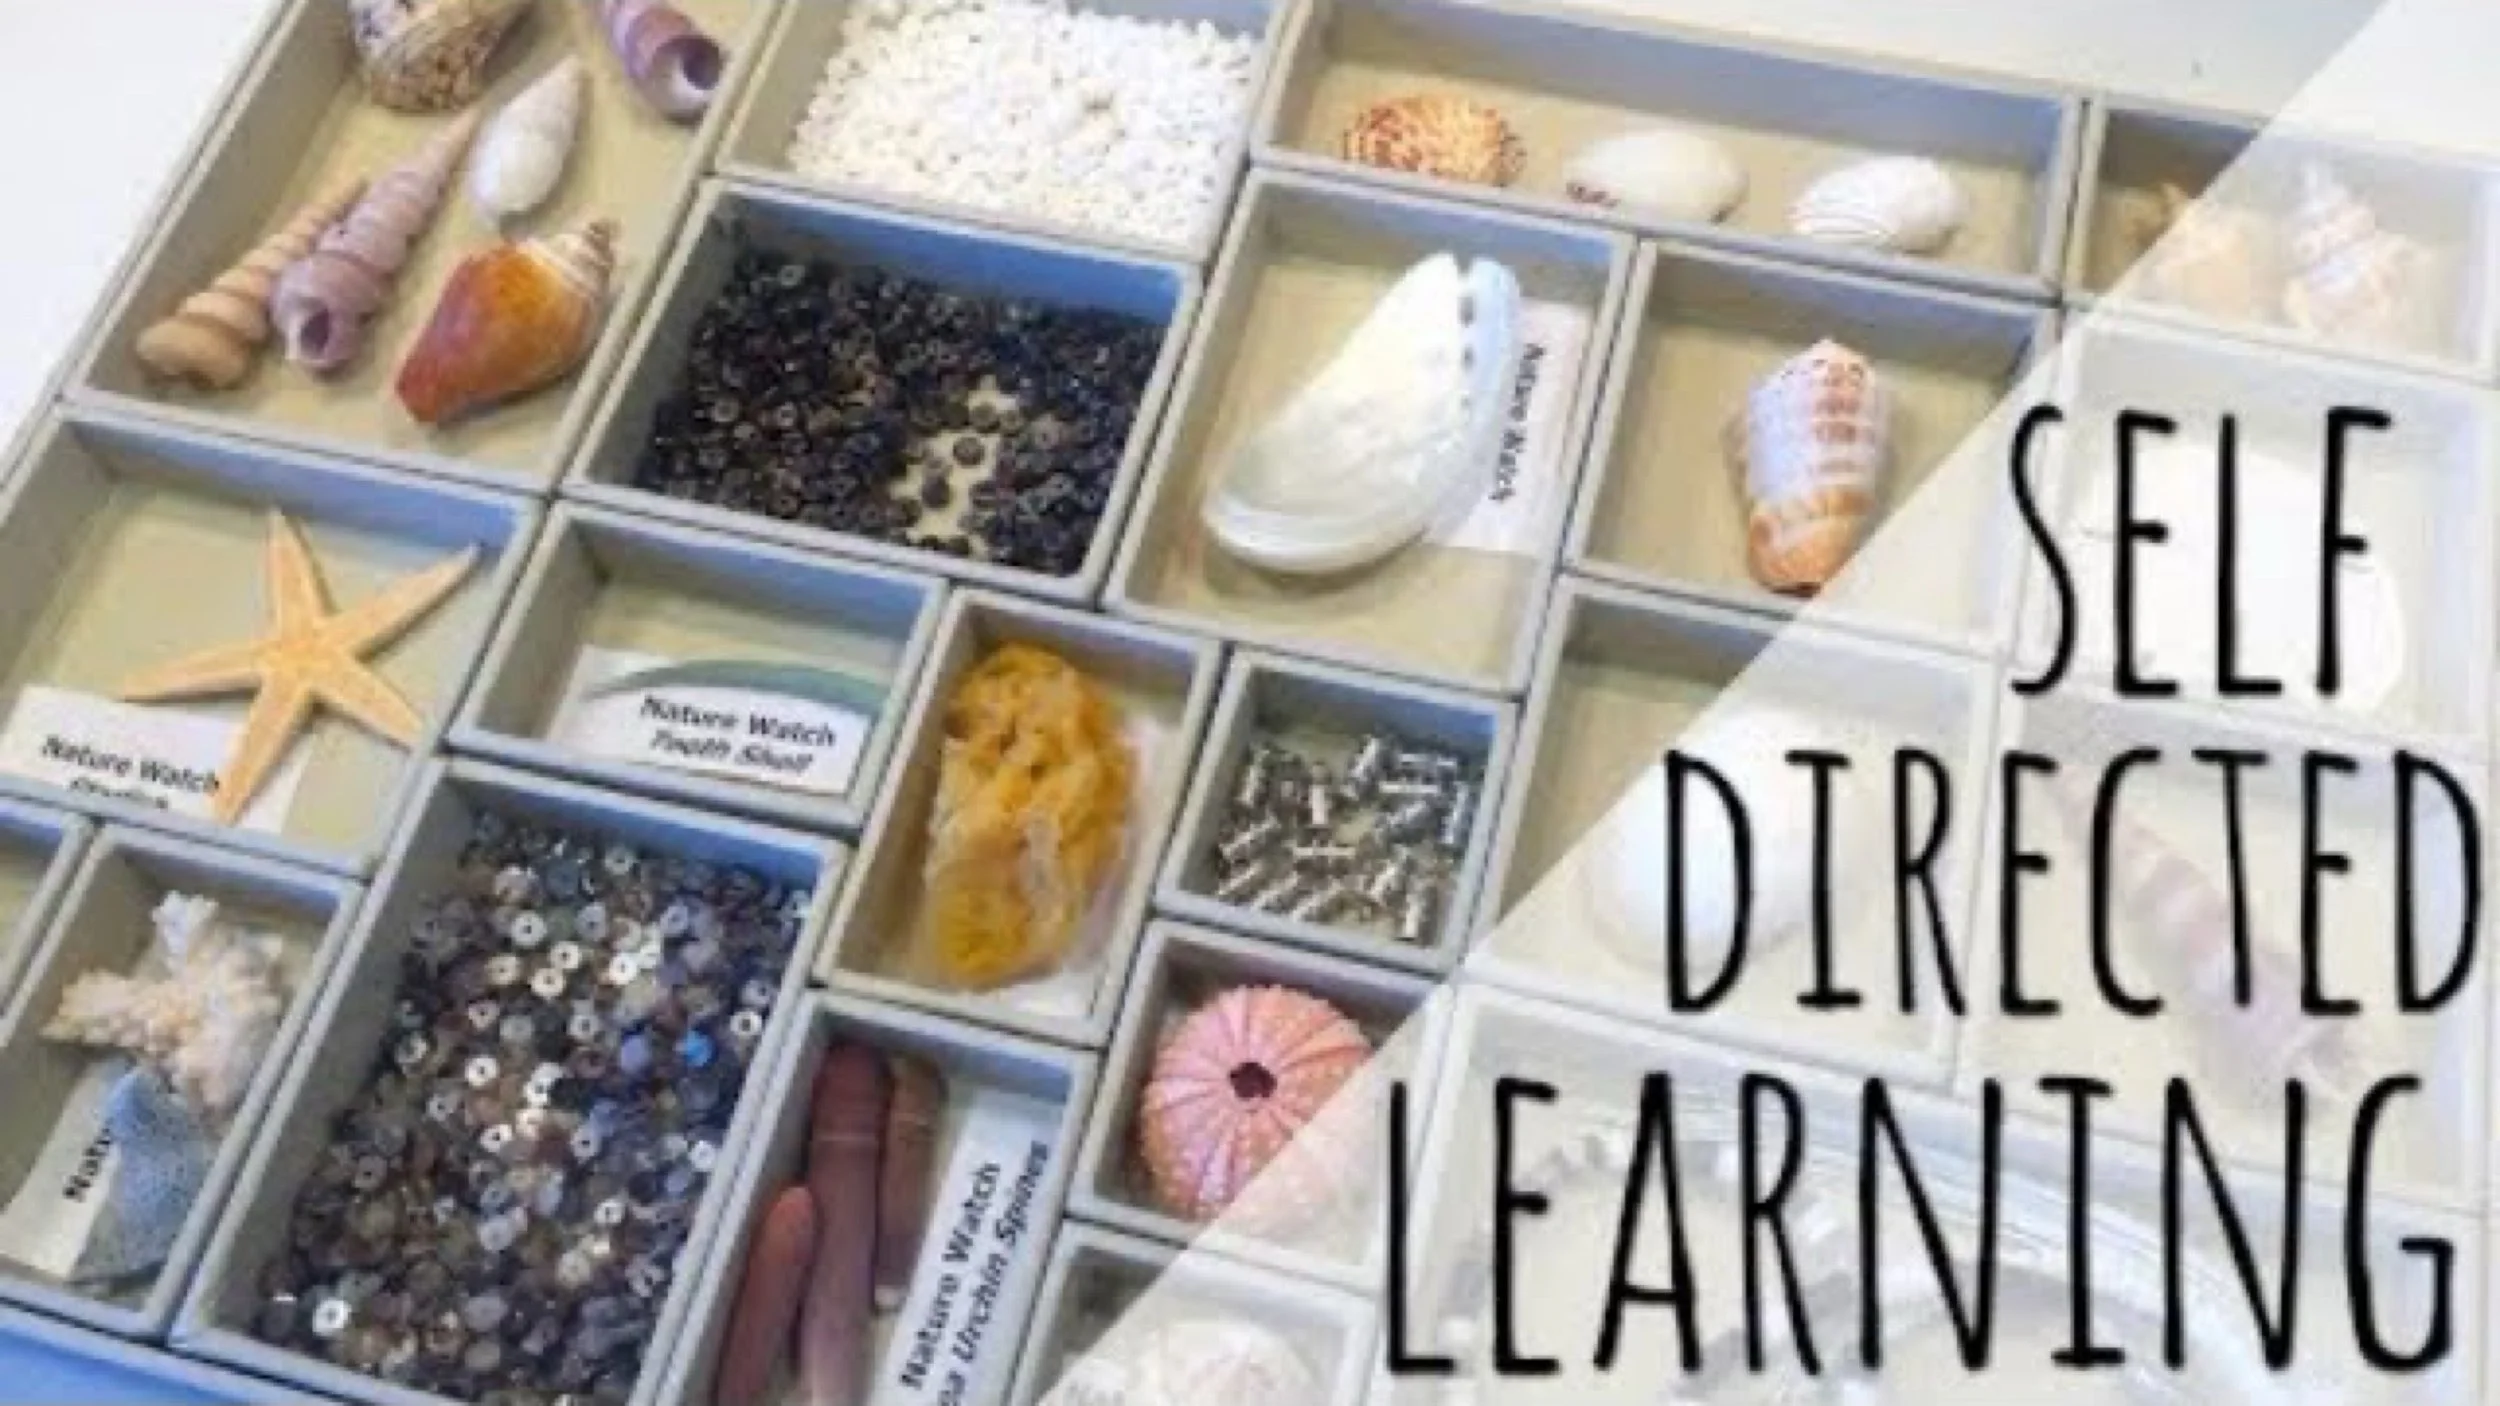
Homeschool Kits for Self Directed Learning
Wait till you see what I do with this Seashell Bracelet kit from Nature-Watch! I even surprised myself. After I arranged this kit in a printer’s tray I use for scrapbooking, I emptied out two more trays to use for other kits and materials. I love the way it’s displayed and how inviting it is for the kids to use.
Making these seashell bracelets and learning about the animals of the shore and tide pools is part of our Ocean Main Lesson block for homeschool, and I’m doing my best to replace the unit studies I assemble myself with main lesson blocks that reflect the Waldorf philosophy more accurately.
Here’s the printer’s tray I used.
I can’t tell you how much I like it and plan to empty my other scrapbooking supplies out of my trays and bring them into the homeschool room. It’s such an inviting way to display materials.
We got other shells from Nature-Watch shells ‘by the pound’.
How to Display Shells
Hands-On Learning
This is a stunning way to decorate a classroom space and provide inspiration for learning. I can easily take this display board to the desk for observation and identification while we work on a lesson. It’s great for organizing loose items so they stay in one spot and look beautiful, and it’s also a fantastic solution for freeing up surface space as these display boards can hang on the wall.
It’s super easy to make, but it does take about 20 minutes or so. You can hot glue any number of specimens. I’ve done rocks, gems, forest specimens and shells. I plan to do more! There’s no limit to what you can have as a visual display for your homeschool space.
I made this with things we already had around the house and I upcycled the backing of paper pads for this project. The thicker the chipboard, the better.
I got the shells from Nature-Watch, and this is for our ocean main lesson block.
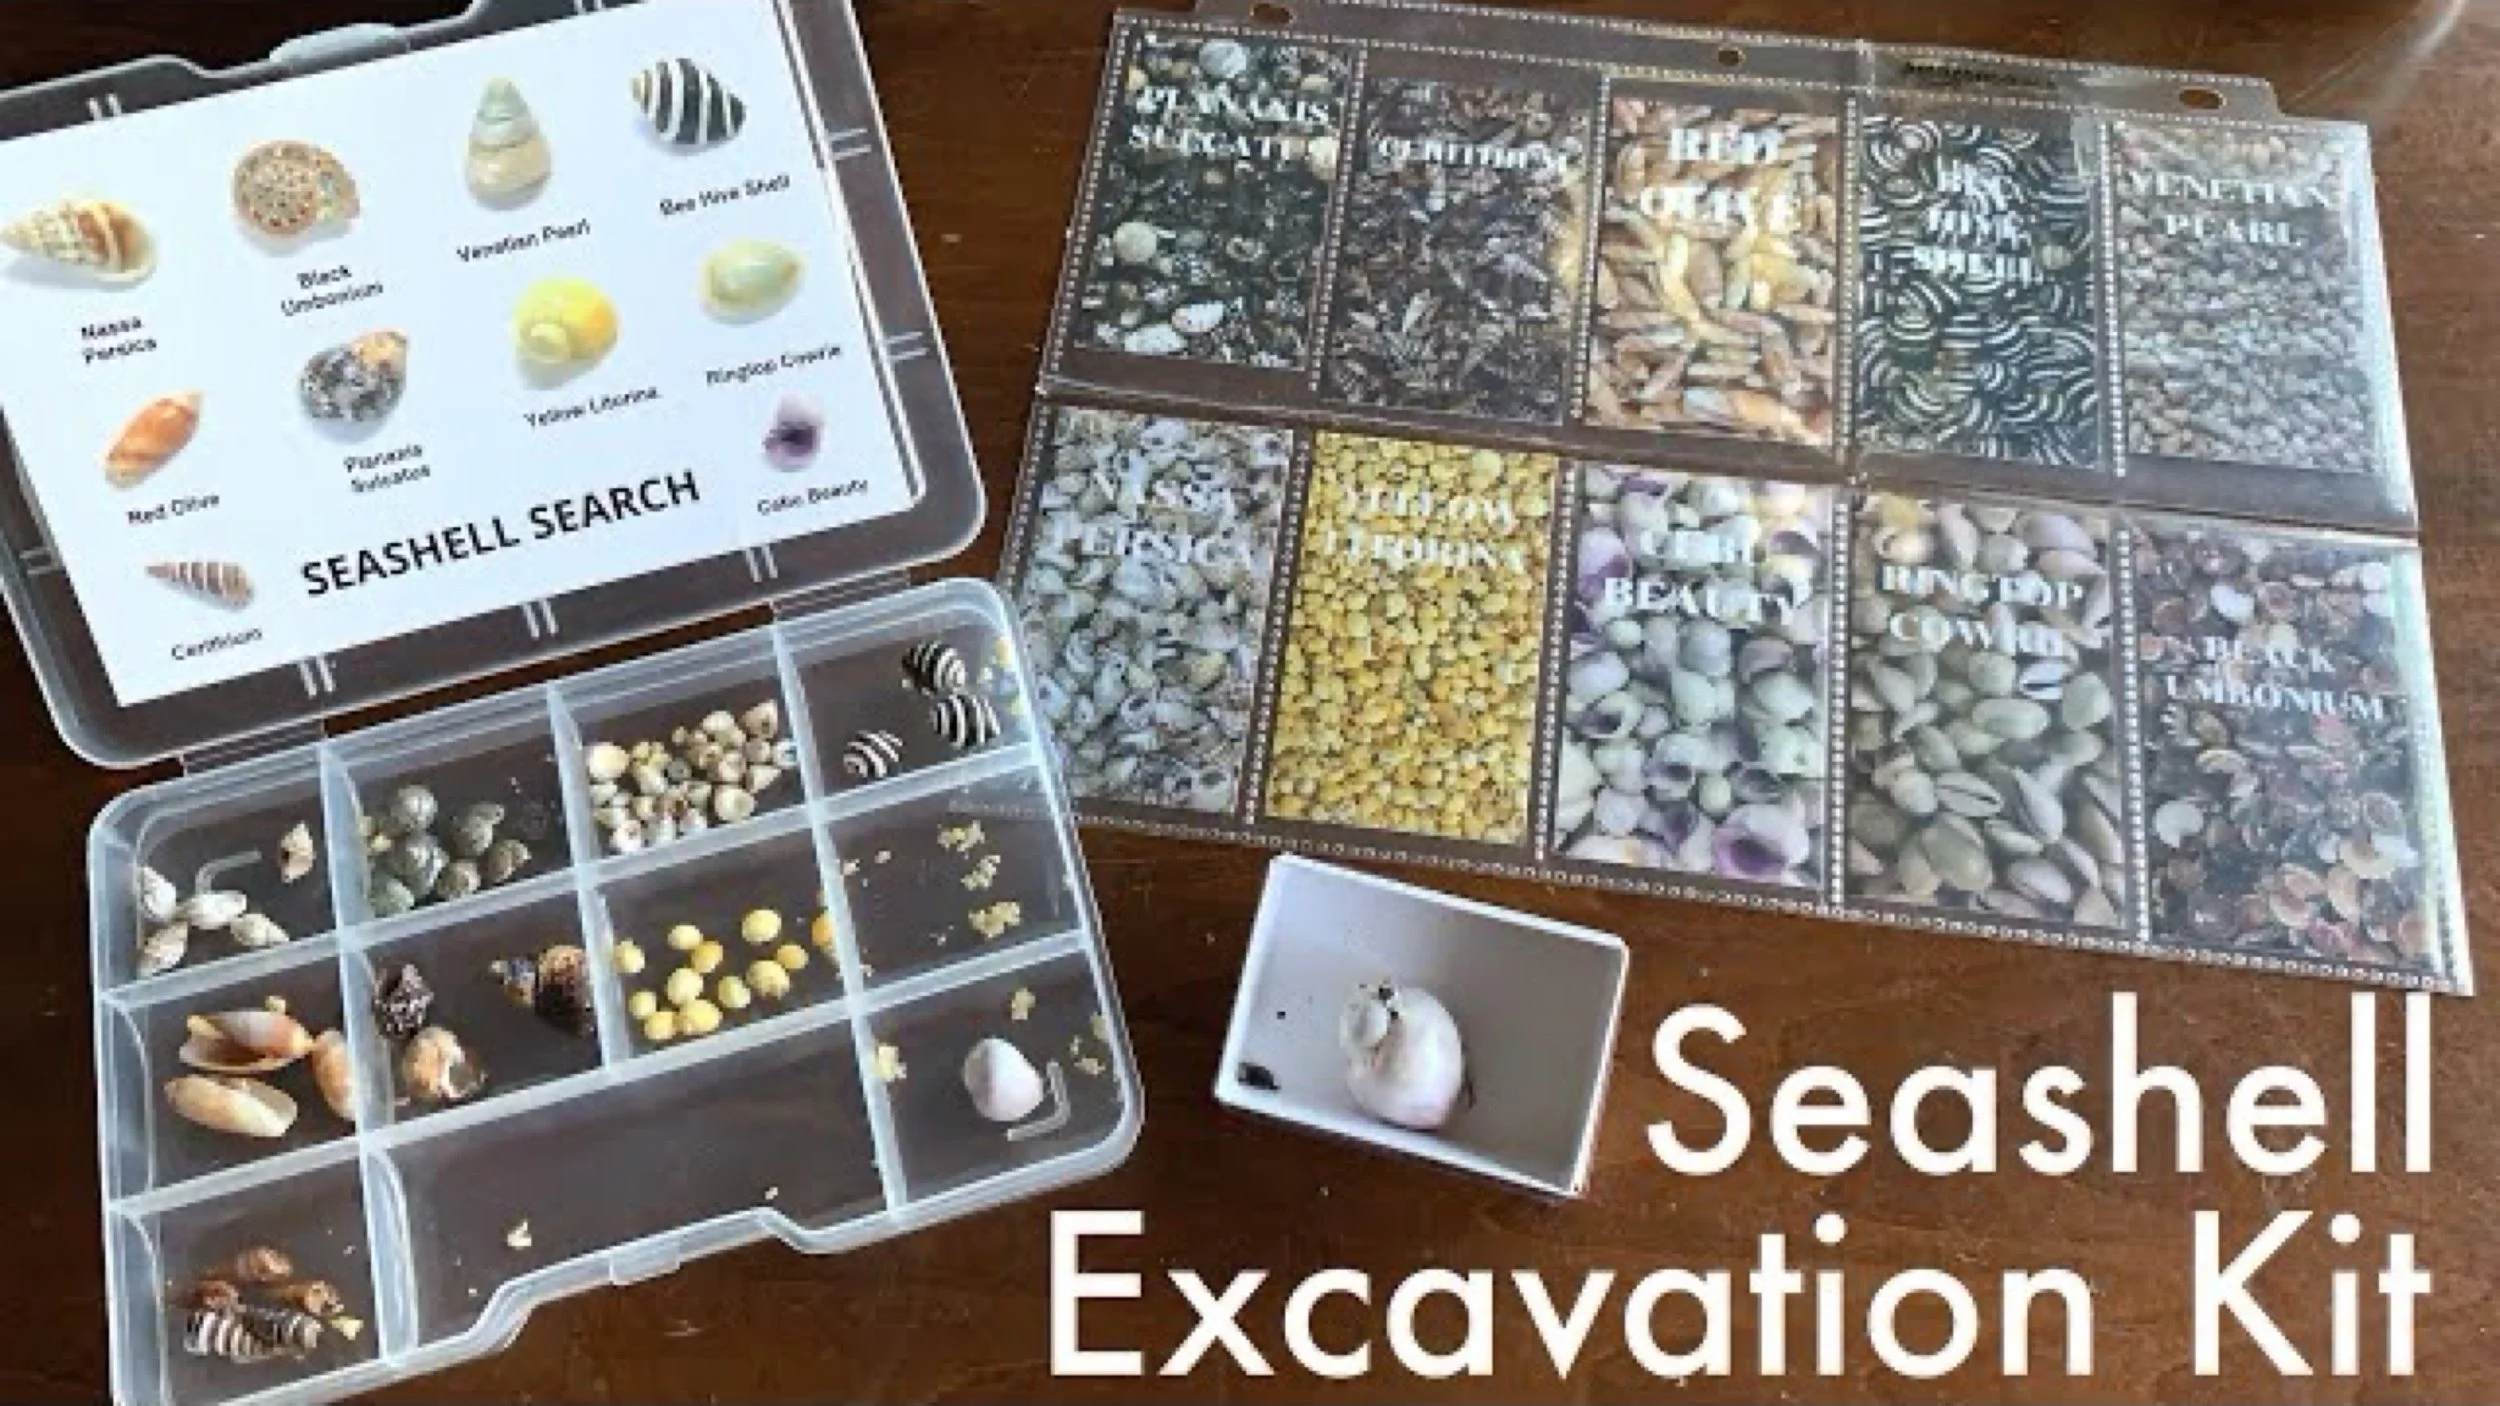
Discovering Seashells
I am totally surprised that so many seashells were packed into that tiny little tin! More too, I’m so impressed with the excavating material. Rather than excavating through plaster, children can discover the hidden shells in kinetic sand! Then they can play with it too! Once they’ve discovered all their specimens, they can identify them with the included card and arrange them in the display case that comes with the kit. Everything has been considered for this kit. The identification card fits just right into the display case. Once it’s shut, the treasures stay in place and don’t shift around or get lost. The trading cards provide additional information and a card sleeve is even included making it easy to add to a binder. The kits are designed to encourage you to complete the sets and with a monthly subscription offer, it’s super easy to add hands on activities for your children. This kit would work well with an ocean main lesson block, you can check out the complete Ocean Main Lesson Block video playlist.
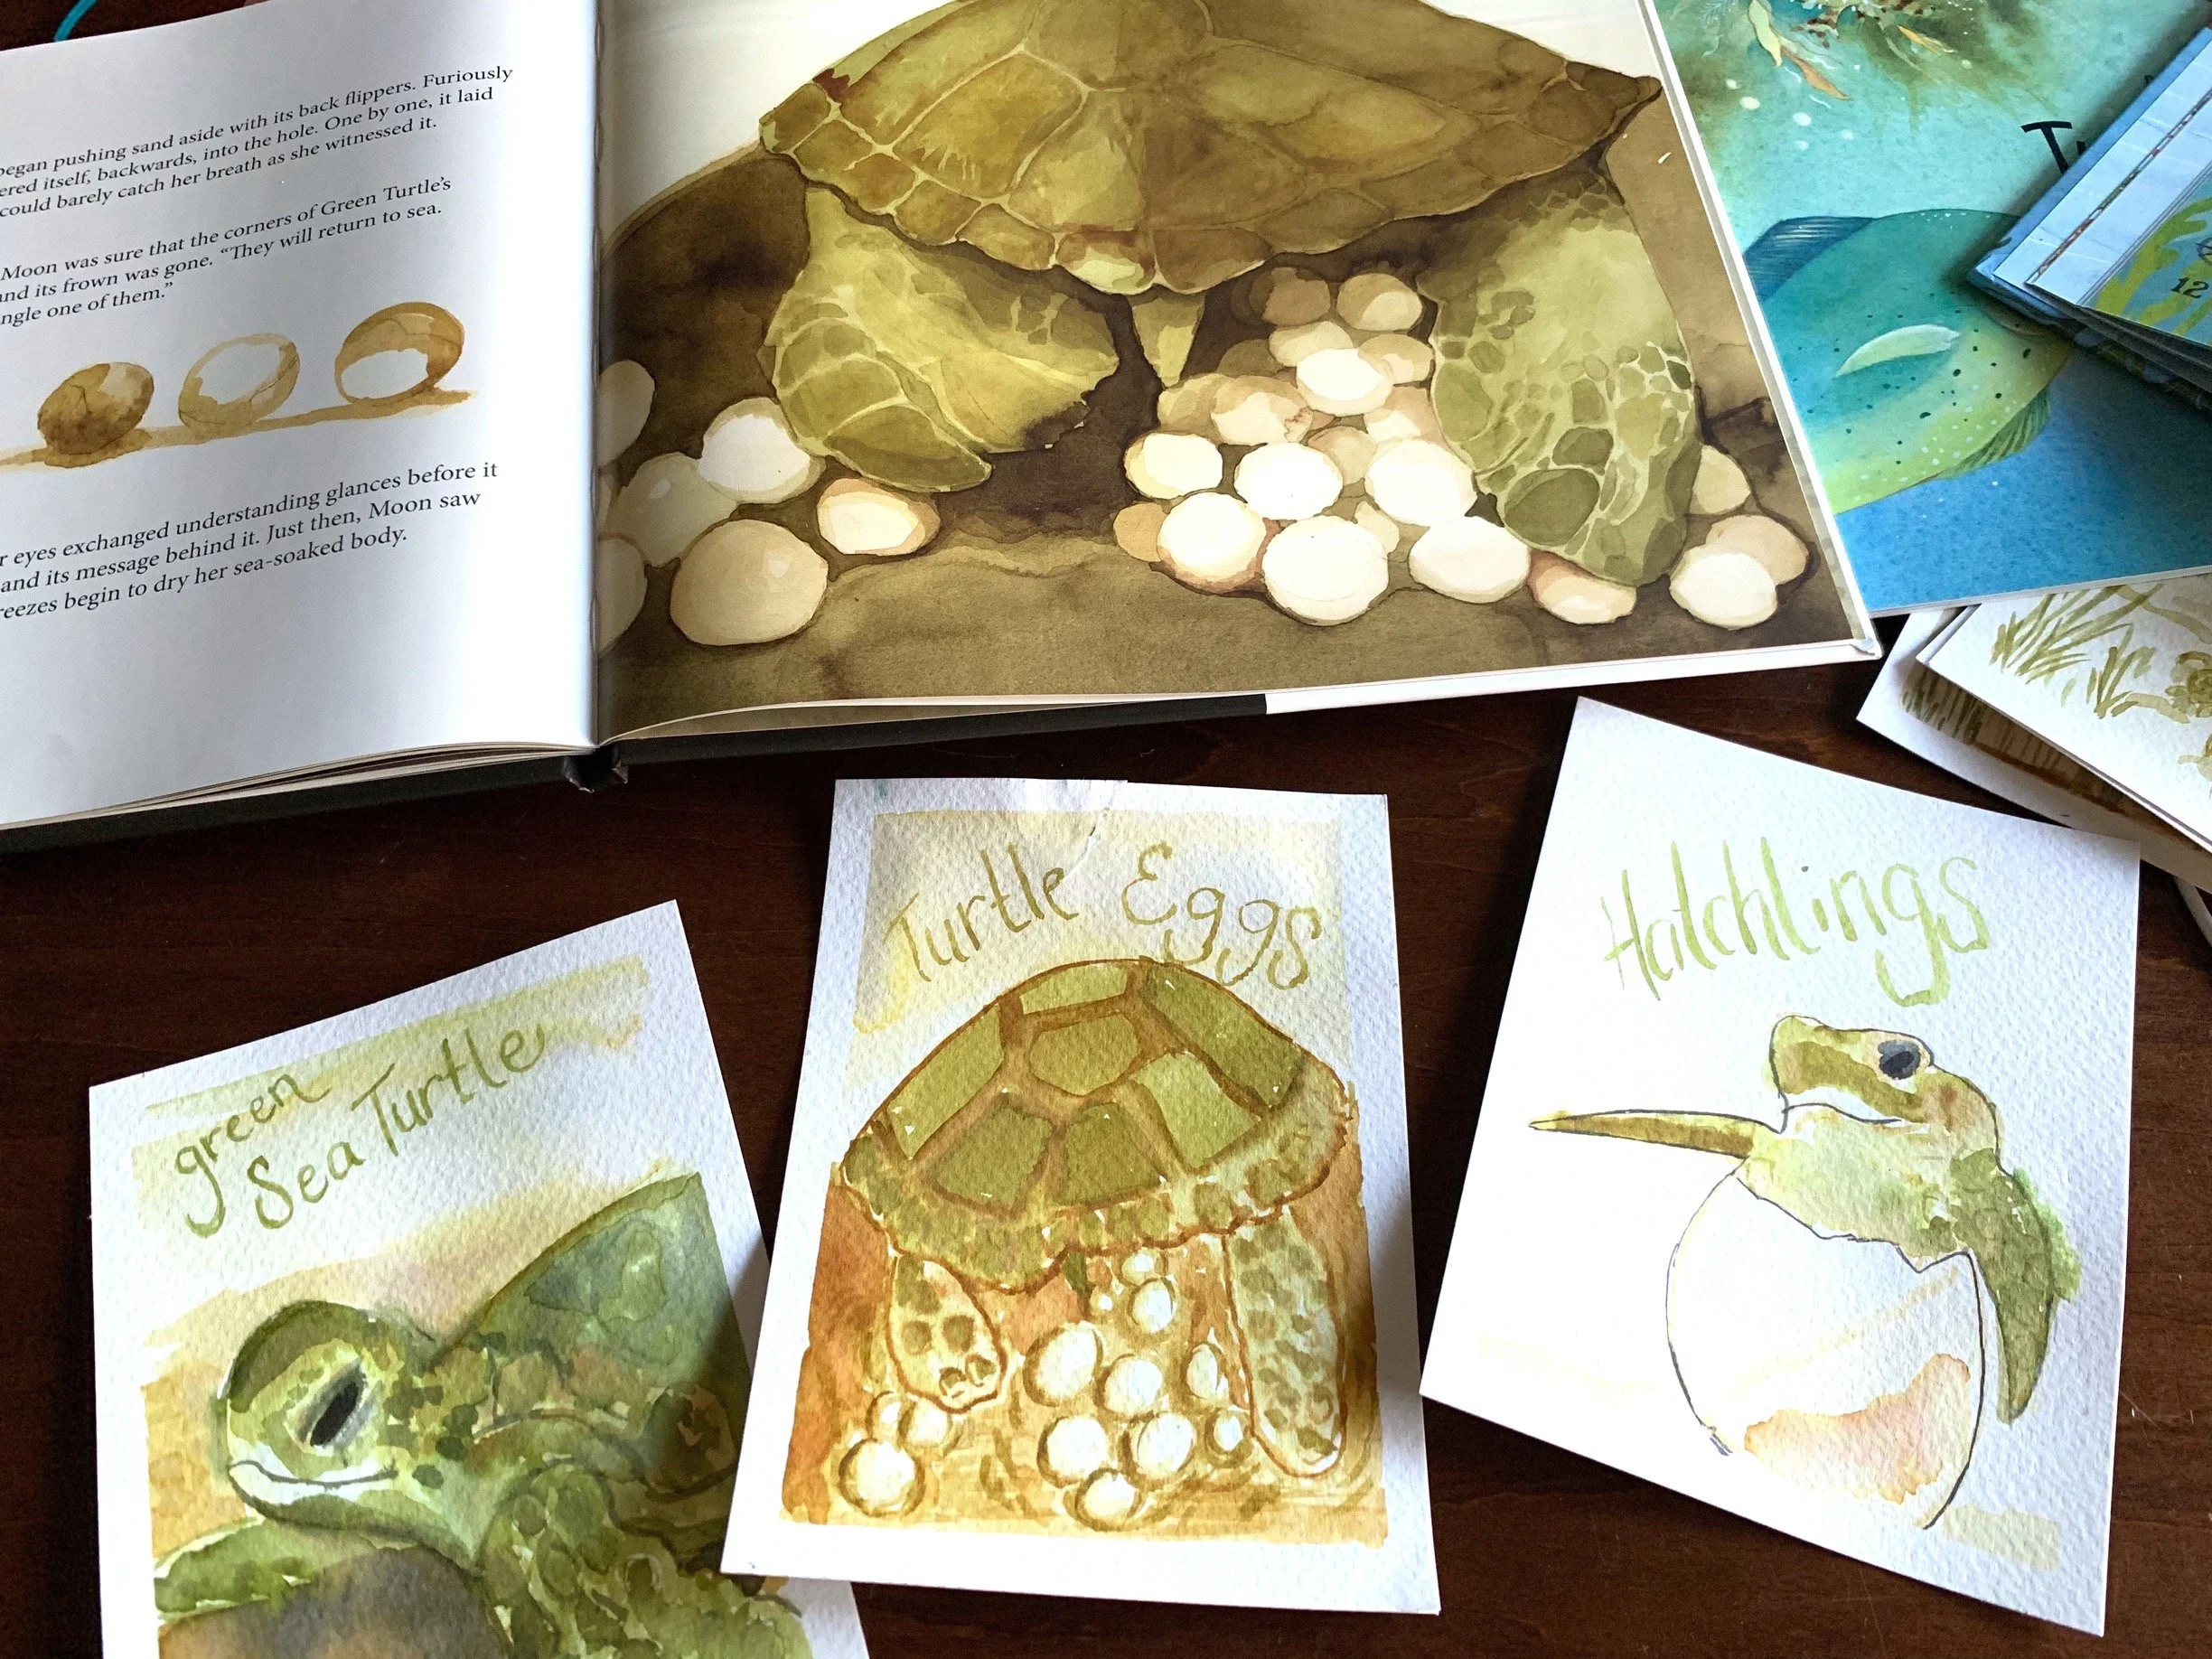
Sea Turtle Nature Cards
Charlotte Mason
Learn how to make nature journaling or nature study cards for any unit! As we continue our nature unit study on Sea Turtles, we decided that the quickest and most beautiful way to show learning for this unit is in the form of these nature trivia cards. Each card has been photographed and is on the blog post for this video. For this project, we used our Fabriano 140lb. watercolor paper and Distress Inks.

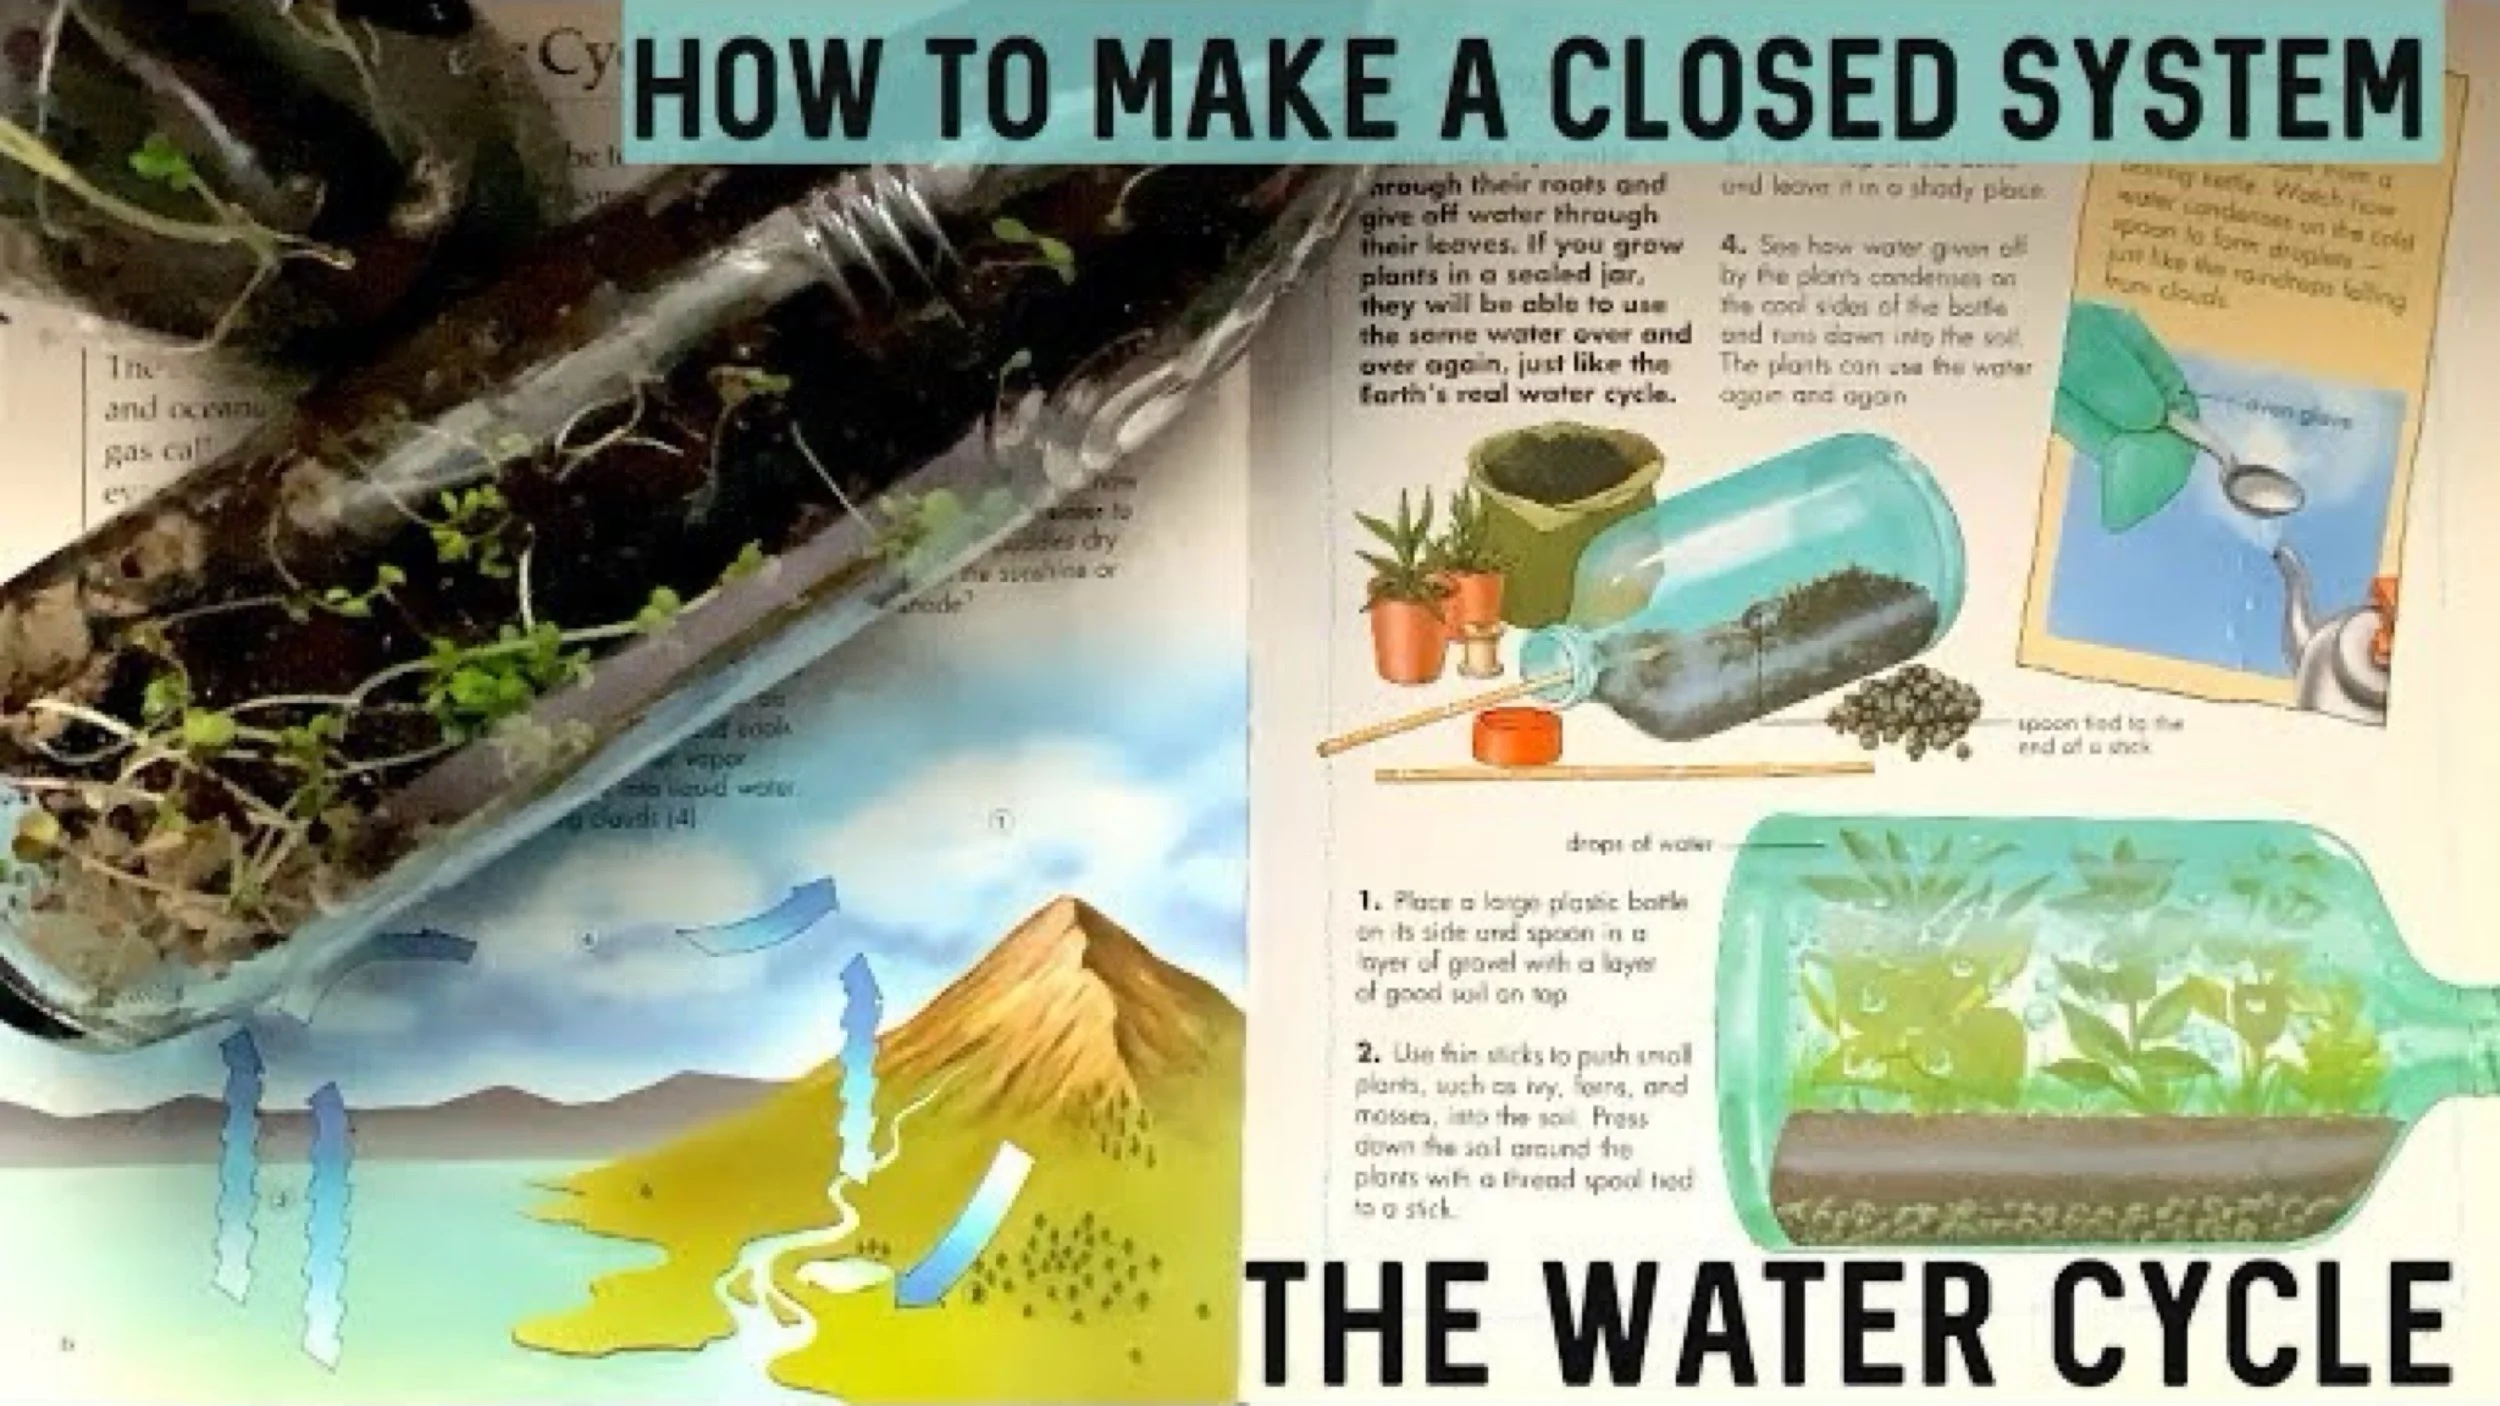
The Water Cycle
How To Make A Closed System
For the past four billion years, the water on this planet has remained the same. It’s been recycled: evaporating from the seas and oceans, forming clouds and finally precipitating out as rain or snow. We recreated a simple closed system to show the water cycle. Using a clear glass bottle, soil and some seeds, we recreated a simply closed system. While we did see a fair amount of condensation, it was hard to really observe the whole water cycle with a basic project like this.
This project is from the book Rivers and Oceans by Barbara Taylor by Kingfisher publications.


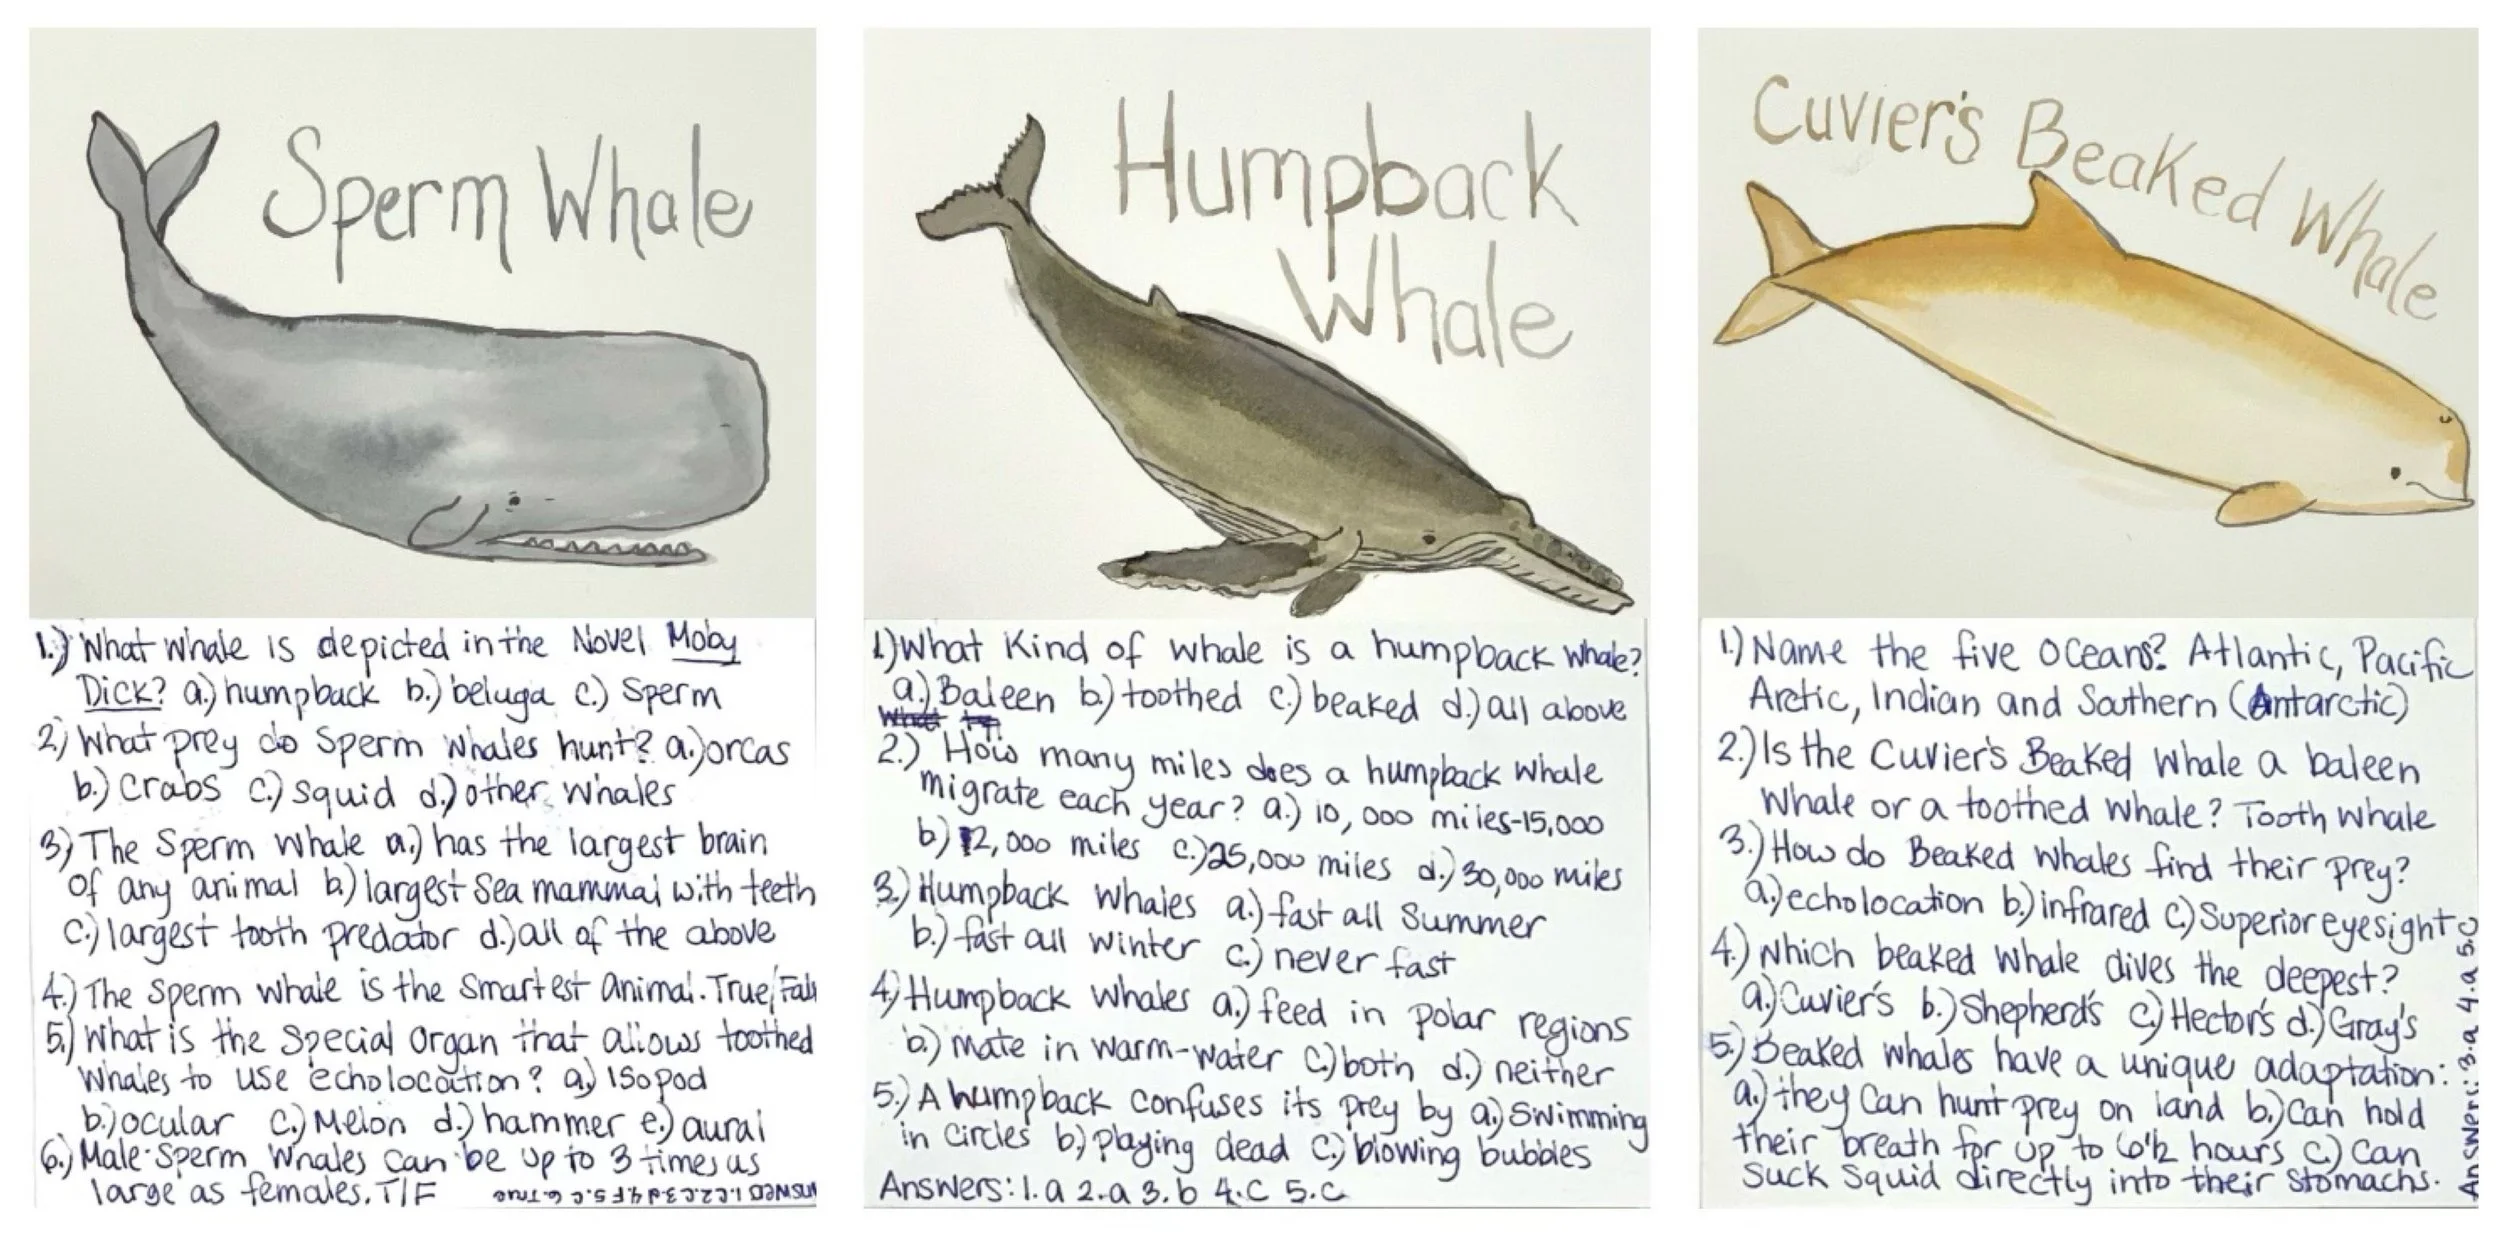
Whale Nature Study Trivia Cards
In case you missed the previous Nature Journaling Card tutorials, here’s one more that’s sure to inspire you. These were the easiest so far. In part, I think because whales are easier to draw than some of the other nature images we’ve done before. Also, I made these with a white background which simplified the process. For this project, I used the same art products we’ve used for previous nature journaling cards. I used Fabriano 140 lb. watercolor paper and Distress Inks in various blues, greys and browns. I used simple synthetic brushes we picked up years ago at a very affordable price from a local chain craft store. We laminated our cards using our Black and Decker 5 mil laminating sheets and my Heidi Swapp Minc machine. It’s a scrapbooking foiling machine that acts as a powerful and versatile laminating machine with five settings that heats up quickly.
For this project we referred to two books mainly, with our other books acting as resource material for the trivia questions on the back. Whales an Illustrated Celebration by Kelsey Oseid and Nature Anatomy by Julia Rothman were the two resources we referred to the most during this project. We added trivia questions to the back of each card before we laminated each 4.5″ by 6″ card.
Check out our complete Ocean Main Lesson Block with videos on how we put this unit together, the resources we used and the projects we did. You can also check out our smaller Whale Unit Study and Sea Turtle Unit Study which includes more projects and resources. We used our Distress Inks for many projects in this unit. You can see all the projects we’ve used Distress Inks for in a complete playlist. Enjoy!


How to Bind a Book
Here's one way to bind a main lesson book after you've completed your work. If you wish to use multiple art mediums for a main lesson block or if you are working with watercolors, binding your loose sheets of papers along with your narrations after the block is over is one way to do it. You can bind the papers easily with a three-hole punch and a binder if you use 8.5x11 inch paper, or you can do a staple binding. If you want to take it up a notch, head over to your office supply store and have them do a coil or spiral binding. It's fairly easy and affordable. Today, I'm showing you how to use a home binding system to bind a book. I'm using the Heidi Swapp Cinch machine available online and at local Michael's craft stores. You buy metal binders in white, black or silver in sizes ranging from .5 inch to 1.5 inches.