Kindergarten Handwork
Kindergarten
Kindergarten handwork is not about producing beautiful projects, though beauty is achieved by means of quality of materials, simplicity of task and care given to each action. Kindergarten is about nourishing the child through meaningful work with natural materials. Every stitch, every knot, every fold, and every dip into a dye pot strengthens the will, develops gross and fine motor skills, and gives children a quiet confidence that comes from creating something with their own hands.
Developmentally, the 3-6 year old child is learning through imitation at a time when their thinking, willing and feeling is all deeply interconnected. Few words are needed when showing children how to do a task as they learn through observation and execution.
In kindergarten, children begin with the simplest forms of hand stitching, learning to guide a needle carefully through fabric with patience rather than perfection. They sew little treasures that have purpose: small pouches, simple ornaments, dolls, and seasonal decorations, these are projects that can be completed by small hands that have yet to develop the fine motor skills that come with the grades. These projects are completed with joy and pride.
Alongside sewing, children are introduced to the beauty of natural fibers. They may dye silk playsilks with onion skins, black beans, marigolds, avocado pits, or other plant dyes, watching with wonder as ordinary cloth is transformed into something uniquely beautiful. They experience color as something living, not manufactured, and begin to understand that the gifts of nature can become part of their creative work.
Handwork also includes finger knitting, simple weaving, braiding, winding yarn into balls, carding wool, wet felting, embroidery on burlap or felt, and caring for the materials themselves. These experiences prepare the hands long before formal knitting begins in the grades.
What I love most about kindergarten handwork is that it doesn’t rush childhood. There is no pressure to make everything perfect. The focus is on the process: working carefully, caring for beautiful natural materials, and experiencing the quiet satisfaction that comes from making something useful, personally and beautiful with your own hands. These seemingly simple activities are laying the foundation for concentration, perseverance, creativity, and a lifelong love of meaningful work.
Handwork Projects | Kindergarten
-

Heart Garland
The wonderful thing about this project is that you can do this in kindergarten and again in grade 6 when students pick up hand stitching again in the curriculum. Once you make one heart, it's so easy to get into a good rhythm, and before you know it, hours have passed and you have nearly 20 stitched hearts made from wool felt.
-
Natural Plant Dye | Using Black Beans to Dye Wool and Silk
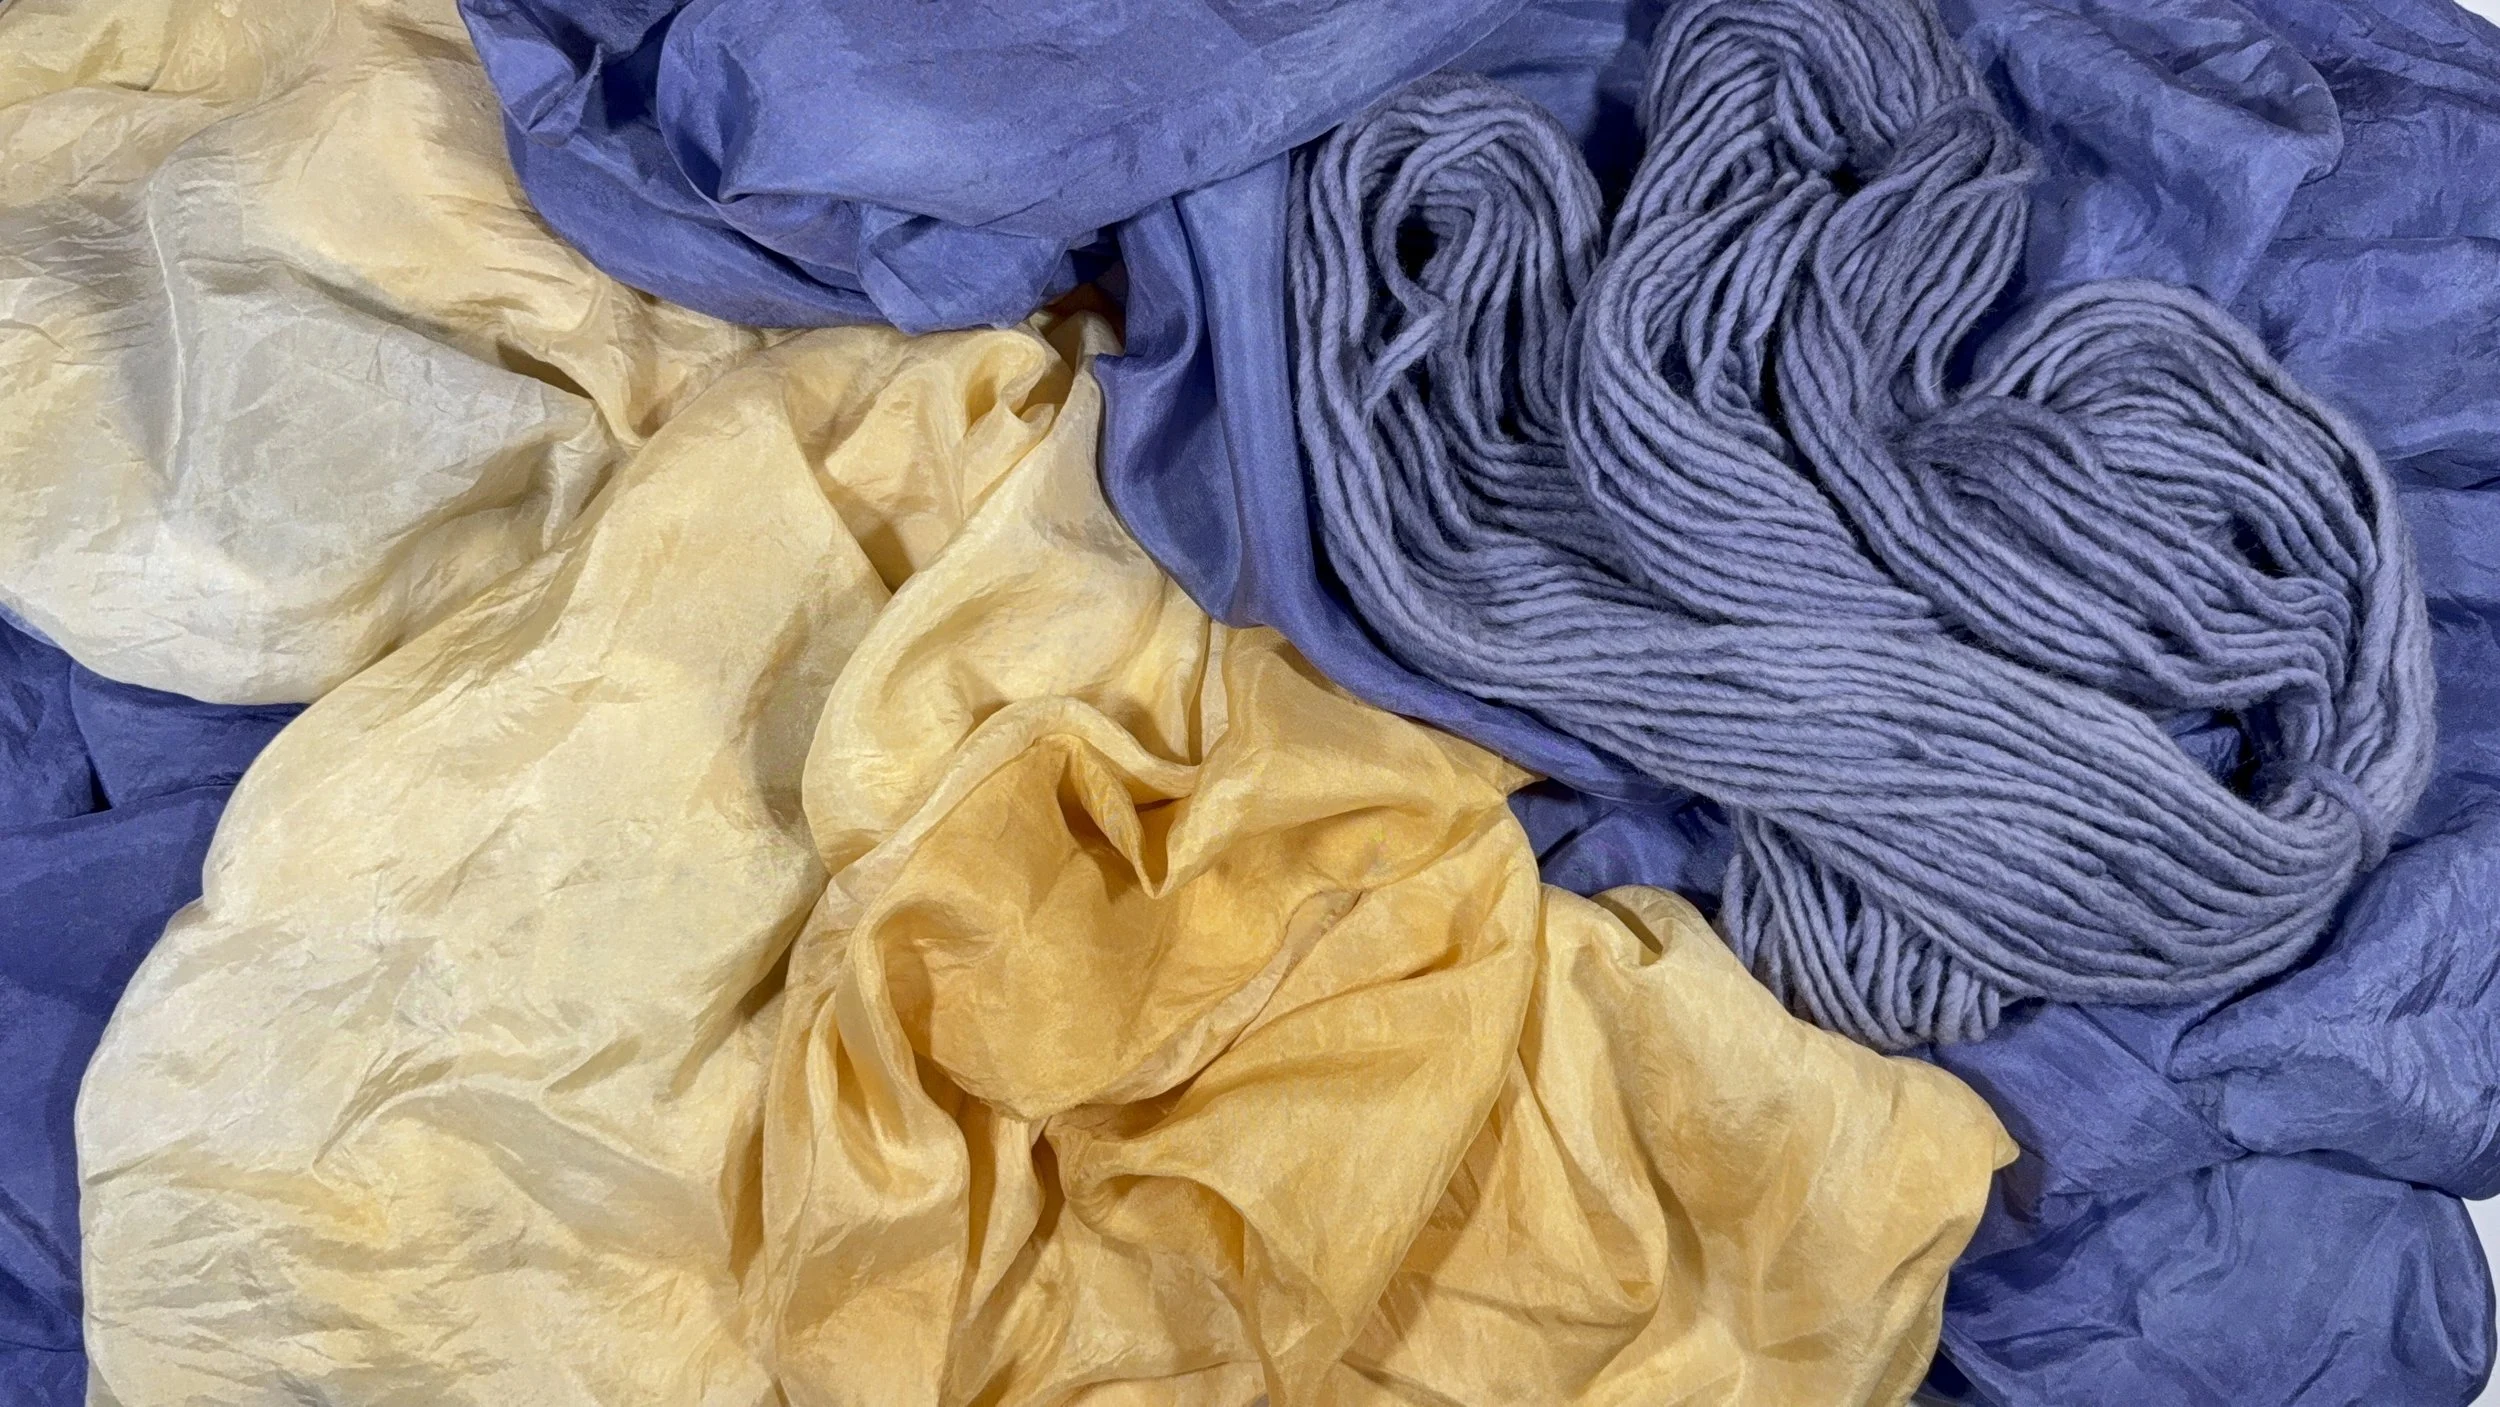
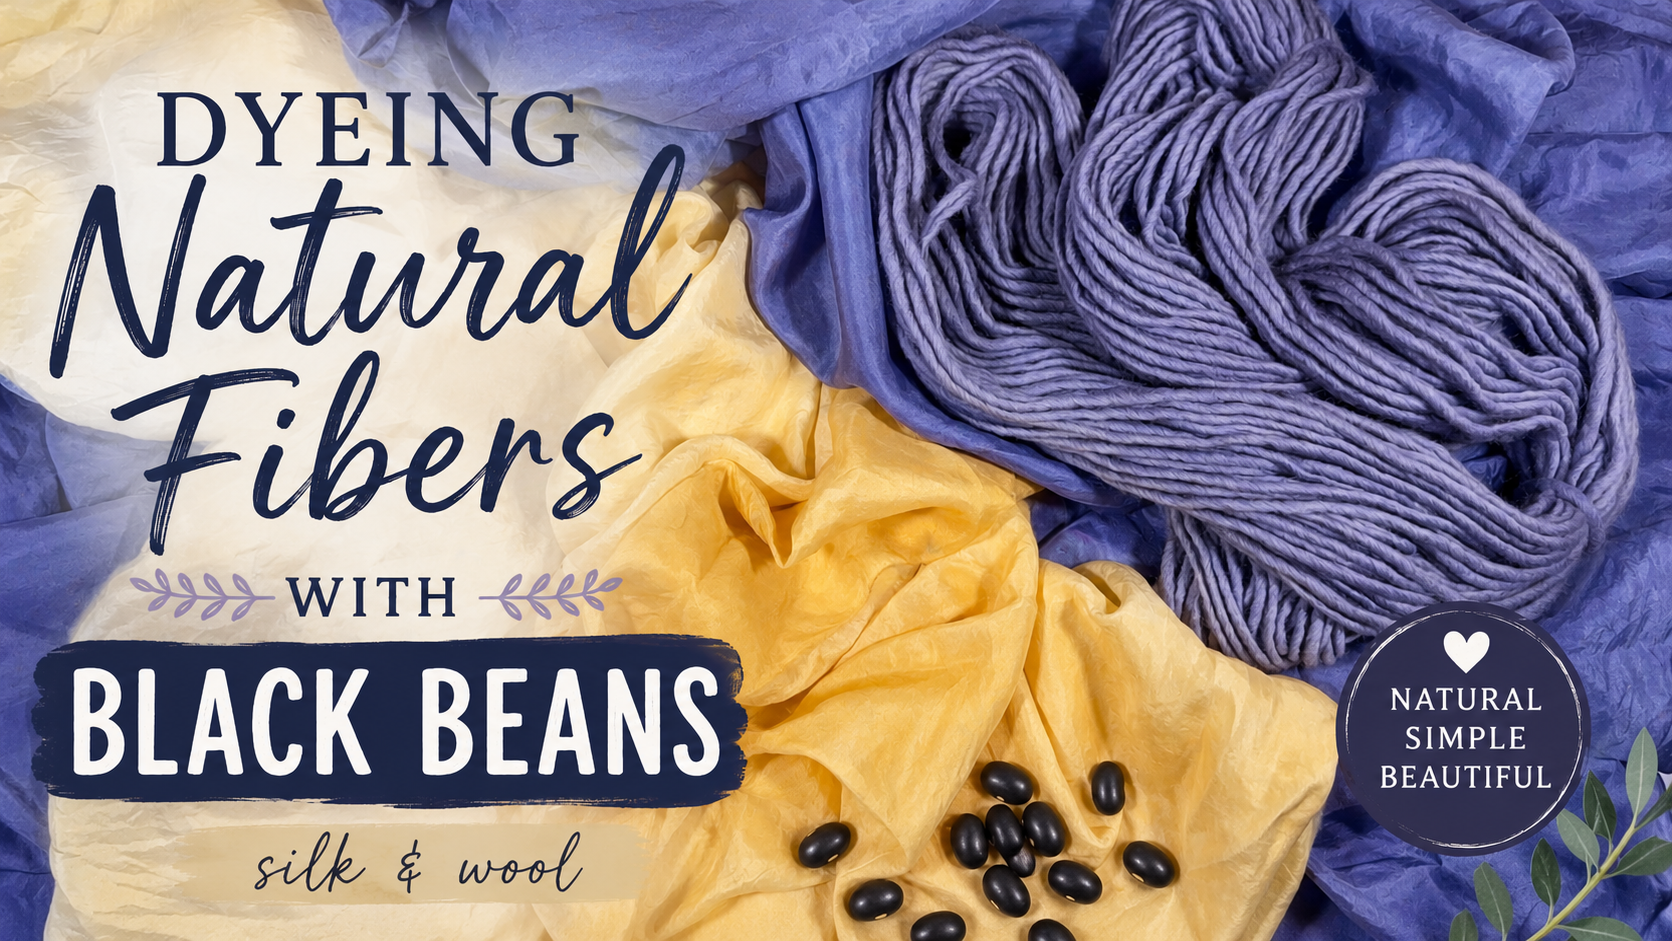
Using plant dyes with natural fibers, the results are stunning. Did you know that you can get a beautiful lavender-blue shade from black beans? The final results completely exceeded my expectations. The silk developed a stunning lavender-purple color with subtle natural variations, while the wool absorbed an even richer shade than what appeared on camera.
-
Natural Dyes and Fabrics
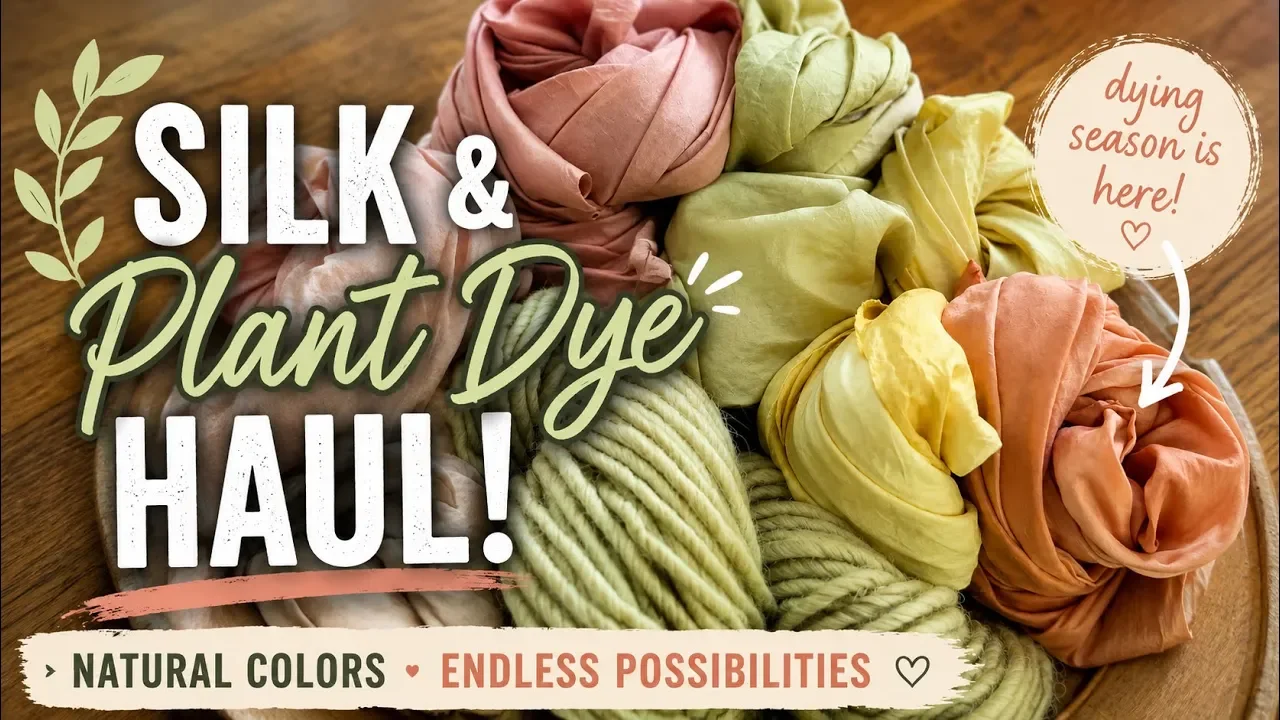
Lately, I've completely fallen in love with natural dyeing, especially working with silk and wool. As I'm preparing for a new handwork position this fall, I've been practicing many of the projects we'll be doing in the classroom while also experimenting with different natural dye materials at home.
-
Natural Plant Dying Rosemary | Silk and Wool
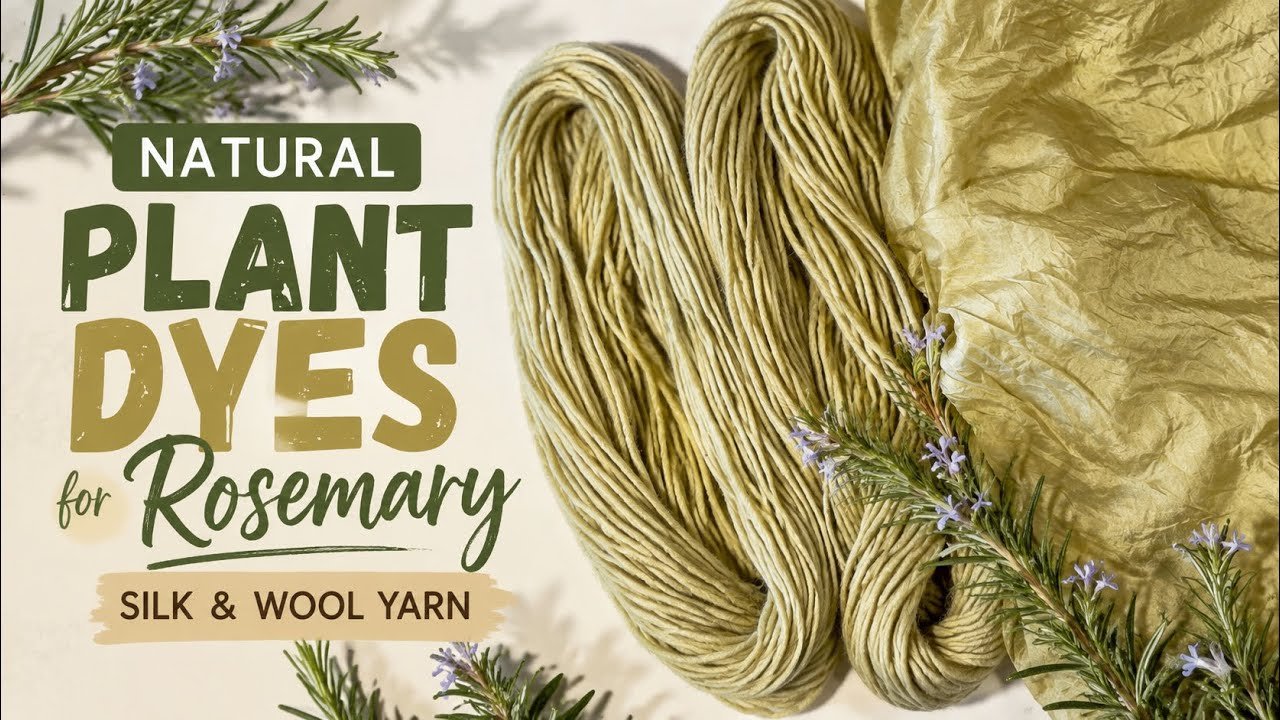
Rosemary might not be the first plant that comes to mind when you think of natural dyes, but it creates one of the most beautiful soft chartreuse greens I've dyed so far. I was hoping for a deeper forest green, but after experimenting with multiple dye baths, different temperatures, and even a few modifiers, I discovered that rosemary naturally produces this gorgeous yellow-green color. It has become one of my favorite plant dyes.
-
Dying Silk and Wool with Avocado
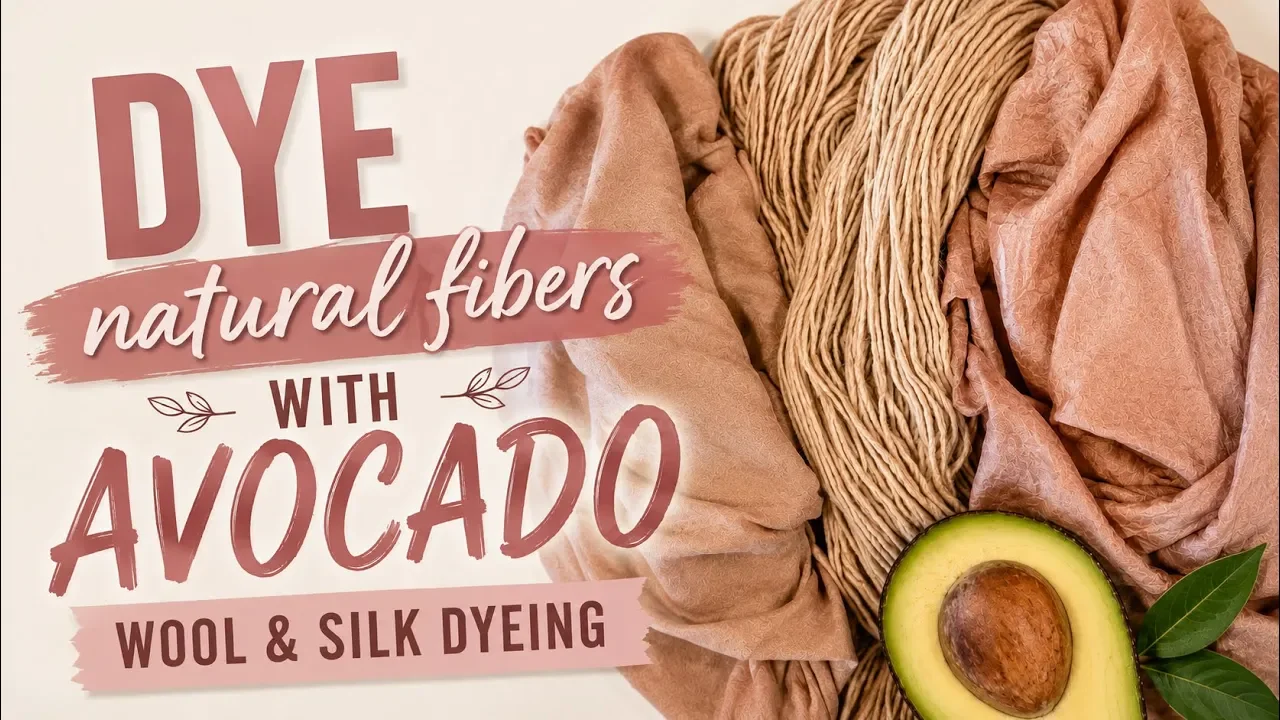
Avocado pits and avocado skins are one of the most fascinating natural dyes because they produce colors you would never expect. Instead of green, they create beautiful blush pinks, dusty roses, and soft warm browns. I had been saving avocado pits and skins in the freezer for quite a while, and once I had collected enough, I decided to dye them separately to compare the colors they produced.
-
Plant Dyes: Henna, Turmeric, Madder Root, and Red & Brown Onion Skin
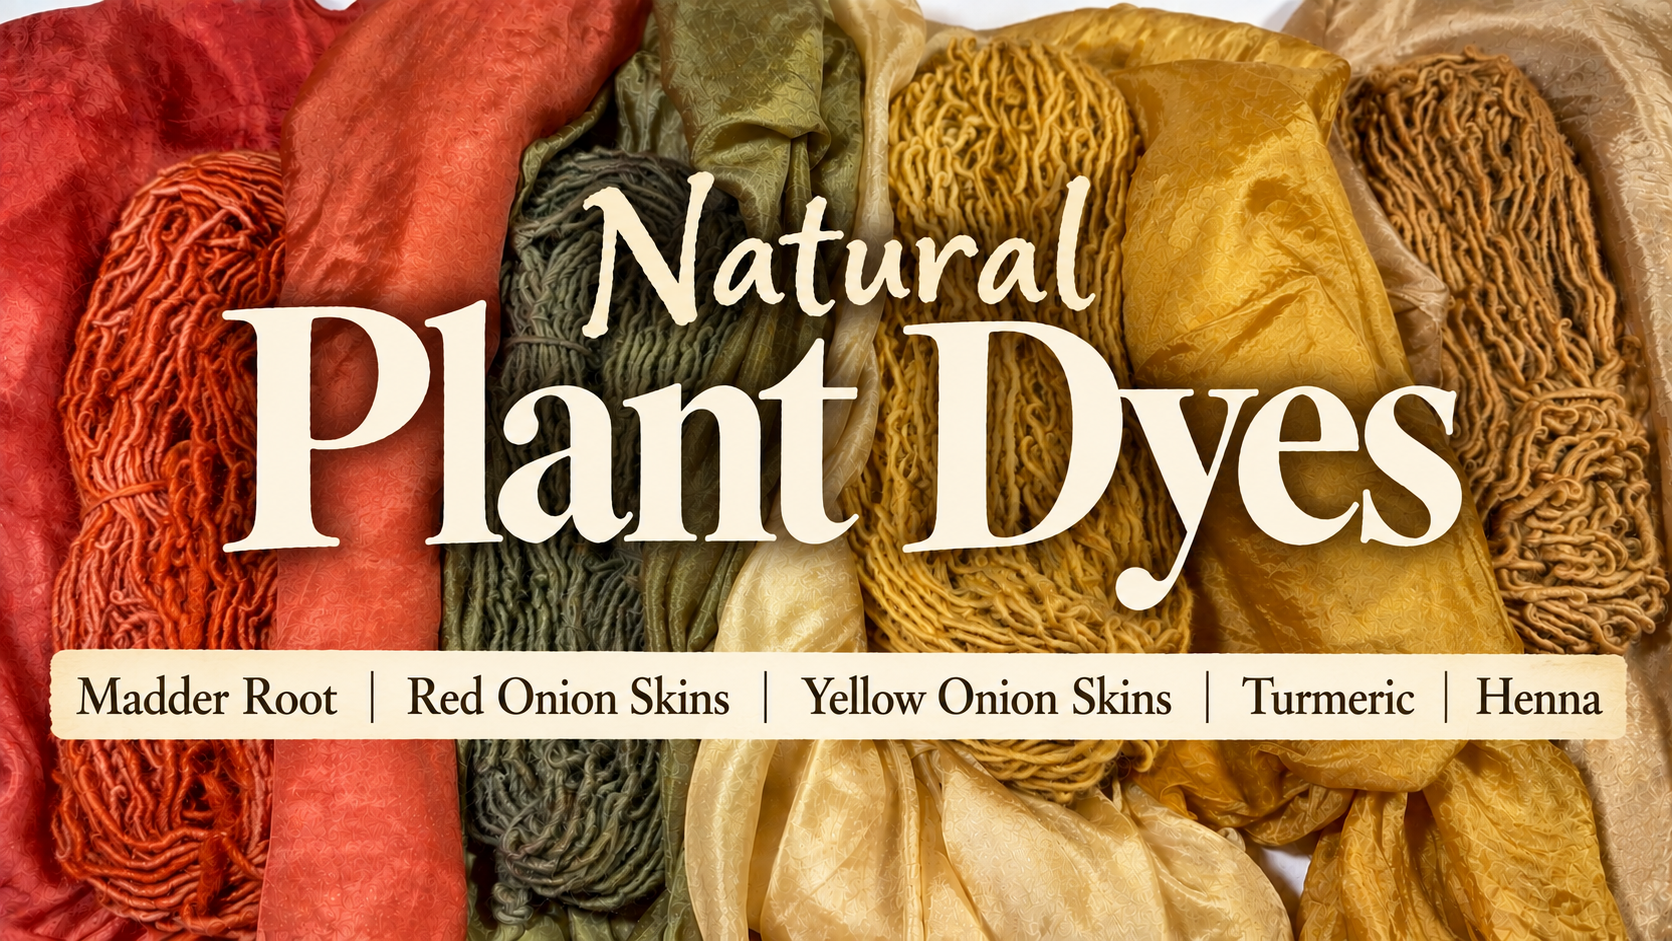
Natural dyeing continues to surprise me. Every time I try a new plant or revisit one I've used before, I learn something new about how the fibers respond, how long to leave them in the dye bath, and how dramatically the colors can change depending on the material. This time I experimented with five different natural dyes: turmeric, Tunisian henna, yellow onion skins, red onion skins, and madder root, using both silk and wool to compare the results.
-
Turkish Plant Dyes | Traditional Arts
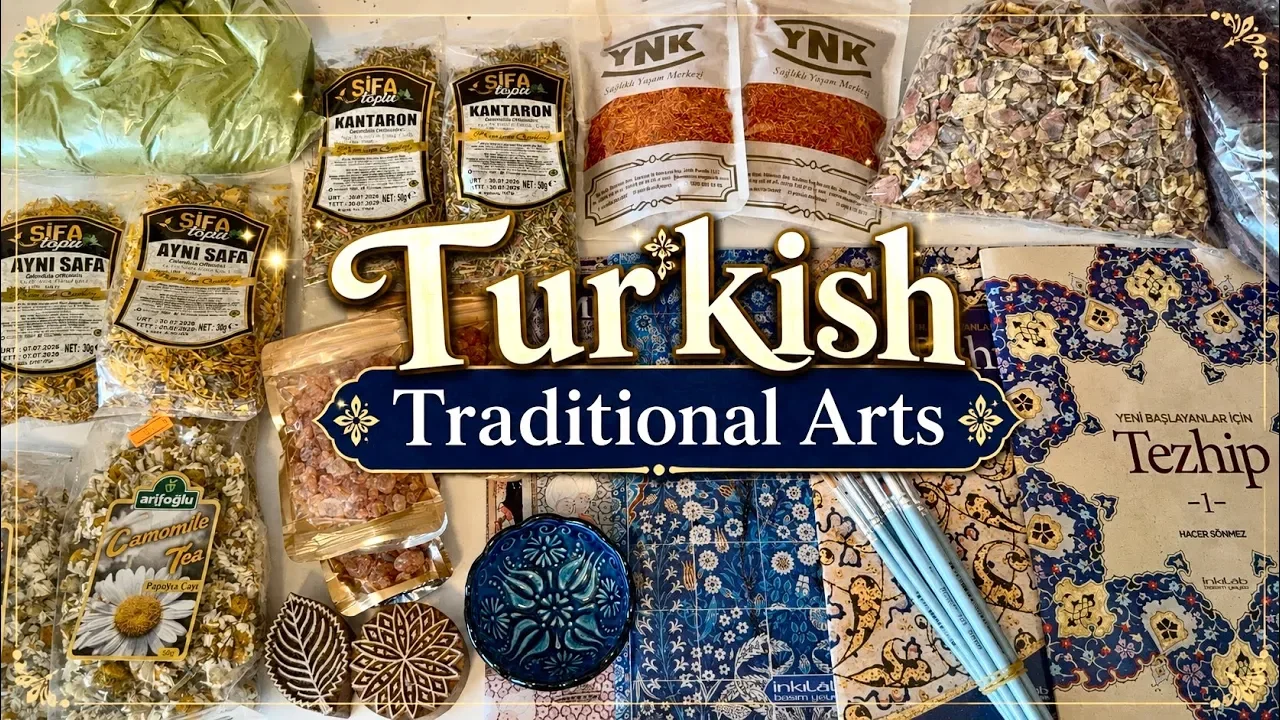
My recent trip to Turkey gave me the opportunity to collect natural plant dyes that are local to the region. While we've already experimented with dyes like turmeric, onion skins, avocado pits, avocado skins, and rosemary here at home, I was excited to find materials that have a long history in Turkey's traditional arts and textile traditions.
-
Plant Dyed Silks
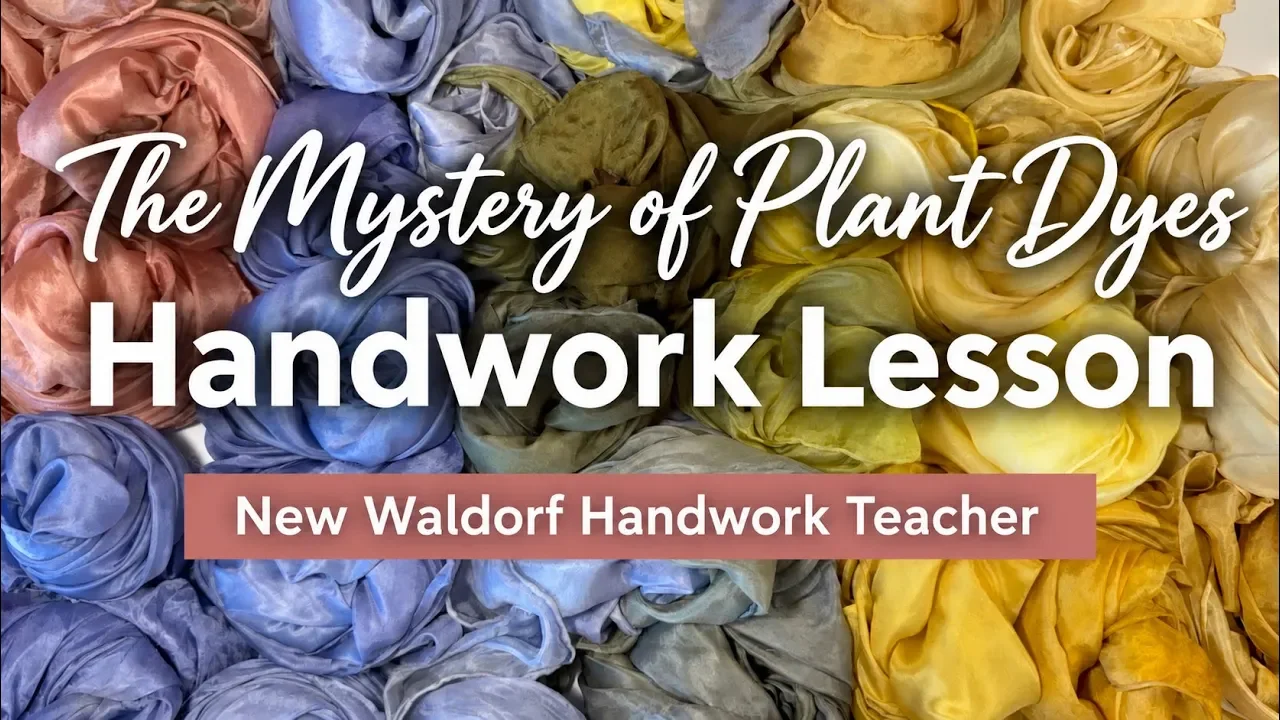
Plant dyeing silk turned out to be one of the most beautiful first handwork projects to do with my students. We worked with children from about six to thirteen years old, using natural dye materials like red onion skins, yellow onion skins, black beans, turmeric, safflower, saffron, and avocado pits to transform simple white silk scarves into these gorgeous pieces of color.
The wonderful thing about this project is that you can do this in kindergarten and again in grade 6 when students pick up hand stitching again in the curriculum.
Once you make one heart, it's so easy to get into a good rhythm, and before you know it, hours have passed and you have nearly 20 stitched hearts made from wool felt.
For this project, I used Holland wool felt in various pinks, reds and purples. You can find 100% wool felt at a Child's Dream as well as other craft stores. I also used wool to fill these hearts just enough to give them some shape. I used 3 strands of a 6-strand cotton embroidery floss to stitched the hearts together using the blanket stitch. I varied the sizes of the hearts for some interest, but really all the same size would have been just as lovely as once they were hung those details (size alternation) were not especially noticeable. The small hearts measure 6.5 cm across and the large hearts measure 10 cm across. Also unnoticed are the various floss colors I tried out. From afar, only highly contrasting colors show and if you want it o be more pronounced, you opt to double your floss for a thicker stitch.
As this project will be enjoyed from a distance and won't be played with by children, it's a good time to use a wool blend or acrylic felt which is far more affordable than 100% wool felt. Alternate filling may be used as well.
One benefit of using wool is its warming quality and distinct feel (acrylic felt as an almost slippery feel). Since my collect of felt is still rather robust, I will continue to use our wool felt until it runs out, but recognize that the expense may be out of budget for some.
To string them together, I 'sewed' them using 6-strand embroidery floss. I used a brand new floss as much of my embroidery floss has been trimmed down for storage and ease of use. with one long piece of floss, I can easily adjust the spacing of the hearts. I sewed one peak of the heart, then down to the center then back up to the other peak ensuring that the hearts would not twist downward. You may also make this into a mobile hanging from a circular metal frame.
Download your template here.
How to Make a Heart Garland
Using plant dyes with natural fibers, the results are stunning. Did you know that you can get a beautiful lavender-blue shade from black beans? Admittedly, I was not impressed the first time I saw the Waldorf Institute of Southern California instructor, Aileen, show us the black bean dye bath. I opted to dye my least favorite fiber in that dye bath, but once I saw the results, I went home and straightaway bought black beans! I came home from that training with an onion skin dye bath which produce a rich golden yellow, and madder root dye bath, which creates vibrant oranges and deep reds.
I’m using undyed silk and bulky-weight wool yarBefore any dyeing can happen, you have to prepare the fiber. I thoroughly wash the fibers with a mild soap (or Dawn dish soap) to remove oils and residues that can prevent the dye from bonding evenly.
To create the black bean dye, I use distilled water rather than tap water because minerals can alter the final color. After soaking the beans for 24 hours, they produce a beautiful purple dye bath without any heating. During this time, I also mordant the fibers using alum (potassium aluminum sulfate), which helps the fibers permanently bond with the dye. Silk and wool require slightly different mordanting methods, with silk being treated in a warm bath and wool in a room-temperature bath.
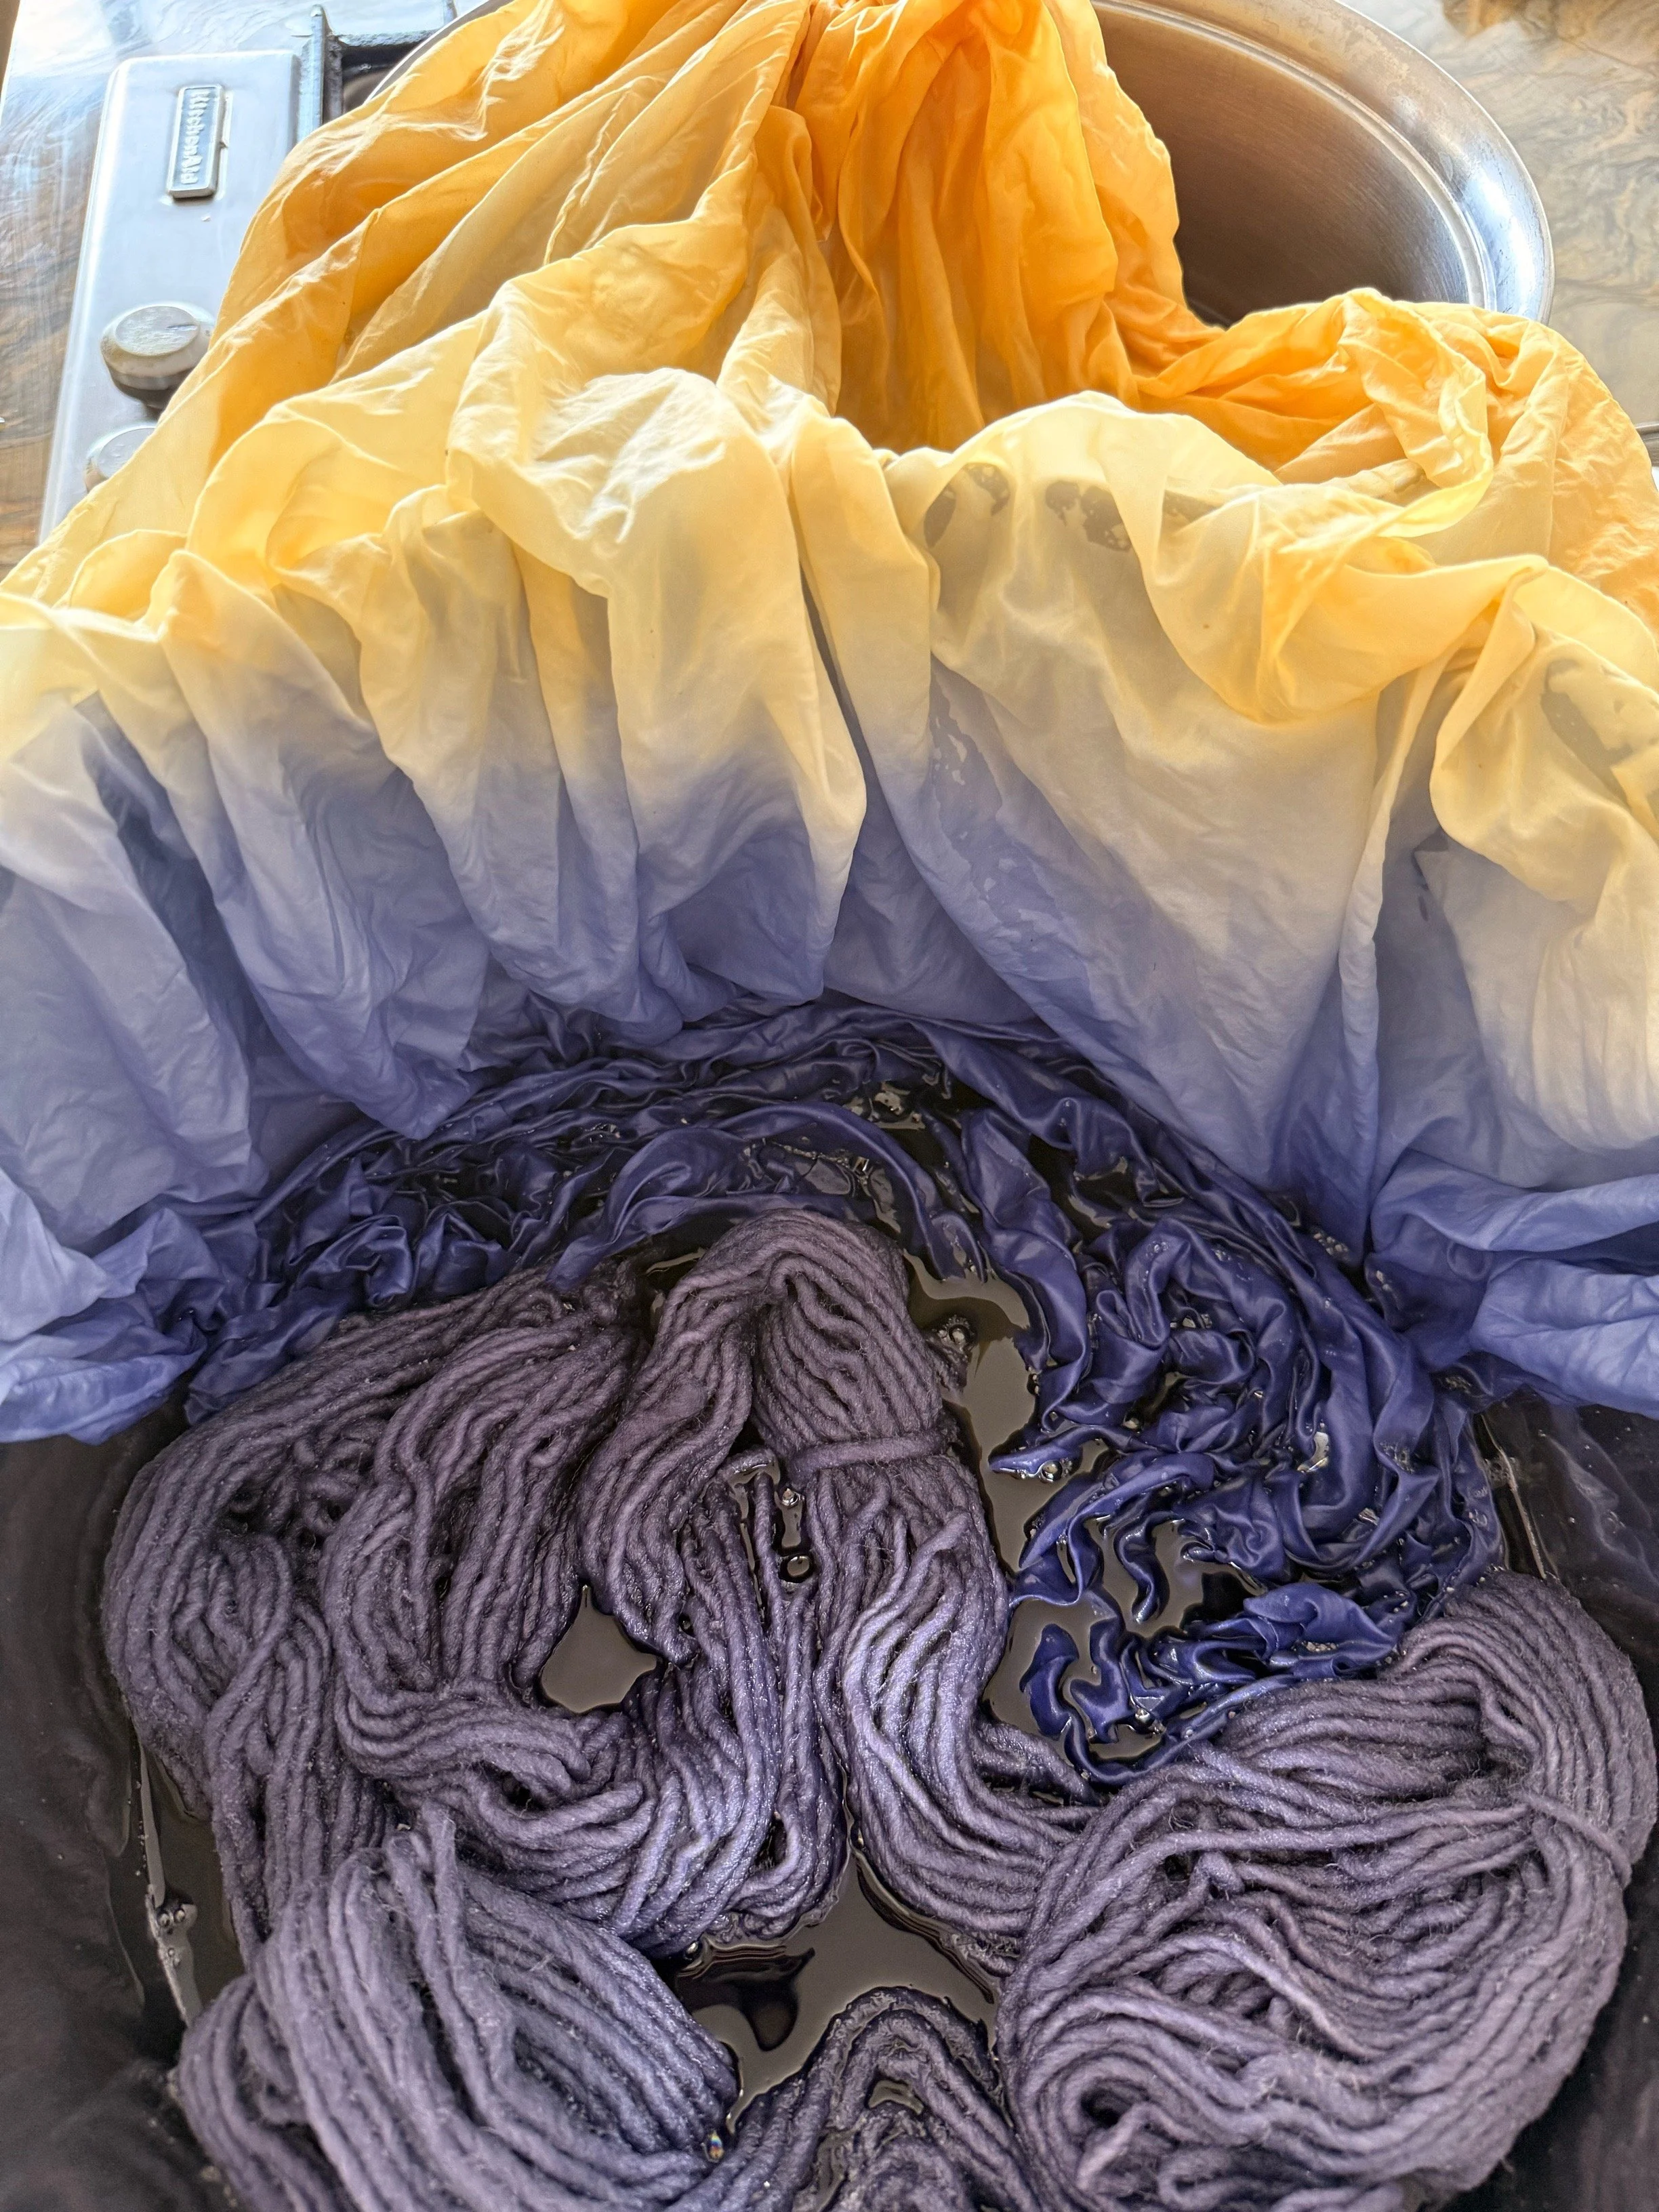
Once everything was prepared, I strained the black bean liquid and place the silk and wool into the dye bath. I also experiment by combining onion skin dye on one end of a silk scarf with black bean dye on the other, hoping the colors might blend into green. Although they never turned green (because I didn’t let the dye bath truly overlap), I ended up loving the soft transition between the warm yellow and cool lavender.
I learned that black bean dye works best during its first extraction. I attempted a second dye bath using the same beans, but after 36 hours in warm July weather the beans fermented too much, became thick and slimy, and had to be composted. In cooler weather or with a shorter soaking period, a second extraction might still be possible.
The final results completely exceeded my expectations. The silk developed a stunning lavender-purple color with subtle natural variations, while the wool absorbed an even richer shade than what appeared on camera. Although I plan to overdye some of the pieces a second time for even greater consistency, I'm incredibly impressed by how accessible, inexpensive, and beautiful black bean dyeing is. It's amazing that such ordinary pantry ingredients can produce such elegant colors on natural fibers.
Detailed Black Bean Dye Recipe
Materials
Fibers
½ pound silk (approximately 10 yards of lightweight silk)
About ⅓ pound wool yarn (or less)
Dye Ingredients
8 oz (225 g) dried black beans per quart mason jar
3 cups distilled water per jar
For this project I used:
4 quart mason jars
32 oz (2 pounds) dried black beans total
About 12 cups distilled water total
Mordant
Alum (Potassium Aluminum Sulfate)
34 g alum
3–5 quarts water for the silk mordant bath
Additional room-temperature water for the wool mordant bath
Supplies
Distilled water
Quart mason jars
Stainless steel, enamel, or glass pots
Fine mesh strainer
Thermometer
Mild soap or Dawn dish soap
Dedicated dye containers (not used for food)
Step 1: Wash the Fibers
1. Fill a sink with room-temperature water.
2. Add 1–2 tablespoons mild soap.
3. Gently wash the silk and wool.
4. Handle the wool carefully to avoid felting.
5. Rinse thoroughly.
6. Gently squeeze out excess water.
Step 2: Mordant the Fibers
Silk
Dissolve 34 g alum in enough water (3–5 quarts) so the silk can move freely.
Heat the bath to 140°F (60°C).
Add the silk.
Soak for approximately 2 hours.
Wool
Dissolve alum first in a little hot water.
Add it to a room-temperature bath.
Keep the wool at room temperature.
Soak for approximately 45 minutes to 2 hours.
Once mordanted, the fibers can be stored for up to two years before dyeing.
Step 3: Prepare the Black Bean Dye
For each quart jar:
8 oz dried black beans
3 cups distilled water
1. Add beans to the jar.
2. Fill with distilled water, leaving about 1 inch of headspace.
3. Loosely screw on the lid so fermentation gases can escape.
4. Let sit 24 hours at room temperature.
Do not heat the dye.
Step 4: Strain the Dye
After 24 hours:
1. Shake the jar gently.
2. Strain out the liquid.
3. Reserve the liquid as the dye bath.
The beans can be attempted for a second extraction by refilling with distilled water, but in warm weather they may ferment too quickly and spoil.
Step 5: Dye the Fibers
Wool
Place directly into the room-temperature black bean dye.
Make sure the yarn is fully submerged.
Let soak at least 1 hour.
Silk
Place into the room-temperature dye bath.
Soak 2 hours for lighter color.
Soak 24–36 hours for much deeper lavender and purple tones.
Longer soaks produced significantly richer colors.
Step 6: Remove and Dry
1. Remove the fibers gently.
2. Squeeze out excess dye without wringing.
3. Hang or lay flat to dry.
4. Colors become slightly lighter as they dry.
Results
Wool
Rich lavender-blue
Slightly deeper in person than on camera
Good candidate for a second dye pass
Silk
Beautiful lavender to soft purple
Natural variegation where fabric folds occurred
Longer dye times produced noticeably richer colors
Here are some things to keep in mind:
Distilled water gives the cleanest, most predictable colors.
Black bean dye should remain room temperature as heating changes the chemistry and the resulting color.
The first extraction provides the strongest color.
Warm summer temperatures can over-ferment the beans during a second extraction, making the dye unusable.
Natural folds in the fabric create beautiful, subtle tonal variations.
Mordanting ahead of time makes future dye projects much easier because prepared fibers remain usable for up to two years.
Black beans are one of the most affordable and accessible natural dyes available, yet they produce surprisingly elegant lavender and purple tones on silk and wool.
Materials Used in This Project
Fibers & Soap (A Child's Dream)
Dye Ingredients (Amazon)
Equipment (Amazon)
Optional
Natural Plant Dye | Using Black Beans to Dye Wool and Silk
Lately, I've completely fallen in love with natural dyeing, especially working with silk and wool. As I'm preparing for a new handwork position this fall, I've been practicing many of the projects we'll be doing in the classroom while also experimenting with different natural dye materials at home. Along the way, I've learned that natural dyeing is full of surprises. The same dye bath can produce completely different colors depending on the fiber, the weave of the fabric, the temperature of the dye bath, and even the water you're using.
One of my favorite experiments has been dyeing with rosemary. Both the wool and silk turned a beautiful chartreuse green, although the wool and silk each expressed the color a little differently. I also dyed silk and wool with avocado pits and avocado skins. Even though they came from the same dye bath, the different silk fabrics produced noticeably different colors. One silk scarf leaned toward soft pinks while another developed much warmer brown tones. It reminded me that every natural fiber has its own personality, and that's one of the things I enjoy most about natural dyeing.
I also experimented with madder root and black beans. One of my silk scarves had previously been lightly dyed with leftover madder root before being placed into the avocado dye bath, which affected the final color. I'm planning to revisit several of these dye baths because I think additional heat and longer dyeing times will produce even richer colors. For the avocado dye, I tried both a hot dye bath and several days of cold dyeing in the refrigerator. While the cold soak was interesting, I suspect the heat plays a much bigger role in developing those beautiful pink tones.
Finding affordable undyed silk became the next challenge. Silk yardage and scarves can be surprisingly expensive, so I began looking for wholesale suppliers. I purchased a large collection of lightweight silk scarves that will be used both for classroom projects and for continued dye experiments. These scarves are beautifully hemmed, incredibly delicate, and much finer than some of the heavier silk scarves I've purchased in the past. While I think the heavier silk is probably better suited for children's imaginative play, these lightweight scarves are perfect for dyeing and would also make beautiful neck or head scarves.
One of the things I love most about natural dyeing is discovering how different fabrics respond to the same dye. An antique silk napkin dyed with onion skins and a little turmeric produced a completely different shade than a modern silk scarf that sat in the same dye bath. Even the original color of the fabric influences the final result. If you ever come across natural fiber linens or silk pieces at estate sales or thrift stores, they're wonderful candidates for natural dyeing.
As my experiments have expanded, I realized I needed more supplies beyond the fibers themselves. I ordered several natural dyes from Dharma Trading, including multiple packages of madder root. Madder can produce everything from soft peach and rust tones to rich reds, depending on the concentration, the fiber, and the dyeing process. I had originally hoped to purchase madder while traveling through Turkey because it's traditionally grown there, but after researching prices and availability, ordering it through Dharma turned out to be the more practical option. I also hope to experiment with saffron and henna as natural dyes in the future.
I also stocked up on several mordants and dye assistants. While protein fibers like silk and wool naturally accept plant dyes quite well, mordants often improve colorfastness and help the fibers retain their color over time. Cellulose fibers such as cotton and linen are much more challenging because they naturally resist plant dyes, making mordants essential if you want rich, lasting colors. I purchased alum, soda ash, calcium carbonate for adjusting pH, and an iron modifier to continue experimenting with how each one changes the final color. Even something as simple as the minerals in tap water can affect the finished result, which is why I often use distilled water for my dye baths.
One of the things I continue to appreciate about natural dyeing is that every project teaches me something new. The amount of dye material, the temperature, the pH, the fiber, and even how long the fabric rests in the dye bath all influence the final result. There are no exact formulas, which is part of what makes this process so fascinating. Every scarf, every skein of wool, and every piece of fabric becomes its own unique experiment, and I'm excited to continue exploring these beautiful plant dyes in future projects.
Haborti silk scarves from Faire are 35 inches square and 5mm.
Jacquard 5 Momme Habotai Silk Scarves (35" Square) – Lightweight, hemmed silk scarves used for natural dyeing (purchased wholesale through Faire).
Habotai Silk Fabric – Undyed silk yardage for scarves and dye experiments.
Undyed Wool Yarn – Used for the rosemary and avocado dye projects.
Madder Root – Produces colors ranging from soft peach and rust to rich reds.
Henna Powder – Mentioned as a future natural dye experiment.
Alum Mordant – Used to improve colorfastness on silk and wool.
Soda Ash – Used for preparing fibers before dyeing.
Calcium Carbonate – Used to raise the pH of dye baths, especially for avocado dyes.
Iron Crystals (Ferrous Sulfate) – Used as an iron modifier to darken or shift natural dye colors.
Electric Spice Grinder – Reserved exclusively for grinding natural dye materials.
Granite Mortar & Pestle – An alternative to a spice grinder for crushing dye materials by hand.
Glass Storage Jars – Used to store prepared dye powders and extra char masala.
Distilled Water – Recommended for more consistent natural dye results because it doesn't contain minerals that can alter the dye bath.
Natural Dyes and Fabrics
Rosemary might not be the first plant that comes to mind when you think of natural dyes, but it creates one of the most beautiful soft chartreuse greens I've dyed so far. I was hoping for a deeper forest green, but after experimenting with multiple dye baths, different temperatures, and even a few modifiers, I discovered that rosemary naturally produces this gorgeous yellow-green color. It has become one of my favorite plant dyes.
Although protein fibers like silk and wool don't require a mordant in the same way that cotton and linen do, I still like to mordant my fibers before dyeing. It helps the color bind more evenly and improves colorfastness. I also find it convenient to prepare large batches of silk and wool ahead of time because once they've been mordanted, they're ready to use in future dye baths for up to two years.
Before mordanting, I always wash my fibers with a gentle soap to remove any oils or residues left from processing. If you don't have a specialty fiber wash, Dawn dish soap works surprisingly well. Taking a few extra minutes to prepare the fibers makes a noticeable difference in how evenly they accept the dye.
For this project, I used alum (potassium aluminum sulfate) as the mordant. The silk was treated in a warm bath at about 140°F for 45 minutes, while the wool was mordanted separately in a room-temperature bath. Wool is much more sensitive to temperature changes, so I avoid exposing it to unnecessary heat during this step.
Once the fibers were ready, I harvested a large amount of fresh rosemary from the garden. I didn't measure it—I simply packed as much rosemary as possible into the dye pot because I wanted a highly concentrated dye bath. I used both the leaves and the woody stems since the stems contain tannins that help improve the dye.
I covered the rosemary with distilled water and allowed it to gently simmer for one to two hours. I never let it come to a full boil because I wanted to slowly extract the color. Before adding my fibers, I tested the dye bath using a small strip of silk to get an idea of the final color.
I also experimented with iron as a modifier. I tried using a rusty garden spade and even some iron filings from one of our physics projects, but neither produced the results I was hoping for. The small areas that came into contact with the iron shifted toward a muted gray-green, but the overall effect wasn't especially attractive. I'll be repeating this experiment in the future using a proper iron modifier to see how much difference it makes.
Once the rosemary had finished simmering, I strained out all of the plant material and returned the dye bath to the pot. Both the silk and wool went directly into the dye bath while still damp from the mordant process. The fibers absorbed the color almost immediately, but I left them in the warm dye bath for an extended period, hoping to deepen the color.
Although I expected a darker green, the finished color remained a beautiful soft chartreuse. I decided to make an entirely new rosemary dye bath and repeat the process a second time. This time I also experimented with a cold dye by placing the fibers in warm dye and then leaving the jars in the refrigerator for five days while I traveled.
That experiment taught me one of the most valuable lessons of this project. Unlike black beans, which develop beautiful colors in cool temperatures, rosemary really needs warmth to develop and hold its color. The second dye bath and the extended cold soak produced almost exactly the same result as the first.
Even though I didn't achieve the deeper green I originally envisioned, I absolutely love the final color. It's a fresh, vibrant chartreuse that sits beautifully between yellow and green, and it dyes both silk and wool exceptionally well. Natural dyeing is full of surprises, and every experiment teaches me something new. I'm already planning to revisit rosemary one more time to see whether maintaining a steady warm temperature for an even longer period will deepen the color just a little bit more.
Per 100 grams of silk , use 10-15 grams of Alum (potassium aluminum sulfate)
Per 100 grams of wool, use 10-15 grams of Alum (potassium aluminum sulfate)
Rosemary Natural Dye Recipe
Materials
Fresh rosemary (leaves and woody stems)
Silk or wool (protein fibers)
Alum (potassium aluminum sulfate)
Gentle fiber wash or Dawn dish soap
Distilled water
Stainless steel dye pot
Thermometer
Fine mesh strainer
Preparing the Fibers
1. Wash the silk and wool with a gentle soap to remove oils and processing residue.
2. Rinse thoroughly until all soap has been removed.
3. Weigh the dry fibers to calculate the amount of alum needed.
Mordant the Silk
Heat water to 140°F (60°C).
Dissolve the alum according to the weight of your fibers.
Add the silk and gently agitate for 45 minutes.
Remove and set aside while still damp.
Mordant the Wool
Dissolve the alum in a small amount of hot water.
Add room-temperature water to create a cool mordant bath.
Add the wool and allow it to soak for 45 minutes.
Remove and leave damp.
Rosemary Dye Bath
Ingredients
A large quantity of fresh rosemary (leaves and stems)
Distilled water
Instructions
Fill a stainless steel pot with as much rosemary as possible.
Cover with distilled water.
Simmer gently for 1–2 hours without boiling.
Test the dye bath with a small piece of silk if desired.
Strain out the rosemary and return the dye liquid to the pot.
Dyeing the Fibers
1. Place the damp mordanted silk and wool into the warm rosemary dye bath.
2. Keep the dye bath warm, but do not boil.
3. Allow the fibers to remain in the dye bath for several hours or until the desired color develops.
4. Remove the fibers, rinse gently, and allow them to dry.
Optional Experiment
For comparison, prepare a second fresh rosemary dye bath and repeat the process. I also experimented by leaving the fibers in the dye bath in the refrigerator for five days, but found that the cool temperatures did not deepen the color. Heat appears to be an important part of developing rosemary's beautiful chartreuse green.
The finished fibers have a soft, luminous green with yellow undertones that works beautifully on both silk and wool.
Natural Dye Materials
pH Test Strips (helpful for adjusting dye baths, especially when working with avocado dyes)
Natural Dye Materials
These are inexpensive grocery or garden items:
Fresh rosemary
Distilled water
Freshly harvested rosemary stems and leaves
Specialty Natural Dye Supplier
Some products are best purchased directly from Dharma because of their quality and selection:
Natural Plant Dying Rosemary | Silk and Wool
Dyeing Silk and Wool with Avocado Pits and Avocado Skins
Avocado pits and avocado skins are one of the most fascinating natural dyes because they produce colors you would never expect. Instead of green, they create beautiful blush pinks, dusty roses, and soft warm browns. I had been saving avocado pits and skins in the freezer for quite a while, and once I had collected enough, I decided to dye them separately to compare the colors they produced.
One thing I learned very quickly is that the avocado pits create a clearer, softer pink, while the avocado skins lean more toward a muted burgundy brown. The difference isn't dramatic, but if your goal is a true blush pink, I would definitely recommend dyeing with the pits alone. You can even peel away the thin brown skin surrounding the pit to encourage even pinker tones.
I always use distilled water for my natural dye baths because the minerals in tap water can change the final color. I also made the dye bath slightly alkaline by adding baking soda, although calcium carbonate works just as well. Raising the pH helps encourage those beautiful pink tones that make avocado such a unique natural dye.
Since I only have one stainless steel pot dedicated to dyeing, I decided to experiment with mason jars for the avocado pit dye bath. Each jar held about three cups of distilled water and approximately 180 grams of avocado pits. It worked surprisingly well for small samples, although I discovered that mason jars don't heat evenly. The fibers sitting near the bottom of the jar absorbed much more color because they stayed closer to the heat source. While the jars are a great solution for small projects, I would use a larger dye pot for full skeins of yarn or larger pieces of fabric in the future.
Before dyeing, I prepared both the silk and the wool by washing them with a gentle textile soap to remove any oils left from manufacturing. If you don't have a specialty soap, Dawn dish soap works very well. Since wool can felt easily, I wash it very gently using lukewarm water. The silk is a little more forgiving, but I still like to wash both fibers together before every dye bath.
Although silk and wool don't require a mordant in the same way that cotton and linen do, I still mordanted both fibers with alum (potassium aluminum sulfate). I find that mordanting helps produce more colorfast results and often gives richer, more even color.
Once the dye bath had developed, I strained out the avocado pits and skins before adding the damp fibers. I dyed wool, habotai silk, and silk chiffon, and each one accepted the color differently. The silk chiffon developed the deepest color, while the wool remained much softer and more subtle. My favorite, however, was the plain habotai silk scarf. It produced the most beautiful dusty blush pink that would be perfect for a play silk or a lightweight scarf.
While I was traveling, I decided to leave several samples in the refrigerator for five days to see whether a cold dye would deepen the color. I had seen wonderful results using cold dye methods with black beans, so I hoped avocado would respond similarly. It didn't. The fibers looked darker while they were wet, but once they dried, the color was nearly identical to the original warm dye bath. This experiment confirmed for me that avocado dyes really benefit from consistent warmth. Unlike black beans, they don't continue developing color in a cold dye bath.
Overall, I was thrilled with the results. The avocado pits produced a gorgeous soft blush pink that was even prettier than I expected, although I would still like to achieve a slightly deeper color in future experiments. The avocado skins created warmer, browner tones that were beautiful in their own way, but if I'm looking specifically for pink, I'll continue reaching for the pits. Every dye experiment teaches me something new, and I'm already saving another batch of avocado pits so I can continue exploring all the beautiful colors they have to offer.
Avocado Pit & Avocado Skin Natural Dye Recipe
Materials
Avocado pits (about 180 grams per small dye bath)
Avocado skins (optional, for comparison)
Distilled water
Baking soda or calcium carbonate
Silk or wool
Alum (potassium aluminum sulfate)
Gentle textile soap or Dawn dish soap
Stainless steel dye pot
Mason jars (optional)
Fine mesh strainer
Digital kitchen scale
Preparing the Dye Bath
Avocado Pit Dye Bath
1. Thoroughly clean the avocado pits and remove any remaining fruit.
2. Freeze until you have collected enough for a dye bath.
3. Place approximately 180 grams of avocado pits into a container with 3 cups of distilled water.
4. Add a small amount of baking soda (or calcium carbonate) to make the dye bath slightly alkaline.
5. Simmer gently for several hours without allowing the dye bath to boil.
6. Strain out the pits before dyeing.
Avocado Skin Dye Bath
Follow the same process using avocado skins instead of pits. The finished color will generally be warmer and more brown than the pit dye.
Preparing the Fibers
1. Wash the silk and wool with a gentle textile soap or Dawn dish soap.
2. Rinse thoroughly.
3. Mordant the fibers using alum (potassium aluminum sulfate).
4. Leave the fibers damp before placing them into the dye bath.
Dyeing the Fibers
1. Add the damp mordanted fibers to the strained dye bath.
2. Keep the dye bath warm without boiling.
3. Allow the fibers to remain in the dye bath until the desired color develops.
4. Rinse gently and allow the fibers to dry away from direct sunlight.
Notes from My Experiments
Avocado pits produce the clearest blush pinks.
Avocado skins create softer burgundy-brown tones.
Removing the thin skin from the pits can encourage pinker colors.
A slightly alkaline dye bath helps develop the pink tones.
Silk chiffon absorbs much more color than habotai silk or wool.
Cold dyeing in the refrigerator did not deepen the color. Consistent warmth produced the best results.
Mason jars work well for small samples but don't heat as evenly as a stainless steel dye pot.
Dyeing Silk and Wool with Avocado Pits and Avocado Skins
Natural dyeing continues to surprise me. Every time I try a new plant or revisit one I've used before, I learn something new about how the fibers respond, how long to leave them in the dye bath, and how dramatically the colors can change depending on the material. This time I experimented with five different natural dyes: turmeric, Tunisian henna, yellow onion skins, red onion skins, and madder root, using both silk and wool to compare the results.
Because these were all small samples, I prepared each dye bath in mason jars rather than using several large dye pots. Each jar held only a few cups of distilled water, which helped eliminate any minerals that might affect the final color. Distilled water gives me a much more predictable starting point, although there are times when adjusting the pH or adding minerals can completely change the final result.
One thing I continue to appreciate about natural dyes is how differently each plant behaves. Turmeric is incredibly strong and only needs a very short amount of time to produce a bright, clear yellow. Onion skins, on the other hand, require surprisingly little dye material compared to most other plants. They extract beautiful color very quickly, making them one of the easiest natural dyes to work with. Madder root is almost the opposite. It requires a much larger amount of dye material in relation to the weight of the fiber, but the range of colors it produces makes it well worth the effort.
As with all of my recent dye experiments, I washed and mordanted both the silk and the wool before dyeing. Although protein fibers don't technically require a mordant with plant dyes, I've found that alum helps the fibers absorb the color more evenly and improves colorfastness. The silk especially takes up these plant dyes beautifully, while the wool generally develops softer, more muted tones.
The Tunisian henna was especially meaningful because it came directly from my daughter-in-law's family's farm in Tunisia. It was wonderful to watch a plant that has been part of their family and landscape become this beautiful warm brown on silk and wool. The color reminded me of the earth tones and desert landscapes where the henna was grown, making this experiment feel even more personal.
The yellow onion skins produced exactly the warm golden tones I was hoping for. By adjusting how long the silk remained in the dye bath, I was able to create a range of colors from soft golden yellow to deeper amber. The wool absorbed the color more slowly, but once it had enough time, it developed the same beautiful earthy tones that make natural dyes so appealing.
The biggest surprise of the entire project came from the red onion skins. I fully expected them to produce some variation of pink or brown, but instead they created the most beautiful olive green. It completely caught me off guard. At first I thought I had somehow made a mistake, but after repeating the process it became clear that the red onion skins really do produce this gorgeous green. Of all five dye baths, this one quickly became my favorite, and it's one I'm looking forward to repeating many times.
Madder root also produced beautiful results. Even using a smaller amount than the recommended maximum, it created colors ranging from soft coral to rich rust-red depending on the concentration and the amount of time the fibers remained in the dye bath. I was especially encouraged to see how much color could be achieved without using an excessive amount of dye material, which means a single package of madder root can go much farther than I originally expected.
Using mason jars worked well for these small experiments, but they also taught me one important lesson. The fibers closest to the bottom of the jars absorbed more color because they stayed nearer to the heat source. In the future, I'll use larger dye pots whenever possible so the fibers have room to move freely and dye more evenly. That's one of the joys of sampling first. Every experiment teaches me something that makes the next one even better.
Of all five natural dyes, I genuinely loved every one of them, but the olive green from the red onion skins was the biggest surprise and perhaps my favorite result. It's always exciting when a natural dye does something completely unexpected, and that's one of the reasons I continue coming back to this process. Every plant has its own personality, and every dye bath feels like a new discovery.
Fibers
Mordants & Dye Assistants
Natural Dye Materials
Fresh turmeric root or ground turmeric
Fresh red onion skins
Fresh yellow onion skins
Tunisian henna powder
Equipment
Recommended Supplier
For specialty natural dyes, mordants, and undyed silk, I purchase many of my supplies from:
I specifically featured dyeing with turmeric, Tunisian henna, yellow onion skins, red onion skins, and madder root, comparing how each natural plant dye behaves on both silk and wool. The madder root was the only dye material I purchased specifically for the project; the remaining plant dye material were all gathered from the kitchen or grocery store.
Videos in This Natural Dye Series
Learn More
Plant Dyes on Natural Fibers: Henna, Turmeric, Madder Root, and Red & Brown Onion Skin
My recent trip to Turkey gave me the opportunity to collect natural plant dyes that are local to the region. While we've already experimented with dyes like turmeric, onion skins, avocado pits, avocado skins, and rosemary here at home, I was excited to find materials that have a long history in Turkey's traditional arts and textile traditions. I stayed in Old Istanbul and spent time exploring both the Egyptian Bazaar and other parts of Istanbul looking for natural dyes, art supplies, and materials that could be used to make inks and paints.
One of my biggest goals was to find dried walnut husks, pomegranate skins, and madder root. Madder has long been associated with Turkey's carpet-making tradition, and it was one of the dyes I was most hoping to bring home. Although I had already purchased madder root before leaving for the trip, I still wanted to see what was available locally and learn more about the traditional dyes used throughout the region.
As I explored the spice market, I quickly realized that the plant dyes weren't displayed alongside the colorful spices and teas. Most people are shopping for culinary ingredients, not natural dyes, so many of these materials had to be requested specifically. Using a translation app, I was able to ask for the items on my list, and it turned into one of the most memorable experiences of the trip. The shopkeeper immediately knew what I was looking for and kept sending his son upstairs to bring down one treasure after another from storage.
Along with the walnut husks and pomegranate skins, I discovered several plants I had never heard of before. One of my favorite finds was alkanet root. I had never worked with it before, and learning that it produces beautiful purple and burgundy tones, but it requires oil or alcohol rather than water to extract the color, made me even more excited to experiment with it. Discovering a completely new plant dye was one of the highlights of the trip.
I also picked up Indian indigo and Indian henna. I've worked with indigo before, although it requires a very different dyeing process than most plant dyes. The henna especially interested me because I had previously dyed with Tunisian henna, which produced a beautiful warm earthy brown. I'm looking forward to comparing the colors that different varieties of henna produce.
Chamomile tea, safflower, St. John's wort, and calendula all found their way into my basket as well. Some of these were already on my list, while others were spontaneous discoveries after translating the labels in one of the herb shops. It's fascinating to see how many plants have the potential to become natural dyes, even though not all of them produce lightfast colors. I now have quite a collection of yellows and golds, from turmeric and onion skins to chamomile, calendula, and safflower, and I'm excited to compare the subtle differences between each one.
One plant that especially caught my attention was safflower. It's sometimes marketed as Turkish saffron, although the two plants are completely different. As I continued learning about natural dyes, I also came across references to safflower in the Islamic tradition, particularly regarding fabrics dyed with safflower. That opened another area of study that I hope to continue exploring alongside the dye experiments themselves.
Beyond the plant dyes, I also gathered supplies for turning these dyes into inks and paints. I purchased gum arabic, which acts as the binder for making watercolor paints and inks, along with a small ceramic dish that will be perfect for mixing pigments. I also found two beautiful hand-carved wood printing blocks that I hope to use for fabric printing once I begin experimenting with plant-based fabric paints.
The trip wasn't only about dyes. I was also searching for several Turkish art books that had inspired me during my art course. After what felt like days of searching bookstores all over Istanbul, I finally stumbled into a small stationery shop just minutes from my hotel only moments before leaving for the airport. To my surprise, they had the last copies of the books I had been searching for the entire trip. Sometimes the best discoveries happen at the very last minute.
Looking back, I'm so pleased with everything I was able to bring home. Every one of these natural dyes represents another opportunity to experiment, to learn, and to discover how different plants interact with silk and wool. Now, wherever I travel, I know I'll be looking for local plant dyes and traditional dye materials. Every region has its own history, its own plants, and its own colors to share, and I can't wait to continue exploring them.
Fabric Dye Tutorials
Resources Mentioned in This Video
Natural Plant Dyes
Ink & Paint Making Supplies
Textile Printing
Painting Supplies
Recommended Books
Mentioned in the Video
Turkish Plant Dyes | Traditional Arts
Plant dyeing silk turned out to be one of the most beautiful first handwork projects to do with my students. We worked with children from about six to thirteen years old, using natural dye materials like red onion skins, yellow onion skins, black beans, turmeric, safflower, saffron, and avocado pits to transform simple white silk scarves into these gorgeous pieces of color.
The scarves are 5 mm silk, so they are lighter and more delicate than the 8 mm scarves I have used in the past, but they were such a good option for a large group because every student was able to work with real silk. The shimmer in the fabric made the natural colors look even more beautiful.
All of the scarves were prepared with a mordant before dyeing, which helped the colors take strongly and richly. It also created some wonderful surprises. Red onion skins, for instance, can produce beautiful pink tones without a mordant, but with a mordant they shift into these deep greens. Some of the richest scarves developed olive and even forest green tones.
Turmeric gives such a clear, strong yellow and works incredibly quickly. In some cases, the silk only needed to be in the dye bath for seconds before the color became rich. Yellow onion skins created deeper mustard, golden, and slightly brown-orange tones. Safflower gave us another beautiful variation in the yellow family with softer golden shades.
Black beans were one of the most surprising dyes. They produced everything from a pale blue to a deep blue-purple depending on how long the scarf remained in the dye bath. This dye needs to stay at room temperature or colder because heat can muddy the beautiful blue color.
Avocado pits gave us a soft blush pink, but they required a lot of material, a longer extraction time, and more time in the dye bath. Using the pits by themselves produced a clearer pink, while avocado skins tend to shift the color toward deeper burgundy tones.
The youngest students mostly worked with one color, while the older students were able to experiment with two colors, ombré effects, and more complicated combinations. Some of my favorite scarves were the ones where two dye baths met and created what looked like landscapes, mountains, sky, or even a night scene.
One scarf combined red onion skins and avocado pits and became known as the watermelon scarf because of the beautiful green and pink combination. Another transitioned from black bean blue into green and looked like mountains beneath a blue sky. One ombré black bean scarf developed such interesting blue and purple variations that it almost looked like the Aurora Borealis.
There were also mistakes and unexpected cross-contamination between some of the scarves and dyed wool balls. Instead of discarding those pieces, I experimented with additional dye baths and sometimes even placed individual black beans directly onto the silk. Some of those mistakes became the most unusual and beautiful scarves of the entire collection.
That became one of my favorite parts of this project. The students were able to look at the finished scarves, notice patterns, describe what they saw, and draw their own conclusions. They saw mountains, sky, watermelon, landscapes, and all kinds of imagery within the natural color.
Each student also painted a watercolor representation of their scarf and wrote about their fabric dyeing experience. Their watercolor and written reflection will be displayed alongside the silk so that the entire school and the parents can enjoy not only the finished work, but also the memory and experience behind it.
We plan to do another silk dyeing project later in the school year. Now that the students understand how these plant dyes behave alone and in combination, they can begin collecting their own materials, planning color combinations, and thinking more intentionally about their next design.
I would love for the next experience to give them even more ownership by having each student bring a glass jar and work more independently with their own dye materials.
This first major handwork project was such a beautiful way to begin the year. The scarves are all completely different, and that is part of what made the project so exciting.
Plant Dye Recipes
Natural Plant Dye | Using Black Beans to Dye Wool and Silk
Natural Plant Dyes: Madder Root, Red Onion Skin, Yellow Onion Skin, Turmeric and Henna
Shopping List
Curtain Clips for Displaying Silk Scarves
As an Amazon Associate, I earn from qualifying purchases.